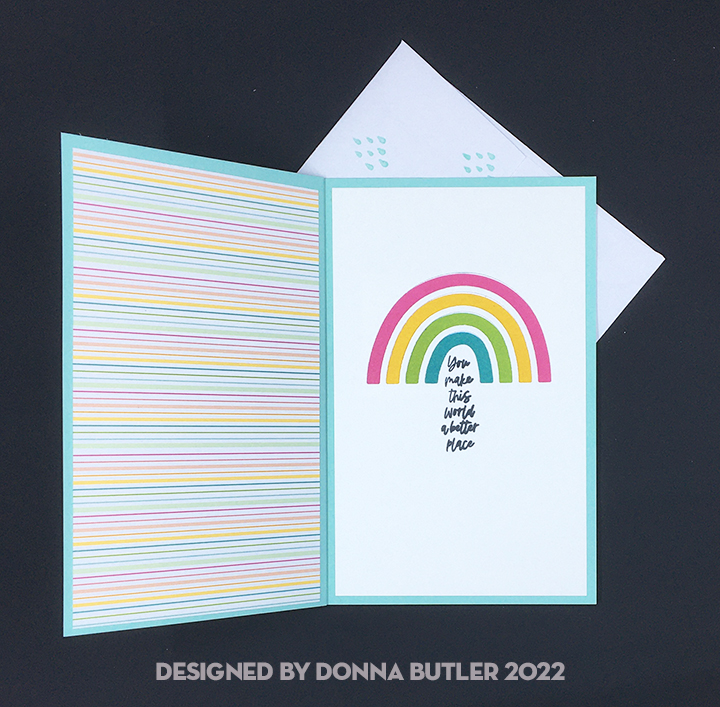
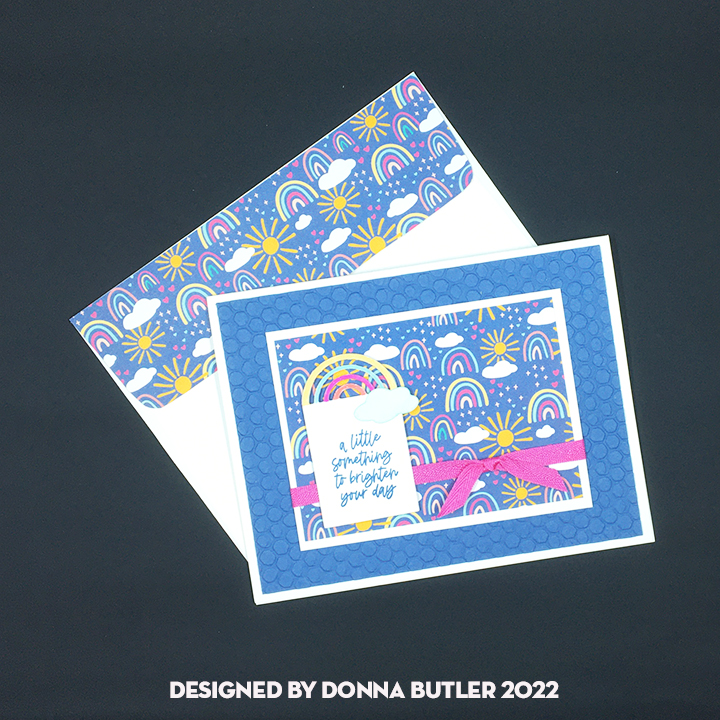
Sometimes it is just fun to craft with others. I took the opportunity to attend a workshop by Donna Butler, a Stampin’ Up demonstrator recently. We made the following three cards using Stampin’ Up products in the Rainbow of Happiness collection.
Donna asked me to say she had cased her designs from Pinterest.
Bookbinder card front
Bookbinder card inside
This was my first bookbinding card.
Embossed mat card front
Embossed mat card inside
I like the use of designer paper scraps being used on the envelope flaps as a quick way to decorate.
Cloud card front
Cloud card inside
Thank you for reading this blog post. Please like and leave comments 😊
First, I stamped the images with Memento Tuxedo Black and colored the toaster with a silver metallic marker. Next, I covered the main body of the toaster with Glossy Accents. The toast, butter pat and butter dish I colored with blending markers and watercolor pencils.
Because I had never used this Lawn Fawn pull tab mechanism before, I found a video to watch for the assembly. It was easy to assemble, but since I had fussy cut my stamped images, I had to trim down the tabs of the mechanism for the toast to be attached to and not show the edges of the tab.
For the pull tab top, I used a scrap of the green plaid cardstock to cover the portion of the tab that shows when the tab is pulled up matching the vertical plaid line. After this cover was glued down, I added the brown oval with the arrow cut-out and folded it to fit the cut-out notch of the cart rather than using the scored fold mark.
The sentiments were stamped with Versamark Watermark ink and heat embossed with a black detail embossing powder onto white scrap cardstock. The front sentiment was cut out as a banner and adhered to the card front with foam squares and the interior sentiment was cut close and glued in place with its matching images.
To hint at the envelope’s contents, I stamped two pieces of smiling toast onto the back flap with brown ink.
Thank you for reading this blog post. Please like and leave comments 😊
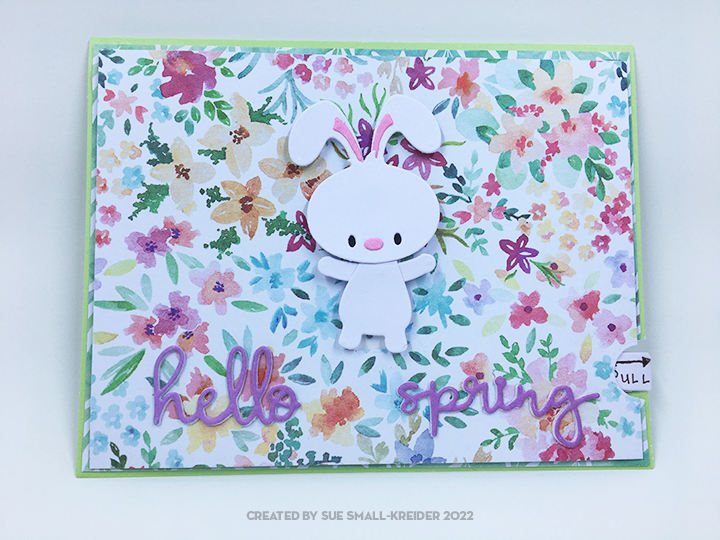
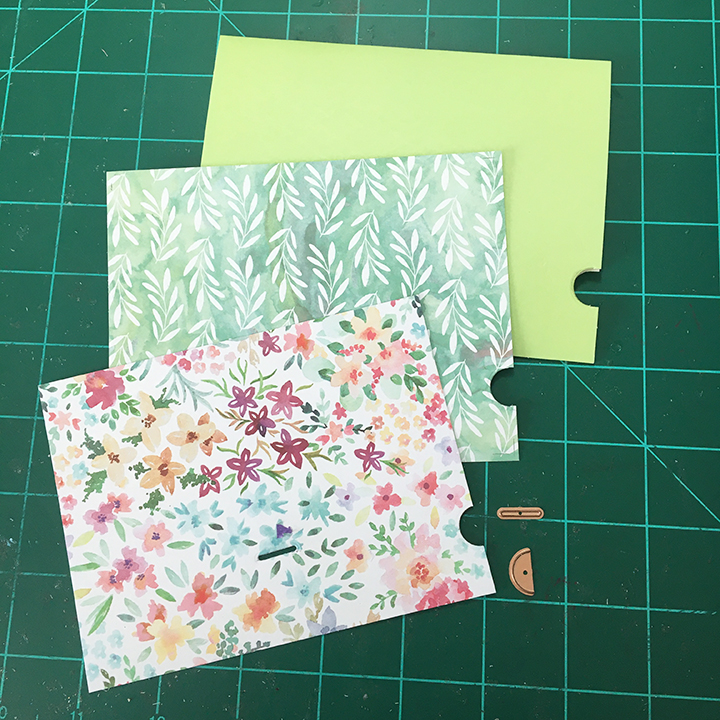
Nothing says “Hello Spring” like dancing bunnies and newly hatched baby ducks. These two cute interactive cards were made with the Spellbinders Spring Together with Lever Pull Cutting Dies set.
This is a great set of dies to use up those small pieces of cardstock scraps for the animals. I used a bluish opal polish on the eggshell to give it some luster. (I watched the assembly video for this die set before making these cards.)
The levers/mechanism pieces are cut twice and glued together to be sturdy. For the Hello Spring sentiment, the words were cut twice from white and once from purple and then glued together.
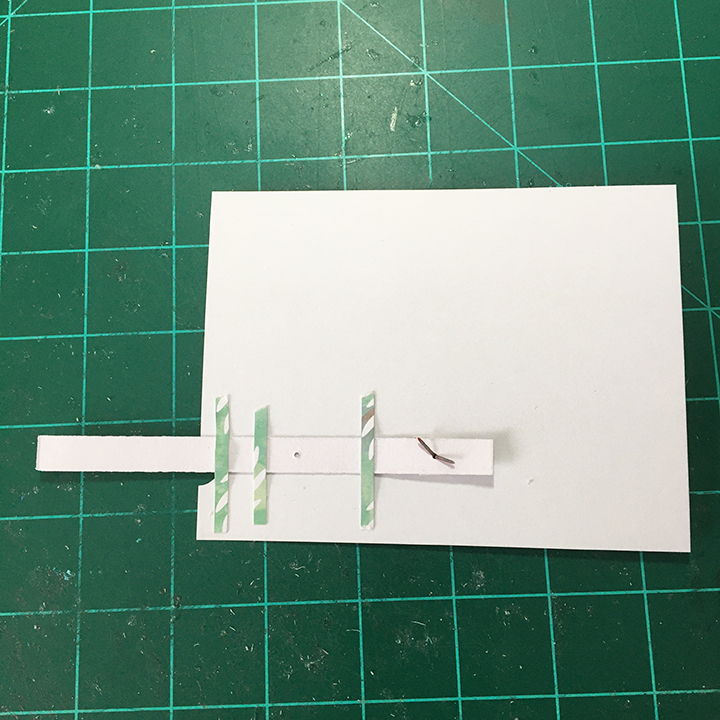
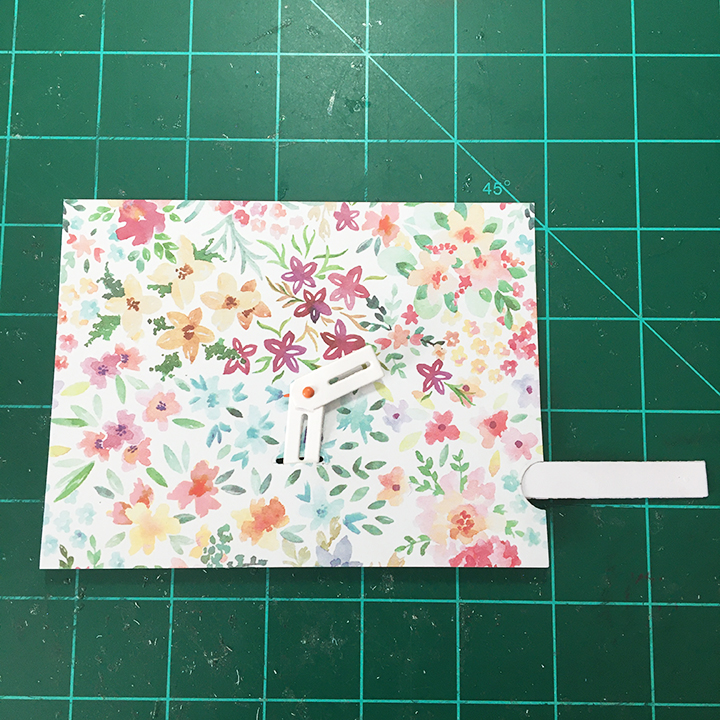
The printed leafy mat was cut an 1/8 of an inch smaller than the solid green card base and the floral top background is 1/4 of an inch smaller than the card base. Once the position of the lever mechanism was decided, the line slit and pull-tab notch were cut on the floral layer. The notches were then cut on the leafy green mat and cardbase using the floral layer to line up the notches.
The thin trimmings of the mat layer were used as lever guides using dots of glue at the ends of the strips.
Two additional brads are used to attach the slotted levers to the floral background. Foam strips were placed on the back to raise up the mechanism from the matting layer. The leafy green mat layer was glued directly to the card base.
Using the decorative scraps trimmed from the front card layers, the backs of the cards were finished.
The back flaps of the cards’ envelopes were stamped with a bunny stamp from Craft Consortium.
Thank you for reading this blog post. Please like and leave comments 😊
Materials Used:
Dies
Spellbinders – March 2021 Large Die of the Month set Spring Together with Lever Pull Cutting Dies – DOML-MAR21
Stamping
Craft Consortium -English Garden Clear Stamps by Hackney & Co.
Stampin’ Up – Classic Stampin’ Pad – Pear Pizzazz
Papers
Park Lane – 8.5in x11 in 100# smooth white core cardstock – Watercolor Floral
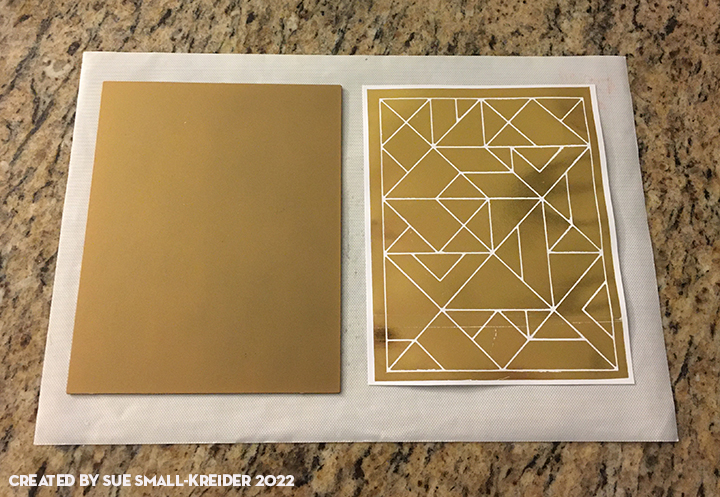
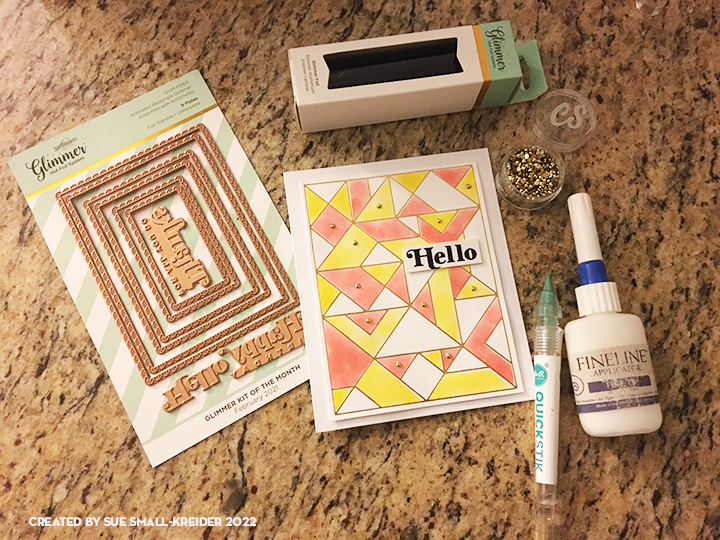
I hot foiled three backgrounds making two foiled lines and one solid foil using the foil leftover. (I accidentally foiled my solid hot foiling plate with the second solid foil piece. Make sure the foil has the backing side next to the paper, not the foiling plate!)
Using the three stencils I did two versions of coloring in the shapes on the foil lines backgrounds. On one background I took the stencil with mostly triangles and used the Citrine ink for the smaller triangles and the Sunbeam ink for the larger shapes. The nenext stencil I used the Poppy Red ink for all the shapes and left the remaining shapes white. For the second colored background, I used a different colored ink for each of the three stencils. Because the Citrine and Sunbeam inks are only one shade different, I feel like the background with the white shapes is more interesting.
For the two “Thanks” cards, I glued the backgrounds directly to the card bases. Next, I cut four of the circle Thanks from white scrap cardstock and glued three of the die-cuts together. The single layer thanks, I glued to the colored background, while the foiled background received the layered die-cut.
The “Hello” card uses a black foiled sentiment from a Spellbinder’s frames and sentiment set. The sentiment and the inked background are adhered with foam squares. To add more interest, I glued tiny gold flatback gemstones from my stash. (I think they may have been in an advent calendar from Craftstash or Crafter’s Companion.)(A sticky tip tool is great for adding small elements like these gemstones to your projects.)
Because I used A7 sized card bases (5 x 7 inches), I needed to trim the bases down for the 5 ¼ x 4 inches foiled backgrounds.
Thank you for reading this blog post. Please like and leave comments 😊
I loved playing with my grandmother’s small egg timer filled with white sand as a child and when I saw The Greetery’s Hourglass dies, I knew I wanted to make several.
To begin, I watched the how to video for the hourglass to get ideas on how to use the die sets. I decided on the cut-out version and cut out 11 hourglass frames from white cardstock. Then I cut out a out a whole hourglass insert using the larger die from the insert set. By mistake I cut the tent fold hourglass from the smaller inset die, but I made it work as I assembled the card. (To cut the tent fold hourglass, fold your cardstock in half and place the top edge just over the fold, so that it won’t cut into the cardstock when cut.) Cut one piece of acetate using the largest insert die.
Next, I adhered sheets of matte gold adhesive foil onto the front and back of a piece of white cardstock before cutting the frame of the hourglass from it. The last items I cut where the Christmas Time in the Country trees, cabin, smoke, snowflakes, stars, and snowbanks from colored scraps of cardstock. Using watercolor pencils and a water brush to color the cabin before assembling it with a scrap of yellow foil paper to go behind the windows. I popped the cabin up on another square cardstock scrap to give it dimension in the hourglass. The trees were cut from brown paper.
The ink blending of the large hourglass insert was done with a large ink blending brush which I also used to ink up the insert 10 insert frames that I had glued together and the eleventh frame that would be the frame to go over the acetate. Once the large insert piece was dry, I glued down the scene pieces weaving the smoke around the tree branches. Next, I sprayed the scene with white ink spray to create the snow fall. (The ink goes on thick, but it becomes translucent as it dries, so let it dry before going to the next set.)
Before assembling the card, stamp and heat emboss the inside sentiment on the tent fold hourglass piece. I used a Catherine Pooler stamp that was the correct size to fit in the smaller hourglass shape. (My stamping was not as solid as I had hoped, so once it was heat embossed, I had to go back and fill in the missing places with a gold gel pen.)
To assemble the hourglass, first glue the large, inked hourglass to the tent fold hourglass. Next, glue the stacked hourglass frames onto the large, inked hourglass. Add any extra snowflakes and stars die cut along with snowflake sequins and stars to the inside of the hourglass with a dash of fine glitter. Adhere the acetate to the top of the stacked frame and then the eleventh inked frame over the acetate. Glue the gold frame over the top of the hourglass. Shake to distribute the glitter to all parts of the hourglass scene.
Because of the thickness of the card, I will make a small box to deliver it in from faux leather cardstock.
Thank you for reading. If you enjoyed this blog post, please like it and follow the blog. 😊
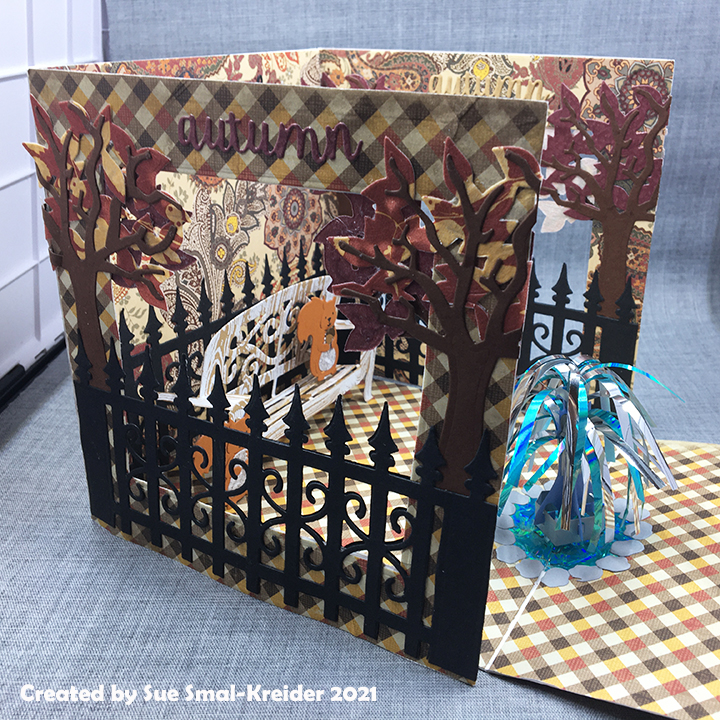
Sometimes spending a holiday alone in a place far from home means that one must adapt and make new traditions, friends and feasts.
This penta-fold aperture card opens out to form a park scene complete with a water fountain and squirrels sharing acorns. Karen Burniston dies are used for all but the 4 inch square apertures.
Card base: Cut four pieces of heavy weight cardstock 6 inches x 6 ¼ inches and one piece 6 inches by 3 inches. Score and fold all the 6 ¼ inches sides at ¼ inch to form tabs.
Adhere decorative papers to the front and back of two of the tabbed squares. (I used double-sided tape at the outer edges of paper.) Center a 4-inch square die over the patterned paper and secure with removable tape. (Remember if you are using different papers for the inside and outside of your card to test that you have the papers on the correct sides of your tabbed card base panels before you cut the apertures.)
Glue the aperture side panels to the 6-inch sides of the back panel whose tab is glued to the floor panel. The floor panel’s tab is glued to the 6-inch side of the 6 inch x 3inch piece. Adhere decorative paper onto all panels on the card base.
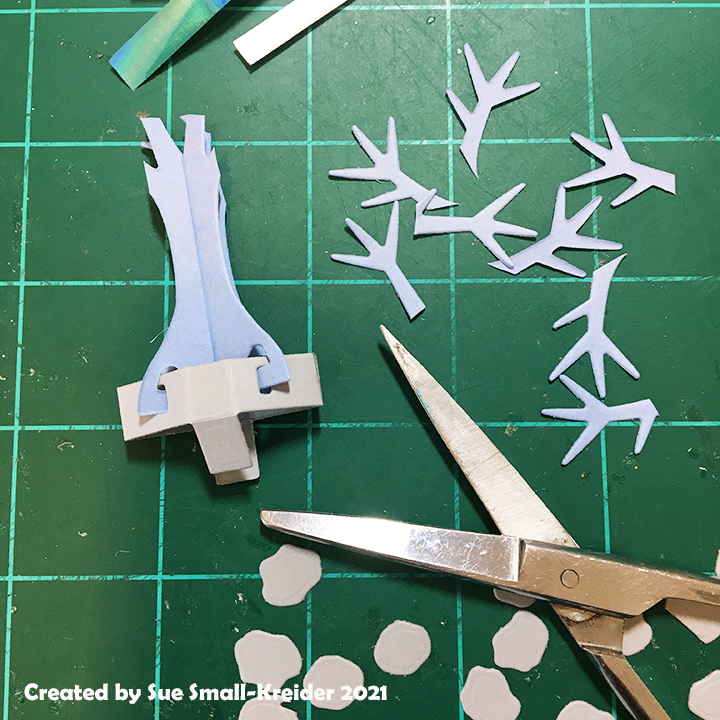
Trees: Cut four tree trunks using Tree Pop-Up die set. Cut four leaves dies. Glue trunks to leaves. Use a fence piece to position each tree trunk on the sides of the apertures, gluing the overlapping leaves together in the aperture opening. Repeat all steps for other aperture panel.
Fence: Cut ten fence panels from the Iron Fence Pop-Up die set. (I cut twelve fence piece incase I made a mistake in cutting, which I did.) Trim five fence panels at the sixth post from the left. Trim the remaining fence panels at the sixth post from the right. Trim off sixth post tip and scrolls at the right of post on left panel as shown in photo. Glue right panel over left panel. Take one elongated fence panel and adhere to the back panel. Glue fences over aperture panels front and back matching up fence tips.
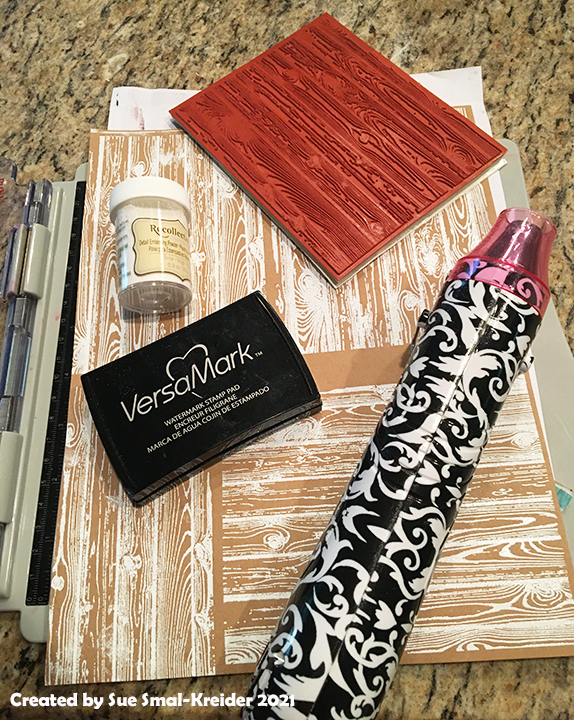
Bench: Stamp with woodgrain stamp onto brown kraft card stock and heat emboss with white embossing powder.
Die cut one whole bench using the Garden Bench Pop-Up die set. Cut the seat section again with the woodgrain going with the seat planks. Save two of the scrolling out-cuts from the bench back to glue onto the front of bench arms. Glue seat onto bench matching up planks. Follow package directions to attach the bench to the back and floor panels.
Fountain: Cut one of each of the two pieces of tree trunk from Tiny Trees Pop-Up die set of blue card stock. Cut tree base from gray card stock. Cut two sets of rocks from Tent Pop Up die set.
Assemble tree as per package directions. Trim the tips of branches off
Trim two colors of mylar foil into 1/8 inch wide strips. (I used the Spellbinders Quick Trimmer) Glue two color strips to each side of the trimmed tree trunk.
Cut a circle of blue foil and glue to fold made by the floor panel and the 6×3 inch panel. Cover edges with gray rocks. Attach the tiny tree foundation per directions on package.
Squirrels: Cut two squirrels and the tummy fur from two different colors. Cut two acorns from a light brown and two acorn tops from a dark brown. Assemble squirrels and acorns per package directions. Cut one of the long pop-up platforms from the bench pop-up die set. Attach to bench per directions on package. Glue squirrel to platform.
Sentiments: “autumn colors”, “happy autumn” , “Happy Thanksgiving” and “Thinking of you” are sentiments from two of Karen Burniston Word die sets – Greetings and Autumn Word Set.
Thank you for reading. If you enjoyed this blog post, please like it and follow the blog. 😊
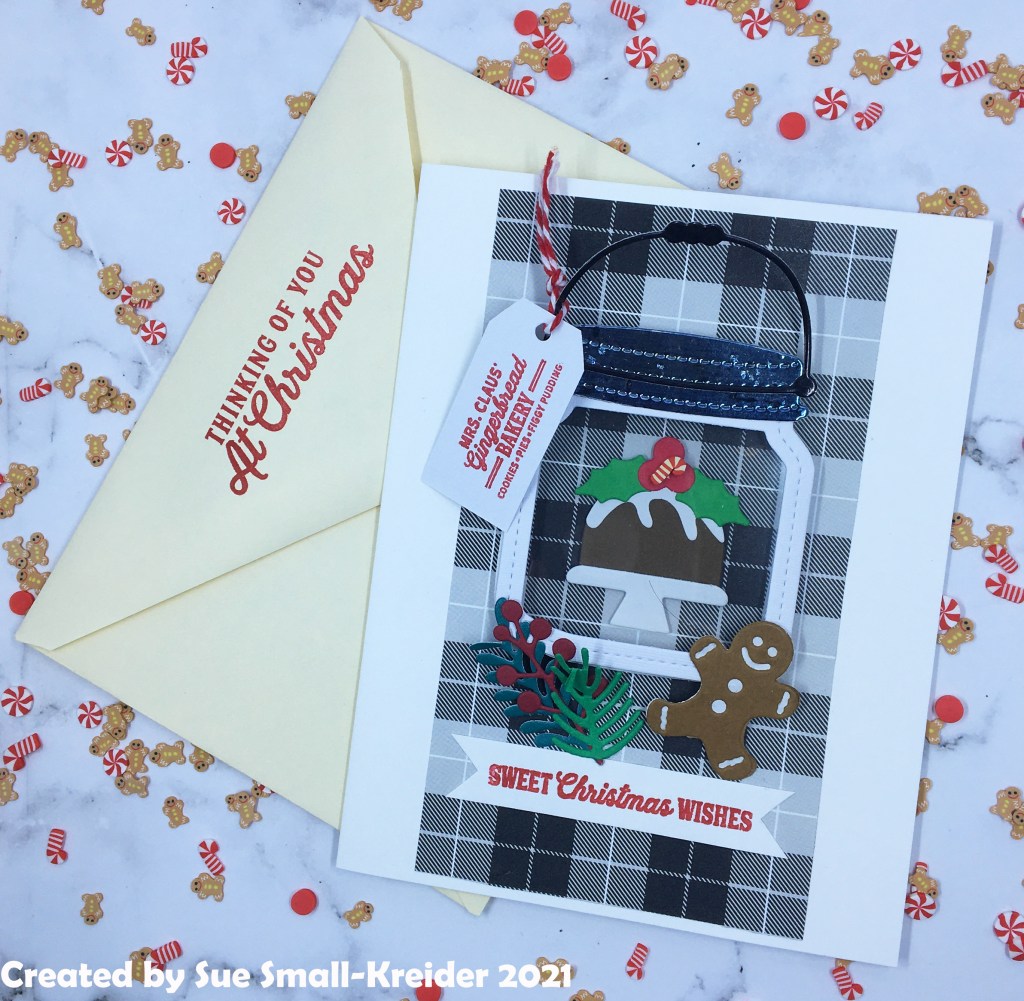
The warm fruity smell of spices and icing sugar as it cools means that Christmas is in the air.
These dimensional cards are made from a Queen & Co. Holiday Jar kit which include the patterned paper, sentiment stamps, dies, foam jar shakers and pre-cut acetate. Colored cardstock scraps and heavy white cardstock card bases and envelopes were the only things besides red ink, glue, baker’s twine and tiny candy canes that were not in the kit.
The tiny tag says “Mrs. Claus’ Gingerbread Bakery, Cookie, Pies, Figgy Pudding” and is one of the tag stamps in the set. both the outside sentiment “Sweet Christmas Wishes and the inside sentiment of “Have yourself A merry little Christmas” are also included in the kit.
For the jar lids I used Hunkydory mirri card from the oxidized metals collection. The jar handle is cut from shiny black cardstock and the white stitched jar frame white linen textured cardstock both from a DCWV “The Spooky Time Cardstock Matstack.”
The envelope flaps are stamped with the same Stampin’ Up Real Red ink as the cards and the sentiment “Thinking of you at Christmas” sets the tone for the card.
I also made one other design from this kit using a fir tree theme complete with a pine scent air freshener tucked inside the card.
PLEASE NOTE: Queen & Co. makes these kits in small batches and when they sell out they may not bring the items back. I usually purchase a kit and several of the refill foam sets when a new kit comes out.
Everyone needs sunshine and the feeling that someone is thinking of them. This flippy flappy card uses dies by Lawn Fawn for the pop-up mechanism as well as the sunshine motifs.
When I began this card, I made a prototype card first to figure out how the mechanism worked. I watched an assembly video and still got it wrong by putting assembling from the front instead of the back. (See photo below.) The pop-up ended up working, but the flap was too long. (I recommend watching the assembly video several times or assemble the mechanism going step by step with video.)
For my actual card I changed up some of the design to make the sunshine really pop. Adding some ink to the background die cut helps emphasize the sun rays . The sun frame is cut from yellow, and the back sun outline is cut from orange with its center circle taped into the hole in the inked background.
The “Hello Sunshine” sentiment is cut twice from a darker orange cardstock to add some dimension. A fine tipped glue bottle makes gluing the fine lines of the letters easy.
The pop-up sun face is adhered to a strip cut from some clear plastic packaging.
To give the card recipient a hint at what is inside the envelope, I stamped the back of the envelope with a background sun burst pattern stamp from Hero Arts using a brown ink onto an orange envelope.
Thank you for reading. If you enjoyed this blog post, please like it and follow the blog. 😊
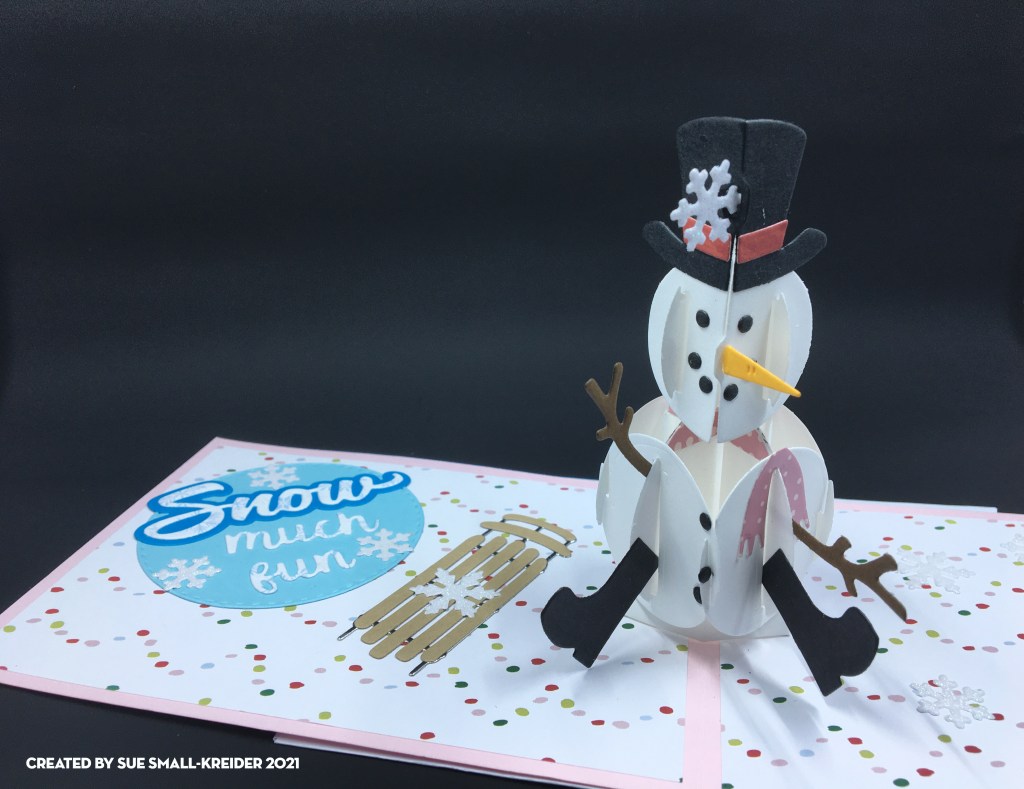
What North American children hasn’t hoped for a school closing day due to a snowstorm. This is a card celebrating a snowy day in lighthearted pastels. Karen Burniston dies are used for the card.
To make this A2 size card, cut a rectangle 4 ¼ x 11 inches of pink heavy cardstock and fold in in the middle to make a 4 ½ inches tall by 5 ½ inches wide card base. Cut four decorative paper panels at 4 x 5 ¼ inches. Adhere these panels to front, back and insides of the card base.
It is easiest to die cut all the pieces you will need to make both the inside and outside snowmen at the same time so that they are similar in colors and papers used. Also cut three circles or other label shapes on which to mount your sentiments. (For the personalized message circle, I added a smaller white circle.) Think about using contrasting colors for your words and their backgrounds. (I used blue to make the mostly white with snowflake paper I used for the words standout.)
After watching the assembly video on the inside snowman assemble as directed. Once the snowman is adhered to the card base, you can begin to decorate the card. (I used a sled die-cut from Memory Box to add to the snow time activities.) Remember to balance out the position of decorations from one side of the card to the other. There are two different snowflakes in the two snowmen die sets by Karen Burniston. They make wonderful filler decorations for the card.
Because I could not make up my mind on which stamp to use on the back of the envelope, I stamped two envelopes with hints as to the card’s theme. The word cloud is from Stampendous while the snowman is from Art Impressions.
Thank you for reading. If you enjoyed this blog post, please like it and follow the blog. 😊