Cottontail Farms

It’s time for the Karen Burniston April 2023 Design Team Challenge with the theme of BUNNIES.

Ever wonder where chocolate bunnies come from? A chocolate bunny farm – of course!

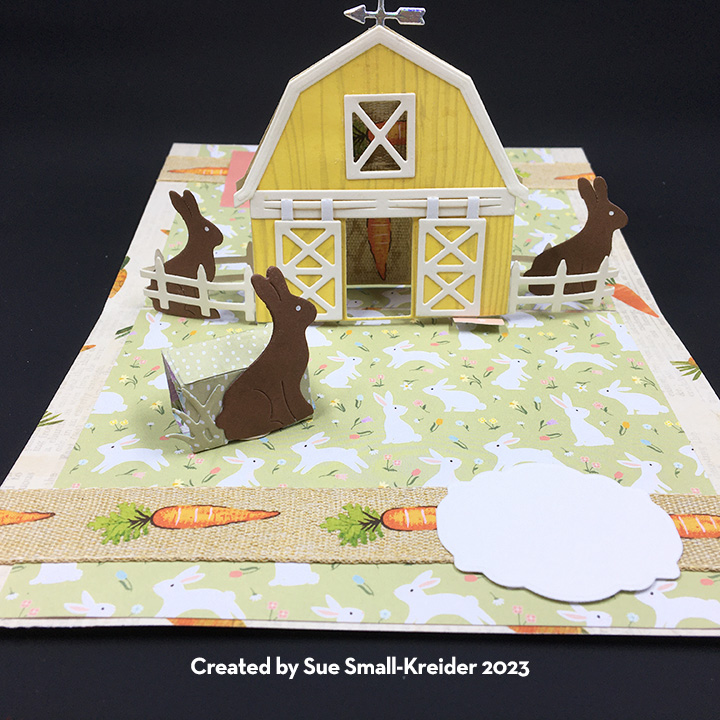
This is a fun, tongue in cheek sort of card using Karen Burniston’s Barn Pop-Up Stand, Easter Charms, Farm Edges, a Bam Box and a fancy label from the Rectangles and Labels – Crosshatch die sets. My inspiration comes from the Echo Park papers and sentiments, chocolate adverts and the on-going tradition in the Sally Worth comic strip where the mother always eats the daughter’s chocolate bunny ears before the daughter has a chance to unwrap the bunny.

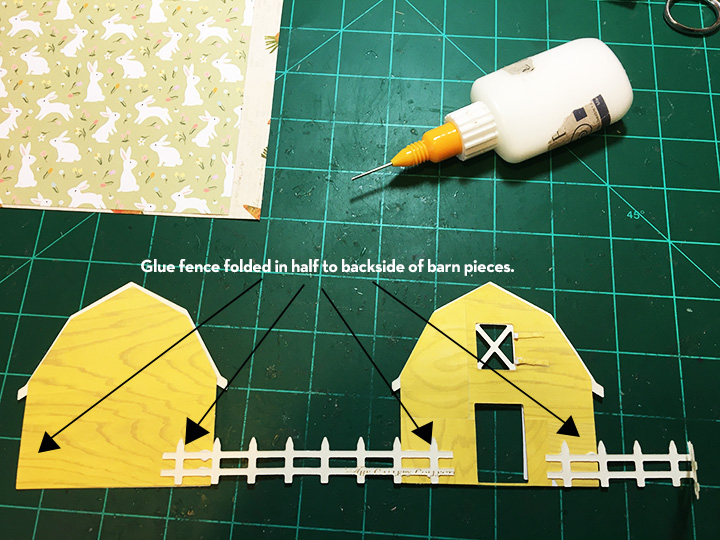
I recommend watching the assembly video for the barn pop-up before starting. My woodgrain paper was only one-sided, so I cut four barns and glued two together for woodgrain inside and out. (Because I had limited woodgrain paper, I had to piece together the backside of the barn front before cutting the door openings into it.) I also cut two fences from the Farm Edges die set which were folded in half and one fence post trimmed off each side to make them fit inside the card when glued to the inside of the barn.

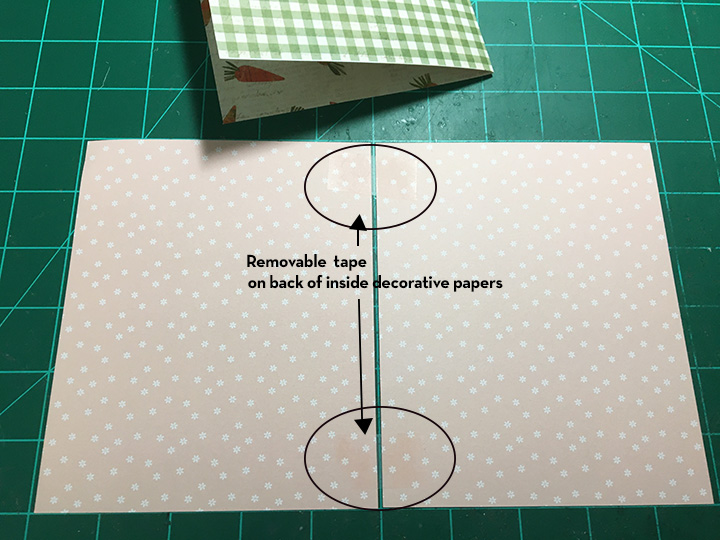
After laying out the placement of the white bunnies on green grass paper, I used clear removable tape to hold them together when I die-cut them for the pop-up stand tabs. Make sure you get your die perfectly centered over the fold line. (I was just a little off-kilter on my die placement and this messed-up the right front tab that attaches to the barn back. You can see this pink tab poking through on a few of the photos. I ended-up cutting off the tab as the other three tabs where functioning.)

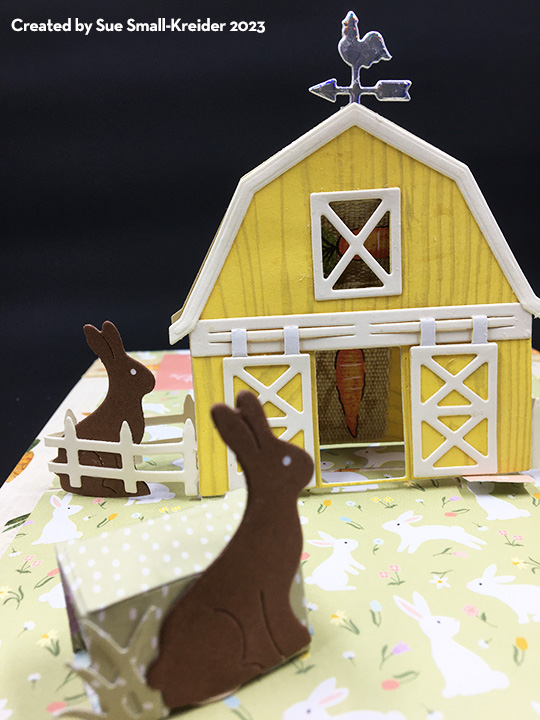
For the chocolate bunnies, I cut seven from brown cardstock using the bunny die in the Easter Charms. The die has a stencil hole for marking the eye with a white gel pen.

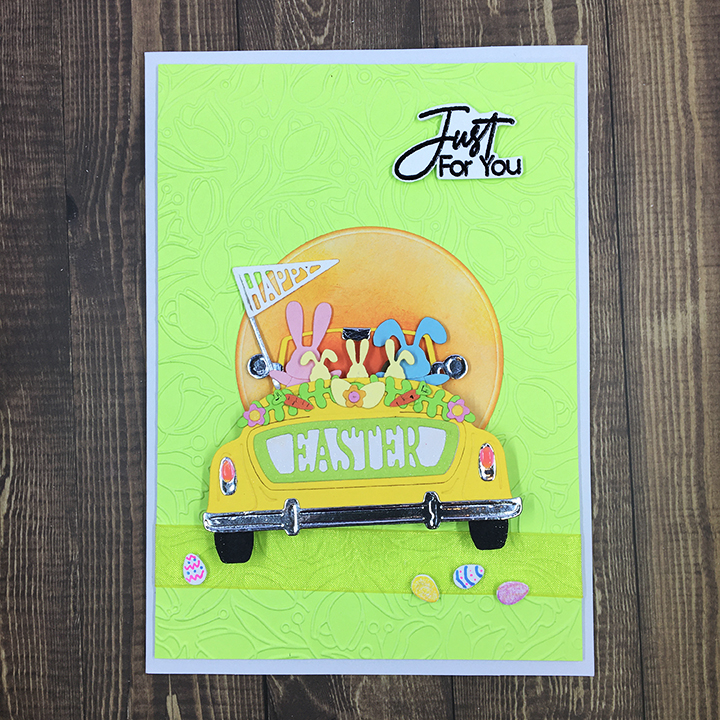
Two chocolate bunnies are on the front of the card surrounding the “Cottontail Farms – Every Bunny Welcome” sign. Another two chocolate bunnies are in the fenced in paddocks by the barn inside, while a third bunny is loose in the yard popped-up on a Bam Box with a piece of grass from the barn die set. The sixth chocolate bunny is on the back of the card with one of its ears having been nibbled on.

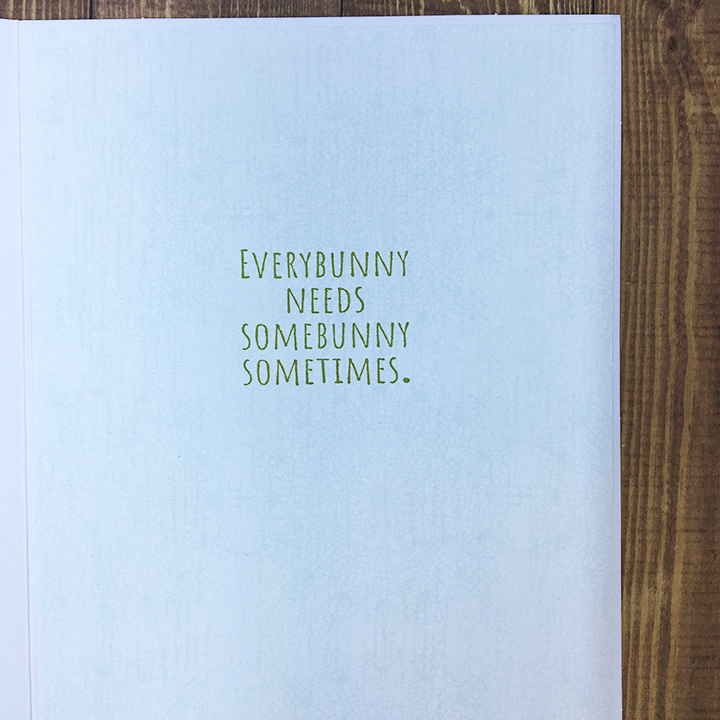
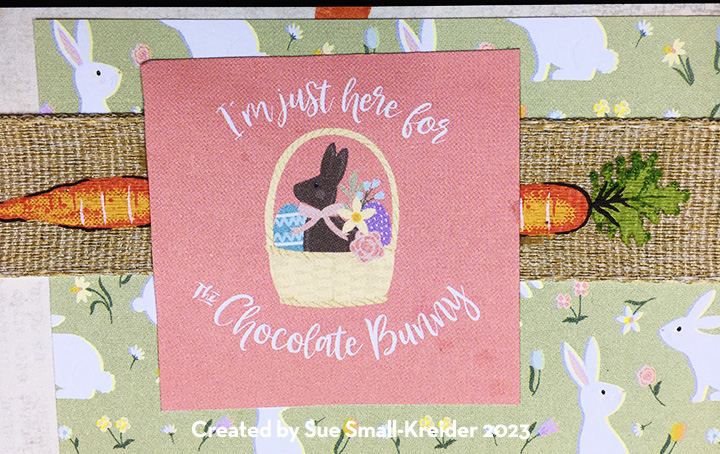
Decorating touches include carrot ribbon that wrapped about the card base on the front and back with the ends covered on the inside with a sentiment “I’m just here for the chocolate bunny” and a white fancy label for a personal message.

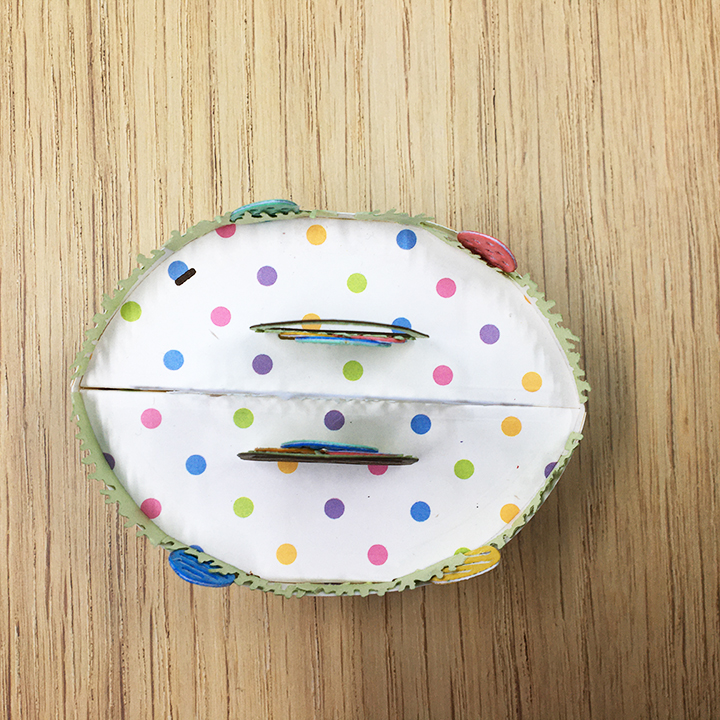
The last bunny is on the envelope flap with a pink ribbon and carrots fussy cut from extra cardbase paper. I like to enclose instructions on how to close the Bam Box. You can download the instructions below.

For more Bam Box projects click here.

Thank you for reading this blog post. I hope this inspires you and makes you smile. Please like and leave comments 😊

Materials Used:

Dies

Papers

  • Photoplay – 12×12 Double-Sided Cardstock – Bunnies & Blooms – Spring Carrots
  • Echo Park – 6×6 Paper Pad – Double-Sided Cardstock – It’s Easter Time
  • Ms. Sparkle & Co. – 5.5×7.5 Paper Pad – Woodgrain Color – Yellow
  • Colored Cardstock and Paper Scraps
  • A7 Envelope – White

Pens/Gels

Adhesives

Miscellaneous

  • Pokey Tool
  • Die Cutting Machine
  • Scrapbook.com – Magic Mat
  • Scissors
  • Time & Place – Easter Ribbon – 7/8-inch wide

Happy Easter!

This card is my second go at using the Spellbinders Spring Collection add-on dies for the Sunday Drive die set that makes a detailed classic convertible car. On this card I went with an Easter Bunny theme complete with colored eggs.

I used a tulip embossing folder from a recent issue of Simply Cards and Papercraft magazine for the background. It took me a number of tries to find the best sandwich pieces to make this embossing folder work. (I ended up using the Glimmer plate, shim and platform to get the right pressure for the embossing folder.) This green background panel was adhered to the white card base using foam tape after it was decorated.

The car goes together as usual except I left off the folded roof layer as you wouldn’t be able to see the baby bunnies.  The adult bunnies have separate arms, heads and body so their poses have lots of possibilities and could be used separately away from the car.  I also added a floral swag with carrots and eggs as well as flowers to the back of the car. For the license plate, I used a white scrap behind the green “Easter” to make it pop and coated Nuvo Glitter Gloss over the plate and the “HAPPY” pendant. The taillights have Nuvo Glow Drops Neon in Shocking Pink for that bit of glow.

A circle the same size as the embossed circle has been inked using a make-up brush and Distress Oxides. It is glued to the green panel.

Once the car was assembled, and a yellow organza ribbon wrapped and taped to the back of the green panel, I used a plastic spring affixed to the back of the car to raise and allow movement for the car.

The “Just for you” sentiment is also from the same Simply Cards and Papercraft free gift set. It is heat embossed and fussy cut. I adhered it with foam squares.

Inside the card, the sentiment is from Riley and Company’s Funnybones series and reads “Everybunny needs somebunny sometimes.” It is stamped on some scrap Hunkydory Christmas insert paper.

The envelope is stamped on the front lower corner and on the back flap with bunnies from the Craft Consortium’s English Garden collection.

Thank you for reading this blog post. Please like, leave comments and follow Ully’s World.😊

Other Sunday Drive cards:

Sunday Drive Celebration

A Snowy Sunday Drive with Santa

Santa Bauble

Santa Delivers to the Tropics

Being Spooky

Driving into a Spooky Sunset

The Best is Yet to Come

Hoppy Spring!

Happy Easter!

MATERIALS USED:

Dies/Embossing Folder

Stamps/Inks/Embossing Powders

Papers

Miscellaneous

© 2021 Sue Small-Kreider/Ully Cat Designs

Popping, Hoppin’ Bunnies

Having just discovered i-crafter dies, I had to try out their Box Pops, Oval Base and Easter Add-on die sets. The folded version fits in an A2 envelope.

I watched Lynda Kanase’s assembly video a few times before making the card. The box pop is a simple mechanism that could decorated for a variety of occasions. I watched this video to get ideas on how to use the Easter Add-on set.

I picked a sturdy polka dotted paper for the base and solid colored cardstock for the sentiments, baskets and grass. The eggs were cut from white scraps and colored with distress inks.

The die cutting and assembly took me about an hour the first time, and by cutting in large batches, later cards assembled even faster.

There are flowers and a unicorn add-ons for the Box Pop Oval base, but you could try using other die cuts as well.

Thank you for reading this blog post. Please like and leave comments 😊

Materials Used:

Dies

Ink

Papers

Miscellaneous

Hoppy Spring!

If you have followed my blog, you will know I am enamored with the Spellbinders Sunday Drive die set and all its seasonal add-ons. The Spring collection has arrived with bunnies.

For this spring card I used a tulip embossing folder from a recent issue of Simply Cards and Papercraft magazine for the background. By using a white core cardstock with green top and bottom, I could sand the top of the embossing to make it white. (Great technique I learned in the magazine from Nicky Gilburt.)

The car goes together as usual except I left off the folded roof layer as you wouldn’t be able to see the baby bunnies.  The adult bunnies have separate arms, heads and body so their poses have lots of possibilities and could be used separately away from the car. For the license plate, I used a white scrap behind the green “SPRING” to make it pop and coated Nuvo Glitter Gloss over the plate and the “HOPPY” pendant.

A circle smaller that fits inside the embossed circle has been inked using a make-brush and Distress Ink.

The “Hello…” sentiment is also from the same Simply Cards and Papercraft free gift set. It is heat embossed on a die cut sentiment strip using a Spellbinder’s glimmer plate die. (Many papercrafting magazines include a free gift set that can really added to your craft stash and gives you inspiration on how to use the stamps, dies and other tools and papers.)

A sequin butterfly from my stash wings bent and adhered on foam squares is the final accent element to the front of the card.

Inside the card, the sentiment is from Riley and Company’s Funnybones series and reads “Everybunny needs somebunny sometimes.” It is stamped on some scrap Hunkydory Christmas insert paper.

The envelope is stamped on the front lower corner and on the back flap with bunnies from the Craft Consortium’s English Garden collection.

Thank you for reading this blog post. Please like and leave comments 😊

Other Sunday Drive cards:

Sunday Drive Celebration

A Snowy Sunday Drive with Santa

Santa Bauble

Santa Delivers to the Tropics

Being Spooky

Driving into a Spooky Sunset

The Best is Yet to Come

Hoppy Spring!

Materials Used:

Dies/Embossing Folder

Stamps/Inks/Embossing Powders

Papers

Miscellaneous

© 2021 Sue Small-Kreider/Ully Cat Designs