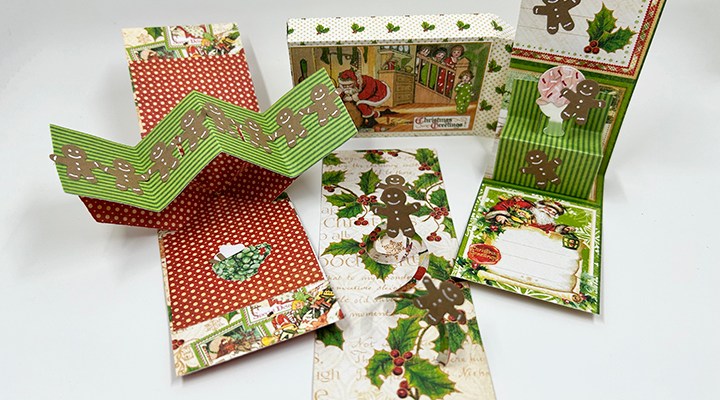
This card was made for Craft Roulette #224 whose parameters included mini cards, “a pretty day” colors, scent(s)/nose(s) and packaging.
I chose to make a gift card box with three mini pop-up cards to celebrate Christmas. Karen Burniston Dies were used to create the box and pop-up mechanisms.
Cardbases: Mini cards are 2 x 7-inch rectangles of double-sided papers folded in half and trimmed to fit inside the box.
Box: Using Karen Burniston’s Candy Hearts Box die set, cut one of the box die. Assemble as shown in the video at the bottom of the linked page. Glue journaling cards to decorate the box.
It’s time for the Karen Burniston June 2024 Design Team Challenge with the theme of using border dies.
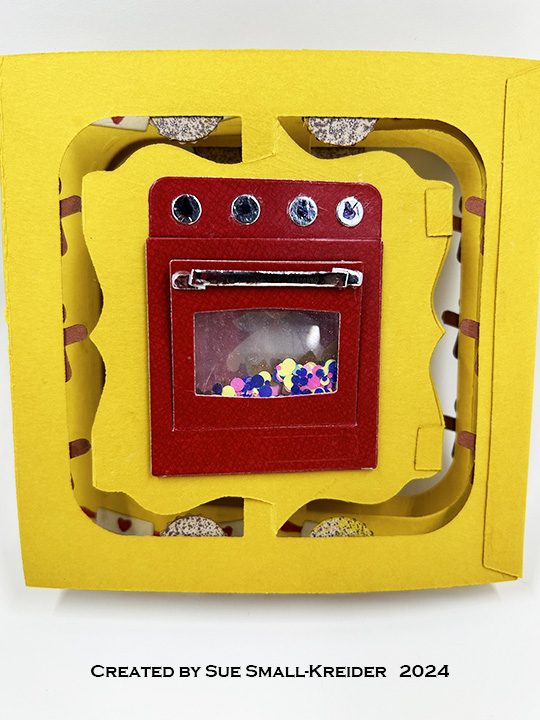
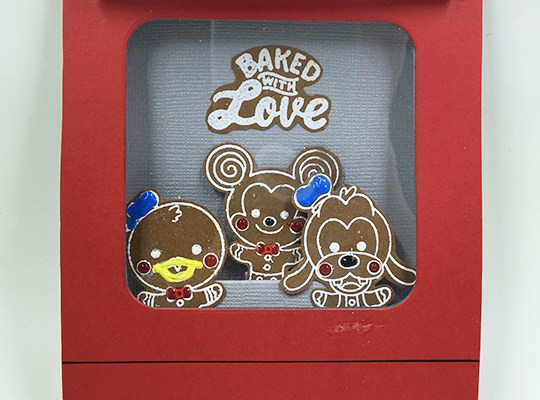
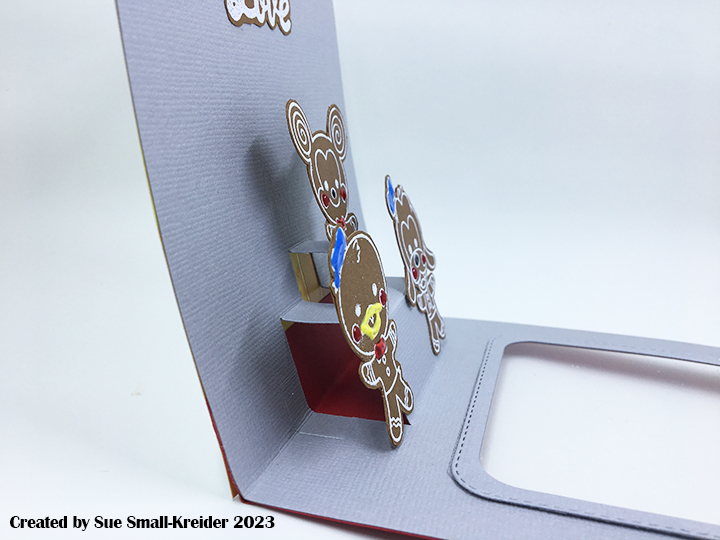
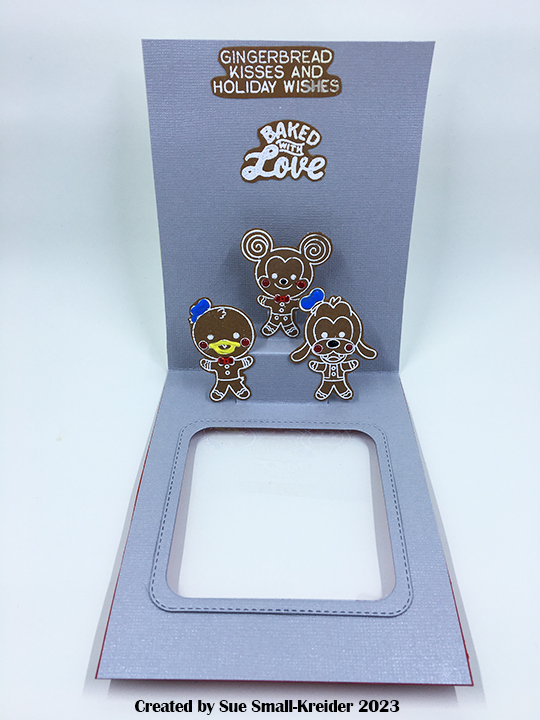
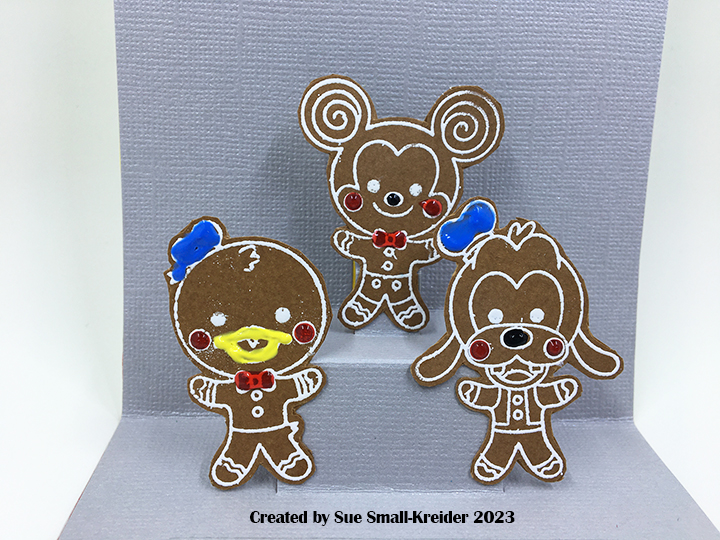
I wanted to get a jump on my end-of-the-year holiday cards by making a baking themed card with pies and gingerbread men from the Baking Borders and Christmas Borders 1 set. The rolling pin and chef’s hat are also in the Baking Borders set. Additional die sets used were: Oven Pop-Up, Tiny Gnomes, and the Fancy Label Accordion. (A 1 3/4-inch square die was used from the Frame Pull Pop-Up set, but any 1 3/4-inch square die could be used. This was the one I had handy.)
Watch my tutorial YouTube video to see how the card was made.
(TIP:Access the assembly videos for any of the dies used by clicking on the die link and scrolling towards the bottom of the linked pagefor the video.)
Cardbase: Cut three of the largest die in the Fancy Label Accordion set from a butterscotch-colored heavy cardstock. Work the scored fold-lines. Wait to until after making and attaching the oven shaker to glue the frames together.
Shaker Oven: Cut ten ovens from red cardstock and two additional ovens from coated red cardstock using the oven die from the Oven Pop-Up set. Trim off stove top section on all 12 pieces. From the two coated cardstock stove top pieces, trim off the back where knobs go and save. Layout oven with stove back on one panel of the cardbase. Mark the outside edges of oven lightly with pencil. Center 1 3/4-inch square die within the oven square and die cut. (You may want to use a ruler to find the center of the fancy label and center the die left to right with the center line. The die will be below the true center up and down because of the stove back piece.)
Glue five of the plain cardstock oven pieces to either side of the cardbase over the square opening. This will form the shaker base. Cut two 2-inch square pieces of clear acetate/plastic. Attach one piece of acetate/plastic with double-sided tape to the top of stacked oven pieces. Turn over and fill shaker with confetti and tiny cookie shapes from the Oven Pop-Up set. Attach the second piece of acetate/plastic with double-sided tape to seal up the oven shaker.
Cut two 1 1/2-inch square pieces of clear acetate/plastic. Adhere to the back of oven doors on the remaining two coated oven pieces using double-sided tape. With more double-sided tape added to the outer edges of the oven pieces, attach them over the shaker acetate/plastic. Glue the stove back with knobs attached to the cardbase above the ovens on both sides.
Pies, Gingerbread Men and Rolling Pins: Cut two strips of pie bases from the Baking Borders set. Color one strip all red .(I used a red glitter brush.) Color four orange and four baked apple yellow on the other strip. Cut out four of each of the pie tops. Ink the pie top to look like browned crusts with maybe some burnt tips of the crusts. Glue lattice pie crust to apple yellow pies, the open ring crust onto the pumpkin orange pies and the flower shaped crusts onto the red pies. Cut all the pies into separate circular pieces. Glue pies to the top and bottom of the front and back panel frames of the card base.
Cut two strips of gingerbread men using the die in the Christmas Borders 1 set. Using a white gel pen with a fine tip, trace the icing onto the men using the stencil feature of the die. Cut men apart and glue to sides of the front and back panel frames of the card base.
Cut two strips of the rolling pins from a kraft colored cardstock using the die from the Baking Borders set. With a red fine-tipped marker stencil on the hearts and color all the handles. Trim the strips to fit the top and bottom of the middle panel frame. Save one of the leftover rolling pins for the chef to hold.
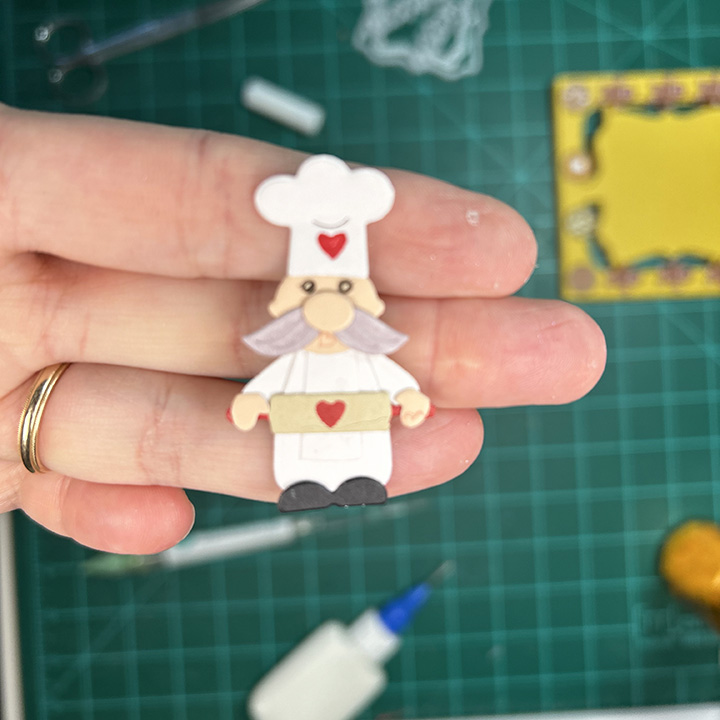
Chef: From the Tiny Gnomes set, cut two of the body piece and one mustache from white cardstock. From flesh colored cardstock cut the head, nose and hands. From black cardstock cut the shoes. With a fine tipped pen, trace the eyes using the stencil feature of the head die. Color the mustache brown or gray. Cut one chef’s hat from white using the die in the Baking Borders set. Using the rolling pin die to stencil a red heart onto the chef’s hat.
To assemble, cut one body piece to have an apron in the center and an arm on either side. (See video for visuals of this.) Glue apron onto other body piece and then head. Added mustache then nose to head. Glue arms onto back of body wide enough to hold a rolling pin. Glue rolling pin to end of arms and then add hands on top of rolling pin handles. Attach shoes and hat.
Sentiments: “Happy Holidays” comes from Word Set 3-Holidays. The labels behind it and the chef are from the decorator dies in the Fancy Label Accordion set. Personal messages can be written on the back of the panels.
Envelope: The card fits into an A7 size envelope decorated with leftover pies and rolling pins on the back flap.
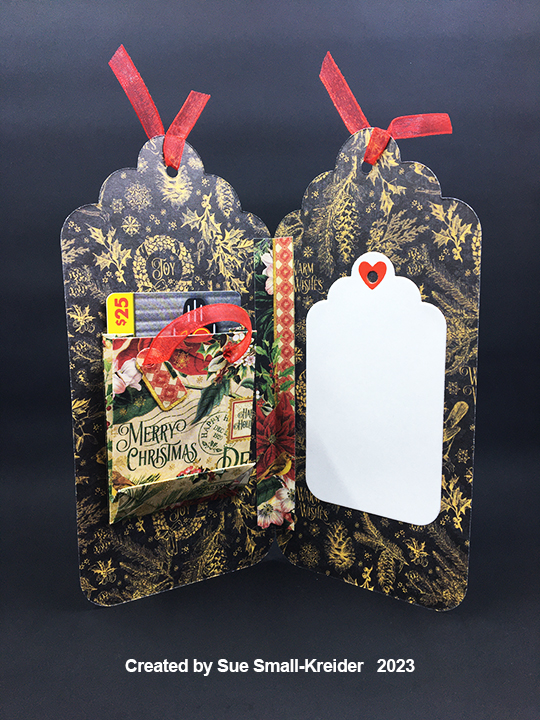
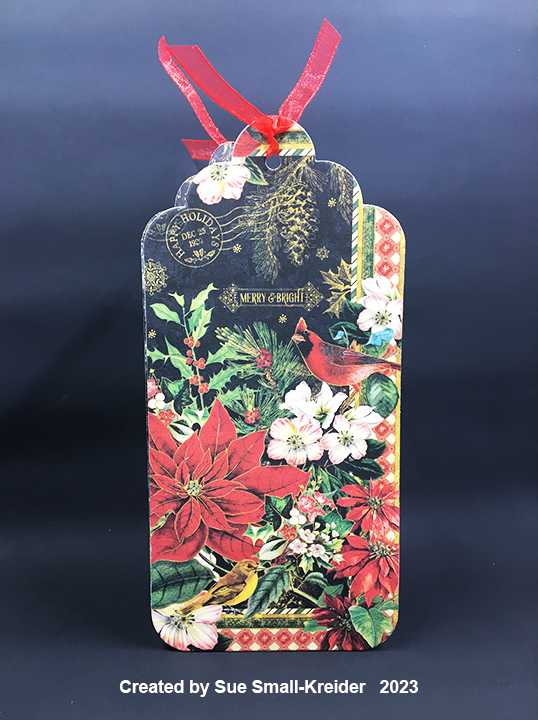
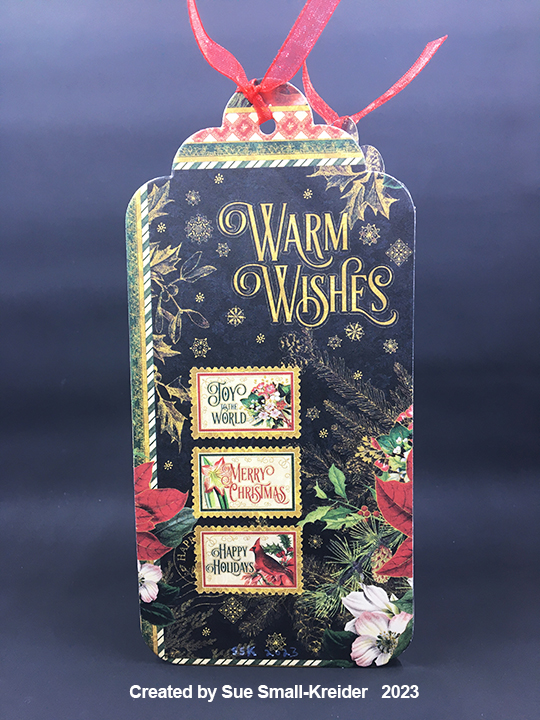
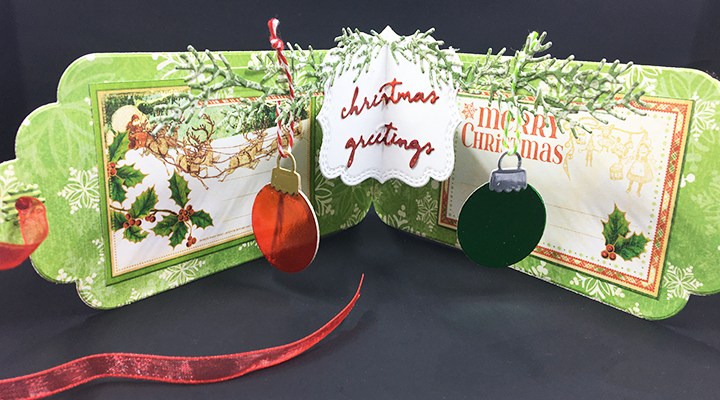
Cardbase: Cut two tags using the largest die in the topper tags set from decorative paper. From the same double-sided paper cut a strip 5×1/2-inch and fold lengthwise in half for the card hinge. Glue the hinge to the tag edges to form the inside of the card. Tie ribbon through the tag hole on each side of the card.
Card FrontCard Back
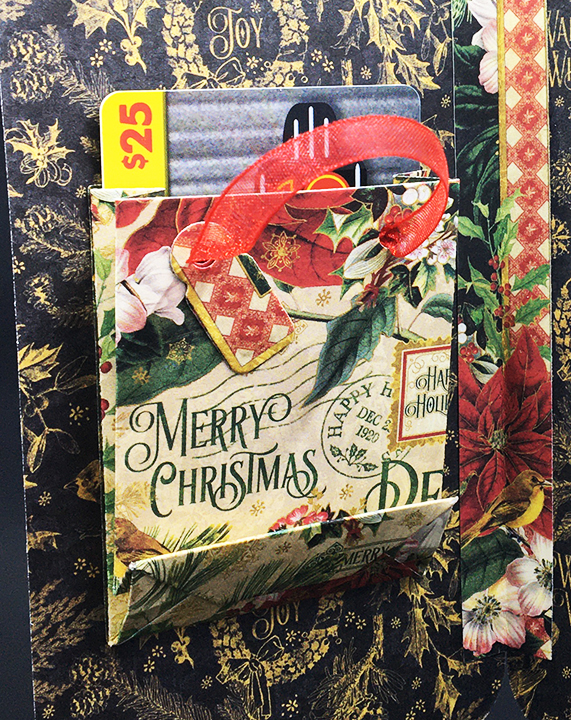
Gift Bag: Plan out what images you want to see on the mini giftbag when it is attached. Center the larger of the two bag dies using the square opening over your desired image making sure the top flat die edge with holes is at the top of your image. (I have a few upside-down paper bags in my stash.) Assemble bag as shown on the packaging. Glue the flat side of the bag to the inside of the card. Add the ribbon handle by threading ribbon through the holes and knotting it inside the bag.
Sentiments: The main sentiments of “Merry & Bright,” “Merry Christmas,” and “Warm Wishes” are all on the decorative cardstock. The white tag label inside for a personal message is cut from smallest tag in the tag set and uses the heart hole protector also in the set.
Envelope: The tag card easily fits into a #10 business envelope.
Thank you for reading this blog post. I hope this inspires you and makes you smile. Please like and leave comments 😊
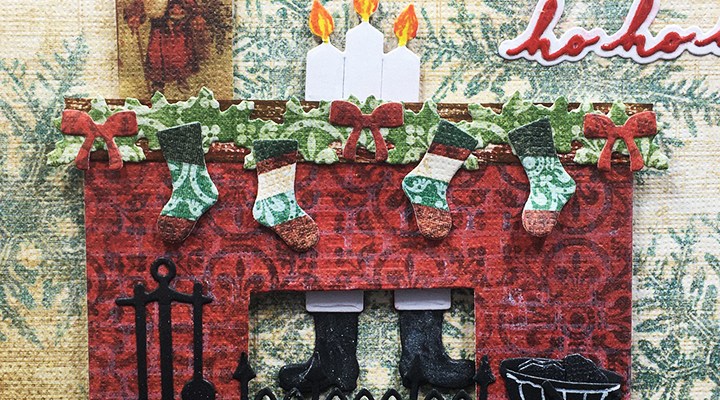
It’s the Karen Burniston design team challenge for December 2023 with the theme of “Naughty or Nice” using Christmas stockings and the idea that naughty persons get coal in their stockings while people who have been good/nice will get presents and sweet treats in their stockings.
Before starting, I recommend watching the assembly videos of the pop-ups which are usually near the bottom of the linked pages for the various dies used.
Cardbase: I folded a 7 3/4-inch by 8 3/4-inch rectangle of white cardstock long-wise in half for the cardbase. Because my decorative papers were 4 1/2-inchby 6 1/2-inch, I centered the papers on each of the four panels.
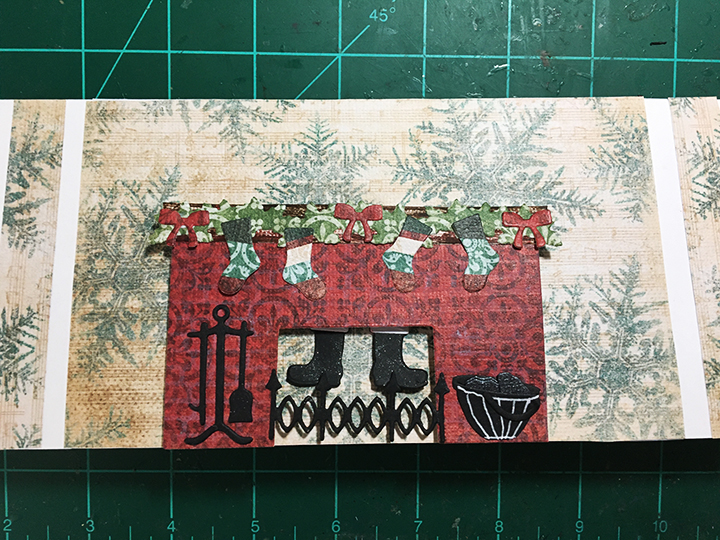
Fireplace: The fireplace main piece was cut using white ink rubbed on the die before cutting. The mantel piece was die cut and folded in half and glued together to add dimension. Christmas decorations – candles, stockings, greenery, bows, fireplace guard and tools are all in the Fireplace Extras 1 set. I cut down the pail from the Adirondack Chair Pop-Up set to be a coal shuttle next to the fireplace. For the picture of Father Christmas, I fussy cut it from the decorative paper collection I used.
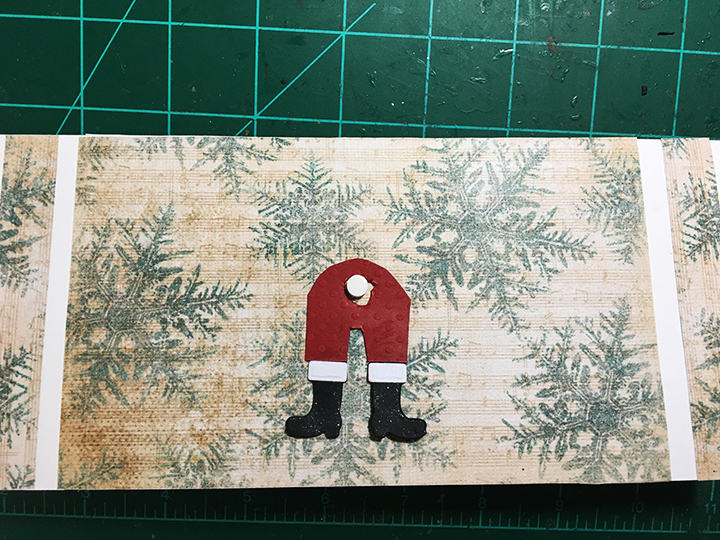
Santa’s Boots: The boots are cut from black and white cardstock using the dies in the Fireplace Pop-Up set. Use the tab atop the boots to attach red pants that were cut free-handed with a holed punched and widened to accommodate a small foam dot. The boots were coated with glitter gloss before attaching to the card. Follow the pictures above for order of assembly of fireplace and Santa’s pants and boots. The fireplace was attached with two layers of foam tape to be slightly taller than the foam dot so that the boots would swing freely.
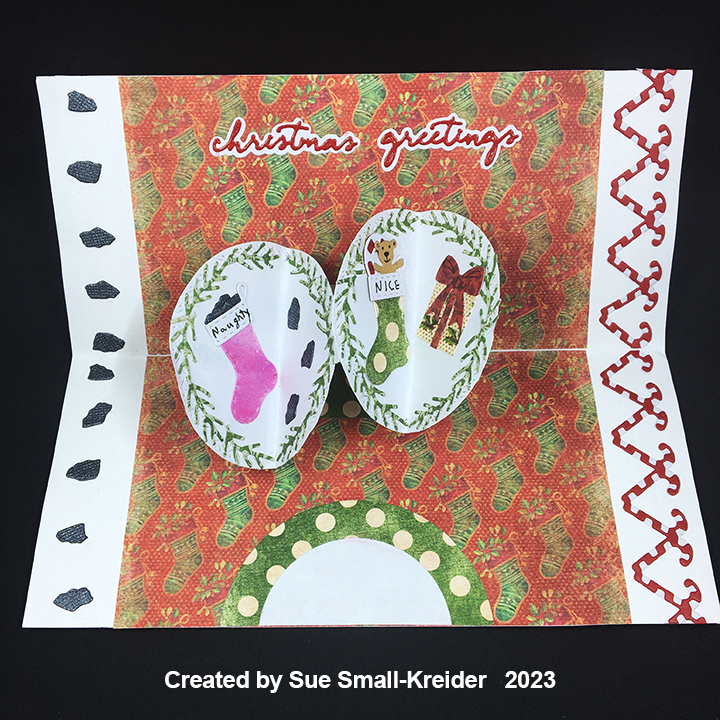
Wreaths: Using the second largest crosshatch circle, I cut two from heavy white paper. The greenery was made by cutting off the fir needles from the branch piece in the Holiday Charms set. Stockings and their coal, teddy bear and candy cane come from the same charms set. The wrapped gift is from the Big Birthday Charms set.
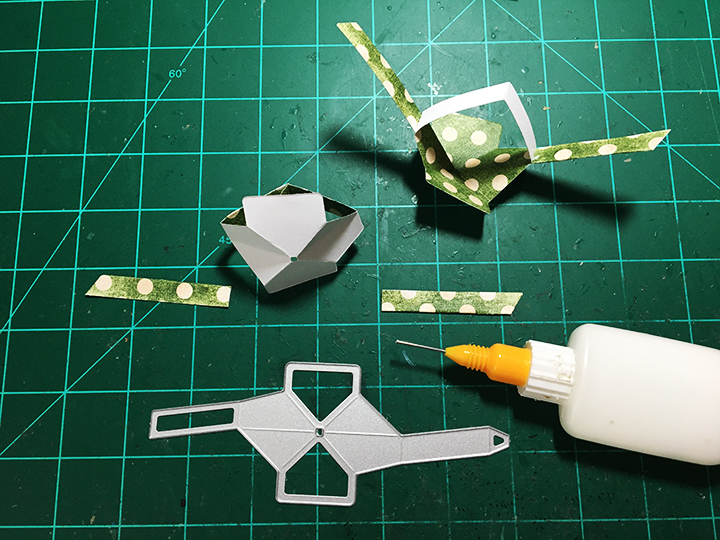
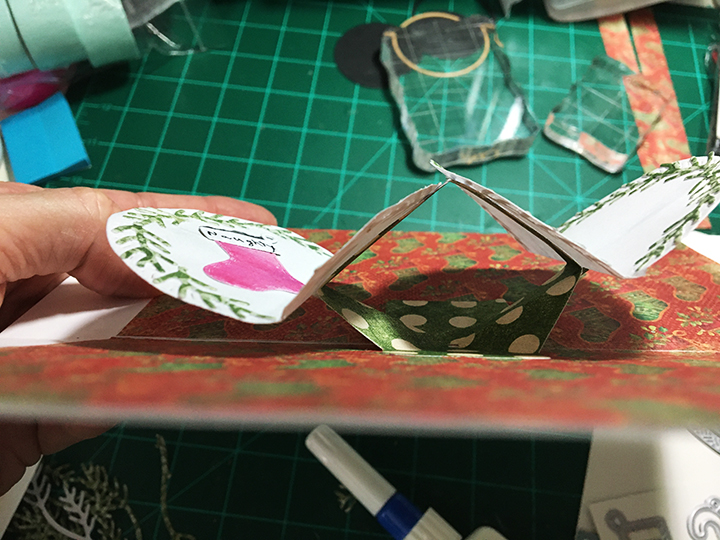
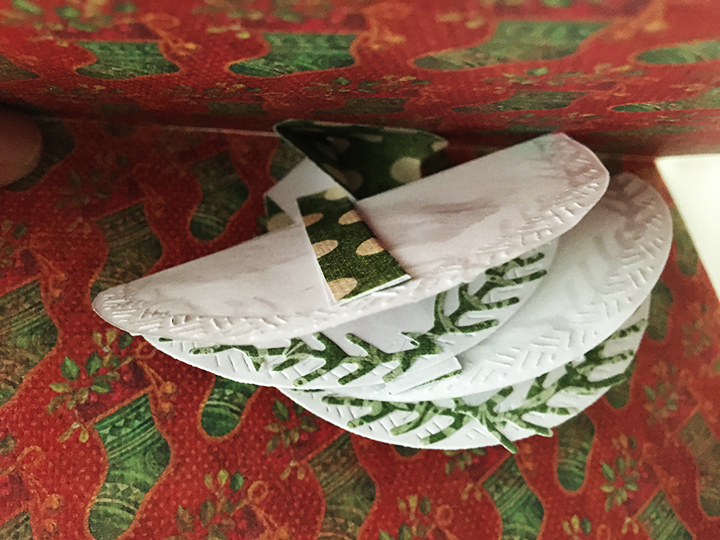
Inside Pop-Up Mechanism: I added extension arms onto the Twist Flower Pop-up mechanism to form a “W” shape. (Watch this Halloween card video to see how to make the mechanism.) The circle wreaths were folded in half and glued to the two “V” arms, playing with the positioning of the circles so there are no catchpoints.
Borders: The inside border of candy canes comes from the Christmas Borders 2 die set while the coal comes from the Holiday Charms. For the back borders, the branch die from the Holiday Charms set was used. Leftover strips of decorative papers were added to the card front as borders.
Sentiments: Clear tape over red cardstock is the secret to the glossy script letters with plain white cardstock shadows. The sentiments all come from the Small Script – Christmas die set. On the front is “ho ho ho” with “Christmas greetings” inside the card.
Envelope: The stocking border from the Christmas Borders 2 set was cut from the same striped paper that was used on the fireplace stockings and glued to the back envelope flap to hint at what’s to come.
Thank you for reading this blog post. I hope this inspires you and makes you smile. Please like and leave comments 😊
This card was inspired by Craft Roulette episode #191 whose parameters were a drop-down card, supper table colors, seasons element (Christmas), and shiny.
This card was made for Craft Roulette #189 whose parameters included an A2 sized card using forest colours, elements starting with “H” and postage stamp(s) and/or cancellation mark(s).
I used Woodware’s Christmas Robin stamp set designed by Francoise Read as well as her Christmas Postmarks set for this A2 (4.25×5.5-inch) side-fold card with matching envelope.
The robin image was stamped on green cardstock with watermark ink and heat embossed with clear powder. I stamped a second image on white cardstock and heat embossed it with red powder. The red image, I fussy cut leaving the cancellation marks attached to the robin’s leg. The “R” tag I cut out and popped-up with foam squares as well as tying a red string to it.
The red robin was glued over the green one and red Nuvo Drops were used to add dimension to the berries.
The green card front was mounted on a fern and white flower printed paper before being attached to the kraft cardstock cardbase.
The sentiment included in the robin stamp set of “Wishing you a wonderful Christmas full of joy,” was stamped in black inside the card with a snowflake.
Christmas Postmark stamps were inked in green ink to the card back and envelope flap.
Thank you for reading this blog post. I hope this inspires you and makes you smile. Please like and leave comments 😊
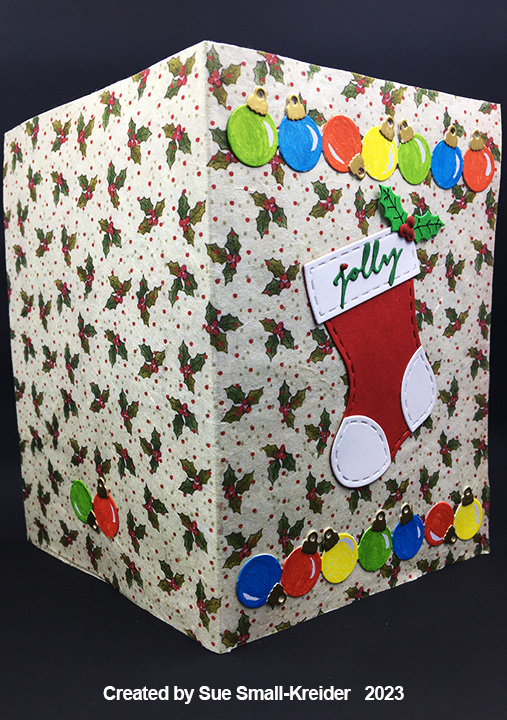
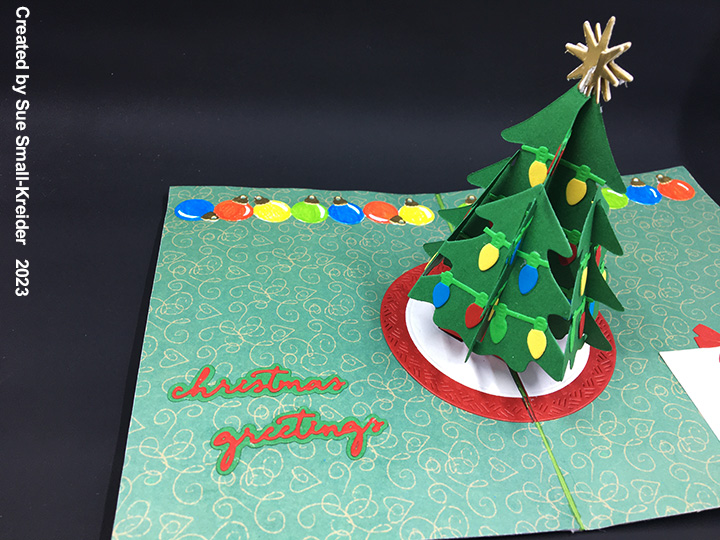
The large tree ornaments in Karen Burniston’s new Christmas Borders 1are very mid-century modern and are the inspiration for this retro pop-up Christmas card.
Cardbase: I used a white purchased A6 (4.75×6.5-inch) cardbase and covered the outside of it with a single piece of printed rice paper using lots of glue and a brayer to smooth the paper down and adhere it to the cardstock. Inside, I cut two 4.75×6.5-inch panels of green printed paper and glued them close to the center fold but leaving a tiny gap at the fold. The white gap was colored in with an olive-green marker to match the paper.
Ornament Borders: For the ornament borders, I cut four of the main border die from the Christmas Border1 die set from a white shimmer cardstock. I also cut four of the ornament cap die from matte gold cardstock. I cut the borders to fit the width of the card. (Seven ornaments fit.) Using permanent markers to individually color the ornament balls, they allowed some of the metallic shimmer to come through the ink. Glue the gold caps to the ornaments.
Stocking: The red and white stocking comes from the Stocking Pop-Up die set as does the holly and berries. I used the stencil feature on the holly to draw leaf veins and Nuvo Drops to add dimension to the berries.
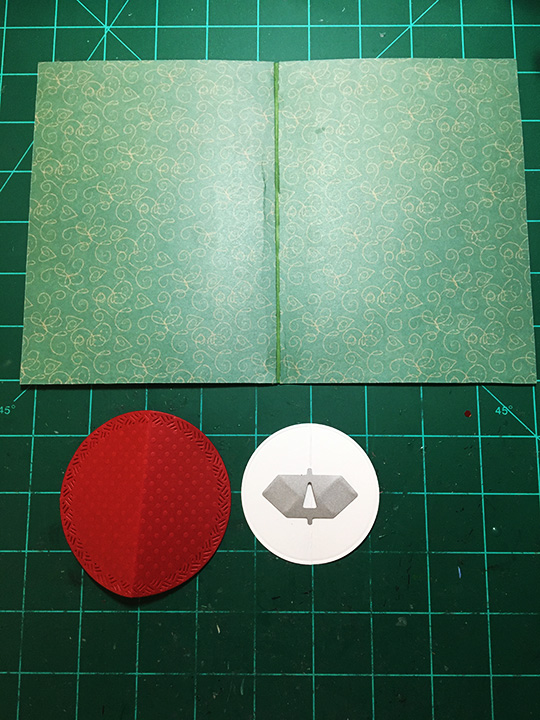
Pop-Up Tree: Watch the assembly video located towards the bottom of the linked page before starting on the tree. I used two circles from the Circles – Crosshatch set to make the tree skirt. I folded both circles in half and on the smaller white circle, I used the small die in the Christmas Tree Pop-Up set to cut the two tabs that work the pop-up mechanism for the tree. The die is centered over the fold. Cut both circles in half on the fold lines. Glue the circles onto the inside of the card leaving the tabs unglued and in the open position. Cut the tree base from red, fold and attach to the white mechanism tabs inside the card.
Cut the four tree greenery pieces and decorate with the string of lights border from the Christmas Borders 1 die set. (I cut seven stands of green lights to use as the base and then two strands each of blue, red and yellow. For the different colored light bulbs, cut the bulbs off the colored strands and glue to the green base.) Make sure that you trim away any light strand pieces from the tree’s assembly slots.
Assemble tree as shown in the video and attach to red base.
Sentiments: On the stocking is the word “jolly” from the new word set –Small Script – Christmas. The “j” is dotted with a Nuvo Drop in red. Inside the card “Christmas greetings” uses both the shadow and script dies in contrasting green and red cardstock. A large white gift box with red bow serves a place for a personal message. The stitched rectangle and bow are from the Stocking Pop-Up die set.
Envelope: On the back of the envelope stamped in red and green are three small light bulbs and the words “Merry & Bright.” I used paper tape to mask half the sentiment to stamp in red and then masked the other half to stamp in green.
Thank you for reading this blog post. I hope this inspires you and makes you smile. Please like and leave comments 😊
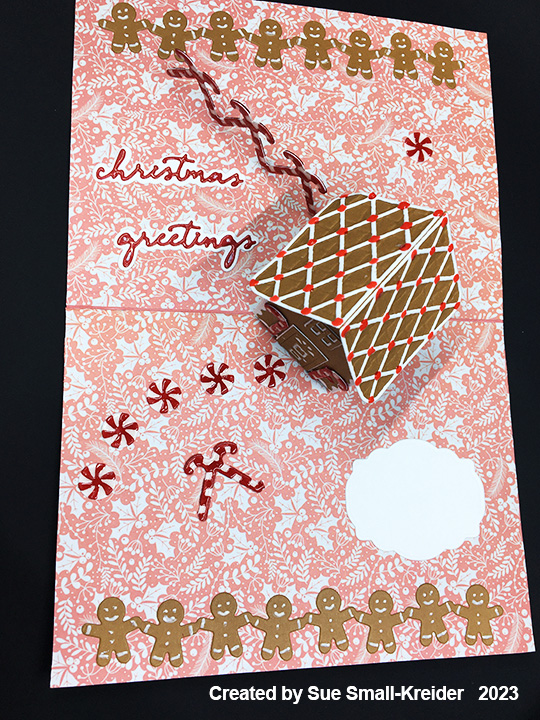
The fragrance of spices and fresh baked gingerbread herald the Christmas season. Decorating a gingerbread house is often a group activity for families. This card is intended to evoke these kinds of memories.
Cardbase: I used a white purchased A6 (4.75×6.5-inch) cardbase and covered the outside of it with two 4.75×6.5-inch panels of golden striped paper. Inside, I cut 4.75×6.5-inch panels of pink patterned paper and glued them close to the center fold but leaving a tiny gap at the fold. The white gap was colored in with a pink marker to match the paper on the inside of the card.
Stove: While the Oven Pop-Up is designed to be 3D, it can be trimmed and used as a flat piece by cutting off the stove top section and using the utensil handle as the burners. The oven window is backed with a silver baking sheet glued and taped to the back of the oven door. (Before I die-cut the oven, I covered the red cardstock with clear packing tape to get a shiny effect.) The handle and knobs were cut, folded and colored as you would for a pop-up version of the oven.
Decorations – Card Front: For the baking elements on the front of the card, all of them except the mixer are in the Oven Pop-up set. The mixer is in the Oven Extras set. The plates that the cookies are on are the burner circles for the stove top. I covered a piece of red cardstock with clear packing tape before cutting out all the red elements. For the white mixing bowl and plates, I used a glitter gloss to make them sparkle.
Gingerbread House:Watch the assembly video for the Gingerbread Tiny House Add-Ons located at the bottom of the linked pagebefore cutting out pieces. I covered all the edges of the tiny house base before adhering the gingerbread panels with glitter gloss to make shiny frosting. You can die-cut tiny candy dots and gum drops to decorate the house. I opted to use translucent red Nuvo Drops to decorate the roof. For all the candy canes on the card come from the Christmas Borders 2 set.
Decorations – Inside: For all of the red and white candy decorations, I first assembled the candies and then added Glossy Accents to give them shine and dimension. (The candy canes on the back of the card I used clear packing tape on red cardstock which kept the white a crisp white rather than the pinkish white of the of the inside candy.) While the fence of candy canes is from the Christmas Borders 2 set, the peppermint candies are from the Gingerbread Tiny House Add-Ons set. The borders of gingerbread men are from the Christmas Borders 1set which has a stencil feature to add the white icing decorations.
Sentiments: The “ho ho ho” and “Christmas greetings” are all from the Christmas Small Script word set. The shadows were cut from white and the words from red cardstock covered with clear packing tape to have a shiny appearance. A white label cut using the Crosshatch Rectangles and Labels is a place to write a personal message.
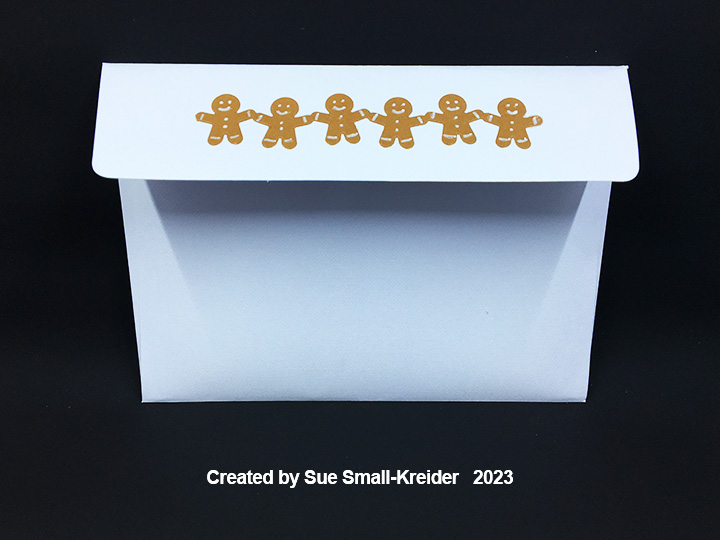
Envelope: Another strip of gingerbread men was cut using the Christmas Borders 1 set and glued to the back flap of the envelope.
Thank you for reading this blog post. I hope this inspires you and makes you smile. Please like and leave comments 😊