Burning Logs TV

This is the fifth card in the Fireplace Christmas Card series.

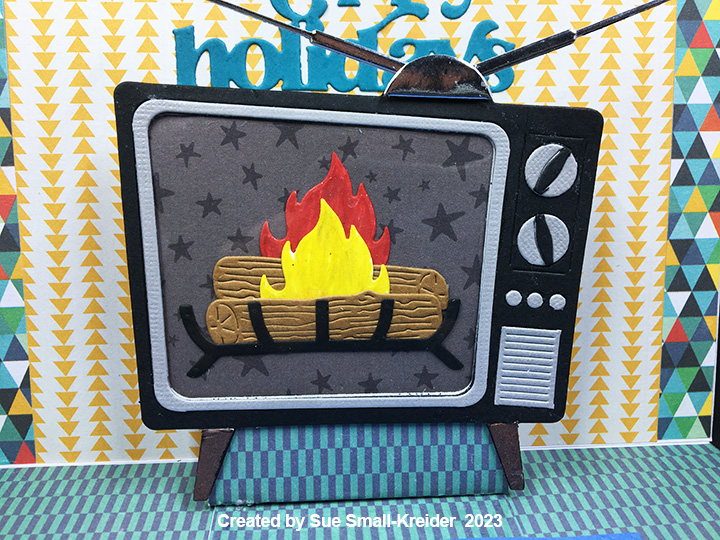
In the good old-days of the 1950s and 1960s, the winter holidays meant snow, winter sports like ice skating on a homemade ice ring made in the backyard of 2×4 boards and a few inches of water frozen. On Christmas day the TV stations broadcast images of burning logs to replace the normal programing.

This card commemorates those childhood memories using dies by Hero Arts along with basic dies and stamps by other companies.

Cardbase: I used a purchase A7 (5×7 inch) cardbase and envelope. I covered the inside with papers that represent wallpaper and carpeting. The card back is also covered with patterned paper. Because I used 6×6 inch patterned paper and some designs I only had one piece, I placed borders of contrasting paper.

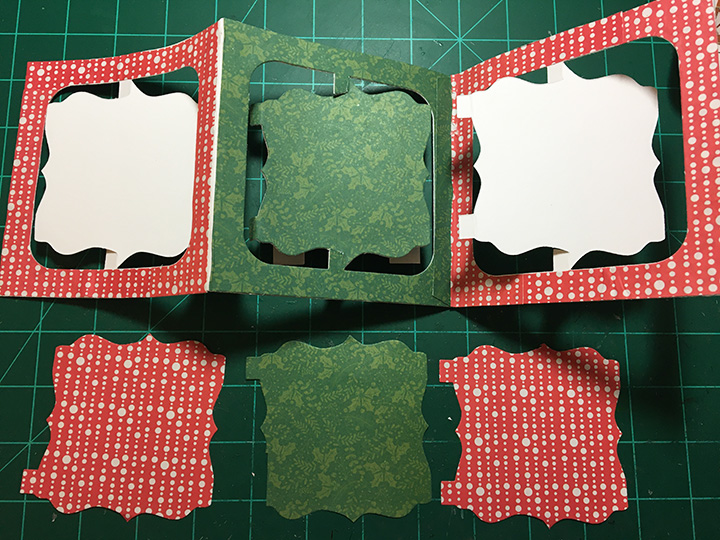
Pop-Up: I wanted this television set to pop-up inside the card, so once it was assembled, I made my own pop-up cube from scrap carpeting patterned cardstock (I would have used the wallpaper, but I had no more of it.) The pop-up cub is made from strip 2.5×7 inches, folded at .5-inches, 3-inches, 3.5-inches and 4-inches, and the .5-inch tab is glued onto the carpet panel inside the card, butted up against the fold and the other 3-inch end of the strip glued to the wallpaper panel.  The TV is glued to the front of the pop-up.

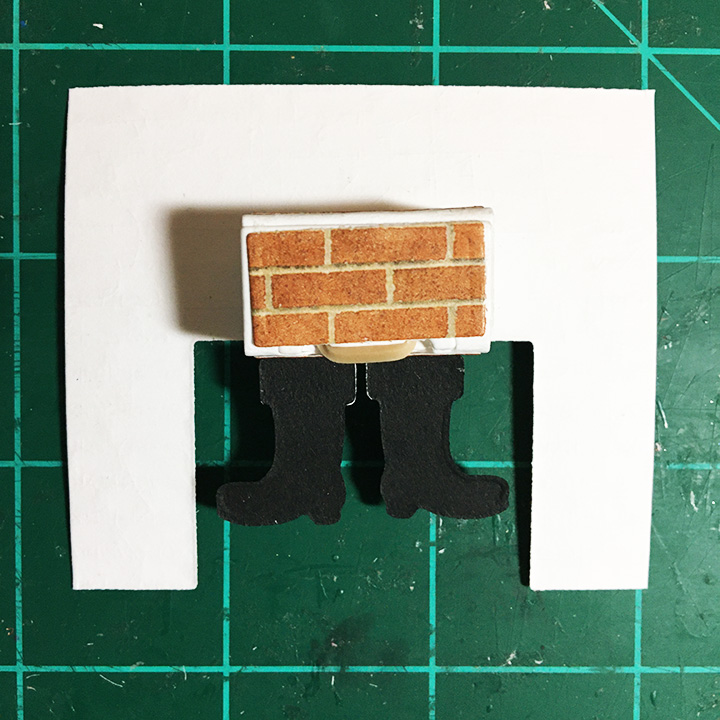
TV: As with many Hero Arts dies, you have to cut them multiple times and then fussy cut with scissors the decorative pieces such as the TV knobs, speaker box and legs. I cut the knobs, speaker and screen frame from a textured metallic gray cardstock and legs from woodgrain paper.

The whole television I cut once from black and twice from a thick cardstock in my junk mail recycling. The junk mail pieces I glued together. On the back of the black piece, I attached a piece of clear acetate using thin double-sided tape. Next, I trimmed the excess acetate. (Don’t attach black front to junk mail back piece until burning log screen is attached.)

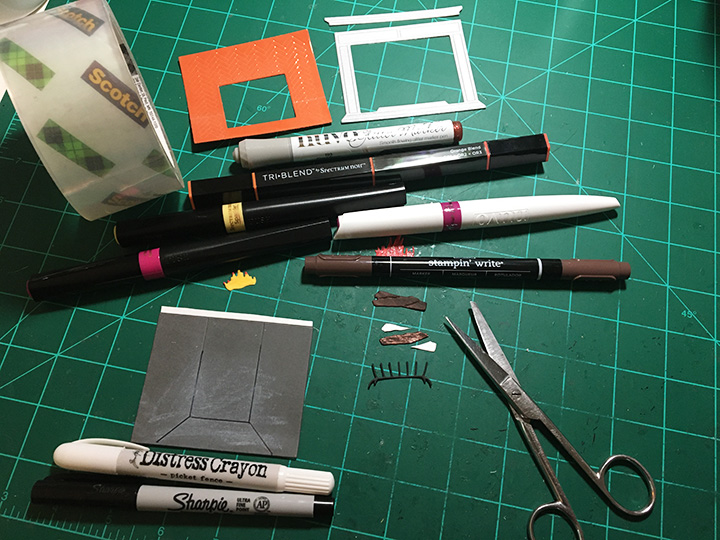
White cardstock that was colored with markers and covered with glitter gloss was used for the flames while recycled kraft cardboard packaging was what the logs were cut from. Once the burning logs were assembled, they were glued to star patterned paper TV screen piece. Place a piece of wide clear packing tape over the backside of the junk mail piece and place the finished screen inside the junk mail frame. Glue the black front to the junk mail piece.

Attach the TV to the pop-up inside card. Play with the antenna placement so they won’t show when the card is closed. (I cut the antenna once from silver foiled packaging and once from the thick junk mail cardstock and glued together.)

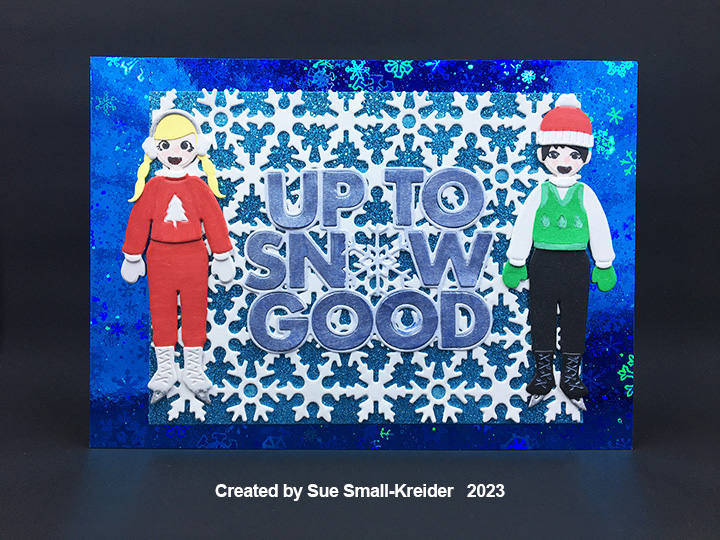
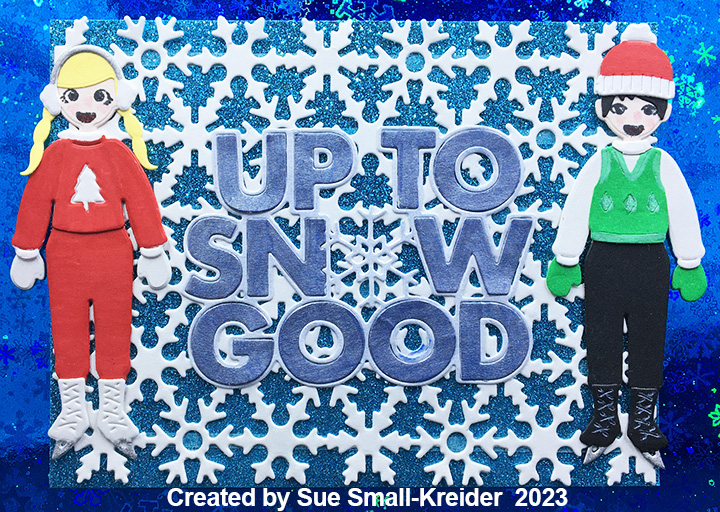
Card Front: For this layered mat front, I used a 5×7 inch rectangle of holographic snowflake cardstock that I cut a 4×5.25 inch crosshatch rectangle out of the center. A 4.25 x 5.5 inch piece of glitter cardstock was covered with a snowflake pattern plate attached with 1/8-inch wide double-sided tape. The open places in the center of some snowflakes had stickiness from the tape adhesive and was covered with an anti-static brush and powder.

Skaters: Hero Arts makes a paper doll die-cut series complete with a variety of hair and facial expressions as well as clothing and accessories. These mid-century styles ice skaters use the Winter Accessories set along with the basic Hero Lifestyle Forms and Faces sets. Markers were used to color the clothing.

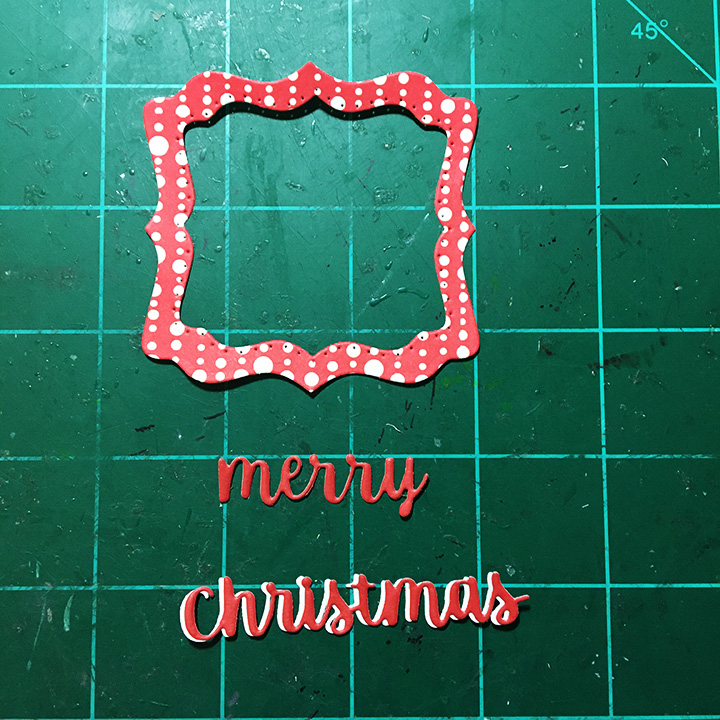
Sentiments: Two die cut sentiments were used on this card. On the front is “Up To Snow Good” a pieced die set by Riley & Company. I cut it once from heavy white cardstock and colored the letters with a blue metallic marker. I used glue to attach all pieces to the snowflake pattern plate. Inside the card is “Happy holidays” a die set by Simon Says Stamp. The lavender rug inside the card is a place for a personal message.

Envelope: To hint at what is to come, the back flap of the envelope was stamped with an Art Impressions’ sentiment stamp in blue ink.

Thank you for reading this blog post. I hope this inspires you and makes you smile. Please like and leave comments 😊

Other Fireplace Cards by designer/brand

Materials Used:

Dies

Stamps

  • Art Impressions – Unmounted Rubber Stamp – Scrapbook.com Exclusive – Sending a Flurry of Holiday Wishes! – 5085
  • Hero Arts – Fancy Dies – Hero Lifestyle Faces – CM500

Papers

  • Bazzill – 8.5×11 Textured Cardstock – Tiara -18-1002
  • Crate Paper – 6×6 Single-Sided Patterned Paper Pad – Cool Kid
  • Grafix – 8.5×11 Acetate .0075 – Clear
  • Honey Bee Stamps – 6×8.5 Double-Sided Paper Pad – Grain and Grunge
  • Hot Off the Press – 8.5×11 Holographic Cardstock – Snowflakes Blue – HOTP-10460
  • Recollections – 8.5×11 White Gold Shimmer Cardstock
  • Thick Smooth Cardboard Junk Mail
  • Thick Kraft Cardstock Packaging
  • Blue Glitter Cardstock
  • White, Black, Blue, Lavendar and Cream Cardstock
  • Park Lane Paperie – A7 Cardbase and Envelope – White

Ink

  • Stampin’ Up – Classic Stampin’ Pad – Misty Moonlight
  • Memento – Fade-Resistant Dye ink – Tuxedo Black
  • Ranger – Tim Holtz – Distress Watercolor Pencil – Kitsch Flamingo
  • Crafter’s Square – Metallic Marker – Blue and Silver
  • Sharpie – Permanent Marker –Fine Tip – Black, Red and Yellow
  • Sharpie – Permanent Marker – Ultra Fine Tip – Brown
  • Nuvo – Aqua Shimmer -Glitter Gloss
  • White Gel Pen

Adhesives

Tools

  • Die Cutting Machine
  • We R Memories – QuickStick
  • Stamping Platform
  • LDRS – Stampendable Stamping Tool
  • Stamping Cloth
  • Scissors
  • Kat Scrappiness – Anti-Static Tool

Modern Holiday Hearth

This is the third card in the Fireplace Christmas Card series.

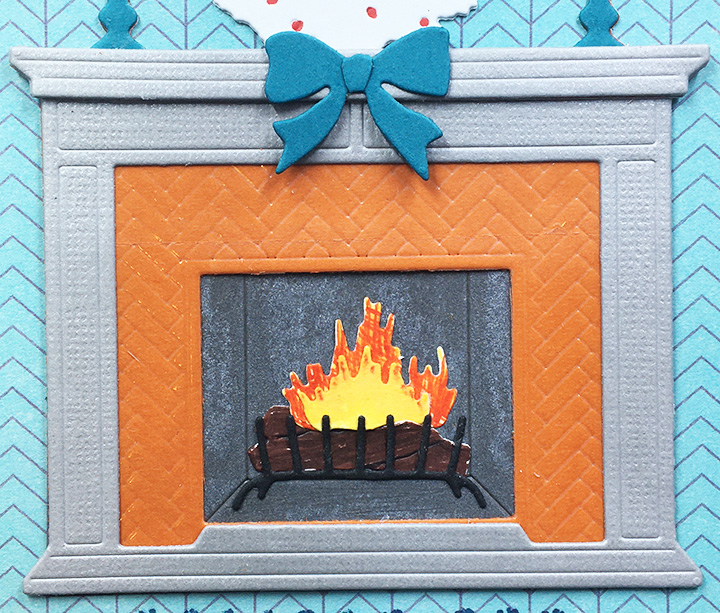
Modern, clean and simple design are what this holiday card is all about. Inspiration comes from Altenew’s Modern Fireplace die set which creates a layered fireplace with a traditional mantelpiece, herringbone brickwork and an embossed firebox. An add-on set of Mantel Décor -Winter offers the wreath, bow and candlesticks. The burning logs and grate are part of the Fireplace set.

Cardbase: I started with an A2 size kraft cardstock base (4.25 x 5.5 inches when closed) and covered the outsides two panels with patterned cardstock.

Fireplace: For the fireplace mantel, I used a textured metallic gray cardstock, cutting the mantel shelf piece twice and the main piece once. The mantel shelf I also cut once from a heavy cardboard piece of junk mail. With the herringbone brick layer, I used a terra cotta piece of cardstock covered with clear packing tape to die-cut the piece. A dark gray piece of cardstock was used for the firebox which was distressed with white water-soluble crayon. To assemble follow the directions on the video on the link page. I glued a strip of white copier paper between the firebox layer and the brick layer just at the top, to give the mantel shelf piece an additional place to be attached to besides the top edge of the mantel base.

I cut the two flames and log pieces from white cardstock and colored them with markers and glitter ink. After coloring, I glued the layering pieces together and added the tiny black grate.

Decorations: The decorations on the card are minimal with two tall candlesticks in teal blue with white candles. All of these pieces were cut once from a heavy cardboard piece of junk mail and a second time from colored cardstock. The wreath was cut once from a heavy cardboard piece of junk mail and colored with a red marker. The bow was cut twice from teal with the knot being fussy cut out of the second piece.

Sentiments: I stamped the “Holiday Fun” before I assembled the card onto the card front. The sentiment was part of an Altenew stamp set that came in a crafting magazine from 2020. Inside the card I used the same teal cardstock from the mantel decorations to die cut “Happy holidays.”

Envelope: For the flap of the envelope, I used Altenew’s Mini Brownstone stamp set with two shades of red ink and two shades of brown ink to stamp the suggestion of what the outside of the home looks like. I finished off the scene with a .01 mm black pen to create a tree, windowpanes, sidewalk and fence.

Thank you for reading this blog post. I hope this inspires you and makes you smile. Please like and leave comments 😊

Other Fireplace Cards by designer/brand        


Materials Used:

Dies

Stamps

Papers

  • Crate Paper – 6×6 Single-Sided Patterned Paper Pad – Cool Kid
  • Spellbinders – 8.5×11 Cardstock 100 lb – Terra Cotta
  • Concord & 9th – 8.5×11 Cardstock 80 lb – Mushroom
  • Bazzill – 8.5×11 Textured Cardstock – Tiara -18-1002
  • Teal, White and Black Cardstock Scraps
  • A2 Cardbase and Envelope – Kraft

Ink

  • Stampin’ Up – Classic Stampin’ Pad – Cherry Cobler, Early Espresso, Misty Moonlight, Real Red, Soft Suede
  • Catherine Pooler – Premium Dye Ink- Party Collection – All That Jazz\
  • Ranger – Tim Holtz – Distress Crayon – Picket Fence
  • Recollections – Watercolor Crayons – White
  • Sharpie – Permanent Marker – Ultra Fine Tip – Black, Brown, Red
  • Pigma – Mircon 01 Fine Tip Pen – Black
  • Spectrum Noir – Sparkle Glitter Brush Pen – Firefly

Adhesives

  • Neutral PH Adhesive by LINECO
  • Fine-Tip Glue Bottle
  • Scor- Tape – Double-Sided Tape -1/8-inch wide

Tools

  • Die Cutting Machine
  • We R Memories – QuickStick
  • Stamping Platform
  • LDRS – Stampendable Stamping Tool
  • Stamping Cloth
  • Scissors

Warm and Cozy Hearth

This is the second card in the Fireplace Christmas Card series.

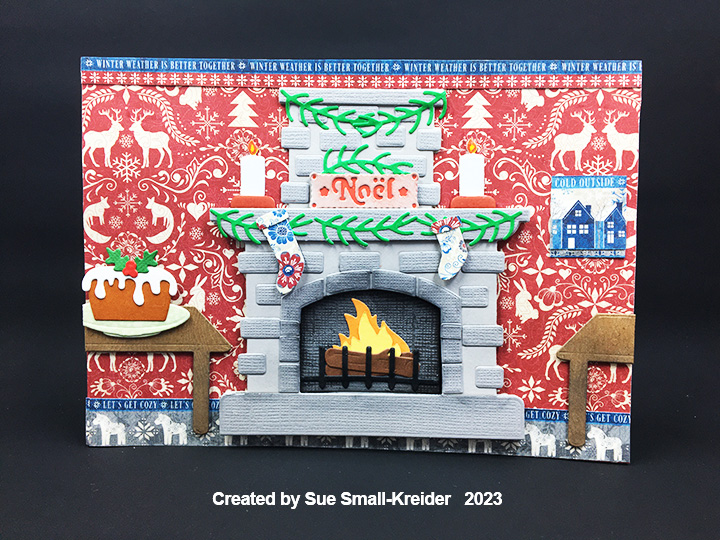
My inspiration for this cozy fireplace scene comes from the Graphic 45 paper collection Let’s Get Cozy and the Elizabeth Craft Designs Cozy Fireplace and Let’s Bake die sets.

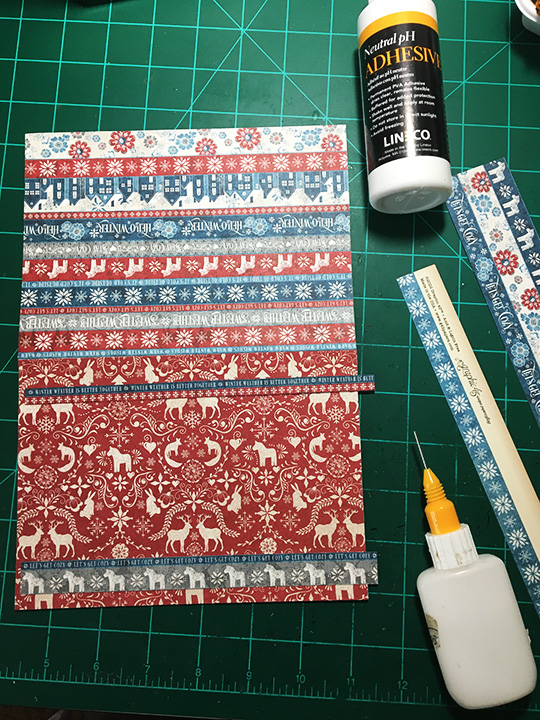
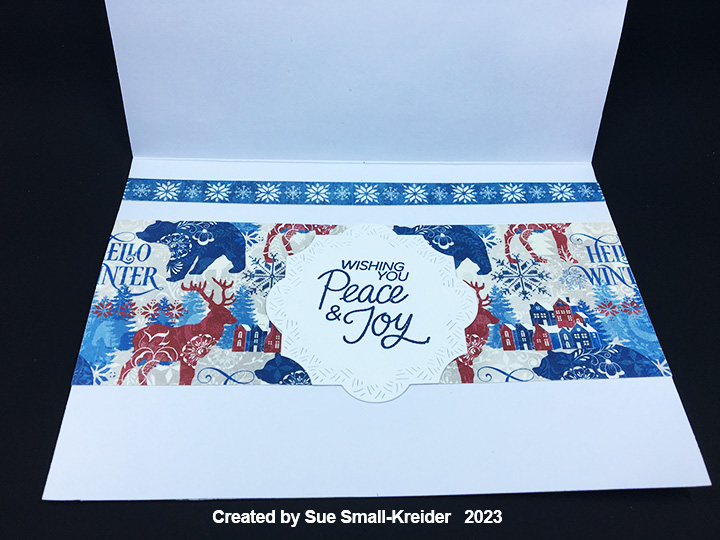
Cardbase: A purchase A7 (5×7 inches) cardbase was covered with decorative papers on the two outside panels with leftover scraps used inside.

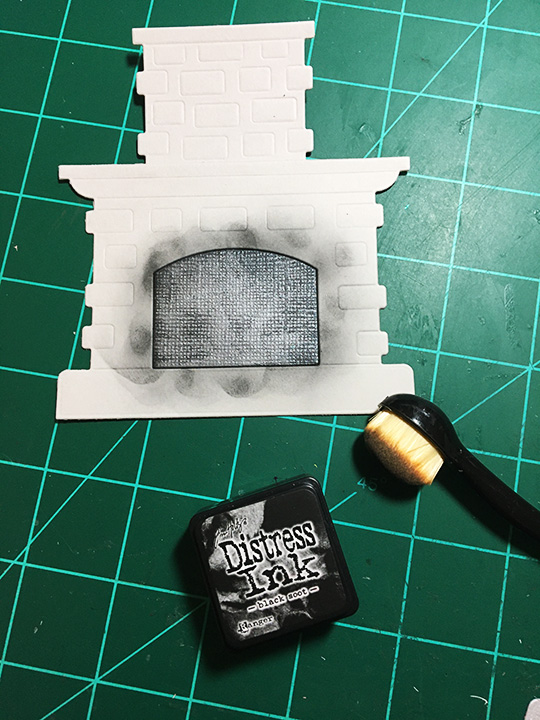
Fireplace: To create the stone fireplace, I cut two chimney pieces and two mantel pieces from the smooth side of the Bazzill cardstock and one mantel piece from the textured side of the same cardstock to get a textured firebox arch, mantel shelf and hearth stone. (The mantel shelf and hearthstone were fussy cut from the die-cut.) The individual stones (cut twice) and stones around the firebox were cut from the textured side of the gray cardstock. The top piece of the chimney was also cut from the textured cardstock. Glue individual stones to one fireplace piece then attach the stones around the opening. With black ink color the firebox piece if sooty.

Glue the two chimneys together. Glue the three chimney top strips together and then attach it to the chimney top. Center the chimney piece behind the fireplace piece with firebox. Using clear tape across the back of the fireplace piece without the stones attached, add the sooty firebox and with an inky blending brush add soot to the surrounding area of the firebox. Assemble the burning logs and glue onto firebox.

Add foam squares to the front of the fireplace with chimney, backsides of mantel shelf and hearthstone pieces. Attach the fireplace with stones onto base, then attach mantel shelf and hearthstone. Glue to front of cardbase.

Decorations: The Cozy Fireplace set comes with stockings, candles, and greenery. From the Let’s Bake set the table was cut from woodgrain embossed paper and ink blended with black ink. The Christmas pudding and its holly decoration comes from the same set with the cake stand cut down to a platter. The tiny NOEL plaque from an old Hunkdory set sits on the mantel shelf and was cut from gray cardstock, inked with red ink and a piece of red paper glued to the back. The candle flames were colored with markers. All decorations were popped-up on foam squares except the candles, greenery and picture which were glued in place.

Sentiments: There is a whole sheet in the Graphic 45 Let’s Get Cozy collection of borders with sentiments like “Winter is better together,” “Let’s get cozy,” “It’s cold outside,” “Warm Winter Wishes,” “Sweater weather,” “Stay cozy” and “Hello winter.” Some of the thin word borders were used on the card front to set the tone of the card. Others are used to cover the card back. A tiny NOEL plaque from an old Hunkdory set, sits on the mantel shelf. Stamped in blue on a crosshatch label inside the card, is the main sentiment of “Wishing you Peace and Joy.”

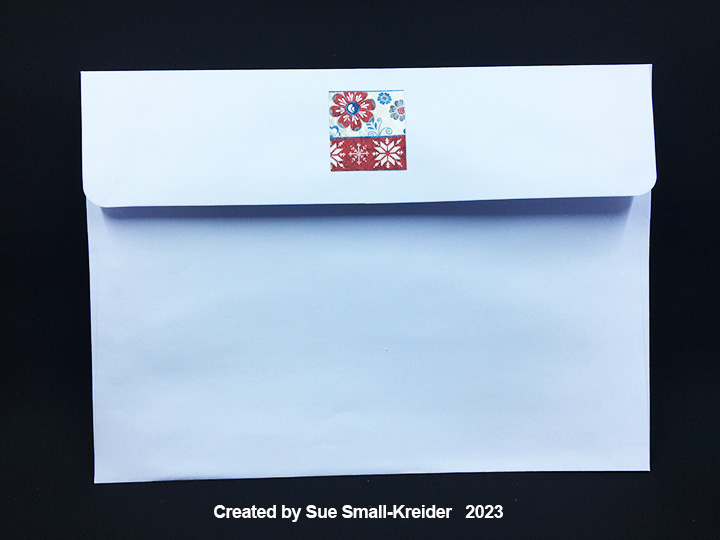
Envelope: A leftover decorative border scrap was glued to the envelope’s back flap as a subtle hint to what is inside.

Thank you for reading this blog post. I hope this inspires you and makes you smile. Please like and leave comments 😊

Other Fireplace Cards by designer/brand

Materials Used:

Dies

Stamps

  • Catherine Pooler – Clear Photopolymer Stamps – Holiday Glimmer – CPS1172

Papers

  • Graphic 45 – 8×8 Double-Sided Paper Pack – Let’s Get Cozy
  • Fun Stampers Journey – 8.5×11 Cardstock – Pumpkin Bread – CS-0098
  • Bazzill – 8.5×11 Textured Cardstock – Tiara -18-1002
  • American Crafts – 12×12 Cardstock – Embossed Wood Grain – Dark Kraft
  • Green, Red, Orange, Yellow, Brown, White and Black Cardstock Scraps
  • Park Lane PaperieA7 Cardbase and Envelope – White

Ink

  • Stampin’ Up – Classic Stampin’ Pad – Misty Moonlight
  • Ranger – Tim Holtz – Distress Ink- Black Soot and Fired Brick
  • Sharpie – Permanent Marker – Ultra Fine Tip – Orange, Red and Yellow
  • Nuvo – Aqua Shimmer – Glitter Gloss

Adhesives

Tools

  • Die Cutting Machine
  • We R Memories – QuickStick
  • Stamping Platform
  • LDRS – Stampendable Stamping Tool
  • Stamping Cloth
  • Sponge Dauber
  • Blending Brush
  • Craft Mat
  • Scissors

Holiday Hearth

This is the first card in the Fireplace Christmas Card series.

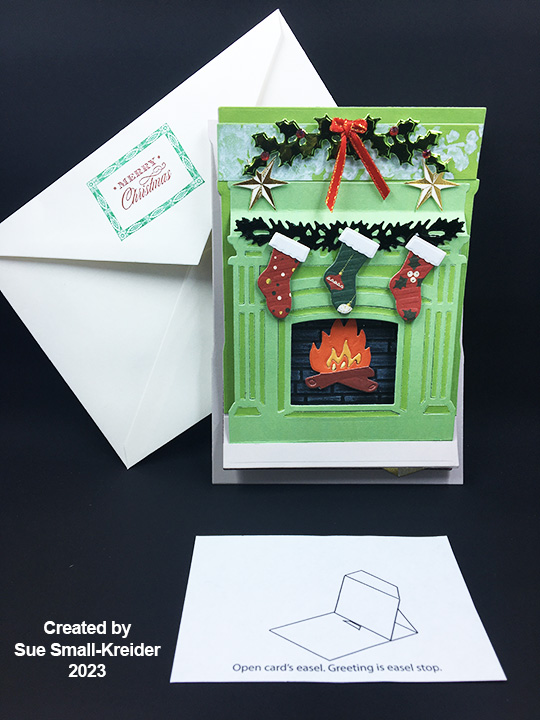
For this turn-of -the century fireplace easel card, Anna Griffin’s Holiday Hearth Easel die set is the star of the make along with some of her stamps and foiled embellishments.

Review the printed instruction sheet included in the fireplace die set before starting card.

Easel Base:  The easel base die cuts in one piece which I cut out in a heavy weight gray cardstock. I added a maroon carpet to the base using the fireplace outline die on a 6×6 inch piece of patterned paper.

Fireplace Mantelpiece:  The mantelpiece die cuts a detailed fireplace front. Because I used a double-sided cardstock that had different shades of green on each side, I was able to save the waste pieces and adhere them back inside the die-cut piece with the use of tape on the backside.

I die-cut the fireplace outline or back twice. Once from gray and once from light green. On the light green piece, I cut-off the bottom flap (and saved it to be stenciled in white to act as wallpaper above the mantel.) I also die-cut just the bottom flap of the fireplace in gray to become the hearthstone that will slide under the easel stopper. The green trimmed back piece was glued on top of the gray back piece. Next the bottom flap of the fireplace was adhered to bottom edge of the back piece and then covered with the gray hearthstone piece. Glue in black brick hearth and fire grate piece. Add glue to the back of the top fireplace tab and, with the entire fireplace flat, adhere to the back piece. Play with the positioning of the back piece on the easel base and then glue easel base tab to gray side of back piece.

Fireplace Grate with Fire:  For the back of the fireplace hearth, I cut a 3.75-inch square of black cardstock which I embossed with a brick wall embossing folder. The bricks were lightly colored with a white Distress Crayon and blended to make a smokey backdrop to the fire. The burning logs piece was cut twice from brown (logs) and once from red, yellow and orange (fire) respectively. I used tape and glue to assemble the fire and logs. To position the burning logs, open the card into the easel position and adhere the piece onto the bricks with foam squares. (When the card is closed flat, the burning logs will look slightly high inside the firebox.)

Decorations:  The die set comes with a stocking die as well as dies for holly and greenery garlands. I cut the stockings from three different decorative papers and then cut the just the cuffs from white cardstock having to do some fussy cut trimming after the die cutting. The garlands are cut from two different shades of green mirror/foil cardstock. The holly garland has red adhesive gems added along with a tiny red ribbon bow. The dark greenery garland is glued onto the mantel edge. All other decorations are adhered with foam squares. Two gold foil stars sit on the mantel shelf and a gold wrapped present sits on the floor. Both are from Anna’s Present Pop-Up Kit.

Sentiments:  A dimensional sentiment sticker from Anna’s Present Pop-Up Kit was popped-up on an additional layer of foam squares to allow the fireplace gray hearthstone to slide under and act as an easel stopper. A blank foiled sticker from the same kit was added to the card base for a personal message that will be hidden when the card is set-up as an easel. The red “Merry Christmas on the envelope flap and its green border are stamps from Anna’s Treasury of Stamps & Dies.

CRX Sheet:  With many interactive cards, the recipient needs instructions on how to open and set-up the card. I create CRX sheets (card recipient experience) to include in the envelope. You can download for free the easel/double easel CRX sheet.

Thank you for reading this blog post. I hope this inspires you and makes you smile. Please like and leave comments 😊

Other Fireplace Cards by designer/brand

Materials Used:

Dies

Stamps

Embossing Folder

  • Altenew – Geometric 3D Embossing Folder 6×6 – Brick Wall – ALT6206

Stencils

  • Funky Fossil Designs – Windy Day

Papers

  • Craft Consortium – A4 Solids Double-Sided Paper Pad – Candy Christmas
  • Echo Park – 6×6 Double-Sided 65 lb Cardstock – Homegrown by Alisha Gordon & Kasie Fry
  • Reminisce – 6×6 Double-Sided Papers – Christmas Wishes
  • Light Green and Dark Green Mirror/Foil Cardstock
  • Black, Gray and White Cardstock
  • Anna Griffin – Present Pop-Up Kit – A7 Envelope – Ivory

Ink

  • Ranger – Tim Holtz – Distress Crayon – Picket Fence
  • Stampin’ Up – Classic Stampin’ Pad – Cherry Cobbler and Emerald Envy
  • Craft Smart –Acid Free Ink Pad – White

Adhesives

  • Neutral PH Adhesive by LINECO
  • Fine-Tip Glue Bottle
  • Clear Tape
  • Foam Squares

Tools

  • Die Cutting Machine
  • We R Memories – QuickStick
  • Stamping Platform
  • LDRS – Stampendable Stamping Tool
  • Stamping Cloth
  • Scissors
  • Fork

Miscellaneous

Vintage Christmas Cards – Room Scene

Recently I came across some family Christmas cards I had designed with the help of my father who owned a letterpress printing press and had cuts (think metal stamps on wooden blocks similar to rubber stamps on wood blocks) made of my drawings. The printing press held an 8×10-inch frame which held the cuts and metal type (letters). Paper was hand-fed into the press which had an electric motor connected with a leather belt which turned the press wheel. From about age 8 and on I earned pocket money running the press to add people’s names to their store-bought Christmas cards, “From the Desk of” notepads and other small print jobs from family and friends.

The five cards that I am sharing this week were created before the computer drawing program Auto-CAD was widely available to individuals. (I know we didn’t have access to digital type fonts that Apple computers offered around that time.) I used rulers, India ink pens and protractors to draw the pop-ups.

In 1985 I designed a pop-up room scene featuring a fireplace tabletop Christmas tree and a cat. I used rub-ons that were popular at the time to created graphics. All the straight lines were rub-ons as well as the letters on the garlands. I used a plastic drawing template for the circles and arcs. The cat was a sticker that had been reduced on a photocopier.

These postcards were hand-colored with watercolors and markers.

On the back of the postcard was the first of my CRX drawings that showed how the finished pop-up should look along with cutting and folding instructions.

I believe this was the last of the family designed Christmas cards as my father discovered Graphics3, a family-owned printing business in Jupiter, Florida that made 3D pop-up cards and began ordering from cards from them.

Here are other vintage Christmas cards:

  • Room Scene

Vintage Christmas Cards – Sleigh

Recently I came across some family Christmas cards I had designed with the help of my father who owned a letterpress printing press and had cuts (think metal stamps on wooden blocks similar to rubber stamps on wood blocks) made of my drawings. The printing press held an 8×10-inch frame which held the cuts and metal type (letters). Paper was hand-fed into the press which had an electric motor connected with a leather belt which turned the press wheel. From about age 8 and on I earned pocket money running the press to add people’s names to their store-bought Christmas cards, “From the Desk of” notepads and other small print jobs from family and friends.

The five cards that I am sharing this week were created before the computer drawing program Auto-CAD was widely available to individuals. (I know we didn’t have access to digital type fonts that Apple computers offered around that time.) I used rulers, India ink pens and protractors to draw the pop-ups.

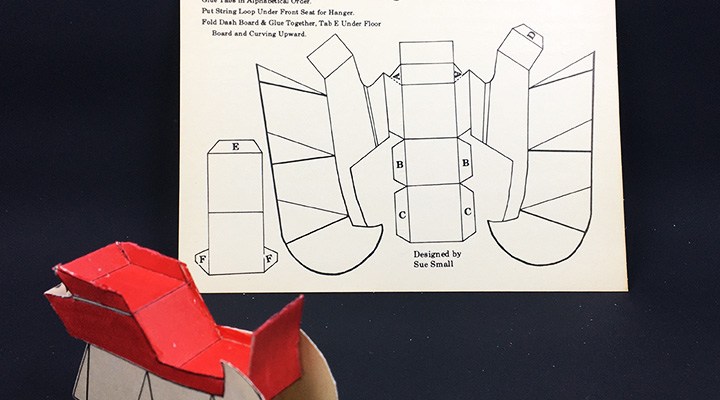
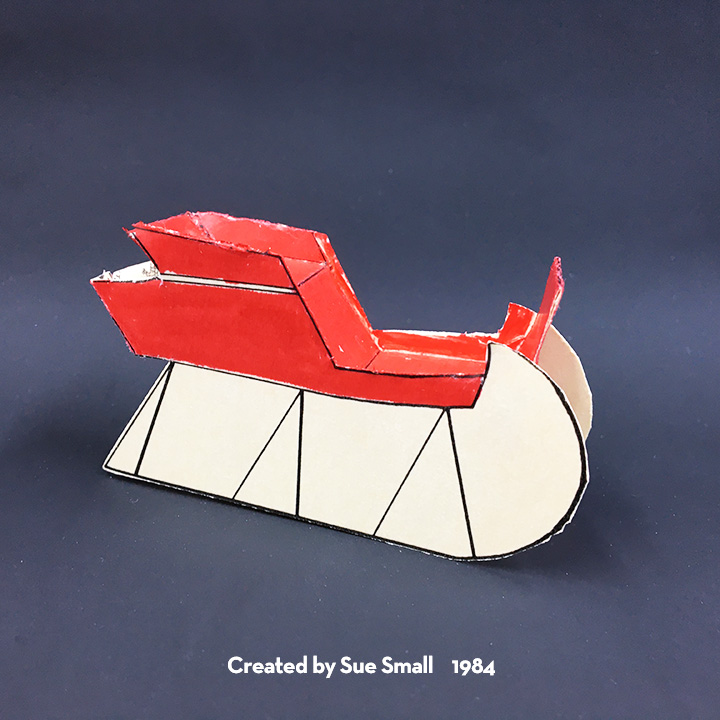
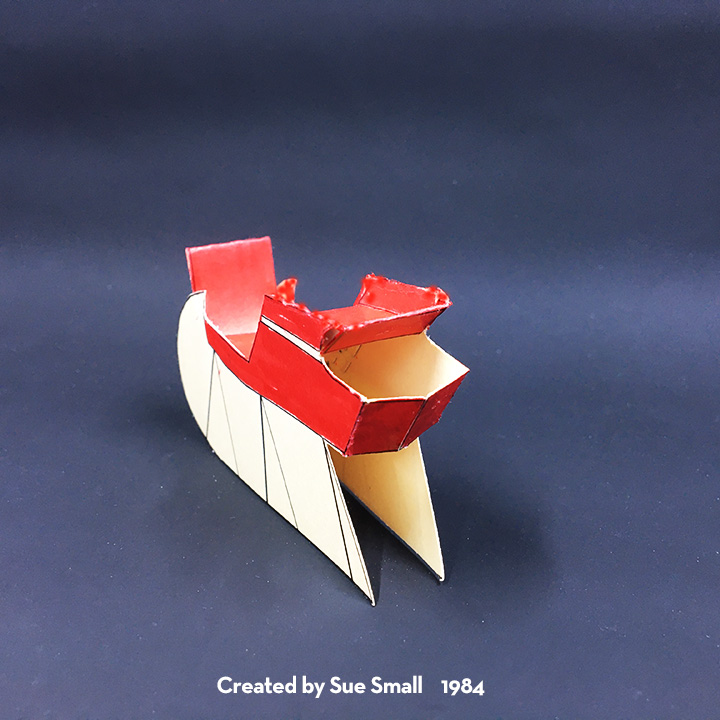
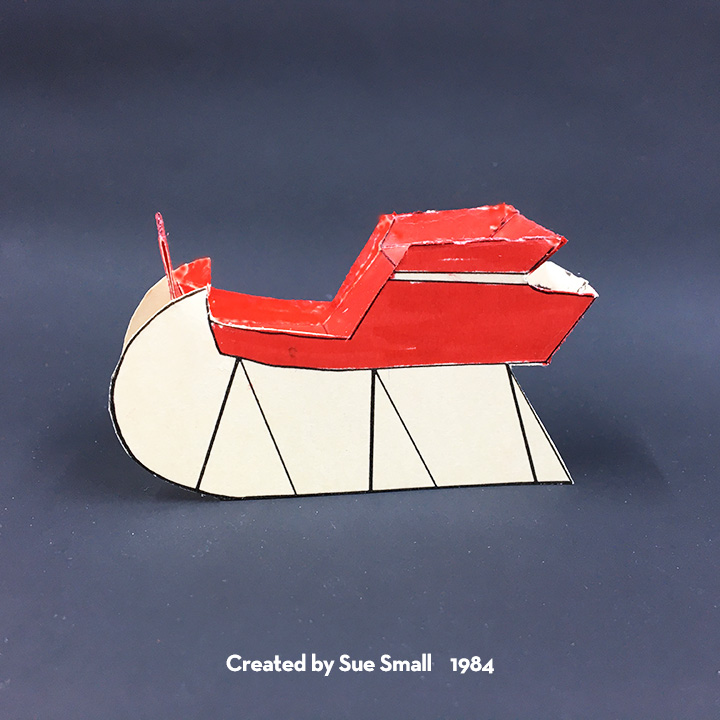
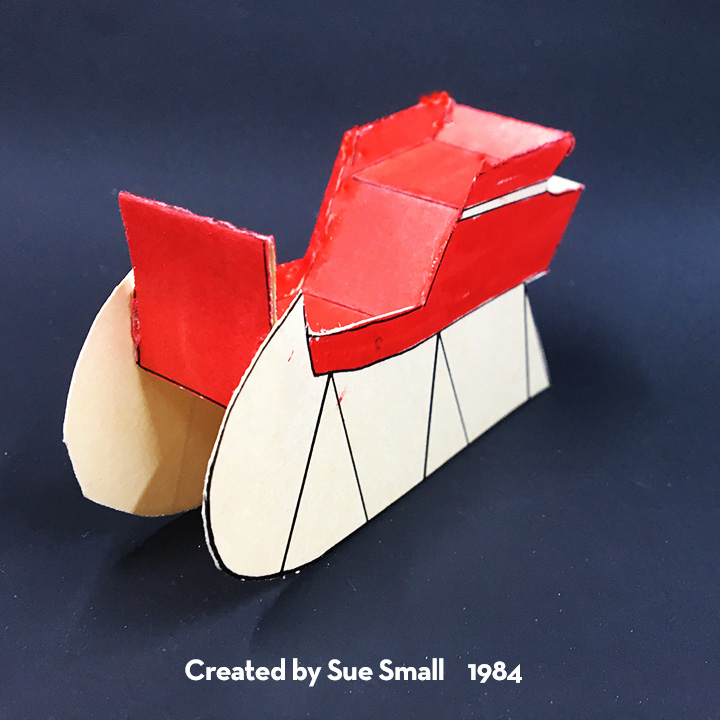
My siblings and I think the sleigh postcard was created around 1984 using an image found in a Dover Publications clip art book. (We didn’t document our source as it was an image in the public domain.)

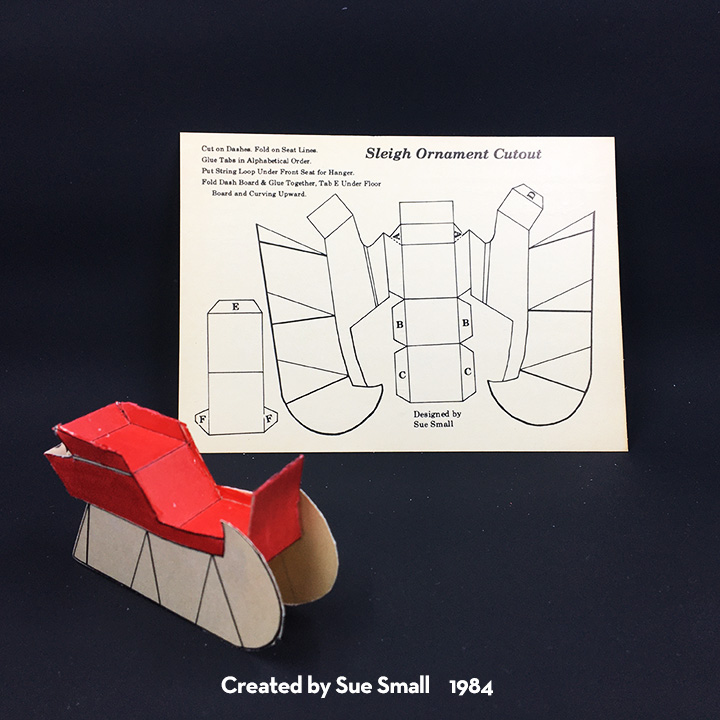
The sleigh was manipulated on a photocopying machine. The image was cut-out twice and one image flipped on its back side and traced with an ink pen. A ruler and protractor were used to create the rectangular shapes and tabs that connected the sides. Rub-on lines were used to create the various thickness of lines and perfect corners.

The instructions, title and tab letters were printed using hand-set type and the cut and pasted onto the drawing. (You can see one of the “F” tabs shows the overlap of paper covering the line.)

These postcards were hand-colored using red makers. We printed 400+ of these cards starting in October.

A few of our friends said they had cut and assembled the sleigh.

Here are other vintage Christmas cards:

  • Sleigh

Vintage Christmas Cards – Fireplace

Recently I came across some family Christmas cards I had designed with the help of my father who owned a letterpress printing press and had cuts (think metal stamps on wooden blocks similar to rubber stamps on wood blocks) made of my drawings. The printing press held an 8×10-inch frame which held the cuts and metal type (letters). Paper was hand-fed into the press which had an electric motor connected with a leather belt which turned the press wheel. From about age 8 and on I earned pocket money running the press to add people’s names to their store-bought Christmas cards, “From the Desk of” notepads and other small print jobs from family and friends.

The five cards that I am sharing this week were created before the computer drawing program Auto-CAD was widely available to individuals. (I know we didn’t have access to digital type fonts that Apple computers offered around that time.) I used rulers, India ink pens and protractors to draw the pop-ups.

For the 1983 stand alone fireplace, I know I was influenced by the cardboard fake fireplaces that were popular Christmas decorations in my childhood. The mantel design may have come from family homes or other 1920’s bungalow style homes with brick fireplaces. It is a more complex assembly with many smaller pieces. I remember printing the instructions and tab names with hand-set type and then cutting and pasting them onto the drawing, before sending it all off to be made into a metal cut.

My father had a little more experience with creating the colors using rub-on sheets of dots to create the coloring of sections of the drawing. Using a photocopying machine, he reduced the size of the dots to make them more intense and he did a reverse of the dots and space in between for the fire. Then he had three cuts made – one for the black drawing, one for the green stockings and mantel greenery and the last one for the red bricks and fire.

For one postcard, it took four runs through the printing press. We printed 400+ of these cards starting in October.

A few of our friends said they had cut and assembled the tiny fireplace adding the suggest string loop to make it a Christmas ornament.

Here are other vintage Christmas cards:

  • Fireplace

Vintage Christmas Cards – House Box

Recently I came across some family Christmas cards I had designed with the help of my father who owned a letterpress printing press and had cuts (think metal stamps on wooden blocks similar to rubber stamps on wood blocks) made of my drawings. The printing press held an 8×10-inch frame which held the cuts and metal type (letters). Paper was hand-fed into the press which had an electric motor connected with a leather belt which turned the press wheel. From about age 8 and on I earned pocket money running the press to add people’s names to their store-bought Christmas cards, “From the Desk of” notepads and other small print jobs from family and friends.

The five cards that I am sharing this week were created before the computer drawing program Auto-CAD was widely available to individuals. (I know we didn’t have access to digital type fonts that Apple computers offered around that time.) I used rulers, India ink pens and protractors to draw the pop-ups.

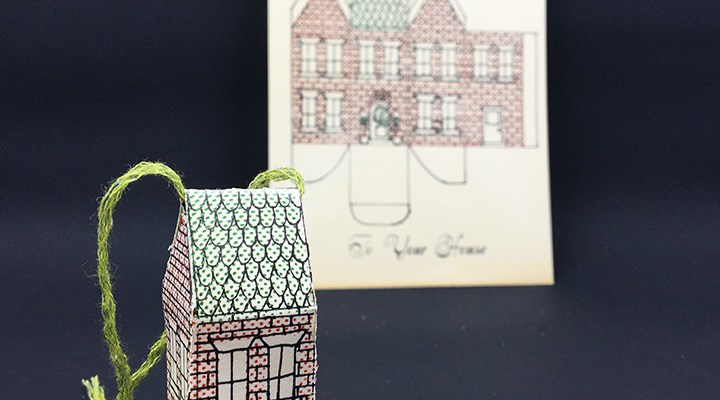
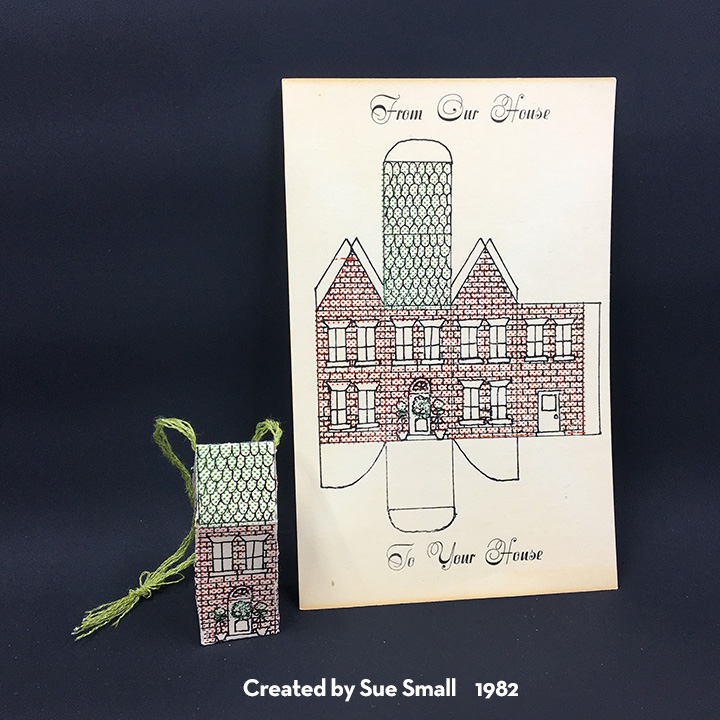
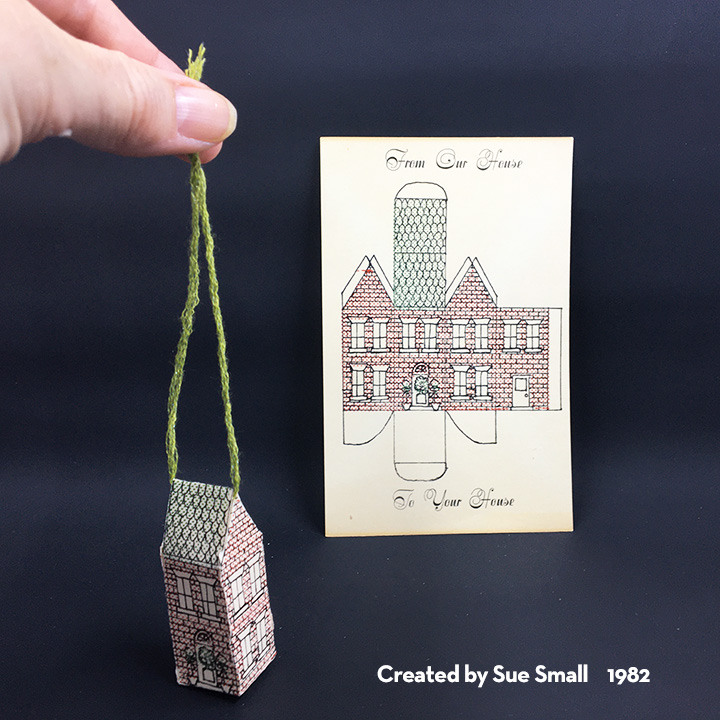
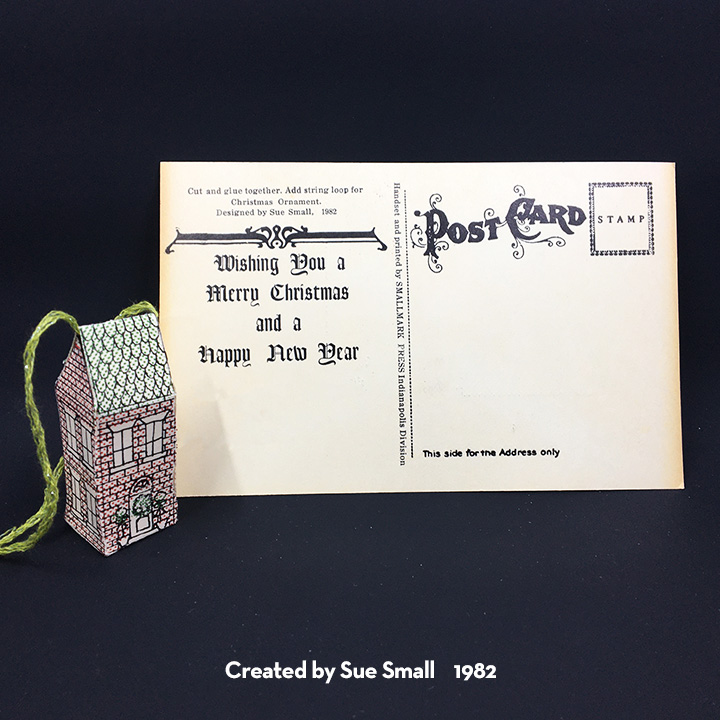
The 1982 “From Our House To Your House” house box postcard was an outgrowth of my fascination with creating house boxes. I had been introduced to box making in a high school commercial art class where I created a blue and white farmhouse box for perfume. At college I expanded on the farmhouse box design by creating a cardboard embossing plate to add raised clapboard siding and roof shingles that was run through an intaglio press. In 1981 I had completed an internship at a historic house museum which was a red brick Victorian house.

The challenge with creating a house box on a postcard was how much would fit on a 5 3/4-inch x 3 3/4-inch postcard. I drew the box on an 8 1/2-inch x 11-inch sheet of paper and used a photocopying machine to reduce it in size.

My father was experimenting with a new technique for him using rub-on sheets of dots to create the coloring of sections of the drawing. He had three cuts made – one for the black drawing, one for the green roof, door wreath and greenery and the last one for the red bricks.

For one postcard, it took four runs through the printing press. We printed 400+ of these cards starting in October.

A few of our friends said they had cut and assembled the wee house box adding the suggest string loop.

Here are other vintage Christmas cards:

  • House Box

Vintage Christmas Cards – NO L Tree

Recently I came across some family Christmas cards I had designed with the help of my father who owned a letterpress printing press and had cuts (think metal stamps on wooden blocks similar to rubber stamps on wood blocks) made of my drawings. The printing press held an 8×10-inch galley or frame which held the cuts and metal type (letters). Paper was hand-fed into the press which had an electric motor connected with a leather belt which turned the press wheel. From about age 8 and on I earned pocket money running the press to add people’s names to their store-bought Christmas cards, “From the Desk of” notepads and other small print jobs from family and friends.

The five cards that I am sharing this week were created before the computer drawing program Auto-CAD was widely available to individuals. (I know we didn’t have access to digital type fonts that Apple computers offered around that time.) I used rulers, India ink pens and protractors to draw the pop-ups.

The NO L Tree card was a mash-up of another Christmas card my parents had done in the 1950s spelling out the alphabet but leaving a space where the “L” would have been, and a 3D triangle tree that I had made as a child which was made of two triangles cut with slits that allowed them to slide together. My father suggested having the sentiment in red ink be on two quadrants while the green alphabet be on the remaining two quadrants. We decided on different type fonts for the two sides.

Hand setting the type was a little challenging, but after several test runs, we found the proper placement. I think we created a cardboard template to trace the tree lines inside the card with a black pen.

Instructions on how to assemble the tree as well as the card title/subtitle and card credits were all made with hand-set type. To print one card, it took two runs of green ink, two runs of red ink and one run of black ink for a total of five runs and one hand tracing of the triangle lines. We would print 200+ cards each year and start printing in October.

My siblings and I think this card was made around 1980-1981.

Here are other vintage Christmas cards:

  • NO L Tree