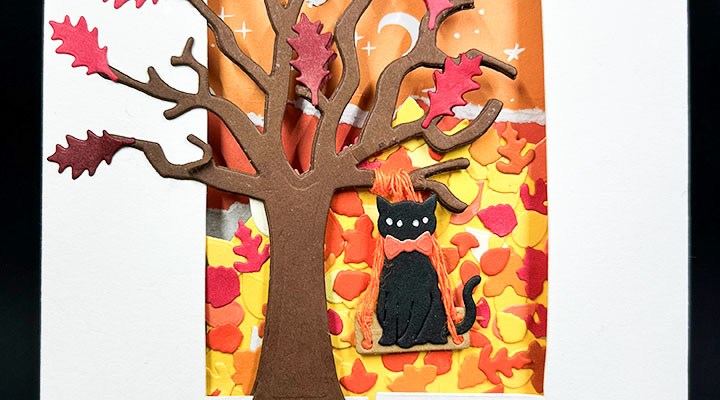
CAS’ed Autumn Gatefold Pop-Up Card

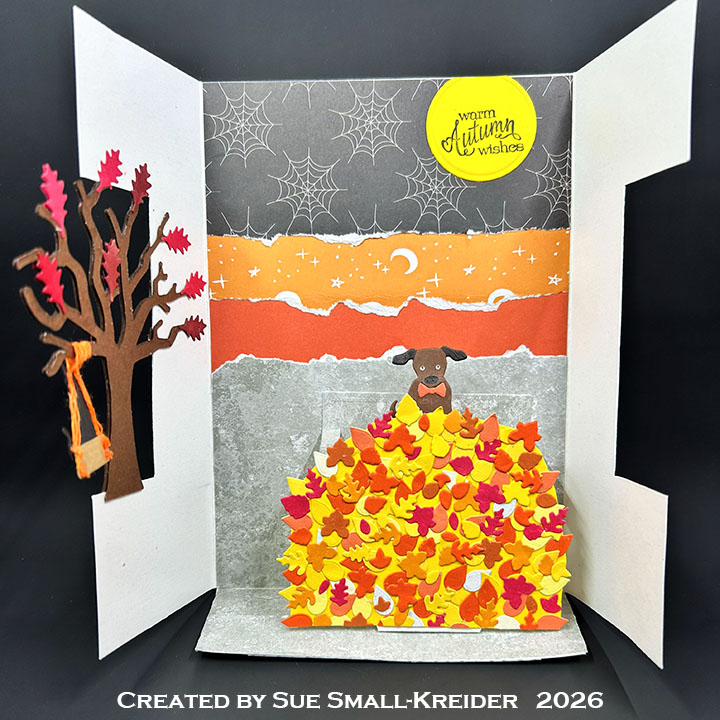
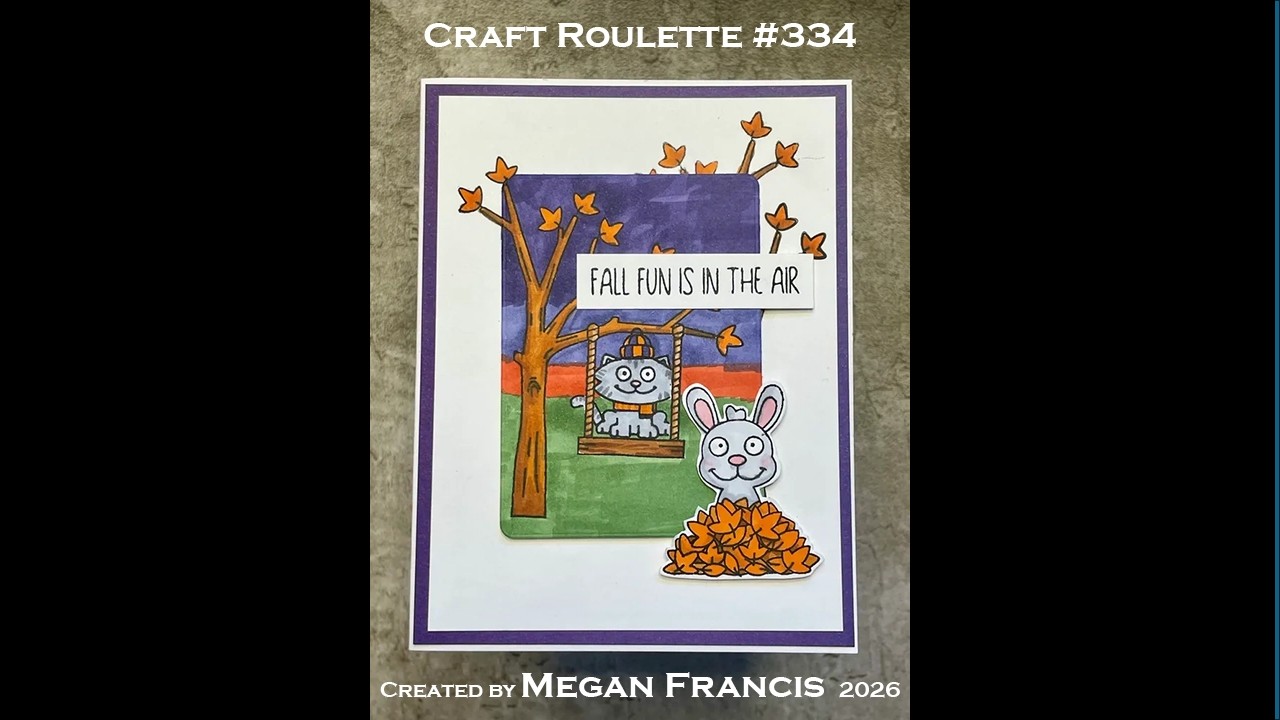
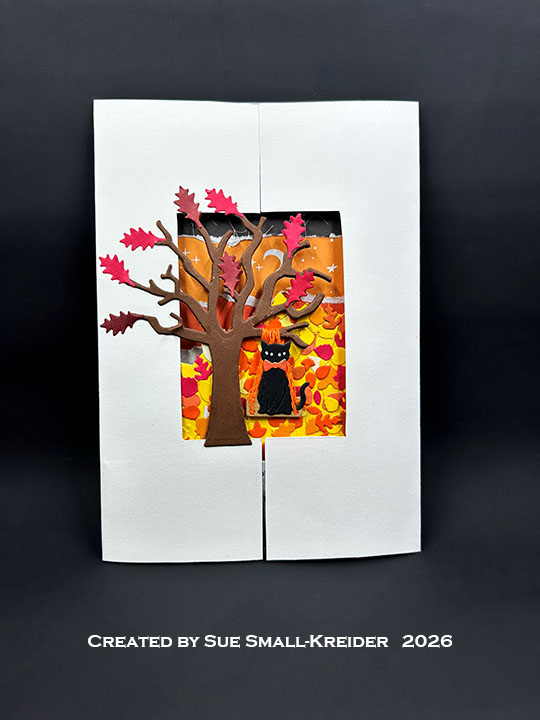
This card was made for Craft Roulette #335 whose parameters were include a gatefold project, vacation colors, CAS (copy and sample) from last week’s gallery as element and paper strip(s) as random. I used Karen Burniston dies and stamp set to CAS Megan Francis’s leafy card from Craft Roulette’s #334 galley.
Watch the video below to learn how I made this card.

Cardbase: Watch the video above for how to cut and score the cardbase. Cut an 8.5×11-inch sheet of white 65lb. cardstock down to 8.5×10-inches and scored at 2.5-inches and 7.5-inches along the long side and then flipped the cardstock sideways to score at 7-inches. Cut away the small rectangles at the sides of the long rectangle.

With the gatefold flaps closed, begin drawing the window aperture over the two flaps. Using a 2.5×3.5-inch rectangle of scrap paper, find the best placement for the ATC cut-out. With a T-square ruler, drawn in the lines to cut out with a craft knife as shown in the video. (My border measurements are 1.75-inches at the top, 1.25-inches at the sides and 2-inches at the bottom.)
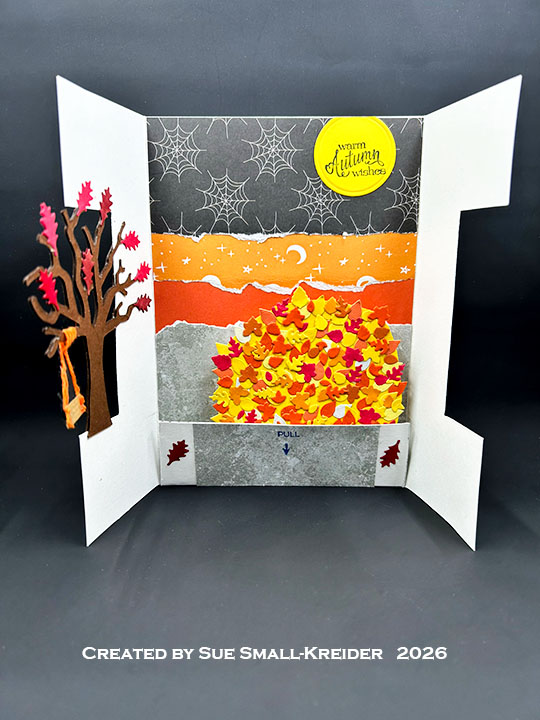
Background: Using torn strips of decorative papers, create the 4.875x 6.875-inch background for the inside of the card. Cover the bottom flap on both sides with your grass-colored paper. (I ended up using scrapes for the flap, and some extra leaves to decorate the side of the flap with the “Pull” and arrow stamped on it. I used My Favorite Things Interactive Labels stamp set.)

Tree: Cut six trees from brown using the Tree Pop-Up die set. Glue three trees together twice as shown in the video above and adhere them to the card. Add leaves cut from the same die set. (I cut three sets of leaves and colored some of the leaves to get three different shades of red using two shades of cardstock – kraft and red.)
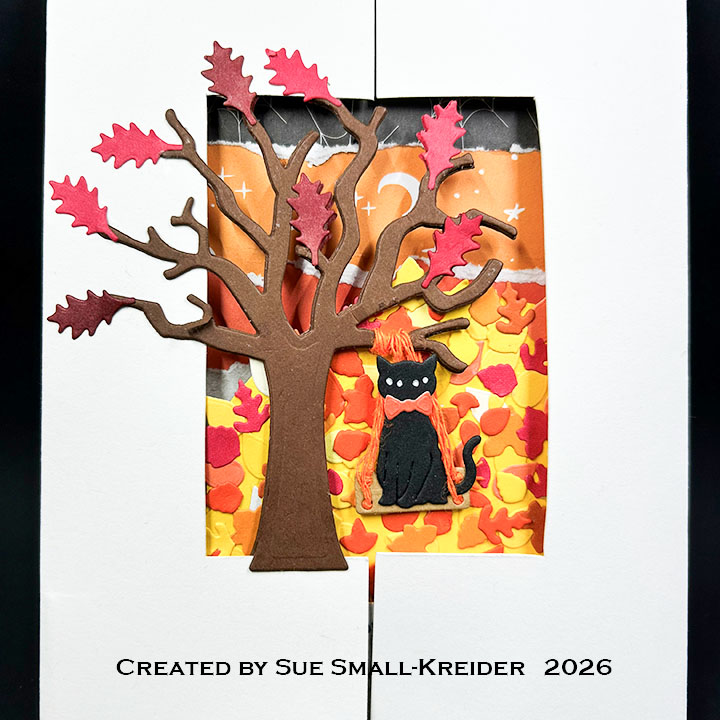
Cat Swing: Cut two black cats from the Skeleton and Bat die set. Glue together. Use die stencil to color eyes. (Yes, the eyes on this cat can look like four eyes or very large cat eyes. Which did you see first?) Add bow tie also in the same die set. Cut two seat pieces from the Tree Pop-Up set and glue together. Glue cat to seat and add orange twine as shown in video above.

Leaf Pile with Pop-up Dog: Cut a squat arch large enough to cover the Parcel Pop-Up mechanism and cover it with die-cut leaves. Watch the assembly video at the bottom of the linked page for the Parcel Pop-Up . Cut the three pieces for the mechanism from white cardstock and assemble as shown in video above. Cut the upper half of the largest mechanism piece from grass colored paper. Trim and adhere it to the mechanism as shown in the video above. Cut two of the dog from Doghouse Tiny House Add-Ons set. Use die stencil to color eyes, nose and belly. Color ears black. Use bow tie from Skeleton and Bat die set in orange as collar. Glue dog onto pop-up strip.
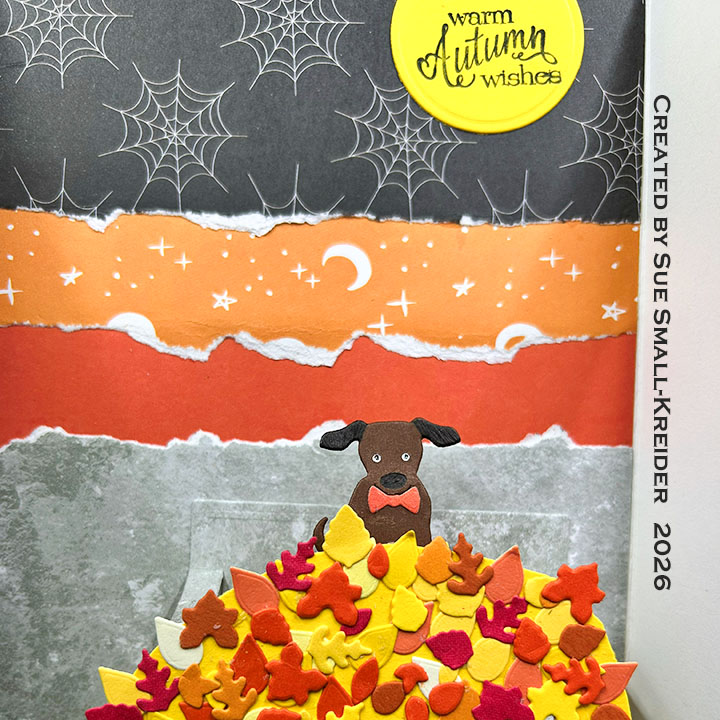
Sentiments: Stamp “Warm Autumn Wishes” from Karen Burniston’s Fall Phrases stamp set onto a 1.5-inch circle of yellow. (My circle die slipped when cutting it out and so my moon goes was placed at the top edge of the card.)
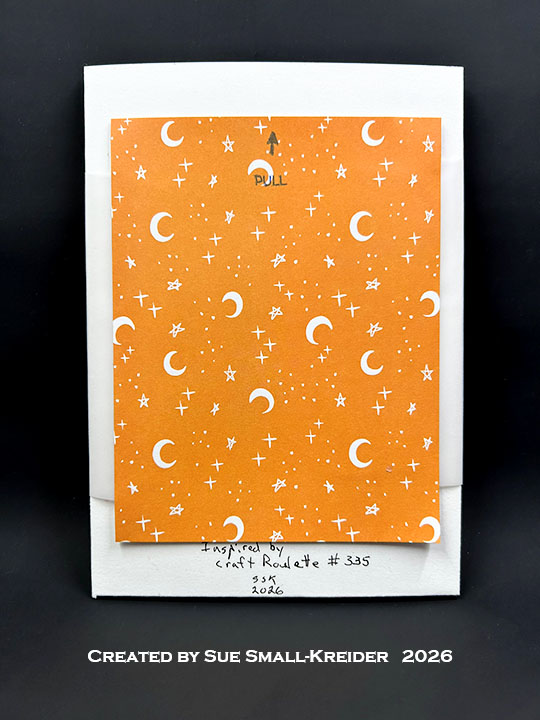
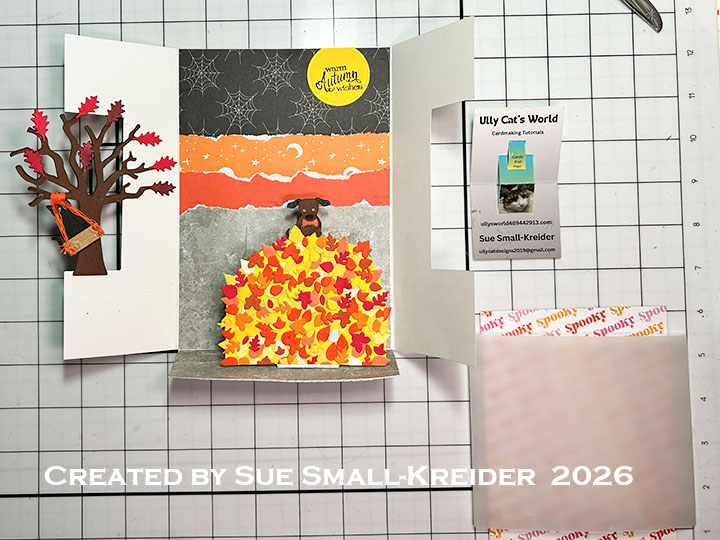
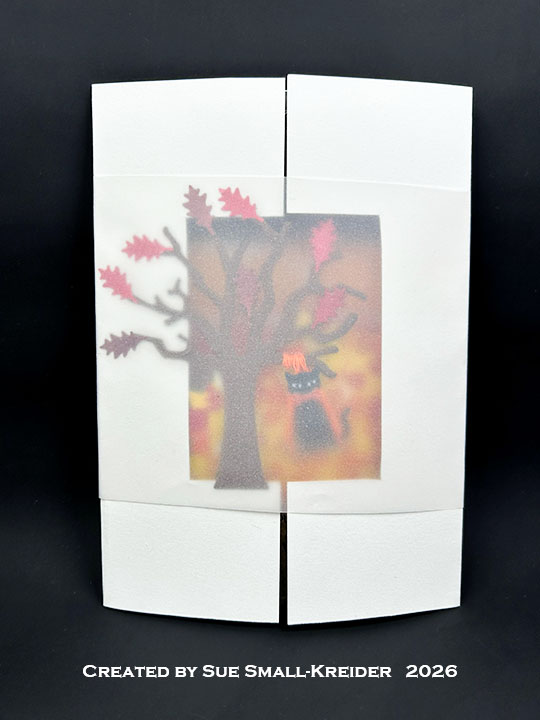
Belly Band: Using a sheet of 4×6-inch decorative paper and a scrap piece of clear vellum, I made the belly band to keep the card closed. Again, stamping the “Pull” and arrow using My Favorite Things Interactive Labels stamp set.

Envelope: The card fits into an A7 (5x 7-inch) size envelope.
Above is my pop-up card in the left two photos and Megan Francis’s card that I CAS’ed on the right. Can you see what elements from her card that I sampled?

___________________________________

Thank you for experiencing this blog post.

I hope this inspires you and makes you smile.

Please subscribe, like and leave comments 😊

Follow my YouTube channel, Instagram and Pinterest as well.

___________________________________

Materials Used:

Dies

Stamps

Papers

  • Scrapbook.com – 4.5×5.5-inches Double-Side Cardstock – Spooky and Willow Lane
  • My Favorite Things- 8.5×11 100 lb. Cardstock – White
  • The Paper Studio – 8.5×11 Clear Vellum
  • Brown, Greens, Kraft, Orange, Red and Yellow Cardstock

Ink

Adhesives

Tools

Miscellaneous

  • Bakers’ Twine – White & Orange
  • Tiny Leaf Die-Cuts from a variety of dies in my stash
Monet Waterlilies Inspired Birthday Pop-Up Card

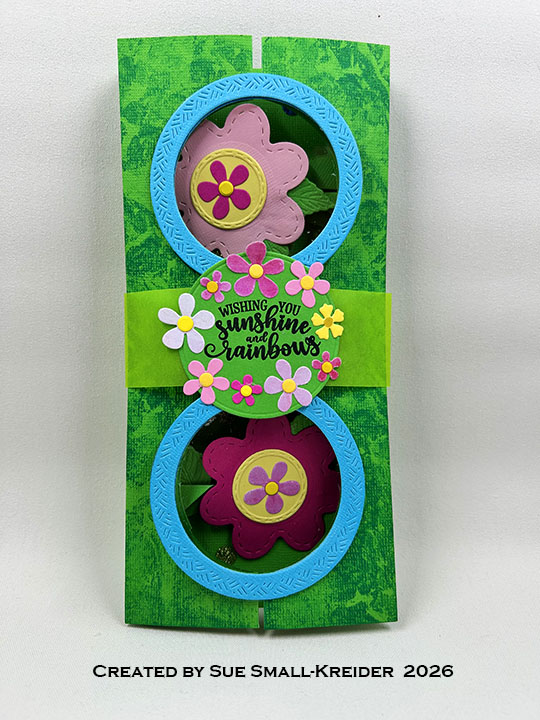
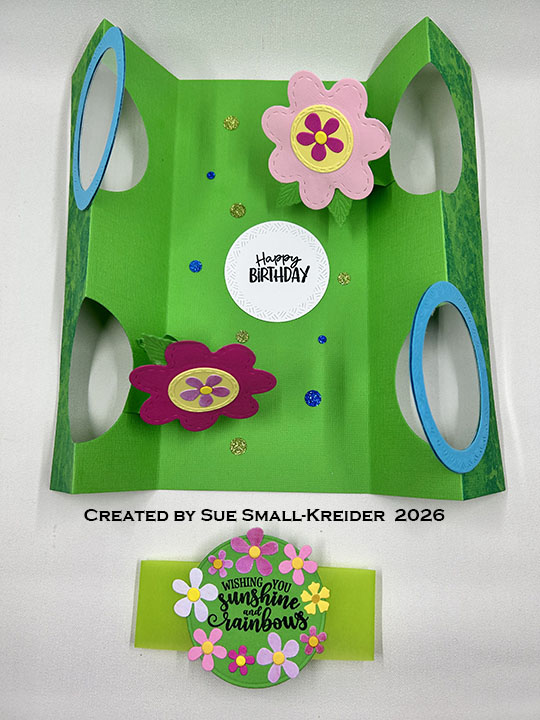
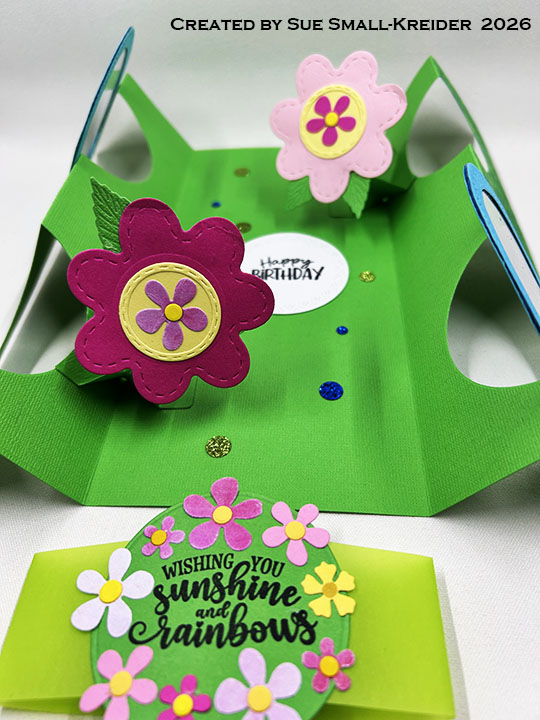
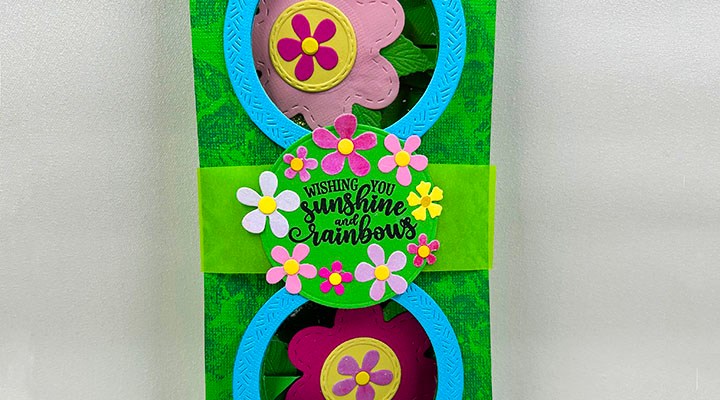
This card was made for Craft Roulette #321 whose parameters were: gatefold card, Monet colors, natural element and crinkle inkle (inking technique) random. I used Karen Burniston dies and stamps for this slimline (4×8 5/8-inch) card.

Watch the process video to see how I made this card.

Cardbase: Cut a 12×8 5/8-inch rectangle of green cardstock. Score at 2-inches, 4-inches, 8-inches and 10-inches. Fold as shown in the video above. Using the fourth smallest die from the Circles – Crosshatch set, cut four circles into the double gate fold sides as shown in the video.

Crinkle Inkle: Using bubble wrap as an inking tool, add blue ink texture to the closed front of the card. (Make sure to put scrap paper inside the card to mask the back panel from ink.)

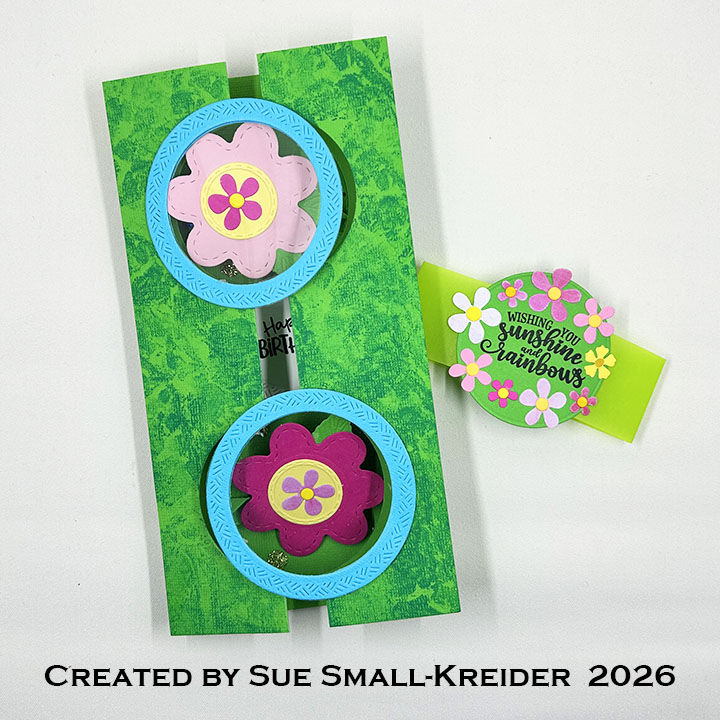
Window Frames: Cut four circular frames from blue cardstock using the fourth and fifth smallest dies from the Circles – Crosshatch set. Using double-sided tape, attach the frames to both sides of a piece of acetate and trim the plastic to fit frames. Glue frames onto card front as shown in video.

Flower Pop-Ups: (Watch the assembly video for the Twist Flower Pop-Up at the bottom of the linked page.) Cut two of the Twist Flower Pop-Up mechanism die from green cardstock and assemble as shown in the videos above. Cut two of the large flowers, centers and stitched rings. Assemble and attach to the pop-up mechanisms as shown in the video. From the Fun Flowers die set. Cut four green leaves and a variety of small flowers and flower centers. Decorate the large flower centers with a smaller flower and use the remaining small flowers for the belly band label.

Sentiments: The front, belly band sentiment “Wishing You Sunshine and Rainbows” and the inside “Happy Birthday” were stamped in black ink using the Rainbow Greetings stamp set. The Circles – Crosshatch dies were used to cut the labels for the sentiments.

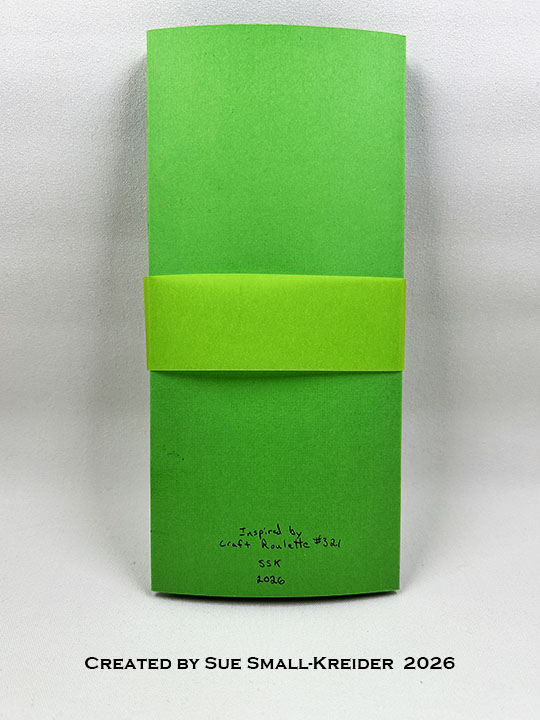
Belly Band: Wrap loosely around the center of the folded closed card a 1 ½-inch x 8 ½-inch strip of yellow – green vellum. Making sure that the strip will easily slide off the card, trim and glue the ends together. Attach the sentiment circle decorated with tiny flowers over the band glued seam.

Card Back with belly band

Envelope: The card fits into a #10 business (4. x 9-inches) size envelope.

___________________________________

Thank you for experiencing this blog post. I hope this inspires you and makes you smile.

Please subscribe, like and leave comments 😊

Follow my YouTube channel, Instagram and Pinterest as well.

___________________________________

Disclaimer: Karen Burniston products are provided free of charge by the manufacturer for review and use. All other items were personally purchased. Compensated affiliate links used where or when possible, meaning I will receive a small percentage commission from these manufacturers at no cost to you. This will allow me to add more content to my YouTube channel and help out a lot. Thank you.

Materials Used:

Dies

Stamps

Papers

  • American Crafts – Core’dination – 12×12 inch 80lb Textured Cardstock – Candy Shop (Green, Blue, Pink)
  • Grafix – 8.5×11 Dura-Lar Acetate .005 – Clear Film
  • 8.5×11 Yellow-Green Vellum
  • Majenta, Pink, White and Yellow Cardstock

Ink

  • Sharpie – Permanent Marker – Fine Tip – Black

Adhesives

Tools

  • Bubble Wrap
  • Die Cutting Machine
  • Paper Trimmer
  • Bone Folder
  • Score Board
  • Stamping Blocks used as paperweights
  • Scissors
  • Pencil
  • We R Memories – QuickStick
  • We R – Precision Press Mini – Stamping Platform
  • Scrapbook.com – Mint Tape

Miscellaneous

  • Trinity Stamps – Rainbow Sparkle Spots Confetti Embellishments

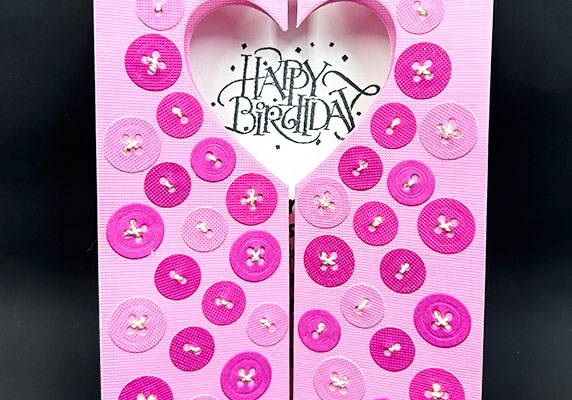
Button Heart Gate Fold Aperture Birthday Card

This card was made for Craft Roulette #250 whose parameters included a funn fold card, nostalgic colors, blanket element and buttons.

Watch the process video to see how I made this card.

Details and supplies used are below.

Cardbase: Cut a 5.5×12-inch piece of light pink cardstock. Score at 2-inches, 4-inches, 8-inches and 10-inches. Fold as shown in video. On the gate fold panels, place heart die with center points over the fold and die-cut. Repeat on other side lining up the die to make a mirror image. I used the third largest die in Karen Burniston’s Hearts – Crosshatch set.

Buttons: I cut 70 buttons from four shades of pink cardstock. Using thin cotton string, thread the buttons’ holes and hand-tied knots to all of the card front buttons. The buttons were cut using Karen Burniston’s Sewing Charms die set.

Sentiments: All sentiments stamped in black ink on two rectangular panels cut using Karen Burniston’s Rectangles Crosshatch die set. “Happy Birthday is by Rubbernecker Stamps and the other two sentiments are Riley and Company’s Funny Bones stamps.

Envelope: The card fits into an A2 (4.25×5.5-inch) size envelope. A die-cut button was glued to back flap to hint at whats to come.

___________________________________

Thank you for experiencing this blog post.

I hope this inspires you and makes you smile.

Please like and leave comments 😊

___________________________________

Disclaimer: Karen Burniston products are provided free of charge by the manufacturer for review and use. All other items were personally purchased. Compensated affiliate links used where or when possible, meaning I will receive a small percentage commission from these manufacturers at no cost to you. This will allow me to add more content to my YouTube channel and help out a lot. Thank you.

Materials Used:

Dies

Stamps

  • Riley and Company – Funny Bones Stamps – Red Rubber Stamp – RWD-1119- Do Something
  • Riley and Company – Funny Bones Stamps – Clear Stamp – RWD-1259-You Are Far Too Special
  • Rubbernecker Stamps – Red Rubber Stamp – 0218 SO – Happy Birthday

Papers

  • DCWV – 12×12 Textured Cardstock Stack – Brights
  • Core’dinations – 12×12 80lb. Textured Cardstock – Candy Shop Canvas
  • Recollections – 8.5×11 65 lb. Cardstock – White
  • Fraser Papers for William House – A2 Envelope – Genesis Text Milkweed Smooth

Ink

  • Memento – Fade Resistant Dye ink – Tuxedo Black
  • Pigma – Mircon 005 Fine Tip Pen – Black

Adhesives

Tools

  • Die Cutting Machine
  • Paper Trimmer
  • Bone Folder
  • Score Board
  • Scissors
  • Paper Masking Tape
  • Tweezers
  • Pencil
  • Art Gum Eraser

Miscellaneous

  • Thin Cotton String

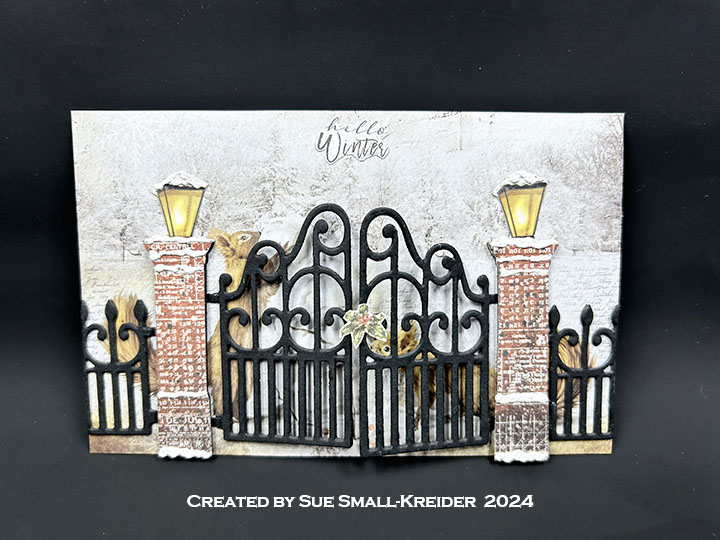
A FUNN Winter Greeting Card

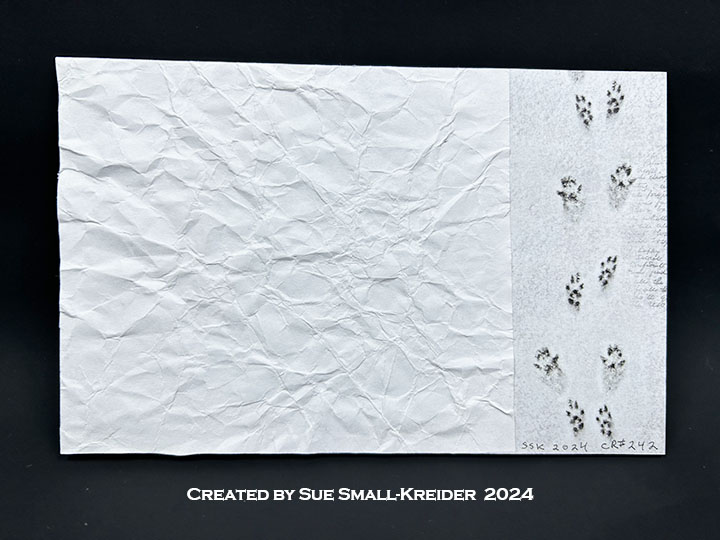
This card was made for Craft Roulette #242 whose parameters included a gatefold card, produce aisle colors, fence element, and crumpled paper.

Watch the process video to see how I made this card.

Cardbase: The cardbase is 4×6-inches of double sided patterned paper.

Sentiment: “hello Winter” is a fussy cut sentiment from the paper collection. The back side of the card has space to write a personal message.

Envelope: This card fits into an A6 envelope with it’s back flap covered with patterned paper to hint at the playful squirrels inside the envelope.

___________________________________

Thank you for experiencing this blog post.

I hope this inspires you and makes you smile.

Please like and leave comments 😊

___________________________________

Disclaimer: Karen Burniston products are provided free of charge by the manufacturer for review and use. All other items were personally purchased. Compensated affiliate links used where or when possible, meaning I will receive a small percentage commission from these manufacturers at no cost to you. This will allow me to add more content to my YouTube channel and help out a lot. Thank you.

Materials Used:

Dies

  • Leane Creatief – LeCrea’Combi Dies – Garden Gate

Papers

  • Ciao Bella Paper – 6×6-inch Double-Sided Papers – Memories Of A Snowy Day
  • Black Cardstock
  • White Copier Paper

Ink

  • Pigma – Mircon 005 Fine Tip Pen – Black

Adhesives

Tools

  • Die Cutting Machine
  • Paper Trimmer
  • Stamping Blocks as paperweights
  • Scissors
  • Paper Masking Tape

Miscellaneous

  • Nellie’s Choice – Effect Snow

Gatefold Fireplace

This is the seventh card in the Fireplace Christmas Card series.

Waiting for the grandchildren to arrive to decorate the tree. It’s that peaceful moment when the dog is asleep before the fire and the chairs are ready for tired bodies.

For this card I used two Paper Discovery die sets by Olga Direktorenko – Timeless Room and Elegant Room as well as the Timeless Room embossing folder. These sets are available in limited quantities from Craftstash. Olga is an amazing designer of scene dies and stamps who lives in Ukraine.

Cardbase: A purchased A7 (5×7 inches) gatefold cardbase and matching envelope were used for this card. The inside was covered in a red and white striped wallpaper with embossed floor moldings made using the Timeless Room embossing folder. A red rug is in the center bottom. The outside has wreath paper from the same 6×6 paper pad as the striped paper.

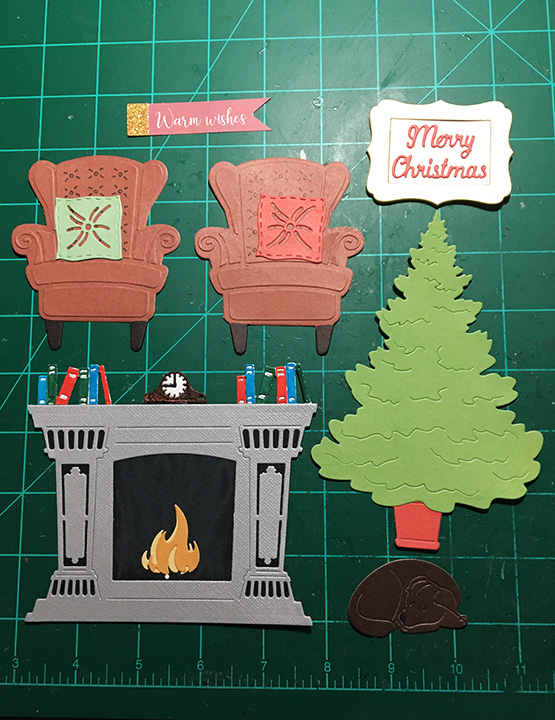
Fireplace: The fireplace die cuts a detailed image that needs to be backed with black paper to make the details stand out.                                     The final touch is the snoozing chocolate labrador retriever in front of the fire.

Chairs: The chair die in the Timeless Room set has an outline die and then one other die that cuts all the detailed pieces that make up the dimensional chair. The seat back die has a stencil feature for tufting which I used with a fine-tipped black marker to add this detail to the chair. The cushions are from the same set. When attached to the inside flaps of the card, the chair extend slightly over the edge, but card covered by the tree on the card front when the card is closed.

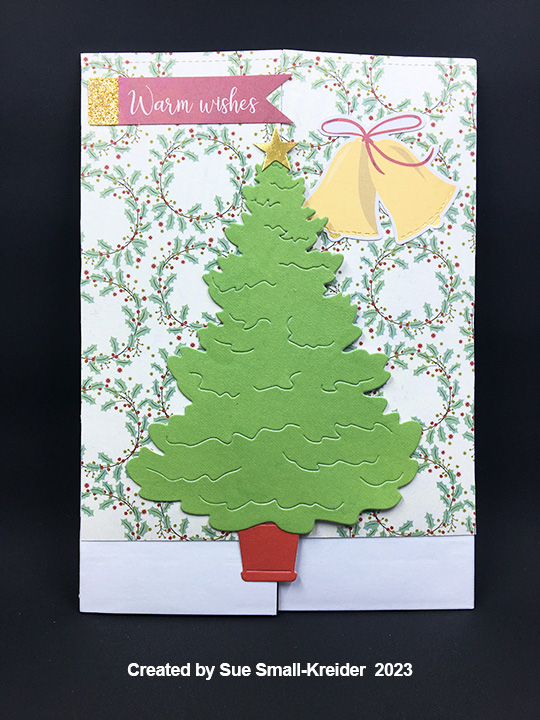
Card Front: An evergreen tree sits in a red pot waiting to be decorated. The tree is from the Elegant Room set while the pot is from the Timeless Room set. The left half of the tree is glued to the left card flap. The yellow bells were added to balance out the banner. Both are from a Spellbinder’s Christmas card kit.

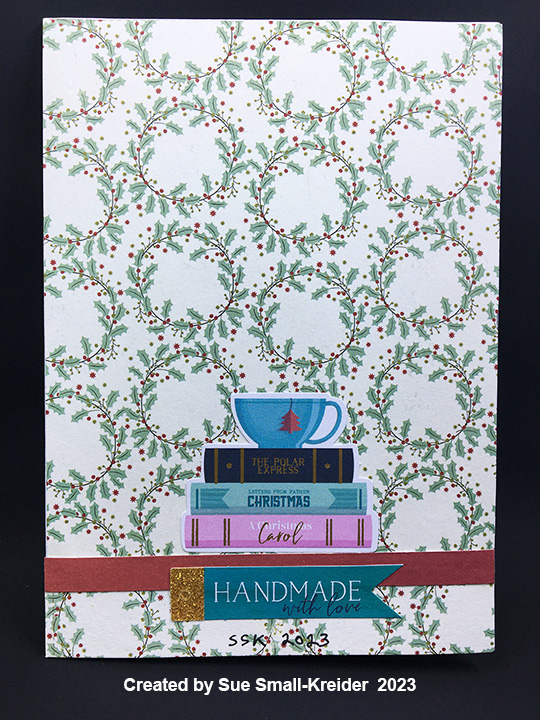
Card Back: A red strip covers the seam where the two pieces of paper meet. Ephemera from a Spellbinder’s Christmas card kit was used to decorate the back including a stack of Christmas themed books and a banner stating, “Handmade with love.”

Sentiments: The front banner “Warm Wishes” is from a Spellbinder’s Christmas card kit. “Merry Christmas” is part of the Elegant Room set and includes the frame. The two white ovals over the chairs are spaces to write personal messages.

Envelope: The back flap is decorated with yellow bells from a Spellbinder’s Christmas card kit.

Thank you for reading this blog post. I hope this inspires you and makes you smile. Please like and leave comments 😊

Other Fireplace Cards by designer/brand

Materials Used:

Dies & Embossing Folders

Papers

  • My Mind’s Eye – 6×6 Double-Sided Paper Pad – Cozy Christmas
  • Craft Consortium – A4 Solids Double-Sided Paper Pad – Candy Christmas
  • Spellbinders – Mega Holiday Cardmaking Kit – Christmas – All Aboard
  • Bazzill – 8.5×11 Textured Cardstock – Tiara -18-1002
  • Matte Gold Cardstock
  • Black and White Cardstock
  • Park Lane Paperie – A7 Gatefold Cardbase and Envelope – White

Ink

  • Ranger – Tim Holtz – Distress Crayon- Hickory Smoke
  • Sharpie – Permanent Marker – Ultra Fine Tip – Black, Blue, Brown, Green and Red

Adhesives

Tools