Cocoa Mug Pop-Up Christmas Card

This card was made for Craft Roulette #246 whose parameters included for a holiday card, tree colors, drinking vessel(s), and something from the floor. (Watch the video to find out what was from my floor.)

Watch the process video to see how I made this card.
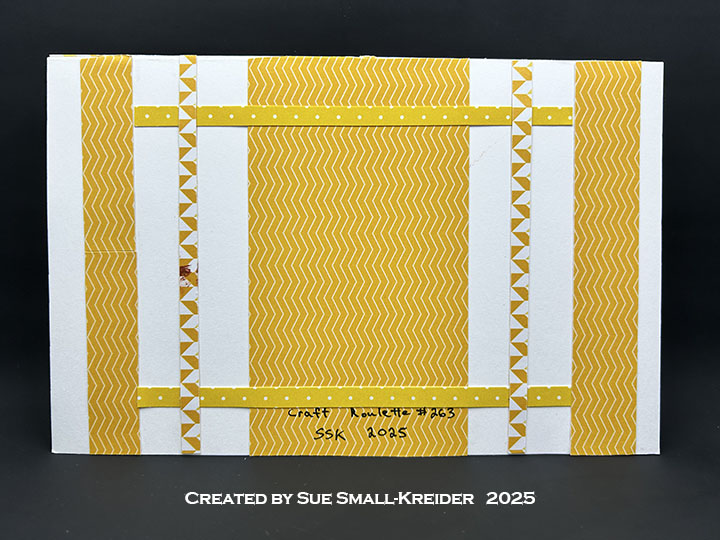
Cardbase:  I used a purchased kraft paper cardbase that measures 4.25×11-inches when open and folded is an A2 side-fold card measuring 4.25-inches wide and 5.5-inches tall. The four panels were covered with decorative papers from my stash (Sorry, I don’t know the manufacturer of either paper.)

Pop-Up Mug:  I modified the Flower Pot Pop-Up by cutting off the folder over flaps on the flower pot and added a handle cut from the mug die from the Tea and Coffee Pop-Up set. (See the video for how the mug was assembled.) Marshmallows are from the Camping Charms while the candy cane comes from the Stocking Pop-Up.

Cookies: The round, jam-filled two-layer Linzer cookie is cut using a scalloped circle die and small star die. The jam is made with Nuvo Glitter Drops and Glossy Accents.  The star cookie was cut with an embossing die using an embossing sandwich on my die-cutting machine. The powdered sugar is white spray ink.

Sentiments:  On the card front is a die-cut “Merry Christmas” made using just the word shadow and words from the Merry Christmas Lorna Add-Ons set. Inside the card two fancy labels were cut from white cardstock using the Rectangles and Labels – Crosshatch and one was stamped in black with “Keep Warm and drink Hot Cocoa” from the Winter Hugs stamp set.

Envelope:  The card fits into a purchased A2 (4.25x 5.5-inches) size kraft paper envelope. Another candycane was glued to the back flap of the envelope.

___________________________________

Thank you for experiencing this blog post.

I hope this inspires you and makes you smile.

Please like and leave comments 😊

___________________________________

Disclaimer: Karen Burniston products are provided free of charge by the manufacturer for review and use. All other items were personally purchased. Compensated affiliate links used where or when possible, meaning I will receive a small percentage commission from these manufacturers at no cost to you. This will allow me to add more content to my YouTube channel and help out a lot. Thank you.

Materials Used:

Dies

Stamps

Papers

  • American Crafts – 12×12 inch Single-Sided Paper – 341347 Red Holly and Berries
  • Unknown – 12×12 inch Single-Sided Paper – Snowflake Scalloped Borders
  • Unknown – 12×12 inch Single-Sided Coated Embossed Cardstock– Christmas Trees
  • Recollections – 8.5×11 65 lb. Cardstock – White
  • The Paper Cut – 8.5×11 Glossy 10 PT Kromekote Cardstock – White
  • Tonic Studios – Craft Perfect – A4 Sized 104 lb Foiled White Kraft Card – Candy Stripe
  • Browns, Red and White Cardstock
  • Horizon Group – A2 Cardbase and Envelope – Kraft

Ink

  • Avery Elle – White Spray Ink
  • Memento – Fade Resistant Dye ink – Tuxedo Black
  • Sharpie – Permanent Marker – Ultra Fine Tip – Black
  • Stampin’ Up – Stampin’ Write Marker – Chocolate Chip

Adhesives

Tools

  • Spellbinders – Platinum Die Cutting Machine
  • Paper Trimmer
  • Bone Folder
  • Stamping Blocks
  • Scissors
  • Pencil
  • T-Ruler
  • Glue Eraser
  • Paper Masking Tape

Miscellaneous

  • Cotton Ball
  • Nuvo – Glitter Accents – Seasonal Pine
  • Ranger – Glossy Accents

Showing Gratitude

Getting ready for the Christmas rush by making Thank You cards using my Spellbinders’ BetterPress and Karen Burniston’s Postage Pop-Up and Thank You dies.
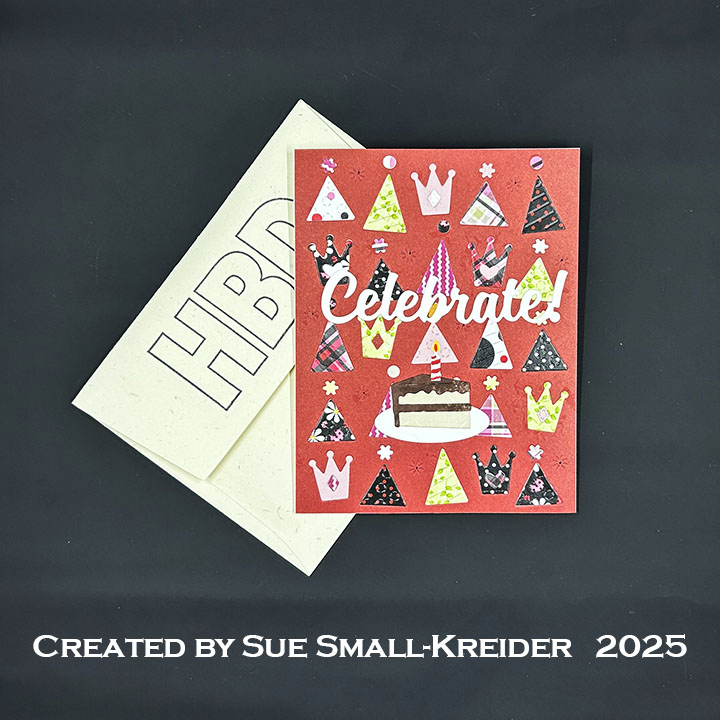
Watch the process video to see how I made this card.

Cardbase: All the cards are made from purchased A7 (5×7-inches) kraft cardstock bases with matching envelopes.

Sentiments: The outside sentiments are all Spellbinders BetterPress plates and inks. The “I’m so Grateful for you” is printed in Clay and Coastal inks using the So Grateful for You plates and die set. The inside pop-up sentiment uses Karen Burniston’s Postage Pop-Up, Thank you and Thank You Shadow die sets.(See video above for assembly.) Thank You very much” cards use the same inks and the Thank You Very Much plates and template.

Envelope: The card fits into an A7 (5×7-inches) size envelope with hand-drawn hearts on the back flaps.

___________________________________

Thank you for experiencing this blog post.

I hope this inspires you and makes you smile.

Please like and leave comments 😊

___________________________________

Disclaimer: Karen Burniston products are provided free of charge by the manufacturer for review and use. All other items were personally purchased. Compensated affiliate links used where or when possible, meaning I will receive a small percentage commission from these manufacturers at no cost to you. This will allow me to add more content to my YouTube channel and help out a lot. Thank you.

Materials Used:

Dies

Press Plates

  • Spellbinders – BetterPress Press Plate & Die Set – So Grateful For You
  • Spellbinders – BetterPress Press Plates – Thank You Very Much

Papers

  • Stamperia – 6×6 inch Double-Sided Patterned Cardstock – Backgrounds – Magic Forest
  • Bazzill – 8.5×11 Cardstock – Evening Surf
  • Kraft and White Cardstock
  • Park Lane Paperie – A7 Cardbase and Envelope – Kraft

Ink

  • Pigma – Mircon 05 Fine Tip Pen – Black
  • Spellbinders – BetterPress Inks – Clay and Coastal

Adhesives

Tools

  • Die Cutting Machine
  • Paper Trimmer
  • Spellbinders – BetterPress System
  • Stamping Blocks used as paperweights
  • Scissors
  • Paper Masking Tape

Miscellaneous

  • Studio Katia – Iridescent Butterflies
  • Blue Organza Ribbon 1/4-inch wide

Good Bye 2024-Hello 2025!

It’s the Karen Burniston design team challenge for December 2024 using the theme of “Happy New Year.” For this challenge I chose to make a top-fold A2 size card with pop-up fireworks and the sentiment “Happy New Year” on a wobble spring.

Watch the process video to see how I made this card.

(Most of the instruction on how to make this card is in the video, but I’ve listed some measurements and sets used below.)

Card Back

Cardbase: Take an 11×4.25-inch rectangle and fold in half to create an A2 size top-fold card. Cover all four panels with decorative paper.

Pop-Up Fireworks: (I’ve used the double Katherine Label Pop-Up mechanism in these other cards – World Card Making Day Card, Flying By Pop-up Birthday Card, Interactive Money Holder Halloween Cards and Do What Brings You Joy.)

Sentiments: “Good Bye 2024” was made using four different sentiment die sets –Good Luck, Happy Birthday, Happy Easter and Mini Alphabet and Numbers. (See video for the word surgery used to create Good Bye.) “Happy New Year” has separate dies to cut out each word and a shadow die. I used four different foil and glitter cardstocks.

Envelope: The card fits into an A2 (4.25x 5.5-inches) size envelope. To decorate, cover the back flap with matching card papers and stamp with the “Made with Love” from the Special Delivery stamp set. (I wasn’t paying attention and stamped the sentiment with the “Love” upside-down on my envelope.)

___________________________________

Thank you for experiencing this blog post.

I hope this inspires you and makes you smile.

Please subscribe, like and leave comments 😊

Follow my YouTube channel, Instagram and Pinterest as well.

___________________________________

Disclaimer: Karen Burniston products are provided free of charge by the manufacturer for review and use. All other items were personally purchased. Compensated affiliate links used where or when possible, meaning I will receive a small percentage commission from these manufacturers at no cost to you. This will allow me to add more content to my YouTube channel and help out a lot. Thank you.

Materials Used:

Dies

Stamps

Papers

  • Recollections – 8.5×11 65 lb. Cardstock – White
  • Stamperia – 8×8 inch Double-Sided Papers – Backgrounds – Alterego
  • Blues and Silver Foil Cardstock
  • Silver No-Shed Glitter Cardstock
  • Clear Plastic Packaging
  • Fraser Papers for William House – A2 Envelope – Genesis Text Milkweed Smooth

Ink

  • Memento – Fade Resistant Dye ink – Tuxedo Black
  • Pigma – Mircon 01 Fine Tip Pen – Black

Adhesives

Tools

  • Die Cutting Machine
  • Paper Trimmer
  • Bone Folder
  • Stamping Blocks used as paperweights
  • Scissors
  • Paper Masking Tape
  • Tweezers
  • We R Memories – QuickStick
  • Kat Scrappiness – Anti-Static Tool

Miscellaneous

  • Simon Says Stamp! – Peppermint Pawsitively Dazzling Gems
  • Riley and Company – Wobbles – Mini Action Springs

A Purrfect Birthday Pop-Up Card

This is the fourth in a series of cards that have shelves as the main element of the card.

This card was made with Waffle Flower dies, stamps and stencils.

Watch the process video to see how I made this card.

Cardbase: The outer cardbase is an A2 (4.25×5.5-inches) made from an 8.5×5.5-inch rectangle of lightweight white cardstock.  The outside is covered with panels of decorative paper.

Pop-Out Shelves: For the popout shelves cut an 8.5×5.5-inch rectangle of either patterned cardstock or lightweight cardstock with decorative paper covering it. Mark the center of the rectangle at 4.24-inches at the top and bottom of the cardstock and place the Inside Pop-Up Shelves die’s dotted center line on the center marks. Run through a die cut machine and work the fold-lines to make the shelves pop-out. Die-cut just the shelves from a woodgrain paper. Cut the shelf sections out and glue to the large pop-up panel. Decorate with plants from the Shelf Add-Ons die set.

Cats: Add to the shelves, cats die-cut from black cardstock using the Cattitude die set. Stencil cats using the Birthday Kitties Stencil set onto white cardstock and fussy cut out for use on card front.

Sentiments: Using the Purrfect Sentiments stamp set, stamp “Everyday is caturday” on white cardstock and “Have a purrect birthday” inside the card. Add “You’re the cat’s meow” diecut Subsentiments Cat to the inside shelves.

Envelope: The card fits into an A2 (4.25x 5.5-inches) size envelope which has a cat stamped on its back flap from the Cattitude stamp set.

___________________________________

Thank you for experiencing this blog post.

I hope this inspires you and makes you smile.

Please like and leave comments 😊

___________________________________

Disclaimer: Karen Burniston products are provided free of charge by the manufacturer for review and use. All other items were personally purchased. Compensated affiliate links used where or when possible, meaning I will receive a small percentage commission from these manufacturers at no cost to you. This will allow me to add more content to my YouTube channel and help out a lot. Thank you.

Materials Used:

Dies

  • Waffle Flower – Steel Craft Die – Cattitude
  • Waffle Flower – Steel Craft Die – Inside Pop-Up Shelves
  • Waffle Flower – Steel Craft Die – Shelf Add-Ons

Stamps

  • Waffle Flower – Clear Stamps – Cattitude
  • Waffle Flower – Clear Stamps – Purrfect Sentiments

Stencil

  • Waffle Flower – Plastic – Birthday Kitties

Papers

  • Recollections – 8.5×11 65 lb. Cardstock – White
  • Stampin’ Up – 12×12 Designer Series Paper – Earthen Elegance
  • Black, Greens and Yellow Cardstock
  • Fraser Papers for William House – A2 Envelope – Genesis Text Milkweed Smooth

Ink

  • Memento – Fade Resistant Dye ink – Tuxedo Black
  • Ranger – Tim Holtz – Distress Ink- Black Soot, Fossilized Amber, Hickory Smoke, Lumberjack Plaid, Prize Ribbon
  • Pigma – Mircon 05 Fine Tip Pen – Black
  • Sakura – Gelly Roll Pen – Medium – White
  • Sharpie – Permanent Marker – Fine Tip – Red
  • Sharpie – Permanent Marker – Ultra Fine Tip –Blue, Green, Red

Adhesives

Tools

  • Die Cutting Machine
  • Paper Trimmer
  • Bone Folder
  • Stamping Blocks
  • Scissors
  • Pencil
  • Ruler
  • Sponge Daubers
  • Paper Masking Tape

Miscellaneous

  • Waffle Flower – Subsentiments Cat – Diecuts

A FUNN Winter Greeting Card

This card was made for Craft Roulette #242 whose parameters included a gatefold card, produce aisle colors, fence element, and crumpled paper.

Watch the process video to see how I made this card.

Cardbase: The cardbase is 4×6-inches of double sided patterned paper.

Sentiment: “hello Winter” is a fussy cut sentiment from the paper collection. The back side of the card has space to write a personal message.

Envelope: This card fits into an A6 envelope with it’s back flap covered with patterned paper to hint at the playful squirrels inside the envelope.

___________________________________

Thank you for experiencing this blog post.

I hope this inspires you and makes you smile.

Please like and leave comments 😊

___________________________________

Disclaimer: Karen Burniston products are provided free of charge by the manufacturer for review and use. All other items were personally purchased. Compensated affiliate links used where or when possible, meaning I will receive a small percentage commission from these manufacturers at no cost to you. This will allow me to add more content to my YouTube channel and help out a lot. Thank you.

Materials Used:

Dies

  • Leane Creatief – LeCrea’Combi Dies – Garden Gate

Papers

  • Ciao Bella Paper – 6×6-inch Double-Sided Papers – Memories Of A Snowy Day
  • Black Cardstock
  • White Copier Paper

Ink

  • Pigma – Mircon 005 Fine Tip Pen – Black

Adhesives

Tools

  • Die Cutting Machine
  • Paper Trimmer
  • Stamping Blocks as paperweights
  • Scissors
  • Paper Masking Tape

Miscellaneous

  • Nellie’s Choice – Effect Snow

A Monsters’ Gallery of Birthday Fun!

Just a fun birthday card featuring monsters on a Karen Burniston Photo Fan Pop-Up.

Watch the process video to see how I made this card.

Cardbase: Starting with a 5.5×8.5-inch rectangle of white cardstock folded in half to form a 4.25×5.5-inch side-fold A2 cardbase, the card was covered with colorful glassine paper inside and out. The inside panels were cut with the largest die in Karen Burniston’s Rectangles-Crosshatch set.

Monsters:  Monster Gallery stamp set is used as a front panel cut out as separate squares for the inside pop-up feature. The images were colored with watercolor pencils and then waterbrushed to even out the color.

Photo Fan Pop-Up: Watch the assembly video at the bottom of the linked page for the Photo Fan Pop-Up die.

Sentiments:  The inside sentiments of “Celebrate your big awesome super day” and “Happy Birthday to You” are from Karen Burniston’s Photo Memories stamp set. The “Monster Wishes” on the card front and “Monster Hugs” on the card back are from the Monster Gallery stamp set.

Envelope:  The card fits into an A2 (4.25x 5.5-inches) size envelope. On the back flap there is a “M” cut from scrap paper and glued there.

___________________________________

Thank you for experiencing this blog post.

I hope this inspires you and makes you smile.

Please like and leave comments 😊

___________________________________

Disclaimer: Karen Burniston products are provided free of charge by the manufacturer for review and use. All other items were personally purchased. Compensated affiliate links used where or when possible, meaning I will receive a small percentage commission from these manufacturers at no cost to you. This will allow me to add more content to my YouTube channel and help out a lot. Thank you.

Materials Used:

Dies

Stamps

Papers

  • Recollections – 8.5×11 65 lb Cardstock – white
  • Scrapbook.com – 4.25×5.5 Heavy Weight, Smooth, 400 GSM Mixed Media Paper Pad – White
  • We R Memory Keepers – 12×12 inch Food Safe & Grease Resistant Glassine Paper – Oh Goodie!
  • Fraser Papers for William House – A2 Envelope – Genesis Text Milkweed Smooth

Ink, Pigments

  • Memento – Fade-Resistant Dye Ink – Tuxedo Black
  • Ranger – Tim Holtz – Distress Watercolor Pencils – Antique Linen, Barn Door, Cracked Pistachio, Fossilized Amber, Kitsch Flamingo, Mermaid Lagoon, Mustard Seed, Pickled Raspberry, Prize Ribbon, Salty Ocean, Salvaged Patina, Speckled Egg, Spiced Marmalade, Twisted Citron, Villainous Potion
  • Pigma – Mircon 005 Fine Tip Pen – Black

Adhesives

Tools

  • Die Cutting Machine
  • Paper Trimmer
  • Bone Folder
  • Stamping Platform
  • LDRS – Stampendable Stamping Tool
  • Stamping Blocks used as paperweights
  • Scissors
  • Paper Masking Tape
  • Waterbrush

Shelf Cards – Christmas desserts

This card was made for Craft Roulette #241 whose parameters included a z-fold card, scarecrow colors, bake element, and crinkle inkle technique. This card is also the fourth day in my shelf card series.

Watch the process video to see how I made this card.

Cardbase: The cardbase is an A2 size but is 1/2-inch thick. The z-fold base is made from a 5 1/2×11-inch rectangle folded at 5 1/2-inches and 2 3/4-inches. The buffet easel is made from two rectangles (4 1/4×6 1/2-inches and 4 1/4×3 3/4-inches) each scored and folded at 1/2 and 1-inch of the 4 1/4-inch side. Watch video for how to fold and glue.

Lights: Watch video for how to install the EZ-lights.

Sentiment: “Merry Christmas” is die cutting three layers of cardstock and PoppyStamps dies. It is popped-up on think foam squares to act as the easel stopper. The card back is left blank for a personal message.

CRX Sheet: The Card Recipient Experience (CRX) Sheet is a set of instructions on how to open and set-up the card and turn on the lights.

Envelope: This card will be hand delivered or mailed in a box.

___________________________________

Thank you for experiencing this blog post.

I hope this inspires you and makes you smile.

Please like and leave comments 😊

___________________________________

Disclaimer: Karen Burniston products are provided free of charge by the manufacturer for review and use. All other items were personally purchased. Compensated affiliate links used where or when possible, meaning I will receive a small percentage commission from these manufacturers at no cost to you. This will allow me to add more content to my YouTube channel and help out a lot. Thank you.

Materials Used:

Dies

  • Anna Griffin – Metal Dies – Slimline 3D Mantle & Fireplace
  • Honey Bee Stamps – Honey Cuts – Lovely Layers – Hoosier Cabinet Holiday Add-On
  • Paper Discovery – Die Set by Olga Direktorenko – Cosy Kitchen 2D Perfect Kitchen Die Set
  • PoppyStamps – Craft Dies – Lavish Merry Christmas

Stamps

  • Pear Blossom Press – Clear Stamps – PBP-01

Papers

  • Memory Box – 8.5×11 inch Woodgrain Embossed Kraft Paper
  • Recollections – 8.5×11 inch 65 lb. Cardstock – Christmas Collection – Poinsettia
  • Stampin’ Up – 8.5×11 Thick Basic White Cardstock
  • Stamperia – 12×12 inch Double-Sided Papers – Winter Botanic
  • Brown Cardstock

Ink

  • Ranger – Tim Holtz – Distress Ink- Aged Mahogany
  • StazOn – Solvent Ink – Jet Black
  • American Crafts – Metallic Marker – Gold
  • Pigma – Mircon 01 Fine Tip Pen – Black
  • Sakura – Gelly Roll Pen – Medium – White
  • Sharpie – Permanent Marker – Ultra Fine Tip – Black, Brown

Adhesives

Tools

  • Die Cutting Machine
  • Paper Trimmer
  • Bone Folder
  • Score Board
  • Stamping Blocks
  • Scissors
  • Ice Pick
  • Piercing Tool
  • Pencil
  • Craft Mat
  • Sponge Daubers
  • Paper Masking Tape
  • Metal Ruler
  • Tweezers
  • We R Memories – QuickStick
  • Cello Bag from packaging

Miscellaneous

  • Red Organza Ribbon 1/2-inch wide
  • Pear Blossom Press – EZ-Lights
  • Heart Shaped Paper Dolie

Shelf Cards – Pop-Up Shelves

This is the second in a series of cards that have shelves as the main element of the card.

Today’s card is a pop-up set of shelves made with On Display Pop-Up die set by Concord and 9th.

Watch the process video to see how I made this card.

Cardbase:  The cardbase is an A2 (4.25×5.5-inch) side-fold made by folding an 8.5×5.5-inch rectangle in half.

Sentiments:  The “hello” on the card front is a die in the On Display Pop-Up die set.

Envelope:  The card fits into an A2 (4.25x 5.5-inches) size envelope with a die-cut plant on the back flap.

___________________________________

Thank you for experiencing this blog post.

I hope this inspires you and makes you smile.

Please like and leave comments 😊

___________________________________

Disclaimer: Karen Burniston products are provided free of charge by the manufacturer for review and use. All other items were personally purchased. Compensated affiliate links used where or when possible, meaning I will receive a small percentage commission from these manufacturers at no cost to you. This will allow me to add more content to my YouTube channel and help out a lot. Thank you.

Materials Used:

Dies

  • Concord and 9th – Metal Dies – On Display Pop-Up

Papers

  • Bazzill – 8.5×11 Cardstock – Tira
  • Concord and 9th – 8.5×11 Cardstock – Honeycomb
  • Impression Obession – 6×6 Double-Sided Cardstock – Basics 1 – Yellows
  • My Favorite Things – 8.5×11 Cardstock – Something Blue
  • Spellbinders – 8.5×11 Cardstock – Cosmic Sky
  • Stampin’ Up – 8.5×11 cardstock – Copper Clay
  • Blues, Browns, Greens, White and Yellows Cardstock Scraps
  • Fraser Papers for William House – A2 Envelope – Genesis Text Milkweed Smooth

Ink

  • Ranger – Tim Holtz – Distress Ink- Rustic Wilderness
  • Nuvo – Glitter-Marker – 197 Lemon Drizzle
  • Pigma – Mircon 01 Fine Tip Pen – Black

Adhesives

Tools

  • Die Cutting Machine
  • Paper Trimmer
  • Score Board
  • Bone Folder
  • Stamping Blocks used as paperweights
  • Scissors
  • Paper Masking Tape
  • We R Memories – QuickStick
  • Sponge Daubers

A Christmas Pop-Up Card – A Great White Shark

This card was inspired by a pun on the Bing Crosby classic “I’m Dreaming of a White Christmas” song. It uses dies by Karen Burniston and stamps by Riley and Company.

Watch the process video to see how I made this card.

Cardbase:  Cut an 8.75 x7.5-inch rectangle of 65lb. white cardstock and score and fold in half to form an 8.75 x3.25-inch top-fold slimline card base. Cover using decorative papers.

Pop-Ups:  Watch the assembly videos for the Lorna Label Pop-Up and the Piano Keys Pop-Up by click on the links and looking for the videos at the bottom of each link’s page.

Decorations: For the musical notes and piano are from the Music Charms set while the shark inside is from the Sea Animals set. The shark border on the card back is from the Beach Borders set. The sharks were cut in white and colored with a gray marker.

Sentiments: The Lorna Add-Ons of  Merry Christmas and Just A Note were used along with the shark sentiments from Riley and Company.

Envelope:  The card will need to be mailed in a bubble wrap envelope because of its size and thickness.

___________________________________

Thank you for experiencing this blog post.

I hope this inspires you and makes you smile.

Please like and leave comments 😊

___________________________________

Disclaimer: Karen Burniston products are provided free of charge by the manufacturer for review and use. All other items were personally purchased. Compensated affiliate links used where or when possible, meaning I will receive a small percentage commission from these manufacturers at no cost to you. This will allow me to add more content to my YouTube channel and help out a lot. Thank you.

Materials Used:

Dies

Papers

  • Riley and Company – Clear Stamps – Funny Bones – Advice From A Shark
  • Riley and Company – Clear Stamps – Shark Puns

Papers

  • Recollections – 8.5×11 inch 65 lb. Cardstock – Christmas – Noel
  • Spellbinders – 8.5×11 100 lb. Cardstock – Raindrop
  • The Paper Studio – 12×12 Printed Paper – Christmas Sheet Music
  • The Paper Studio – 12×12 Printed Paper – Classic Snowflakes – Blue
  • The Paper Studio – 12×12 Printed Paper – Red & Cream Diagonal Stripe
  • The Paper Studio – 12×12 Printed Paper – Red & Cream Diagonal Stripe
  • The Paper Studio – 8.5×11 65 lb. Cardstock – White
  • Black Cardstock

Ink

  • Hero Arts – Alcohol-Marker Friendly Ink Pad – Intense Black
  • Creative Craft Products – Alcohol Markers – Dual Tipped – WG 1 Warm Grey
  • Pigma – Mircon 01 Fine Tip Pen – Black

Adhesives

Tools

  • Die Cutting Machine
  • Paper Trimmer
  • Bone Folder
  • Stamping Blocks used as paperweights
  • Scissors
  • Paper Masking Tape