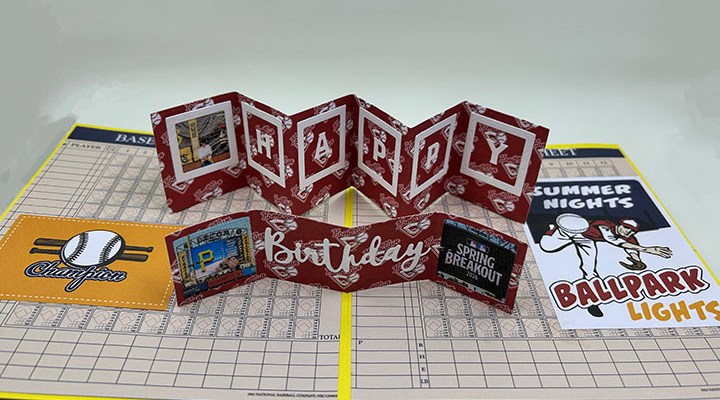
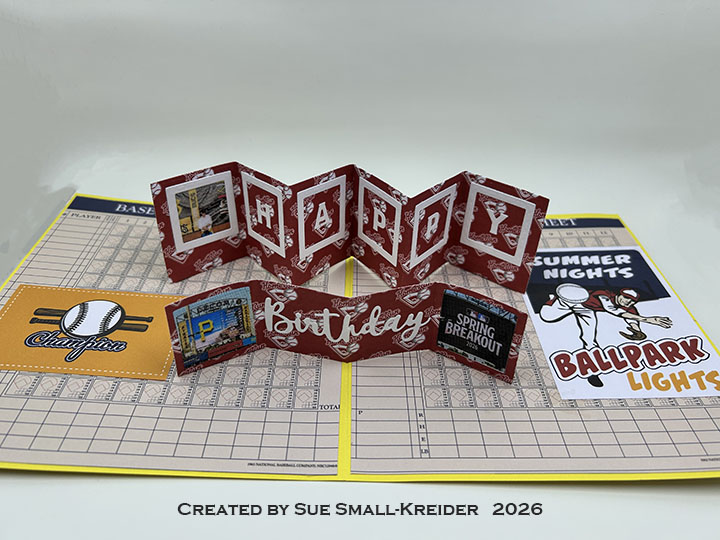
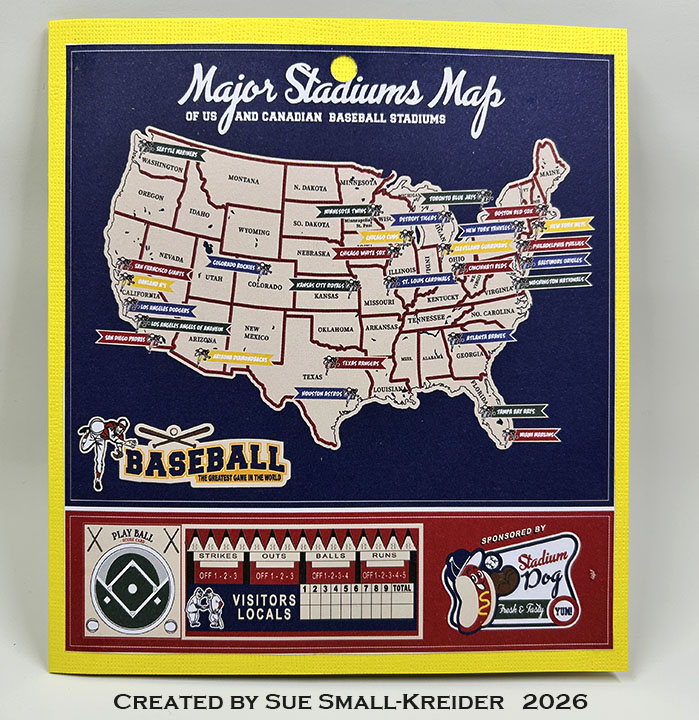
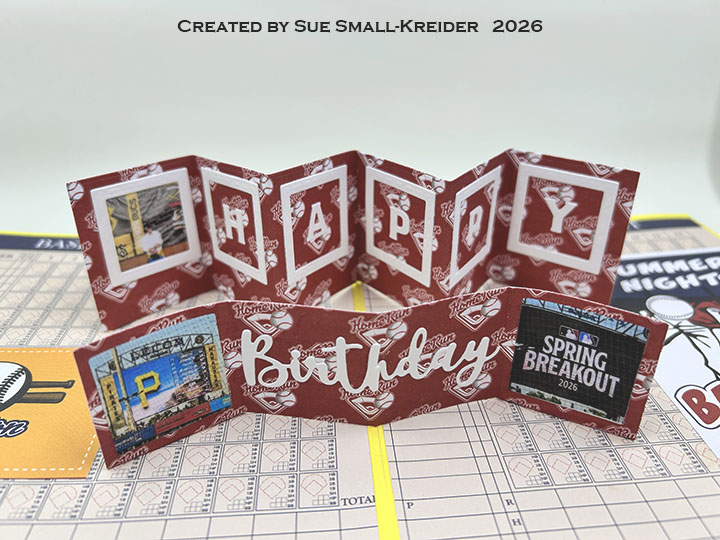
Made this special birthday card for a MLB baseball stringer using Karen Burniston’s Photo Gallery Pop-Up and Happy Birthday Lorna Add-Ons along with Carta Bella Home Run double-sided papers by Steven Duncan.
Cardbase: I folded a 6.5×12-inch rectangle yellow cardstock in half to create a 6.5×6-inch cardbase. Next, I covered the cardbase with full sheets from the Carta Bella 6.5×6-inch paper pad and then added some of the journaling cards.
Pop-Ups: Watch the assembly video at the bottom of the linked page of Photo Gallery Pop-Up. Add the sentiment and decorations before installing in the cardbase.
Sentiments: I used the word dies from the Happy Birthday Lorna Add-Ons and the square frames decorator dies from the Photo Gallery Pop-Up.
Disclaimer: Karen Burniston products are provided free of charge by the manufacturer for review and use. All other items were personally purchased. Compensated affiliate links used where or when possible, meaning I will receive a small percentage commission from these manufacturers at no cost to you. This will allow me to add more content to my YouTube channel and help out a lot. Thank you.
Materials Used:
Dies
Karen Burniston in cahoots with Riley and Company – Happy Easter – 1263
Karen Burniston in cahoots with Riley and Company – Squares – Crosshatch – 1056
Papers
Carta Bella – 6×6-inch Double-Sided 65lb. Papers by Steven Duncan. – Home Run
Core’dinations – 12×12 inch Textured 80lb Cardstock – Candy Shop
Watch the process video to see how I made this card.
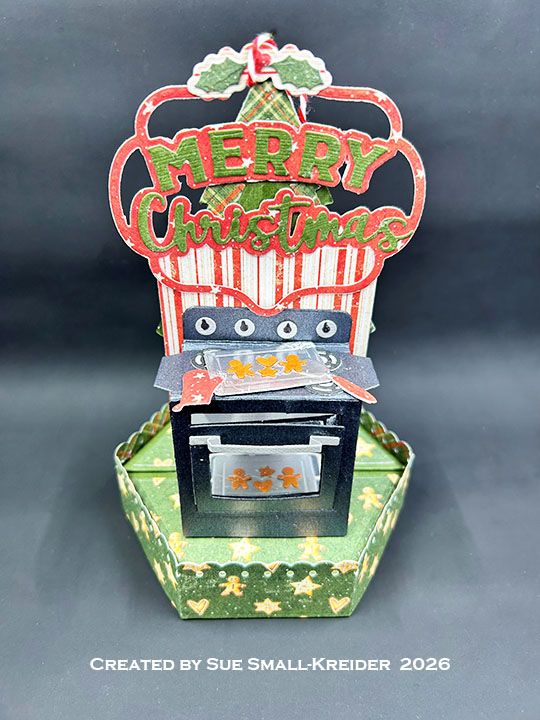
Pop-Up Stage Base: (Watch the assembly video at the bottom of the linked page for Stage Pop-Up.) Cut two base pieces from the Stage Pop-Up die set in green and two scalloped side pieces from the Party Stage Add-Ons set from decorative cardstock. Cut one decorative rectangle from the Stage Pop-Upset in white. Cut two of the base polygon decorative pieces from white cardstock and two decorative papers. Save the white pieces to be stamped with a sentiments before gluing to the bottom and side of the stage base. Cut a rectangle to be glued between the two stage base pieces. (I used the 2.4×3.7-inch die in the Rectangles – Crosshatch set.)
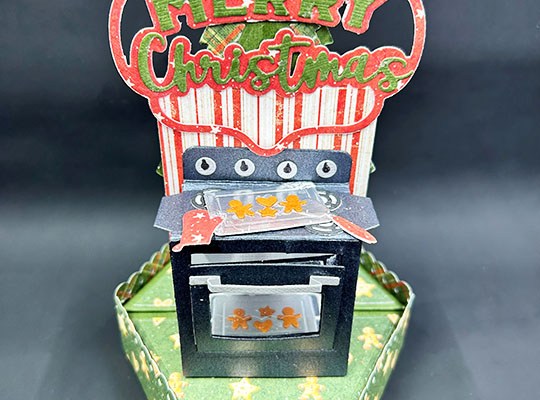
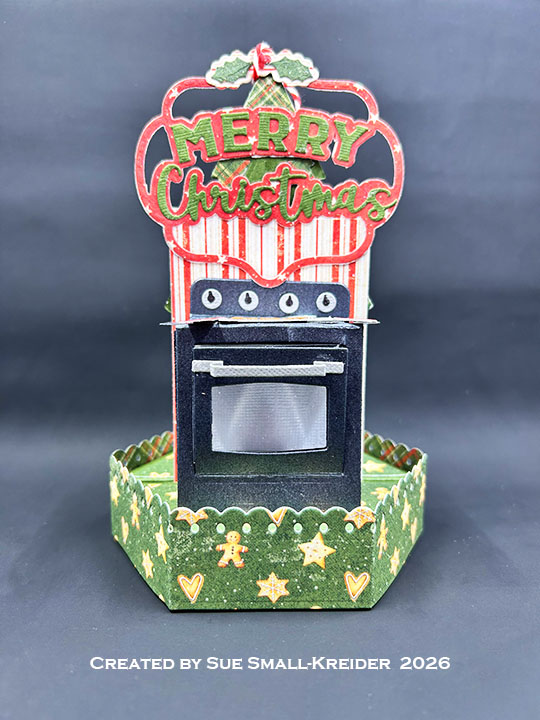
Oven Pop-Up: (Watch the assembly video at the bottom of the linked pages for OvenPop-Upand the video above for alterations to the installation of the oven.) Cut two main oven pieces from black metallic cardstock. Trim one down to just the front with door. Cut a 1 3/8-inch square of clear acetate and sand which between the two oven doors using narrow double-sided tape. Cut one base piece from black metallic cardstock and trim off triangular sides as shown in video above. Add decorative rack, cookie tray, cookies, spatula, oven mitt, stove burners and knobs. Add to stage base as shown in video above.
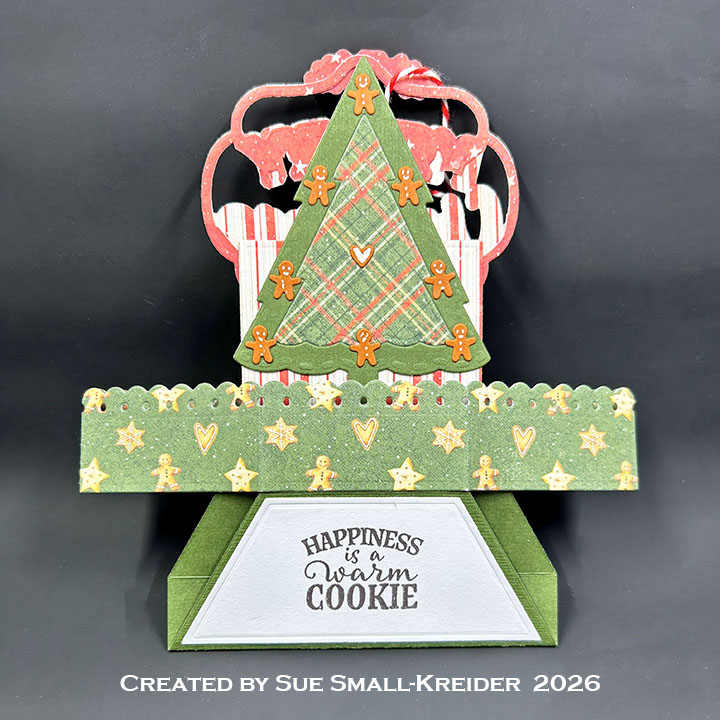
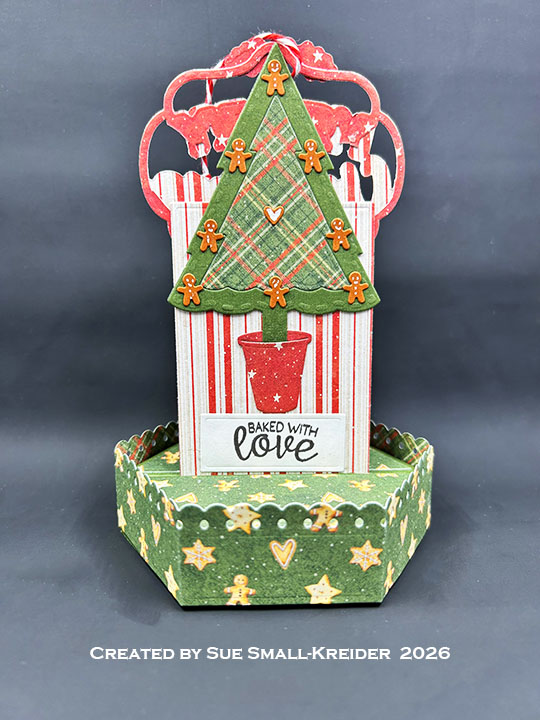
Christmas Tree: From the Christmas Trees Pop Stand, cut one of the large tree die from green cardstock and another from decorative cardstock. Taking the inside tree of decorative paper and tape it from the back to a green tree frame. Glue the extra tree pieces to the back of the taped one to form a double sided tree. Add gingerbread cookies to tree that are cut from the OvenPop-Up set and decorated with a white gel pen. Cut a pail from red using the pail from the Adirondack Chair Pop-Up set. Glue tree inside the pail’s edge. (Watch installment of tree in video above.)
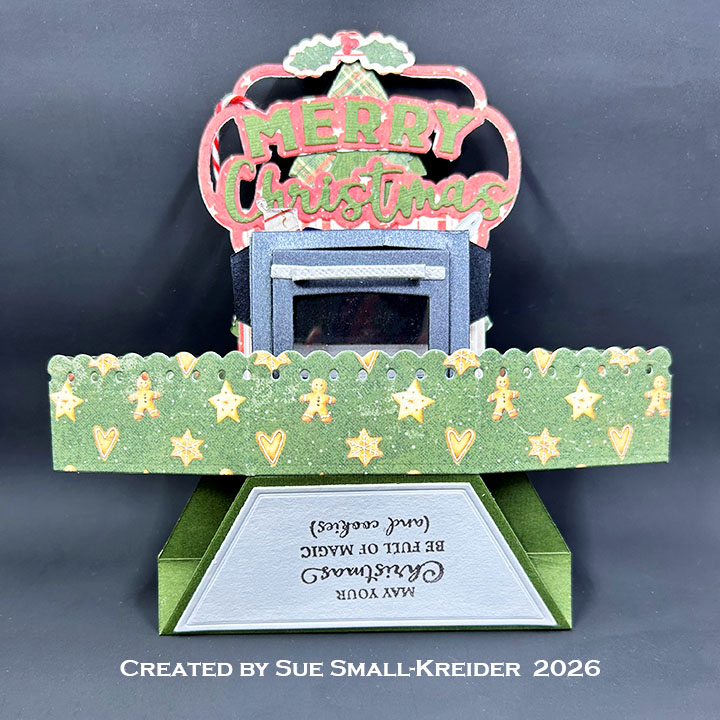
Sentiments: The tree sentiment “Baked with love” is from the Sweet Treats stamp set and stamped on the white rectangle decorator piece with brown ink. The bottom stamped sentiments come from Christmas Wishes and Sweet Treats stamp sets. “Merry Christmas” is die cut using the Merry Christmas Lorna Add-Ons with the base piece cut twice from red decorative paper and the letters cut once from green cardstock. (Watch the video above to see how the die-cut sentiment is installed. For an assembly video of the Lorna Add-ons click here and watch video at the bottom of the linked page.)
Envelope: The card is about 6 1/4 x 6 1/4-inches so it would require a custom made envelope or, if the striped wall piece was shortened by 1/4-inch, it would fit into a catalog envelope of 6×9-inches.
Disclaimer: Karen Burniston products are provided free of charge by the manufacturer for review and use. All other items were personally purchased. Compensated affiliate links used where or when possible, meaning I will receive a small percentage commission from these manufacturers at no cost to you. This will allow me to add more content to my YouTube channel and help out a lot. Thank you.
Watch the process video to see how I made this card.
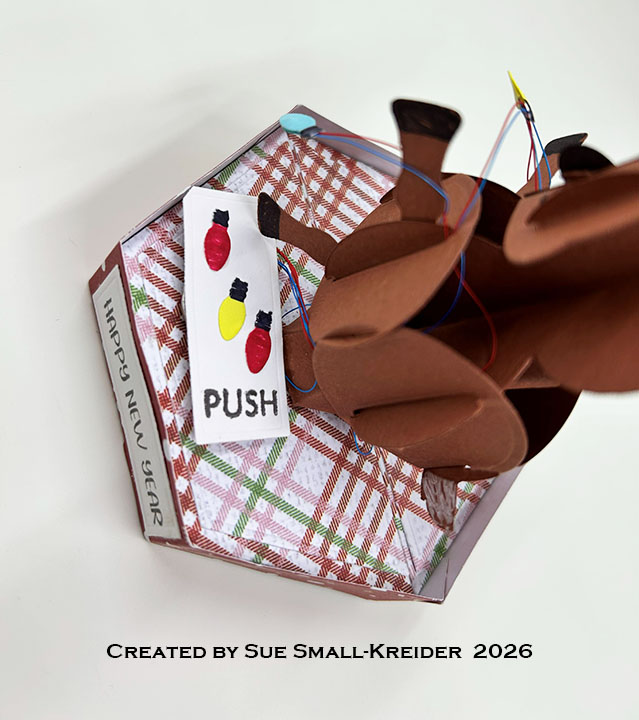
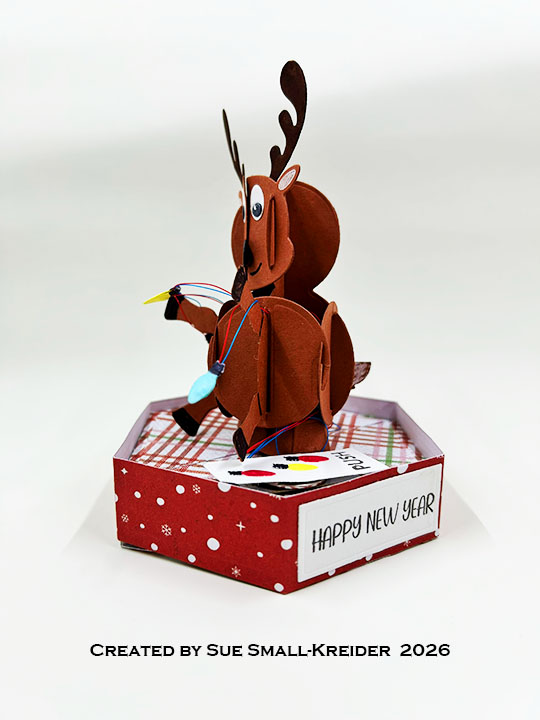
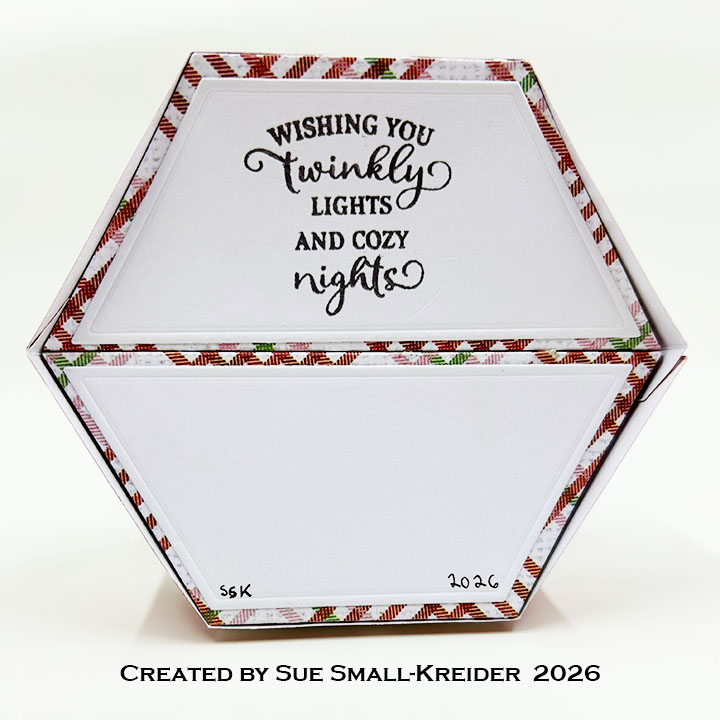
Pop-Up Stage Base: (Watch the assembly video at the bottom of the linked page for Stage Pop-Up.) Cut two base pieces and two side pieces from the Stage Pop-Up die set from decorative cardstock. Cut three decorative rectangles from the Stage Pop-Upset in white. Cut two of the base polygon decorative pieces from white cardstock and two decorative papers. Save the white pieces to be stamped with a sentiments before gluing to the bottom and side of the stage base.
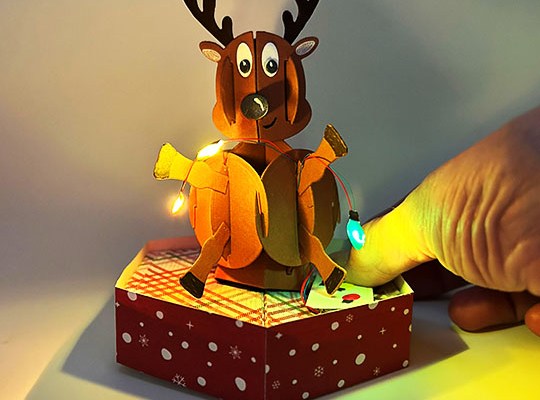
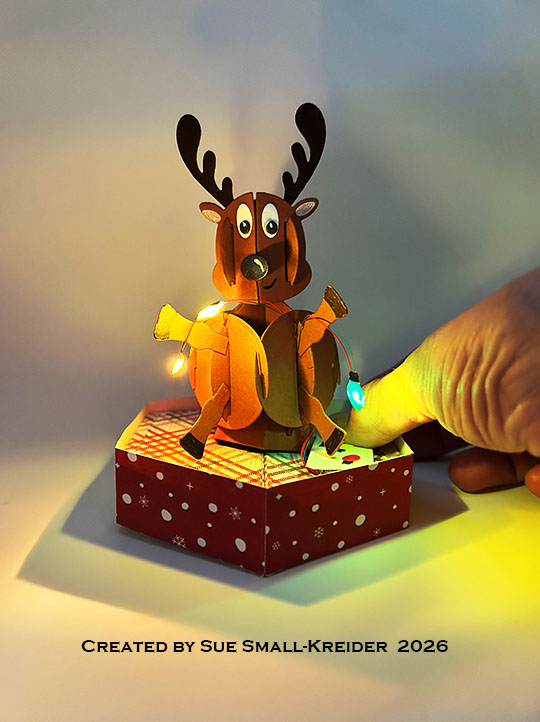
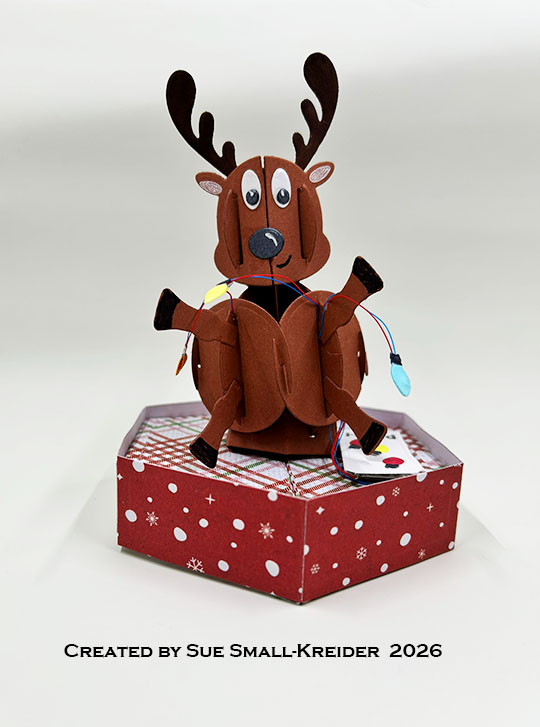
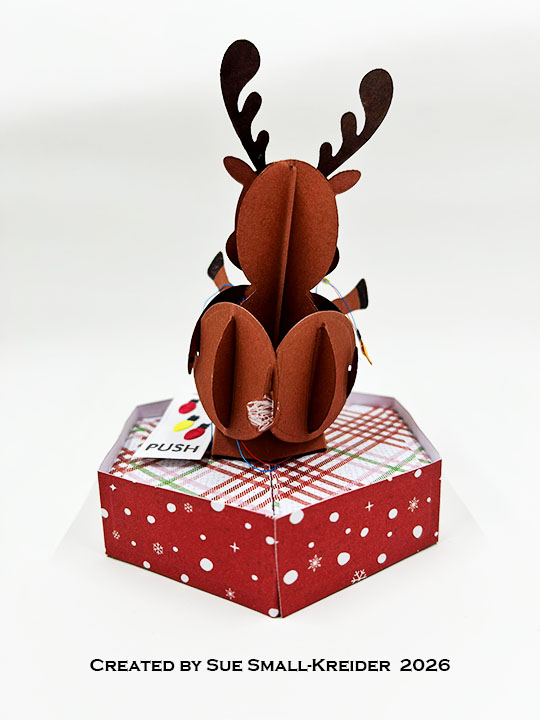
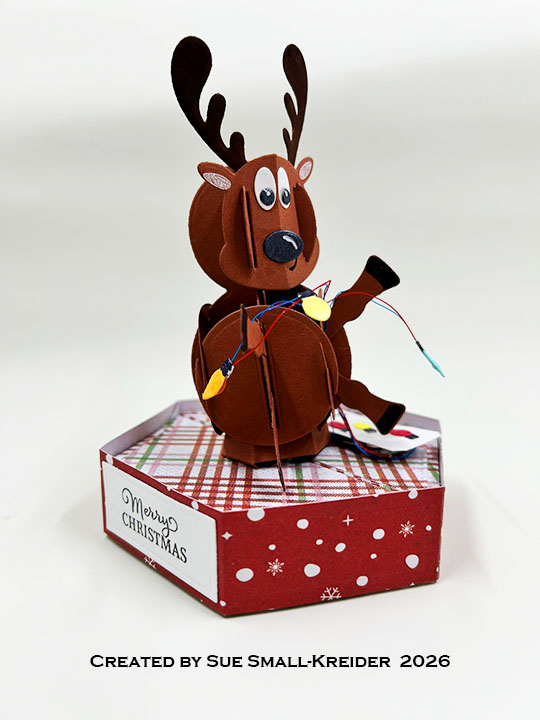
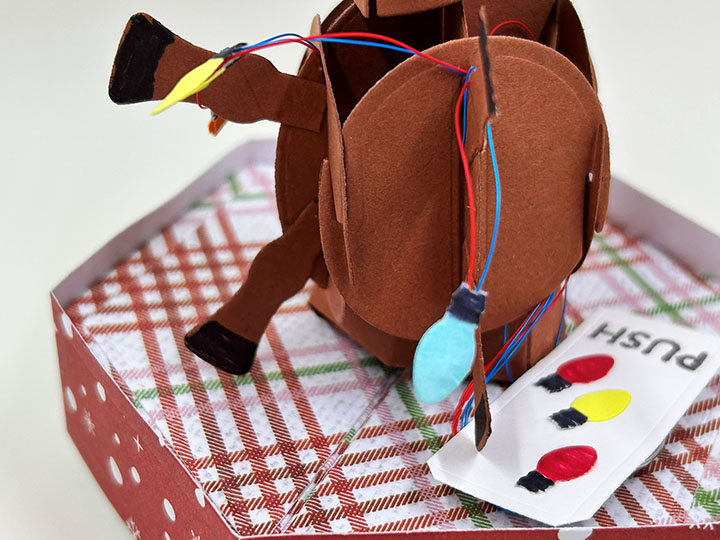
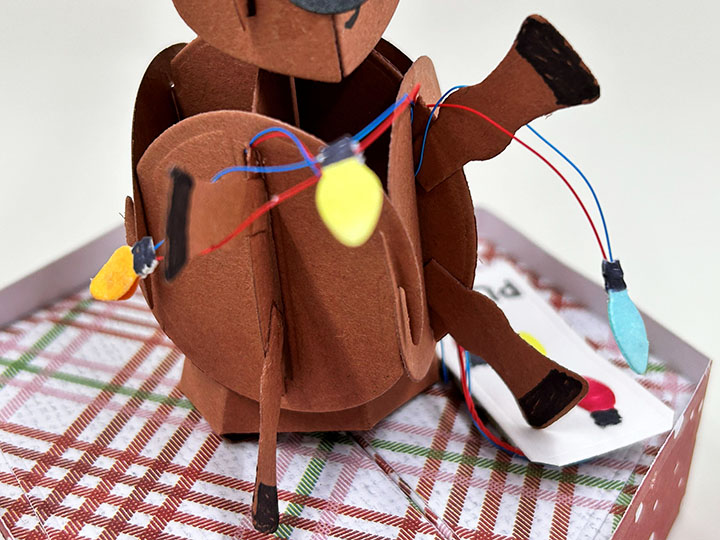
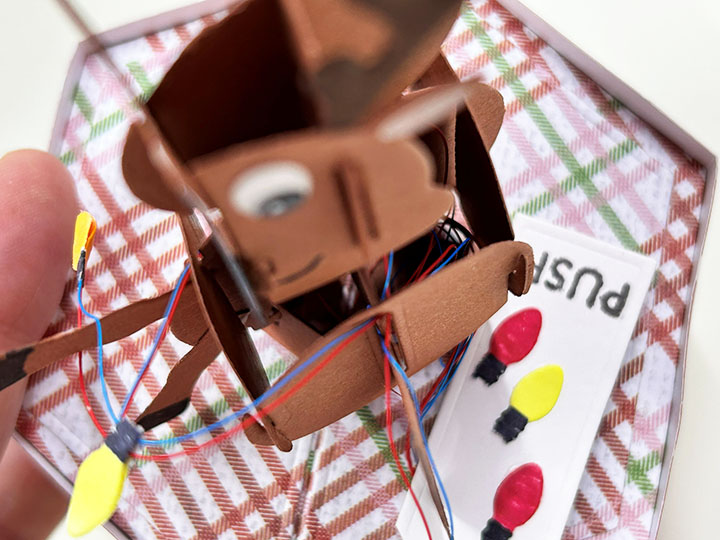
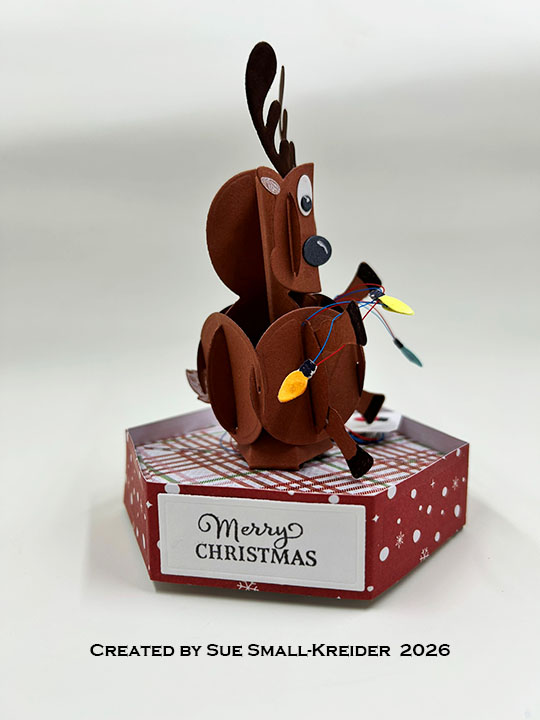
Reindeer Pop-Up: (Watch the assembly videos at the bottom of the linked pages for Snowman Pop-Up and Penguin and Reindeer Snowman Add-Ons and the video above for alterations to the installation of the reindeer.) Cut from brown cardstock two set of the circle sides, one set of snowman body pieces, and one base strip from the Snowman Pop-Up. From the Penguin and Reindeer Snowman Add-Ons set, cut one set of antlers, two sets of legs, one set of face pieces and one tail from brown cardstock. From white and black cardstock cut nose and eye pieces. Use the die stencil features to color leg hooves, and add highlights to eyes and nose. Assemble reindeer and add to stage base as shown in video above.
Lights: From the Penguin and Reindeer Snowman Add-Ons set, cut two sets of light bulbs from white and color with markers. Use one set of Pear Blossom Press EZ Lights which are available from the KB Riley on-line shop. (Watch the video above for how the lights were added to the reindeer.)
Sentiments: The bottom sentiment is stamped with brown ink and comes from Christmas Wishes as is the side “Merry Christmas.” the “Happy New Year” is from Season of Cheer.
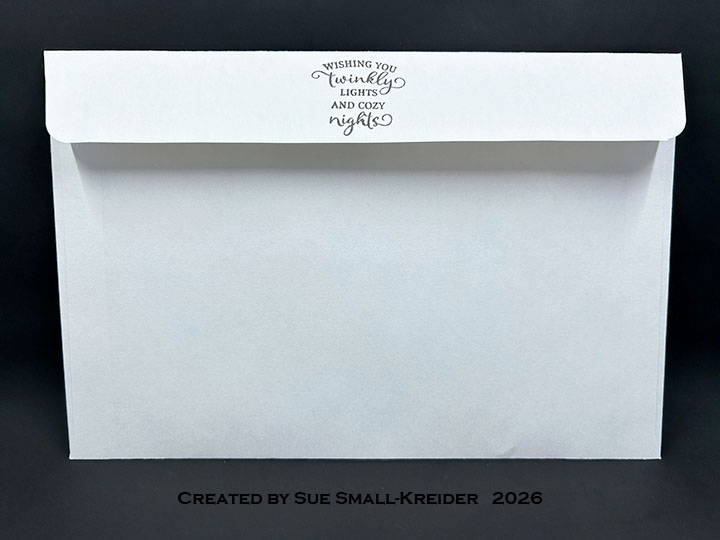
Envelope: The card is about 5 3/4 x 6 1/4-inches so it fits into a catalog envelope of 6×9-inches with the Twinkly Lights sentiment stamped on its back flap.
Disclaimer: Karen Burniston products are provided free of charge by the manufacturer for review and use. All other items were personally purchased. Compensated affiliate links used where or when possible, meaning I will receive a small percentage commission from these manufacturers at no cost to you. This will allow me to add more content to my YouTube channel and help out a lot. Thank you.
Materials Used:
Dies
Karen Burniston in cahoots with Riley and Company – Stage Pop-Up – 1332
Watch the process video to see how I made this card.
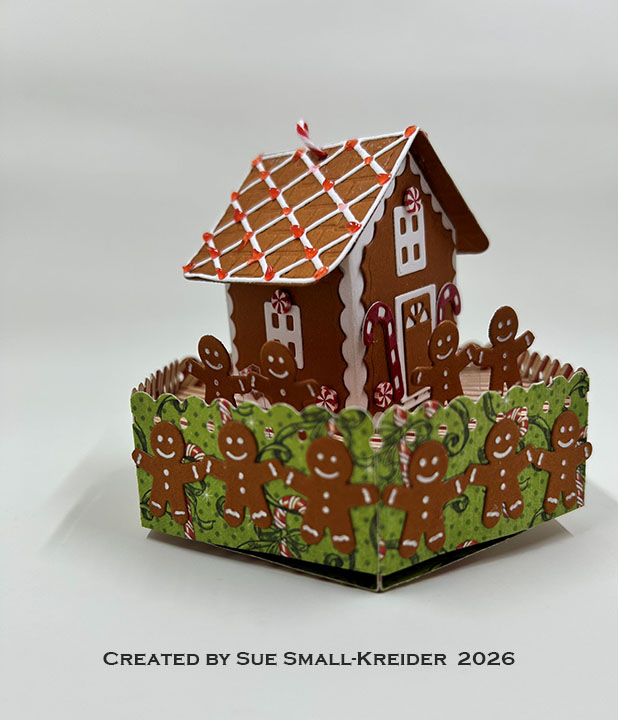
Pop-Up Stage Base: (Watch the assembly video at the bottom of the linked page for Stage Pop-Up.) Cut two base pieces from the Stage Pop-Up die set and two scalloped side pieces from the Party Stage Add-Ons set. Cut one decorative rectangle from the Stage Pop-Upset. Cut two of the base polygon decorative pieces from white cardstock from the same set. Save the white pieces to be stamped with a sentiments before gluing to the bottom and side of the stage base.
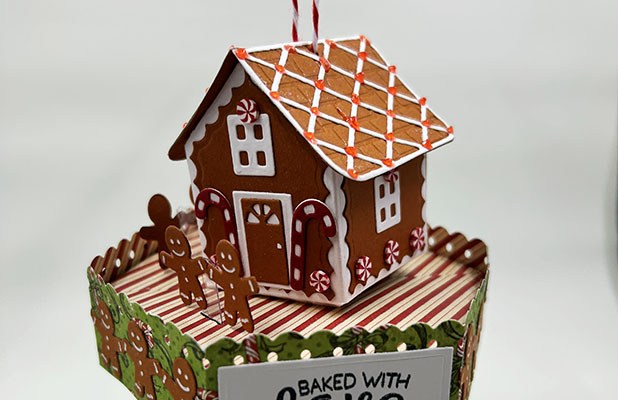
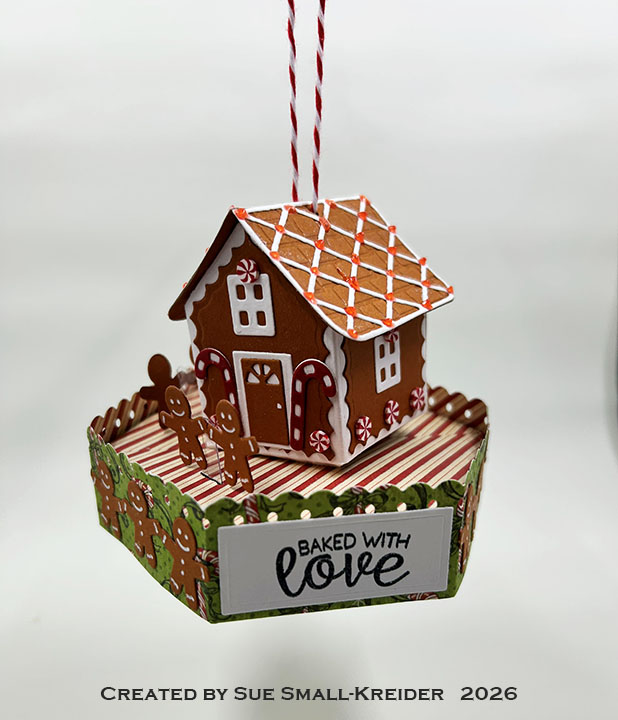
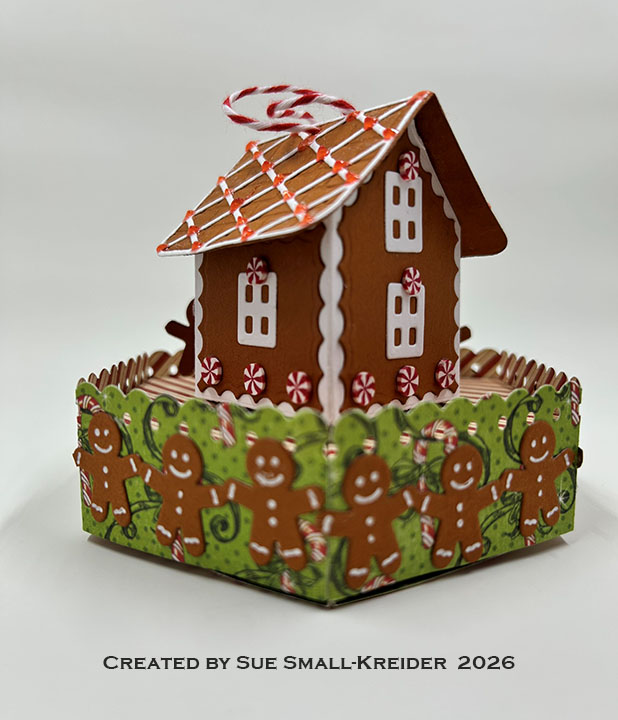
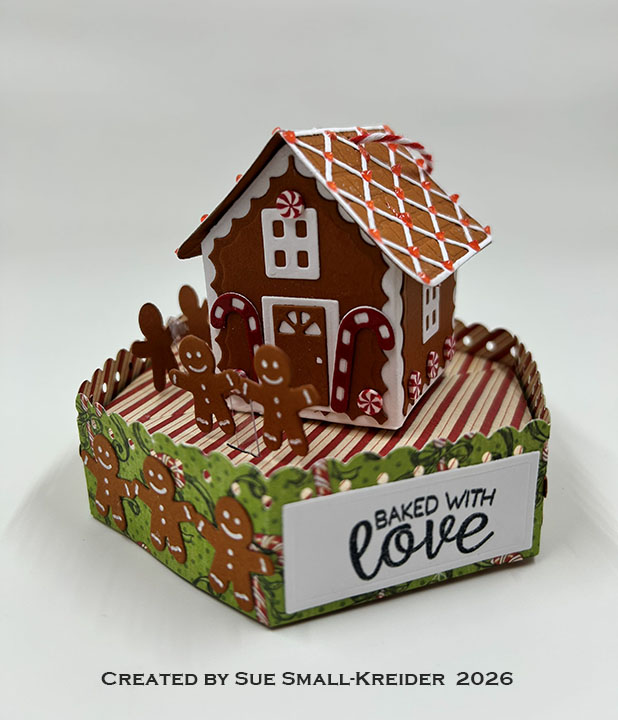
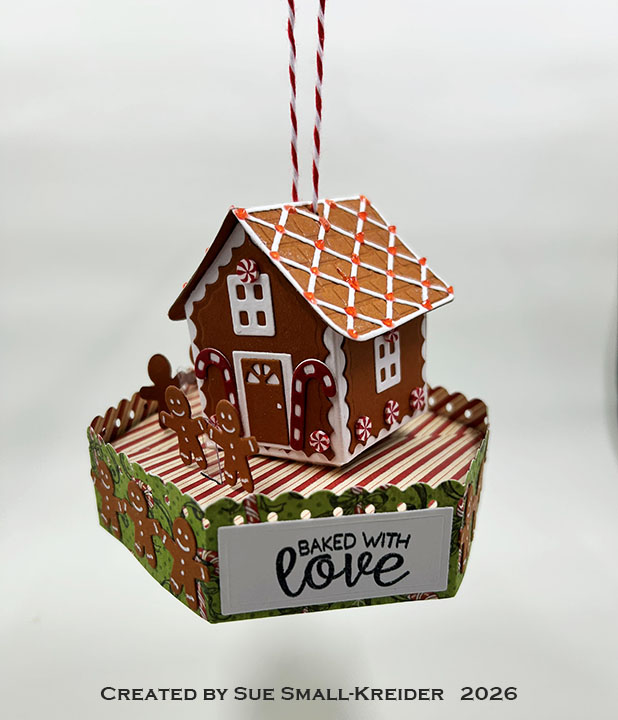
Tiny House Gingerbread Pop-Up: (Watch the assembly videoes at the bottom of the linked pages for Tiny House Pop-Up and Gingerbread Tiny House Add-Ons.) Cut one house base from white, one roof and one door from brown using the Tiny House Pop-Up die set. Cut the two scalloped gingerbread house pieces twice from brown and five windows, two lattice roof pieces and one door rectangle from white using the Gingerbread Tiny House Add-Ons die set. With a glitter gloss brush marker, add shimmer to the edges of the white house piece (see video above) and to all the white window and door pieces. Assemble with glue as shown in the videos. The gingerbread-men are cut from the Christmas Borders 1 from brown cardstock with the features inked in using the stencil feature in the die with a white gel pen.The Candy Canes by the door comes from the Gingerbread Tiny House Add-Ons set with the red pieces cut from cardstock covered with clear packing tape to get some shine. The two different sized peppermint decorations are polymer clay embellishments that come with adhesive on their backs. The roof was the first piece assembled with the white lattice pieces glued on and then the strawberry Nuvo Jewel Drops added and allowed to dry for several hours before the roof was glued onto the house.
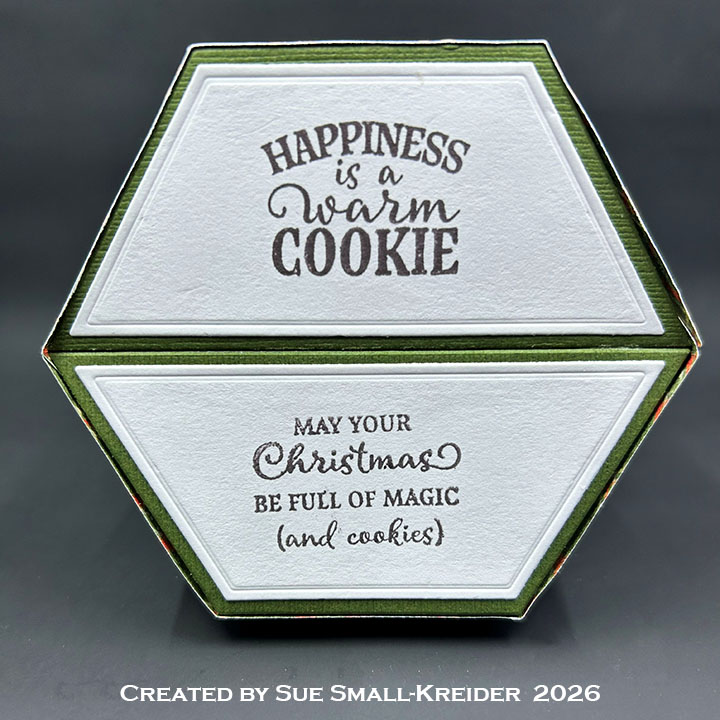
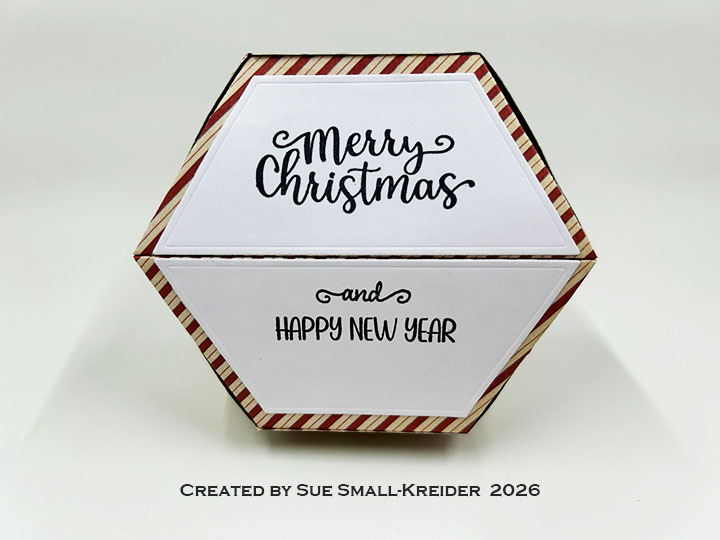
Sentiments: The side sentiment “Baked with love” is from the Sweet Treats stamp set and stamped on the white rectangle decorator piece with black ink. On the bottom side of the Stage Pop-Up, I stamped on the two white decorator panels with “Merry Christmas and Happy New Year” from the the Season of Cheer stamp set.
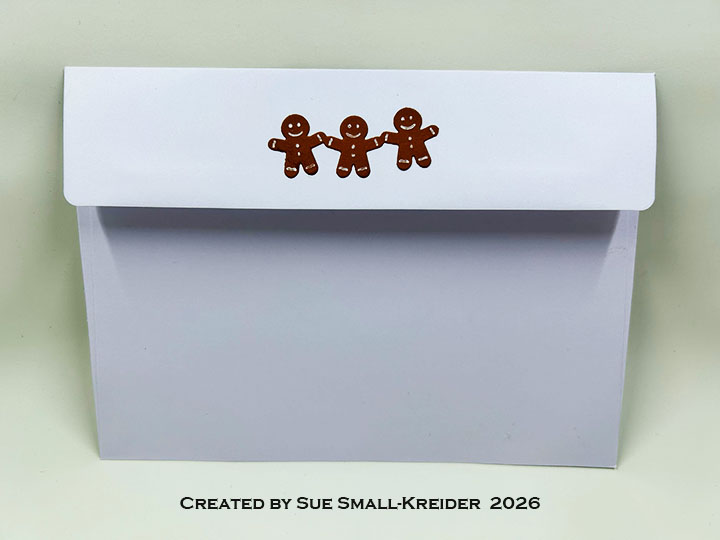
Envelope: The card fits into 5×7-inches A7 size envelope decorated with some gingerbread-men from the Christmas Borders 1 die set. .
Disclaimer: Karen Burniston products are provided free of charge by the manufacturer for review and use. All other items were personally purchased. Compensated affiliate links used where or when possible, meaning I will receive a small percentage commission from these manufacturers at no cost to you. This will allow me to add more content to my YouTube channel and help out a lot. Thank you.
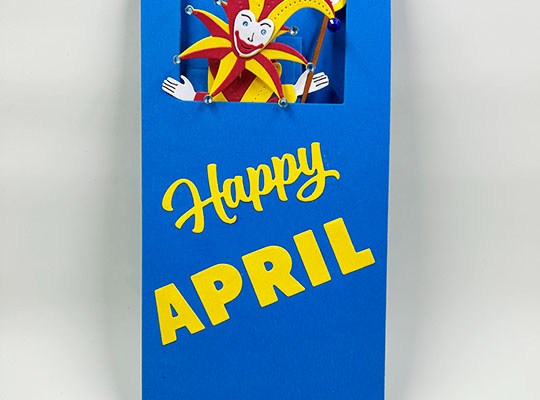
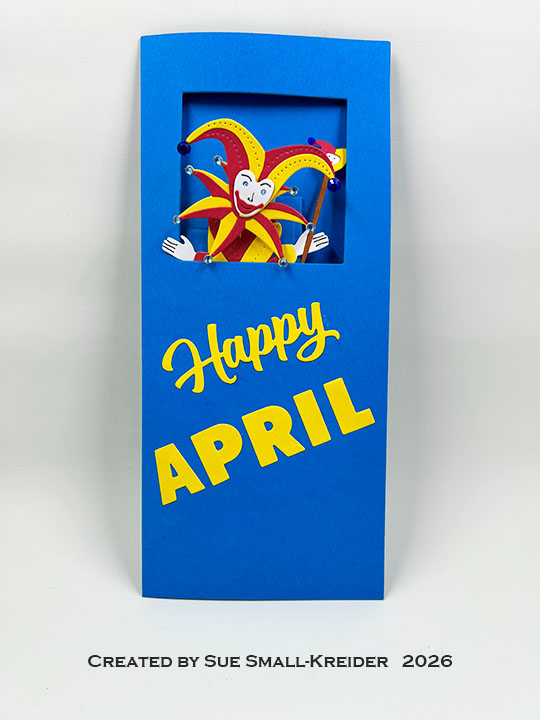
This card was made for Craft Roulette #312 whose parameters were: a slimline card, insects colors, April element and “twist(s)”in the corner.”. I created this 3.75×8.5-inch card using Karen Burnistonand Spellbinders dies.
Watch the process video to see how I made this card.
Cardbase: Watch the assembly video above for how to create the cardbase from a 7.5×8.5-inch rectangle. I used the 2.4-inch die from Karen Burniston’s Squares – Crosshatchset to cut the window in the card front centered about .875-inches from the top edge.
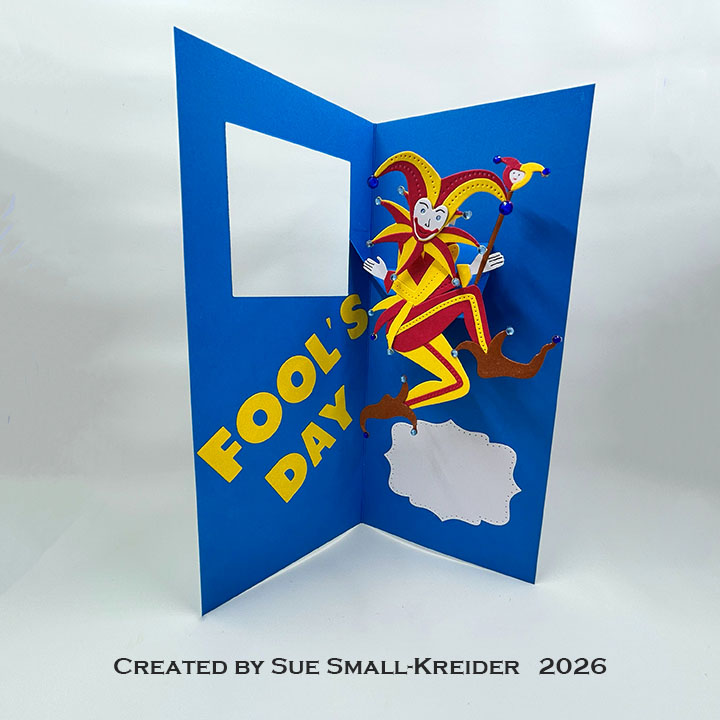
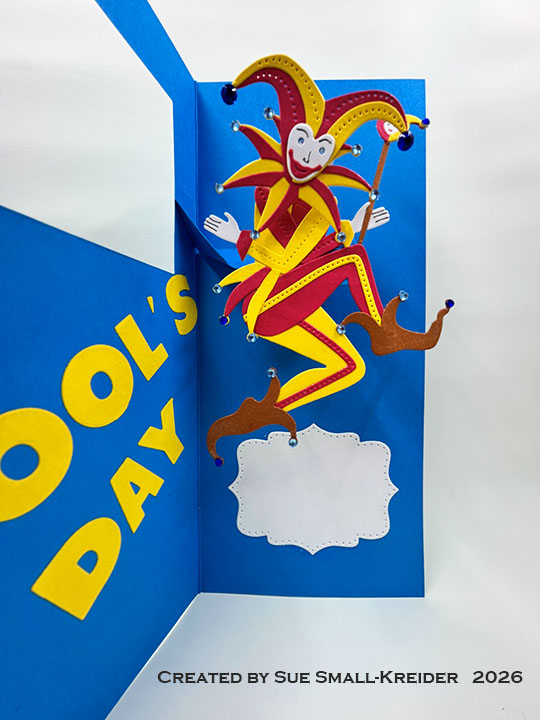
Fool/Jester: I used Spellbinders’ Wild Jokerdie set designed by Jaycee Gasper for my April Fool.I made him/her much like the package illustration, but cut all the dies twice – the clothing once in yellow and again in red – so I could mix up the clothing bits like a traditional jester’s costume. I cut down the middle of the main body piece and used scrap strips on the back to piece it together. I also place the collar with the head and hat on a wobble spring. Adhesive-backed gems were used as the round bells on the jester’s costume.
Pop-Up Mechanism: (Watch the assembly video at the bottom of the linked Katherine Label Pop-Uppage.) Cut one of the mechanism from cardstock matching the cardbase. added to card as shown in the video above. Trim excess bit of mechanism that shows thru the window. Glue the jester onto the pop-up box so that the hand and hat don’t interfere with the mechanism and the jester’s foot stays inside the closed card.
Sentiments: The “Happy” comes from Karen Burniston’s Happy Easterdie set while the remaining “APRIL FOOL’S DAY” was cut using her Alphabetset. The white label for a personal message comes from Katherine Label Pop-Up.
Envelope: The card fits into a #10 Business (9.5×4.25-inch) size envelope with the Funny Bones sentiment of “Handmade Cards because no one displays an email on the mantel” stamped in blue ink.
___________________________________
Thank you for experiencing this blog post. I hope this inspires you and makes you smile.
Disclaimer: Karen Burniston products are provided free of charge by the manufacturer for review and use. All other items were personally purchased. Compensated affiliate links used where or when possible, meaning I will receive a small percentage commission from these manufacturers at no cost to you. This will allow me to add more content to my YouTube channel and help out a lot. Thank you.
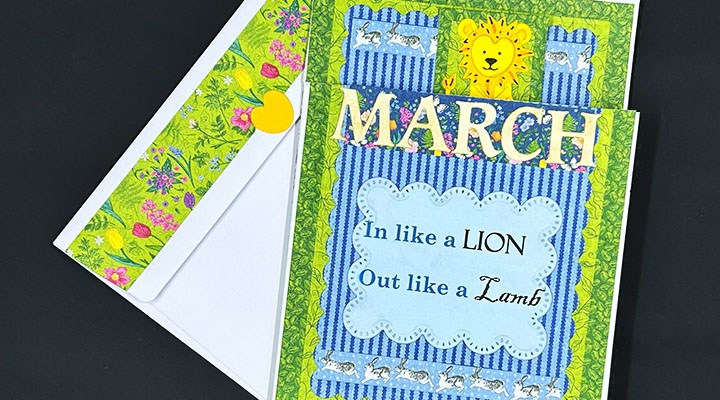
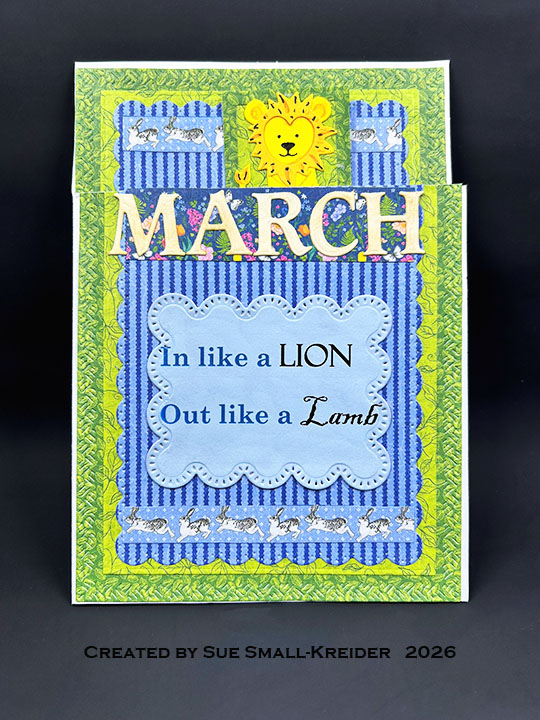
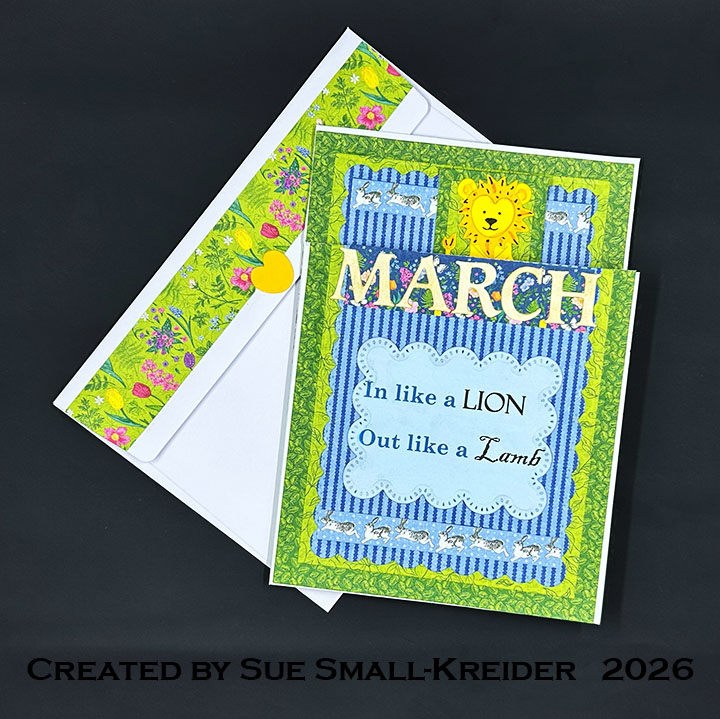
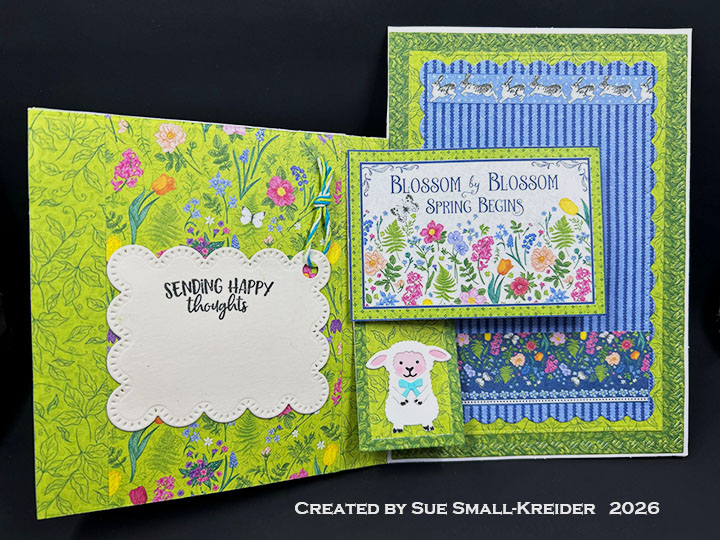
This card was made for Craft Roulette #311 whose parameters were: a card with a tag, aquarium colors, march/March element and twist(s). I created this 5×7-inch card using Karen Burnistonstamps and dies as well as Graphic 45 papers.
Watch the process video to see how I made this card.
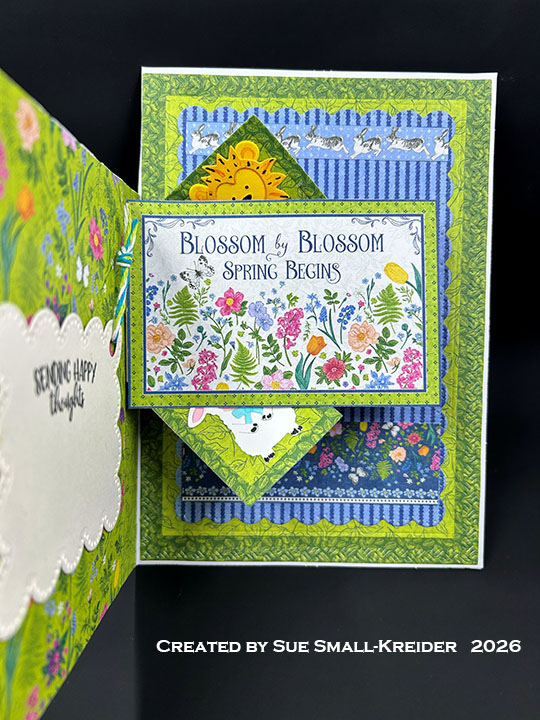
Cardbase: Watch the assembly video above for how to create the cardbase from a purchased 5×7 cardbase. I trimmed off 1.75-inches from the top of the card front. From the paper collection I used three different designs to cut the mats used on the front and inside of the card. Using the Rectangles and Labels – Crosshatch die set, I cut two of the largest crosshatch border die from dark green, two of the largest plain die from light green and the scalloped rectangle from blue. From the green rectangles I used the medium plain rectangle die to cut out the centers for use elsewhere in the card.The paper collection has a sheet of borders that I cut apart and used to decorate the card.
Lion and Lamb: Watch assembly videos at the bottom of the linked pages for the Chicken, Pig and Lamb and the Monkey and Lion die sets. I used markers to add dimension and texture to the animals.
Pop N’ Swap Mechanism: (Watch the assembly video at the bottom of the linked Pop N’ Swappage.) Cut one of the mechanism from a light to medium weight cardstock. Using the two small rectangle dies in the Pop N’ Swap, cut two of the large die from light green and another two using the smaller die inside the larger die to cut frames of dark green. Assemble the framed rectangles with the lion and lamb as shown in the video above. Test placement of rectangles and trim as necessary before gluing the rectangles onto the mechanism arms.
Sentiments: The front sentiment of “March – In like a lion and Out like a Lamb” was originally from the Farmer’s Almanac. I die cut the word “MARCH” using a retired Spellbinder’s Font One – Upper Case and digitally created the rest of the sentiment and then die cut it out using the scalloped edge rectangle die in the Pop N’ Swap die set. Inside, a journaling card was used from the Graphic 45 Spring Is In The Aircollection pack for the “Blossom by Blossom, Spring begins.” The tag was cut using the same die as on the card front with a stamped sentiment of ” Sending Happy Thoughts” from Karen Burniston’s Stage Scenes stamp set. I used a hole punch to have a spot to thread some baker’s twine through to make a tag.
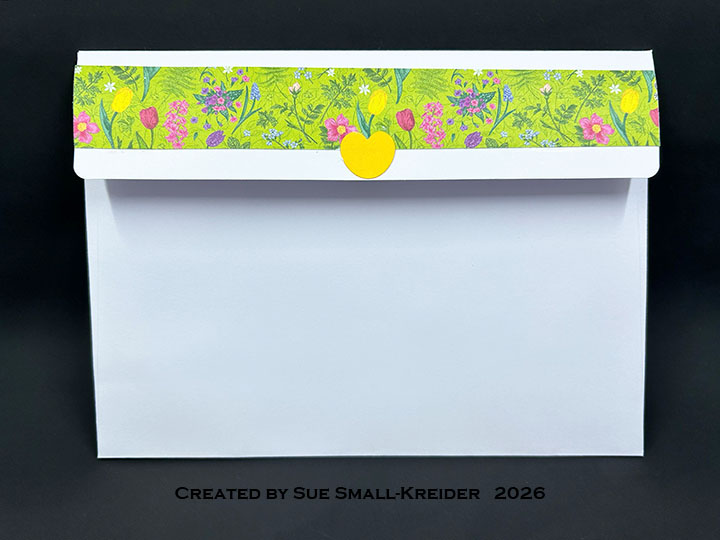
Envelope: The card fits into an A7 (5×7-inch) size envelope with a strip of decorative paper and leftover heart on the back of the envelope.
___________________________________
Thank you for experiencing this blog post. I hope this inspires you and makes you smile.
Disclaimer: Karen Burniston products are provided free of charge by the manufacturer for review and use. All other items were personally purchased. Compensated affiliate links used where or when possible, meaning I will receive a small percentage commission from these manufacturers at no cost to you. This will allow me to add more content to my YouTube channel and help out a lot. Thank you.
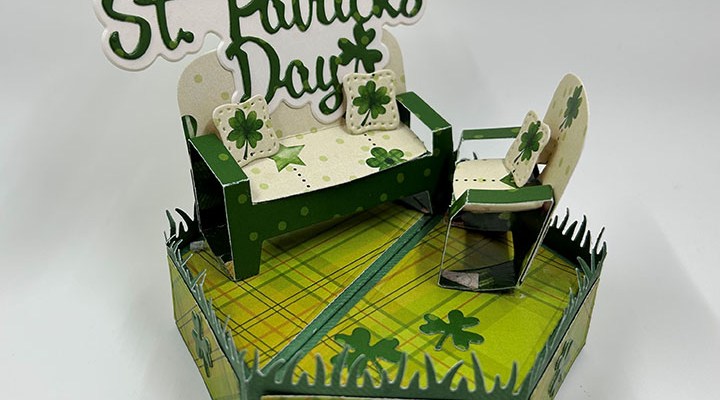
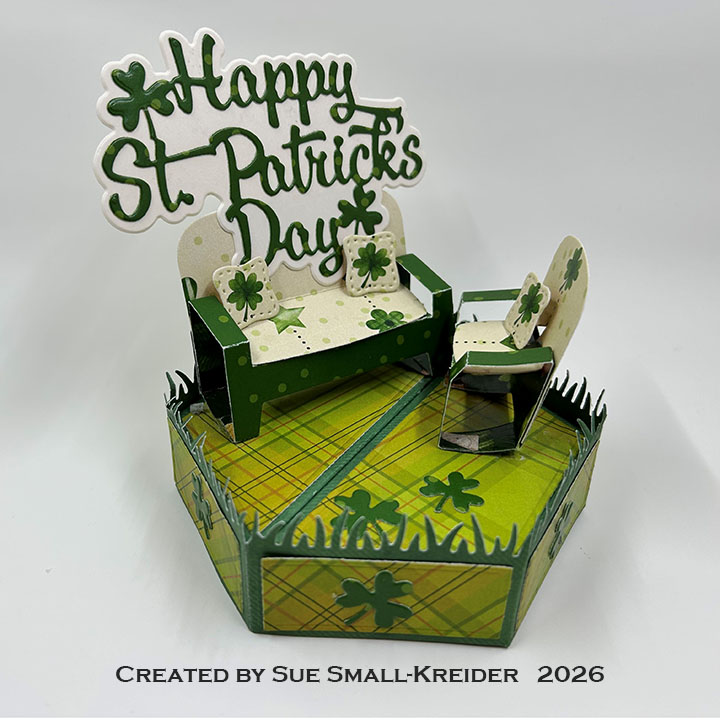
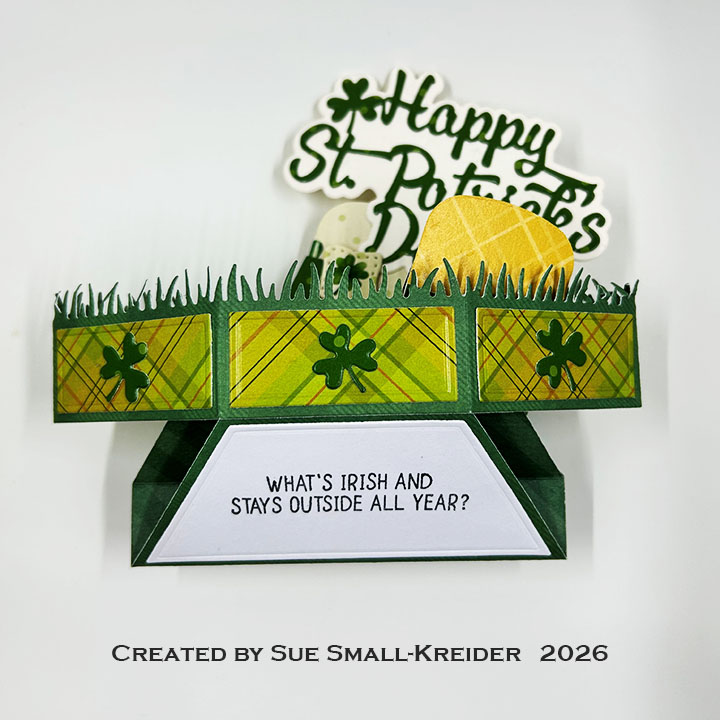
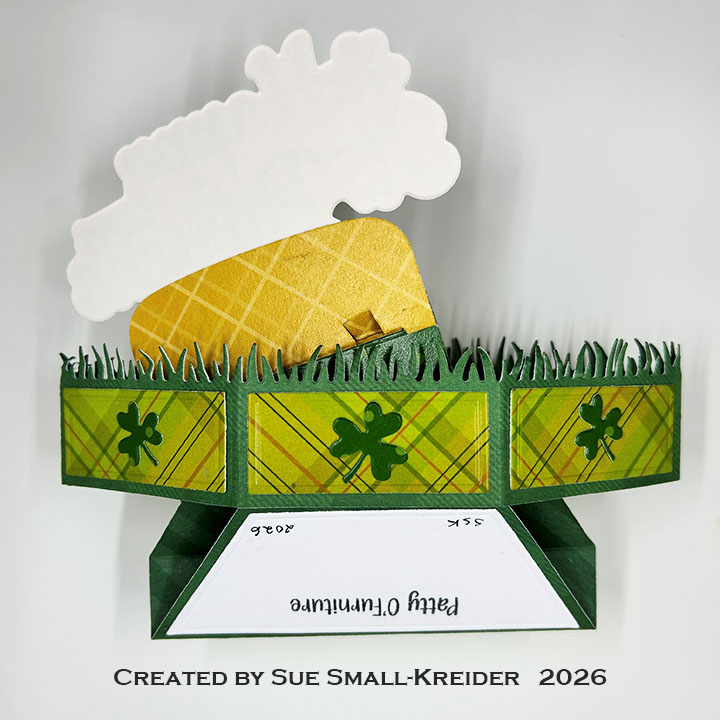
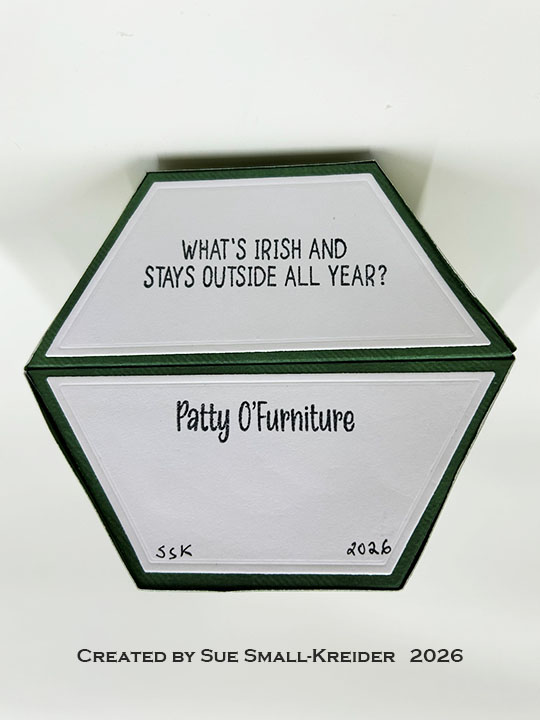
When I saw this Funny Bones sentiment (scroll down to see the joke), I immediately thought of Karen Burniston’s Family Room Pop-Up dies that would make some fun patio furniture using Karen’s new Stage Pop-Up as a base.
Pop-Up Stage Base: (Watch the assembly video at the bottom of the linked page for Stage Pop-Up.) Cut two base pieces from the Stage Pop-Up die set and two grassy side pieces from the Grass Stage Add-Ons set. Cut six decorative rectangles from the Stage Pop-Upset. Cut two of the base polygon decorative pieces from patterned cardstock and two more from white cardstock. Glue the patterned cardstock to the top of the bases and the save the white to be stamped with a sentiment before gluing to the bottom of the stage base.
Furniture Pop-Up: (Watch the assembly video at the bottom of the linked page forFamily Room Pop-Up.) Using shamrock patterned cardstock cut the sofa and chair seats and pillows. Cut the base piece from dark green cardstock. Assemble as shown in video. (Because I used a slippery coated patterned cardstock for my card. I had to use double-sided tape and glue dots to adhere my furniture.)
Sentiments: The top sentiment “Happy St. Patrick’s Day” is from the die set of the same name. On the bottom side of the Stage Pop-Up, I stamped on the two white decorator panels with the Funny Bones “ What’s Irish and stays outside all year?” on the upper piece and the answer “Paddy O’Furniture” on the lower piece so that when the card is folded you only see the question before you see the answer.
Envelope: The card fits into 6×9-inches catalog size envelope.
Disclaimer: Karen Burniston products are provided free of charge by the manufacturer for review and use. All other items were personally purchased. Compensated affiliate links used where or when possible, meaning I will receive a small percentage commission from these manufacturers at no cost to you. This will allow me to add more content to my YouTube channel and help out a lot. Thank you.
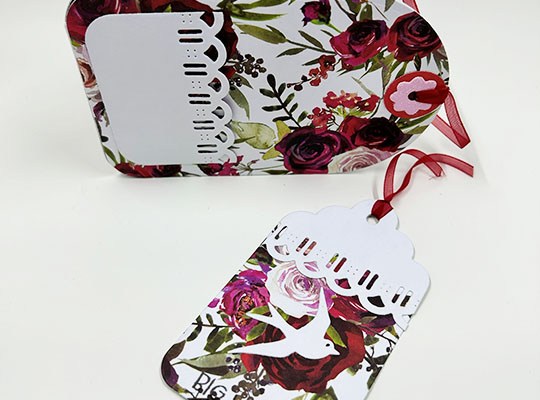
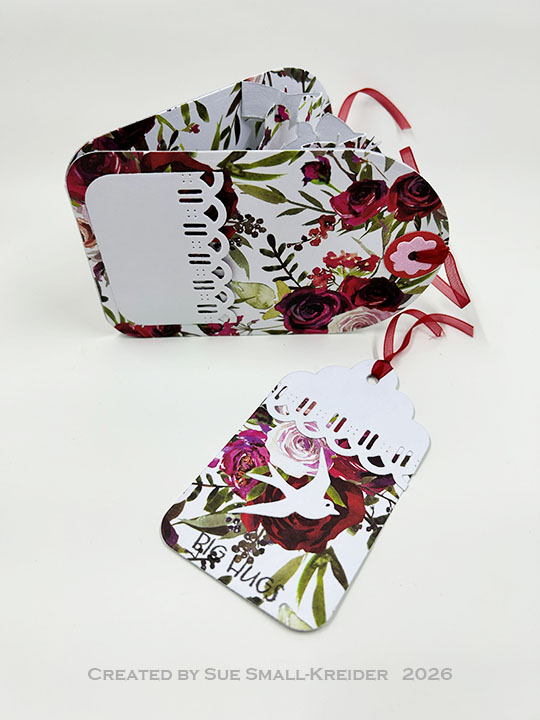
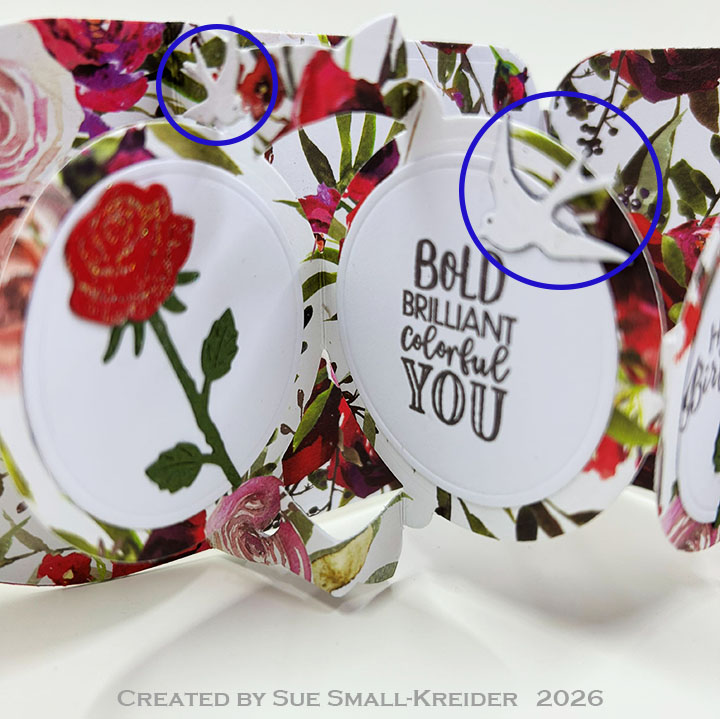
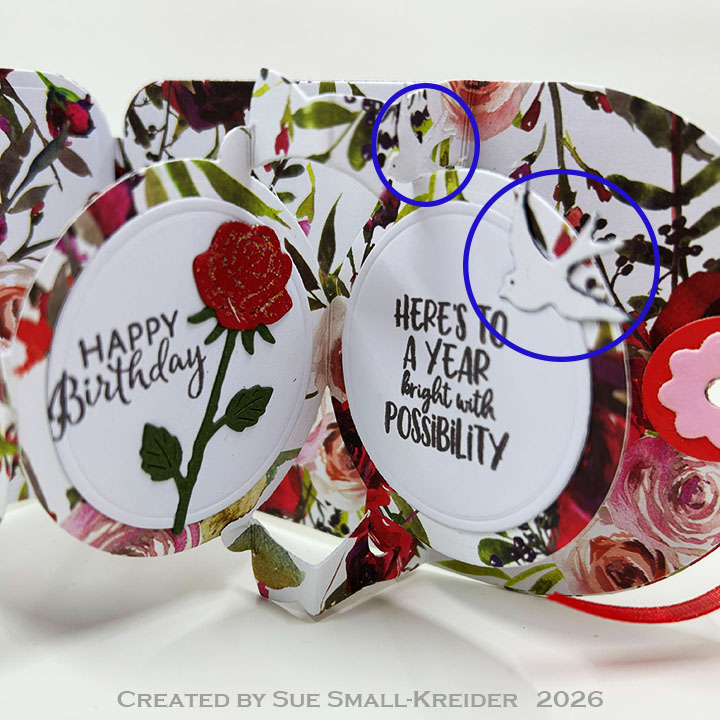
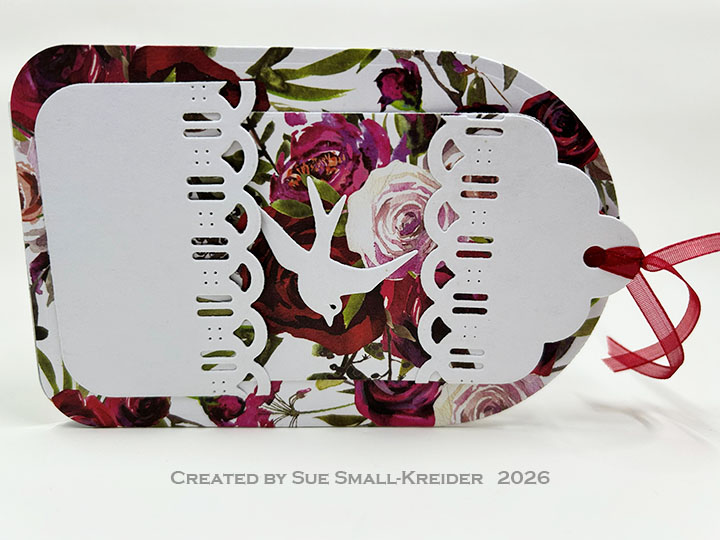
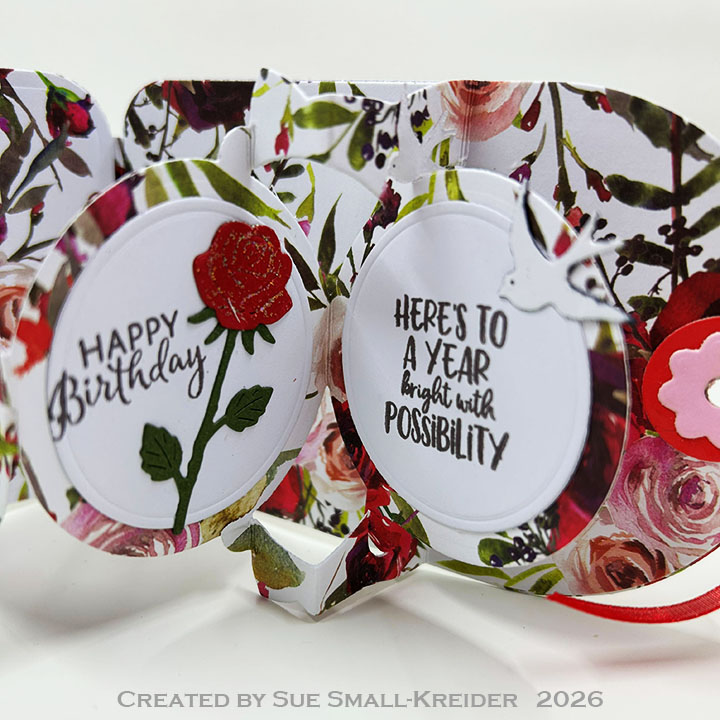
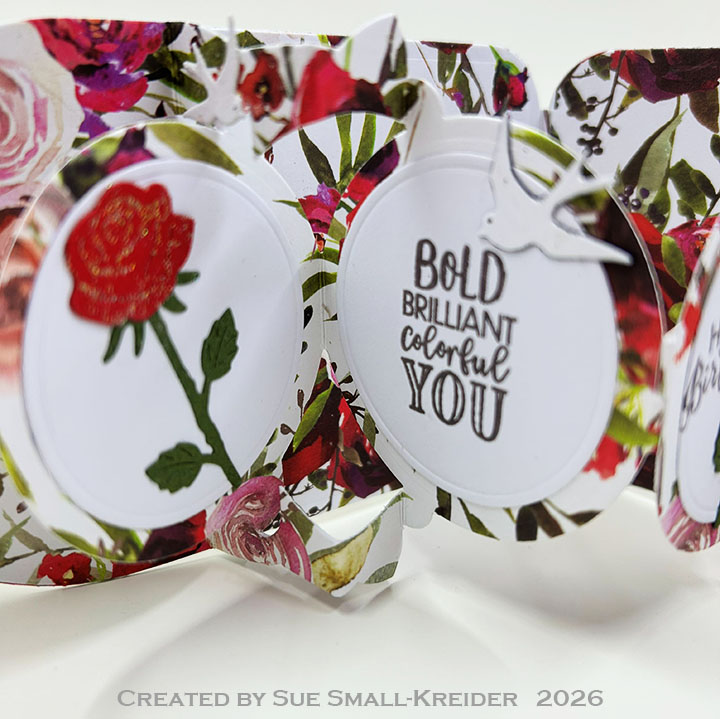
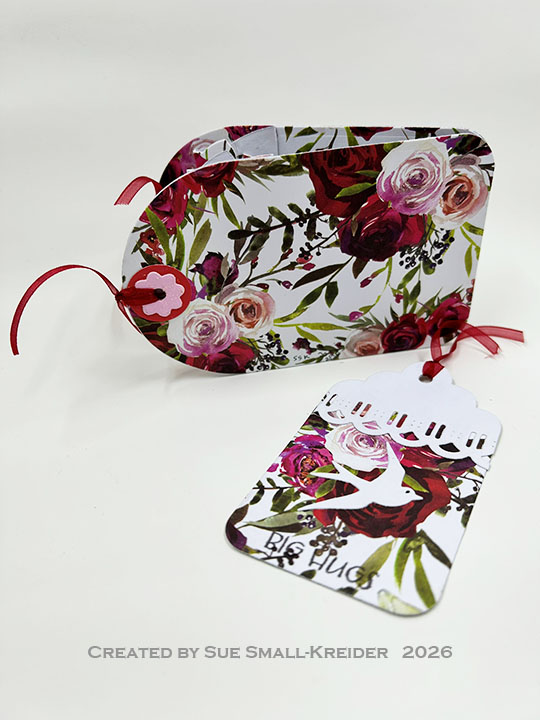
It’s time for the Karen Burniston Design Team March 2026 Challenge whose theme is For The Birds.I’ve chosen to make a Circle Tag Book Pop-Up card using rose patterned paper with bird embellishments from the Outdoor Scene die set and long stem roses from the Love Is In The Air Charms. There is also a tag bookmark feature to the card using the Topper Tags die set.
Watch the process video to see how I made this card.
Cardbase: Watch the assembly video at the bottom of the linked page for the Circle Tag Book Pop-Up. Cut four of the tag die from patterned paper. Cut one hinge piece and two of the pop-up mechanism piece from the same patterned paper. Cut four of the circles from white cardstock. Also from white cardstock, cut two each of the medium and small birds in the Outdoor Scene set. Cut from red and pink cardstock four each of the circle and flower hole protectors from the Circle Tag Book Pop-Up set. Follow the video above for the assembly of card and placement of small birds.
Bookmark: The bookmark and lacy pocket were made by cutting the smallest tag die in the Topper Tags set from patterned paper. The white trim was cut from the backside of a scrap of the patterned paper with the decorative edge die in the same set and trimmed with the smallest tag die. The pocket was made in a similar way, but using the next largest tag die to cut to size. The flying bird was cut from white cardstock using the largest bird die in the Outdoor Scene set.
Disclaimer: Karen Burniston products are provided free of charge by the manufacturer for review and use. All other items were personally purchased. Compensated affiliate links used where or when possible, meaning I will receive a small percentage commission from these manufacturers at no cost to you. This will allow me to add more content to my YouTube channel and help out a lot. Thank you.
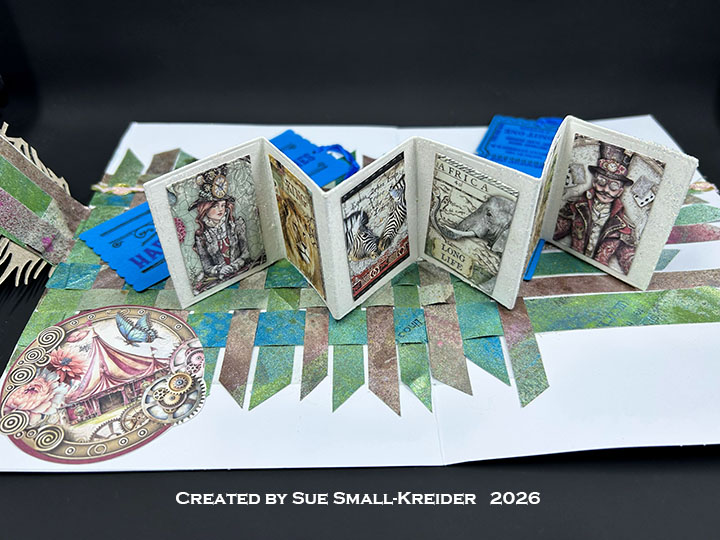
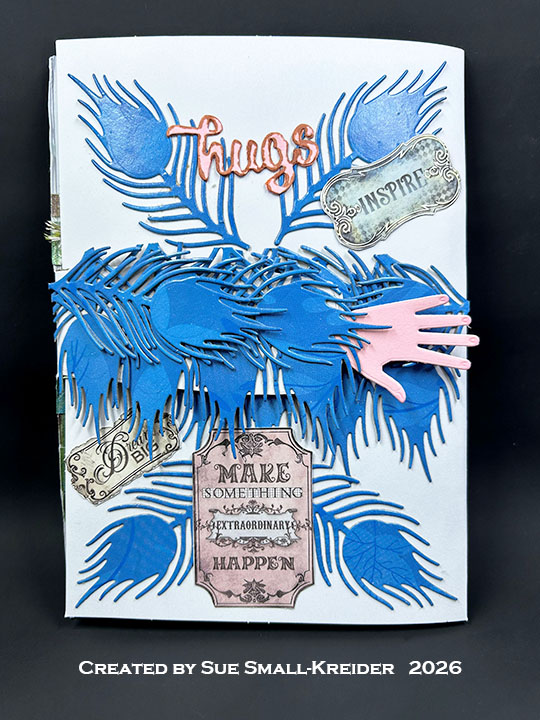
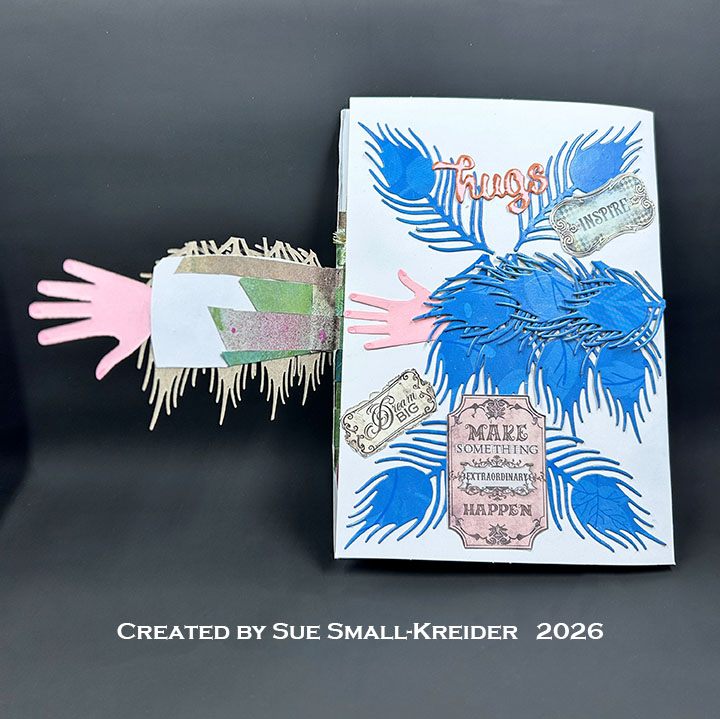
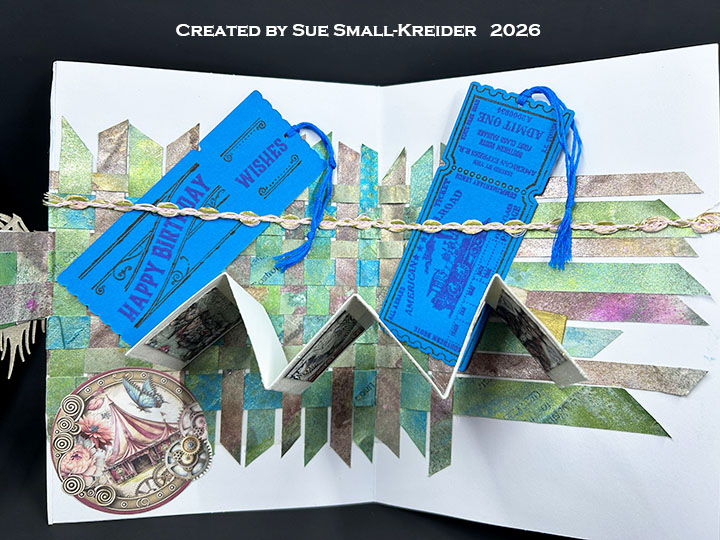
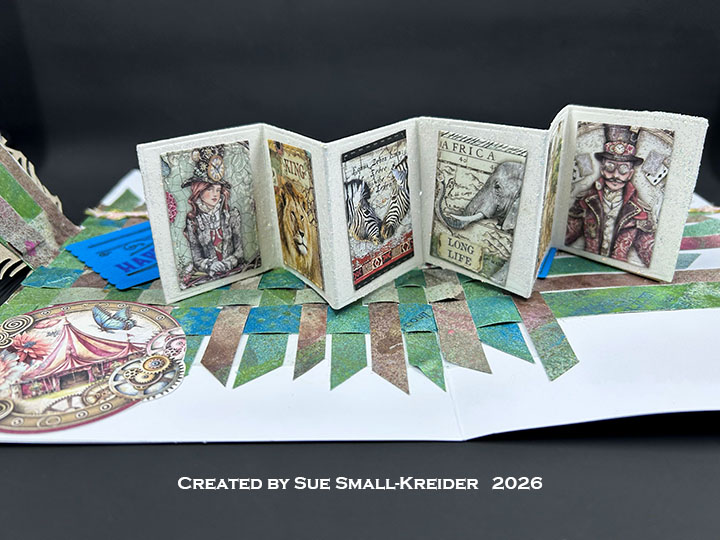
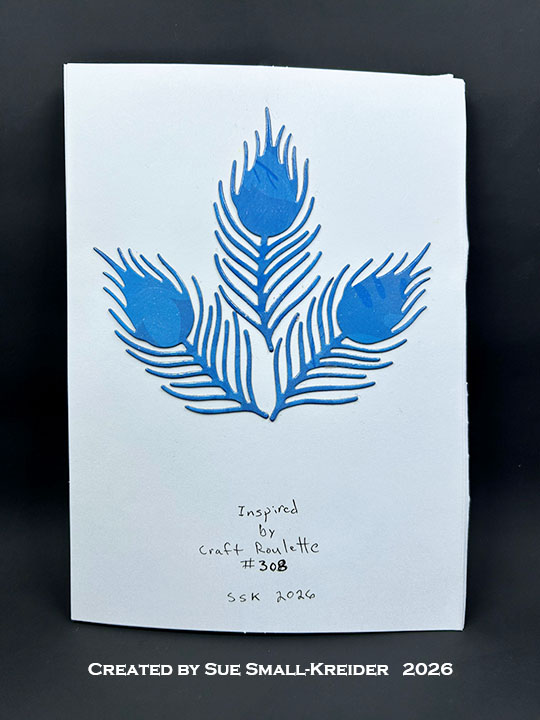
This card was made for Craft Roulette #308 whose parameters were: a card with a bookmark, circus colors, hug(s) element and feather(s)/(ing). I used dies from Karen Burniston and My Favorite Things to make this tri-fold, 5×7-inch pop-up birthday card.
Watch the process video to see how I made this card.
Cardbase: (Watch the video above for assembly instructions.) Using two purchase 5×7-inch cardbases, glue them together to form a tri-fold card.
Hugging Arms: Follow the video above to see how 14 of the feathers cut using Karen Burniston’s Peacock Add-Onsdie set were used with the two pink hands cut using My Favorite Thing’s Crafty Handsdie set.
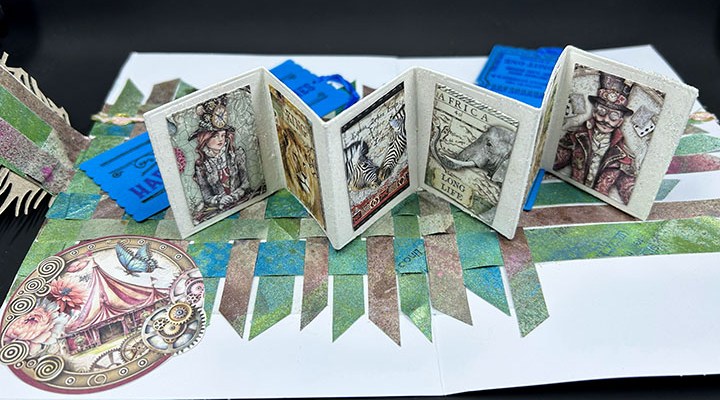
Photo Gallery Pop-Up: Cut two of the large pop-up gallery strips and their attachment triangle tabs from white cardstock using Karen Burniston’s Photo Gallery Pop-Updies. Cover the strips with glitter paste as described in the video above and spray the tabs with mica sprays. Allow to dry before assembling. Cut the images to glued to the photo gallery using the largest rectangle die in Karen Burniston’s Greeting Labels die set.
Sentiments: On the card front is “Hugs” which is die cut twice from pink using Karen Burniston’s Word Set 9 – Love, glued together and the edges inked in brown to match the other signs cut from the Stamperia paper collection – Master of Magic. The “Happy Birthday Wishes” on the two train tickets were stamped using Honey Bee Stamps Ticket To Ride set.(See more about the making of these bookmarks by clicking here.)
Disclaimer:Karen Burniston products are provided free of charge by the manufacturer for review and use. All other items were personally purchased. Compensated affiliate links used where or when possible, meaning I will receive a small percentage commission from these manufacturers at no cost to you. This will allow me to add more content to my YouTube channel and help out a lot. Thank you.