Groovy Vibes Tri-fold Junk Journal Birthday Card

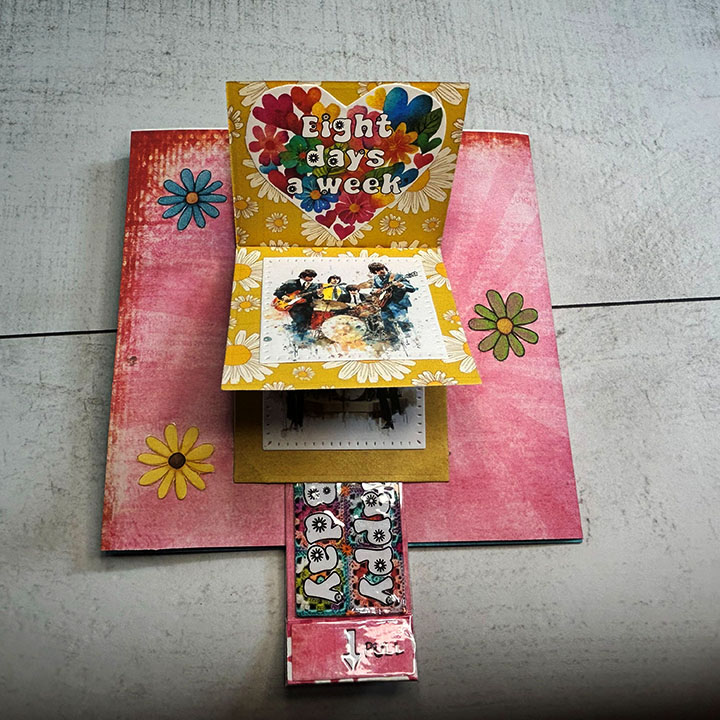
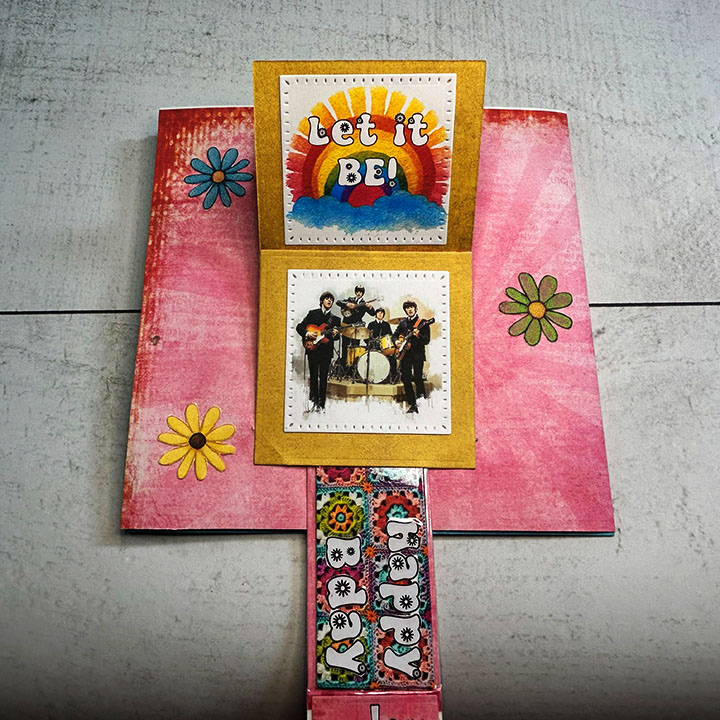
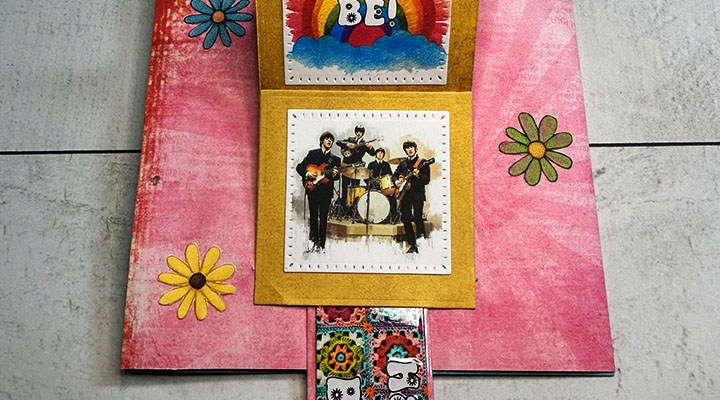
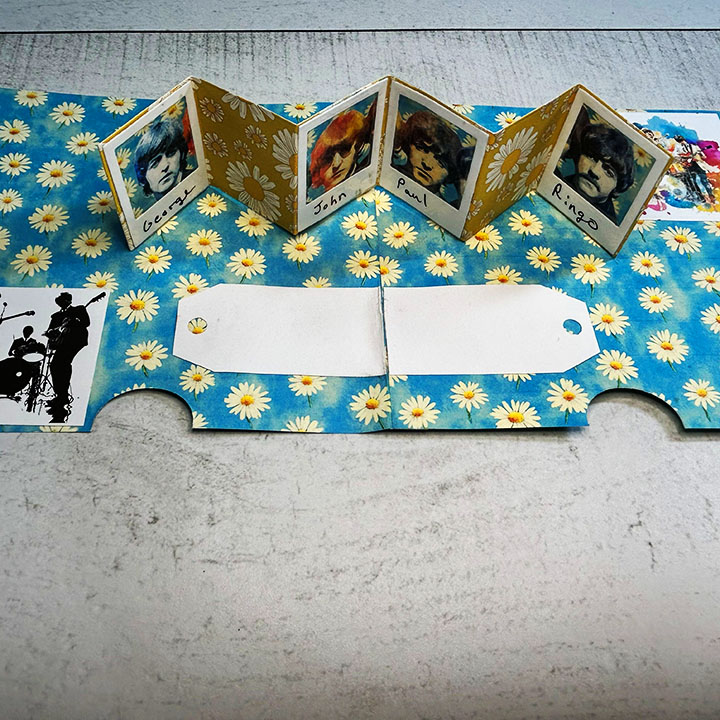
I’m here today with a pop-up junk journal birthday card full of the FAB FOUR using Relatively Thoughtful digital papers – A collection called Groovy Vibes.
Watch the process video to see how I use the paper collection.

Cardbase: I printed double-sided papers of the blue daisies with solid blue on the back and the crocheted granny squares with the pink sunburst on the back. from the blue daisies I cut a 6-inch square and a 6.5×6-inch rectangle. From the granny squares paper I cut a 6.5×6-inch rectangle. The two rectangles were scored and folded at a half-inch to form 6-inch squares with a tab. Follow the video above on how to glue the two tabbed pieces to the 6-inch square.
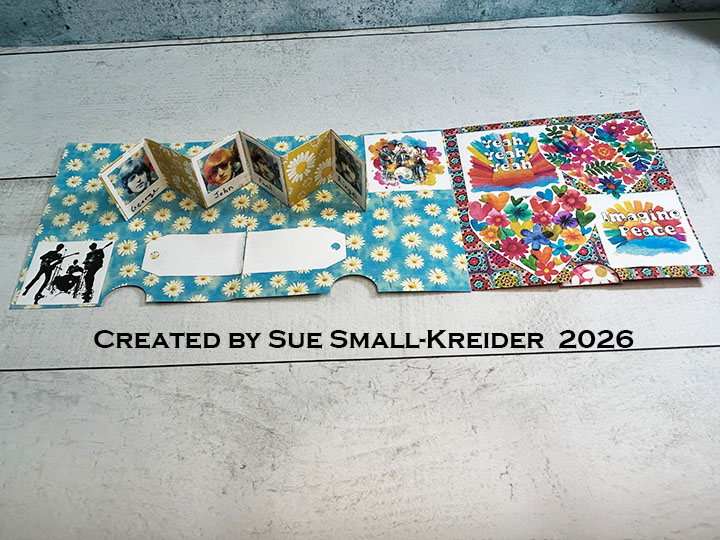
Waterfall Card Front: I printed double-sided paper of the pink daisies with the pink sunburst on the back, before cutting out the waterfall pieces using the Karen Burniston’s 1161 – Waterfall Card dies. Follow the directions in the video above to assemble. The Fab Four images were from the smaller images page of musicians while the song lyrics were from the larger rainbow page and the smaller hearts page.The square images were cut out using dies in the set. The title piece and birthday sentiment were fussy cut from the digital paper collection.
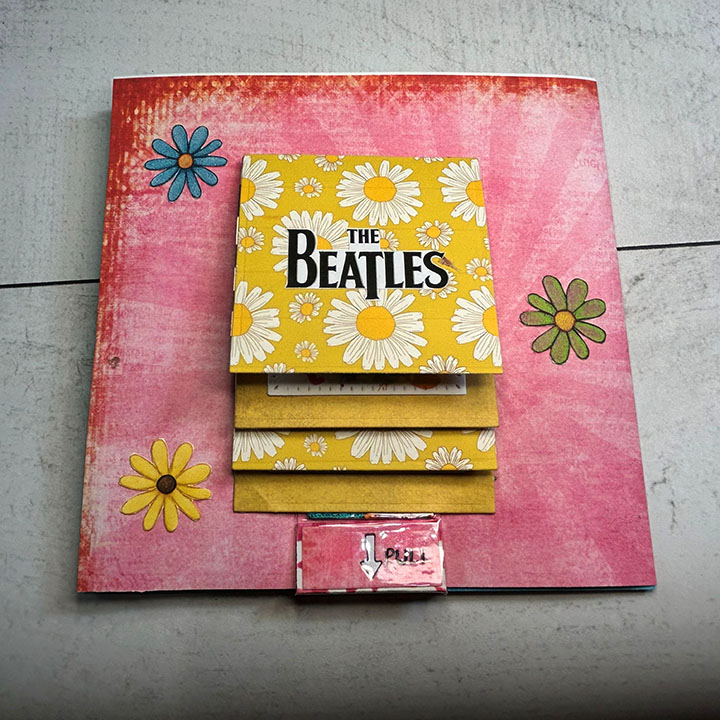
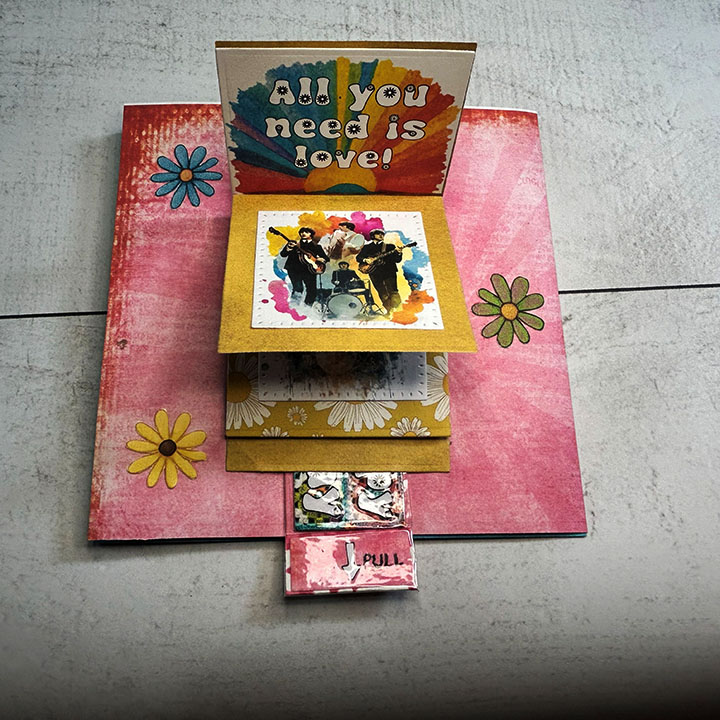
Photo Gallery Pop-Up: I used the Karen Burniston’s 1331 – Photo Gallery Pop-Up dies to create the pop-up gallery of head shots of the FAB Four. Follow the directions in the video above to assemble. The names were written on the white cardstock frames with a black fine-tipped marker before the clear packing tape was applied.
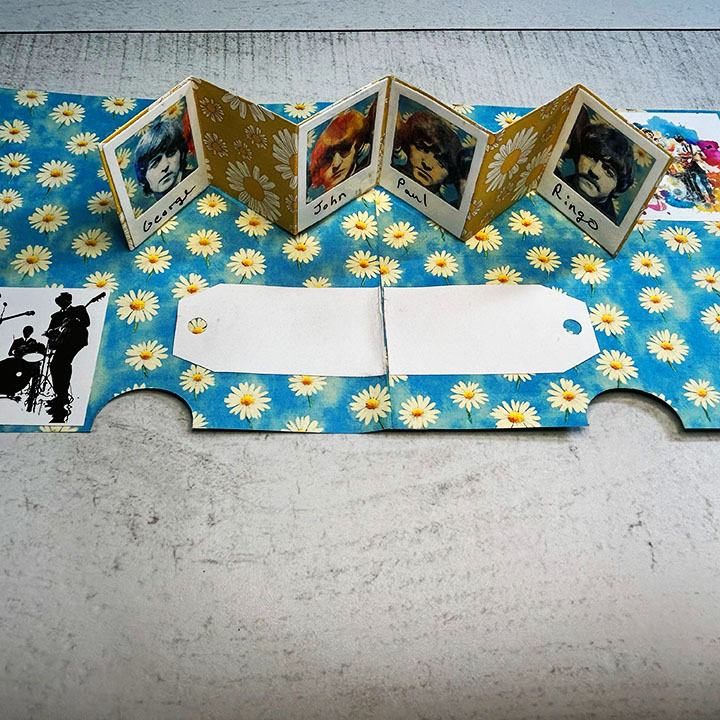
Sentiments: All the inside sentiments and images were hand-cut including the two white tags for a personal message.
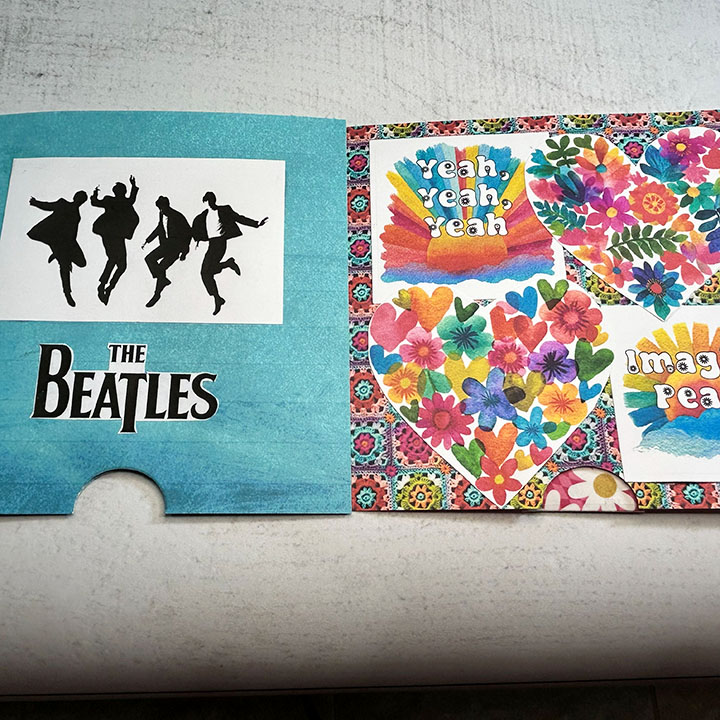
Envelope:  The card would need a custom envelope and because of its thickness, it would be best hand-delivered.

___________________________________

Thank you for experiencing this blog post.

I hope this inspires you and makes you smile.

Please subscribe, like and leave comments 😊

Follow my YouTube channel, Instagram and Pinterest as well.

___________________________________

Disclaimer: Relatively Thoughtful and Karen Burniston products were provided for free or at a discount by the manufacturer for review and use. All other items were personally purchased. Compensated affiliate links used where or when possible, meaning I will receive a small percentage commission from these manufacturers at no cost to you. This will allow me to add more content to my YouTube channel and help out a lot. Thank you.

Materials Used:

Dies

  • Karen Burniston in cahoots with Riley and Company – Photo Gallery Pop-Up – 1331
  • Karen Burniston in cahoots with Riley and Company – Waterfall Card – 1161
  • Karen Burniston in cahoots with Riley and Company – Photo Collage Pop-Up – 1098

Papers

Adhesives

  • Neutral PH Adhesive by LINECO
  • Fine-Tip Glue Bottle
  • Double-Sided Tape – 1/4-inch wide
  • Clear Packing Tape

Tools

  • Computer and Color Printer
  • Die Cutting Machine
  • Scissors
  • Circle Hole Punch – 1/4-inch wide
  • Paper Masking Tape

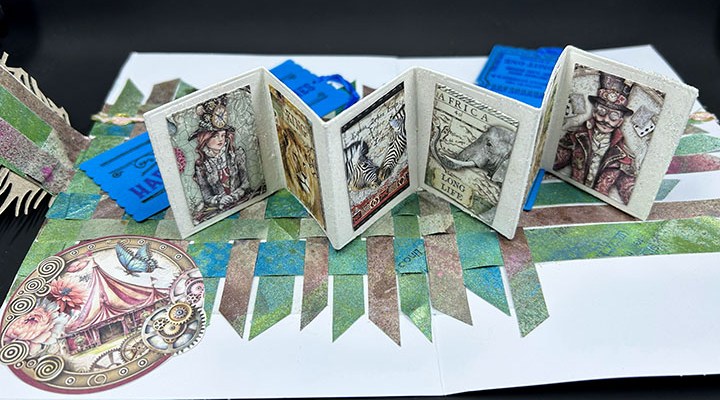
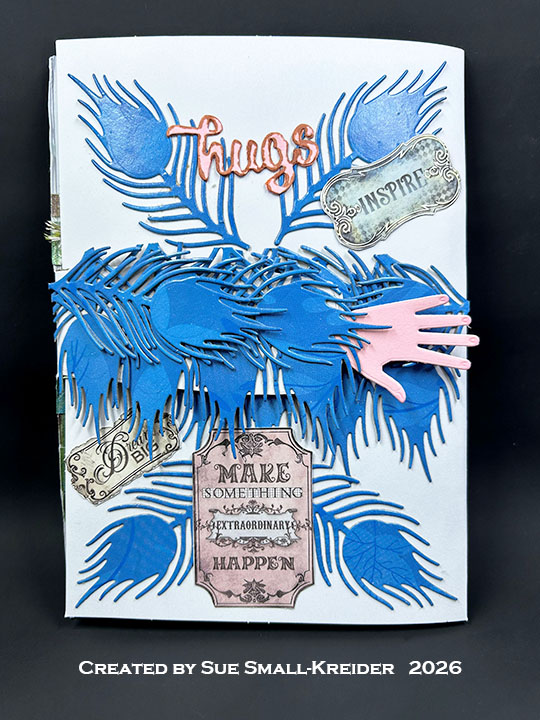
Circus Themed Pop-Up Birthday Card

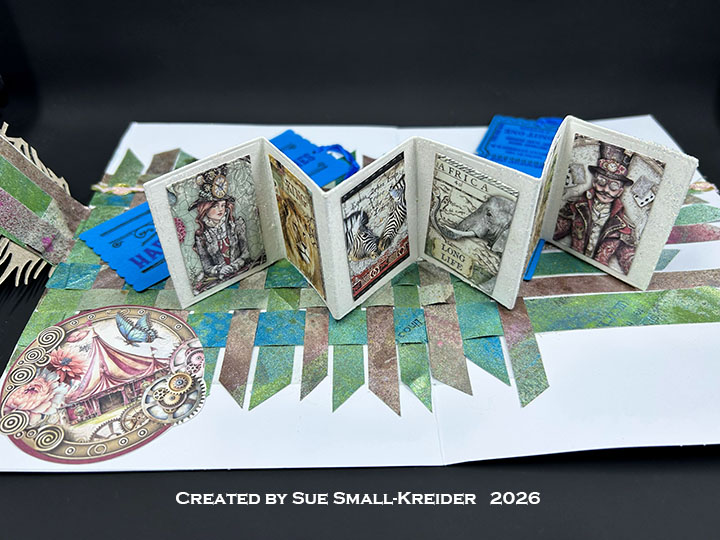
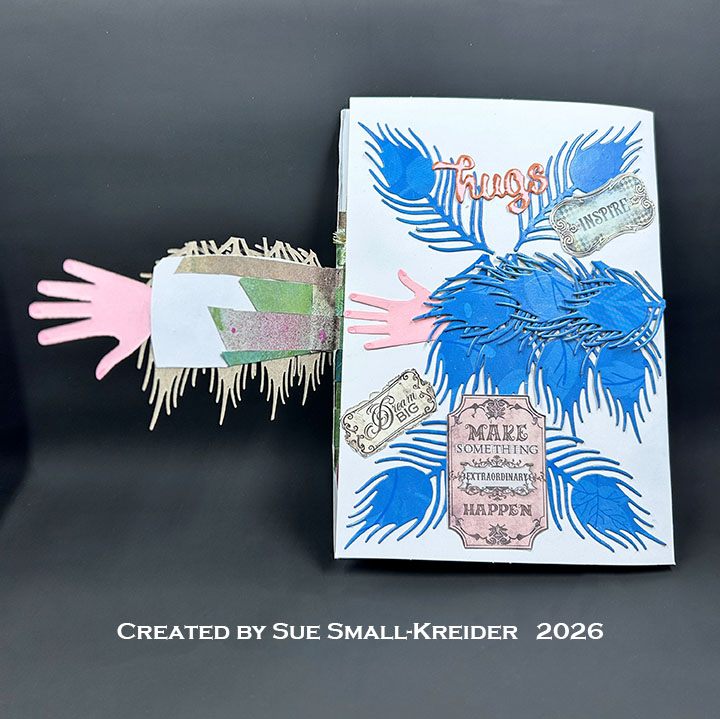
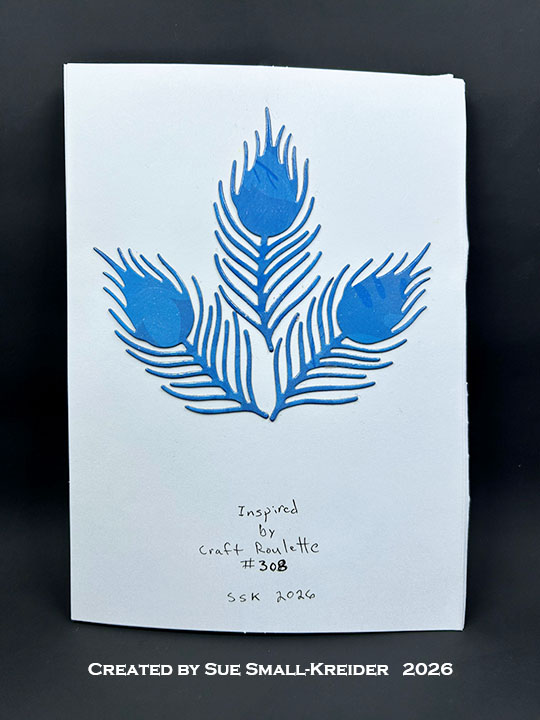
This card was made for Craft Roulette #308 whose parameters were: a card with a bookmark, circus colors, hug(s) element and feather(s)/(ing). I used dies from Karen Burniston and My Favorite Things to make this tri-fold, 5×7-inch pop-up birthday card.

Watch the process video to see how I made this card.

Cardbase: (Watch the video above for assembly instructions.) Using two purchase 5×7-inch cardbases, glue them together to form a tri-fold card.

Hugging Arms: Follow the video above to see how 14 of the feathers cut using Karen Burniston’s Peacock Add-Ons die set were used with the two pink hands cut using My Favorite Thing’s Crafty Hands die set.

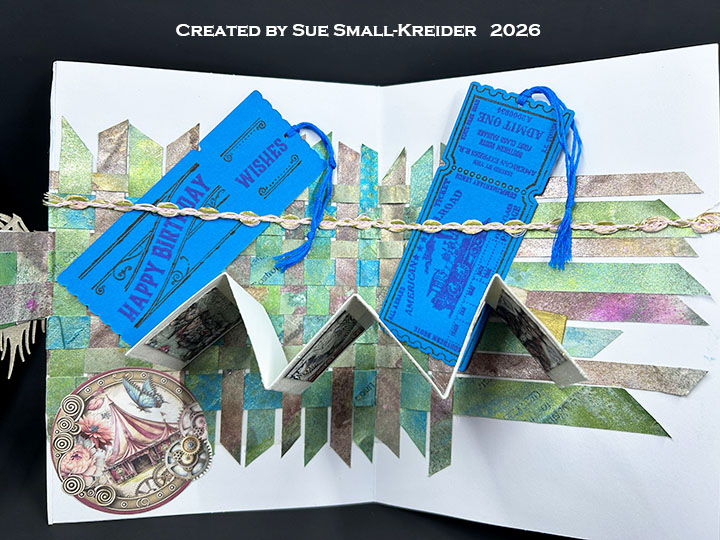
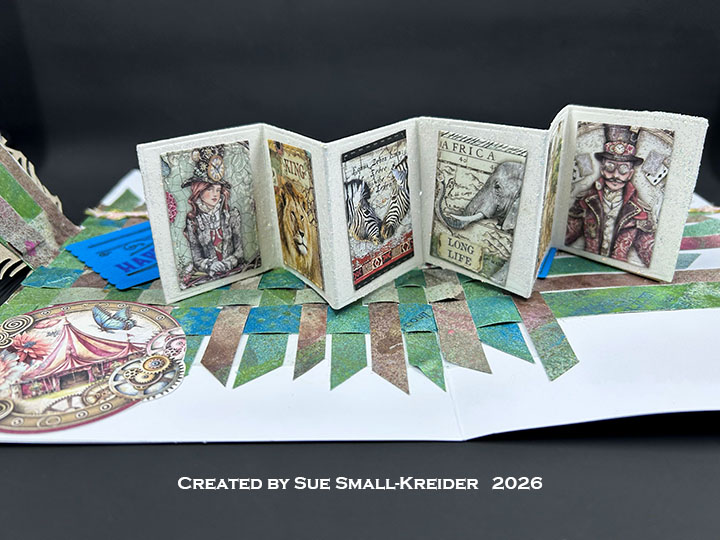
Photo Gallery Pop-Up: Cut two of the large pop-up gallery strips and their attachment triangle tabs from white cardstock using Karen Burniston’s Photo Gallery Pop-Up dies. Cover the strips with glitter paste as described in the video above and spray the tabs with mica sprays. Allow to dry before assembling. Cut the images to glued to the photo gallery using the largest rectangle die in Karen Burniston’s Greeting Labels die set.

Sentiments: On the card front is “Hugs” which is die cut twice from pink using Karen Burniston’s Word Set 9 – Love, glued together and the edges inked in brown to match the other signs cut from the Stamperia paper collection – Master of Magic. The “Happy Birthday Wishes” on the two train tickets were stamped using Honey Bee Stamps Ticket To Ride set.(See more about the making of these bookmarks by clicking here.)

___________________________________

Thank you for experiencing this blog post.

I hope this inspires you and makes you smile.

Please subscribe, like and leave comments 😊

Follow my YouTube channel, Instagram and Pinterest as well.

___________________________________

Disclaimer: Karen Burniston products are provided free of charge by the manufacturer for review and use. All other items were personally purchased. Compensated affiliate links used where or when possible, meaning I will receive a small percentage commission from these manufacturers at no cost to you. This will allow me to add more content to my YouTube channel and help out a lot. Thank you.

Materials Used:

Dies

Stamps

  • Honey Bee Stamps– Clear Stamps & Dies – Ticket To Ride

Papers

  • Blue Patterned Coated Cardboard Packaging
  • Pink Cardstock
  • Two A7 (5×7-inch) Cardbases – White
  • My Favorite Things – 8.5×11-inch 100lb Cardstock – White
  • Scrap Paper used in the bottom of a Spray Box
  • Stamperia – 8×8-inch Double-sided Papers by Antonis Tzanidakis – Master of Magic
  • Stamperia – 8×8-inch Double-sided Papers by Cristina Aadovan – Savana

Ink & Glitter Pastes

  • Memento – Fade Resistant Dye Ink – Paris Dusk, Rose Bud, Tuxedo Black
  • Nuvo – Mica Mist – Antique Gold, Fresh Pear, Nebula Blue
  • OLO Marker – Cotton Candy
  • Pigma – Mircon 05 Fine Tip Pen – Black
  • Ranger – Simon Hurley’s Astro Paste – Phoenix Feathers
  • Stampin’Up – Stampin’ Blends Marker – Light Copper Clay
  • Tsukinfko – Antiquing Solution – Walnut Ink

Adhesives

Tools

  • Die Cutting Machine
  • Pencil
  • Scissors
  • Plastic Palette Knife
  • Scrapbook.com – Magic Mat
  • Scrapbook.com – Mint Tape
  • Stamping Block
  • Stamping Platform
  • Microfiber Cloth

Miscellaneous

  • Metallic Pink Trim
  • Blue Embroidery Floss

A Peachy Thank You Card

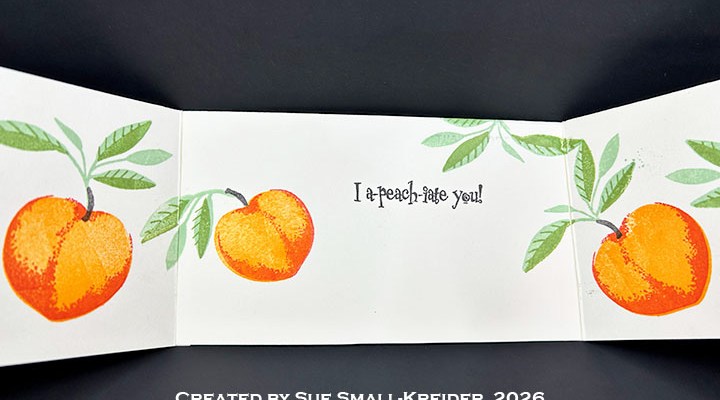
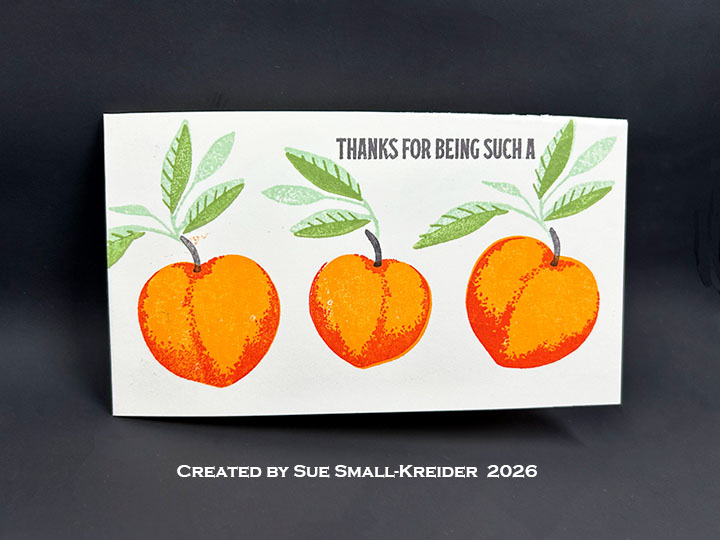
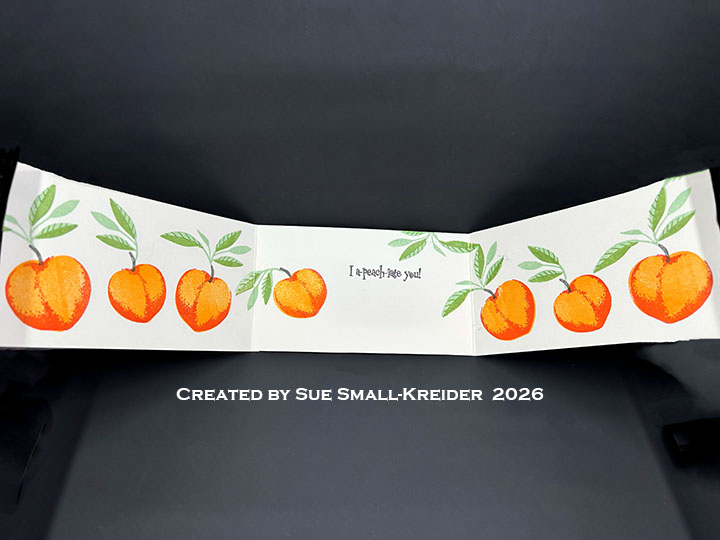
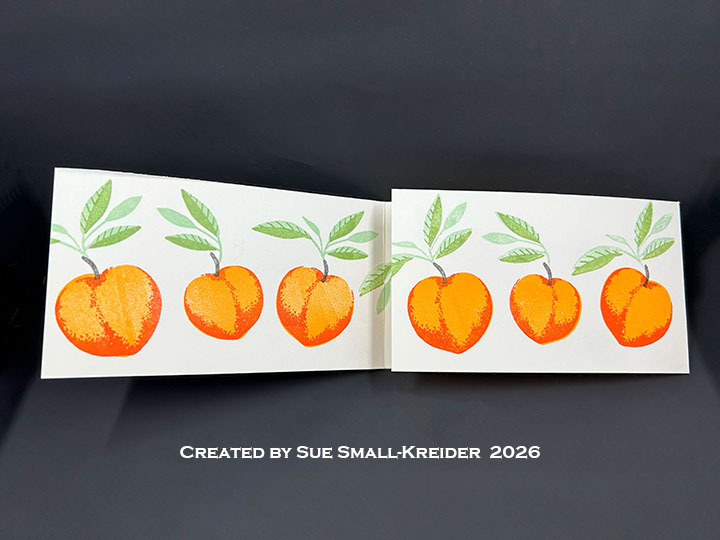
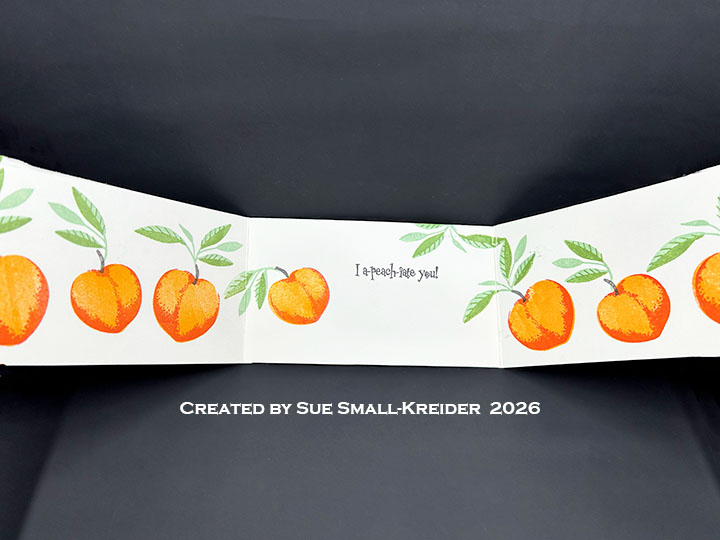
This card was made for Craft Roulette #307 whose parameters were: a mini slimline card, fungi colors, fruit element and two-tone. I used stamps from The Greetery and Riley & Company to make this tri-fold, min slimline Thank You card.

Watch the process video to see how I made this card.

Cardbase: (Watch the video above for assembly instructions.) Cut two 3.5 x 6.25-inch rectangles from heavy cream cardstock and score and fold at 6-inches. Cut one 3.5 x 6-inch rectangle. Glue tabs to 6-inch piece to form a tri-fold, mini slimline cardbase.

Peaches: Follow the video above to see how to do the layered peach stamps from The Greetery‘s Peachy Keen stamp set.

Sentiments: On the card front is “Thank you for being a” is from Just Peachy Sentiments from The Greetery. The “I a-peach-iate you!” is from Riley & Company.

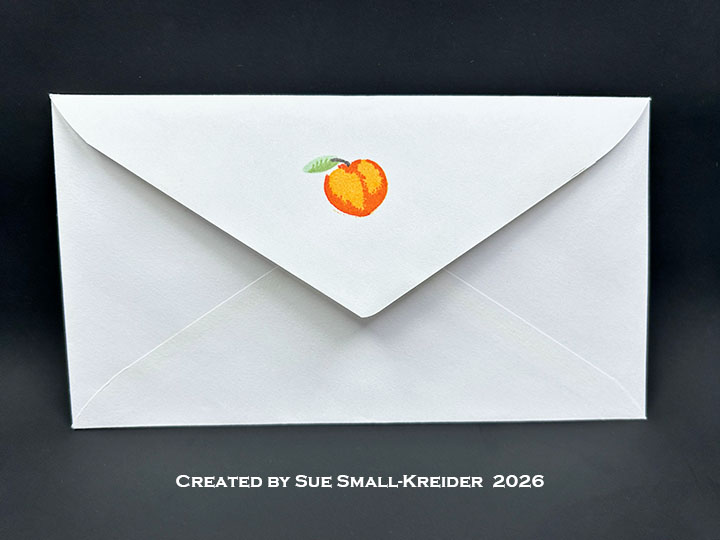
Envelope: The card fits into a 3.625×6.625-inch envelope decorated with a stamped peach from the Just Peachy Sentiments from The Greetery.

___________________________________

Thank you for experiencing this blog post.

I hope this inspires you and makes you smile.

Please subscribe, like and leave comments 😊

Follow my YouTube channel, Instagram and Pinterest as well.

___________________________________

Disclaimer: Karen Burniston products are provided free of charge by the manufacturer for review and use. All other items were personally purchased. Compensated affiliate links used where or when possible, meaning I will receive a small percentage commission from these manufacturers at no cost to you. This will allow me to add more content to my YouTube channel and help out a lot. Thank you.

Materials Used:

Stamps

  • The Greetery – Clear Stamps –Peachy Keen
  • The Greetery – Clear Stamps –Just Peachy Sentiments
  • Riley & Company – Clear Stamps – Cool Stamps

Papers

  • Cream Cardstock
  • 3.625×6.625-inch Envelope – White

Ink

  • Catherine Pooler – Premium Dye Ink Minis – Sauna, Succulent, Tiki Torch, Tutti Frutti, Wintergreen
  • Memento – Fade Resistant Dye Ink – Espresso Truffle
  • Pigma – Mircon 005 Fine Tip Pen – Black

Adhesives

Tools

  • Bone Folder
  • Die Cutting Machine
  • Scissors
  • Scoreboard
  • Scrapbook.com – Magic Mat
  • Scrapbook.com – Mint Tape
  • Stamping Block
  • Stamping Platform
  • Microfiber Cloth

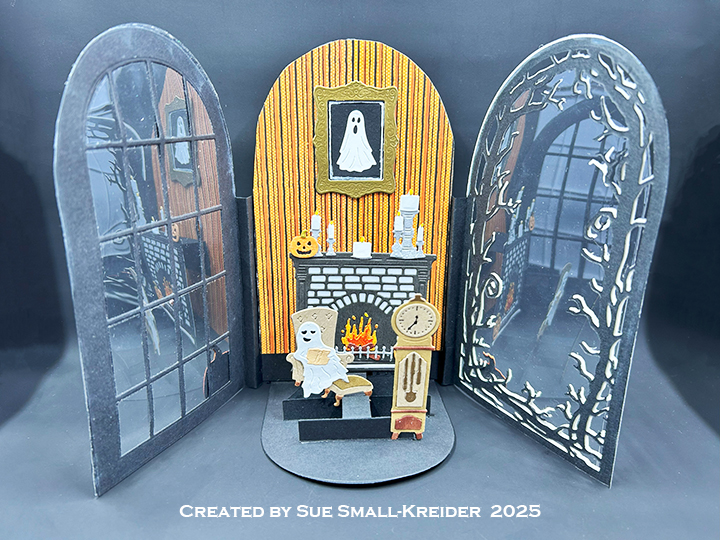
Halloween Tri-Fold Pop-Up Card

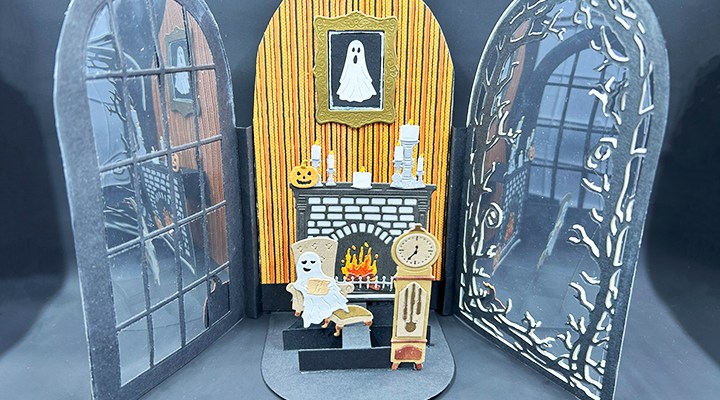
I recently purchased some new Scrappy Tails Halloween dies to make some pop-up tri-fold cards. Here is my first go at making one of Sabrina Leavell’s tri-fold cards. I watched a few of her YouTube lives before I began.

Watch the video below to see how I made this card.

___________________________________

Thank you for experiencing this blog post.

I hope this inspires you and makes you smile.

Please subscribe to the email notices, like and leave comments 😊

___________________________________

Disclaimer: Karen Burniston products are provided free of charge by the manufacturer for review and use. All other items were personally purchased. Compensated affiliate links used where or when possible, meaning I will receive a small percentage commission from these manufacturers at no cost to you. This will allow me to add more content to my YouTube channel and help out a lot. Thank you.

Materials Used:

Dies
• Scrappy Tails – Metal Craft Dies – Ghost Gallery
• Scrappy Tails – Metal Craft Dies – Ghost Study
• Scrappy Tails – Metal Craft Dies – Halloween Tri-Fold Window Add-On

• Scrappy Tails – Metal Craft Dies – Spooky Fireplace
• Scrappy Tails – Metal Craft Dies – A7 Tri-fold Pop Up Card Base


Stamps
• Colorado Craft Company – Clear Stamps – Scary Pumpkin – BB704


Papers
• Bazzill – 8.5×11 Cardstock – Tiara -18-1002

• Graphic 45 – 8×8 Double-Sided Papers – Midnight TalesFull Moon

• Grafix – 8.5×11 Dura-Lar Acetate .005 – Clear Film

• Concord & 9th – 8.5×11 Cardstock – Mushroom

• Fun Stampers Journey – 8.5×11 Cardstock – Tin Pail

• Black, Browns, Oranges, Tans, White and Yellow Cardstock

• #10 Business Envelope – White


Ink
• Memento – Fade Resistant Dye ink – Tuxedo Black
• Pigma – Mircon 01Fine Tip Pen – Black
Sakura – Gelly Roll Pen – Medium – White
• Stampin’ Up – Stampin’ Blends Marker – Dual Tip – Dark Copper Clay & Dark Wild Wheat


Adhesives
Neutral PH Adhesive by LINECO
Fine-Tip Glue Bottle

• Scrapbook.com – Double-sided Tape – 4-inch wide


Tools
• Die Cutting Machine

• Paper Trimmer

• Stamping Platform

• Scissors

• Pencil

• Paper Masking Tape

• Riley and Company – Pick & Poke Tool

• This Calls For Confetti – It’s No Secret Anti-Static Powder Brush

• Microfiber Cloth

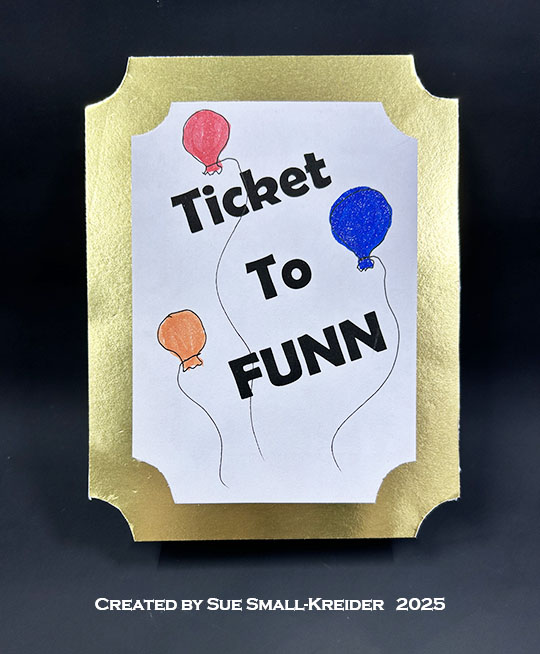
Ticket Shaped, Tri-Fold Easel, Birthday Card

This card was made for Craft Roulette #261 whose parameters included an A2 size card, amusement ride colors, JD element, and ticket(s).

Watch the process video to see how I made this card.

Cardbase: Start with a 4.25 x 11-inch piece of heavy cardstock, score at 5.5-inches and fold in half to form a top-fold A2 (4.25×5.5-inch) card. Cut a 4.25×6-inchpanel of heavy cardstock and score and fold at .5-inch to form a narrow tab. Glue the tab to one end of the A2 cardbase to form a tri-fold card. Using a 1-inch circle hole punch, cut notches out of each panel’s corners. Create a gold and white ticket for the front of the card as show in video.

Box of Chocolates: The easel stop is a heart shaped box of chocolates made using Trinity Stamps’ Bon Bon Box stamps & dies, colored using glitter markers and popped up on thin foam tape.

Sentiments: The “Ticket to Funn” was computer generated while the inside sentiments were stamped in dark brown ink using Craft Roulette’s Funn Sentiments #01 stamp set. All the stamping on the card back comes from Craft Roulette’s The Basics stamp set.

Envelope: The card fits into an A2 (4.25x 5.5-inches) size envelope stamped with a sentiments from Craft Roulette’s The Basics stamp set on the back flap in dark brown ink.

___________________________________

Thank you for experiencing this blog post.

I hope this inspires you and makes you smile.

Please like and leave comments 😊

___________________________________

Disclaimer: Karen Burniston products are provided free of charge by the manufacturer for review and use. All other items were personally purchased. Compensated affiliate links used where or when possible, meaning I will receive a small percentage commission from these manufacturers at no cost to you. This will allow me to add more content to my YouTube channel and help out a lot. Thank you.

Materials Used:

Stamps

  • Craft Roulette – Clear Stamps – The Basics
  • Craft Roulette – Clear Stamps – Funn Sentiments #01
  • Trinity Stamps – Clear Stamps & Dies – Bon Bon Box

Papers

  • Scrapbook.com – 8.5×11 inch 110lb Cardstock – White
  • Matte Gold Cardstock
  • White Computer Paper

Ink

  • Stampin’ Up – Classic Stampin’ Pad – Copper Clay & Early Espresso
  • Nuvo – Glitter Marker – Lemon Drizzle
  • Pigma – Mircon 01 Fine Tip Pen – Black
  • Pigma – Mircon 05 Fine Tip Pen – Brown
  • Scrapbook.com – Glitter Brush Markers – Deep Blue, Coral, Red Shimmer

Adhesives

Tools

  • Die Cutting Machine
  • Paper Trimmer
  • Bone Folder
  • Stamping Blocks
  • Scissors
  • Paper Masking Tape
  • 1″ Hole Punch

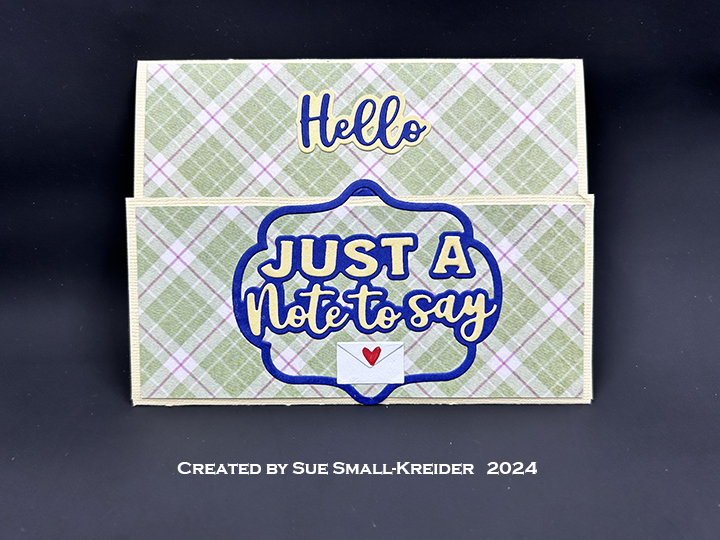
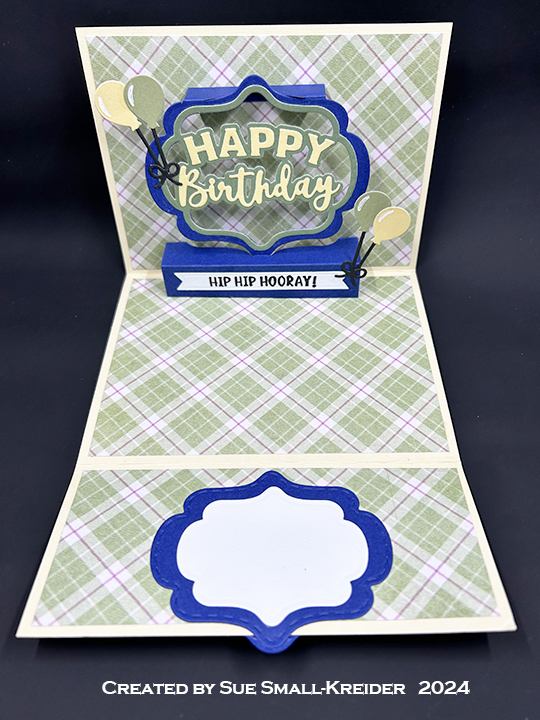
A Tri-fold Pop-Up Birthday Card

This card was made for Craft Roulette #229 whose parameters included a faux envelope project, berries colors, string element and overlap.

I made this card using dies and stamps by Karen BurnistonLorna Label Pop-Up, Just A Note Lorna Label Add-Ons, Happy Birthday Lorna Label Add-Ons and the Belated Birthday stamp set.

Watch the process video to learn how I made the card.

Cardbase: Cut an 11 x 5 1/2-inch rectangle and score and fold at 4 1/4-inches and at 8 1/2-inches. Cover with decorative papers cut at 4 x 5 1/4-inches (cut four of these) and then cut two of 2 1/4 x5 1/4-inches.

Envelope: The sentiment stamped on the back is by Technique Tuesday.

___________________________________

Thank you for experiencing this blog post.

I hope this inspires you and makes you smile.

Please like and leave comments 😊

___________________________________

Disclaimer: Karen Burniston products are provided free of charge by the manufacturer for review and use. All other items were personally purchased. Compensated affiliate links used where or when possible, meaning I will receive a small percentage commission from these manufacturers at no cost to you. This will allow me to add more content to my YouTube channel and help out a lot. Thank you.

Materials Used:

Dies

Stamps

Papers

  • American Crafts – Core’dination – 12×12 inch Textured Cardstock – Sandable Vanilla Cream
  • Craft Consortium – Hackney & Co. – A4 Double-Sided Solid color Cardstock – Gardeners Delight
  • Crafter’s Companion – Nitwit – 12×12 Double-Sided Cardstock – Paws-itivity
  • Black, Blueberry and White Cardstock
  • Fraser Papers for William House – A2 Envelope – Genesis Text Milkweed Smooth

Ink

Adhesives

Tools

  • Die Cutting Machine
  • Bone Folder
  • Stamping Blocks
  • Scissors
  • We R Memories – QuickStick
  • Paper Masking Tape
Hillside Holiday Wishes

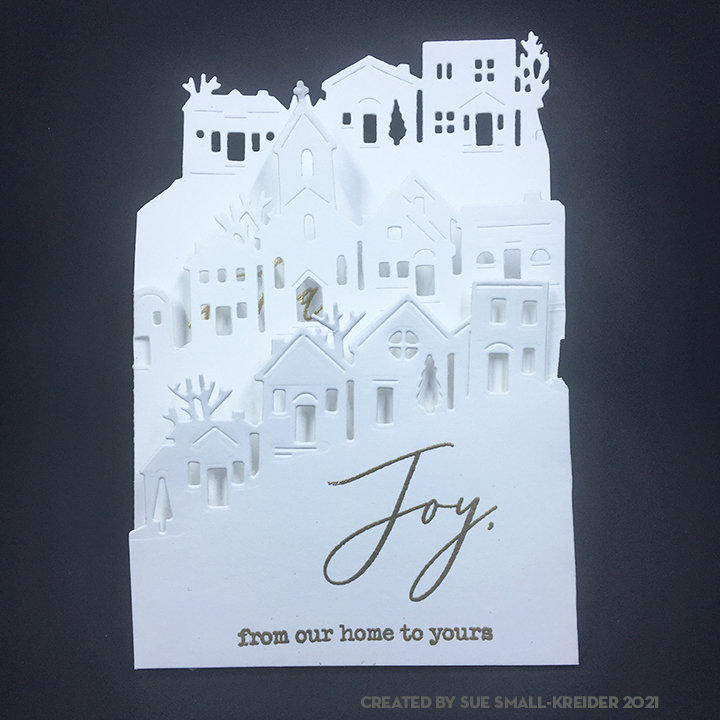
One Christmas I got to experience Christmas in San Francisco with its hillside houses. Another Christmas I was driving through up-state New York on snowy streets where the houses are all on hillsides. This card evokes these memories for me.

It took several tries experimenting with the three dies in this Hero Arts die set. I finally figured out the positioning on an 11-inches by 5 3/8 inches card. The card is folded at 3 5/8 inches and 7 5/16 inches. I used a bone folder to burnish my folds.

The card sat on my desk for a few weeks until I found the right sentiment stamps. When my copy of Creative Stamping, issue 101 arrived with Lou Collins’ Text{ures} brand Seasonal Sentiments stamps, I knew they would be perfect when heat embossed in gold on the all-white card.

I remembered to wipe the card with an anti-static bag the first time I stamped and heat embossed the card, but I forgot to wipe the last panel before I stamped and there are a few tiny stray gold specks. (Moral of the story – always wipe the space that you will be applying embossing powder to before you stamp.)

To finish this clean and simple card, I chose a cream A2 size envelope and stamped the flap with the words “Happy Wishes” and heat embossed in gold. The stamps are from the same stamp set as the card.

Thank you for reading. If you enjoyed this blog post, please like it and follow the blog. 😊

Dies

  • Hero Arts – Fancy Dies – Tri-fold Edge, Village

Stamps

  • Text{ures} by Lou Collins – Seasonal Sentiments from Creative Stamping, issue 101, November 2021

Ink & Embossing Powder

  • VersaMark – Watermark Stamp Pad
  • Cosmic Shimmer – Detail Embossing Powder – Bright Gold

Papers

  • Heavy weight 8 ½ inches x 11 inches white cardstock
  • A2 envelope

Additional Supplies:

One in a Melon

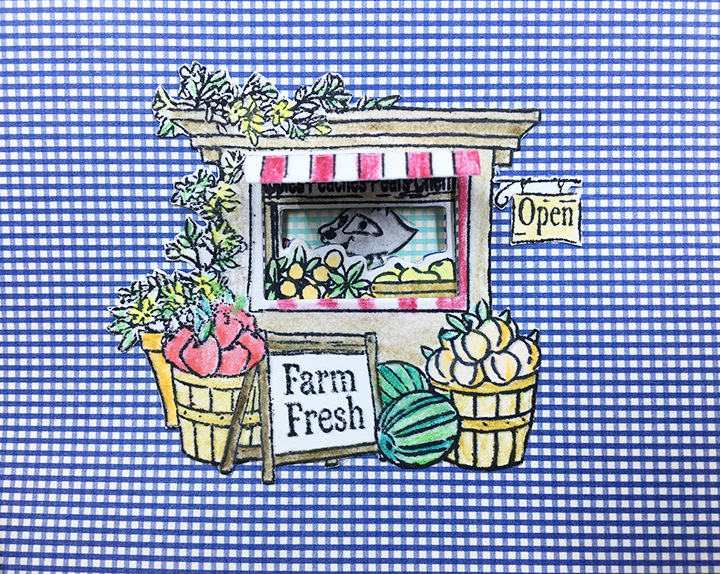
When you are caught eating a melon at a farm stand you know you are one in a melon!

This cute little card is made from an Art Impressions Tryfolds by Bonnie Krebs. The set has six stamps and two dies that cut the apertures or windows in the farm stand and fruit stand.

I stamped the images on white cardstock with a permanent black ink that won’t run when wet and colored with watercolor pencils. Next I fussy cut the images.

The card base is made from two pieces blue gingham cardstock (5 ½ inches x 4 ¼ inches) and a piece of green gingham cardstock cut 6 inches x 4 ¼ inches. The green piece was scored and fold at ¼ inch on each end to form two tabs to glue the two blue pieces to form the tri-fold card.

I positioned my stamped, colored and cut out images following the layout on the packaging to determine the positioning of the front image. I traced the inside of the opening onto the card front and used the accompanying die to die cut the hole. Next, I glued the image in place on the front. I did the same for the middle image on the second flap, positioning the image so it shows through the aperture cut in the first image and then die-cutting the aperture. The final image was positioned, traced and then glue in place on the central panel.

The “Happy Birthday” is die-cut from green cardstock and glued in place.

Stamped on the back flap of an A2 slim envelope from Taylored Expressions is the sentiment from the stamp set “You’re one in a Melon!” green ink.

Thank you for reading this blog post. Please like and leave comments. 😊

If you enjoyed this tri-fold card, check out some of my other trifolds:

Shabby Chic Trifold Card

Festive Foliage and Hearts – Trifold card

Santa Vintage Trifold

Sleepytime Dreams

Materials Used:

Dies

Stamps

Inks/Watercolors

Papers

Miscellaneous

Shabby Chic Trifold Card

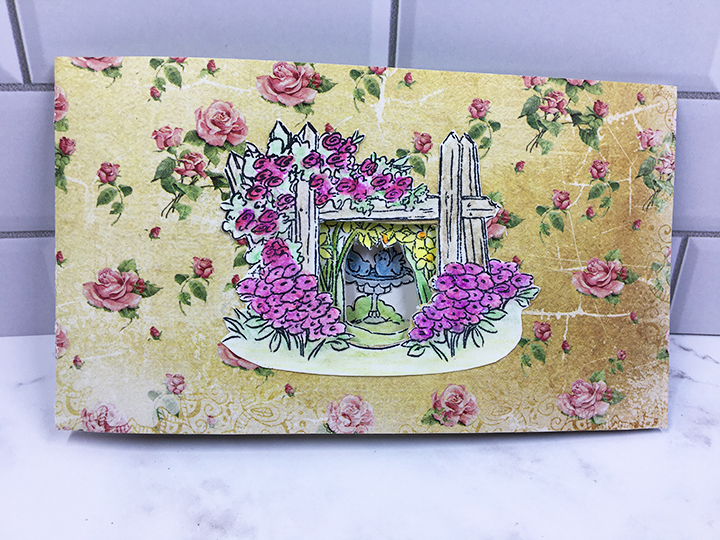
How do you dress up an old stamp set? Add it to some distressed vintage-style floral papers and stamps and heat emboss the sentiment.

My creative mojo has been missing and to jump start it I tried stamping an older Art Impressions tri-fold stamp and die set and coloring it using watercolor pencils. Next, I fussy cut out the three images and went searching through my stash for some fun paper to make the card base from.

Because I had some mini slim envelopes in my stash, I made a 3 ¼ inch x 6-inch tri fold card from two pieces of heavy Dress My Craft cardstock that is printed only on one side. I cut one 3 ¼ inches x 12 inches piece of rose patterned card stock and a 3 ¼ inches x 6 ¼ inch piece of green leaves patterned card stock. The long rose piece I folded in half and the smaller leave piece I scored and fold ¼ inch in from one of the smaller sides. The ¼ inch tab was glued to the back of the fold rose piece to form a tri-fold card.

Because the inside of the card was plain white, I added pink vellum stripes to hide my seams inside and them covered the inside front and back panels with floral patterned paper from my stash which I believe was from Stampin’ Up.

I positioned my stamped, colored and cut out floral images following the layout on the packaging to determine the positioning of the front image. I traced the inside of the opening onto the card front and used the accompanying die to die cut the hole. Next, I glued the image in place on the front. I did the same for the middle image on the second flap, positioning the image so it shows through the aperture cut in the first image and then die-cutting the aperture. The final image was positioned, traced and then glue in place on the central panel.

Decorative patterned borders were stamped using several stamps from LeCrea Designs Lacy long stamp set. The “Happy Birthday” was gold heat embossed using a stamp from an older Apple Blossom stamp set.

Stamped on the back flap of a mini slim envelope from Taylored Expressions is the clover chain stamped in the same “Always Artichoke” green ink as the inside of the card.

Thank you for reading this blog post. Please like and leave comments. 😊

If you enjoyed this tri-fold card, check out some of my other trifolds:

One In A Melon

Festive Foliage and Hearts – Trifold card

Santa Vintage Trifold

Sleepytime Dreams

Materials Used:

Dies

Stamps

Inks/Embossing Powder/Watercolors

Papers

Miscellaneous