Oh My Hearts

It’s the Karen Burniston design team challenge for February 2024 using the theme of “Oh My Hearts.”

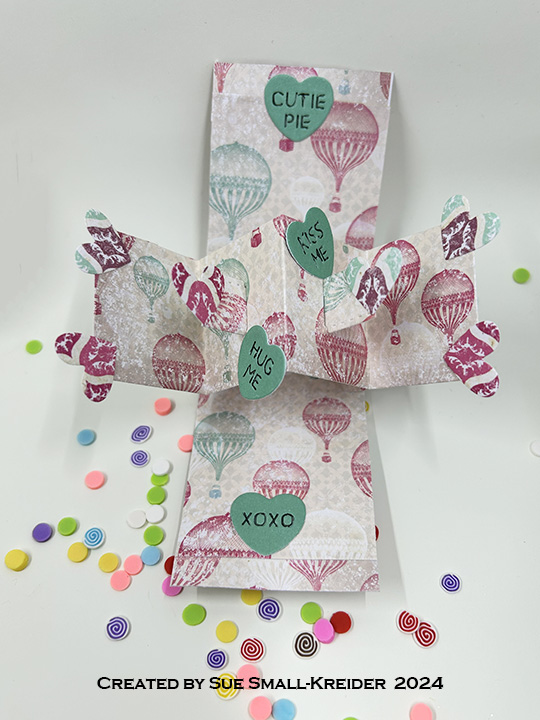
For this challenge I chose to make some mini valentines that fit into a Candy Hearts Box.

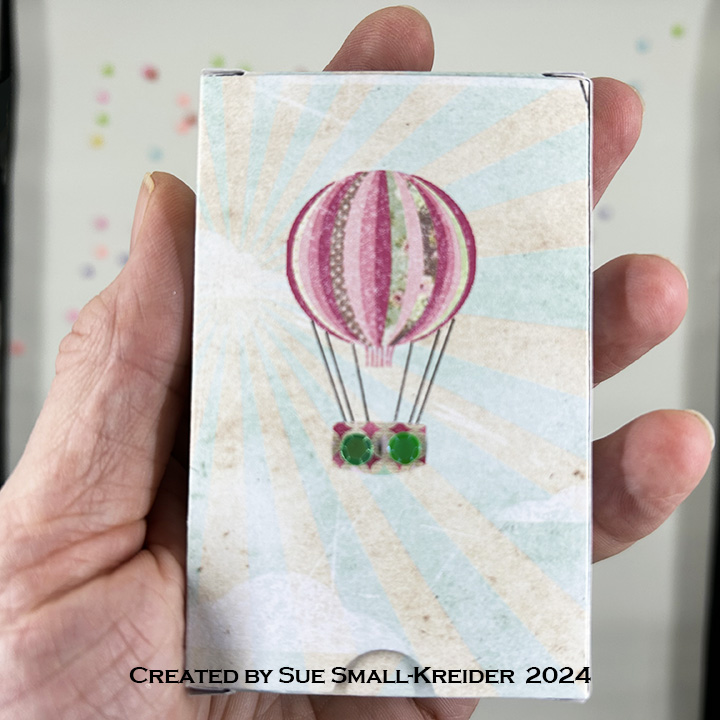
Box: Review the assembly directions on the back of the packaging for the Candy Hearts Box. I used thin double-sided tape to assemble the box. Adhesive sequins were added to the hot air balloon printed on the cardstock. Three hearts were cut from all the hearts without words in the die set from coordinating papers. The top two hearts were attached with a strip of double-sided tape and the sides folded up. Two adhesive backed sequins were glued to the center of the hearts.

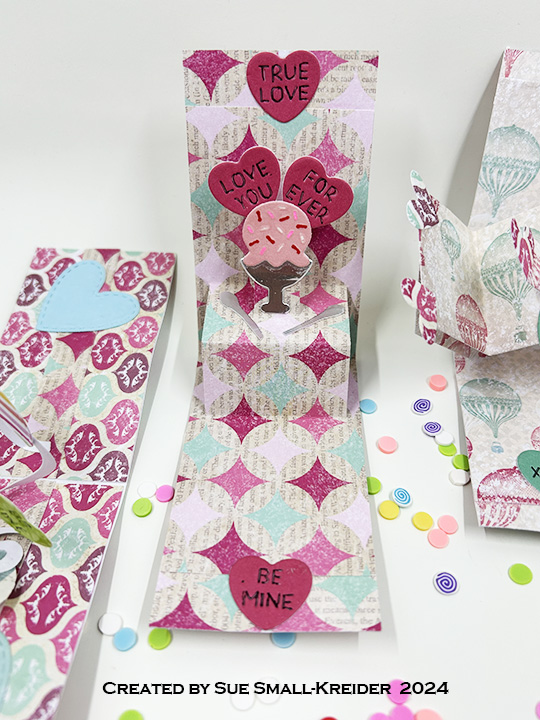
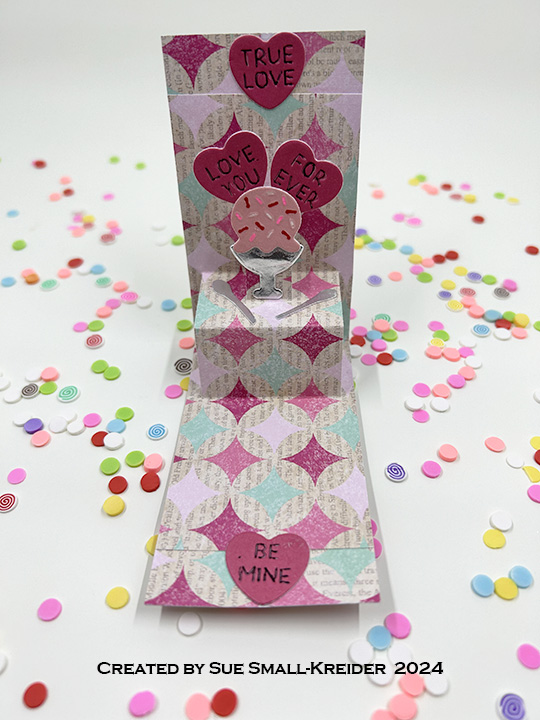
Ice Cream Card: A 2-inch by 6-inch rectangle was cut from decorative cardstock and folded in-half for a 2×3-inches top fold card. The inside of the card was covered with decorative cardstock. A second piece 3-inch by 5-inch rectangle of matching cardstock was folded in half and the tiered platform pop-up from the Mini Pops die set was used to cut in to the 3×5 rectangle following the assembly video at the bottom of the link page. Train the main platform’s folds and then center over the top fold card and glue down. Trim excess platform cardstock from edges of card.

Cut the scoop of ice cream from the Sweet Treats Charms set and color in the sprinkles with pens. Cut the silver dish from the bottom of the trophy in the Treasure Charms.

Cut candy hearts with messages using the dies in the Candy Hearts Box set. I cut free-handed the two tiny spoons from silver mirror cardstock. Adhere ice cream assembly to top tier of platform.

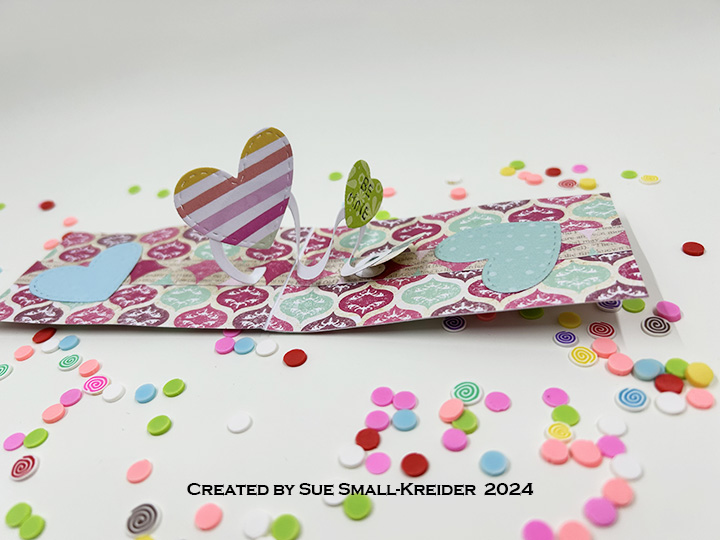
Spiral Hearts Card: A 2-inch by 6-inch rectangle was cut from decorative cardstock and folded in-half for a 2×3-inches top fold card. The inside of the card was covered with decorative cardstock. The spiral platform is from the Mini Pops die set and cut from white shimmer cardstock. Follow directions in the assembly video at the bottom of the link page or on back of the packaging for attaching the spiral. Add three sizes of hearts cut from the Candy Hearts Box set and glue to spiral platform. I had leftover hearts and labels from an Easter box project that I used to decorate the card.

Twist Panel Card: A 2-inch by 6-inch rectangle was cut from decorative cardstock and folded in-half for a 2×3-inches top fold card. The inside of the card was covered with decorative cardstock. Using the same patterned cardstock used inside the card, cut one twist panel mechanism using the Little Twist Panel Pop-Up die set. Cut the panel strip and the two banner halves from decorative paper. Follow directions in the assembly video at the bottom of the linked page or on back of the packaging to attach the twist mechanism, panel and banner. Trim the excess paper from edges of card before decorating. The banner ends may need to be trimmed back to fit into the card. Add hearts and check the positioning by closing the card while glue is still wet. I used the tiny heart in the Office Charms die set to decorate, but you could use other tiny hearts from other die sets.

The three cards easily fit into the candy box for a boxed set of mini-Valentines.

_____________________________________________

Thank you for reading this blog post. I hope this inspires you and makes you smile. 😊 

Please like and leave comments.

_____________________________________________

Materials Used:

Dies

Papers

  • Craftwork Cards – 8×8 Single-Sided Paper Collection – Flying High
  • Recollections – 8.5×11 White Gold Shimmer Cardstock

Ink

  • Gel Pens – White and Pink
  • Sharpie – Permanent Marker – Ultra Fine Tip – Red
  • Pigma – Mircon 01 Fine Tip Pen – Black

Adhesives

Tools

  • Die Cutting Machine
  • Scissors

Miscellaneous

  • Stampin’ Up – Adhesive Backed Seasonal Sequins

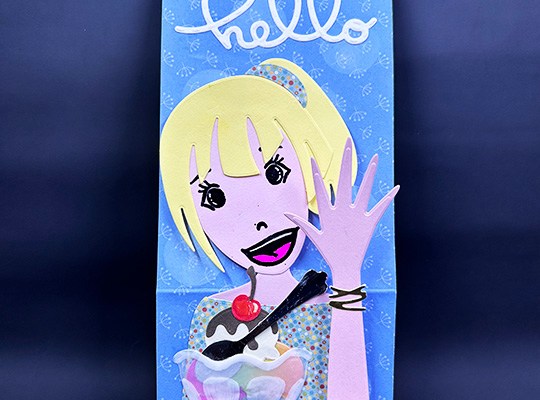
Waving Hello For Valentine’s Day

This card was made for Craft Roulette #201 whose parameters included an easel card, quiet colors, sweets element and bokeh.

Cardbase: Cut one rectangle 3 3/4x 8 1/2-inches from heavy white cardstock. Cut a second white rectangle 3 3/4x 8 3/4-inches. On the largest rectangle score at 1/4 inch at one end and 3-inches at the opposite end. (The 1/4-inch is the tab folded under as the card hinge to card back. The 3-inch tab is the ease for the paper doll.)

Thank you for reading this blog post and watching the video. I hope this inspires you and makes you smile. Please like and leave comments 😊

Materials Used:

Dies

  • Karen Burniston in cahoots with Riley and Company – Hello – 1166
  • Karen Burniston in cahoots with Riley and Company – You’re Sweet – 1087
  • Karen Burniston in cahoots with Riley and Company – Ice Cream Sundae Pop-Up – 1082
  • Studio Light – Misses Dies & Stamps by Karin Joan – Betty
  • Studio Light – Misses Dies & Stamps by Karin Joan – Tasha

Stamps

  • Studio Light – Misses Dies & Stamps by Karin Joan – Betty
  • Studio Light – Misses Dies & Stamps by Karin Joan – Tasha

Papers

  • PhotoPlay – 12×12 Double-Sided Cardstock Collection Pack by Becky Moore – Snail Mail
  • Pink, Brown, Cream Cardstock
  • Heavyweight White 100lb Cardstock
  • Clear Vellum
  • #10 Business Envelope – White

Ink

  • VersaMark Ink – Watermark
  • Simon Says Stamp – Pigment Ink – White
  • Gel Pens – White and Pink
  • Black Glossy Embossing Powder

Adhesives

  • Neutral PH Adhesive by LINECO
  • Fine-Tip Glue Bottle

Tools

  • Die Cutting Machine
  • Bone Folder
  • Scoring Board
  • Stamping Platform
  • LDRS – Stampendable Stamping Tool
  • We R Memories – QuickStick
  • Craft Clips
  • Sponge Dauber
  • Stamping Blocks used as paperweights
  • Kat Scrappiness – Anti-Static Tool
  • Heat Tool
  • Scissors
  • Paper Cutter

Miscellaneous

  • Mini Woobler Spring

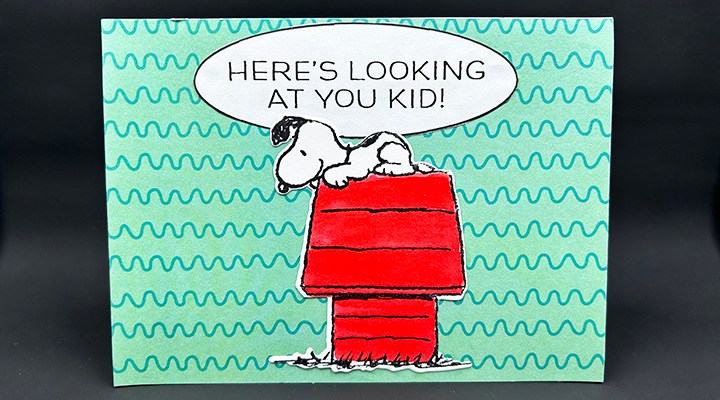
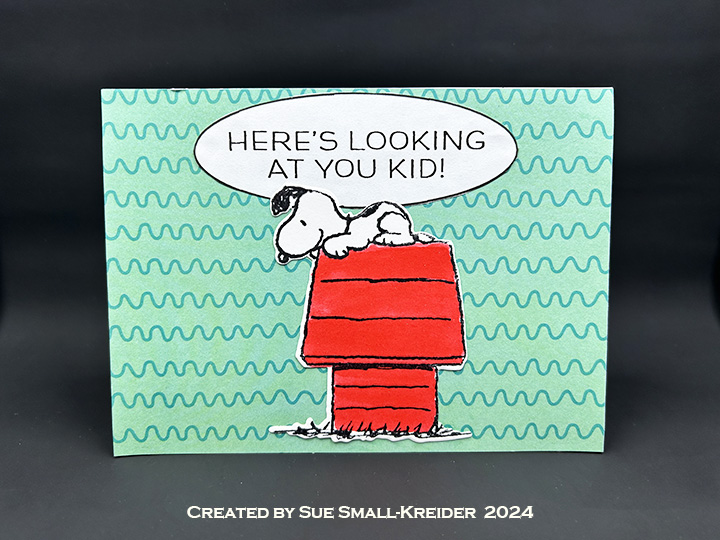
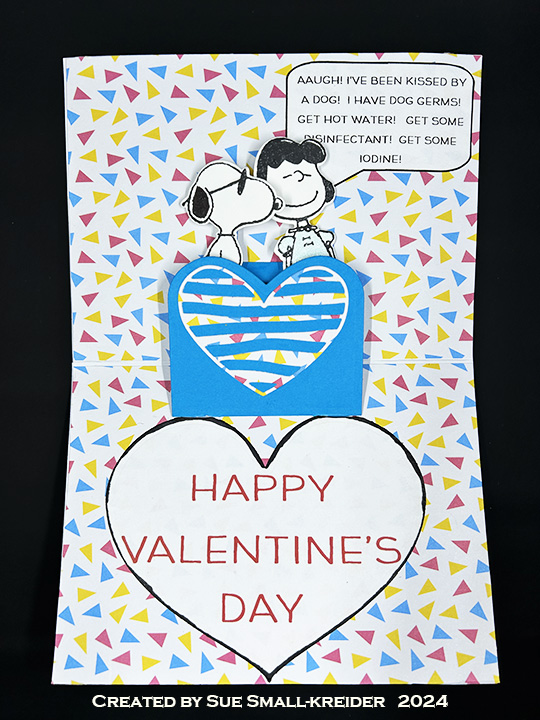
A Dog Kiss Valentine

This Valentine was made for Craft Roulette #200 whose parameters included kid’s card, brrrr colors, comic or cartoon element and button(s).

I have had a Peanuts collection of stamps, coordinating dies along with papers and washi tape sheets from Craftstash for a few months and thought the comic parameter was a perfect use of them.

Snoopy has such a cute button nose and the papers have some icy blues. Because a kid’s card needs some interactivity, I used a wiper mechanism by i-crafter to make Snoopy smooch Lucy. The sentiments are all computer generated.

Thank you for reading this blog post. I hope this inspires you and makes you smile. Please like and leave comments 😊

Materials Used:

Stamps & Dies

  • Craftstash – Peanuts Stamp and Die Set
  • i-crafter – Metal Dies – Heart Hands, Wiper Insert
  • Fun Stampers Journey – Die Templates – Heart-Felt

Papers

  • Craftstash – 8×8 Single-Sided 190gsm Paper Pack – Peanuts
  • Spellbinder’s – 8.5×11 Color Essentials Cardstock – Snowdrift
  • Teal Cardstock
  • Park Lane Paperie – A6 Cardbase and Envelope – White

Ink

  • StazOn – Solvent Ink – Jet Black
  • Scrapbook.com – Glitter Brush Marker – Frosty Blue
  • Scrapbook.com – Glitter Brush Marker – Red Shimmer
  • Sharpie – Permanent Marker – Chisel Tip – Black
  • Sharpie – Permanent Marker – Ultra Fine Tip – Black

Adhesives

  • Neutral PH Adhesive by LINECO
  • Fine-Tip Glue Bottle
  • Scor-Tape – Double-Sided Tape -1/8-inch wide

Tools

  • Die Cutting Machine
  • Stamping Platform
  • LDRS – Stampendable Stamping Tool
  • Stamping Blocks used as paperweights
  • Scissors

A Fancy Fold Dad Joke

It’s no joke that I’ve created a video tutorial for a fancy fold card. (Warning it is a long video. more like a live video than a short teaching reel.) Click here for video.

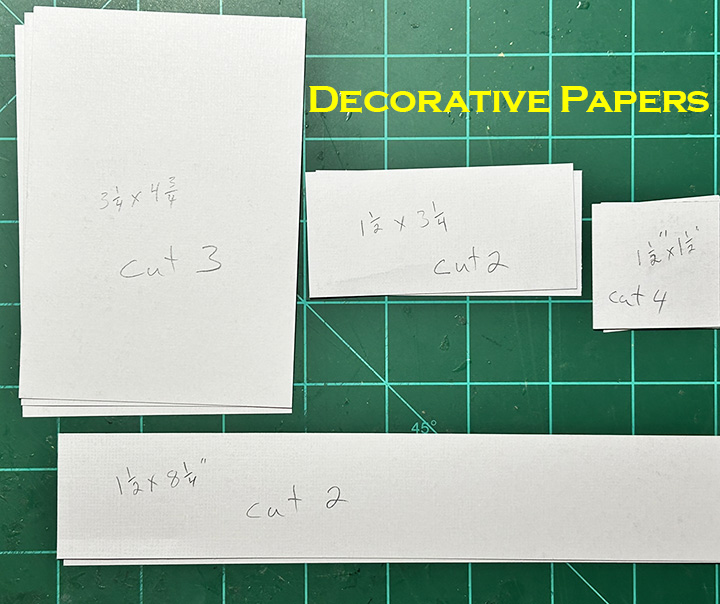
Below are photos of the cardbase measurements and the decorative paper layers measurements.

Thank you for reading this blog post. I hope this inspires you and makes you smile. Please like and leave comments 😊

Materials Used:

Dies

Stamps

  • Riley & Company – Funny Bones – Rubber Stamp – Sir Loin – RWD-1162

Papers

  • Core’Dinations – 12×12 inch Single-Sided Papers – Light Green Crosshatch 377870
  • Core’Dinations – 12×12 inch Single-Sided Papers – Light Green Plaid 377868
  • Core’Dinations – 12×12 inch Single-Sided Papers – Antiqua 378261
  • Fun Stampers Journey – 8.5×11-Inch 100lb Cardstock – Pumpkin Bread
  • Recollections – 8.5×11-Inch 110lb Cardstock – Apple Green
  • Recollections – 8.5×11-Inch 65lb Cardstock – Green
  • Black, Cream, Gray and White Cardstock
  • Gold Foil Cardboard Packaging
  • Ivory Scrap Paper from an envelope
  • #10 Business Envelope – Ivory

Ink & Embossing Powder

  • Hero Arts -Alcohol-Marker Friendly Ink – Intense Black
  • Sharpie – Permanent Marker – Fine Tip – Black
  • Sharpie – Permanent Marker – Ultra Fine Tip – Black
  • Pigma – Mircon 01 Fine Tip Pen – Black
  • Recollections – Detail Embossing Powder – Clear
  • Ranger – Tim Holtz Distress Crayon – Brushed Pewter
  • Pencil

Adhesives

Tools

  • Die Cutting Machine
  • Bone Folder
  • Stamping Platform
  • LDRS – Stampendable Stamping Tool
  • Kat Scrappiness – Anti-Static Tool
  • Heat Tool
  • Craft Knife
  • Scissors
  • T-Ruler
  • Metal Ruler/Straight-Edge
  • Pencil
  • Tombow – Mono – Sand Eraser -512A

Carousel Birthday Card

This birthday card was made for Craft Roulette #199 whose parameters included card with a bookmark, bakery colors, large animal element and horizontal lines.

For this card I used dies from two of my favorite crafting companies – Karen Burniston Pop-Ups and Rubbernecker Stamps (rebranded as Brass & Bliss). The front carousel, as well as the animals and lattice work used on the inside cake are from Rubbernecker’s retired Carousel set. The other dies used are Karen Burniston’s Happy Birthday Shadow, Happy Birthday, Cake Trims and Cake Pop-Up.

Cardbase: I used a purchased A7 (5×7-inch) cardbase and envelope. Cut four 5×7 panels of decorative paper. Glue two to the outside and two to the inside of the cardbase leaving the center fold uncovered. (I used two panels of a London park map paper inside the card, matching up the design at the fold.)
Card Front: The background paper, green border and journaling quote card are all from a Mary Poppins themed paper collection. The carousel is a bookmark tucks into the journaling card pocket. To create the pocket, I used thin strips of foam tape on three sides of the journaling card.
Bookmark: Because the carousel die is one piece, I cut it three times from white cardstock and once from red cardstock. For the animals I used markers to color them and glitter markers to add some magic to each critter. Once all the elements for the carousel were cut, colored and assembled, I glued them together at the top of a 4×8-inch rectangle of heavy white cardstock. Using a ruler, draw with a pencil the bookmark base as a 2-inch wide column centered at the bottom of the carousel. Fussy cut around the carousel and bookmark base. Punch a hole in the top point of the carousel. Thread two 6-strand pieces of yellow embroidery floss through hole for a bookmark pull. Decorate base and back with stickers from the paper collection.
Card Back: keeping with the bookmark theme, more of the collection paper was used to cover the card back featuring books and a sticker related to reading.

Pop-Up Cake: Watch the assembly video at the bottom of the link page for the Cake Pop-Up before die cutting. I wanted the cake to resemble the carousel, so the middle layer is white with the animals from the carousel die attached. The base layer is red and uses the carousel base cut in white trimmed to fit the sides of the cake. The top layer uses the Cake Trims set’s scalloped swag trim and the candle from the Cake Pop-Up set to suggest the roof and flag of the carousel.

Sentiments: Happy birthday uses two dies – the shadow cut in pink patterned paper and the words cut in matte gold.

Envelope: The back flap of the envelope has a carousel tent top.

Thank you for reading this blog post. I hope this inspires you and makes you smile. Please like and leave comments 😊

Materials Used:

Dies

Papers

  • Carta Bella – 12×12 Double-Sided textured Paper Collection Kit – Practically Perfect
  • Spellbinder’s – 8.5×11 Color Essentials Cardstock – Snowdrift
  • Fun Stampers Journey – 8.5×11 Cardstock – Cranberry Bliss
  • Matte Gold Cardstock
  • Park Lane Paperie – A7 Cardbase and Envelope – White

Ink

  • Ranger – Tim Holtz – Distress Ink- Fired Brick
  • Pigma – Mircon 01 Fine Tip Pen – Black
  • Crafter’s Square – Metallic Marker .05 in Point – Gold
  • Sharpie – Permanent Marker – Fine Point – Pale Lavendar
  • Stampin’ Up – Stampin’ Write Marker – Chocolate Chip
  • Stampin’ Up – Stampin’ Blends Marker – Light Daffodil Delight
  • Scrapbook.com – Glitter Brush Marker – Pretty Pink
  • Scrapbook.com – Glitter Brush Marker – Sunshine Yellow

Adhesives

Tools

  • Die Cutting Machine
  • Bone Folder
  • Craft Mat
  • Sponge Dauber
  • Stamping Blocks used as paperweights
  • Pencil
  • Ruller

Miscellaneous

  • Embroidery Floss –Yellow

A Reindeer Dog Christmas Card

I have a neighbor who has the happiest small dog that when I saw this PoppyStamps die set, I thought of this dog in his winter vest.

I cut all the pieces from cardstock in my scrap bin. I think the patterned papers are from Photoplay while the other solids are a mixture of weights and textures.

Using a prescored A2 card base in my stash that is green outside and white inside, the die cuts were glued in place including all the sentiments. Strips were added to the front and back of the card and envelope flap for decoration.

Thank you for reading this blog post. I hope this inspires you and makes you smile. Please like and leave comments 😊

Materials Used:

Dies

  • PoppyStamps – Craft Die – Peace Love and Belly Rubs -2594
  • PoppyStamps – Craft Die – Lavish Merry Christmas -2590
  • PoppyStamps – Craft Die – Holiday Corgi -2572

Paper

  • Photoplay – Tulla & Norbert’s Christmas Party 6×6 paper Pad
  • Craft Consortium – A4 Solids Double-Sided Paper Pad – Candy Christmas – Reds
  • Multi-Colored Cardstock Scraps

Ink

  • Pigma – Mircon 01 Fine Tip Pen – Black
  • Pigma – Mircon 01 Fine Tip Pen –Brown

Adhesives

  • Neutral PH Adhesive by LINECO
  • Fine-Tip Glue Bottle

Tools

  • Die Cutting Machine
  • Bone Folder
  • Scissors
  • Stamping Blocks as paper weights

Pop-Up Clock Retirement Card

This retirement card was made for Craft Roulette #198 whose parameters included a spanner project, butterfly colors, centerpiece element and dial(s).

Thank you for spending time with this blog post. I hope it inspires you and makes you smile. Please like and leave comments 😊

Materials Used:

Dies

Embossing Folder

  • Memory Box – Open Studio – 3D Embossing Folder – EF1018

Stamps

  • Tonic Studios – Tonic Craft Kit 59 – Clocks & Cogs

Papers

  • Dare 2B Artzy – 12×12 Double-Sided Cardstock – Honey Bloomz by Andie Hanna – English Garden – PP1045
  • Bazzill – 12×12 inch Cardstock – Travertine
  • Gold Matte Cardstock
  • Black, Light Blue and White Cardstock
  • Park Lane Paperie – A7 Cardbase and Envelope – White

Ink

  • StazOn – Solvent Ink – Jet Black
  • Pigma – Mircon 01 Fine Tip Pen – Black

Adhesives

Tools

  • Stamping Blocks used as paperweights
  • Scissors

Miscellaneous

Easter Candy Boxes

Little candy treat boxes left by the Easter Bunny make the child in all of us smile.  

For these fun boxes I used the Candy Hearts Box in the December 2023 release by Karen Burniston.

The box is cut in one piece. (I used patterned paper which the striped paper had a white backside while the egg paper had stripes inside.) Before assembling, cut out the window with the square or hearts decorator dies in the set and back it with a scrap of clear acetate or plastic packaging. Then, adhere a contrasting frame cut with the same dies. Thin double-sided tape works well to adhere the plastic the inside of the box and for the long side tab, but glue will work as well.

I used stickers from the paper collection as well as “Happy” and the bunny from Word Set 2 and Spring Animals to decorate the boxes.

Thank you for reading this blog post. I hope this inspires you and makes you smile. Please like and leave comments 😊

Materials Used:

Dies

Papers

  • Violet Studio Designs – 8×8 Single-Sided Paper Pad – Hoppy Easter
  • Photoplay – 12×12 Double-Sided Paper Collection by Michelle Coleman – Bunnies and Blooms
  • White, Pink, Blue and Brown Cardstock Scraps
  • Grafix Dura-Lar .005 Clear Film (Acetate/Plastic)

Inks

  • Gel Pen – Pink
  • Pigma – Mircon 01 Fine Tip Pen – Black

Adhesives

Tools