A Truly Great Friend

Hello, it’s Sue of the Dies R Us Design Team and today we are making a Happy Mail card using Karin Joan Misses dies and stamps by Studio Light.

This slimline easel card was inspired by some made by Jennifer McGuire. Elements from both sets were used to create the paperdoll and an action wobble spring. 

Cut from the Betty die set:

  • One head and shoulders from skin colored cardstock making sure to not loose the ears which cut separately as is the head
  • One blouse using just the shoulders and neck section of the die, cut the blouse from a patterned paper. Then using v die cut the v-neckline
  • One collar and button placket from white cardstock. (Save the button circles for another card)
  • One long bangs from your choice of hair colored cardstock

Cut from the Tasha die set:

  • Two arms from skin colored cardstock (Glue them together for sturdiness)
  • One arm from patterned paper as a sleeve (Fold back hand and trim to form sleeve cuff. I covered my cuff with a scrap of white cardstock.)
  • One long hair piece from your choice of hair colored cardstock

Cut four Hellos from Hello die.

To assemble the paperdoll, begin by stamping and heat embossing the facial features using the stamps from the Tasha set. (I colored the tongue with a pink gel pen and the teeth and eye highlights with a white gel pen.) Play with the layout of the hair pieces, ears and head. Once you have the position using a pencil, mark the location of the head and ears on the long hair piece. Glue the ears in place using a fine tipped glue bottle then glue bangs in place. Glue top half of head to long hair piece making sure to leave the lower half without glue. 

Adhere collar and button placket to front of blouse. Glue blouse to shoulders and neck piece. (I used Nuvo drops for the buttons and let the piece dry overnight before going to the next step.)  Using the fine tipped glue bottle, attached the head to the neck. Glue the long hair to back of shoulders.

Assemble arm and sleeve as directed on cutting instructions. (You may want to cut an additional sleeve and cuff if it will be seen on the backside.) Add the action wobble spring to the back of the arm.

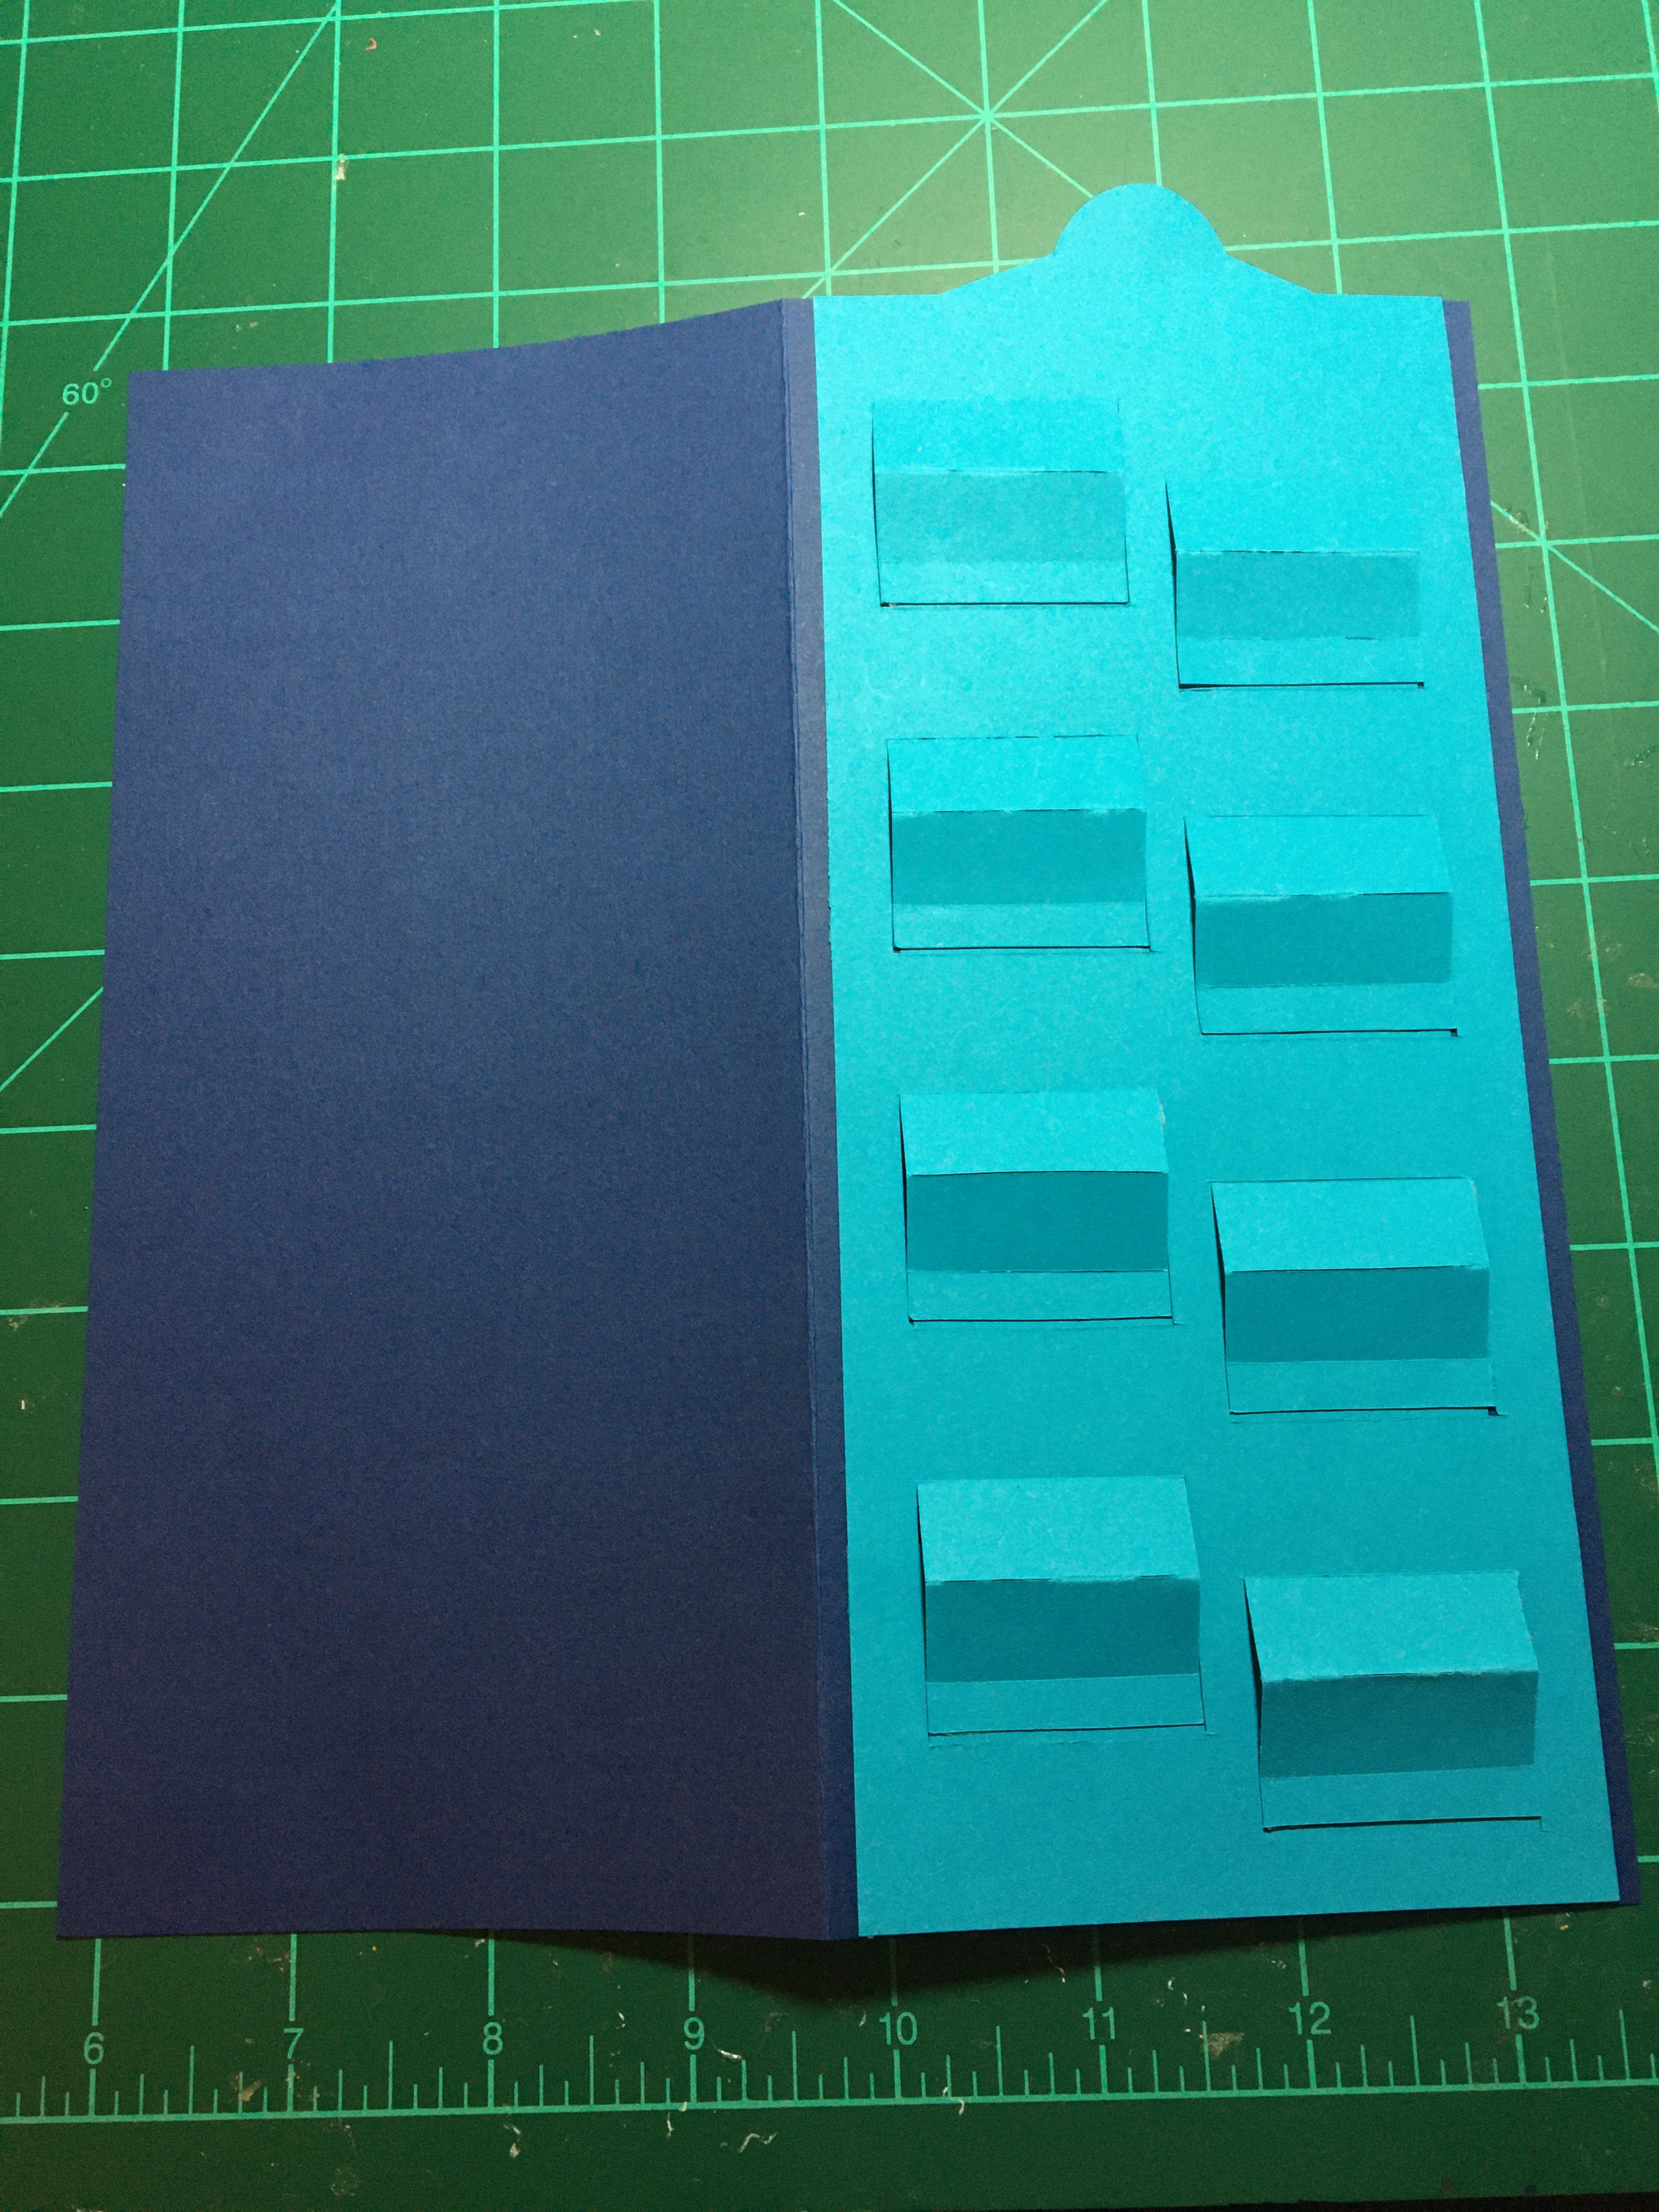
To make the card base cut two piece of patterned cardstock 8 1/2 x 4 inches.  Score one piece across the short end 1/2 inch. Fold and glue the tab to the end of the other piece. Score and fold the top flap of card base at 2 3/4 inches to form the easel.

Glue three hellos together to form the easel stop that will be glued to lower card base.  The fourth hello will be used for decoration on the card front when closed.

Position paperdoll and arm piece on the easel portion of card front. Make sure that the hand is within the card front when closed. Adhere paperdoll and arm to card making sure to only glue lower half of paperdoll to easel.  The arm’s elbow needs to not touch or catch on the card base.  (I ended up having to trim a small tip of the elbow on this card to make it wave smoothly.)

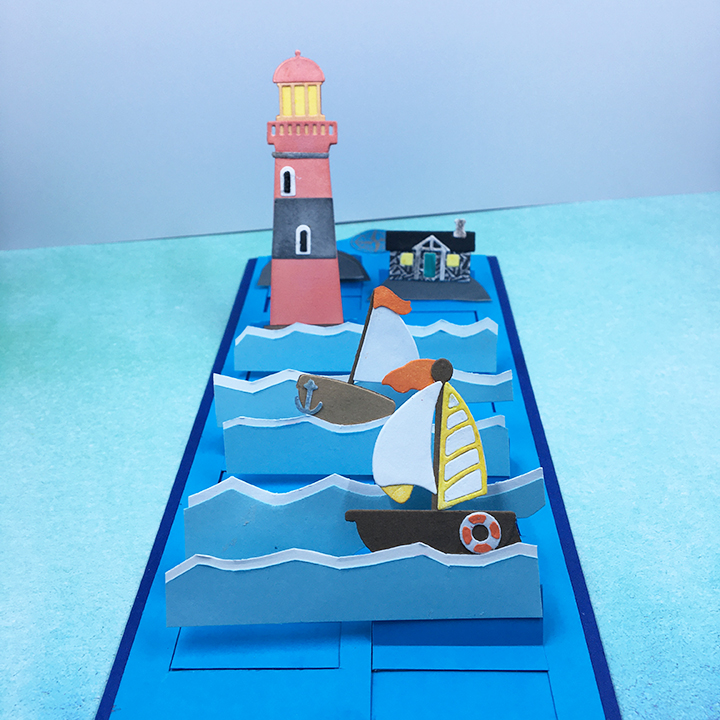
Now you have a card that will wave a cheery hello.

“A truly great friend is hard to find, difficult to leave and impossible to forget,” is the sentiment stamped on the back of the envelope.

Hope this fun card has put a smile on your face and provided some inspiration for your crafting. 😊

Supplies Used from Dies R Us:

Additional Supplies Used:

  • Pink gel pen
  • Patterned papers from Recollections, Hot Off the Press
  • Colored paper scraps from my stash
  • VersaMark – Watermark Stamp Pad
  • Recollections -Detail Embossing Powder – Ebony
  • Nuvo Dream Drops – Cloud 9
  • Papertrey ink – Quoted: True Friends Stamp Set – 3374
  • Stamin’ Up Classic Stampin’ Pad – Blueberry Bushel
  • No. 10 – Neenah Social – Bare White Techweave Envelope

Split Seas Slider

Life gets rough and choppy sometimes and life isn’t always smooth sailing. Sometimes our friends need to be encouraged to take a chance and try something new. This interactive card is for those times.

This card is the first of a series to use my Ully Cat Designs’ Split-Slider Slimline template.

Split-Slider: Print split-slider template (download under Materials Used) onto bright blue lightweight cardstock and then cut out the top panel and slider arm around the outer red cutting lines. (Note: The printed side of the cardstock will be the back of the panel and when assembled will not be seen.) Using a craft knife and a metal ruler, cut the top panel’s eight mini-easels on the red lines. Next, using a scoring tool, score the green and blue fold lines – green being valley folds and blue mountain folds.

Because the top panel is adhered on three sides to the card base and needs to be raised the thickness of the lightweight cardstock slider arm, place two layers of double-sided tape on the long sides and bottom of the panel making sure not to cover the red lines of the easels. A single layer of double-sided tape should be placed on each of the narrow tabs of the eight mini-easels. (If you are using tape that is wider than the tabs, trim off excess.)

To adhere the slider arm to the mini -easel tabs, first, using low-tack tape, tape the front side of the easels shut. (This will ensure that the easels are adhered to the slider arm in the shut/flat position.) Position the slider arm over the back of the panel, making sure there is at least an 1/8 inch/3 mm gap between the tape along the panel edges and the slider arm. Hold the slider arm in place and remove the backing tape on the lowest easel and adhere to the slider panel. Repeat removing tape backing and adhering each easel. Once slider arm is attached to easels, turn over and remove low-tack tape. Test the slider. You may have to help fold the easels into the fully opened position the first time to train them. Once satisfied with the slider/easels’ movement, remove panel backing tape paper and adhere to card base.

Decorating the Easels: For my die-cut lighthouse and boats, I used Distress Oxides and Inks to color the lighthouse and boat flags, a black gel pen for windows and a silver gel pen to color the anchor. The lightkeeper’s house is cut from a pattern paper and colored with pencil for the grey stone. The blue and white layered sea waves are cut freehand as is the rocky land masses for the three easels around the lighthouse. Make sure you don’t glue anything that will impede the easels from moving. (Note the 2nd & 4th waves on my card have been trimmed to allow the easel in front to operate.)

The gold heat embossed compass on the pull-tab of the slider arm, was stamped on a separate peace of cardstock, embossed and them fussy cut. The compass adds sturdiness to the pull-tab. (Depending on the thickness of your cardstock, you may want to add another circle on the bottom of the pull-tab as well.)

The “SEAS the Day” sentiment is attached with foam squares between two easels and is not adhered to any moving parts.

Inside Decorations: You can decorate as you would normally inside the card. Because of the dark card base, I used paper that looks like an old ship’s log, to stamp the inside sentiments “Enjoy life’s journal” and “We cannot control the wind, but we can direct the sails.”

The back flap of the envelope was stamped with a Sara Davies Nautical Collection sentiment “Adventure awaits” to hint at the enclosed card is about.

I enclose a slip of paper with instructions on how to open the card. (See split slider CRX sheet download below.)

Thank you for reading this blog post. Please like and leave comments 😊

Split-Slider Slimline Template Series:

Day 1 – Split Sea Slider

Day 2 – Cloud Dreams

Day 3 – Triple Hearts

Day 4 – A Valentine for A Baseball Fan

Materials Used:

Please note that this template is copyrighted, and Ully Cat Designs must be cited if you publish a card made using it.

Dies

Stamps

Inks/Embossing Powders

Papers

Miscellaneous

© 2021 Sue Small-Kreider/Ully Cat Designs

Lilies of the Valley

According to the Language of Flowers, a small book that Amazon Drygoods reprinted from its Victorian original, lilies of the valley mean a “return of happiness.” And so to, does this card promise happiness from it envelope through to its inside message.

Based on a panel die from Tutti Designs, that was die-cut twice (one white cardstock and one green paper), this card comes together with its sentiments. The front “With love” is a foiled strip on scrap cardstock. (Sometimes when my mojo is lacking, I make a batch of foiled sentiments to have on hand.)

Inside the sentiment is heat embossed onto vellum. The longer sentiment is:

“Let us be grateful

to people who make us happy;

they are the charming gardeners

who make our souls blossom.”

Only liquid glue was used in the assembly of the card.

The back flap of the envelope was stamped with a Card Making Magic sentiment “OPEN immediately to release happiness!” to hint at what the enclosed card is about

You can see more Valentines by clicking here.

Thank you for reading this blog post. Please like and leave comments 😊

Materials Used:

Dies

Stamps

Inks/Embossing Powders

Papers

Miscellaneous