Flowery Thanks

Iris, cosmos and cornflowers stitched around a golden “THANKS” makes for a simple, but heartfelt thank you.

I used another stitched flower die from Spellbinders, this time the Small Die of the Month for April 2021. The die comes with separate letters to die cut the word “THANKS” as well as the larger background die cut with stitching holes.  Using very heavy pale blue cardstock, I die-cut the large piece to be stitched. I had a piece of junk mail that had large sections of matte gold and I die-cut the letters from that.

The larger flower petals and leaves were outline or chain stitched before filling in the centers of them using three strands of floss. The yellow stamens are French knots. While I knotted the floss ends when starting, I finished the flowers on the back side by adding dots of glue to seal the thread ends and add dimension to the stitched frame.

After gluing the gold letters on the front of the stitched piece, I added foam squares with glue to back side of the stitched piece behind the letters and attached to the front of the card base. The card base is an 8 x8 inches sheet of heavy white card stock folded in half using a scoring board.

If you enjoyed this stitched card, there are two more stitched card posts this week as well as pervious stitched cards:

Thank you for reading this blog post. Please like and leave comments 😊

Materials Used:

Dies

Papers

  • Scrap heavy blue and matte gold cardstock
  • 8 x8 inch heavy weight white cardstock

Miscellaneous

  • Blues, purples and green embroidery floss
  • Large eyed needle
  • Foam squares
  • Scoring board and tool

Stitched Flowers for a Summer Birthday

Bright yellow and orange flowers, stitched with shiny embroidery floss hoovering over a raised matte gold Happy Birthday make for a fun and cheery card.

I used a stitched flower die from Spellbinders that originally was part of their Large Die of the Month Club but is now available to everyone via their on-line shop. Initially I die-cut into an 8.5 x 5.5 inches sheet of pale-yellow heavy cardstock that was in my stash. I stitched it completely before trimming it down to the final 4.5 x 5.75 inches to fit on a 5 x 6 inches card base.

The larger flower petals and leaves were outline or chain stitched before filling in the centers of them using three strands of floss. The black stamens are French knots. While I knotted the floss ends when starting, I finished the flowers on the back side by adding dots of glue to seal the thread ends and add dimension to the stitched frame.

The Poppy Stamps “Happy Birthday – Poe Script” sentiment was cut three times from a gold piece of junk mail and glued together. The words were glued directly to the card base after determining the placement with the stitched frame. The frame was attached to the card base with thick foam squares.

For the envelope, I stamped the back with an older rubber stamp from Fun Stampers Journey using my favorite gold-like ink from Stampin’ Up called Crumb Cake.

If you enjoyed this stitched card, there are two more stitched card posts this week as well as pervious stitched cards:

Thank you for reading this blog post. Please like and leave comments 😊

Materials Used:

Dies

Stamps

  • Fun Stampers Journey – Button Bliss – AT-0096

Ink

  • Stampin’ Up – Classic Stampin’ Pad – Crumb Cake

Papers

  • Scrap heavy yellow and matte gold cardstock
  • A7 white card base and envelope

Miscellaneous

Stitched Flowers for a Spring Birthday

Luscious purple, blue and lavender flowers, stitched with shiny embroidery floss hoovering over a raised matte gold Happy Birthday make for a simple yet elegant card.

I used a stitched flower die from Spellbinders that originally was part of their Large Die of the Month Club but is now available to everyone via their on-line shop. Initially I die-cut into an 8.5 x 5.5 inches sheet of pale blue heavy cardstock that was in my stash. I stitched it completely before trimming it down to the final 4.5 x 5.75 inches to fit on a 5 x 6 inches card base.

The larger flower petals and leaves were outline or chain stitched before filling in the centers of them using three strands of floss. The yellow stamens are French knots. While I knotted the floss ends when starting, I finished the flowers on the back side by adding dots of glue to seal the thread ends and add dimension to the stitched frame.

The Poppy Stamps “Happy Birthday – Poe Script” sentiment was cut three times from a gold piece of junk mail and glued together. The words were glued directly to the card base after determining the placement with the stitched frame. The frame was attached to the card base with thick foam squares.

If you enjoyed this stitched card, there are two more stitched card posts this week as well as pervious stitched cards:

Thank you for reading this blog post. Please like and leave comments 😊

Materials Used:

Dies

Papers

  • Scrap heavy blue and matte gold cardstock
  • A7 white card base and envelope

Miscellaneous

Impossible Boxes for Photographers

Impossible boxes come in a variety of shapes from squares to hexagons. They are called impossible because to open them it seems impossible as the lid is attached to the box base and has to be fully pushed open to retrieve what is inside the box.

I made some boxes for my photographer friends to hold some small trinkets using Helen Griffin’s Simply Made Crafts’ Hexagonal Impossible Box Dies Set for the box. The way the box lid opens reminds me of a camera lens. The box will easily hold something 3 x 3 x 2 inches.

To decorate the box, I used Lou Collins’ TEXT{ures} wavy film strip die from her Vintage Travel Collection cut I twice in black.  On one box I had the film go over the box lid edge, cutting it apart so the box could open. The other I wrapped around the box.

Here are some brands of Impossible Box Die sets:

Videos and blogs on Impossible Boxes

If you enjoyed reading this post, please“Like” and “Follow” my blog.

Hourglass Valentine

Having made this hourglass card once before, I realized it would make a lovely winter Valentine with the Penny Black’s stamp sentiment “I love you to the moon and back” if I added a 3/4 inch moon to the scene. The Greetery’s Hourglass dies make this an easy card to create, but time consuming to cut and color all the pieces.

You can read about how I created my first hourglass card by clicking here. The video below will show you more on how I created this card.

You can view more Valentines by clicking here.

Thank you for reading. If you enjoyed this blog post, please like it and follow the blog. 😊

Dies

Stamps

Inks & Embossing Powder

  • VersaMark – Watermark Stamp Pad
  • Cosmic Shimmer – Detail Embossing Powder – Bright Gold
  • Ranger – Tim Holtz’s Distress Oxides – Tumbled Glass, Stormy Sky, Chipped Sapphire and Prize Ribbon
  • Avery Elle White Ink Spray
  • Red, yellow and dark blue fine tipped markers

Papers

  • Heavy weight 8 ½ inches x 11 inches white cardstock
  • Colored, pearlescent, glitter cardstock scraps
  • Xcut – Xtras Adhesive Foil Sheets A5 – Gold – XCU 174419
  • Dura-Lar – Archival Polyester Film – .005 clear (Acetate)

Additional Supplies:

Stitched Valentine

Valentine’s Day is coming and a handmade card in masculine colors with a bit of stitching and soft bling, maybe just the thing for your loved one.

In playing around with the Spellbinder’s Layered Stitched Background dies, I realized that if put side-by-side, two of the backgrounds would fit on a slimline card for a #10 business envelope which would go well for the masculine card I needed to make for Valentine’s Day. The card is to be attached atop a chocolate bar.

I had enough large scraps of pearlescent coordinating green cardstock and a pale celery green textured paper to cut two each of the layers. (I saved all the out-cut pieces and tiny dots to use in other cards.) The card base is a brown flowery patterned cardstock with a white back cut into a 6 ½ inch x 9-inches rectangle, scored and folded in half.

The stitching was done with three strands of brown embroidery floss. Using clear tape on the backside to adhere the thread tails to the card.

A fine tipped glue bottle is the easiest way to apply glue to the fine lines of the top two layers of the die-cuts. (I cut the thicker, middle layer from the lightest color to add contrast to the two other shades of green and to make the medium green fine line detail pop.) Once the lattice layers were glued together it was easy to adhere them to the stitched layer.

Hot foiling the inside of the card needed to be done before the stitched panels could be adhered to the card base. Spellbinders calls their hot foiling system glimmering. (Here are two videos explaining the hot foiling process – Jennifer McGuire  and Yana Smakula) I have found their Quick Trimmer to be much easier to cut the foil with than scissors. I usually do a batch of hot foiling when I get out the Glimmer Hot Foil System heating plate and my die-cutting machine as it takes time to heat-up and cool-down. (I use a die-cutting machine that can take an 8 1/2 x 11 inches sheet of paper but the system can use a smaller 6-inch wide machine too.)

I did some small sentiments first on scraps of the green cardstock and a piece of cream cardstock using scraps of different foils. Some worked well, but some had issues. (I do these as practice runs as I only had one shot at the card inside.) I positioned my foiling plates and rose blush foil on the inside of my card and taped them down using low tack tape. (The plates moved slightly when I ran them through the die-cutting machine and made the sentiments a bit wonky. I should have taped both sides of the plates down.) A sand eraser is good for removing errant foil bits but be careful when using white corded cardstock as the eraser will wear away the color to white.

Once the foiling was completed, the stitched card layers were glued to the front of the card base.

The front sentiments “FROM ME TO YOU” (in Speckled Aura foil on cream cardstock) and “XOXO” (in Aura foil on dark green cardstock) are glued to other scraps to give them some firmer stability before being adhered to the card front with foam squares. Ten gold sequins were added to the tops of the stitching and where the lattice frames meet for a bit of sparkle.

A gold heart rub-on transfer was added to the back of the brown envelope. A chocolate bar will be bundled under the card-stuffed envelope and tied with a white ribbon for presentation.

You can view more Valentines by clicking here.

Thank you for reading this blog post. Please like and leave comments 😊

Materials Used:

Dies

Foiling

Papers

  • Scrap colored and textured green papers and cardstock
  • Hunkydory – Adorable Scorable Patterned Paper Pack – Secret Garden
  • Brown #10 Business Envelope

Miscellaneous

The Best Baking Birthday Card

Mary Berry and Paul Hollywood, icons of British baking and favorites of the person this card is made for, have been hosts for The Great British Baking Show from 2010-2016.

This stand-up U-fold card with crossbars is reminiscent of an old Aga stove. The card uses Paper Discovery by Olga Direktorenko’s Cosy Kitchen collection of dies, stamps, embossing folder and papers. Paper Discovery is a brand from Craftstash-UK or Craftstash-USA

Stove Doors: I wanted the oven doors to have the look of enameled iron, so I cut set of blue doors. (Save the out-cut of door openings for stamping and stove knobs for later) I cut a tiny white circle for the oven gauge and glued it in place on the one door. Next I covered all but the hinges on the doors with Glossy Accents gel and let them dry overnight. Once they were dry, I cut and glued the silver latch and hinges on to them before gluing them on to the doors I had already glued to the stove.

Tile Backsplash: I cut the tiled back splash from white card stock and brushed a light coat of Glossy Accents over the rows of tiles, avoiding the deep embossed grooves between tiles.

Glass Jars of Fruit: To achieve the look of glass, stamp and color on white cardstock using permanent inks when dry cove with a thick layer of Glossy Accents. When dry curve around your finger or pen to create the curved glass effect.

Dresser: Cut one and use an embossing sandwich for your die-cutting machine to emboss the details into the cardstock. Cut a 1/4 inch x 4 1/2 inches strip of white cardstock for the shelve crossbar. Using an ink blending tool color the crossbar and dresser to bring out the embossed details using a yellow ink. (Don’t ink where the stove is as you will be stamping there.)

Oven Stamping: Using the stove out-cut from cutting the stove doors, trace with pencil where the door openings are onto the dresser back. Remove stove out-cut and using a stamping platform stamp sentiments or baking trays in oven openings. (I masked off the other openings that the rolling pin handles and baking pan that would cover with yellow paper tape.)

Stove Assembly: Cut another stove from blue cardstock. Glue all the doors to the backs of the “enameled’ doors from first step.  Glue the stove front to dresser matching up stamped images with the door openings.  Adhere two layers of the blue stove knob cut-outs to top of stove. (This will add some dimension to make the knobs be raised up from stove front.) Cut from silver mirror cardstock the knobs, thin line trim, door hardware, stove burners and utensil rack. Glue silver hardware onto doors and knobs and silver trim in place.  Glue door hinges into place on to stove front being careful not to get glue onto stamped images. Once glue is dry, fold doors back to crease hinges. Cut a 1/2 inch x 4 1/2 inches strip of blue cardstock for the stove burners crossbar.  Glue dresser on to card base after the shelf and burners step.

U-Fold Card Base: Cut a 6 3/8 inches x 6 15/16 inches rectangle from heavy white cardstock. Score on a scoreboard at 1 inch, 1 1/2 inches, 5 7/16 inches and 5 15/16 inches and fold the outer folds as mountain folds and the inner folds as valley folds. This should create a U-shaped card base.

Wallpaper: Cut pieces of your decorative “wallpaper” to fit the top half of each of the card base’s sections. Allow for black space over the folds. Glue decorative pieces in place. (Note: It might make the crossbars stronger if you glued the narrow inside strips of decorative paper on after the crossbars are attached, but before the dresser is glued in place.)

Wainscoting: Using the kitchen background embossing folder, emboss the wainscoting and floor from a piece of cardstock that is at least 7 inches x 3 inches. Using an ink blending tool, color the wainscoting and floor with yellow ink to match the dresser. Cut pieces to cover the lower half of the card base (two 1-inch panels of wainscoting and first row of floor tile and one 3 7/8 inches x 3 /4 inch of two rows of floor tile and bottom edge of wainscoting.) Glue the two 1-inch panels to the side sections of card base. Cut a 3 7/8 inches x 2 1/2 inches piece of blue cardstock to be glued in place as the back of the stove.  With the card base open in the U-shape, position the dresser with stove over the opening and mark with a pencil where the shelf and stove burner crossbars should go on the narrow inside walls. Adhere the large blue stove back to the card base using the pencil mark for the stove burner crossbar for positioning. Glue remaining strip of flooring with wainscoting at the bottom of the stove back.

Shelf and Burners: Stamp color and cut out herb pot, utensils and kettle. With tiny dots of glue, attach the utensils to the silver rack and add tiny piece of foam squares to the back of the rack and utensils. Attach the kettle to the from of a stove burner. Fold 1/4 inch tabs blue crossbar at each end. Using scraps of blue, attach the burners to the blue crossbar centering them over the stove knobs. Glue the backsplash tile onto the card base above the burners. Adhere the utensil rack above the tile backsplash.  Assemble the shelf and its contents in the same manor as the stove burners crossbar. Glue in place to card base using pencil marks. 

Birthday Banner: Stamp onto a 3-inch x 5/8-inch paper strip a sentiment from the Simply Food stamp set.  Cut notches on ends of strip and fold into a ribbon banner. Glue ends of ribbon to top of dresser.

Envelope: I used a 6 x 9 inches envelope for this card that folds flat into 5 3 /4 inches x 6 3/8 inches. The stamps are from the baking set of stamps.

Thank you for reading. If you enjoyed this blog post, please like it and follow the blog. 😊

Dies

Embossing Folders

Stamps

Inks

  • Memento – fade-resistant Dye Ink – Tuxedo Black, Rich Coco
  • Ranger – Tim Holtz’s Distress Ink – Salt Ocean, Fossilized Amber
  • Silver metallic pen
  • Silver gel pen
  • Crayola Signature Brush & Detail Dual-ended Markers

Papers

Additional Supplies:

Faux Leather Bag

A favorite leather bag has a certain smell and memories of all the fun times with friends and family. This little faux tooled leather bag can add to those memories.

Made with the tote die set by Divinity Designs, a crafting company based out of Ohio, the bag goes together relatively easily. I looked at the assembly video before making, but I assembled the bag mesh pockets a little differently.

Cut two each of the front/back, side, mesh pocket, handle, pocket pleat, front/back layer and handle layer from brown Kraft cardstock. Cut one each of front pocket flap, front pocket flap layer, pocket layer, and stitched belt buckle set from brown Kraft cardstock. Cut two front/back layers from brown paper. Cut one each of the buckle and pin from orange foil cardstock.

Using the tote embossing insert plate and your embossing sandwich for your die-cutting machine emboss the two front/back layers and pocket flap and pocket layers.

With an ink blending sponge, darken the edges of all pieces, especially the stitched areas with brown ink.  Rub the embossed layering pieces to highlight the “tooled” design.  Glue the layers onto their base pieces.

To assemble, I glued the mesh pocket tabs on to the side tabs first, bowing out the mesh pocket. Next, I adhered the bottom side tabs to the bottom rectangle of one of the front/back pieces. Glue the other bottom rectangle over the top of the first rectangle to hide the side tabs. Next adhere the side tabs to the front/back pieces. Take your time to hold the tabs in place until the glue sets.

Shape the handles by running them through your fingers to bend them into an arch shape. Glue rounded ends of on handle to the front of the bag. Repeat with handle for the back side of bag.

To assemble the front pocket, pleat the two pocket pleats and glue one tab to the inside of the front pocket tab. Repeat with the other pocket pleat. Fold the bottom tab of Front pocket over the ends of pleats and glue corners. Fold over the front pocket flap tab and glue its corners to the top pleat corners.  Glue assembled pocket to front of bag.  Thread large brown stitched belt piece through foil buckle and glue pin in place. Fold tiny stitched brown piece around larger piece as the loop that holds the belt tongue in place. Glue top of belt piece to pocket flap and loop tabs to pocket. This belt with hold the pocket flap securely closed.

I used some tiny star brads that I had in my stash to reinforce the handles to the bag. I punched the starter holds with an old ice pick or awl and a sanding block inside the bag. Once the brads were in place, I glued the front/back layer over the inside of the bag to hide the brads and side tabs.

All of the glued layers make for a study bag that measures 6 ¼ inches high x 5 inches wide and 2 inches deep.  I plan to gift a lovely scarf and earrings in this bag.

Thank you for reading. If you enjoyed this blog post, please like it and follow the blog. 😊

Dies

Ink

  • Ranger – Tim Holtz’s Distress Ink – Vintage Photo

Papers

  • Heavy weight 8 ½ inches x 11 inches brown cardstock
  • Brown kraft paper
  • Orange foil cardstock scraps

Additional Supplies:

Nativity Ornament

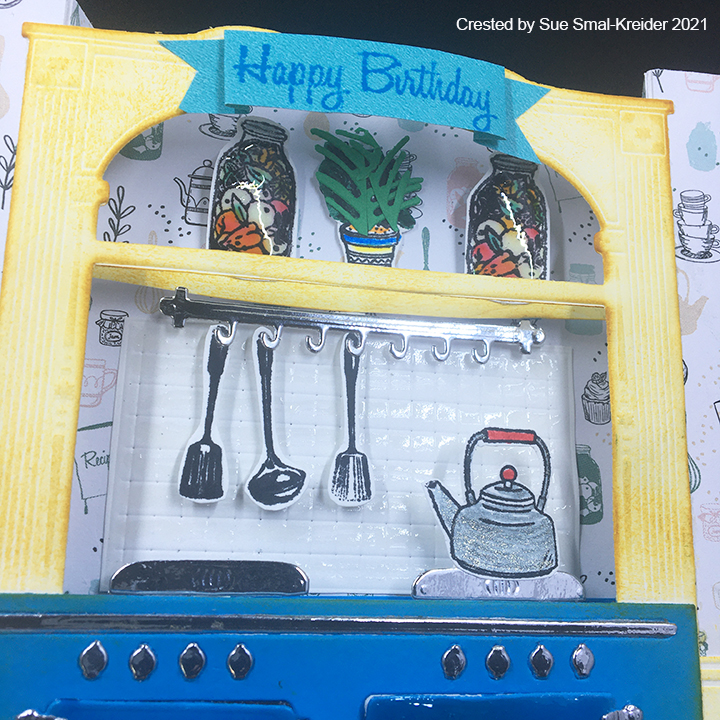
Sometimes an ornament can be a fun Christmas card.  A traditional nativity scene makes for a special greeting and gift.

Memory Box dies and Distress Inks make for a quick make with brown kraft cardstock and white card stock scraps. While you can purchase a bundle of the Memory Box dies from Craftstash, I purchased my dies from several stores and skipped using the House Frame base die.

Cutting Pieces:

Cut from brown kraft cardstock:

  • 3 of the Nativity house frame
  • 2 of K-shaped crossbars
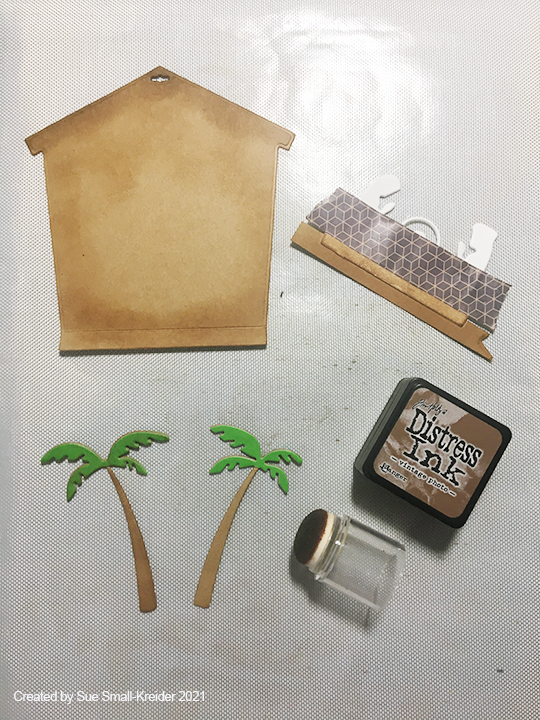
  • 2 sets of palm trees
  • 1 of the house frame background
  • 1 strip 3/8 inch x 2 3/8 inches

Cut from green paper:

  • 2 sets of palm leaves

Cut from white cardstock:

  • 2 of human figures

Cut from gold glitter cardstock:

  • 1 of star

Cut a 9-inch piece of linen twine

Creating Sturdy Pieces:

Glue the palm trees together to form a study pair of trees with green leaves on the front and back of trees.

Glue one of the K-shaped crossbars to the back side of a house frame. Cut the tab off another of the house frames. Glue the trimmed frame to the back of the first frame sandwiching the crossbar between the two frames.

Glue the two human figures together.

Creating Middle Frame:

Trim 1/8 inch of the remaining house frame’s tab.

Glue human figures onto strip positioning them to fit inside the frame opening.

Inking House Pieces:

Using Walnut Stain Distress Ink, cover the front and middle frames. 

Ink just the roof of the House background.

Inking with Lighter Brown:

Ink the palm tree trunks with Vintage Photo ink. Lightly tap some brown on the green leaves.

Ink around the sides, floor and eaves of house background.

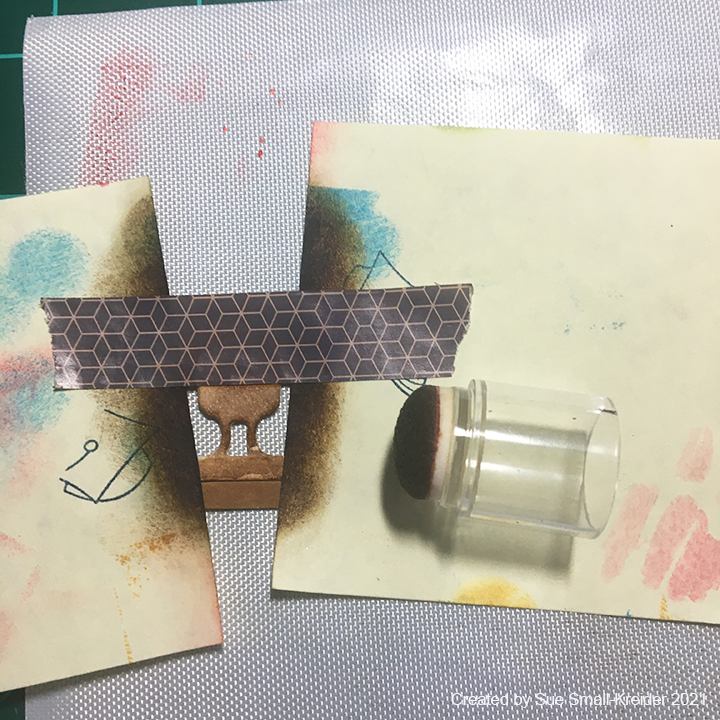
Using washi tape or low tack tape mask the human figures off and ink the white ground to blend into the brown strip.

Inking with Yellow Ink:

Using Fossilized Amber Distress Ink, Blend the center of the house background into the darker edges.

Mask off all but the halo, baby’s head and straw and solidly color it yellow.

Inking with Green Ink:

Mask the hands and face. Using Mowed Lawn Distress Ink, color the male figure.

Inking with Blue Ink:

Mask the hands of female figure and manger/crib. Ink with Mermaid Lagoon ink.
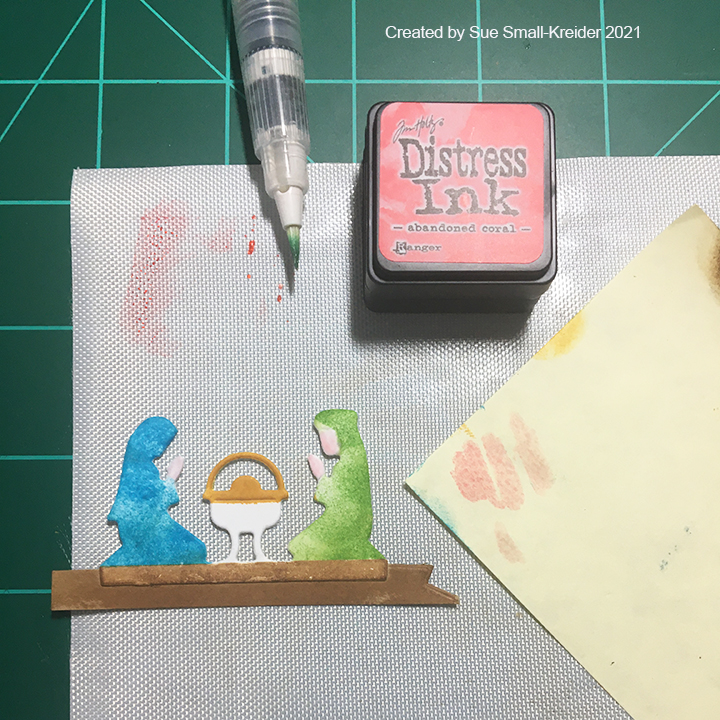
Painting Flesh:

Tap a small amount of Abandoned Coral or other flesh toned ink on to a craft mat. Using a waterbrush pick-up some ink and experiment on scrap paper to get the desired flesh tone before painting the human figures.

Inking Manger/Crib:

Using both brown inks, color the crib to be darker than the ground.
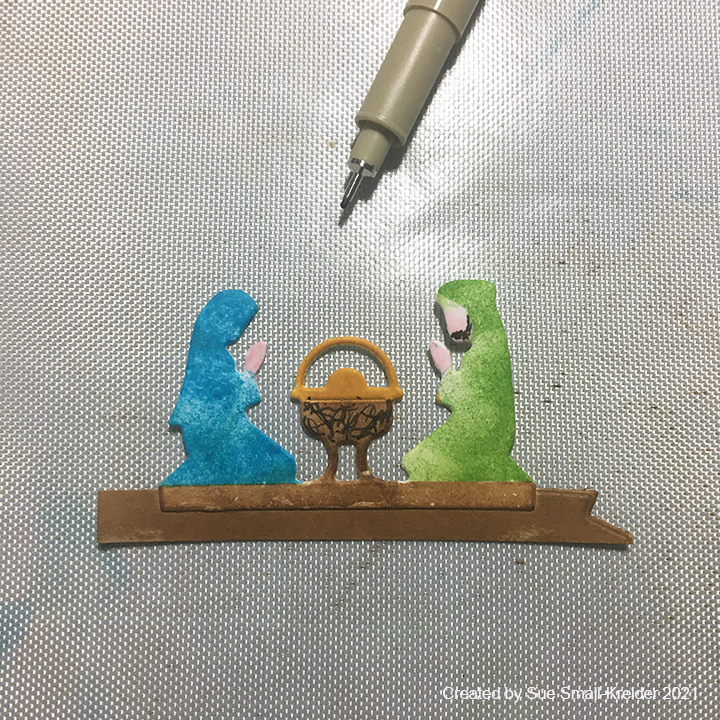
Inked Details:

Using a fine-tipped brown pen, draw in man’s beard and add woodgrain to crib.

Golden Sparkle Detail:

Color the halo and baby’s head with a gold gel pen.

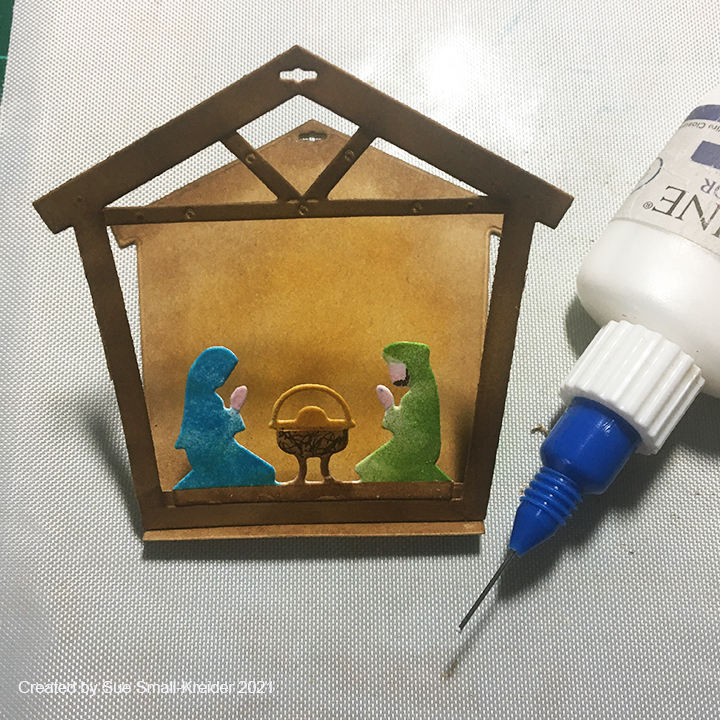
Attaching Figures to Middle Frame:

Add glue to back of middle frame and glue brown strip with human figures to house frame.

Attaching Middle Frame to House Background:

Fold back 1/8-inch tab on middle frame and glue to folded tab of house background. (A fine-tipped glue bottle makes this so much easier.)

Attaching Front Frame to House Background:

Fold back front house frame tab. Place glue on inside of tab and adhere to the bottom of house background tab.

Adding Twine Hanger:

Thread twine through all three holes in top of the roofs.

Knotting Twine:

Fold out the house frames flat to create slack in the twine before double knotting the twine at the roof pinicale.

Finishing Hanger:

Loop twine ends into a solid knot and trim ends to be even.

Glue star tips to house frame and twine.

Mailing Ornament:

The ornament fits into an A2 envelope. (I plan to seal mine into small plastic bags to go through the mail safely. You could also seal the entire piece with a spray acrylic sealer to stop the inks from running with if exposed to moisture.)

Thank you for reading. If you enjoyed this blog post, please like it and follow the blog. 😊

Dies

Inks

  • Ranger – Tim Holtz’s Distress Ink – Mowed Lawn, Mermaid Lagoon, Walnut Stain, Vintage Photo, Fossilized Amber, Abandoned Coral
  • Brown fine-tipped pen
  • Gold gel pen

Papers

  • Brown Kraft cardstock
  • White cardstock scrap
  • Recollections – 8.5 x 11 glitter card stock – Cashmere Glitter
  • A2 envelope

Additional Supplies: