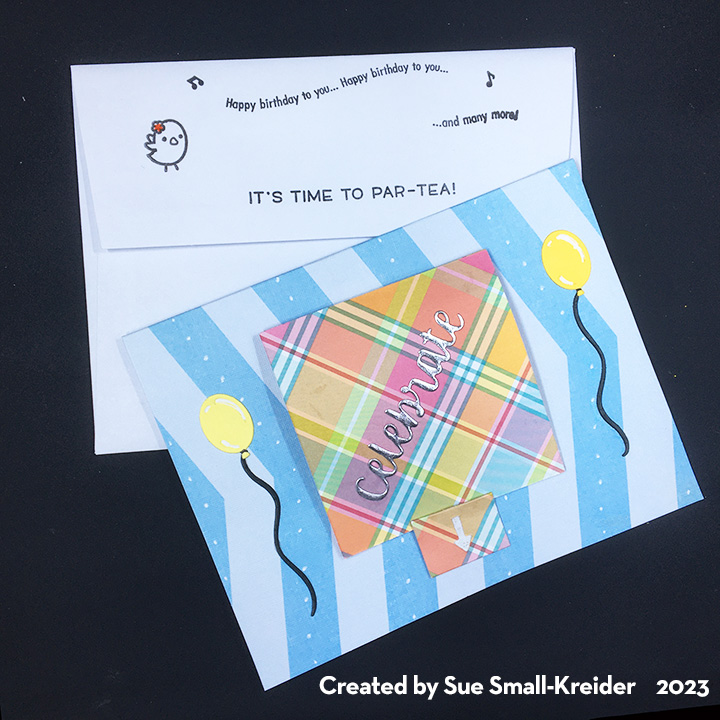
This card was made for Crafting Roulette #159 whose parameters included a card on a card, sky view colors, a table and white dots or spots.
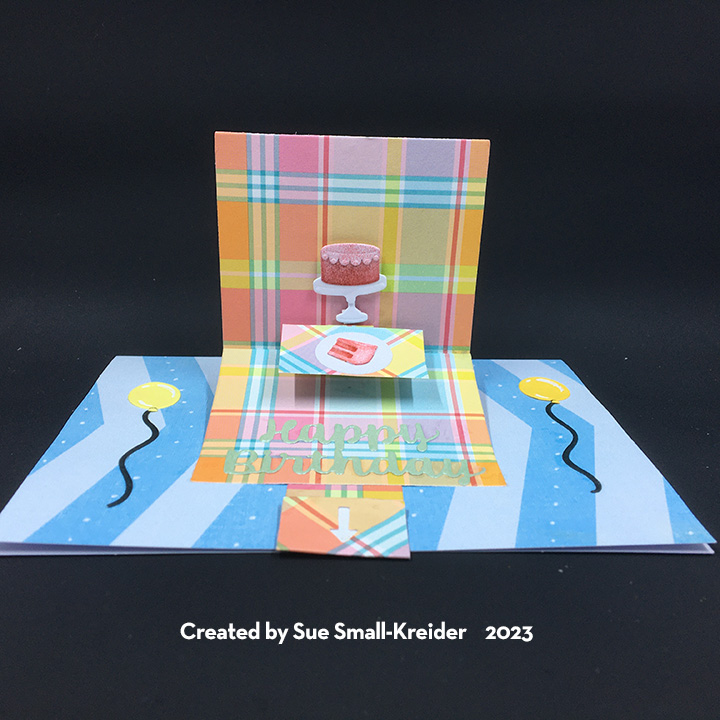
For the pop-up card on the purchased printed cardbase, I used Karen Burniston’s Frame Pull Pop-Up die set with a Lawn Fawn double-sided plaid paper. (This card is similar to some cards I made a few years ago but simplified.) The balloons and inked cake die cuts are from a set by Courtney Chilson. (I could have also used Karen Burniston’s Big Birthday Charms for a cake plate with a fork.) A floating table was formed by gluing a rectangle of plaid paper onto the pop-up cube in the Frame Pull set.
Once the pop-up card was installed on the printed cardbase, I added white dots to the blue chevrons with a gel pen. Leftover yellow balloons that I had made for another card were used to finish the card front. the “celebrate” and “Happy Birthday” are all from the Karen Burniston’s Word Set 2 – Birthday.
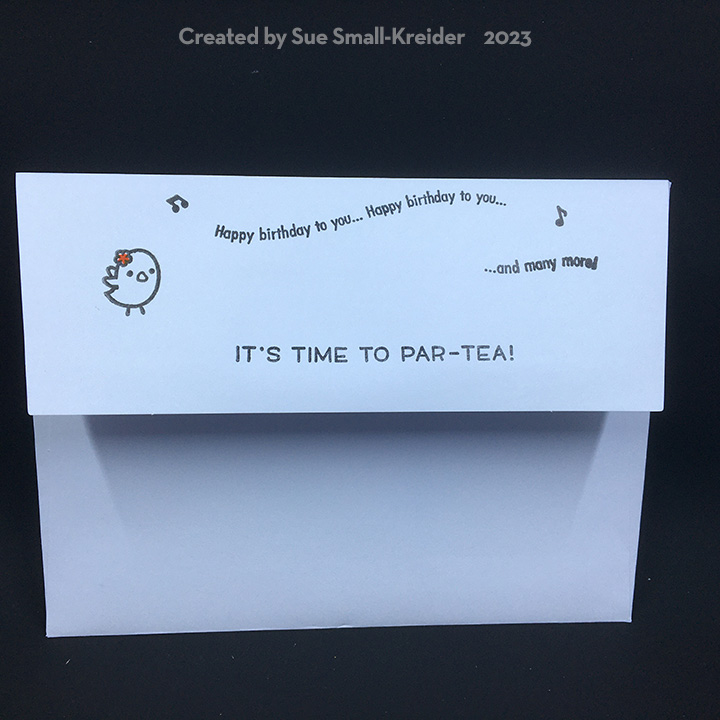
Inside the card, the red sentiment is a rubber stamp by Impression Obsession while the critters sharing cake are by Lawn Fawn.
For the envelope’s back flap, I used the same Lawn Fawn stamp set and colored the bird’s tiny flower red as I did inside the card.
Thank you for reading this blog post. I hope this inspires you and makes you smile. Please like and leave comments 😊
Watch the assembly video for the Paper Frames Pop-Up before starting. I used a purchased A7 (5×7 inches) card base and envelope for this card and covered the inside panels with decorative paper (4 7/8x 7-inches) and the outside panels with colored cardstock and journaling cards.
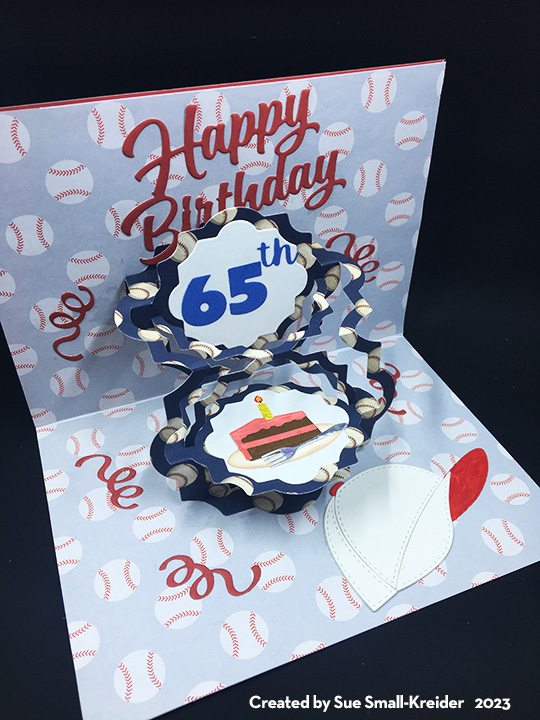
The Paper Frames Pop-Up is designed to be opened horizontally, but having seen a card made by Nicky Foden that used the frames opening vertically, I decided to try the vertical top fold cardbase with vertical frames. (Installation is the same as the assembly video, but I found that the weight of the frames didn’t allow for a full pop-up of the frames, so I added strips of the navy-blue patterned cardstock behind the four arms near the top and bottom tabs that are glued to the cardbase.)
The decorative panels on the pop-up frames use the Numbers die set which has the “th” in it, and the cake slice is from the Big Birthday Charms set. The red streamers around the pop-up frames are also from the Big Birthday Charms. “Happy Birthday” was die cut in red. The white baseball cap is a die cut by Waffle Flower and serves as a place to write a personal message.
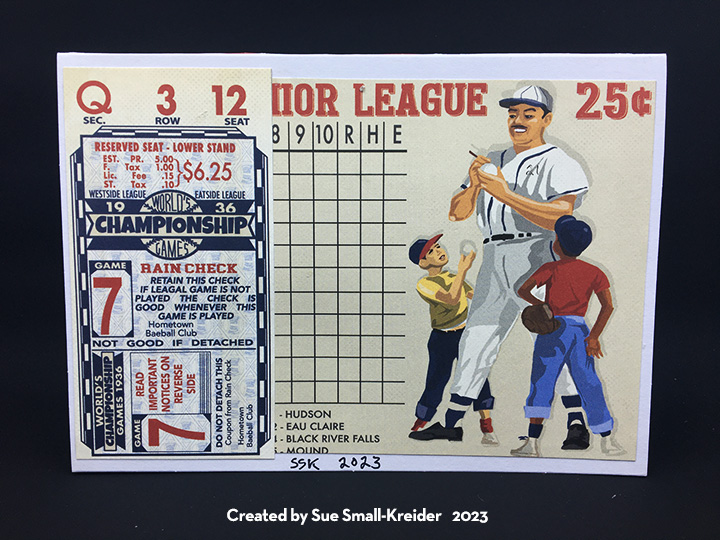
From the Sports Charms set, I die-cut and stenciled 11 of the baseball charms and snipped off their charm loops. Along with the larger baseball die cut using a Waffle Flower die set, ten of the baseball charms were glued to the card front. “Celebrate!” was die cut from some of the solid color red cardstock that is part of the Echo Park Baseball paper collection.
The last baseball charm is on the envelope flap.
Thank you for reading this blog post. I hope this inspires you and makes you smile. Please like and leave comments 😊
Spring greenery and the mention of fairies, sprits, leprechauns and other wee creatures of mischief and fortune is what this card is about. It uses papers from the Graphic 45’s Little Things collection and dies by Karen Burniston including the new Rectangles and Labels Crosshatch set for creating backgrounds.
The card uses a pre-made 5×7-inch cardbase that decorative papers have been adhered. For the card front a card topper and two layers of decorative papers were used.
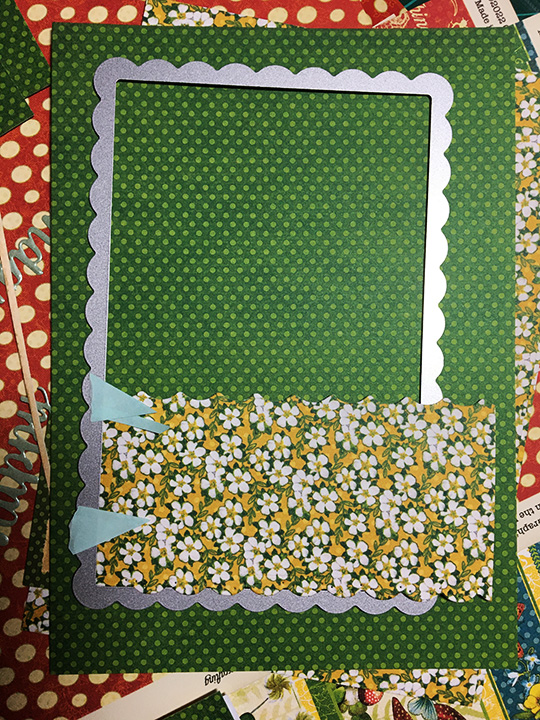
On the inside of the card, I covered the cardbase with a green dotted paper (5×7-inch) and then cut the floral papers (6×4.5-inches). I wanted a scalloped edge on the floral paper, but the scalloped rectangle in the die set is slightly smaller than 6×4-inches, so I had to cut the edges in a modified way. I placed one edge under the die and the other over the top of the die to cut. Unfortunately, I messed-up and cut two edges, which meant I had to piece the paper when I adhered it. The edge of the floral paper that abuts the center fold is not scalloped.
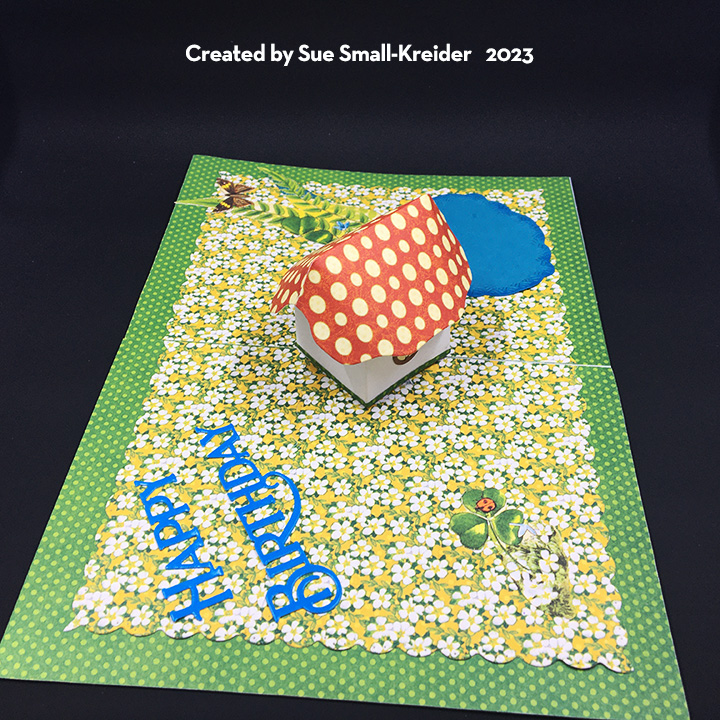
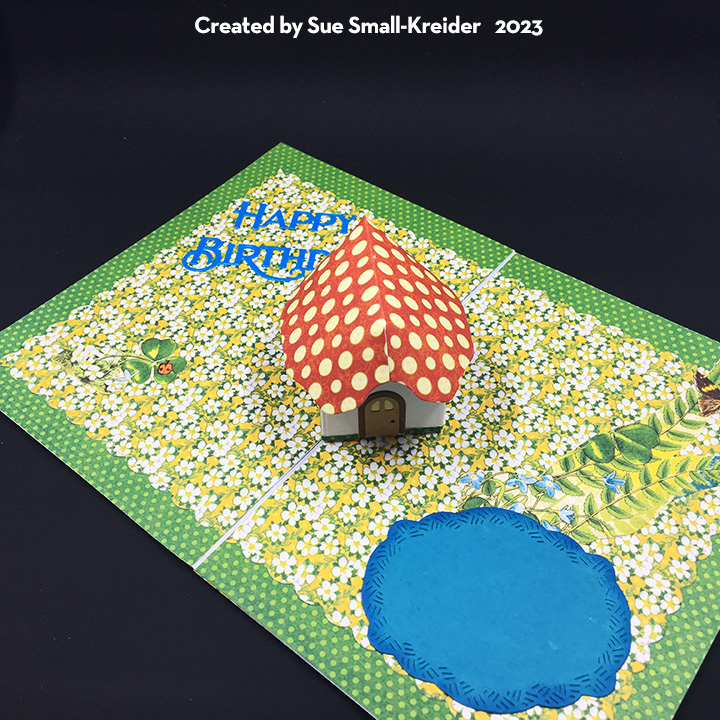
Before cutting or assembling the mushroom house, I watched the assembly video for both the Tiny House and Mushroom Roof. I decorated the white house piece first before assembling the house using windows and door from the mushroom set. I had a thin strip of the green dotted paper that I placed as grass edging the bottom of the house. The paper collection has a red dotted mushroom paper that was perfect for the roof.
I wanted the “Happy Birthday” to match as close as possible to the lettering font used on the card front, so I used a PoppyStamp word die, cut twice from blue cardstock scraps and glued together before adhering to the card.
For the pond label, I cut the crosshatch label from the new Rectangle and Labels die set and inked the edges with a dark blue ink. The clover leaf and ferns were fussy cut from the decorative papers.
One of the coordinating papers was used on the card back while a large sentiment was cut from the paper set for the back of the envelope flap.
Thank you for reading this blog post. I hope it gave you inspiration and a smile. Please like and leave comments 😊
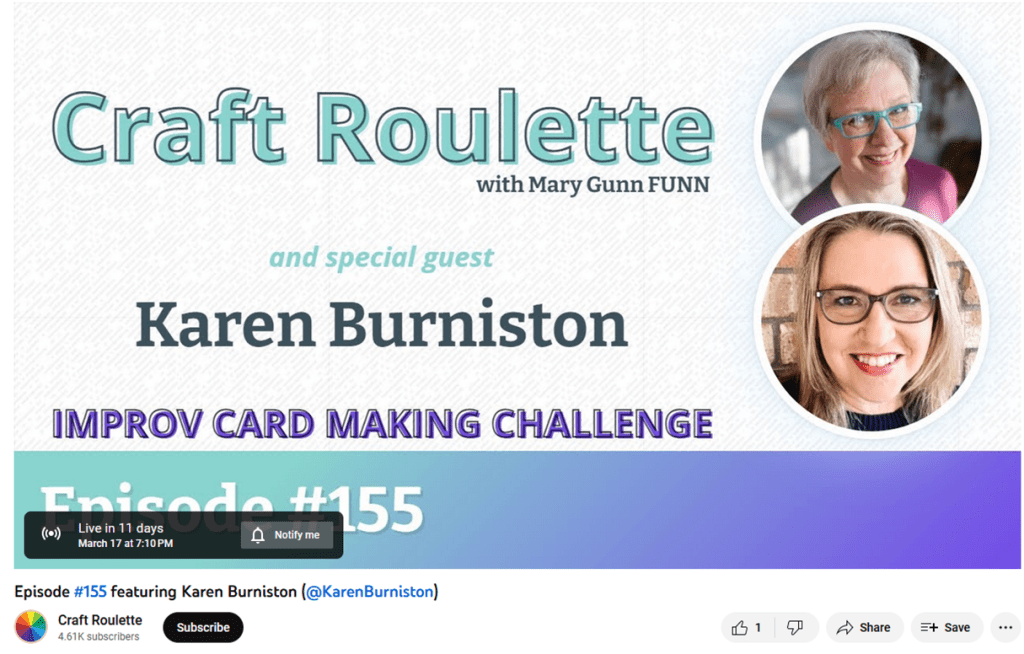
If you haven’t watch this fun Friday night YouTube crafting show https://www.youtube.com/c/CraftRoulette) which has a game show theme and hosted by Mary Gunn. Each week Mary and a guest crafter spin the roulette wheel to randomly pick four perimeters that crafters should use to make a card for that week. Mary and the guest crafter also make cards using the perimeters during the remainder of the hour. Randomly chosen winners from each week’s submissions receive prizes. On March 17, 2023 the guest crafter will be Karen Burniston. (website: https://craftroulette.live/show)
For my Craft Roulette submission card I took an accordion fold design, I had made a template for, but hadn’t constructed yet.
Having experimented with Karen Burniston’s Landscape Rectangle Accordion and cutting the pivot panel into other shapes. For this card I took inspiration from a pivoting die that Karen Burniston had designed for Elizabeth Craft Designs that had a house and a picket fence.
I made a template from heavy cardstock (110 lb) by first cutting an accordion panel and then tracing around a die-cut of the fence portion of the House Pivot Card die to create the fence pattern. (Make sure you don’t cut away the pivot mechanism at the top and bottom of the panel. The center point of the rectangle is the scored fold-line.) I fussy cut the pattern and then used it to trace onto my die-cut panels of patterned, pale blue cardstock.
After tracing the fence onto the panels I cut the fence out using a metal ruler and craft knife to cut all the straight edges and scissors for the curved parts. I used a small corner punch to round the accordion frame corners, folding the tab to be rounded as well.
Because my fence was cut from blue cardstock, I had to color or whitewash the pickets with an white opaque marker. The flowers are small flowers from the following Karen Burniston die sets: Fireplace Extras 2,Tiny House Pop-Up, Flowers and Bee, and Flower Pot Pop-Up. (The flowers in Flowers and Bee and the Flower Pot Pop-Up are the same.) I used yellow posy flatback gems as the purple flower centers. The grass was cut from a spotted green paper using the grass from Long Nature Edges.
“Happy Birthday” is a die cut sentiment using a navy-blue star patterned paper. A personal message can be written on the backside of the frames and fence posts.
The card fits an A2 size envelope.
Thank you for reading this blog post. I hope this inspires you and makes you smile. Please like and leave comments 😊
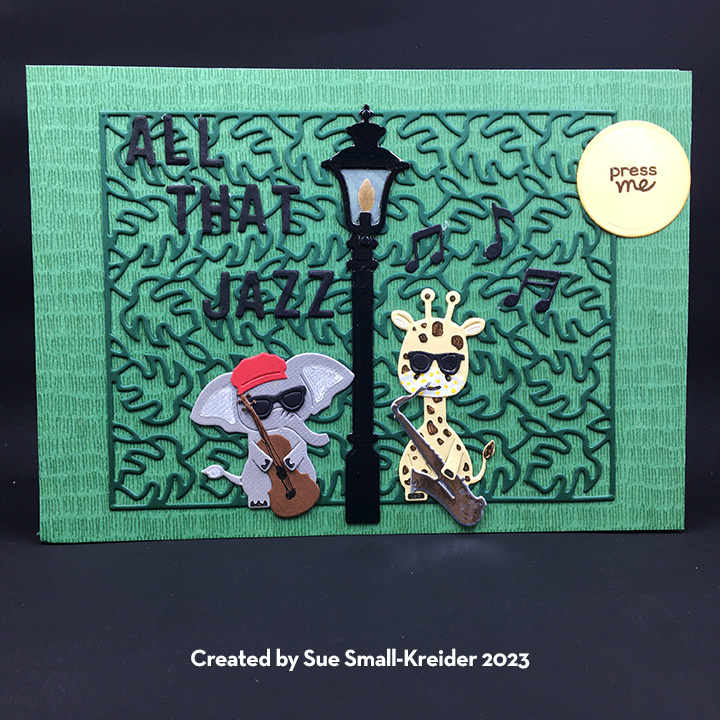
Needing a birthday card for a fun loving and jazz enthusiast gentleman who always supports concerts in the park, was the inspiration for this card.
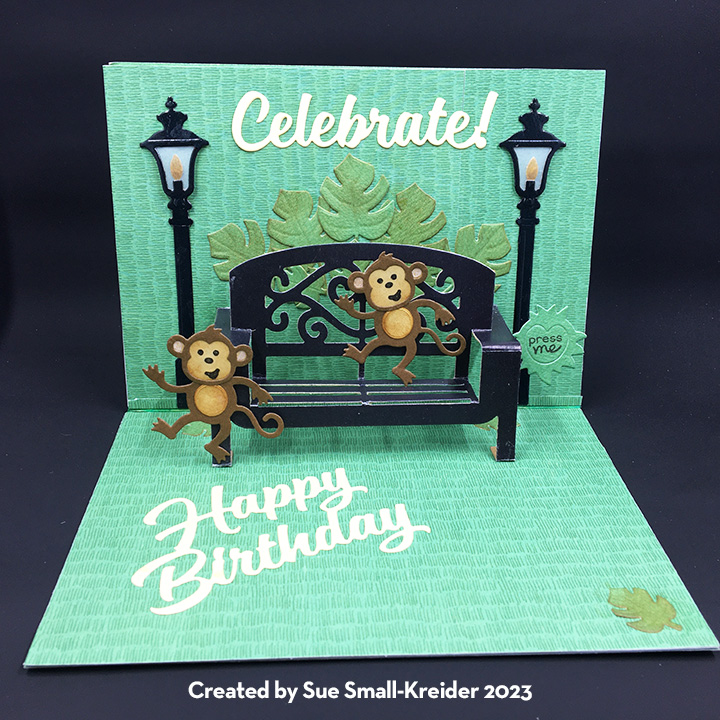
It uses a variety of animals and scene dies as well as a pop-up bench by Karen Burniston. This was my first time using the Pear Blossom Press EZ-lights which are also available on the Karen Burniston website.
EZ-Lights: To start the card, I had to plan out how the lights were to be installed knowing that the switch/battery piece had to be surrounded by foam strips and that I wanted lights on both the front of the card and inside the card. I don’t like to have wires going across the card-fold, so everything needed to be above the fold on this top-fold A7 (5×7-inch) card. (I also watched some assembly videos on using the EZ-Lights.) I made my front decorative panel and added decorative papers to the inside of my card base before poking the holes for the one light on the card front and two lights on the inside top panel.
Front Panel: The front panel uses the fronds pattern plate cut from a dark green cardstock over a grass printed paper.
Lampposts: These are cut using the street lantern pop-up die set using a glossy black piece of cardboard packaging which gives nice dimension as well as highlighting the embossed features of the dies. The edges of the lampposts I colored with black markers. For the lamp itself I used both clear vellum and golden parchment to allow the light to show through. (Assembly video)
Bench: For the bench, I used the garden bench pop-up die set. I found a piece of glossy black paper that looks like metal, and I adhered it to some brown cardstock and then die-cut the bench. This pop-up is a glue-in pop-up, so I watched the assembly video several times to get the installation of the bench correct for this card. The monkeys are attached using foam squares.
Animals: The jazz duo of a bass playing elephant and a giraffe playing the sax are from the safari animals die set with a beret cut down from an engineer’s cap and sunglasses from the three tiny accessories die sets. The musical instruments come from a die set from Doxie Craft Supply. The monkeys are from the monkey and lion die set. All the animals have stencils within the dies to add details like hoofs, eyes, mouths, ears and tails.
Bushes: To create bush behind the bench, the large and small frond branches were cut from the landscape scene die set and inked with brown Distress ink. Three small fronds were used to cover up mistakes around the ground under the bench and for a decoration on the lower right corner.
Sentiments: In order to turn on the lights two “Press me” labels were created -a yellow moon on the front and a green bush on the inside. The moon come from the landscape scene die set while the bush is the lion’s mane from the monkey and lion die set. A stamp was used for the “press me” stamped in brown ink.
“All that jazz” uses the mini alphabet die set. A strip of paper tape was used to provide a straight edge to line up the letters when adhered to the card front.
“Celebrate” and “Happy Birthday” are die sets also from Karen Burniston cut from yellow and tan cardstock.
This card is to be hand delivered, so no envelope.
Thank you for reading this blog post. I hope it provides inspiration and joy. Please like and leave comments 😊
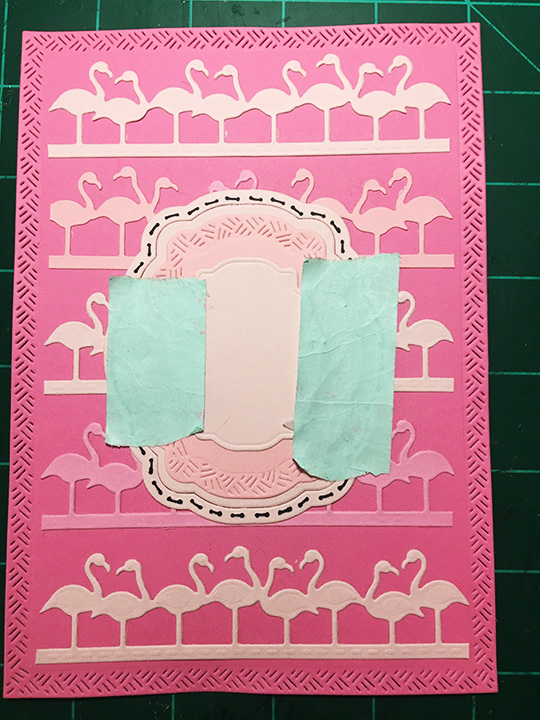
To make the cake I used some textured iridescent cardstock which had a slick surface to it that only allowed double-sided tape to be used as an adhesive. I watched the assembly video before putting together the cake. The easiest way to assemble the flamingo cake is to stick together each layer, adhering the flamingo border as you go, and then putting together the full cake. (I used a strip of 1/4-inch wide double-sided tape along the bottom strip of flamingos doubled-over to adhere the birds to the cake.)
The Rectangle and Labels set has a variety of fancy label shapes that I used as mats on the front of the card as well as the inside for a personal greeting space and the cake tray.
(I did use one extra fancy label from the Label Charms Pop-Up set for the top layer on the inside of the cardbecause the shinny paper was recycled junk mail with words that needed to be covered up.)
For the inside decorations I put dots of glue in a random pattern and sprinkled large glitter over them. The “Happy Birthday” sentiment and it’s shadow are also by Karen Burniston. The front sentiment was computer generated.
I like to decorate the backs of my cards with leftover pieces. The envelope flap has a die-cut of the large flamingo charm with its loop trimmed off.
Thank you for reading this blog post. I hope it gives you inspiration and makes you smile. Please like and leave comments 😊
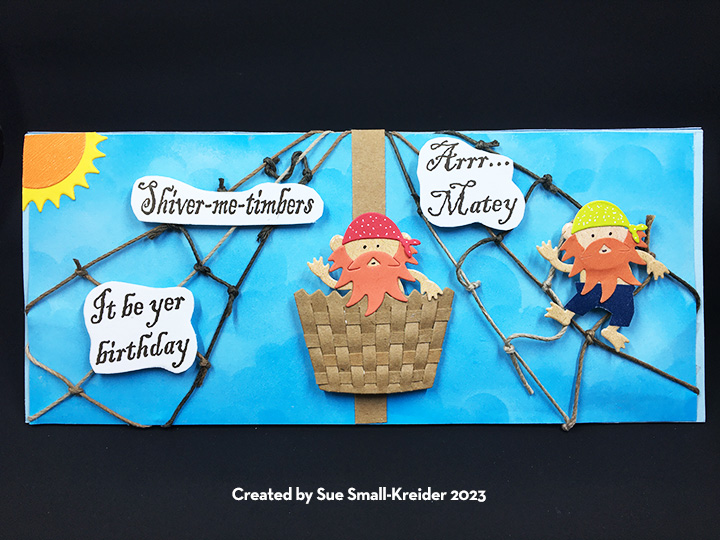
I love playing with the mechanical pop-up mechanisms designed by Karen Burniston. Her Facebook page Karen Burniston Pop-Up Peeps is a place for people to post their projects using her dies. Many talented people post wonderful and creative cards and projects. One such person is John Watterson who has created several cards featuring pirates using Karen Burniston dies. His work is the inspiration for this card, and I give him all credit for the pirate figures and pirate sail. I took inspiration for the crow’s nest from him as well.
Backgrounds: For the blue skies background on the card front, I took a piece of sky-blue cardstock and inked it using a cloud stencil, white ink and a small blending brush. Because the front scene is of a ship’s crow’s nest the viewpoint would be closer to the sky and sun, so everything would look bigger. The inside sky what also done with the white ink and just the blending brush for a more distant look of the clouds and sun. The suns are just one sun made from the Landscape Scene cut in half and the glued to the corners and trimmed again.
Rigging and Crow’s Nest: I raided my jewelry making supplies for some brown cord to make the rigging going up the main mast. The crow’s nest is made from the larger cupcake holder from the Cupcake Pop-Up set with thin strips of the same brown paper woven through the slits and glued. I used my fingers to put a curve in the crow’s nest.
Pirate Crew: (Click here to see John Watterson’s marooned pirate post.) While John’s pirate is on a deserted island and dancing a jig, my pirate crew are scouting the waters from the crow’s nest. I used the Monkey die set for the body and head of my pirates, took the beard from the Gnome and Santa set, and the bandana head covering from Tiny Accessories 1. The pants I fussy cut by tracing around the legs and body and cutting a bit wider than the pencils lines. The pirate is glued to the back of the crow’s nest and then adhered to the mast with foam tape.
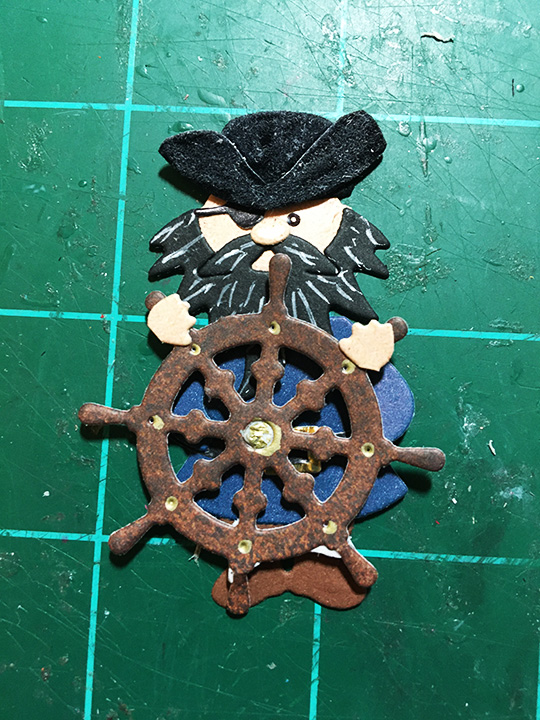
Pirate Captain: (Click here to see John Watterson’s pirate captain post.) John’s pirate captain sails with a spotted dog and a black cat in a basket ship. I followed John’s lead using the Gnome and Santa dies for the head, beard, coat and boots. Since John made his own hat, I did similar but used the bowler hat from the Tiny Accessories 1 for its base. The hat is cut from suede paper that I brushed with a white opaque marker to age it. I also used the eye patch from this Tiny Accessories set. The ship’s wheel is from the Cruise Charms and attached to the captain with small foam squares. His hands are from the Gnome set but glued to the wheel. I also added some white gel pen to the beard to make it stand out. My final touch was to add a parrot to the captain’s shoulder using one of the birds from the Tiny Tree set. The captain is glued to the top platform on the mini pops platform.
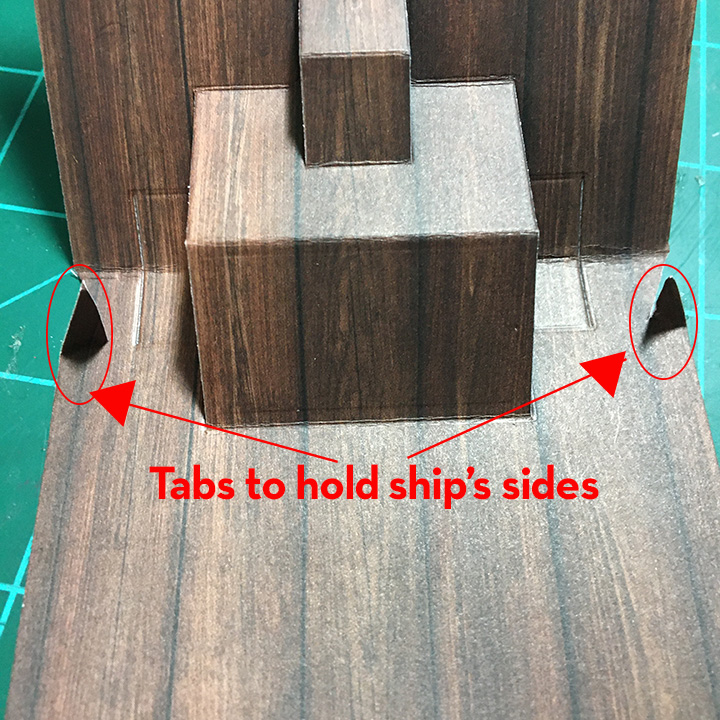
Ship: The ship is based on two pop-up mechanisms – the Bam Box and the Mini Pops Pop-Up set and two of the smallest crosshatch long rectangles. The main deck base and mast are cut from a 6 1/2 x 3 1/4 inch piece of double-sided woodgrain cardstock scored and folded at 2 7/8 for the center fold using the tiered platform from the Mini Pops set. (The longer side of the cardstock is the top of the platform.) Train the large platform and top platform to pop-up as shown in the assembly video, but leave the two outer platforms as part of the base.
The main deck is a custom fitted piece cut from one of the crosshatch rectangles. And added after the bam box and its deck have been attached and tested.
The other crosshatch rectangle is folded in half and a bam box glued to the inside just at the fold. (Bam Box assembly video) (The bam box needs to fold out, away from the main deck platform so make sure to attach the box with the arched tab on top with the rubber band side next to the rectangle.) This piece now becomes the bow or front of the ship. Position the tip of the bam box so it just touches the main deck platform. Test to see that the bam box will fold down correctly before gluing in place and that the triangular point of the bow is in the center of the main deck. Cut a 90-degree triangle from the wood grain cardstock that has 2-inch sides. Trim to fit as the deck covering the bam box.
Train the bam box to open and close checking for catchpoints and trimming triangle as needed.
You will need to cut two diagonal tabs in the base bottom to hold the ship sides in place once the card is open.
Attach the main deck to its platform. Trim the back of the base to form a center mast, leaving a back railing at the height of the ship sides or taller. Trim the bottom of the base to 1/8 inch around the ship sides. Add waves to bottom of shop sides. The ship is now ready to be attached to the cardbase. Add waves to hide ship base.
Raft: The raft is a place to write a personal message. It was made by using the thinnest die in the Long Rectangles die set to cut the planks which were trim down to approximately 3 1/4 inches. Bamboo cord was used to lash the planks together with the ends taped to the backside of the planks. Foam squares adhere the raft to the card. The stamped sentiment was fussy cut and attached to the fancy label which was cut using a die from the Label Charm Pop-Up set.
Shark & Waves: By using a wave patterned paper, creating the ocean was easy. The waves under the ship and at the horizon line at the card’s center fold were cut using the Tropical Scene dies from light blue cardstock and inked with white ink. The gentler light blue waves in the corners were the off cuts from the waves. The shark is cut from gray cardstock and a scrap of white for his teeth using the Sea Animals set.
Sentiments: The pirate birthday sentiments are rubber stamps by Crackerbox Stamps and were stamped in brown ink and fussy cut. Thick foam tape was used to pop the sentiments on the front of the card, while double-sided tape was used for adhering “Happy Birthday” to the raft inside.
Envelope: While this card is designed as an 8 3/4 x 3 3/4 inch slimline card, its thickness of 1/2 inches makes it too thick to mail in a regular envelope and would need its own box or padded envelope.
Thank you for reading this blog post. I hope it provides inspiration and joy. Please like and leave comments 😊
Need a fun card? Make a tower card with a honeycomb paper feature. Using products purchased from Craftstash, this card was quick to make. The flamingo and green leaves are from a Creative Craft Products bundle which includes the dies and honeycomb paper.
The card base is made with the Terrific Tower die by Sam Calcott of Made to Surprise that creates an art deco feel for this elegant display card. The front sentiment was computer generated.
.The back of the card features a die-cut “Happy Birthday” by Chole’s Creative Cards.
The card will fit in an A5 size (7 x 5 inches) envelope that has a die-cut flamingo from Karen Burniston’s Beach Charms on its back flap.
Thank you for reading this blog post. Please like and leave comments 😊
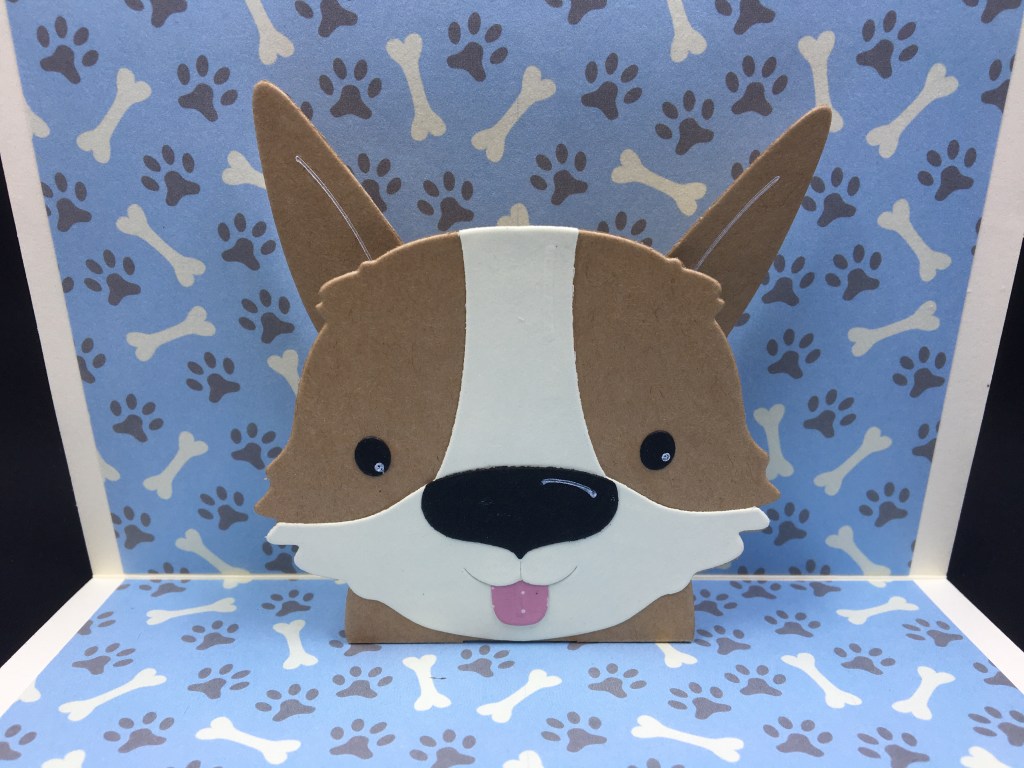
Watch the assembly video before putting together. The video recommends decorating the front and back of the card before adding items to the inside.
I masked off a banner on the front of the card using low tack paper tape. Next, I did a light spritz of a brown sparkle spray to create a sand like texture. Remove the tape and glue die-cut sentiment strip in place.
I used a left-over strip of decorative paper and two 1/8-inch tall strips of cream cardstock to finish the front of the card.
The card back uses another decorative paper scrap and a die-cut paw print that has its paw pads inked. I found that by attaching the tiny paws pads to a piece of low tack tape, I could easily ink the pieces with a sponge dauber.
I found that the puppy face dies have stencils within them that I used to ink with a white gel pen make highlights.
As with all my cards that are sent in an envelope, I have decorated the back flap with an embossing folder and a paw die-cut. Both the embossing and die-cut were inked with a dark brown ink. The card fits into an A6 envelope.
Thank you for reading this blog post. I the card made you smile and gave you inspiration. Please like and leave comments 😊