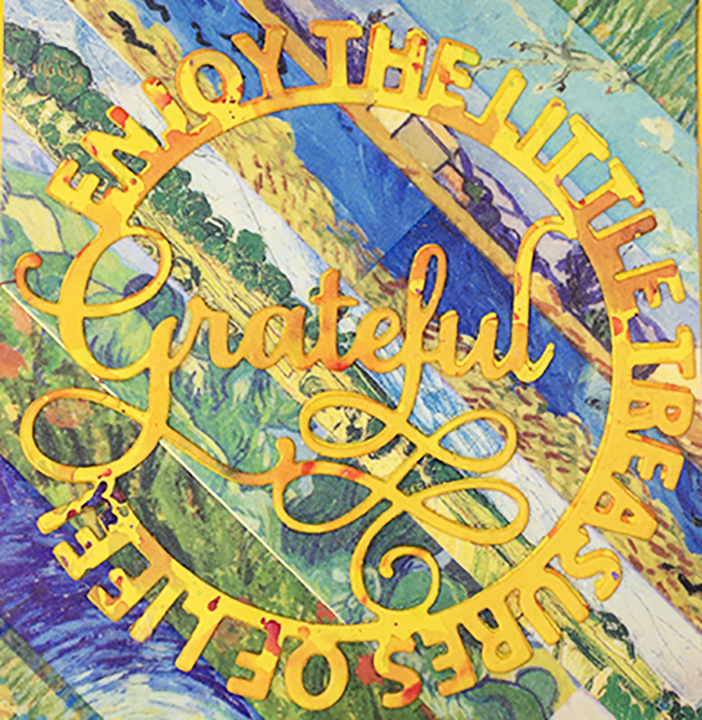
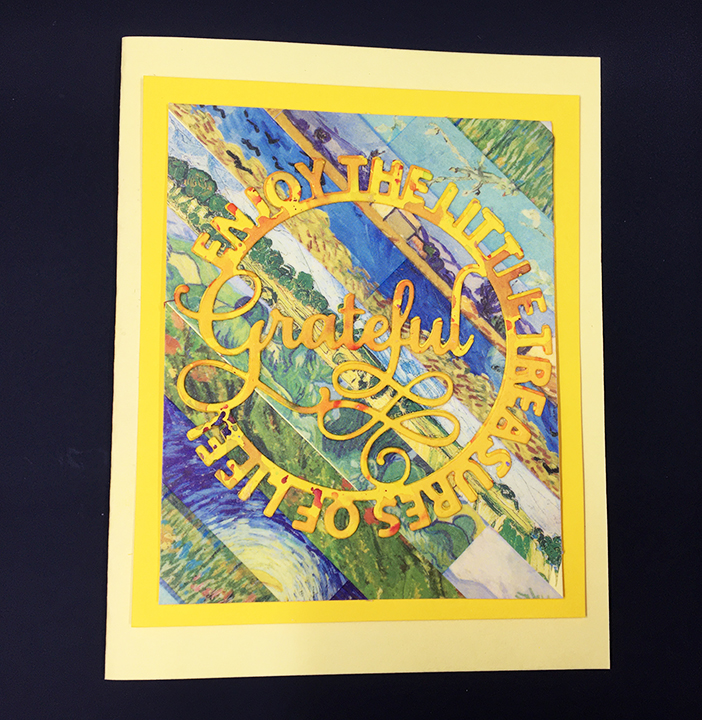
Being grateful for the small things of everyday life is sometimes all we can be. This card is for those times when we need to take in the beauty of a sunrise, a field of wheat, or a stary night sky.
Using card stock in two shades of yellow for the card base and backing mat, the sentiment (cut twice and glued together) is glued onto the washi tape background while the background and bright yellow mat are adhered with thin foam squares.
A hint of what is to be found inside the envelope – “Find beauty in the small things” from the Alte New Whimsical Flowers & Quotes set – is stamped on the back flap in brown ink.
Thank you for reading this blog post. Please like, leave commentsand follow Ully Cat’s World blog. 😊
During these COVID 19 times when we all are having to be more isolated, it is relaxing to dream of traveling once again. Here is a card that depicts that dream.
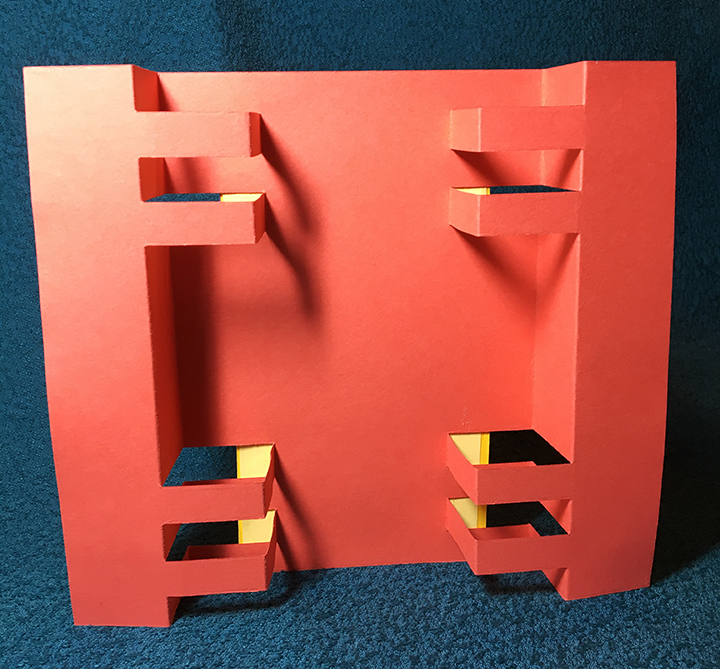
Split-Slider: Print split-slider template (download under Materials Used) onto light blue lightweight cardstock and then cut out the top panel and slider arm around the outer red cutting lines. (Note: The printed side of the cardstock will be the back of the panel and when assembled will not be seen.) Using a craft knife and a metal ruler, cut the top panel’s eight mini-easels on the red lines. Next, using a scoring tool, score the green and blue fold lines – green being valley folds and blue mountain folds.
Because the top panel is adhered on three sides to the card base and needs to be raised the thickness of the lightweight cardstock slider arm, place two layers of double-sided tape on the long sides and bottom of the panel making sure not to cover the red lines of the easels. A single layer of double-sided tape should be placed on each of the narrow tabs of the eight mini-easels. (If you are using tape that is wider than the tabs, trim off excess.)
To adhere the slider arm to the mini -easel tabs, first, using low-tack tape, tape the front side of the easels shut. (This will ensure that the easels are adhered to the slider arm in the shut/flat position.) Position the slider arm over the back of the panel, making sure there is at least an 1/8 inch/3 mm gap between the tape along the panel edges and the slider arm. Hold the slider arm in place and remove the backing tape on the lowest easel and adhere to the slider panel. Repeat removing tape backing and adhering each easel. Once slider arm is attached to easels, turn over and remove low-tack tape. Test the slider. You may have to help fold the easels into the fully opened position the first time to train them. Once satisfied with the slider/easels’ movement, remove panel backing tape paper and adhere to card base. (Hint: If parts of the mechanism is catching, place some clear tape over the edge that is catching such as I did with the circle on the pull-tab pictured below.)
Decorating the Easels: I have had these hot air balloon charms from Blue Fern Studios for awhile. To make the dirigible dangle, I’ve used some sturdy plastic strips cut from packaging as the posts to string the charm on monofilament fishing line. The smaller charms are on foam tape glued to the plastic strips. Clouds were embossed in dies using the embossing sandwich for my die cutting machine, then die-cut, inked with Distress Ink and then painted with Nuvo Glitter Gloss pen. Make sure you don’t glue anything that will impede the easels from moving.
Two white 1-inch circles were cut using a paper punch and glued to the circle pull-tab – on front and back side of the slider arm. A hole was punched to thread a piece of shimmery ribbon through as a pull.
More of the ribbon was used to decorate the front of the card. I was careful not to get glue inside any of the slider easels or their slider tracks.
The “enjoy the journey” sentiment charm is attached with foam squares.
Envelope: The back flap of the envelope was stamped with a Sara Davies Nautical Collection sentiment “Adventure awaits” to hint at the enclosed card is about.
I enclose a slip of paper with instructions on how to open the card. (See split slider CRX sheet download below.)
Thank you for reading this blog post. Please like and leave comments 😊
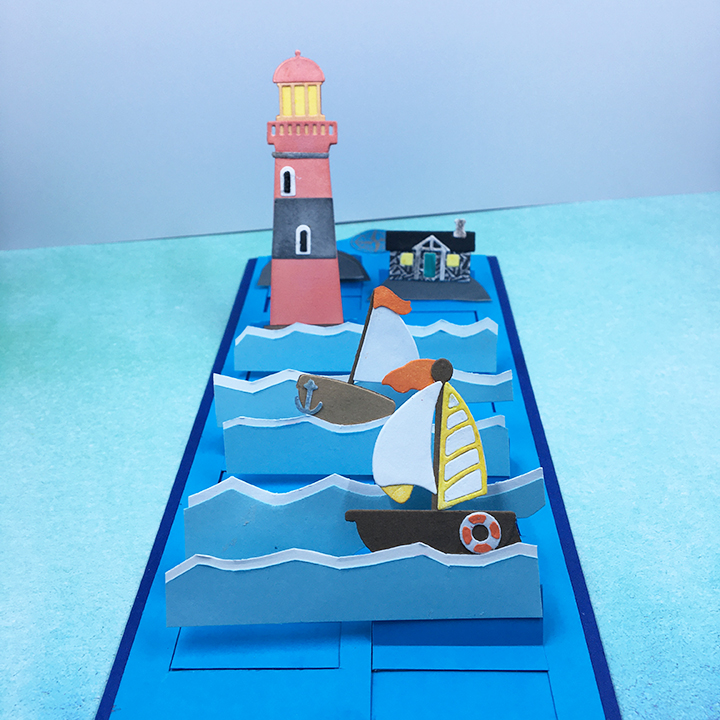
Life gets rough and choppy sometimes and life isn’t always smooth sailing. Sometimes our friends need to be encouraged to take a chance and try something new. This interactive card is for those times.
This card is the first of a series to use my Ully Cat Designs’Split-Slider Slimline template.
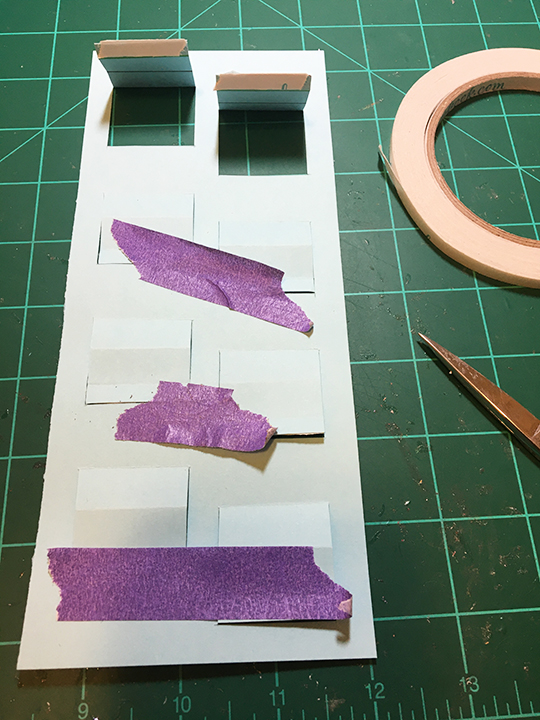
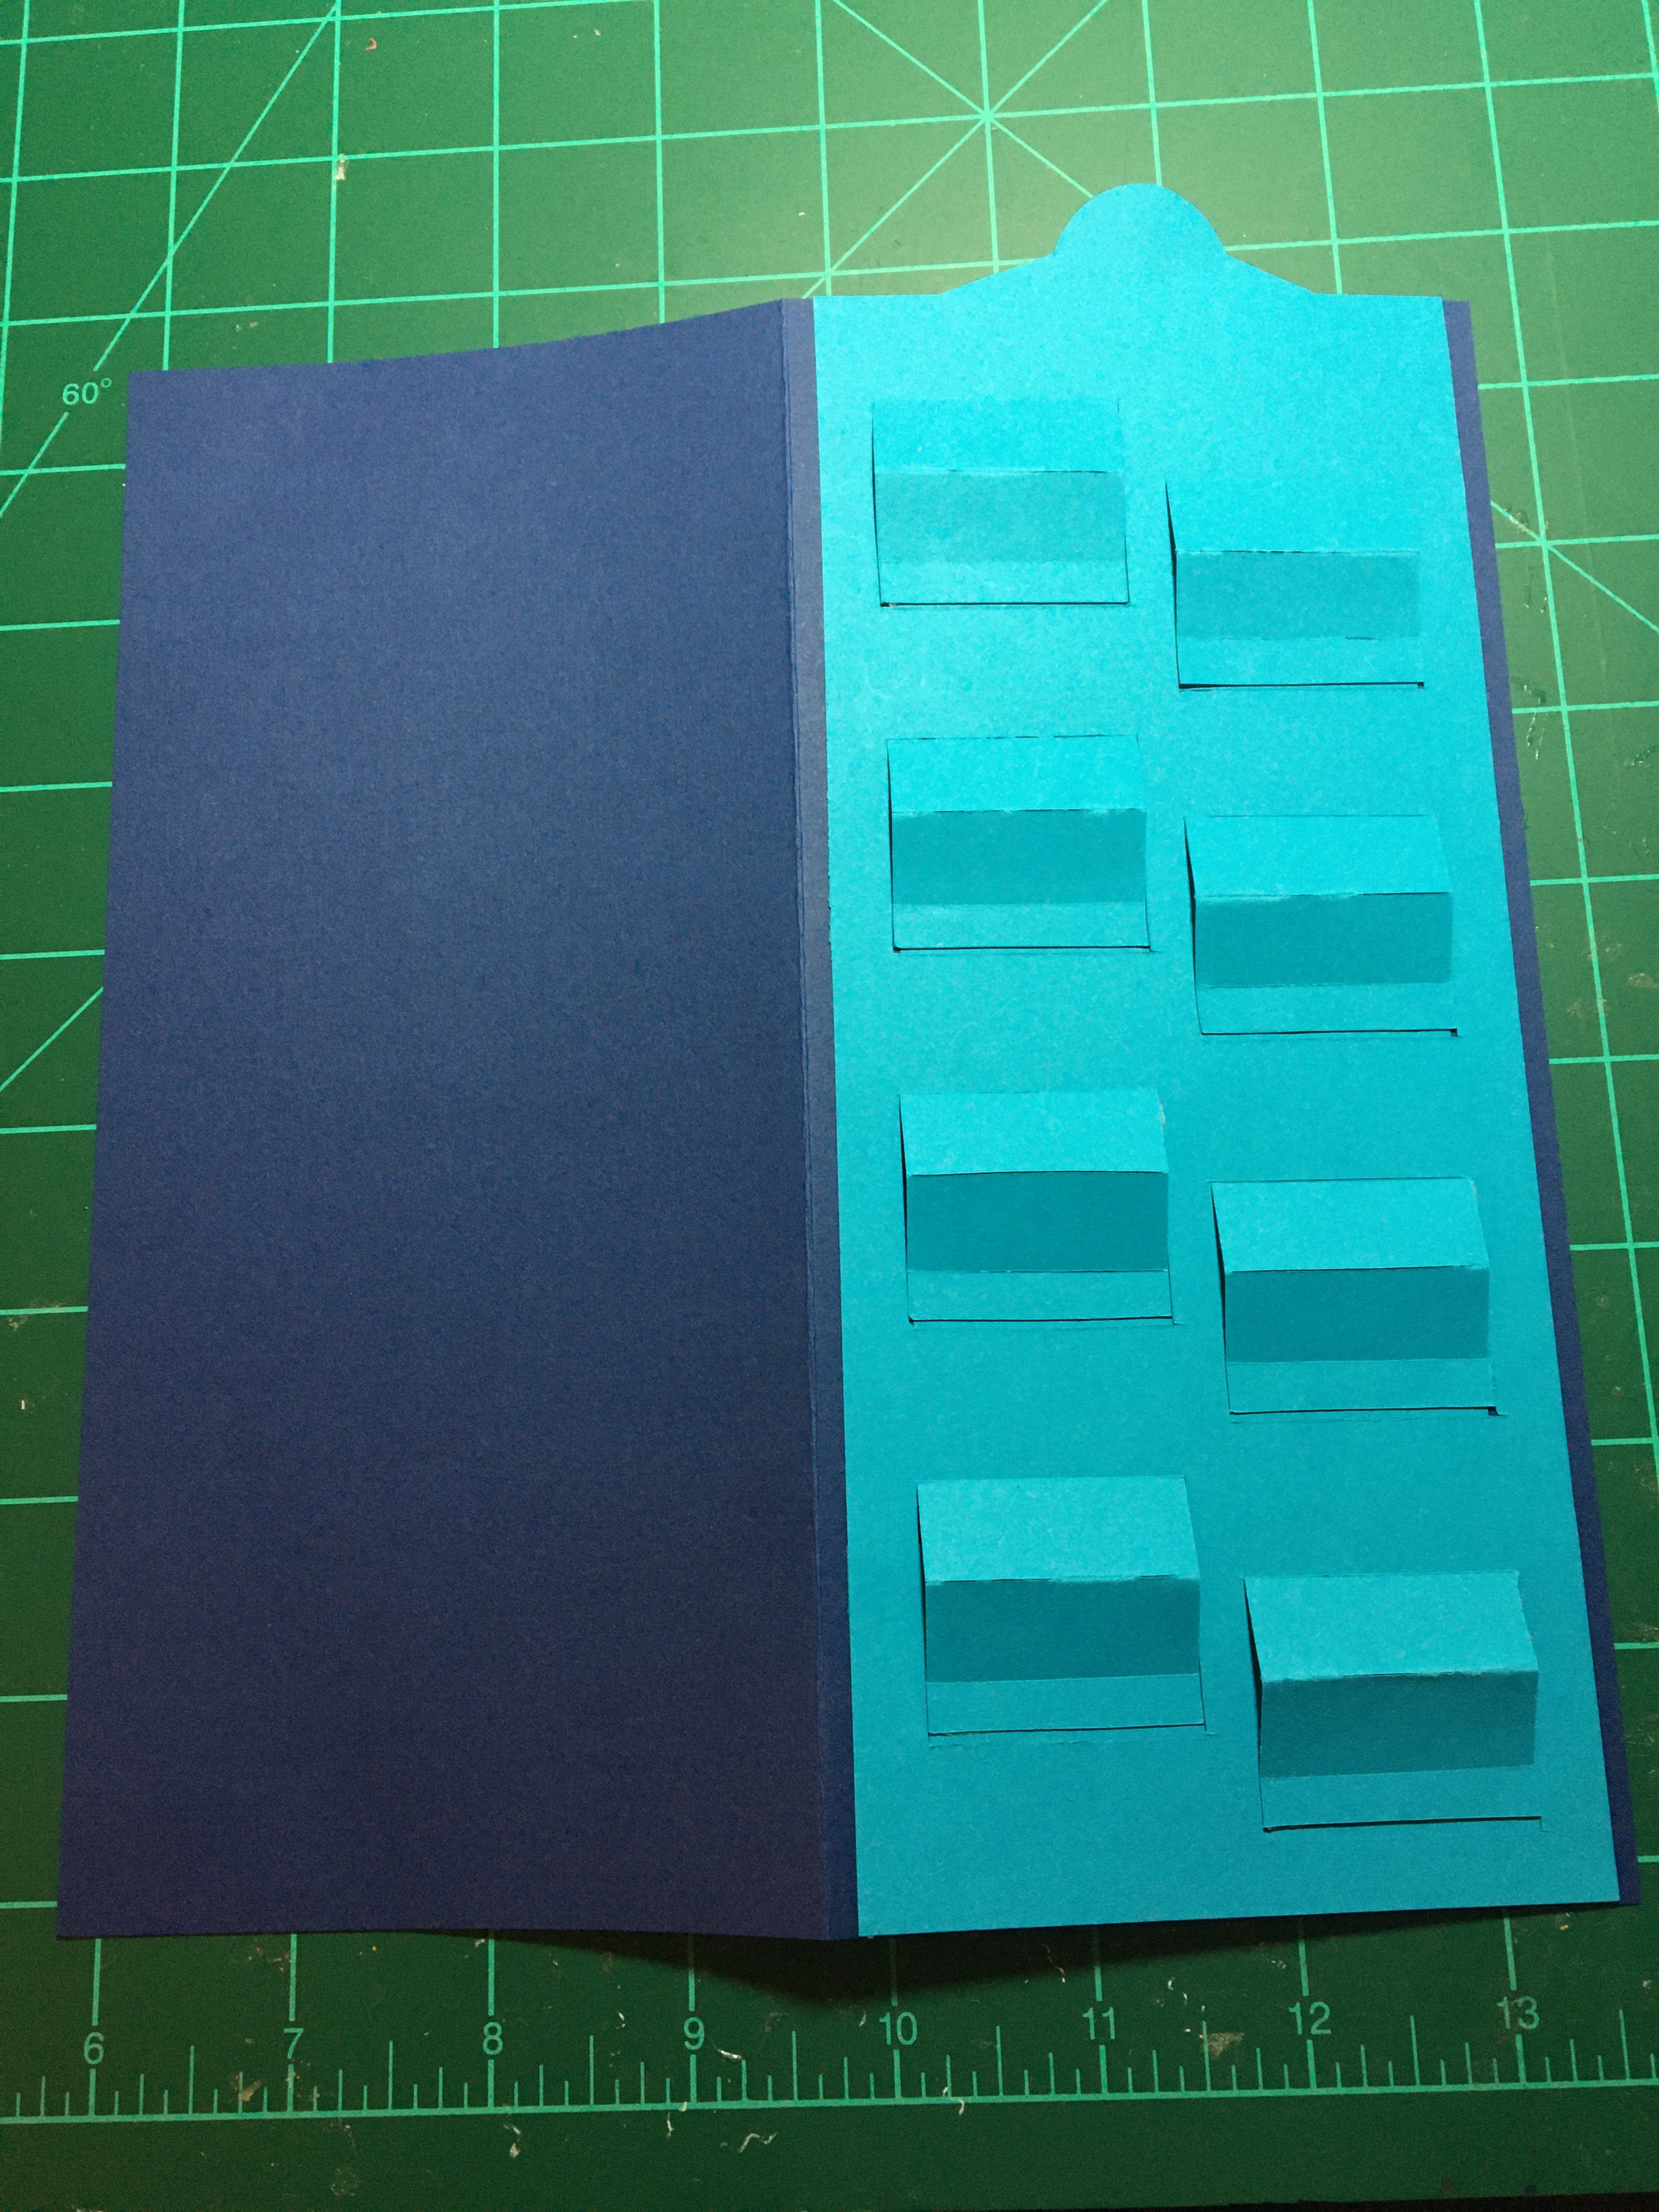
Split-Slider: Print split-slider template (download under Materials Used) onto bright blue lightweight cardstock and then cut out the top panel and slider arm around the outer red cutting lines. (Note: The printed side of the cardstock will be the back of the panel and when assembled will not be seen.) Using a craft knife and a metal ruler, cut the top panel’s eight mini-easels on the red lines. Next, using a scoring tool, score the green and blue fold lines – green being valley folds and blue mountain folds.
Because the top panel is adhered on three sides to the card base and needs to be raised the thickness of the lightweight cardstock slider arm, place two layers of double-sided tape on the long sides and bottom of the panel making sure not to cover the red lines of the easels. A single layer of double-sided tape should be placed on each of the narrow tabs of the eight mini-easels. (If you are using tape that is wider than the tabs, trim off excess.)
To adhere the slider arm to the mini -easel tabs, first, using low-tack tape, tape the front side of the easels shut. (This will ensure that the easels are adhered to the slider arm in the shut/flat position.) Position the slider arm over the back of the panel, making sure there is at least an 1/8 inch/3 mm gap between the tape along the panel edges and the slider arm. Hold the slider arm in place and remove the backing tape on the lowest easel and adhere to the slider panel. Repeat removing tape backing and adhering each easel. Once slider arm is attached to easels, turn over and remove low-tack tape. Test the slider. You may have to help fold the easels into the fully opened position the first time to train them. Once satisfied with the slider/easels’ movement, remove panel backing tape paper and adhere to card base.
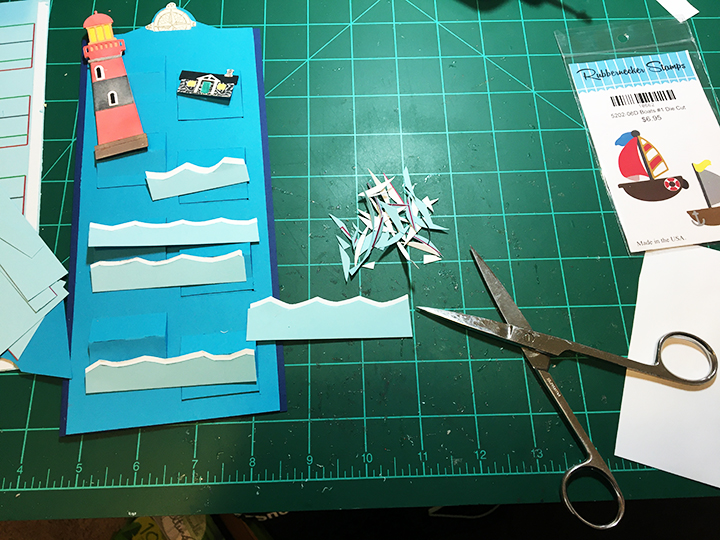
Decorating the Easels: For my die-cut lighthouse and boats, I used Distress Oxides and Inks to color the lighthouse and boat flags, a black gel pen for windows and a silver gel pen to color the anchor. The lightkeeper’s house is cut from a pattern paper and colored with pencil for the grey stone. The blue and white layered sea waves are cut freehand as is the rocky land masses for the three easels around the lighthouse. Make sure you don’t glue anything that will impede the easels from moving. (Note the 2nd & 4th waves on my card have been trimmed to allow the easel in front to operate.)
The gold heat embossed compass on the pull-tab of the slider arm, was stamped on a separate peace of cardstock, embossed and them fussy cut. The compass adds sturdiness to the pull-tab. (Depending on the thickness of your cardstock, you may want to add another circle on the bottom of the pull-tab as well.)
The “SEAS the Day” sentiment is attached with foam squares between two easels and is not adhered to any moving parts.
Inside Decorations: You can decorate as you would normally inside the card. Because of the dark card base, I used paper that looks like an old ship’s log, to stamp the inside sentiments “Enjoy life’s journal” and “We cannot control the wind, but we can direct the sails.”
The back flap of the envelope was stamped with a Sara Davies Nautical Collection sentiment “Adventure awaits” to hint at the enclosed card is about.
I enclose a slip of paper with instructions on how to open the card. (See split slider CRX sheet download below.)
Thank you for reading this blog post. Please like and leave comments 😊
According to the Language of Flowers, a small book that Amazon Drygoods reprinted from its Victorian original, lilies of the valley mean a “return of happiness.” And so to, does this card promise happiness from it envelope through to its inside message.
Based on a panel die from Tutti Designs, that was die-cut twice (one white cardstock and one green paper), this card comes together with its sentiments. The front “With love” is a foiled strip on scrap cardstock. (Sometimes when my mojo is lacking, I make a batch of foiled sentiments to have on hand.)
Inside the sentiment is heat embossed onto vellum. The longer sentiment is:
“Let us be grateful
to people who make us happy;
they are the charming gardeners
who make our souls blossom.”
Only liquid glue was used in the assembly of the card.
The back flap of the envelope was stamped with a Card Making Magic sentiment “OPEN immediately to release happiness!” to hint at what the enclosed card is about
White elephants can be seen as special creatures in some cultures. This white elephant card was made to cheer up a friend going through some difficult times.
I was trying for a rich and silky effect by doing a blend of sunrise colors over a cut and embossed background that was then gone over with a Cosmic Shimmer Opal Blaze Polish to make it shimmer. The card base is made from shimmer paper as well.
The elephant’s headpiece and covering also have some of the opal blaze polish. The leafy heart die cut was adhered with foam squares to the embossed layer, and the elephant glued to the leaves.
The foiled sentiment was one that I had made previously in a foiling session. It is adhered with foam squares.
Sequins finish the decorations.
Althrough not pictured, I stamped the back envelope flap with “sending you love and Kindness” from a Hero Arts using an ombre ink pad.
Thank you for reading this blog post. Please like and leave a comment. 😊
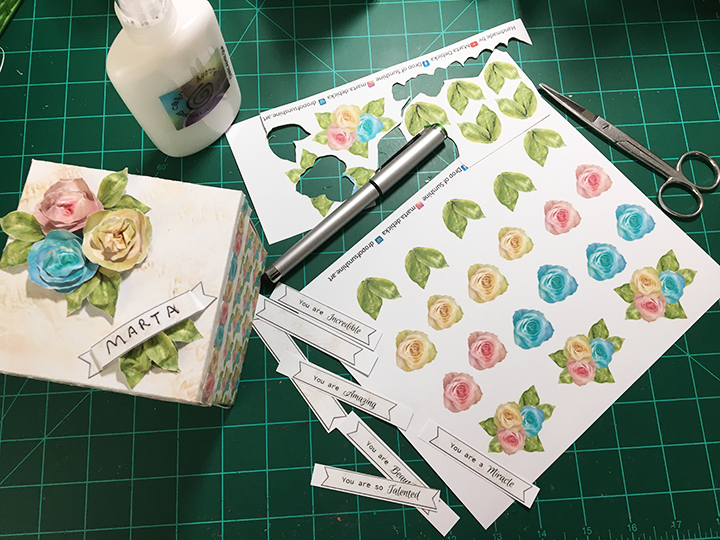
Have to share some inspiration with you from a papercrafter who goes by the name Drop of Sunshine. I have been inspired by her mixed media creations, but she has shared some papers and digital kits to make things like this exploding box.
To access her free digital download that I am linking to, you need to be a member of Craftworld.com which is a free membership based site where papercrafters (and crafters in general) have a community to post and share their projects, get inspiration, and converse with crafters from all over the world.
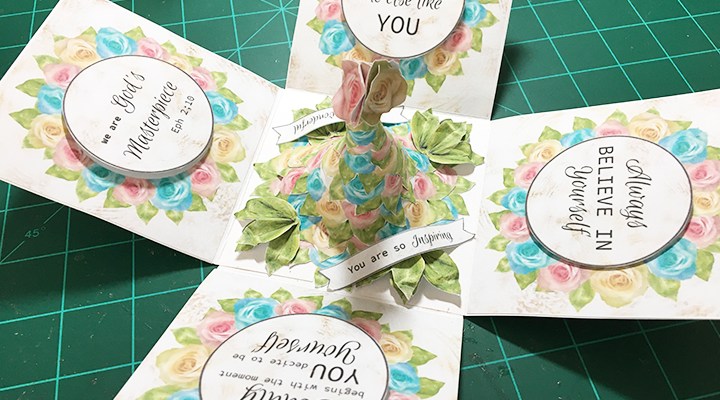
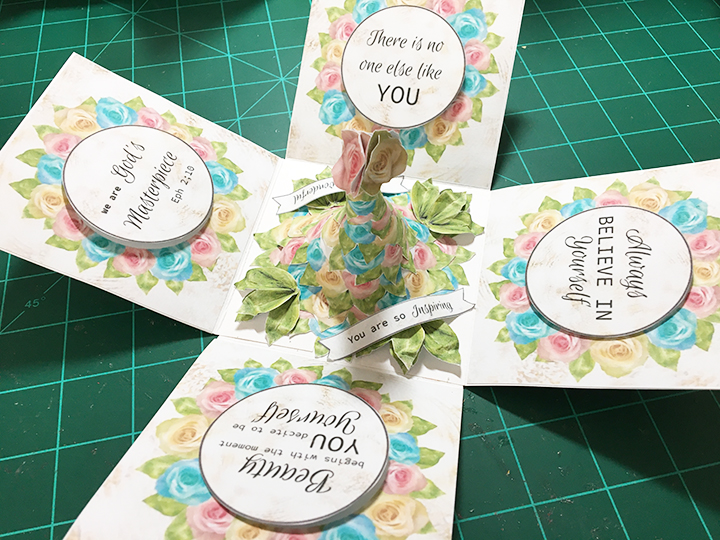
I downloaded and printed the six sheets that make up this exploding exploding box digital kit on lightweight white cardstock. I followed Drop of Sunshine’s YouTube tutorial and only changed up the center decoration by cutting the four flower wreaths with no background into two cones, one spiral strip and one base mat. The two cones I glued one on top of the other and used the spiral to make the top of the tree. I fussy cut most of the individual rose blooms and leaves and shaped them by scoring, folding and curving the leaves with my fingers. The roses are in several sizes so the layers are largest on the bottom and the smallest on top again with folding and curving the petals with my fingers.
From scrap cardstock left from fussy cutting I made four small loops to act as ‘faux foam tape’ to raise the circle sentiments up. The other sentiment strips were curved and pleated using my fingers. I used a black pen to write the recipient’s name on one of the blank banners.
Below is all the flower and sentiments I had left over from the kit. I made the box in about two hours using only scissors, glue, ruler, scoring board and black pen.
Thank you for reading this blog post. Please like and leave comments 🙂
What to send to cheer a friend up when they are an ocean away and going through some tough times is the theme of this card – part thinking of you, part Valentine.
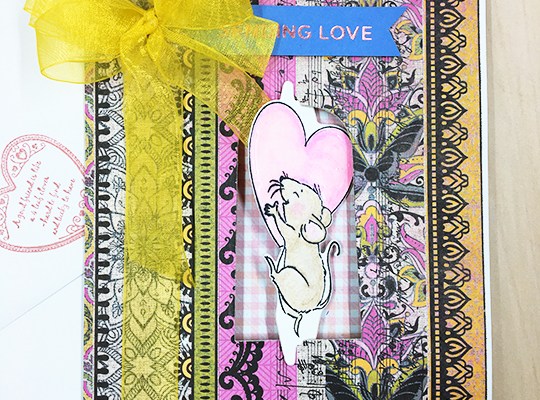
A whimsical mouse carrying a heart is a stamp set designed by Bonnie Krebs for Art Impressions. It comes with coordinating dies to cut out the image and with a companion die the twist frame it makes an interactive element that can twist to see the front and back of the image.
I colored the image with watercolor pencils and brushed them with water. Once the images were dry, I added a layer or two of Glossy Accents, a clear gel that adds dimension. (Hint: if you get air-bubbles in the gel, quickly pop them with a straight pin before they harden into the piece.) I let these pieces dry over-night before I glued them together.
Using a pre-cut and scored 10 inches x 6 ½ inches card base with coordinating envelope, I cut three pieces of 5 inches x 6 ½ inches double-sided patterned paper from the Hot Off the Press Spice Market set. I glued two of the pieces to the front and back of the card base and the third was glued inside the front panel. Because the pattern paper is thinner than cardstock, I used the reinforcement of the double paper for the card front so that it would be sturdy when I cut the twister window from it. (Hint: if you glue the papers on first, you only have to die-cut the window once.)
Once the window was cut, I decorated the card front with a foiled sentiment strip and yellow ribbon. The slotted mouse image pops in the notched center of the window perfectly. (Hint: use up your cardstock scraps by hot foiling a bunch of sentiment strips at one time and save for future projects.)
For the inside of the card, I wanted a pink gingham background to match the pink of the heart and also something lighter and not so intense in color as the front of the card. I found it in in a journaling card pad from Prima. (Hint: if you love a paper collection and can’t afford the larger paper pads, try the journaling cards or 6 x6 pads as they are affordable and often can be found in the clearance sections.) At 4 inches by 6 inches the journaling card left some white space on which I doodled some circles, hearts and arrows.
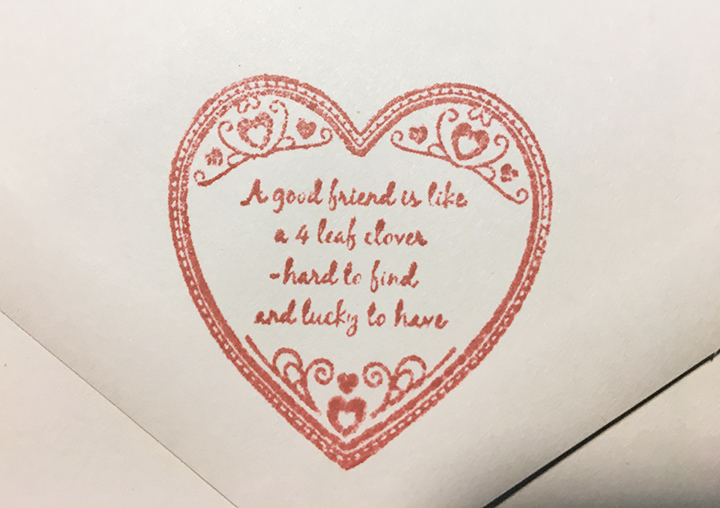
The back flap of the envelope has a heart with a friendship message stamped in Blushing Bride pink to give a hint as to what was inside.
Back side of tower card with space for a personal message.
Close-up of shaker
Using the Pink Fresh Studio slimline circle apertures dies with the My Favorite Things 2-inch circle shaker pouches works well. The only thing I had to do was to snip in between each scallop to allow the pouch to fit through. I cut the circles apart and rounded the corners. Had to use some teal mirror card to suggest water or sky. After gluing the teal mirror card and lemon-yellow layer together, I glued the shaker pouches to the lemon-yellow layer, filled the pouches and then glued the pale-yellow backing to each. (Remember to use an antic static pad to wipe the inside of pouch to cut down on the static cling of sequins to the plastic.)
The Towers die set comes with all the rectangular matting layer panels. The base card is cut in a grapefruit orange and the panels are in a pale yellow and a lemon yellow.
The stars/suns are made from the Made to SurpriseExcellent Edges die set by cutting the bottom star from orange and the top from pale yellow. The tiny 3D red and pink flowers and greenery are decorative elements I had left over from another project and are cut from the Spellbinders3D Fun Time Cruiser die set.
Finishing touches are the stamping of the sentiment and the back-envelope flap from the What the Doodle Sun stamp set.
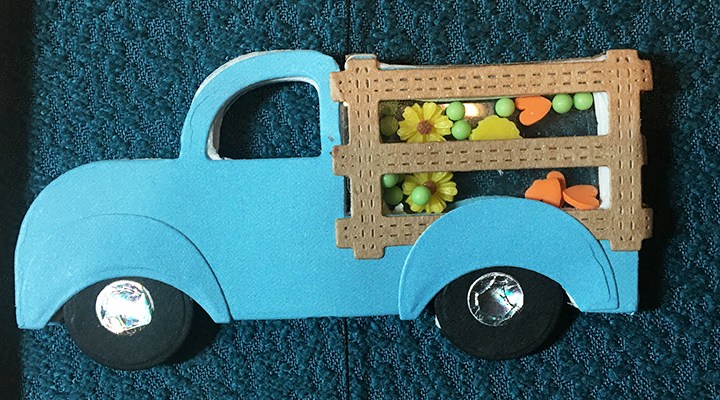
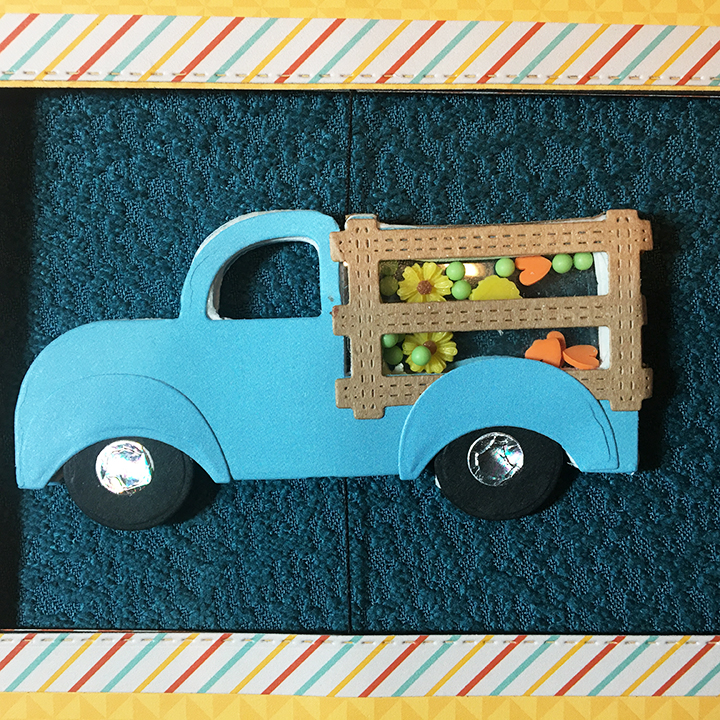
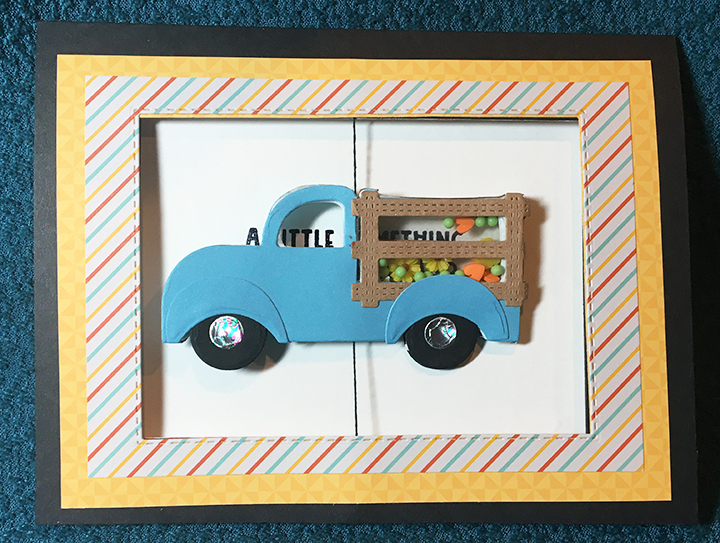
Ever have one of those blue truck kinda days when an old pick-up truck full of flowers (maybe sunflowers?) would really brighten your day? Here is a fun spinning and shaking little truck full of flowers to brighten your day!
For this spinning shaker truck, I cut 3 craft foam trucks, 2 sets of the blue truck, wheel cover, tires, hub caps and brown truck bed fencing. I also cut 2 pieces of acetate to cover the truck bed fencing. Before I cut the foam pieces, I covered enough foam on both sides with sheets of double-sided adhesive to cut two of the three foam trucks.
Having made other spinning shaker elements for cards I found that having one sheet of foam that is not covered in adhesive will help stabilize the shape. Aligning one adhesive backed foam shape with the plain foam shape and then slowly pealing off the backing paper means that your truck shape will be properly aligned. Align and adhere the blue truck paper to the front of the truck by slowly peeling of backing paper. Repeat with other double-sided adhesive foam piece and blue truck piece.
Glue acetate to back side of the 2 truck bed fencing pieces. Glue one of these pieces to the truck. Fill the truck bed with shaker elements. Glue other acetate fencing piece to seal up shaker element. Finish adding tires, wheel covers and any other decorating of truck, such as a thin strip of blue paper to cover the exposed edges of foam.
Thread a long sewing needle with black thread and pull the center of truck. Create card base with cut out rectangle on front. Align truck and thread in the middle of the rectangular opening. Tape thread in place off card base and glue overnight to card base. Once glue is dry tape thread in place and trim excess thread off. Decorate card base with frames of patterned paper.
Using Versamark Watermark ink stamp sentiment on white card and heat emboss in black. Adhere white card to inside back of card.
I stamped a yellow flower on the back-envelope flap.