Snowflake Kisses and Warm Wishes

It’s Sneak Peak Week for Karen Burniston’s October 2024 release of new dies and sentiment stamps. These dies will be available for purchase on October 28, 2024 on the KB Riley LLC website.

Today’s card is an A2 size top-fold card that uses the new Snow Charms die set and Winter Hugs stamp set.

Watch the process video to see how this card was made.

Cardbase:  Fold in half an 11×4.25 inch piece of white cardstock to form a top-fold A2 (4.25×5.5 inch) size cardbase. Cover all four panels with rectangles of patterned paper using the largest die from the Rectangles – Crosshatch set. Cut a frame of white glitter cardstock using the same die and the next largest die and glue to the front panel.

Mug of Cocoa:  Using the Tea and Coffee Pop-Ups die set cut one mug from red cardstock covered with clear packing tape. Cut one of the largest snowflake in the Snow Charm set, snip off charm loop and cover with glitter gloss before gluing to mug center. Allow to dry before rounding/shaping mug with a bone folder. Cut from white shimmer cardstock the cupcake frosting piece from the Cupcake Add-Ons set and adhere to back of the mug with two small foam dots. Cut one steam piece from the Tea and Coffee Pop-Ups set from clear vellum.

Cut the mechanism piece and arm strip from the same patterned paper as inside of card. Cut a white crosshatch label from the Rectangles and Labels – Crosshatch set and trim off about 1/2-inch from long side. Glue the large piece of label onto the inside card floor centering it up against the fold. Glue the mechanism into card as instructed on the assembly video located at the bottom of this linked page. Attach arm to mechanism. Using a large foam dot adhere the mug to the front of mechanism. Glue vellum steam piece to arm making sure it is positioned so it does not peak-out of the card when it is closed.

Decorations: The card front decorations are from the Snow Charms set, along with some snowflake sequin mix elements. The inside spoon is from the Tea and Coffee Pop-Ups set.

Sentiments: Β All the sentiments come from the Winter Hugs stamp set. All the fancy labels come from the Rectangles and Labels – Crosshatch die set. β€œSnowflake kisses & winter wishes” was stamped on clear vellum with StazOn ink and the whole label was covered with glitter gloss. The vellum was adhered to the card front using glue dots.

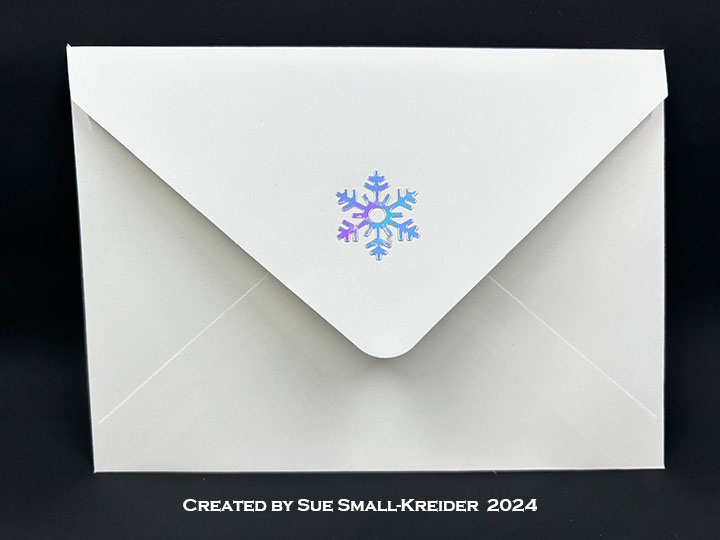
Envelope: Β The card fits into an A2 (4.25x 5.5-inches) size envelope. The back flap was decorated with a hat from the Winter Animals set and mittens from the Snow Charms set.

___________________________________

Thank you for experiencing this blog post.

I hope this inspires you and makes you smile.

Please like and leave comments 😊

___________________________________

Disclaimer: Karen Burniston products are provided free of charge by the manufacturer for review and use. All other items were personally purchased. Compensated affiliate links used where or when possible, meaning I will receive a small percentage commission from these manufacturers at no cost to you. This will allow me to add more content to my YouTube channel and help out a lot. Thank you.

Materials Used:

Dies

Stamps

Papers

  • Hot Off The Press – 8.5×11 inch Double-Sided Papers – Magnolia Blooms
  • PinkFresh Studio – Essentials 8.5×11 inch Glitter Cardstock – Glacier
  • Recollections – 8.5Γ—11 White Gold Shimmer Cardstock
  • The Paper Studio – 8.5×11 Clear Vellum
  • Sliver Foil Cardstock
  • Black, Red and White Cardstock
  • A2 Envelope – Cream

Ink

Adhesives

Tools

  • Die Cutting Machine
  • Paper Trimmer
  • Bone Folder
  • Stamping Platform
  • LDRS – Stampendable Stamping Tool
  • Stamping Blocks used as paperweights
  • Scissors
  • Craft Knife
  • Pencil
  • T-Ruler
  • Paper Masking Tape
  • We R Memories – QuickStick

Miscellaneous

  • Buttons Galore & More – 28 Lilac Lane – Sequin Mix – Snowflakes

Reindeer Games

It’s Sneak Peak Week for Karen Burniston’s October 2024 release of new dies and sentiment stamps. These dies will be available for purchase on October 28, 2024 on the KB Riley LLC website.

This card was inspired by the age-old question pertaining to the Rudolph-The-Red-Nose-Reindeer song – What are reindeer games? My interpretation is Winter games Olympic style with Rudolph winning the sledding race!

Watch the process video to see how this card was made.

Cardbase: The cardbase is an A7 size (5 x 7-inch) purchased card base with decorative papers glued to the four panels. I used the largest rectangle in the Rectangles and Labels – Crosshatch die set to cover the inside of the card and leftover pieces for the outside of the card.

Finish Line Flag Pop-Ups: Two Photo Fans Pop-Ups were created using white cardstock brushed with glitter gloss the arms and decorator pieces. the arm decorator pieces were cut in black and the two sided flags come from the Pirate Ship Add-Ons set. (You can also find a single flag in the Castle Pop-Up set.)

Sitting Reindeer: The sitting reindeer uses the body of the Snowman Pop-Up with the face, antlers, legs and tail from the Penguin and Reindeer Snowman Add-Ons set. The sled is from the Snow Charms set. (If I were to make this card again I would make two sleds and glue them into the card first, placing them so they overlap under the reindeer trimming off the excess front and back sled pieces before gluing the reindeer base over them and into the card.)

Standing Reindeer: Two reindeer were cut using the Christmas Animals die set. One reindeer is assembled on the reverse side so that the reindeer can face each other.

Sentiments: “Reindeer Games” was created using the Mini Alphabet die set while the inside “You’re so Cool” was stamped on a fancy label from the Rectangles and Labels – Crosshatch set with a stamp from the Winter Hugs stamp set. The “Made with Love” circle image on the back of the card is from the Special Delivery stamp set. The blank personal message label is also from the Rectangles and Labels – Crosshatch set. (I didn’t have a piece of matching cardstock wide enough for this label die, so I elected to center the die and cut with flat top and bottom of the label.)

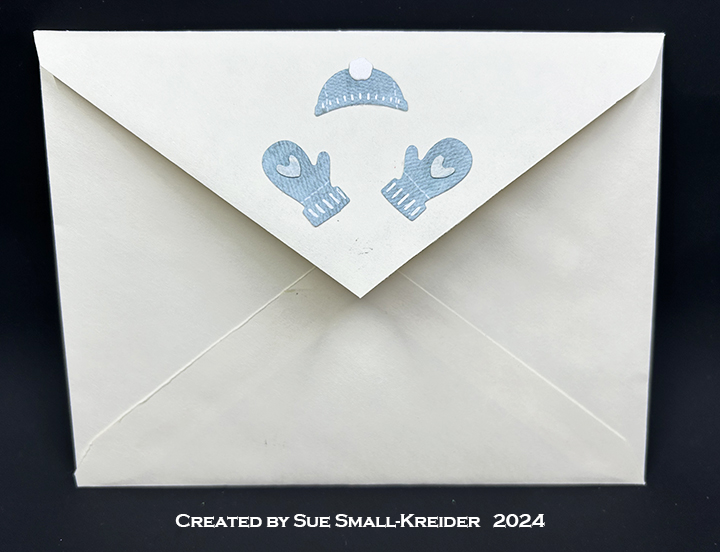
Envelope:  The card fits into an A7 size envelope with the back flap decorated with leftover blue flags.

___________________________________

Thank you for experiencing this blog post.

I hope this inspires you and makes you smile.

Please like and leave comments 😊

___________________________________

Disclaimer: Karen Burniston products are provided free of charge by the manufacturer for review and use. All other items were personally purchased. Compensated affiliate links used where or when possible, meaning I will receive a small percentage commission from these manufacturers at no cost to you. This will allow me to add more content to my YouTube channel and help out a lot. Thank you.

Materials Used:

Dies

Stamps

Papers

  • Carnation Crafts – Merry and Bright from PaperCrafter issue 40
  • Echo Park – 12×12 Double-Sided Cardstock – Bundle of Joy -Peek-A-Boo
  • Silver Foil Cardstock
  • Black, Browns, Cream, Teal Blue, White and Yellows Cardstock
  • Park Lane Paperie – A7 Cardbase and Envelope – White

Ink

  • Hero Arts – Alcohol-Marker Friendly Ink Pad – Intense Black
  • Ranger – Tim Holtz – Distress Ink- Scorched Timber
  • Pigma – Mircon 005 Fine Tip Pen – Black
  • Sharpie – Permanent Marker – Ultra Fine Tip – Black and Red
  • Sakura – Gelly Roll Pen – Medium – White

Adhesives

Tools

  • Die Cutting Machine
  • Paper Trimmer
  • Bone Folder
  • Paperweight
  • Stamping Blocks used as paperweights
  • Scissors
  • We R Memories – QuickStick
  • Sponge Dauber
  • Paper Masking Tape
  • Glue Eraser
  • Pencil