Just wanted to share some of the quick and fun Box Pops that I’ve made using i-crafter dies – specifically their oval base Box Pop.


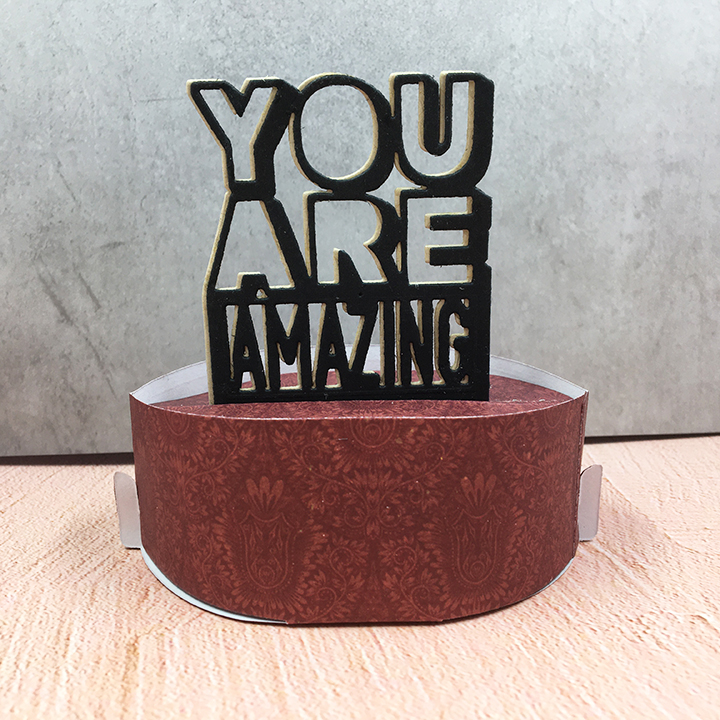


Hope you’ll check out the i-crafter brand as Lynda keeps adding more delightful interactive die sets.

Just wanted to share some of the quick and fun Box Pops that I’ve made using i-crafter dies – specifically their oval base Box Pop.
Hope you’ll check out the i-crafter brand as Lynda keeps adding more delightful interactive die sets.

Hi, it’s Sue here from the Dies R Us Design Team with an interactive Father’s Day card.

This card is made with Karen Burniston dies focusing on the Tiny Trees Pop-Up in a 3 3/4 inch x 8 3/4 inch card base. (I used a thin white card base cut 8 3/4 inch by 7 1 /2 inch folded in half and covered with four panels of 3 3/4 inch x 8 3/4 inch decorative papers.)

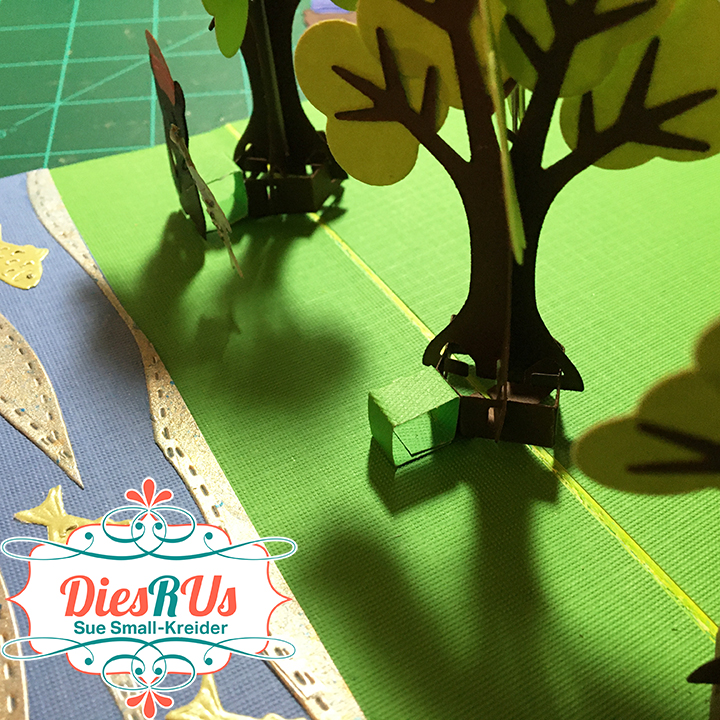
Cut the number of trees you plan to use and assemble using the packaging directions. Decide on placement of trees based on where they will be in the folder position. (For slimline cards the trees must be place on the center fold rather than using the offset piece which allows for trees to be added off the center card fold.) Glue down tree frames and wait until glue has set to attach trees.

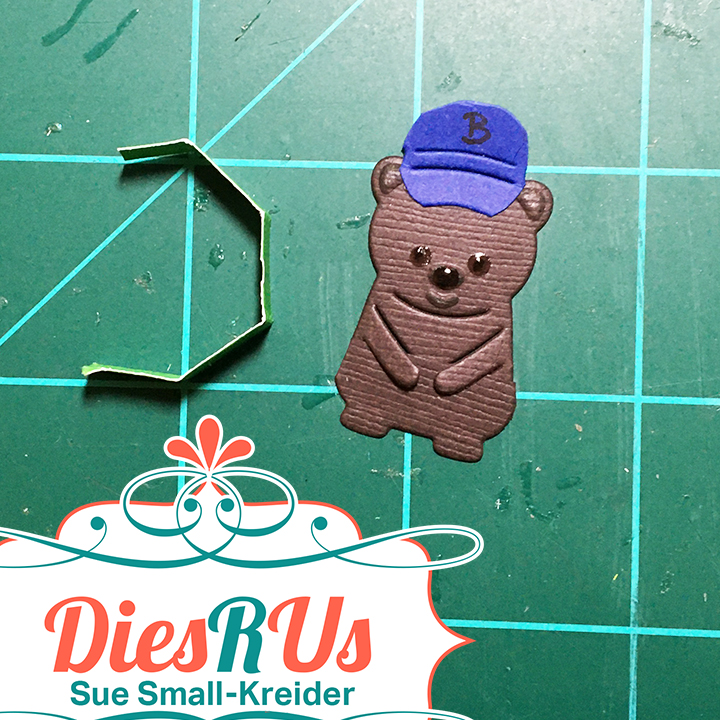
Die-cut four bears (Winter Animals) stenciling through the die with a black fine tip pen the eyes, nose and mouth. Run the stenciled bears back through the machine with the embossing mat and plate for your die-cutting machine to emboss the face and bottom feet. To make a baby bear, cut the bear just below its paws and then slide the bottom piece up under the arms and trim off excess edges. Glue together. The baseball caps are made by die-cutting the engineer’s cap from the Tiny Accessories 3 die set and rounding off the puffy crown and bill of the cap. (I tried to make the logo of the recipient’s favorite baseball team on the caps.) The fishing poles are described below. Drops of Glossy Accents were added to the bears’ eyes and nose to made them standout on the dark brown cardstock.

The stream is made with a long scrap of shiny spray painted paper in blue, gold and silver that was die-cut several times using the hill die from the Long Nature Edges die set. These wavey pieces were then glued to a strip of blue cardstock and fish cut from the Camping Charms die set, were added to the stream flow. The same fish were embossed, and their eyes stenciled in black ink and then glued to a piece of string or cording which was glued to the stick charm from the same die set. The rings were all cut off of the charms.

To make the bears stand under the trees inside, a small strip of green cardstock was cut and scored to form a cube. The cube is glued to both the card base and the tree frame and then the bear is glued to the font of the cube.

Decorations to the card include one tree front with leaves and three birds cut using the dies from the Tiny Trees set, two apples from the Tree Fruit set, and a white blanket from the Picnic Elements set. The blanket could be used to write a personal message on.

The “Happy Father’s Day” was cut three times from thin cardstock using Karen Burniston’s Alphabet dies. The layers were glued together and then glued to the front of the card using a T-ruler to keep the letters in a straight alignment.

Hope this fun card has provided some inspiration for your crafting. 😊
Other Father’s Day cards on my blog
A Fishing Father’s Day
A Father’s Day Waterfall Pop-Up
A Work Bench Father’s Day Card
SUPPLIES Used from Dies R Us:
Other Supplies Used:
Don’t forget to come join in the fun at the Dies R Us Challenge Blog. There’s a new challenge theme offered on the 1st and 15th of each month and one lucky randomly drawn winner will receive a gift voucher prize to the Dies R Us Store.

For your convenience, all the important Dies R Us links are provided below.
click below for:

Today we are making a 3-dimensional swing card using Karen Burniston dies from Dies R Us.

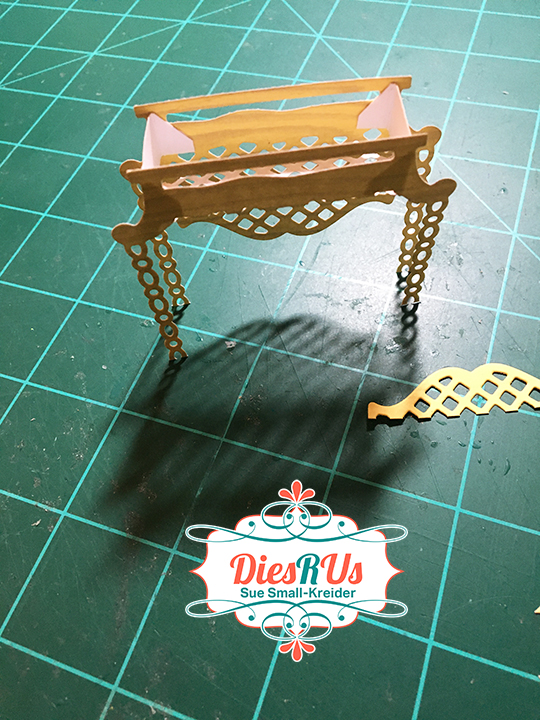
1. Cut two of each color using the swing die. Save the off-cut pieces for bench supports (I find the best piece is right below the bench , about 3/8 inches tall x 2 inches)

2. Trim off two roofs from darkest colour and the four posts from the lightest color. Cut the chains off the middle color. Cut bench support into two strips. (I save all the parts that I’m not using on this card to use on other cards.)

3. Cut words from each of the three colors.

4. Cut four stems from green and ten small flowers and center circles from flower dies.
5. Cut a 5 inch square and four small strips ¼ inches X 1 ¼ inches from sturdy green cardstock for the card base and post tabs.
6. Trim heart and scallop off one of the roof pieces. Glue roofs to yellow bases.

7. Glue heart and scallop trim together, being careful not to glue roofs.

8. Glue white posts ton fronts of yellow base posts.
9. Take one of yellow benches, snip the back at sides and fold down back to become bench seat. Trim of top of the bench as shown.

10. Cut the bench support strip into two side strips Fold ¼ on either end to form two tabs.

11. Trim tabs to fit the bench cut-outs. Glue tabs to lower side of back of seat piece as shown. Then glue other tabs to back bench piece.
12. Take 5 inches green square and fold in half, fold down one side to make a mountain fold, repeat on other side. Base should have two mountain folds in the shape of a “M.”
13. Glue small green support strips to inside of posts. Let dry and then glue posts to inside valley of base as shown in red circles.

14. Trim off top two loops on bench chains.
15. Cut two lengths of thread or embroidery floss. Thread one piece through the two chains on one side of bench. Repeat with other thread on opposite side of bench.

16. Tape threads to underside of roof making sure bench hangs evenly. (Red circles) Trim off tails of thread. Test swinging your bench. Smile.

17.Glue your words together offsetting at least one or both of the back colors. (Off-setting all three gives a blurred effect as shown, but off-setting just one makes the letters look 3D.)
18. Glue your flowers together and then onto the stems/bushes. Glue to base.

Hope this fun card has put a smile on your face and provided some inspiration for your crafting.
Want to see other swing cards I’ve made? Click here.
Thank you for reading this blog post. Please like and leave a comment. 😊
SUPPLIES Used from Dies R Us:
Additional Supplies Used:
Don’t forget to come join in the fun at the Dies R Us Challenge Blog. There’s a new challenge theme offered on the 1st and 15th of each month and one lucky randomly drawn winner will receive a gift voucher prize to the Dies R Us Store.

For your convenience, all the important Dies R Us links are provided below.
click below for:

Hi, it’s Sue here from the Dies R Us Design Team with an interactive wedding card.

This card is primarily made with Karen Burniston dies focusing on the Cake Pop-Up in a 7 inch x 5 inch card base. (I used an off-white shimmer card stock for the inside of the card and took mica spray-painted shimmer card panels for the front and back of the card.)
Cut out two of each of the cake tier pieces, two of the three scalloped edging pieces and two of the bride and groom piece. (I used shimmer cardstock for all but the groom pieces.) Fold tier pieces on scored lines as shown in the video. Glue each tier together following the video.
It is easier to decorate the cake before attaching it to the card. (I added some embellishment drops to the scalloped edges that needed to dry overnight.) Glue one set of bride and groom together on to tab at cake top. Glue the second set on to back side of cake top. Adhere the scalloped edging on to each tier of cake, starting and stopping each scalloped piece at the center fold of each tier.
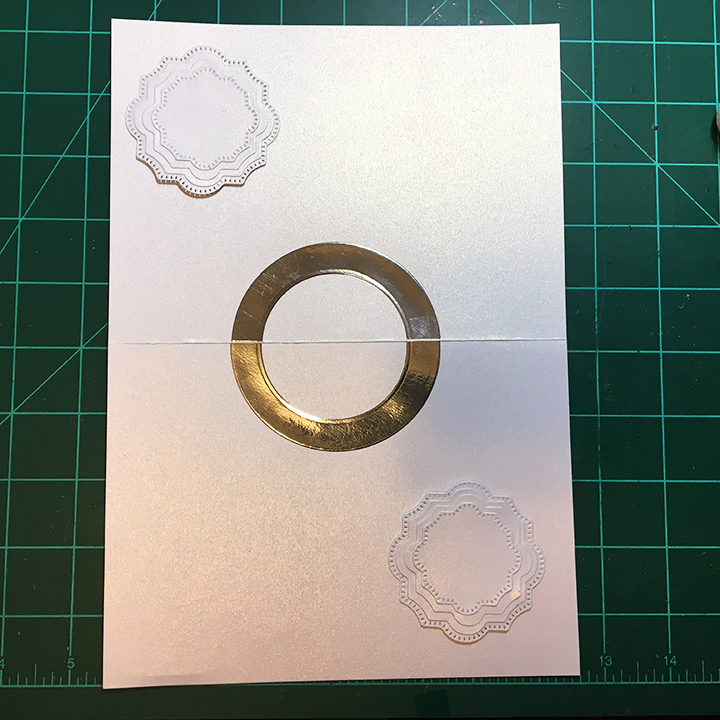
Cut a 3 1/4 inch circle from silver mirror and then cut a 2 1/4 inch circle from the center of the larger circle. Cut in half and glue on either side of the card base fold. Play with the layout of your decorative pieces before gluing the cake to the silver circle. Align the cake center fold with the card base fold. Place glue on the lowest tier’s folded tabs and glue in place. Fold card closed and firmly press cake to card base. Wait until glue has set to open.

I used the fancy layered label and tiny hearts dies from the Paper Frames Pop-Up set to decorate the inside of the card. (To make the tiny hearts be visible I coated them in a peachy translucent embellishment drops that had to dry overnight.)

The sentiments for the card front are dies from my stash and the “Happily ever after” is a Karen Burniston die that I cut twice so that I could paper piece the red heart into the blue words. The gold swags on the card front are from another Karen Burniston dies set of Party Border Blends.
Hope this fun card has provided some inspiration for your crafting. 😊
SUPPLIES Used from Dies R Us:
Dies
Miscellaneous
Other Supplies:
Don’t forget to come join in the fun at the Dies R Us Challenge Blog. There’s a new challenge theme offered on the 1st and 15th of each month and one lucky randomly drawn winner will receive a gift voucher prize to the Dies R Us Store.

For your convenience, all the important Dies R Us links are provided below.
click below for:

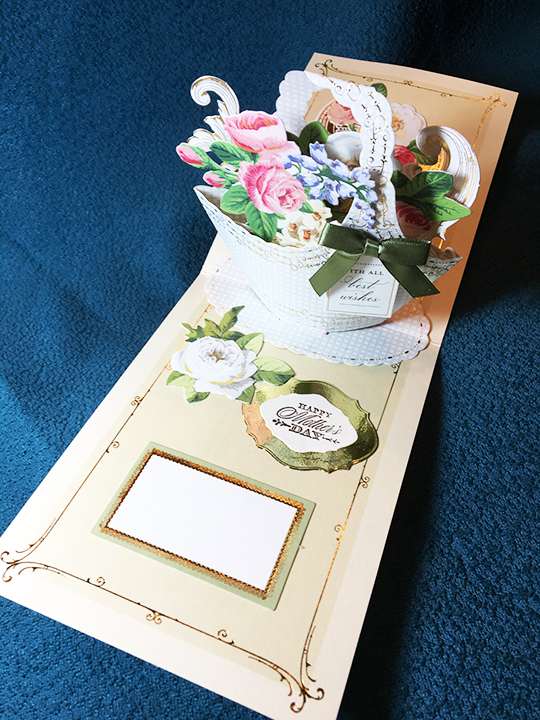
Mothers deserve special cards. A basket full of roses using Anna Griffin’s new Basket Pop-Up kit and a few tea service pieces from an older Anna Griffin Favorite Tea Embellishments made the perfect card for this special mom.

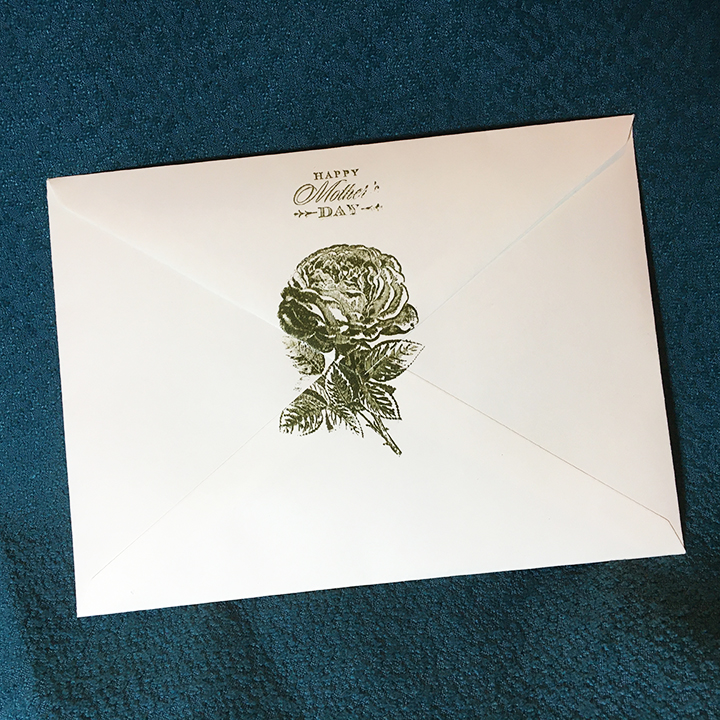
The envelope was stamped with stamps from Anna Griffin’s Treasury of Stamps and Dies using Stampin’ Up Always Artichoke ink.
Other cards using stamps and papers from Anna Griffin include:
Thank you for looking at my blog. Please like, comment and follow. 🌞

Hi, I’m Sue SK of Ully Cat’s World and a new member of the Dies R Us Design Team.

This sweet spring card is a z-fold card that when flat fits in an A2 (4 3/8 in x 5 ¾ in) envelope.
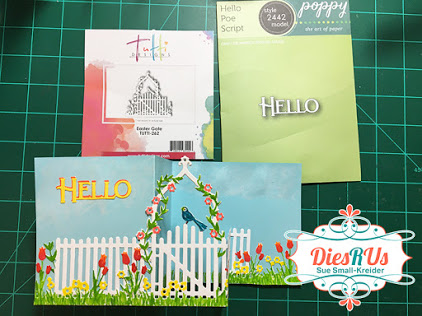
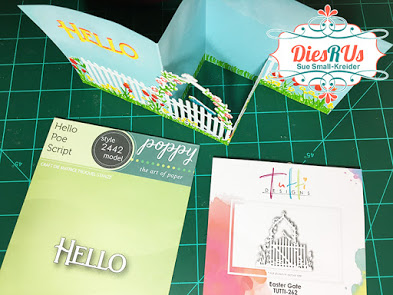
It uses two dies – TuttiDesigns Easter Gate and PoppystampsHello Poe Script.
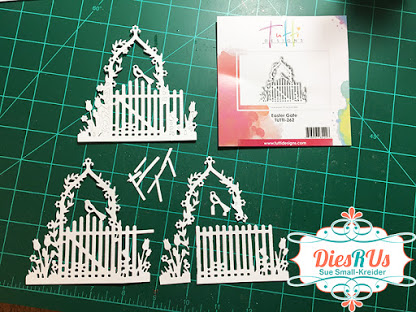
1. Cut three gates from white cardstock, saving the waste pieces from between the fence pickets to use as fence rail extensions. (See bottom left gate).
2. Trim arch and left flowers from gate/fence and save off-cuts from second die-cut.
3. Trim off areas of gate to make into fence. (Compare right fence to left gate.)
4. Repeat steps 2 & 3 with third die-cut.

5. Glue a fence section to each side of gate. Use the waste pieces as fence rail extensions and flowers to glue the pieces together.

6. Fold right side of fence as shown.
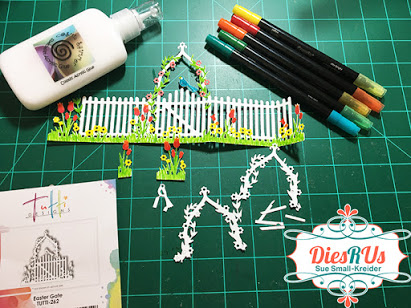
7. Color the flowers, vine and grass using fine tip markers.
8. Taking one of the waste birds, trim off excess paper from feet and tail. Cut a wing from scrap and glue onto bird. Color bird.
9. Glue bird’s eye back into gate piece and glue colored bird over bird on gate. Use fine tip pen to add dot to eye. Glue third scrap bird onto back of bird on gate.
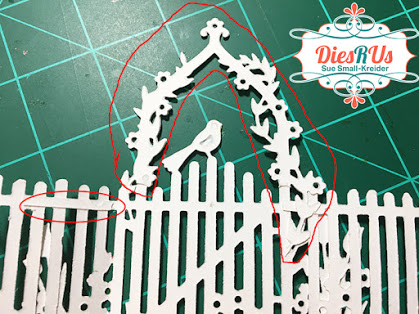
10. Glue the two waste arch/vine pieces to the back of gate arch. (Red outline) Add fence rails as needed to support where fence pieces were added to gate piece.

11. Cut a blue piece of cardstock 10 inches x 4 inches. Score at 3 ¼ inches and 5 5/8 inches.
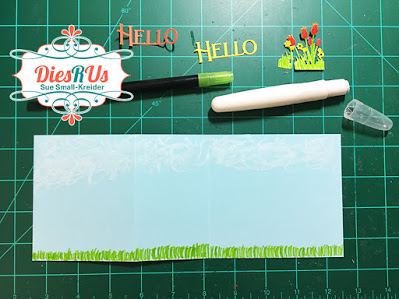
12. Color the background to add grass using a green marker and clouds using white watercolor crayon.
13. Die-cut two of the “Hello” sentiment in light and dark colors. Glue light on top of dark, off setting to create a shadow.

14. Glue left side of fence to left side of card, matching bottom edges and left corner.
15. Glue right small folded flower/fence section and fold card base onto glued section.
16. Glue sentiment onto from of card.

Don’t forget to decorate your envelope and get more use out of your dies by using the off-cuts as stencils.
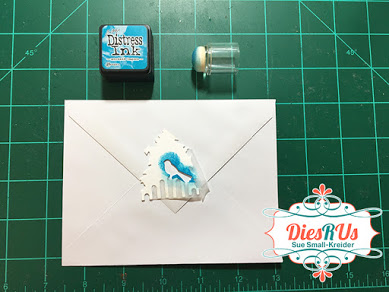
17. Using the waste piece from under the arch and gate, tape closed the bird’s feet and tail. Stencil using ink and sponge dauber.

18. With a fine tip pen add details to the bird.
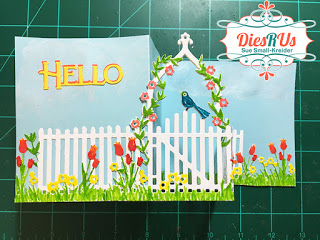
Hope this card brings a smile to your face and provides some inspiration to your crafting.
Click here to see more cards I’ve made with fences.
SUPPLIES Used from Dies R Us:

Tutti Designs – Dies – Easter Gate


CosmicShimmer – Specialist Acrylic Glue – 125ml

Sizzix – Big Shot PLUS die cutting Machine
Don’t forget to come join in the fun at the Dies R Us Challenge Blog. There’s a new challenge theme offered on the 1st and 15th of each month and one lucky randomly drawn winner will receive a gift voucher prize to the Dies R Us Store.

For your convenience, all the important Dies R Us links are provided below.
click below for:

Cards for men can be fun to make when they use a small die set by Leane Creatief which includes a suit jacket, a vest, shirt collar, two ties and a BBQ apron as well as a tag box. The box makes up to a little over 4 ½ inches tall by 1 ¾ inches wide and 3/8 inches deep. Perfect for tucking a note, tickets to a sporting event, or folded money.
(I purchased this die from Dies R Us when they had one of their special European dies sales, but it sold out quickly. You can get some lovely dies from around the world in these sales, but you must act quickly when you see one you like.)

For the card background I used two Poppystamps border dies to create a layered set of circles using oatmeal cookie and a dark brown scrap of cardstock for the layers under the plaid paper. Oatmeal cookie was used to cut the tags out of and a cream piece of Recollections cardstock was used to make a mini slimline card base (5 ½ inches x 3 ½ inches).
The “Happy Birthday” sentiment was cut once from a light color and once from a dark brown scrap and glued together a bit off set to give depth. A third layer was cut and glued to the back not be seen, but to raise the words up.
The vest was cut from a plaid paper. The buttons and pockets were stenciled on through the die. The tag is attached using foam squares.
A mustache was stamped using an older Sizzix stamp set in a dark brown on the back of the envelope.
Thank you for reading this post. Please like, comment, and follow this blog. 🌞
Supplies:
Dies
Stamps
Papers
Inks
Miscellaneous

Hi, I’m Sue SK of Ully Cat’s World and a new member of the Dies R Us Design Team.

My mother told me that you can never say thank you enough, so this card is to say thank you to Dies R Us for inviting me to be part of their team.

I really like using this Karen Burniston Swirls pattern plate die with background papers that I made with color pigments like Brusho Inks or Cosmic Shimmer – Pixie Powders.

Picking a dark background makes the swirls stand out. The swirls die-cut is 4 ¼ inches x 5 ½ inches, so I cut a black piece of card 4 ½ inches x 5 ¾ inches to glue the swirls onto using CosmicShimmer Specialist Acrylic Glue.

Next, I cut the Karen Burniston “Thank You” three times – one in white, one from a blue and white background paper and one from the orange background paper. I off-set the words and glued them together to create a sentiment with depth and shadow. (An alternative Thank You die to the one I use is Altenew – Dies – Simply Thank You.)
After adhering the sentiment on top of the swirls, I used foam squares to adhere the panel to a 4 ¾ inches x 6 ½ inches black panel glued to the white card base.
Hope this provides some inspiration for your crafting.
SUPPLIES Used from Dies R Us:

KarenBurniston – Die – Pattern Plate – Swirls – 1124

Altenew – Dies – Simply Thank You

Cosmic Shimmer – Pixie Powders
CosmicShimmer – Specialist Acrylic Glue – 125ml
Sizzix – Big Shot PLUS die cutting Machine
Don’t forget to come join in the fun at the Dies R Us Challenge Blog. There’s a new challenge theme offered on the 1st and 15th of each month and one lucky randomly drawn winner will receive a gift voucher prize to the Dies R Us Store.

For your convenience, all the important Dies R Us links are provided below.
click below for:

Special aunts deserve special cards. A basket full of spring flowers using Anna Griffin’s new Basket Pop-Up kit and a few flowers from an older Anna Griffin Pretty Paintings kit made the perfect card for this special aunt.

The envelope was stamped with stamps from Anna Griffin’s Treasury of Stamps and Dies using Stampin’ Up Soft Suede ink.

Thank you for looking at my blog. Please like, comment and follow. 🌞
Other cards using stamps and papers from Anna Griffin include:
