Slider Easel Card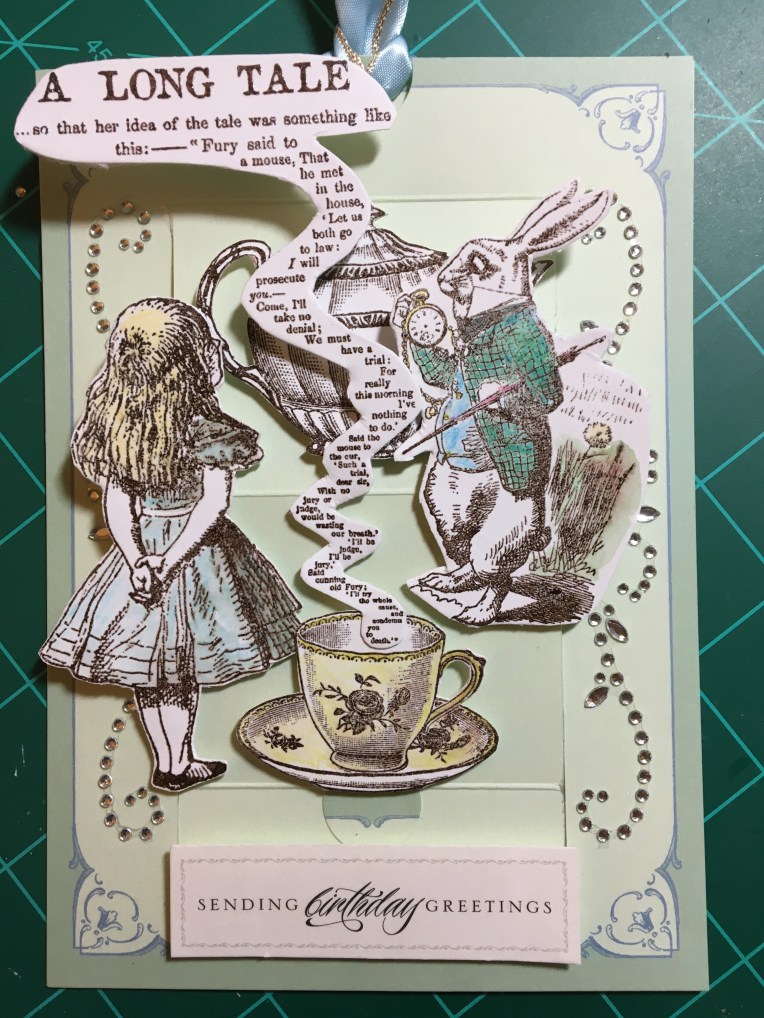
When is an easel not an easel? When it is a flattened easel slider card. This card slides open to reveal two hidden messages.
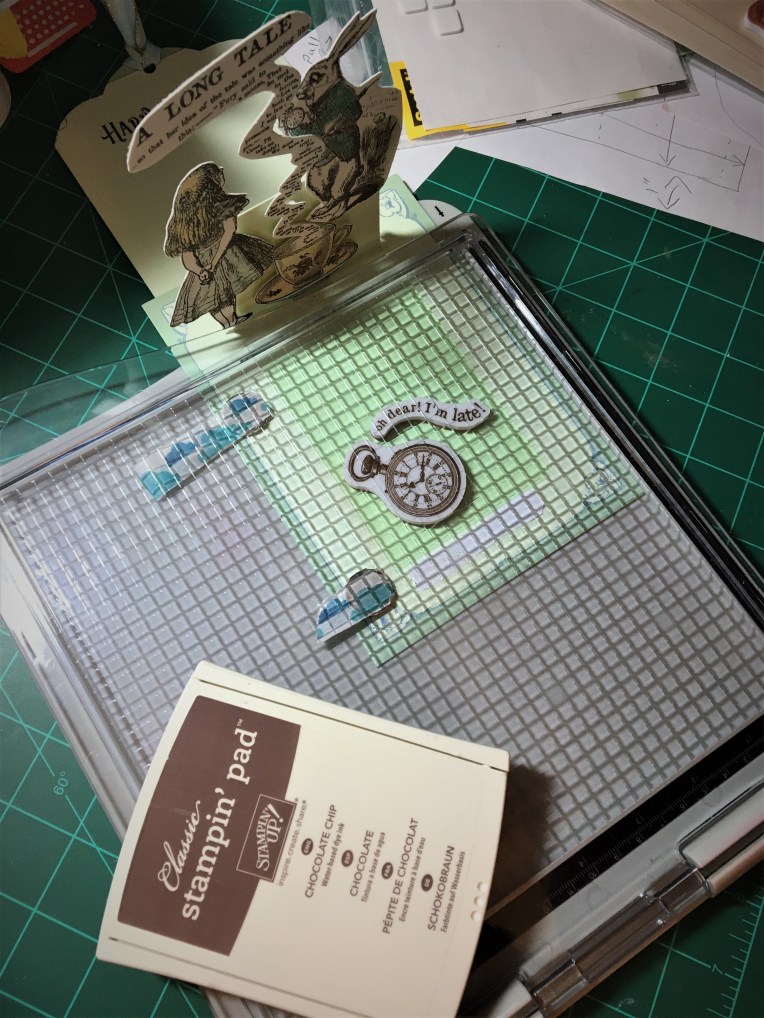
- Stamp images onto white cardstock using a dark brown ink and heat emboss with clear embossing powder to set ink.
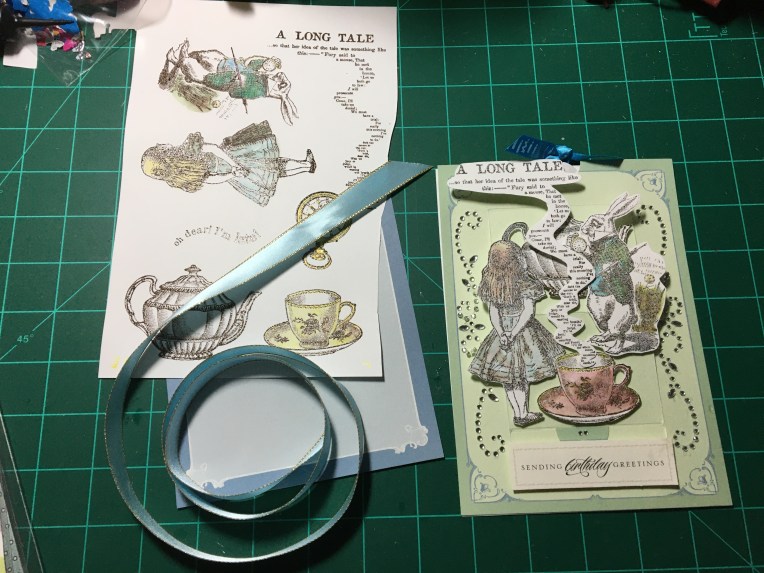
- Using watercolor pencils color images and then use water and brush to blend colors. Let dry.
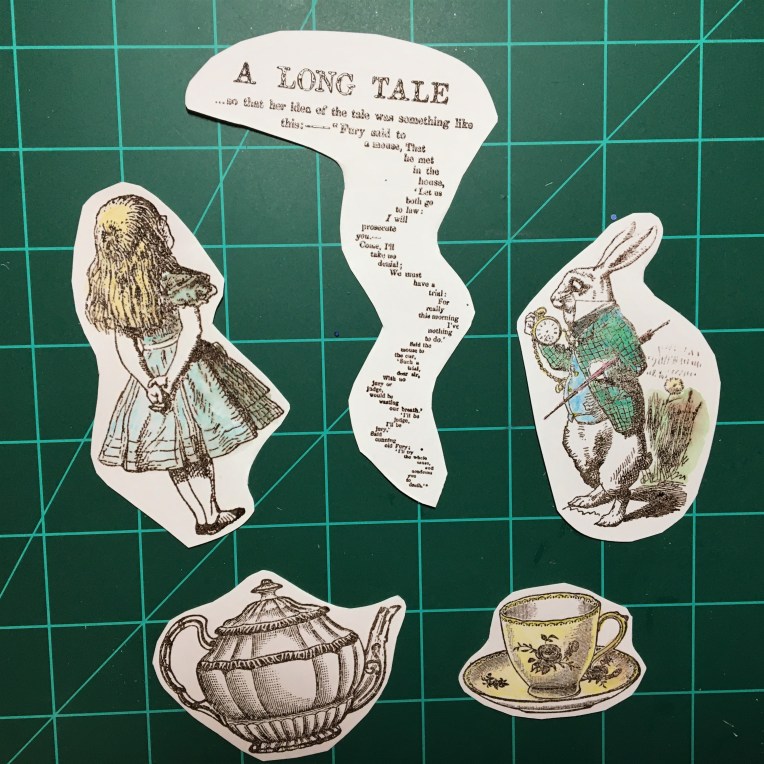
- Rough cut images and glue to heavy cardstock. Let dry and then fussy cut out images.
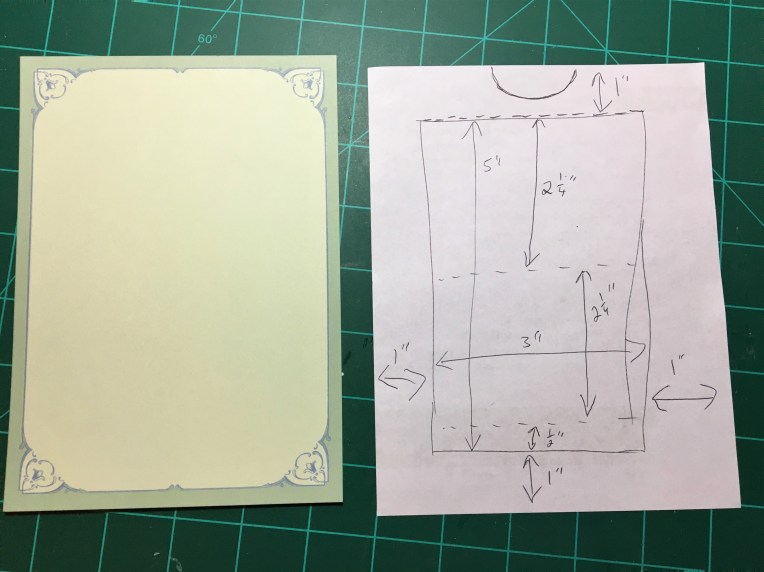
- Take one printed card front and on back side make lines 1 inch (25 mm) from all edges.

- Using a blade knife and metal ruler, cut three lines in card front to form a door flap.
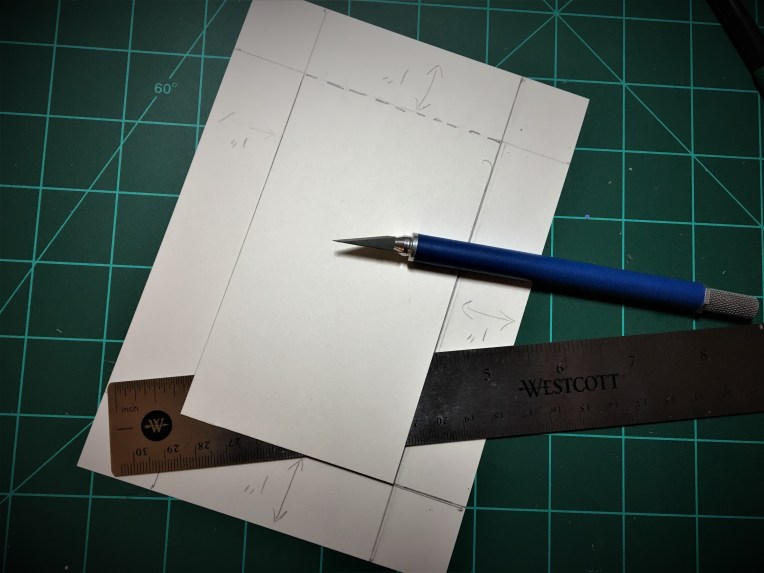
- Using a score board, score door flap at ½ inch (12 mm), 2 ¼ inches (55 mm) and 5 inches (127 cm) from door flap bottom edge. Fold door flap with valley folds at ends and mountain fold in middle.
")


- Cut second printed card front down to 6 1/2 inches (170 mm) x 4 3/8 inches (110 mm). make a cutting template for top by folding scrap paper the is 4 3/8 inches wide in half and cutting out design. Trace template on to top of card and cut out. Punch hole in center top for pull ribbon. Thread ribbon through punched hole and tie off ribbon. This is slider card.

- Using a 1 inch (25 mm) wide circle punch, cut a half circle at top center edge. Place double-sided tear tape at edges on three sides of back of printed card with door flap leaving top edge with half circle untaped. Peel off backing tape and place a second layer of tape on top of first layer of tape. Place one layer of red backed double-sided tape on back of bottom tap of door flap.

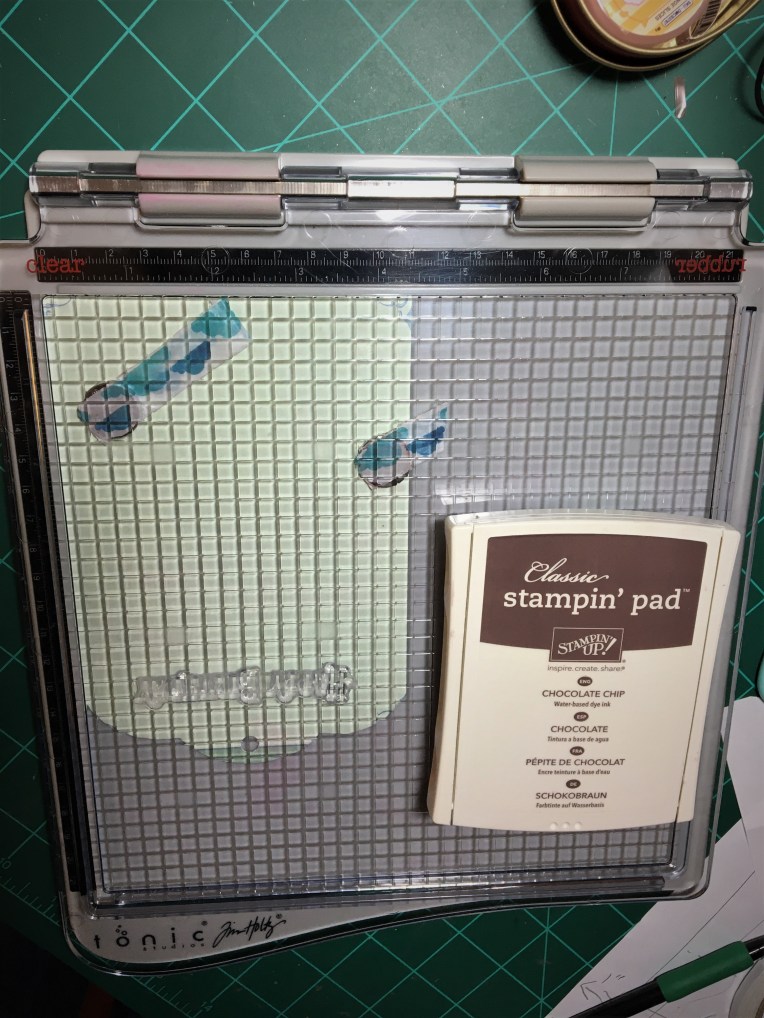
- Stamp sentiment on top half of slider card using stamp platform.
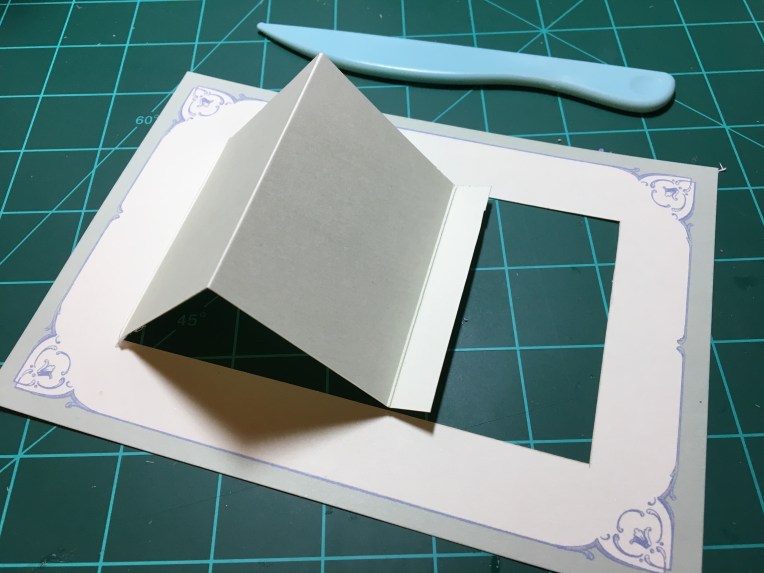
- Peel off red backing on taped door flap tab. Place slider card face down on back side of door flap card so that it is inside the three taped edges and the ribbon pull is at the half circle end. Adhere taped edge of door flap to slider card. Turn over card front and test slider so easel comes up. Reposition or trim slider card to eliminate catchpoints.

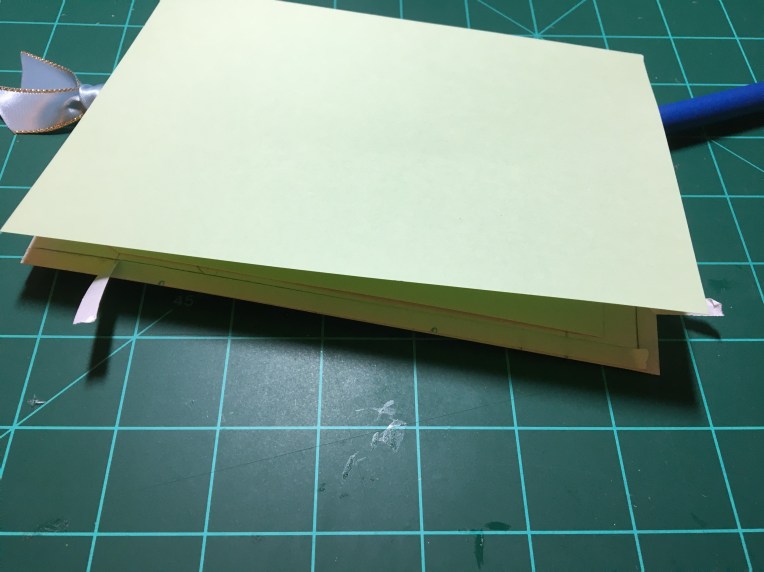
- Position 5 x 7 inches colored cardstock over back of printed card front. Peel off backing tape and line up one edge at a time until slider pocket is formed.
- Using a stamp platform, place card with ease up revealing hidden space to be stamped. Stamp sentiment.
- Decorate the slider easel by laying out stamped images on flatten card and playing with slider to see how and where to place double-sided sticky foam squares to one side of easel or other. Decorate card front frame edges with sticky backed gems, but do not block easel slider.


- A simple sketch showing how the card functions may need to be included in the mailing envelope for good CRX (Card Receiver Experience).

Materials:
Printed Card Front – Anna Griffin 5 x 7 inches -Delicate Engravings
Colored Lightweight Cardstock – 5 x 7 inches pale green (127 mm x 177 mm)
Heavy White Cardstock – 8.5 x 11 inches
Rubber Stamps – Stamperia – Alice
Brown Ink-Stampin’ Up Classic Stampin’ Pad – Chocolate Chip
Clear Embossing Powder – Recollections Detail Embossing Powder
Watercolor Pencils – Prima Marketing Inc. Watercolor Pencils – The Basics
Printed Sentiment – Anna Griffin-Delicate Engravings Card Toppers
Ribbon – 8 inches
Sentiment Stamp – Apple Blossom-Parisian Sentiments-Happy Birthday
Foam Squares – Scotch Create Permanent White Foam Squares
Sticky-backed Gems – Recollections Bling on a Roll
Glue – Cosmic Shimmer Specialist Acrylic Glue
Double-Sided Tear Tape – Scrapbook.com Clear Double Sided Adhesive Roll ¼ inch
Super Sticky Red Backed Double-Sided Tape – Home Hobby by 3L Extreme Double-Sided Tape 1/8 inch
Clear Tape – Scotch Magic Tape
Tools:
Blade Knife
Sharp Pointed Scissors
Metal Ruler
Heat Tool
Anti-Static Bag
Stamping Platform
Scoreboard
1 inch (25 mm) circle punch

Amazing!!! I just love this one. You are so creative.
LikeLiked by 1 person
Gorgeous, love the vintage feel and the quote as steam from the cup of tea. Emma
LikeLiked by 1 person