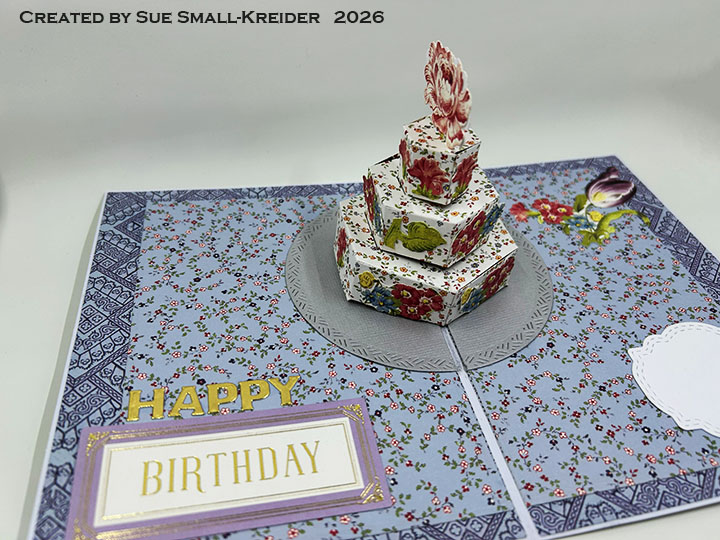
This cake pop-up card is for a spring birthday for a flower garden enthusiast and is made using Karen Burniston dies.
Watch the process video to see how I made this card.
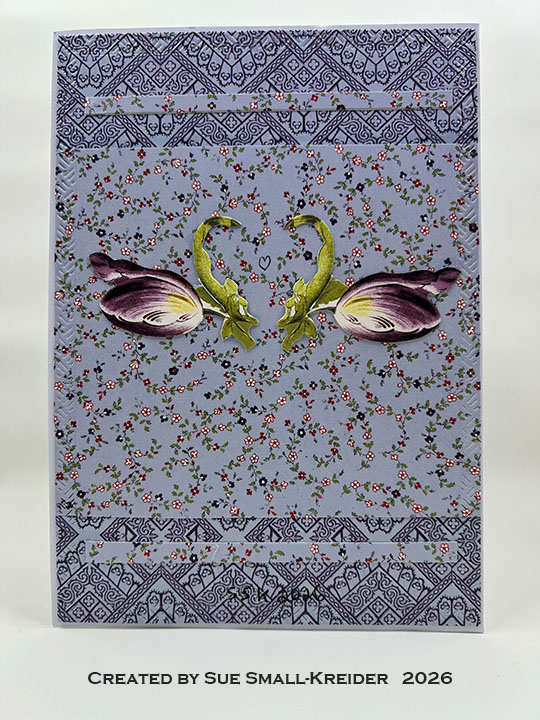
Cardbase: Using a purchased A7 (5×7-inch) cardbase, cut from at least three different pattern papers, three each of the three largest rectangle dies in the Rectangles and Labels – Crosshatch die set for the inside of the card and card front. Using the fourth largest rectangle die, cut out the centers of all but the scalloped rectangles. Glue these smaller rectangles together and cut out the largest rectangle die for the card back panel. Glue panels together and onto the card as shown in the video above.
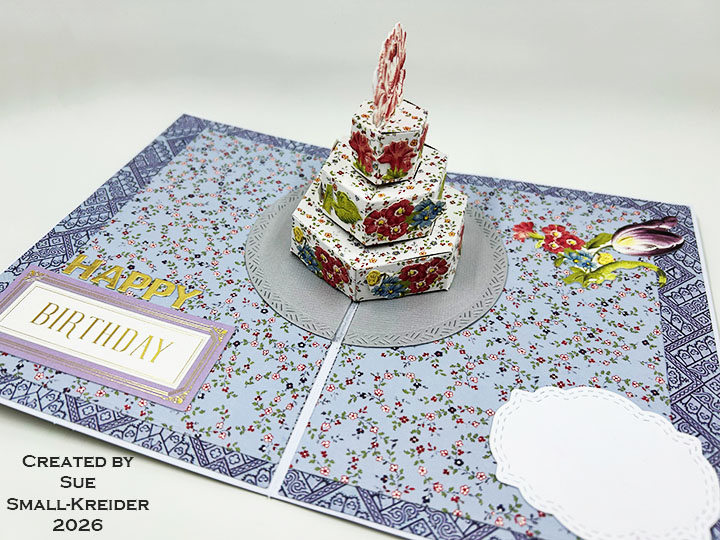
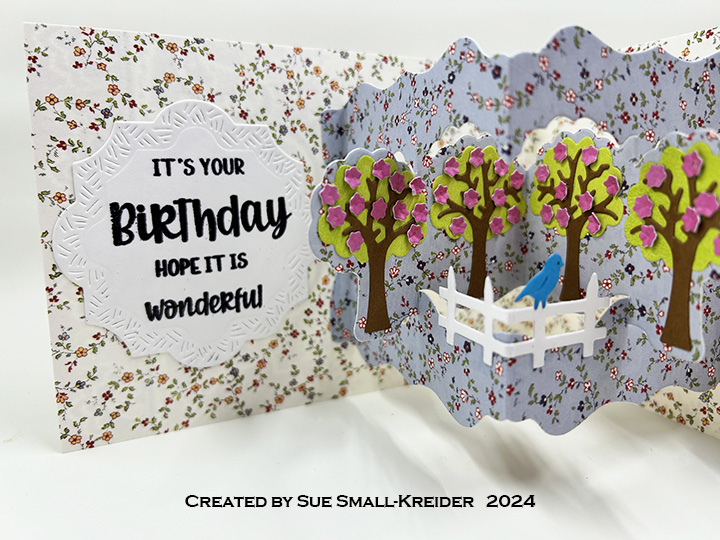
Cake Pop-Up: Watch the assembly video at the bottom of the linked page for Cake Pop-Up. Cut the largest circle in Circles – Crosshatch set from a silver or gray paper. Cut in half and glue each half as shown in the video above. Color the fold area between the two circle halves with a silver marker. Cut two each of the three cake dies from a white patterned paper. Assemble as how in the video above.
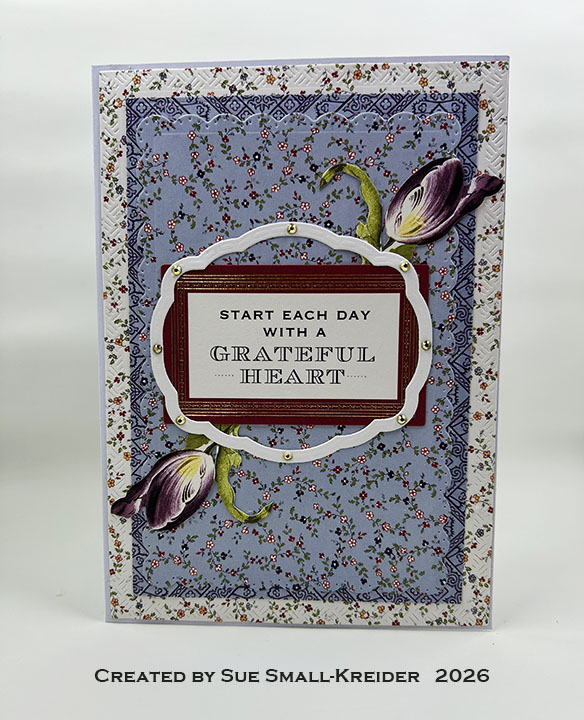
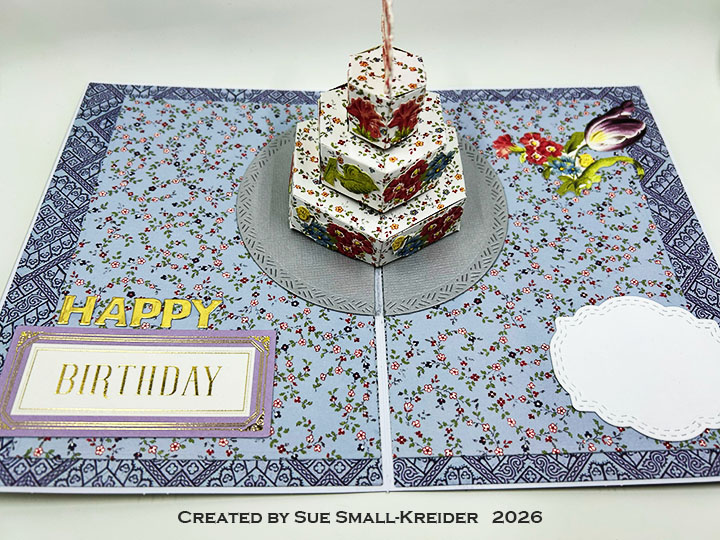
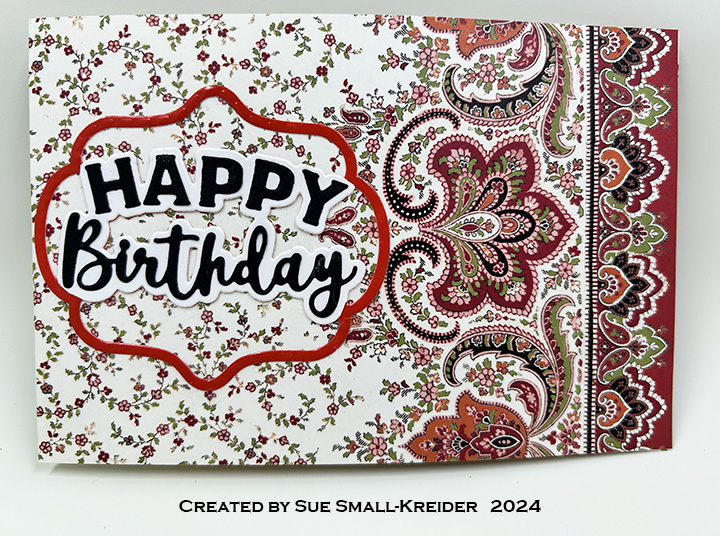
Sentiments: The front sentiment “Start each day with a grateful heart” and the inside “Birthday” are embellishment cards from Anna Griffin. The white label frame around the front sentiment is cut using the label frame die from Rectangles and Labels – Crosshatch. “HAPPY” on the inside is die cut from gold mirror cardstock using the letters in Happy Birthday Lorna Add-Ons. The white personal message label is cut using the Greeting Labels.
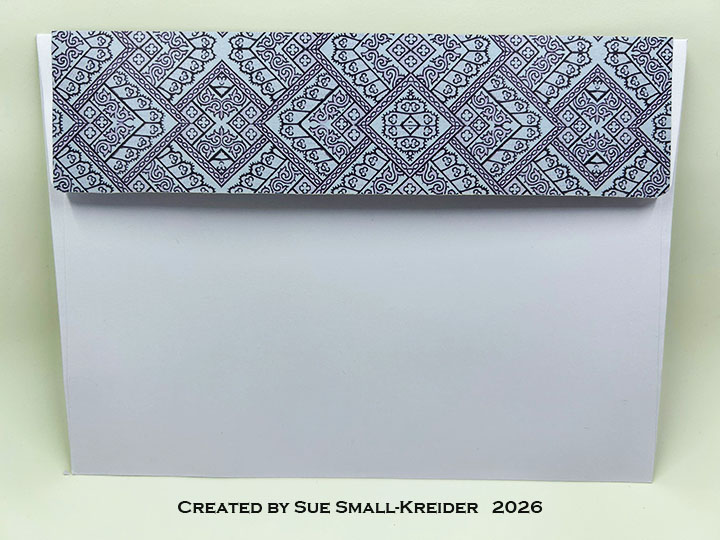
Envelope: The card fits into an A7 (5×7-inch) size envelope with patterned paper glued to the back flap.
___________________________________
Thank you for experiencing this blog post.
I hope this inspires you and makes you smile.
Please subscribe, like and leave comments 😊
Follow my YouTube channel, Instagram and Pinterest as well.
___________________________________
Disclaimer: Karen Burniston products are provided free of charge by the manufacturer for review and use. All other items were personally purchased. Compensated affiliate links used where or when possible, meaning I will receive a small percentage commission from these manufacturers at no cost to you. This will allow me to add more content to my YouTube channel and help out a lot. Thank you.
Materials Used:
- Karen Burniston in cahoots with Riley and Company – Greeting Labels – 1312
- Karen Burniston in cahoots with Riley and Company – Happy Birthday Lorna Add-Ons – 1276
- Karen Burniston in cahoots with Riley and Company – Rectangles and Labels – Crosshatch – 1233
- Karen Burniston in cahoots with Riley and Company – Circles – Crosshatch – 1057
- Karen Burniston in cahoots with Riley and Company – Cake Pop-Up – 1028
Papers
- Anna Griffin – 12×12 inch Paper Collection with Embellishments – Paisley Papers
- Bazzill – 8.5×11 Cardstock – Tiara -18-1002
- Gold Mirror Cardstock
- White Cardstock
- Park Lane Paperie – A7 Cardbase and Envelope – White
Ink
- American Crafts – Metallic Marker – Silver
- Pigma – Mircon 005 Fine Tip Pen – Black
Adhesives
Tools
- Die Cutting Machine
- Paper Trimmer
- Stamping Blocks used as paperweights
- Scissors
- Reverse Tweezers
- Paper Masking Tape
- We R Memories – QuickStick
Miscellaneous
- Craftstash – Gold Half Gems