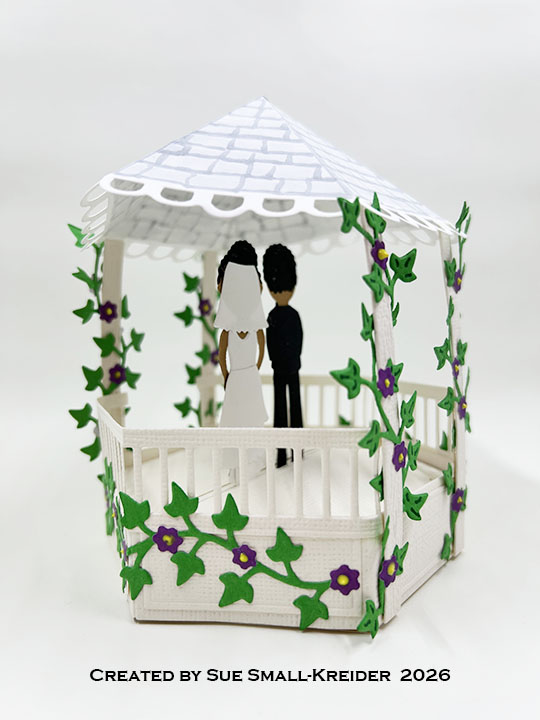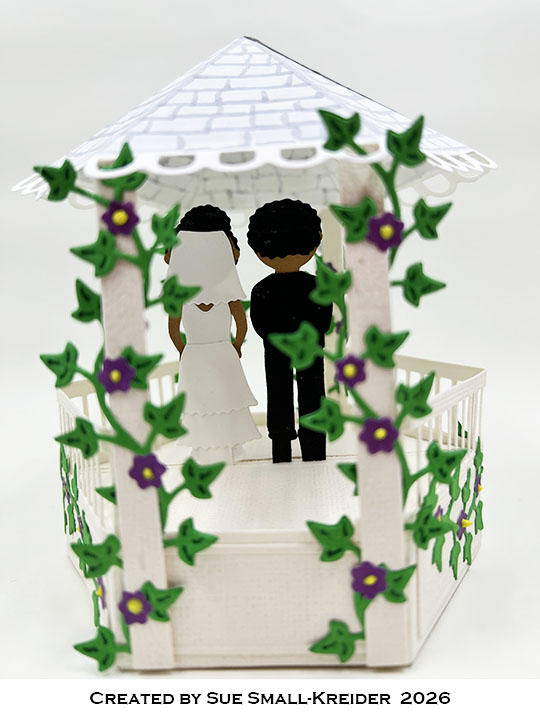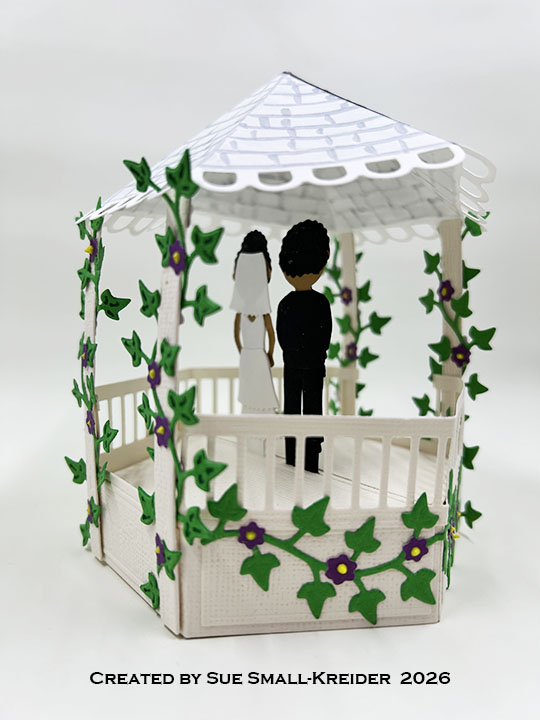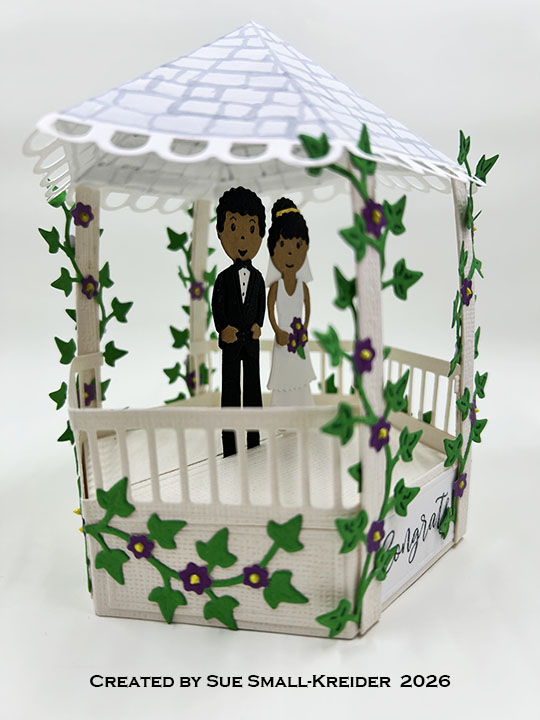
Wedding Gazebo Pop-Up Card

Welcome to our Karen Burniston Products – KB Riley LLC July 2026 Release Blog Hop. (See GIVEAWAY details at the end of this post for blog hop list.) The Design Team have come together with Karen today for a fun blog hop to celebrate the release of ten new die sets and five new stamp sets. Sneak peeks of the new release started last week, and the dies are available to order NOW on Karen Burniston’s website.
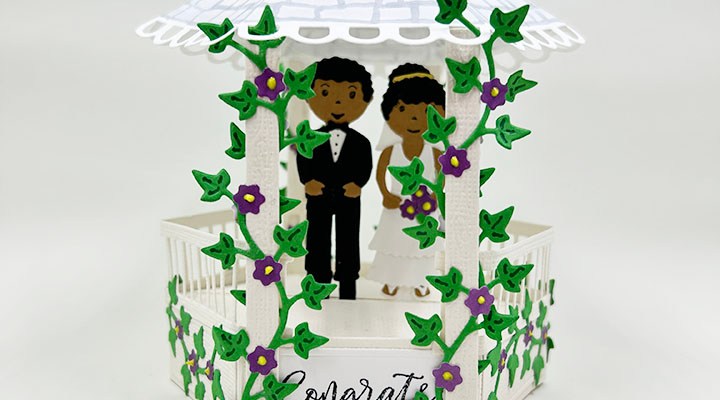
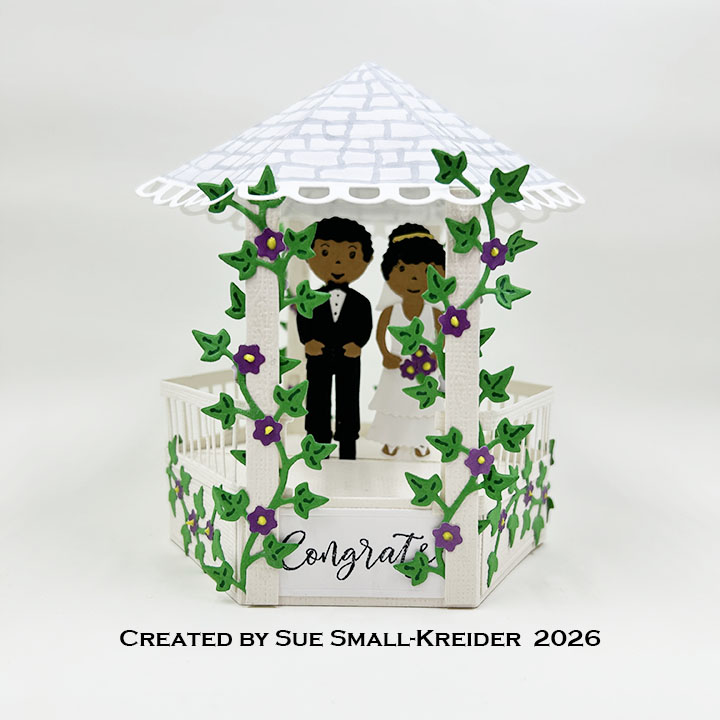
This pop-up wedding card features the new Gazebo Stage Add-Ons,  Little Bench Pop-Up and Paper People Summer Styles die sets and Sweet Life Sayings stamp set along with the previously released Stage Pop-Up, Paper People, Word Set 17 and Wedding Charms dies and the Fun Faces 1 and Seasons stamps.
Watch the process video to see how I made this card.

Stage Pop-Up Base: (Watch the assembly video at the bottom of the linked page for Stage Pop-Up.) Using the Stage Pop-Up die set and a medium weight cream textured cardstock, cut two of the large stage pieces, two of the side strips, two of the polygon decorator shapes and five of the rectangle side labels. From white cardstock cut two of the polygon decorator shapes and one of the rectangle side labels. Cut two of the “L” strips from black for the groom and one strip from white for the bride. Following the assembly steps in the video above, waiting to insert the bride & groom between the two stage sections, before gluing the base together. Stamp sentiment labels. Add the rectangle labels to the stage side strips before attaching to stage base.
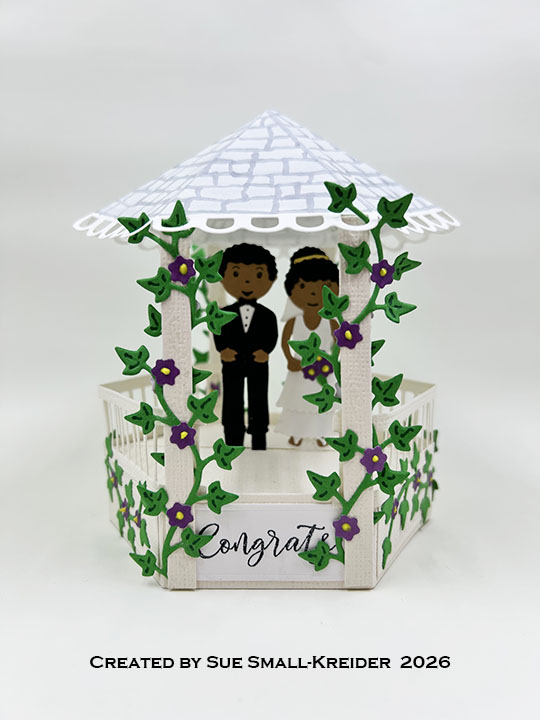
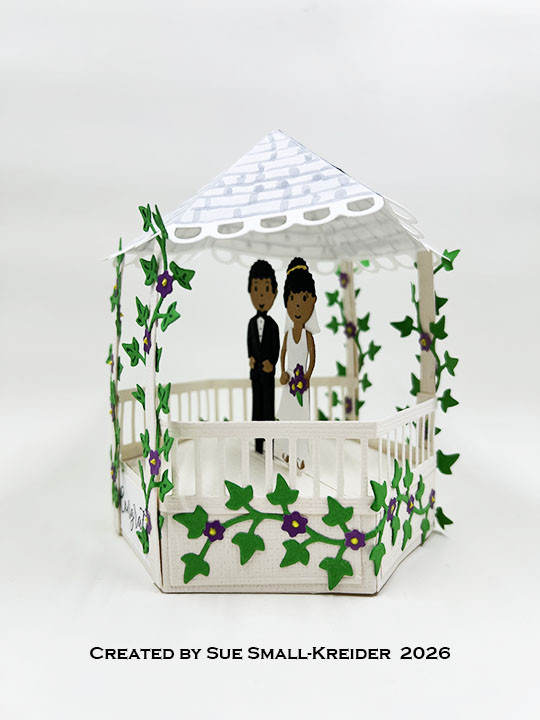
Gazebo Stage Add-Ons: Using the Gazebo Stage Add-Ons set, cut four of the woodgrain posts and two railings from cream cardstock. Cut two of the scalloped roof pieces from medium to lightweight white cardstock. Color the slate roof with alcohol markers. Assemble the gazebo as shown in the video above – adding the two posts to each roof section and then attaching the roof sections together. Cut and emboss six of the vine die from the Little Bench Pop-Up set and highlight the leaf veins with a fine tipped green marker. Weave four of the vine decorations around the four posts before gluing posts to the stage base. Once the posts are attached to base, glue down the remaining two vines to the sides.

Watch this video to see how I styled the bride and groom figures.

Bride: Using the Paper People Summer Styles die set, cut one of the figure, two sets of hair style pieces, five of the long skirt, two of the curvy top and one set of the flip-flop sandals. From gold foil cardstock, cut one diamond using the Wedding Charms die set. This will be the tiara that tucks behind the front hair piece. Assemble as shown in the video making sure to attach the “L” strip on to back side of the bride before gluing on her back skirts. (I used the Fun Faces 1 stamp set to stamp on her face before I added her hair.)
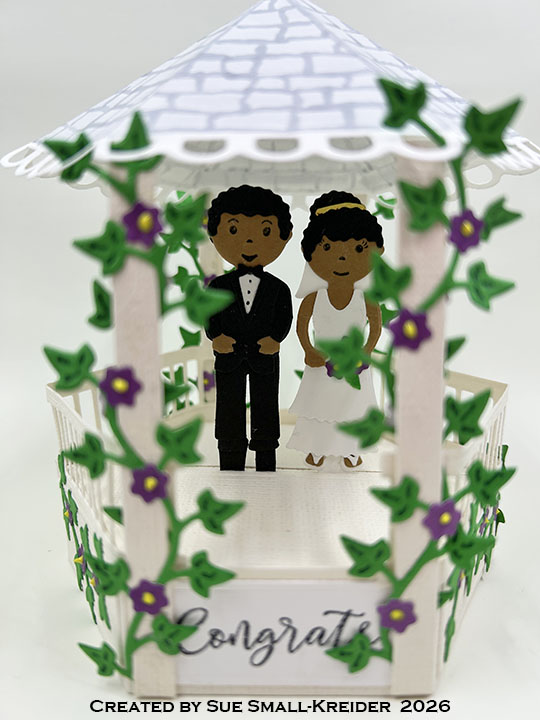
Groom: Using the Paper People die set, cut one of the figure, two sets of hair style pieces, two pants, two sets of shoes, one long sleeved shirt (use this shirt to trace the back piece with the open collar closed). Using the Wedding Charms die set, cut one tuxedo and one of the shirt triangle piece. Trim the tuxedo’s loop, sleeves and pants off. Glue in shirt triangle and assemble the coat as shown in the video above. (I used the Fun Faces 1 stamp set to stamp on his face before I added his hair.)

Flowers: Using the Little Bench Pop-Up set, cut four or more sets of the flowers. Add yellow centers to the flowers. (I used a liquid resin to add the flower centers, so I did this first when cutting out all my pieces so the resin had time to dry.)
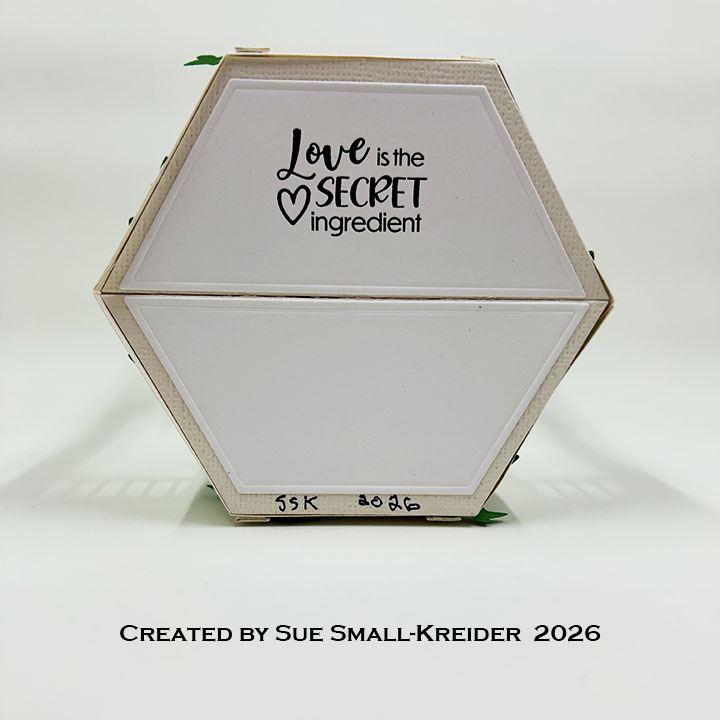
Sentiments: “Congrats” is from the Seasons stamp set While the “Love is the secret ingredient” is from Sweet Life Sayings set.
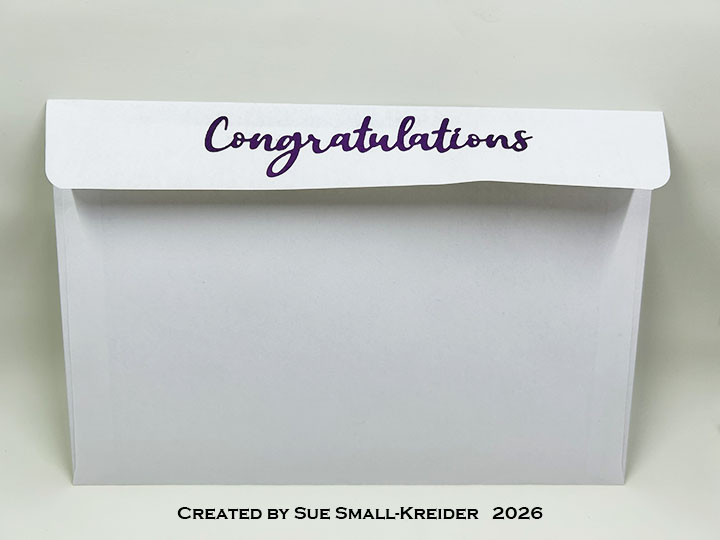
Envelope:  The card fits into a catalog (6×9-inches) size envelope. The back envelope flap is decorated with the word “Congratulations” die-cut using Word Set 17 from the same purple paper that was used for the gazebo flowers.

___________________________________

Thank you for experiencing this blog post.

I hope this inspires you and makes you smile.

Please subscribe, like and leave comments 😊

Follow my YouTube channel, Instagram and Pinterest as well.

___________________________________

Disclaimer: Karen Burniston products are provided free of charge by the manufacturer for review and use. All other items were personally purchased. Compensated affiliate links used where or when possible, meaning I will receive a small percentage commission from these manufacturers at no cost to you. This will allow me to add more content to my YouTube channel and help out a lot. Thank you.

Materials Used:

Dies

Stamps

Papers

  • 8.5×11 Textured Cardstock – Cream
  • Park Lane Paperie -8.5×11 110 lb. Patterned Cardstock – Roses
  • Rainbow Splash -8.5×11 65 lb. Cardstock – Carmel
  • The Paper Studio – 8.5×11 65 lb. Cardstock – White
  • Gold Foil Cardstock
  • Black, Green and Purple Cardstock
  • Catalog (6×9) Envelope – White

Ink

  • Memento – Fade Resistant Dye ink – Tuxedo Black
  • OLO Marker – N-G1 and N-G3 Neutral Gray
  • Pigma – Mircon 005 Fine Tip Pen – Black
  • Sharpie – Permanent Marker – Ultra Fine Tip – Green

Adhesives

Tools

  • Die Cutting Machine
  • Paper Trimmer
  • Bone Folder
  • Stamping Blocks used as paperweights
  • Scissors
  • Craft Knife
  • Pencil
  • We R Memories – QuickStick
  • Ruler
  • Scrapbook.com – Mint Tape
  • Tweezers
  • We R – Precision Press Mini – Stamping Platform

Miscellaneous

  • Pop Of Color – Gloss – Sunshine

GIVEAWAY

To celebrate the release Karen Burniston and each of the Karen Burniston – KB Riley LLC Design Team members will be giving away a $25 Gift Certificate to some lucky person who comments on our blog posts, so make sure you join the hop and comment on everyone’s blog post. Winners will be randomly chosen from ALL of the blog hop comments received on our blog posts by Thursday, July 30, 2026. Lots of chances to win some goodies, so just leave a comment on this post or any other blog hop posts to enter! Don’t forget to leave some way for us to contact you, in case you are a lucky winner!

Karen Burniston – https://karenburniston.com/blog/july-2026-blog-hop/

Lois Bak https://clownmomcreations.blogspot.com/2026/07/karen-burniston-new-release-blog-hop.html

Sue Small-KreiderYOU ARE HERE

Frances Byrnehttps://stampowl.blogspot.com/2026/07/karen-burniston-kb-riley-llc-july-2026.html

Jennifer Websterhttps://www.jlwebstercreations.com/2026/07/karen-burniston-kb-riley-llc-july-2026.html

Suzanne Smithttps://knutselsuus.blogspot.com/2026/07/kb-riley-llc-juli-2026-release-blog-hop.html

Nicky Fodenhttp://mymessycraftroom.me/2026/07/23/thinking-of-you-bird-feeder-july-release-blog-hop/

Sandy Dillerhttps://sandydiller.blogspot.com/2026/07/july-2026-new-release-and-blog-hop.html
Root Beer Pop-Up Birthday Card

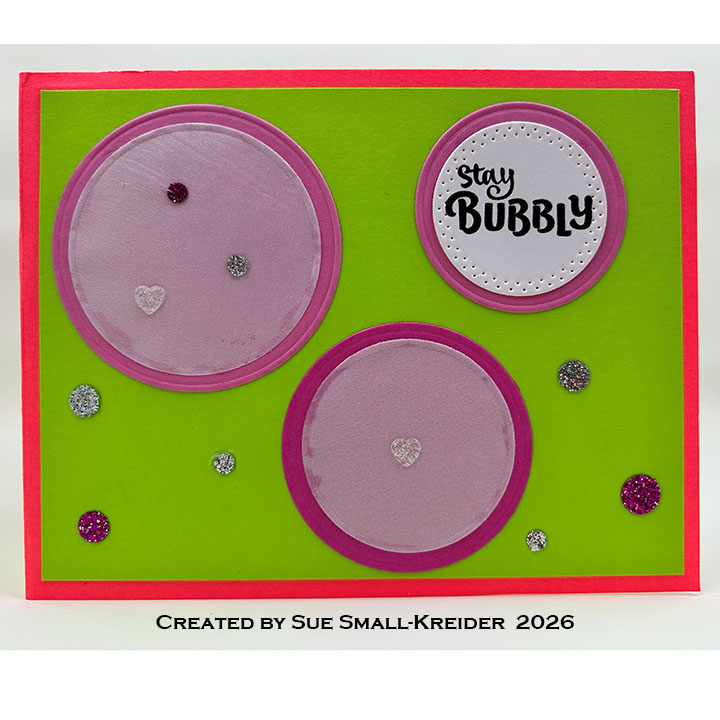
This card was made for Craft Roulette #328 whose parameters were: an A2 (4.25×5.5-inch) card, Tutti Fruiti colors, container(s) element and unusual color as random. I used Karen Burniston dies and stamp sets including the soon to be released Toolbox Pop-Up, Six Pack Toolbox Add-Ons, Cascade Pop-Up dies and the Beer and Soda Sayings stamps.

(New dies and stamps will be available on July 23, 2026 on Karen Burniston’s website.)

Watch the video below to learn how I made this card.

Cardbase: Score and fold an 11×4.25-inch neon pink rectangle of cardstock into a 4.25×5.5-inch cardbase. Cut four 4×5.25-inch rectangles of lime green cardstock and glue on to the cardbase panels.

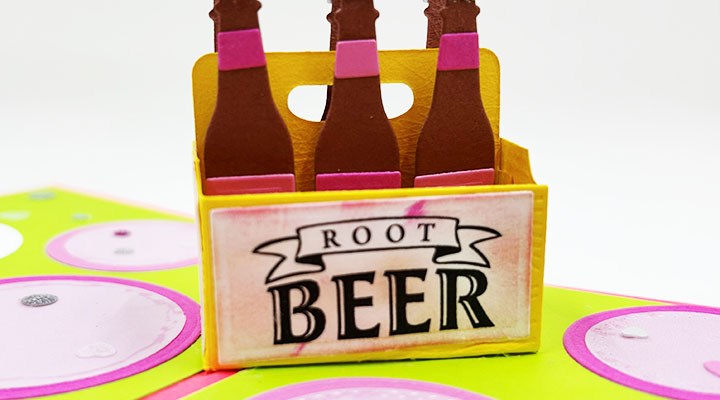
Six Pack Root Beer Pop-Up: Watch the assembly video at the bottom of the linked page for Six Pack Toolbox Add-Ons. The video will also explain the Toolbox Pop-Up assembly. Watch the video above for more details on bottles.

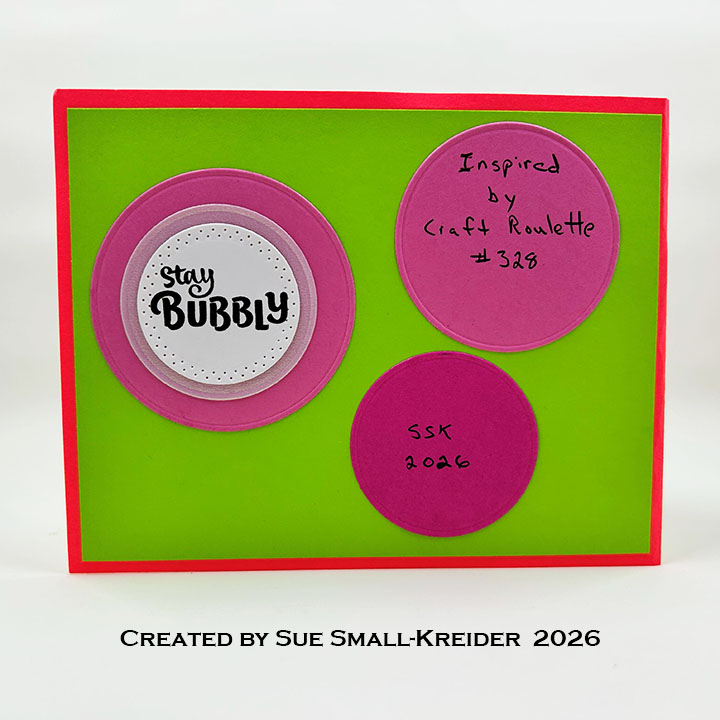
Bubbles: The bubble decorations are created by using the circles in the Cascade Pop-Up set to cut various size and shades of pink circles as well as vellum and pearlescent vellum circle. Sparkle spots and hearts are added for accents and tiny bubbles.

Sentiments: Using the Beer and Soda Sayings stamp set, stamp the “Root Beer” labels twice from white and die cut using the rectangle die in the Six Pack Toolbox Add-Ons die set. Ink blend labels with a light pink ink. From the Stage Scenes set stamp “Happy Birthday to you” in black and die cut using the medium circle in the Cascade Pop-Up die set. Use the smallest banner die in the Greeting Labels die set to cut out ” Hope your day pops” from the Beer and Soda Sayings stamp set and glue on to the popping circle with uses the largest Fireworks die and leaves from the leaf stem in the Cascade Pop-Up trimmed to droplets.

Envelope: The card fits into an A2 (4.25×5.5-inches) envelope.

___________________________________

Thank you for experiencing this blog post.

I hope this inspires you and makes you smile.

Please subscribe, like and leave comments 😊

Follow my YouTube channel, Instagram and Pinterest as well.

___________________________________

Materials Used:

Dies

Stamps

Papers

  • Lawn Fawn – 8.5×11 Vellum – Pearlescent
  • The Paper Studio – 8.5×11 65 lb. Cardstock – White
  • Ginger Brown, Lime Green, Shades of Pink and Yellow Cardstock
  • Matte Silver Paper

Ink

  • Memento – Fade-Resistant Dye Ink – Tuxedo Black
  • Pigma – Mircon 01 Fine Tip Pen – Black
  • Ranger – Tim Holtz – Distress Ink- Saltwater Taffy

Adhesives

Tools

  • Bone Folder
  • Die Cutting Machine
  • Microfiber Cloth
  • Ruler
  • Scrapbook.com – Magic Mat
  • Scissors
  • Scrapbook.com – Mint Tape
  • Sponge Dauber
  • Stamping Blocks as paper weights
  • Tweezers
  • We R Memories – QuickStick

Miscellaneous

  • Trinity Stamps – Sparkle Spots – Silver, Pink & White Hearts

Floral Pop-Up Arch Wedding Card

This card was made for Craft Roulette #327 whose parameters were: an interactive card, Summer colors, “Here Comes The Bride” element and ink edging as random. I used Karen Burniston dies and stamp sets.

Watch the video below to learn how I made this card.

Cardbase: Score and fold a 10×7-inch white rectangle of cardstock into a 5×7-inch cardbase. Ink the edges with green ink cube. Cut two sets of crosshatch frame and rectangle from two different patterned papers using the largest two dies in the Rectangles and Labels – Crosshatch die set. Glue frames and rectangles onto the four panels of the cardbase as shown in video above.

Arch Pop-Up: Cut from all the Arch Pop-Up pieces. Using Peacock Add-Ons, cut one of the large base piece. Assemble as shown in the video above. Glue tabs on back of arch down before gluing on the decorator dies cut from the Rainbow Add-Ons set. Decorate with the bride and groom and floral pieces described below.

Bride: Using the Paper People die set, cut one of the figure, one set of hair style pieces, one short skirt, one of the curvy v-neck t-shirt and one set of the slippers. From silver foil cardstock, cut one half circle. This will be the tiara that tucks behind the front hair piece.Using the Wedding Charms die set, cut one dress and trim off the bodice.This will be the skirt of the wedding dress. Trim figure at the waist and glue legs to back of the skirt so just the toes of the shoes pip out. Assemble as shown in the video (I used the Fun Faces 1 stamp set to stamp on her face before I added her hair.) Brush dress with Glitter Gloss for a shimmer.

Groom: Using the Paper People die set, cut one of the figure, one hair, one pants, one set of shoes, one long sleeved shirt. Using the Wedding Charms die set, cut one tuxedo and one of the shirt triangle piece. Trim the tuxedo’s loop, sleeves and pants off. Glue in shirt triangle and assemble the coat as shown in the video above. (I used the Fun Faces 1 stamp set to stamp on his face before I added his hair.) Color shoes, jacket lapels and buttons with light gray marker. Brush tuxedo with Glitter Gloss for a shimmer.

Floral Decorations: Assemble flowers and three butterflies from the Flower Pot Add-On die set using a small sponge dauber to add inky highlights to the pieces. Cut and assemble six large daisies, two small daisies and several tiny flowers from the Flowers and Bee die set. Using the Twist Flower Pop-Up set, cut six daisy borders and a number of small daisies. Cut six of the bluebells from the Fence Add-Ons set.

Sentiments: Using the Wedding Charms die set, cut “Best Wishes” from matte gold cardstock and the shadow from white. Adhere to card front using the left over flowers to decorate. Cut two large fancy labels from the Rectangles and Labels – Crosshatch die set and brush the crosshatch frames with Glitter Gloss.

Envelope: The card fits into an A7 (5×7-inches) envelope with “Congratulations” stamped in gray ink using a stamp from the Grad Greetings stamp set.

___________________________________

Thank you for experiencing this blog post.

I hope this inspires you and makes you smile.

Please subscribe, like and leave comments 😊

Follow my YouTube channel, Instagram and Pinterest as well.

___________________________________

Materials Used:

Dies

Stamps

Papers

  • Dare 2 B Artzy – 12×12 Double-Sided Paper Honey Blooms by Andie Hanna – Berry Botanical & English Garden
  • Recollections – 8.5×11 110 lb. Cardstock – Greens, Ocean, Rose, Yellows
  • The Paper Studio – 8.5×11 65 lb. Cardstock – White
  • Matte Gold Cardstock
  • Silver Foil Cardstock
  • A7 (5×7-inch) Envelope – White

Ink

  • Memento – Fade-Resistant Dye Ink – Flannel Gray & Tuxedo Black
  • OLO Marker – N-G 1 Neutral Gray
  • Pigma – Mircon 01 Fine Tip Pen – Black
  • Ranger – Tim Holtz – Distress Ink- Broken China, Rustic Wilderness, Spiced Marmalade
  • Spellbinders – Splatter Effects – Raven
  • Stampin’ Up – Stampin’ Blends Marker – Dark Pebbled Path

Adhesives

Tools

  • Bone Folder
  • Die Cutting Machine
  • Microfiber Cloth
  • Riley and Company – Pick & Poke Tool
  • Ruler
  • Scoring Board
  • Scrapbook.com – Magic Mat
  • Scissors
  • Scrapbook.com – Mint Tape
  • Sponge Daubers
  • Stamping Blocks as paper weights
  • Tweezers

Miscellaneous

  • Nuvo – Aqua Shimmer – Glitter Gloss
  • Pop Of Color – Gloss – Sunshine

Another Banner Year

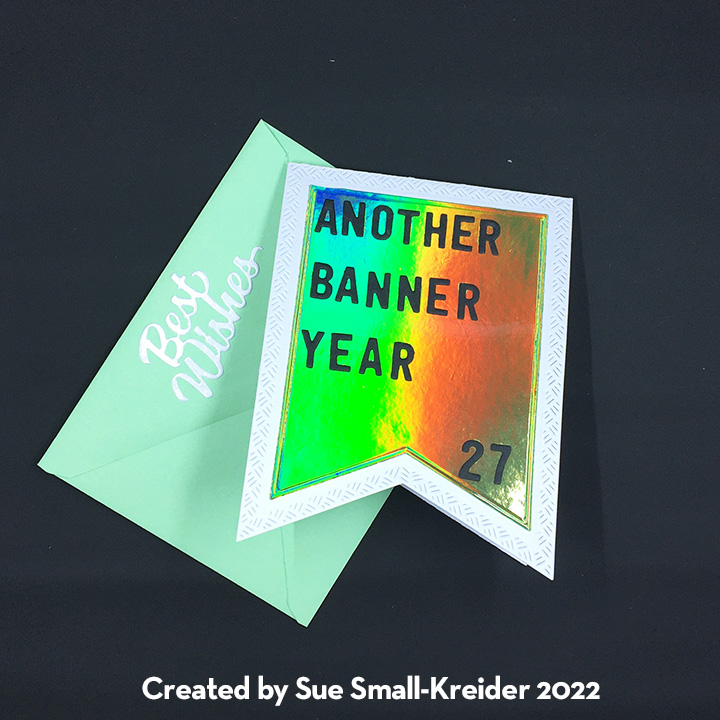
Traditionally, across the world the 27th wedding anniversary is jet stones or ebony wood, but there is no designation for the anniversary in the United States of America. We hope it is another banner year to use a sports metaphor.

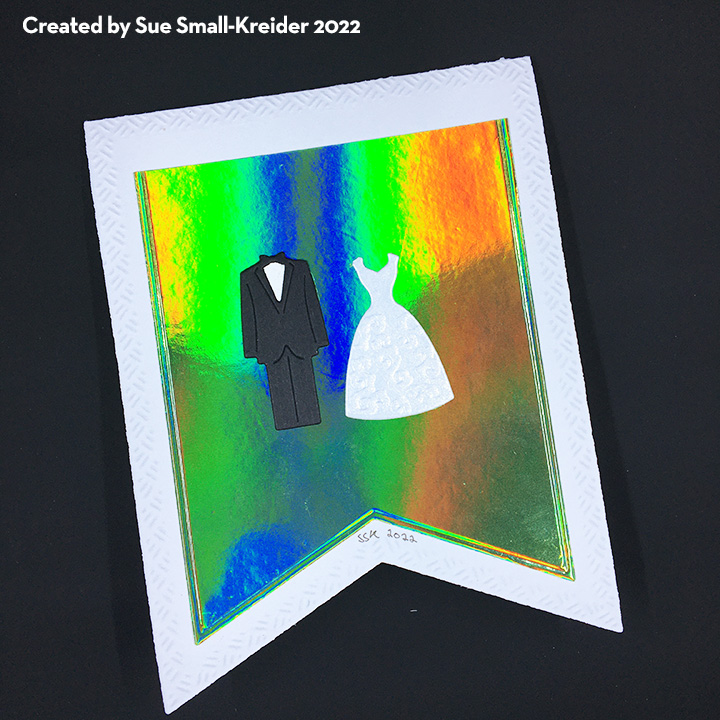
Shaped cards that are pop-ups are easy with Karen Burniston’s die sets. I used several die sets from her December 2022 release including Banner Crosshatch and Wedding Charms. Previous released die sets include Cake Pop-up, Anniversary Word Set 12 and Mini Alphabet and Numbers. (The green holographic cardstock goes rainbow when photographed.)

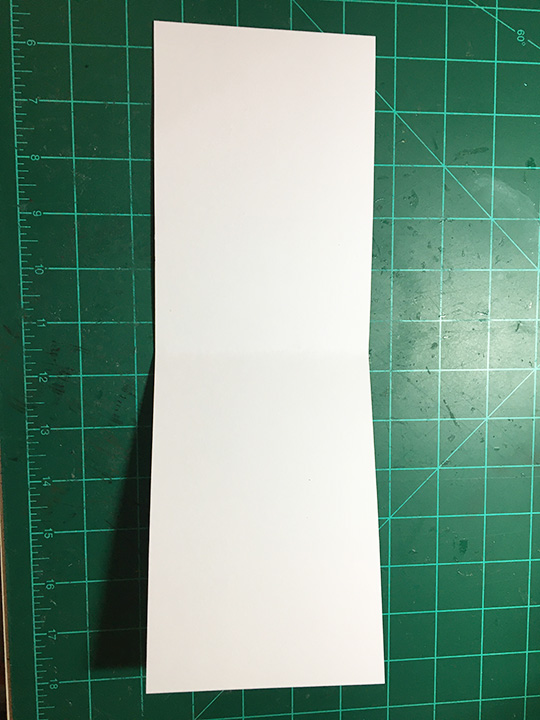
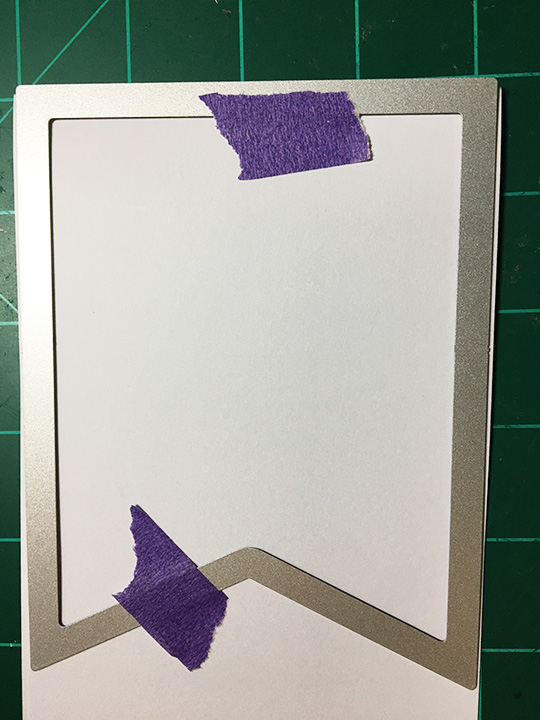
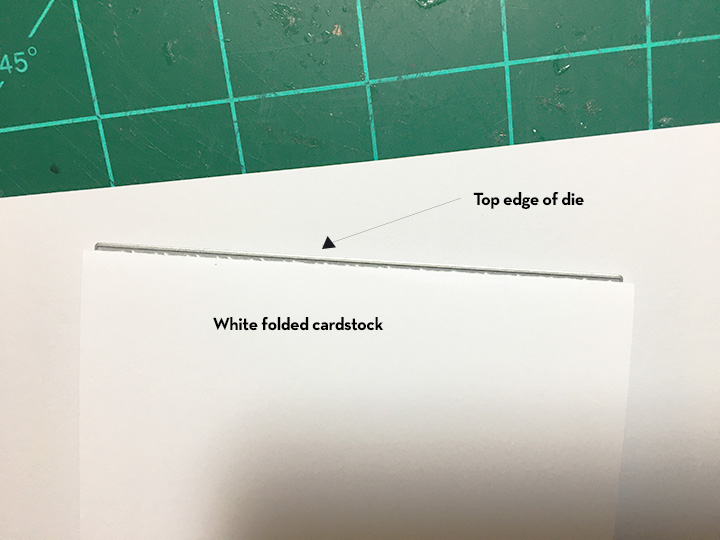
To cut a shaped cardbase fold a mid-weight cardstock (4 1/4 x 11 inches) in half. Place the die so that it just hangs over the top fold of the cardstock and die cut through both layers.

The cool part of using the largest of the banner crosshatch dies to make the cardbase is that it adds a border pattern to all edges of the card.

I cut, with the next size down banner die, the patterned paper for inside the card, and the holographic mirror cardstock for the front and back of the card. (Thin paper inside and thick cardstock outside helps the cake pop-up work smoothly.)

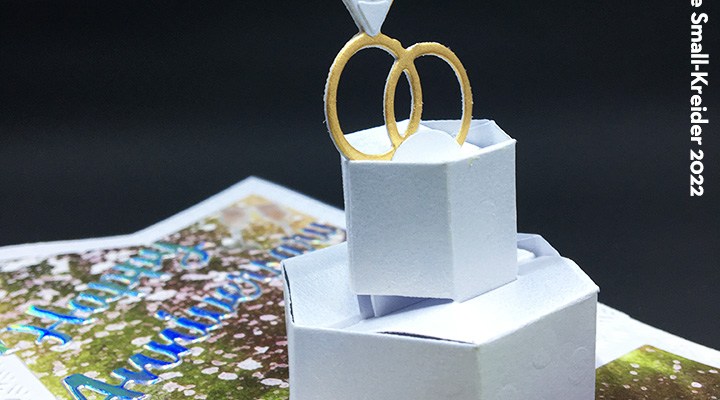
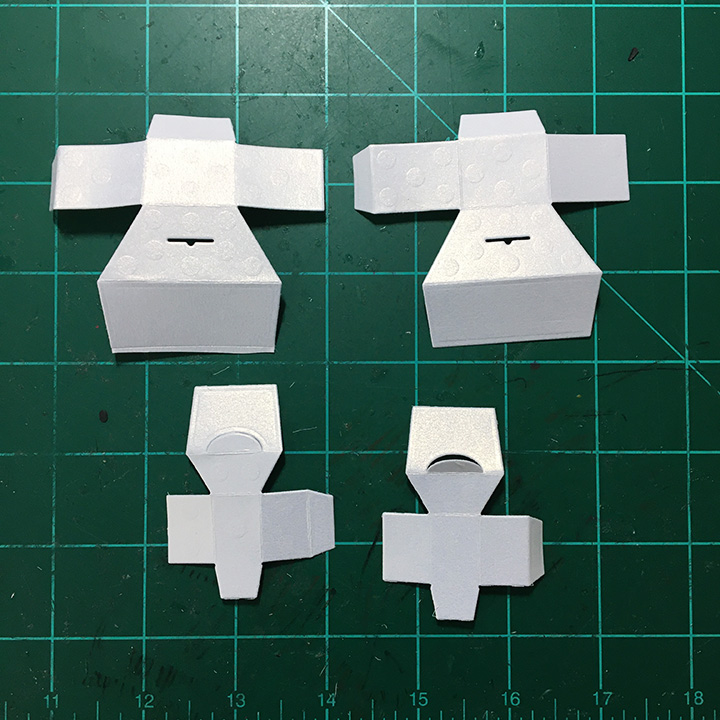
To have the pop-up cake fit inside the card, I used only the top two layers, folding down the tabs on the middle layer to glue to the cardbase. For the cake decoration of the double wedding rings, I folded a scrap of gold foil cardstock in half and die-cut the rings so that I had matching gold rings that I could glue together. The diamond is cut from shimmer cardstock scrap and embossed after it was glued to the ring. (I used the ring die to emboss with.)

Included in the Wedding Charms die set is the “Best Wishes” sentiment which pairs well with the previously released “Happy Anniversary” sentiment.

Card Back

Vellum champagne glasses and the tuxedo/wedding dress charms finish off the card.

(I used tape runner adhesive to assemble the champagne glasses.)

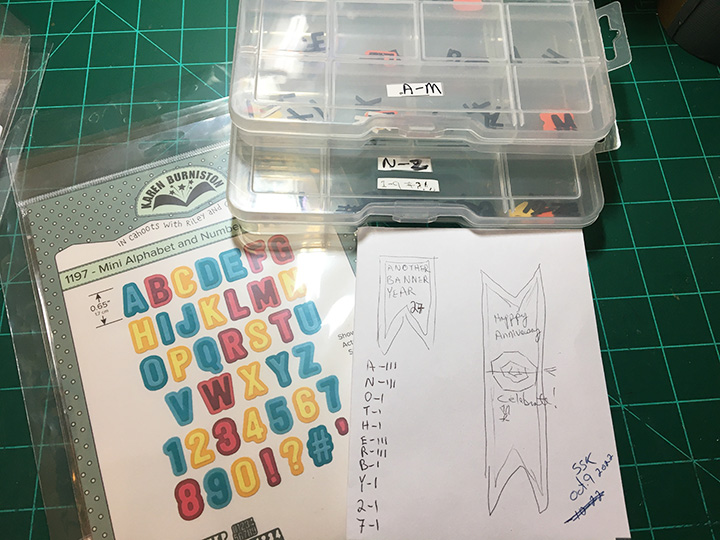
For the front custom sentiment, I used the Mini Alphabet and Numbers. (Storing the individual letters in separate compartments makes it easy to spell out words. Writing out the count needed for each letter is also helpful.)

To hint at what is inside the envelope, I used the “Best Wishes” sentiment in the Wedding Charms set to cut from white gold shimmer cardstock.

Thank you for reading this blog post. Please like and leave comments 😊

Materials Used:

Dies

Papers

  • Park Lane Papier – 6×6 Paper Pad – Silver Holographic Cardstock
  • Tonic Studios – Craft Perfect Mirror Cardstock – Seafoam Green
  • Funky Fossil Designs – 8×8 Paper Pad – Watercolour Rainbow
  • The Paper Studio – 8.5×11 Vellum – Clear
  • Hunkydory – 8.5×11 Printed Parchment – Forever Florals – Autumn Days
  • Recollections – 8.5×11 White Gold Shimmer Cardstock
  • Black and White Scrap Cardstock
  • A2 Green Envelope

Miscellaneous