This card was made for Craft Roulette #265 whose parameters included an A7 card, floral wreath colors, lyrics element, and cinco (5). I used a Funny Bone Stamps by Riley & Co. along with a Karen Burniston die set released by Elizabeth Craft Designs.
Watch the process video to see how I made this card.
___________________________________
Thank you for experiencing this blog post.
I hope this inspires you and makes you smile.
Please like and leave comments
___________________________________
Disclaimer: Karen Burniston products are provided free of charge by the manufacturer for review and use. All other items were personally purchased. Compensated affiliate links used where or when possible, meaning I will receive a small percentage commission from these manufacturers at no cost to you. This will allow me to add more content to my YouTube channel and help out a lot. Thank you.
Materials Used:
Dies
Elizabeth Craft Designs – Karen Burniston Pop It Ups – Oval Pull Card – 1109
Stamps
Riley & Co. – Funny Bones – Clear Stamp – A Year Older – RWD-1144
Riley & Co. – Funny Bones – Rubber Stamp – Happy Birthday To You – RWD-1251
Papers
Stampin’Up – 12×12-inch Designer Series Paper – Masterfully Made
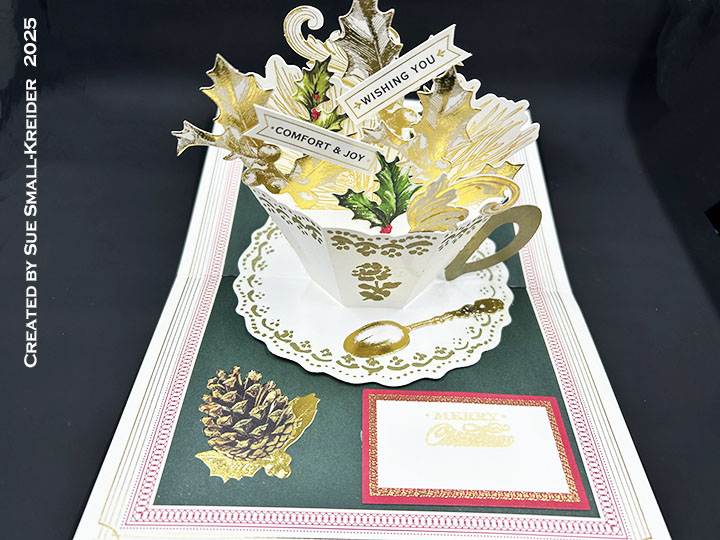
This pun themed card is a pop-up card that has a piece of toast that moves up when the card is opened. It is a top-fold A2 (4.25×5.5-inch) cardbase That uses Karen Burniston’s Parcel Pop-Up mechanism to make the toast and lever move when you open it.
The frame around the inside sentiment is from Karen Burniston’s Frame Pull Pop-Up and the sentiment is from her Photo Memories stamp set. The HBD! stamped on the toast is by Craft Roulette.
The toaster and bread were of my own design. The black decorative design on the toaster comes from a previously released die set by Karen Burniston. The doily is from Paper Discovery.
The letters on the card front are by PoppyStamps.
___________________________________
Thank you for experiencing this blog post.
I hope this inspires you and makes you smile.
Please like and leave comments 😊
___________________________________
Disclaimer: Karen Burniston products are provided free of charge by the manufacturer for review and use. All other items were personally purchased. Compensated affiliate links used where or when possible, meaning I will receive a small percentage commission from these manufacturers at no cost to you. This will allow me to add more content to my YouTube channel and help out a lot. Thank you.
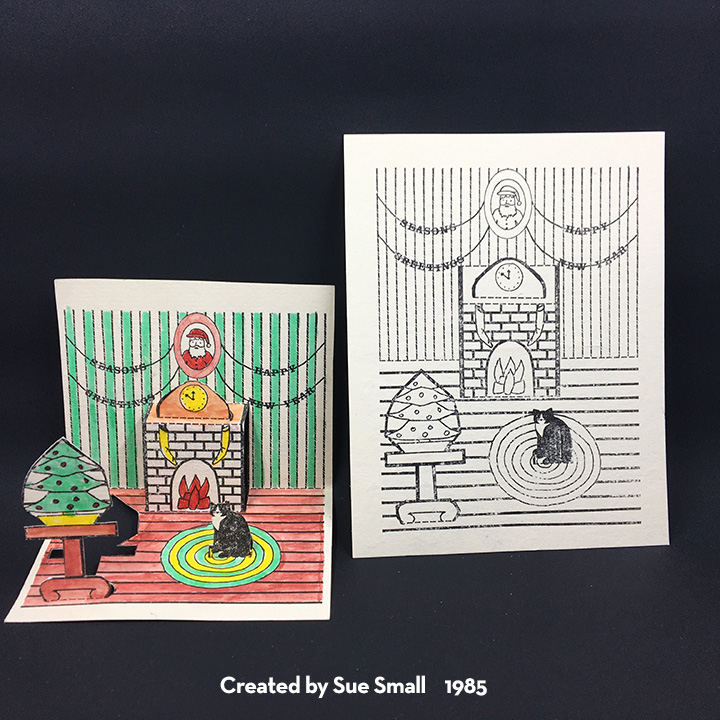
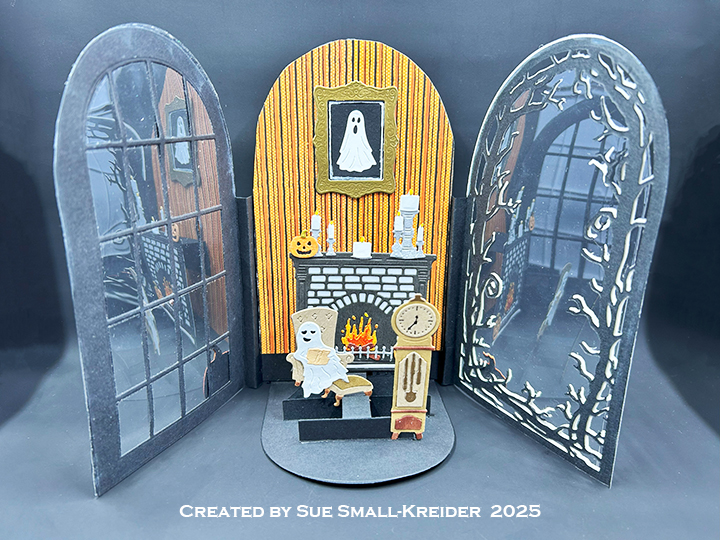
I have been collecting and making fireplace cards for several years now. Here is a collection of all my fireplace blog posts. Click on an image to see details of the fireplace.
___________________________________
Thank you for experiencing this blog post.
I hope this inspires you and makes you smile.
Please like and leave comments 😊
___________________________________
Disclaimer: Karen Burniston products are provided free of charge by the manufacturer for review and use. All other items were personally purchased. Compensated affiliate links used where or when possible, meaning I will receive a small percentage commission from these manufacturers at no cost to you. This will allow me to add more content to my YouTube channel and help out a lot. Thank you.
I have been collecting and making oven cards for several years now. Here is a collection of all my ovens blog posts. Click on an image to see details of the oven.
(Images are posted from the earliest release of dies/stamps/kits 2016 to newest 2023.)
____________________________
Thank you for experiencing this blog post.
I hope this inspires you and makes you smile.
Please like and leave comments 😊
___________________________________
Disclaimer: Karen Burniston products are provided free of charge by the manufacturer for review and use. All other items were personally purchased. Compensated affiliate links used where or when possible, meaning I will receive a small percentage commission from these manufacturers at no cost to you. This will allow me to add more content to my YouTube channel and help out a lot. Thank you.
Watch video above for a tutorial on how to make the card.
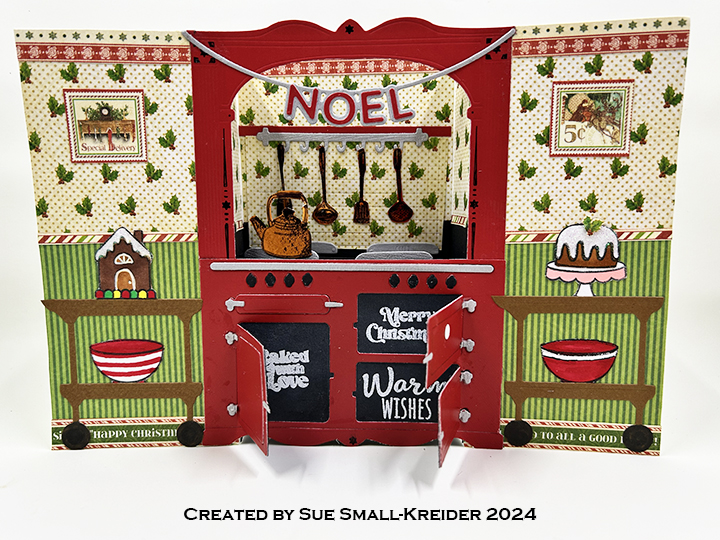
Cardbase: Cut a 4 1/4 x8 1/2-inch rectangle of white cardstock and fold in half to form a 4 1/4-inch wide by 5 1/2-inch tall top fold A2 size cardbase. Cover the outside panels with decorative paper.
Oven: Use the Kitchen die set package image assemble the oven.
Cake: Cut one covered pot in brown and another in green. Cut off all the handles on each piece. Trim the lid off the green to make a plate for the cake to sit on. Add Nuvo drops for icing on cake top.
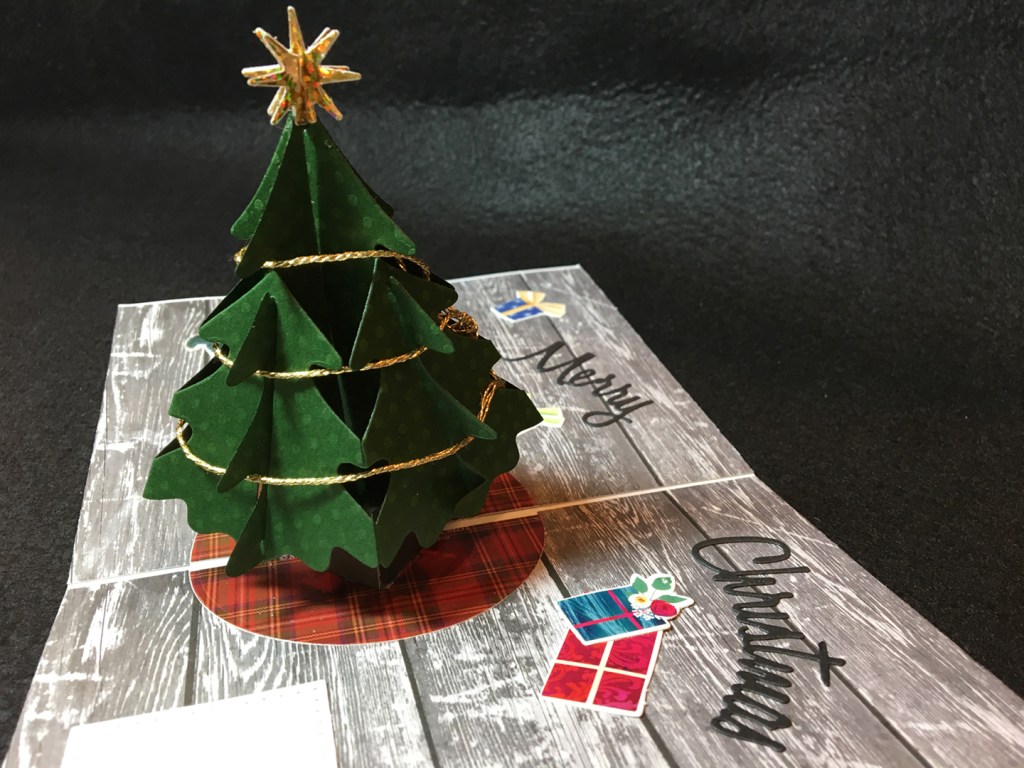
Sentiments: The sentiments on the front of the card are from The Greetery‘s Bake Someone Happy stamp set. The inside sentiment is from Scrapbook and Cards Today‘s Jolly Holiday workshop kit.
Envelope: The card fits into an A2 envelope. Its back flap is decorated with a Christmas cake made using the Let’s Bake die set.
___________________________________
Thank you for experiencing this blog post.
I hope this inspires you and makes you smile.
Please like and leave comments 😊
___________________________________
Disclaimer: Karen Burniston products are provided free of charge by the manufacturer for review and use. All other items were personally purchased. Compensated affiliate links used where or when possible, meaning I will receive a small percentage commission from these manufacturers at no cost to you. This will allow me to add more content to my YouTube channel and help out a lot. Thank you.
Materials Used:
Dies
Elizabeth Craft Designs – Metal Dies – Kitchen – 1993
Elizabeth Craft Designs – Metal Dies – Let’s Bake – 1994
This past few weeks I’ve been playing with some of Karen Burniston’s accordion dies released under the Elizabeth Craft Designs (ECD) and combining them with her more recent dies branded under the KB Riley LLC label.
This July 4th accordion decoration features the Accordion Star and Star Fancy Frame Edges from ECD and the Fancy Label Accordion and Fancy Solid Frame sets which are currently available on Karen Burniston’s website. The patriotic stamped images and stamped border paper are from Honey Bee Stamps.
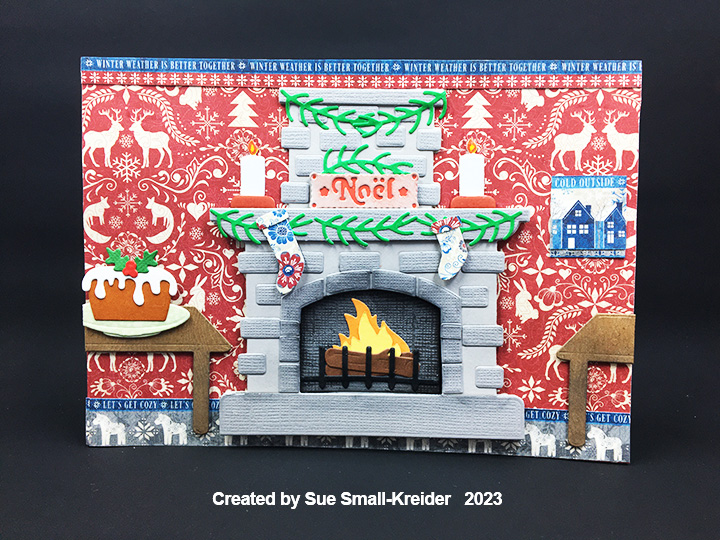
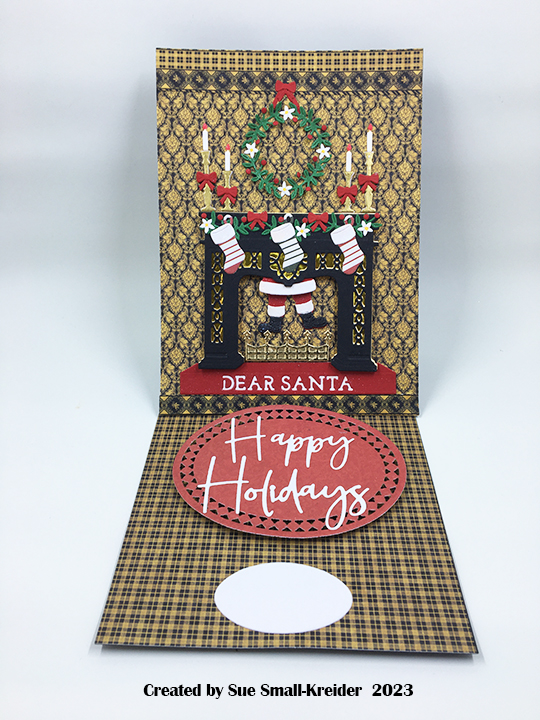
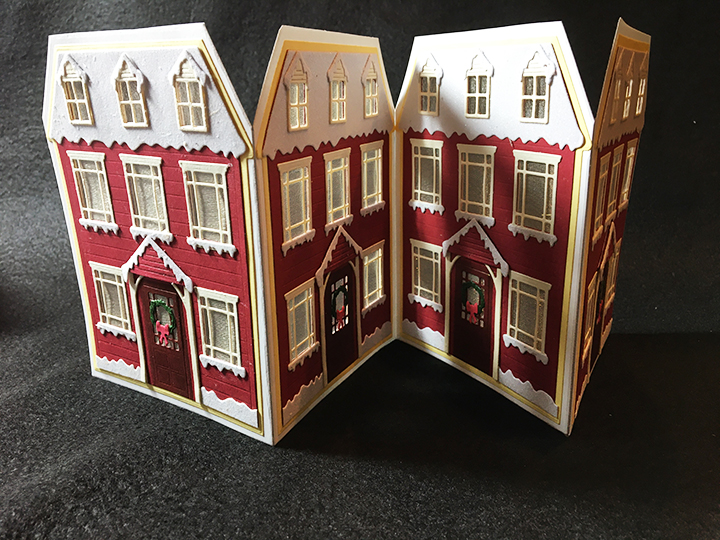
This is the second card in the Fireplace Christmas Card series.
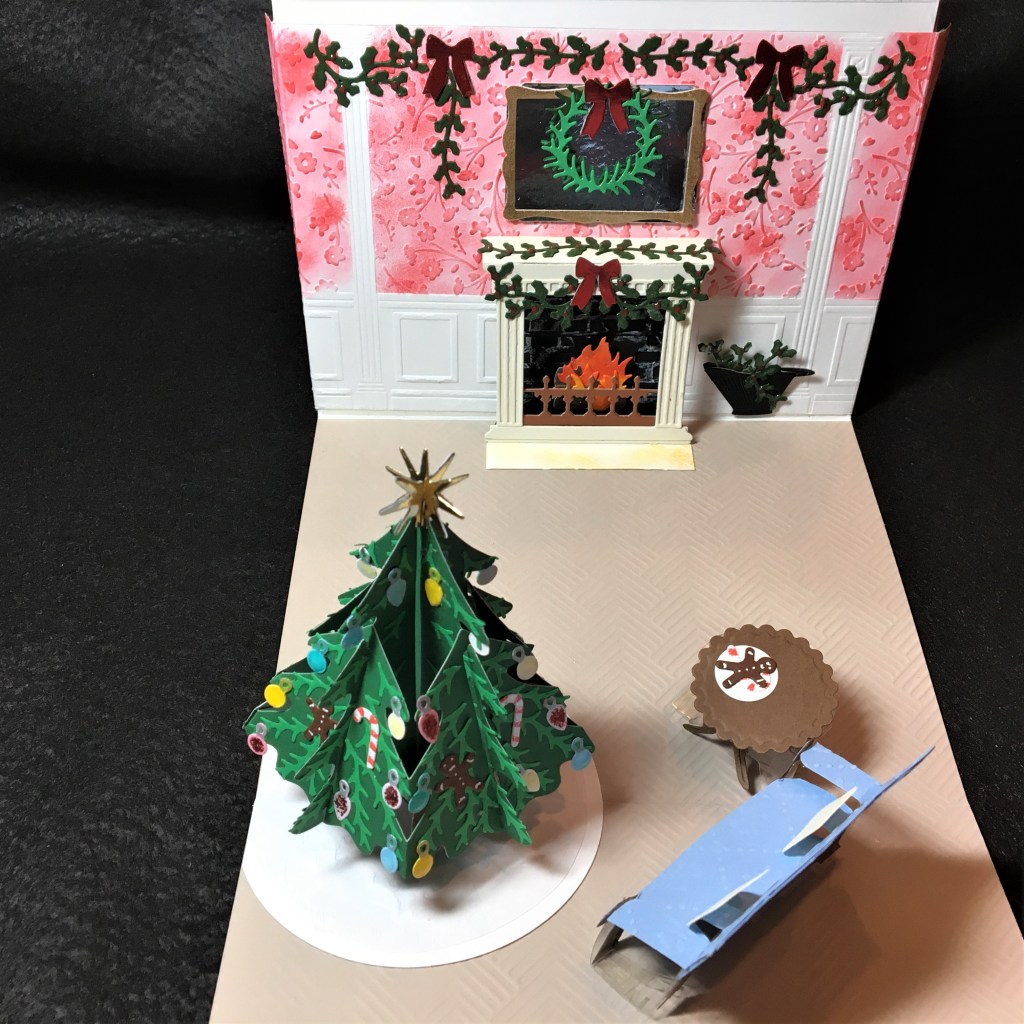
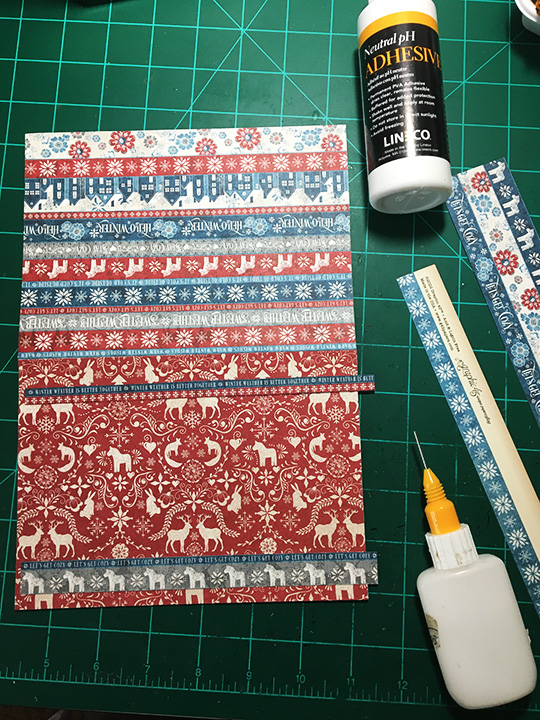
My inspiration for this cozy fireplace scene comes from the Graphic 45 paper collection Let’s Get Cozy and the Elizabeth Craft Designs Cozy Fireplace and Let’s Bake die sets.
Cardbase: A purchase A7 (5×7 inches) cardbase was covered with decorative papers on the two outside panels with leftover scraps used inside.
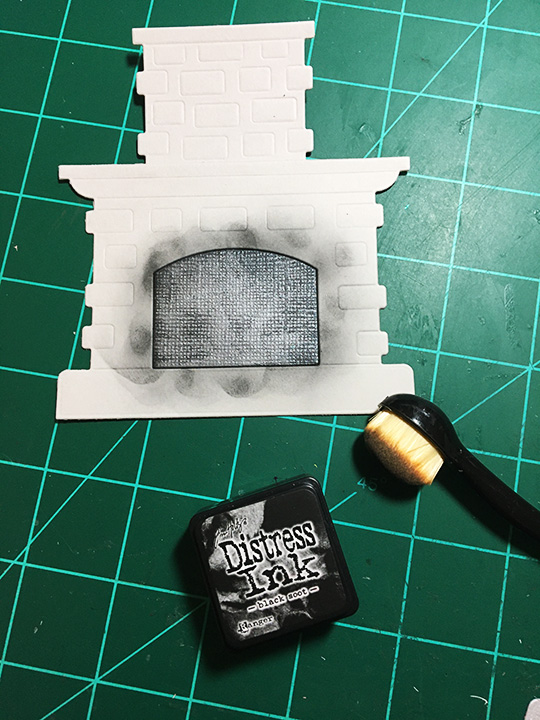
Fireplace: To create the stone fireplace, I cut two chimney pieces and two mantel pieces from the smooth side of the Bazzill cardstock and one mantel piece from the textured side of the same cardstock to get a textured firebox arch, mantel shelf and hearth stone. (The mantel shelf and hearthstone were fussy cut from the die-cut.) The individual stones (cut twice) and stones around the firebox were cut from the textured side of the gray cardstock. The top piece of the chimney was also cut from the textured cardstock. Glue individual stones to one fireplace piece then attach the stones around the opening. With black ink color the firebox piece if sooty.
Glue the two chimneys together. Glue the three chimney top strips together and then attach it to the chimney top. Center the chimney piece behind the fireplace piece with firebox. Using clear tape across the back of the fireplace piece without the stones attached, add the sooty firebox and with an inky blending brush add soot to the surrounding area of the firebox. Assemble the burning logs and glue onto firebox.
Add foam squares to the front of the fireplace with chimney, backsides of mantel shelf and hearthstone pieces. Attach the fireplace with stones onto base, then attach mantel shelf and hearthstone. Glue to front of cardbase.
Decorations: The Cozy Fireplace set comes with stockings, candles, and greenery. From the Let’s Bake set the table was cut from woodgrain embossed paper and ink blended with black ink. The Christmas pudding and its holly decoration comes from the same set with the cake stand cut down to a platter. The tiny NOEL plaque from an old Hunkdory set sits on the mantel shelf and was cut from gray cardstock, inked with red ink and a piece of red paper glued to the back. The candle flames were colored with markers. All decorations were popped-up on foam squares except the candles, greenery and picture which were glued in place.
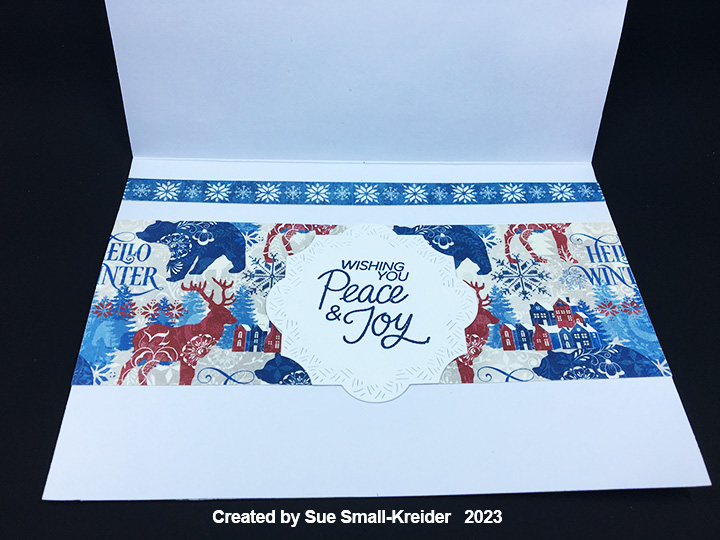
Sentiments: There is a whole sheet in the Graphic 45 Let’s Get Cozy collection of borders with sentiments like “Winter is better together,” “Let’s get cozy,” “It’s cold outside,” “Warm Winter Wishes,” “Sweater weather,” “Stay cozy” and “Hello winter.” Some of the thin word borders were used on the card front to set the tone of the card. Others are used to cover the card back. A tiny NOEL plaque from an old Hunkdory set, sits on the mantel shelf. Stamped in blue on a crosshatch label inside the card, is the main sentiment of “Wishing you Peace and Joy.”
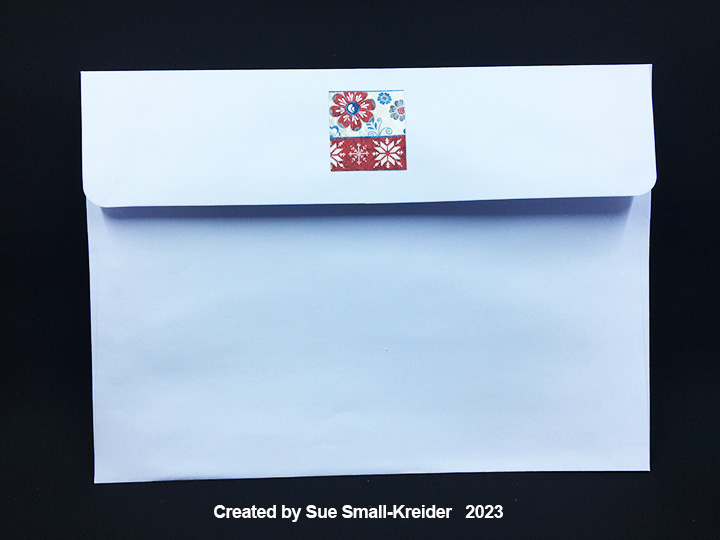
Envelope: A leftover decorative border scrap was glued to the envelope’s back flap as a subtle hint to what is inside.
Thank you for reading this blog post. I hope this inspires you and makes you smile. Please like and leave comments 😊
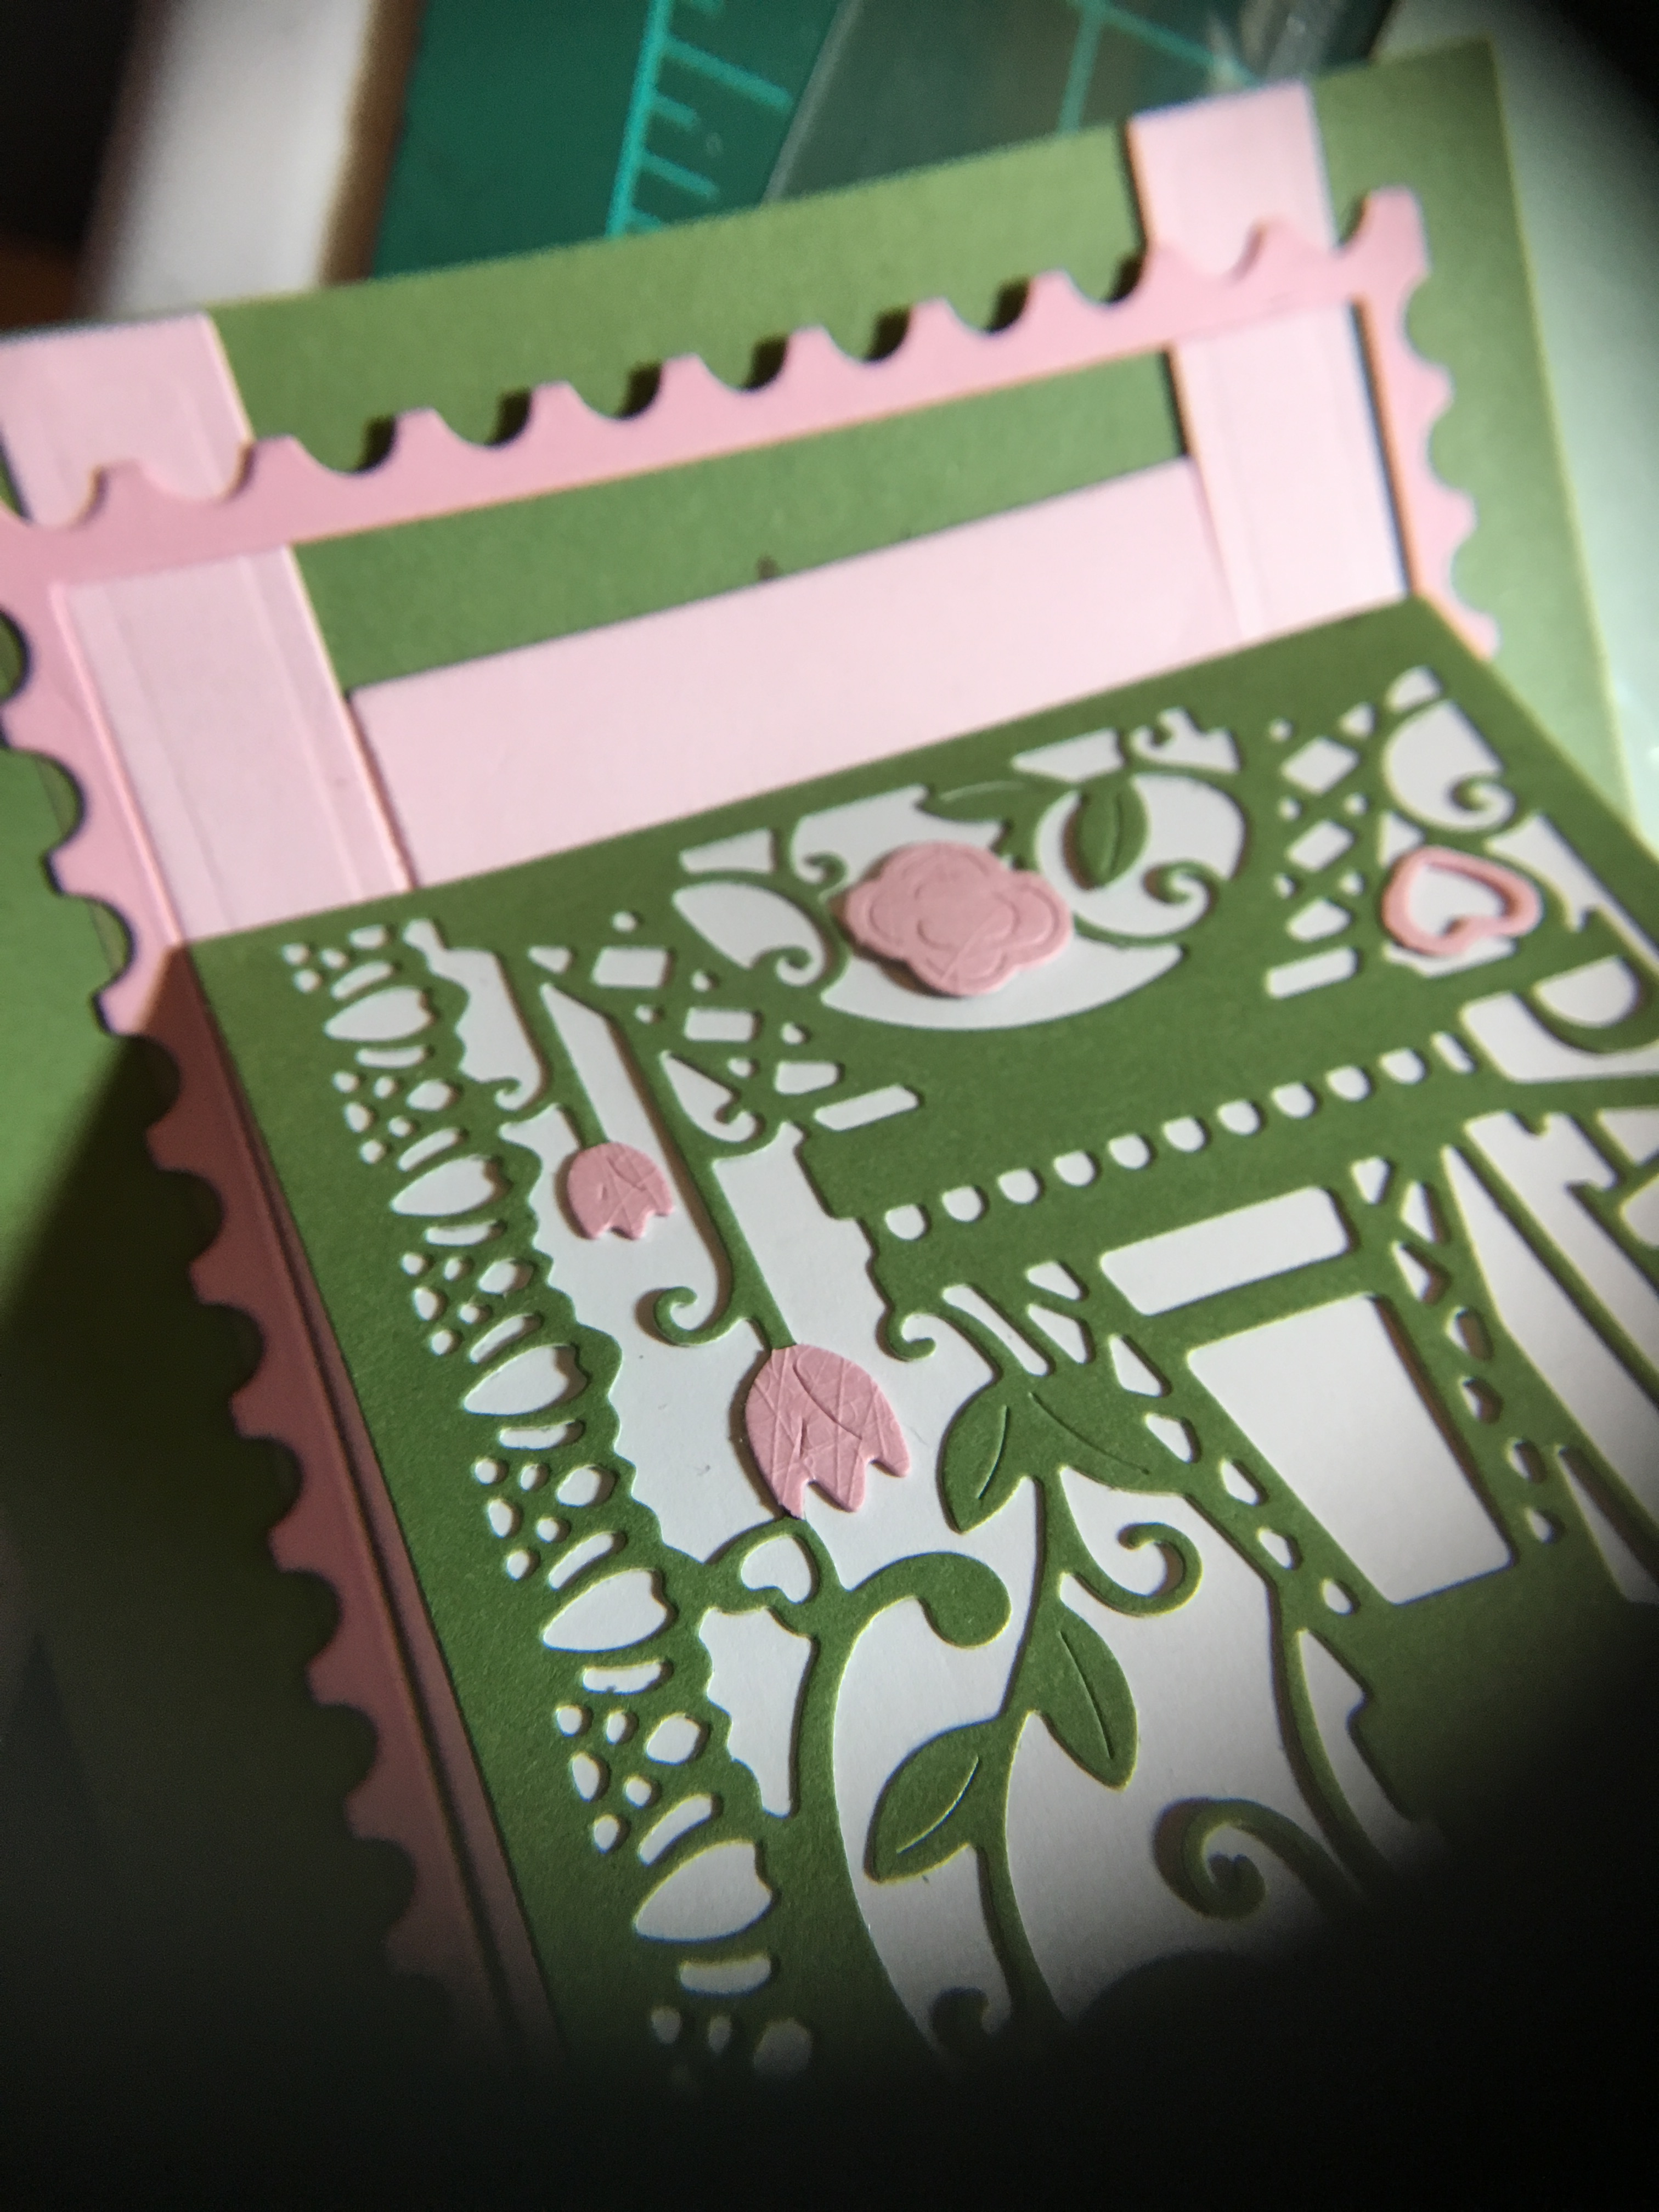
What a romantic image of Paris ! When I received the two dies that I used on this card, I looked at the packaging images for ideas for colors and layout and then did some modification to the easel mechanism.
Changing the frame from a hanging charm to a larger flat panel on an easel was as simple as using ½ inch wide, red-sticky-permanent double-sided tape to hold in place the rectangle piece that was cut out for the frame. And adhering the flat panel to the easel.
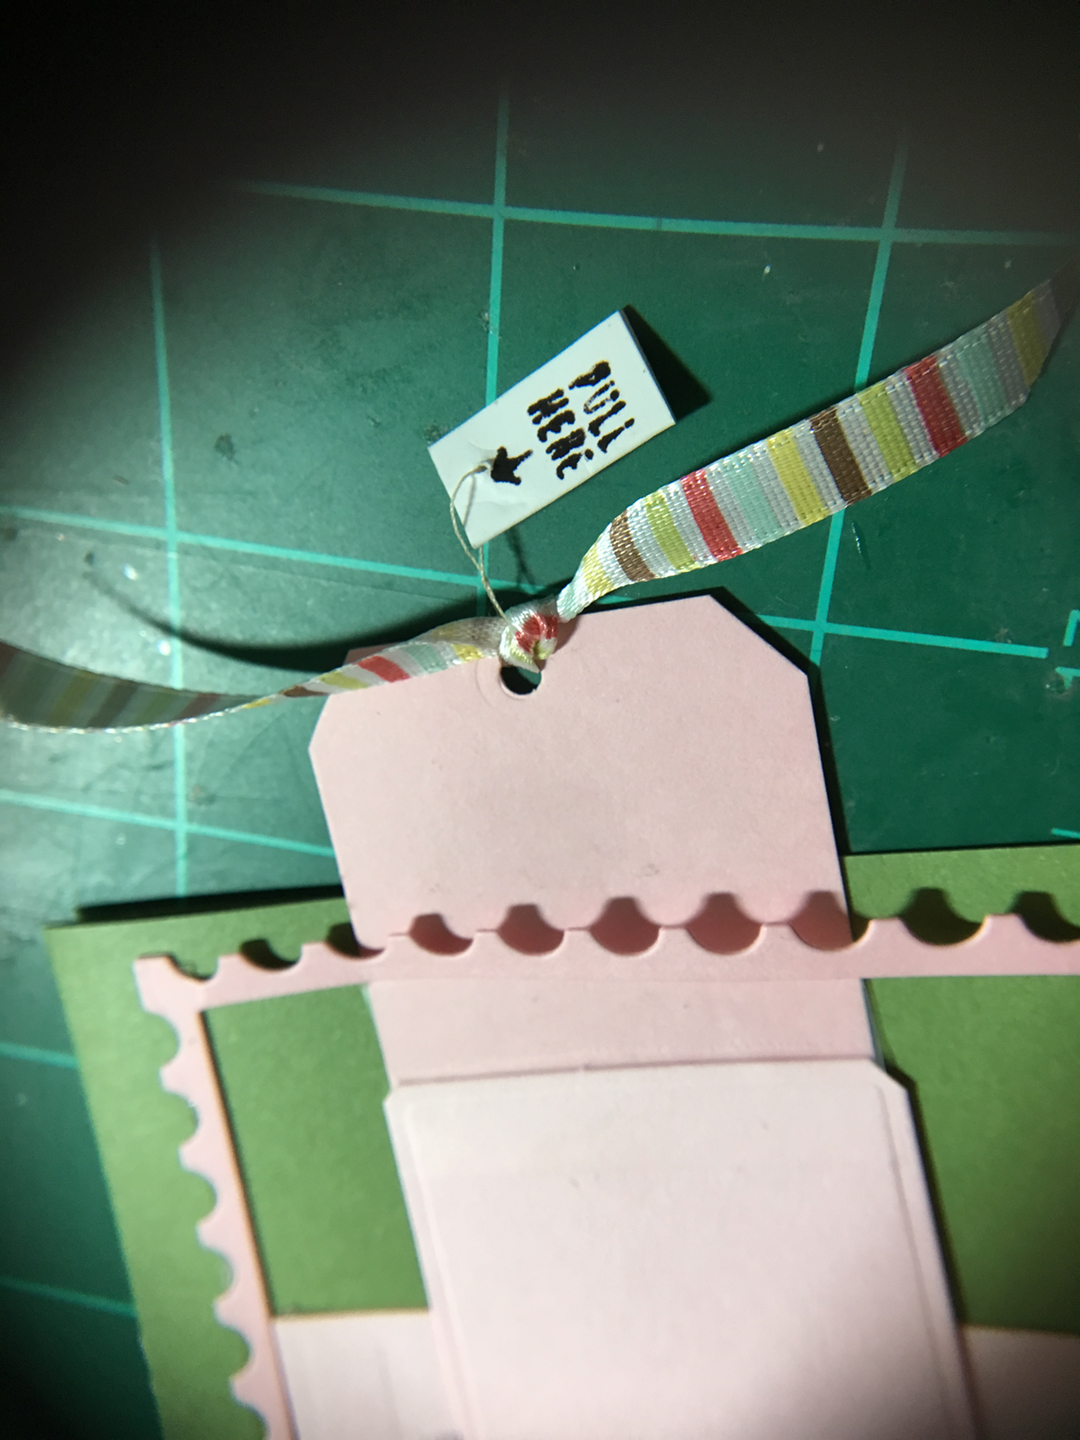
Because the flat panel is larger than the original frame pull tab, I had to add an extension tab. I used clear removable tape to smooth over the catching point where the extension level changes. In order to be able to fit the card in an A2 envelope, I punched a hole and tied a ribbon to the tab as a pull grip.