Queen & Co. make some delightful shaker card kits and this Candy Land one is no exception. The thing that I love about the company’s kits are the pre-cut foam shaker frames that simplify the effort needed to make a shaker card. The extra foam left over from the frames is ideal for popping some of the candies cut from the paper pad as additional decorations.
The dies have uses beyond shaker cards with some basic shapes of circles and ovals.
I filled the shaker with elements I collected over the years, and are not included in the kit.
To hint at the envelope’s contents, I stamped in a variety of colors the candy stamps from the set with the sentiment “goody, goody gumdrops!” on the back flap and more colorful candy on the front left edge of the envelope.
Thank you for reading this blog post. Please like and leave comments 😊
Materials Used:
Dies & Dies
Queen & Co. – Candy Land Kit
Inks
Memento – fade-resistant Dye Ink – Tuxedo Black
Hero Arts – Hero Hues Reactive – Creamsicle, Blue Hawaii, Pool Party and Key Lime Fizz
Hero Arts – Dye Inks – Rose Hues -Cotton Candy, Pale Tomato and Bubble Gum
Papers
Queen & Co. –double-sided papers -6”x 6” Mat Stack – Candy Land
A2 floral card base and white envelope from American Crafts Boxed Cards – The Pier
Shaker Elements
Kat Scrappiness – Rainbow Dot Sprinkles
Buttons Galore & More – Sprinkletz – Pink It UP
Stamp Anniething Adornments – Jelly Dots – Blue and Red
Making cards for loved ones requires a good idea and secrecy to make the card. For a dad who shares his love of golf with his children, is known to wear blue plaid shirts and loves green, this card’s concept came easily.
For the card base I cut two panels (6 1/4 inches x 3 1/4 inches and 6 1/2 inches by 3 1/4 inches) the longer piece I scored a 1/4 inch tab and glued the tab to the other panel. The tabbed piece is the top of the card.
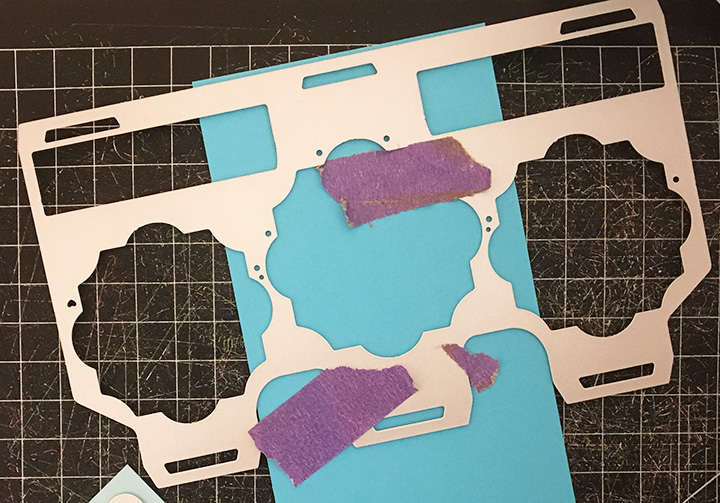
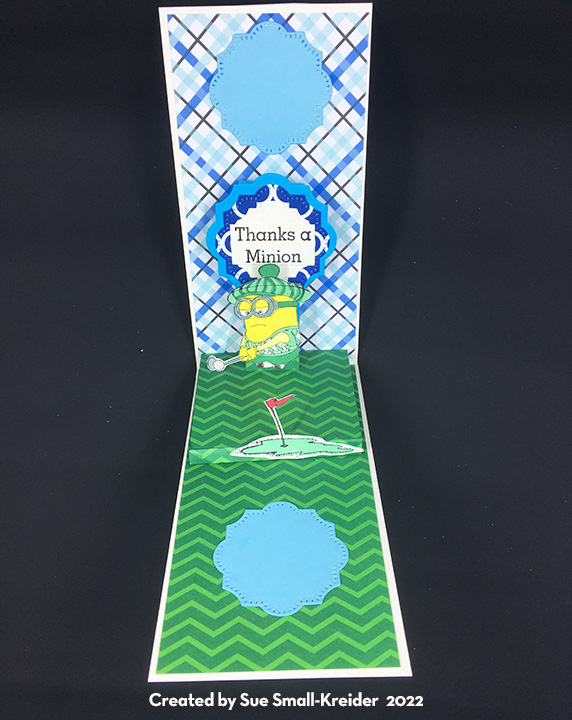
I’ve used the platform from the House & Fence Pop-up by Karen Burniston a few times before and knew it would work to have Bob the Minion standup as well as provide a place to glue the green with the flag image.
The card needed some height, so I cut the middle section from another Karen Burniston die, the Little Labels Pop-up, and modified the width of the top tab. The blue labels at the top and bottom panels inside are also from the Little Labels set and are spaces to personalize the card.
All the images are stamped in a permanent ink and colored with makers and then fussy cut.
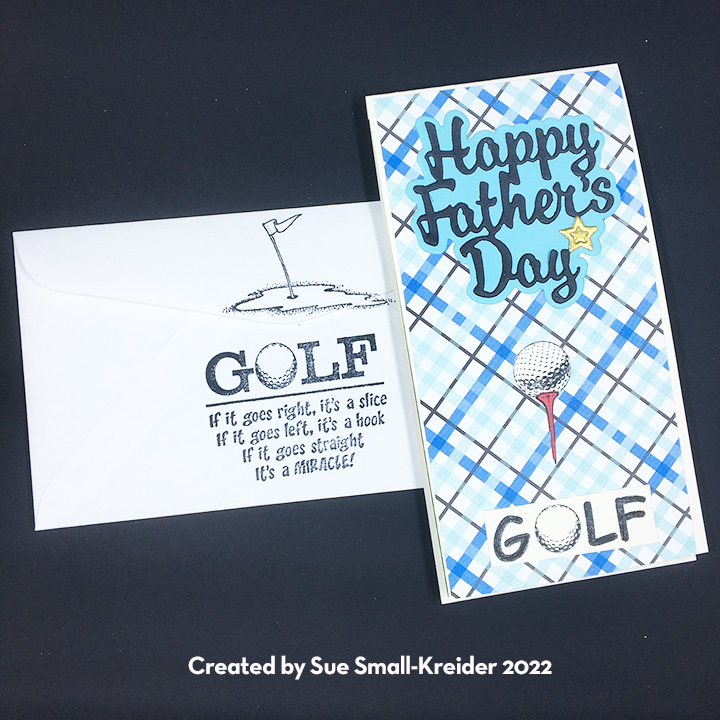
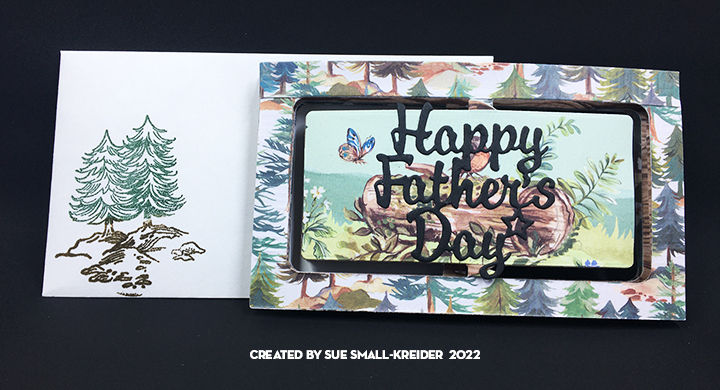
For the front die-cut “Happy Father’s Day” sentiment and its background shadow piece I used another die set by Karen Burniston. The small gold star is cut from a small scrap of gold foiled cardstock and glued it on top of the sentiment. The stamped golf images are from Crackerbox Stamps.
The card fits into a mini slimline envelope which has been stamped on the front with a golf ball on a tee. The back of the envelope has a humorous golfing sentiment along with the flag on the green. The stamps are all from Crackerbox Stamps.
Thank you for reading this blog post. Please like and leave comments 😊
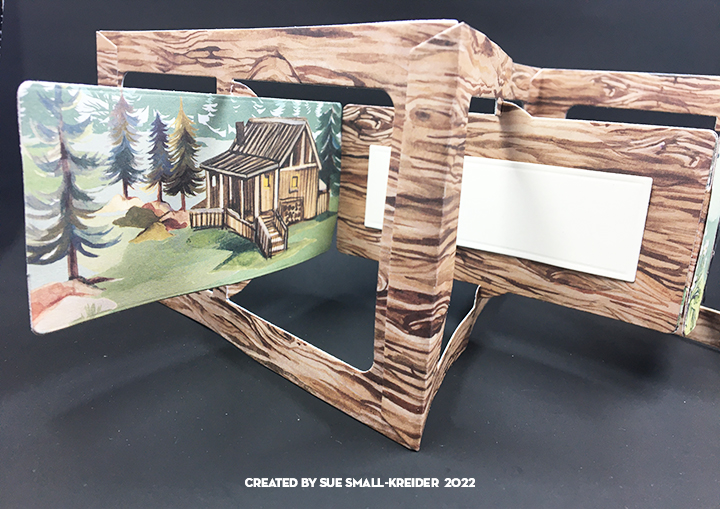
Designed for a gentleman who use to take his sons up to a mountain cabin in the 1960s, this card should help evoke memories of good father and son times.
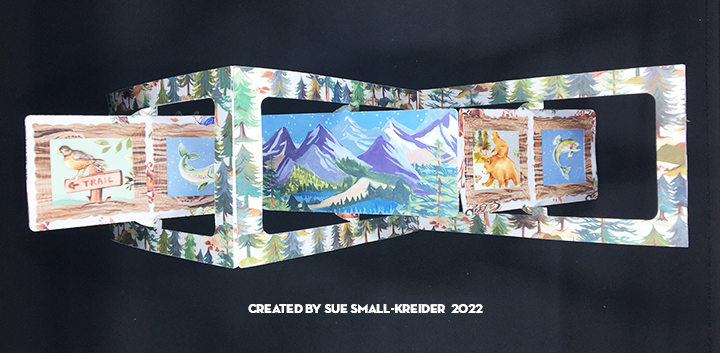
The mechanism for this triple panel accordion card is by Karen Burniston. The 12-inch by 12- inch double-sided paper pad in the In The Forest Collection by Clare Therese for Craft Consortium has a page with three narrow panorama scenes that work for the main panels. The smaller framed animals are from the cover of the 6-inch by 6-inch pad of papers from the same collection while the wood grain paper is from the larger pad. The large panorama scenes were cut with scissors from the die-cut frames and glued to the woodgrain frames’ center panels that pivot.
To make the card frame sturdy the woodgrain paper was glued to the back of the scenic paper. I followed the assembly video for the accordion fold card. (I found it useful to layout the card and its decorative pieces before gluing as sometimes a tab that connects the various panels needs to be hidden by a decorative piece so the order of gluing all the tabs together needs to be thought through before assembly.)
For the black “Happy Father’s Day” I used another Karen Burniston die and glued it in place letting the edges of some letters overhang the panel but making sure they would not impede the pivot mechanism. The small white rectangle can be written on with a personal message and then glued to the card. It is cut with a rectangle die from another coordinating Karen Burniston die set.
The card fits into a mini slimline envelope which has been stamped on the front with pine trees in both green and brown ink. The back of the envelope has a trail signpost stamped in brown ink. The stamps are coordinating ones from the In The Forest Collection by Clare Therese for Craft Consortium.
Thank you for reading this blog post. Please like and leave comments 😊
Knock, knock. Who’s there? Hoppy Day the dancing bunny of spring.
Interactive cards are fun and creating one with layers adds to the excitement. Hints of Easter baskets filled with eggs flank a blue door that when opened, reveals a cute white bunny that will dance when the pull tab is moved back and forth.
Both the doorway and bunny are craft die sets by Spellbinders. The doorway is the Open House Door Base using the door mat from the Open House Spring die set. (I have found that you can save on bundles from Scrapbook.com for the Spellbinder’s Open House collection.) For the dancing bunny, the March 2021 Large Die of the Month set Spring Together with Lever Pull die set was used. (I watched the assembly video for this die set before making this card.)
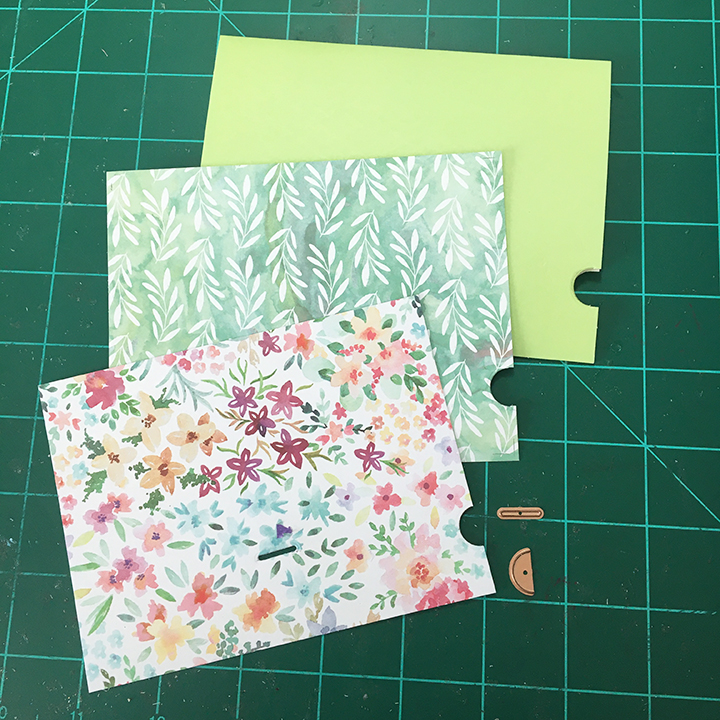
Die-cut the door from blue cardstock and then die cut the windows from the door. Using the door, mark its placement with pencil and then cut the three sides using a metal straight edge and craft knife. Trace the window placement from blue door to pink door and die cut the windows.
Die cut four door windows and a transom window from white cardstock. Use the large transom window die to cut window opening in the pink card front. Adhere the vellum to back of pink card and then glue white window frame into window opening and onto vellum. The door windows are created by sandwiching the vellum between the blue and pink doors. Glue the white door window frames to the front of blue and back of pink doors.
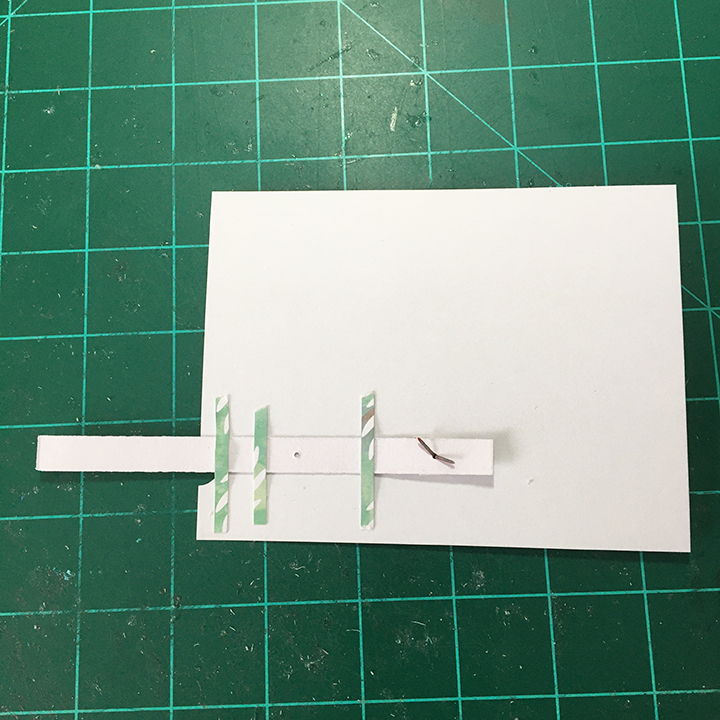
Cut two of the mail slots and four of the doorknobs from silver foil cardstock. Adhere the mail slots to each side of the door and three doorknobs to the front blue side and one knob to the pink side of door. Mark the door opening with pencil onto the background paper. This will let you figure out the placement of the bunny.
Once the lever pieces are double cut and glued together for strength, they can be linked used tiny brads. Using the assembled level to position the line die, cut the slit for the mechanism to slip into the backing paper. Thread the level through the slot and add additional brads to affix the mechanism to front of card.
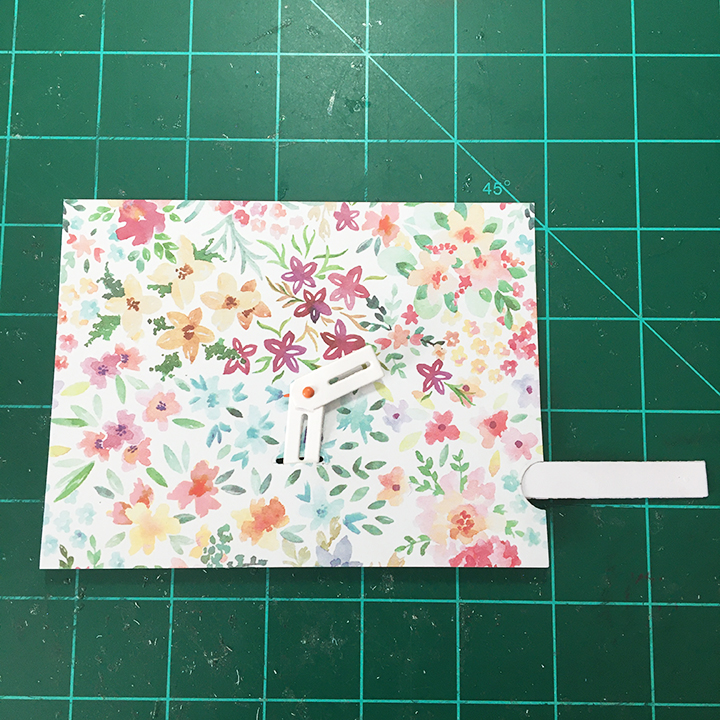
Adhere the bunny body first with foam strips and then the head. Cut the semi-circle notch on the top and background layers of the card as well as the card base before assembling the card front.
Using foam strips adhere the pink card with door to background piece avoiding the lever mechanism.
The door mat is colored brown cardstock with Aged Mahogany Distressed Ink with a black backing for the letters. Die-cut the half-circle for the pull lever on the card base before adhering front layered piece to card base.
The Easter baskets used the large eggshell from the Spring Together set with green foliage from the Open House Spring die set and freehand eggs and handles. The flowers are finished with dots of Nuvo Drops and a pink flower sequin.
Decorate the back of the card with scrap pieces.
Thank you for reading this blog post. Please like and leave comments 😊
First, I stamped the images with Memento Tuxedo Black and colored the toaster with a silver metallic marker. Next, I covered the main body of the toaster with Glossy Accents. The toast, butter pat and butter dish I colored with blending markers and watercolor pencils.
Because I had never used this Lawn Fawn pull tab mechanism before, I found a video to watch for the assembly. It was easy to assemble, but since I had fussy cut my stamped images, I had to trim down the tabs of the mechanism for the toast to be attached to and not show the edges of the tab.
For the pull tab top, I used a scrap of the green plaid cardstock to cover the portion of the tab that shows when the tab is pulled up matching the vertical plaid line. After this cover was glued down, I added the brown oval with the arrow cut-out and folded it to fit the cut-out notch of the cart rather than using the scored fold mark.
The sentiments were stamped with Versamark Watermark ink and heat embossed with a black detail embossing powder onto white scrap cardstock. The front sentiment was cut out as a banner and adhered to the card front with foam squares and the interior sentiment was cut close and glued in place with its matching images.
To hint at the envelope’s contents, I stamped two pieces of smiling toast onto the back flap with brown ink.
Thank you for reading this blog post. Please like and leave comments 😊
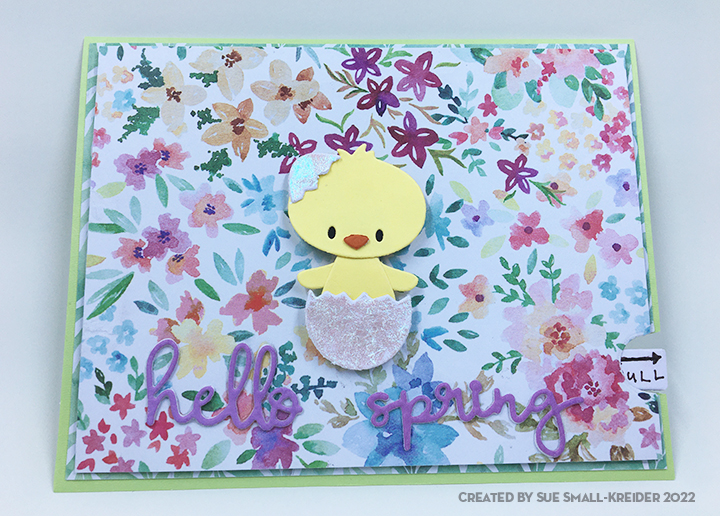
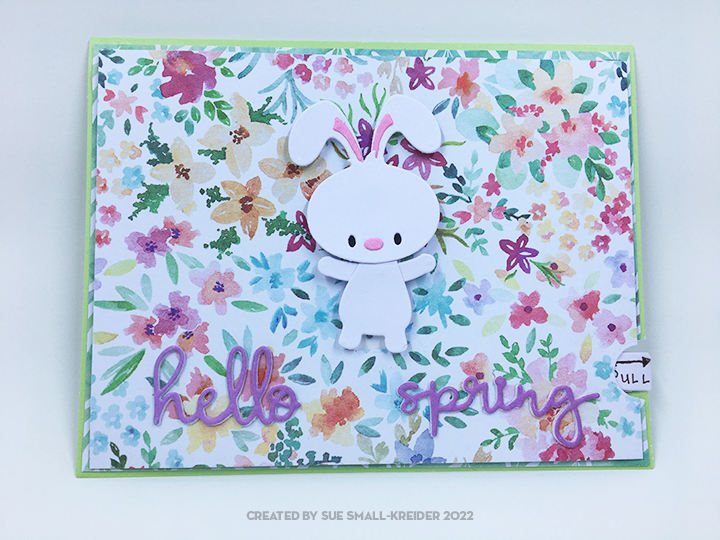
Nothing says “Hello Spring” like dancing bunnies and newly hatched baby ducks. These two cute interactive cards were made with the Spellbinders Spring Together with Lever Pull Cutting Dies set.
This is a great set of dies to use up those small pieces of cardstock scraps for the animals. I used a bluish opal polish on the eggshell to give it some luster. (I watched the assembly video for this die set before making these cards.)
The levers/mechanism pieces are cut twice and glued together to be sturdy. For the Hello Spring sentiment, the words were cut twice from white and once from purple and then glued together.
The printed leafy mat was cut an 1/8 of an inch smaller than the solid green card base and the floral top background is 1/4 of an inch smaller than the card base. Once the position of the lever mechanism was decided, the line slit and pull-tab notch were cut on the floral layer. The notches were then cut on the leafy green mat and cardbase using the floral layer to line up the notches.
The thin trimmings of the mat layer were used as lever guides using dots of glue at the ends of the strips.
Two additional brads are used to attach the slotted levers to the floral background. Foam strips were placed on the back to raise up the mechanism from the matting layer. The leafy green mat layer was glued directly to the card base.
Using the decorative scraps trimmed from the front card layers, the backs of the cards were finished.
The back flaps of the cards’ envelopes were stamped with a bunny stamp from Craft Consortium.
Thank you for reading this blog post. Please like and leave comments 😊
Materials Used:
Dies
Spellbinders – March 2021 Large Die of the Month set Spring Together with Lever Pull Cutting Dies – DOML-MAR21
Stamping
Craft Consortium -English Garden Clear Stamps by Hackney & Co.
Stampin’ Up – Classic Stampin’ Pad – Pear Pizzazz
Papers
Park Lane – 8.5in x11 in 100# smooth white core cardstock – Watercolor Floral
I loved playing with my grandmother’s small egg timer filled with white sand as a child and when I saw The Greetery’s Hourglass dies, I knew I wanted to make several.
To begin, I watched the how to video for the hourglass to get ideas on how to use the die sets. I decided on the cut-out version and cut out 11 hourglass frames from white cardstock. Then I cut out a out a whole hourglass insert using the larger die from the insert set. By mistake I cut the tent fold hourglass from the smaller inset die, but I made it work as I assembled the card. (To cut the tent fold hourglass, fold your cardstock in half and place the top edge just over the fold, so that it won’t cut into the cardstock when cut.) Cut one piece of acetate using the largest insert die.
Next, I adhered sheets of matte gold adhesive foil onto the front and back of a piece of white cardstock before cutting the frame of the hourglass from it. The last items I cut where the Christmas Time in the Country trees, cabin, smoke, snowflakes, stars, and snowbanks from colored scraps of cardstock. Using watercolor pencils and a water brush to color the cabin before assembling it with a scrap of yellow foil paper to go behind the windows. I popped the cabin up on another square cardstock scrap to give it dimension in the hourglass. The trees were cut from brown paper.
The ink blending of the large hourglass insert was done with a large ink blending brush which I also used to ink up the insert 10 insert frames that I had glued together and the eleventh frame that would be the frame to go over the acetate. Once the large insert piece was dry, I glued down the scene pieces weaving the smoke around the tree branches. Next, I sprayed the scene with white ink spray to create the snow fall. (The ink goes on thick, but it becomes translucent as it dries, so let it dry before going to the next set.)
Before assembling the card, stamp and heat emboss the inside sentiment on the tent fold hourglass piece. I used a Catherine Pooler stamp that was the correct size to fit in the smaller hourglass shape. (My stamping was not as solid as I had hoped, so once it was heat embossed, I had to go back and fill in the missing places with a gold gel pen.)
To assemble the hourglass, first glue the large, inked hourglass to the tent fold hourglass. Next, glue the stacked hourglass frames onto the large, inked hourglass. Add any extra snowflakes and stars die cut along with snowflake sequins and stars to the inside of the hourglass with a dash of fine glitter. Adhere the acetate to the top of the stacked frame and then the eleventh inked frame over the acetate. Glue the gold frame over the top of the hourglass. Shake to distribute the glitter to all parts of the hourglass scene.
Because of the thickness of the card, I will make a small box to deliver it in from faux leather cardstock.
Thank you for reading. If you enjoyed this blog post, please like it and follow the blog. 😊
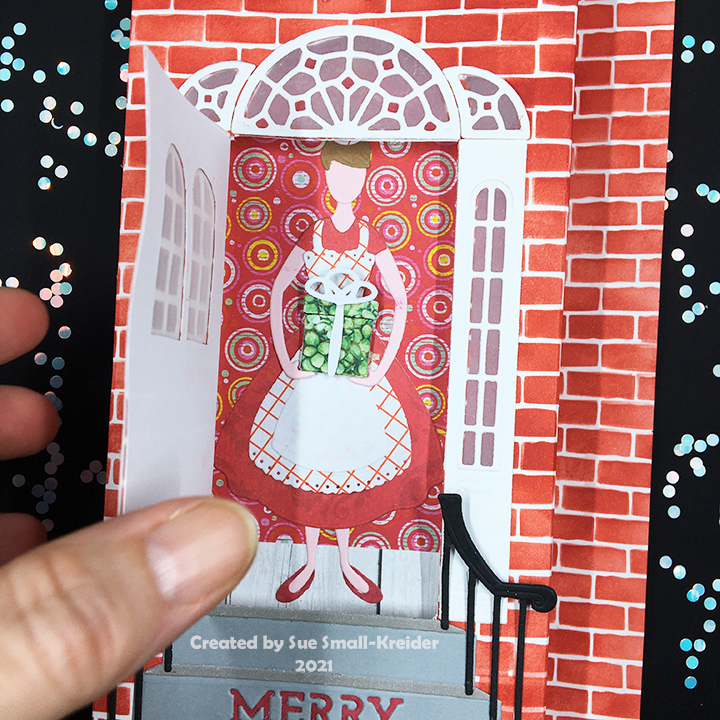
Spellbinder’s Open House collection has a number of add-on sets for various holidays, but none include a door wreath. (I had to use an older Lawn Fawn Mini Wreath from their door collection to complete my card.) I did use the side panel set to add more windows to the doorway.
Card base: Using heavyweight white cardstock that is 8 ¾ inches tall x 8 ½ inches wide, I scored and folded at 1 1/8 inches, 2 2/8 inches, 6 1/8 inches and 7 3/8 inches. Next, I stenciled the card base with brick colored ink, a brick stencil and a small make-up brush (I find these inexpensive contour make-up brushes from Dollar Tree work as well as the expensive ink brushes.) The folds should go to the back of the card, to form a jut-out entryway often found on townhouses.
Stairs: A gray cardstock was used to cut the main steps with the sentiment “Merry Christmas.” The sentiment was backed with scraps of red paper. I found an old envelope that was just a shade darker gray that the cardstock for the step tops. The railing is cut from heavy black cardstock and glued only at the rod tips to the steps. The stairs where then adhered to the center of the card base, which when folded shut is 3 ¾ inches.
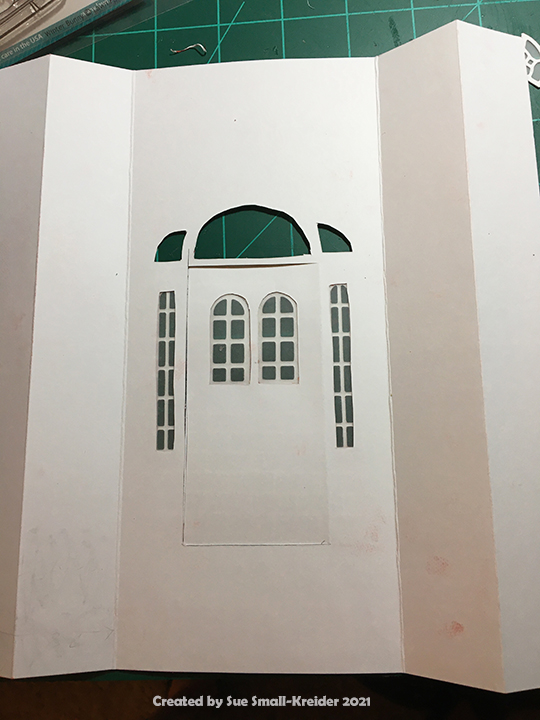
Door and Windows: The door was die cut with the windowpane dies in one pass. The side panels had to be cut and then cut with the window die. The top transom windows were also die cut from white cardstock.
I positioned the die cut door over the stairs and used a pencil to trace where the windows and the door edges.
Using the pencil lines, I cut out the windows and three side of the door with a craft knife.
Positioning the side panels next to the door, I traced the window positions with pencil and cut out and did the same with windows over the door and panels.
I saved the window frames to be glued in place to scrap pieces of clear vellum on the back side of the door and side panels and transom windows. Then I glued the vellum backed door onto the card base door. The vellum backed panels and transom windows where also glued in place so that the vellum was sandwiched between the case base and the white window and panel frames.
Inside Mechanism: To create the set-back house interior, I cut a 8 ½ inches tall x 5 ½ inches wide piece of lightweight white cardstock. I scored and accordion folded at ¼ inch, ½ inch ¾ inch, 1 inch, 4 ½ inches, 4 ¾ inches, 5 inches and 5 ¼ inches. Next, I cut a floor from some woodgrain paper and the wallpaper from a small, patterned paper. These piece where adhered to the center of the inside mechanism.
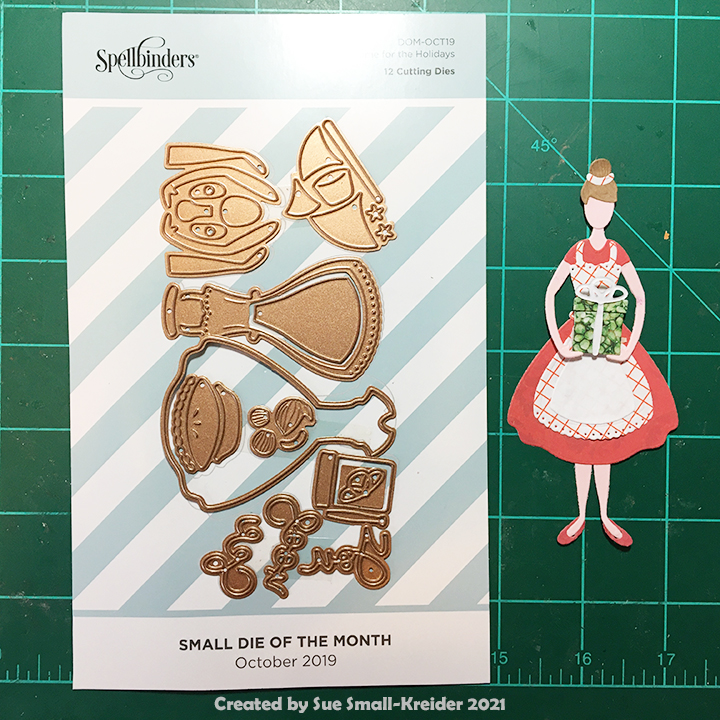
The woman is an older Spellbinder’s small die of the month that can hold a pie, a present or a small fir tree. I chose a present popped-up on a foam square. The woman is glued to the wallpaper and floor before the inside mechanism is glued onto the back side of the card base.
The finishing touches are a tiny wreath I had in my stash that is glued over the door and attaching the mail slot and doorknob (cut twice and glued together for depth) to the door front.
The back of the envelope is stamped in red using a Tim Holtz rubber stamp “Have Yourself a Merry Little Christmas.”
Thank you for reading. If you enjoyed this blog post, please like it and follow the blog. 😊
Before assembling this card, I rewatched the two assembly videosKaren Burniston has made for the Spinner Square Pop-Up. Once I understood how to fold the mechanism, I folded it backwards from the video so that it would move its arm upwards instead of downwards.
I wanted a slimline card, so I cut a front panel with a ½ inch tab (9 x 3 ¾ inches) from heavy white cardstock. The back panel is 8 ½ x 3 ¾ inches also cut from heavy white cardstock. The inside panel that floats up is 7 ½ x 3 ¾ inches cut from light weight white cardstock. I die-cut the mechanism and its arm (3 ½ x 1 ¼ inches) from lightweight white cardstock. The stamping was completed before assembling the card.
Stamping the trees on the front and inner panels, required creating masking papers to cover the trees that were to be in front of the other trees. The back trees are the darker color and stamped after the front tree. A white pigment ink was used to stamp the snow onto the trees. The moon was stamped in Citrine with the crescent specks in Sunbeam. The “Winter Wonderland” sentiment is by Stampendous! while the inside “Magical Christmas Wishes” is by Sheena Douglass.
To assemble, the front tab was folded and glued on the back panel. Next, the pop-up mechanism was folded backwards and glued into the inside of the card. The arm was glued onto the square spinner as directed in the assembly video. With the card closed I positioned the fussy cut Santa’s sleigh and reindeer onto the arm top so that it would not be visible when the card was closed and played with the positioning before the glue set-up. Last to glue, is the inside stamped panel that hides the mechanism. It is glued on to the small raised platform on the mechanism.
The card fits into a #10 business envelope with the Sheena Douglass “Winter Wonderland” sentiment stamped on its back flap in black ink.
Thank you for reading. If you enjoyed this blog post, please like it and follow the blog. 😊