Interactive Money Holder Halloween Cards

These two cards are for a 12-year-old girl and her 14-year-old brother. The card sender requested that they be money holders as well as interactive Halloween cards.

Both cards are variations of previous Halloween cards I’ve done this year, but with money holders. They also show how adding a second Karen Burniston pop-up mechanism and reversing the direction of it can really make a card jump for joy or reveal hidden treasure.

The original card called Witchy Shoes and this card are made with dies and papers from Queen & Co. Halloween collections – Fright Fest (shoes, pumpkin & papers) and Witch Hat die.

The money holder is an orange jack-o-lantern Trick or Treat pail intended as a shaker, but I taped the pumpkin frame to the center cutout and used the matching foam frame behind the jack-o-lantern, cutting off the top bar, so rolled paper money could be placed in it.

I added two pop-up mechanisms by Karen Burniston from her Spinner Square Pop-ups die set to make the legs move.(Assembly video). I reversed the direction of one of the mechanisms to make them move away from each other.

Envelope back

The envelope uses image stamps by Tim Holtz and sentiment stamps From Queen & Co.

Card front and front of envelope

For the Open If You Dare card I based it off the card Do What Brings You Joy using two of the pop-up mechanisms from the Katherine Label Pop-Up die set by Karen Burniston (assembly video). I reversed the direction of one of the mechanisms to make them move away from each other.

The ghosts and spiderwebs are from the Queen & Co Halloween Foundation Dies and the Paper Studio checkerboard brown craft paper has been in my stash for a while.

The Trick or Treat bag is a rectangle that was accordion folded at the sides and the bottom edge folded up into a tab. The edge of the bag was cut with pinking shears and then the bag was stamped in black using a stamp by Tim Holtz.

Card back

All other stamps used on the card are from the Queen & Co Fright Fest collection.

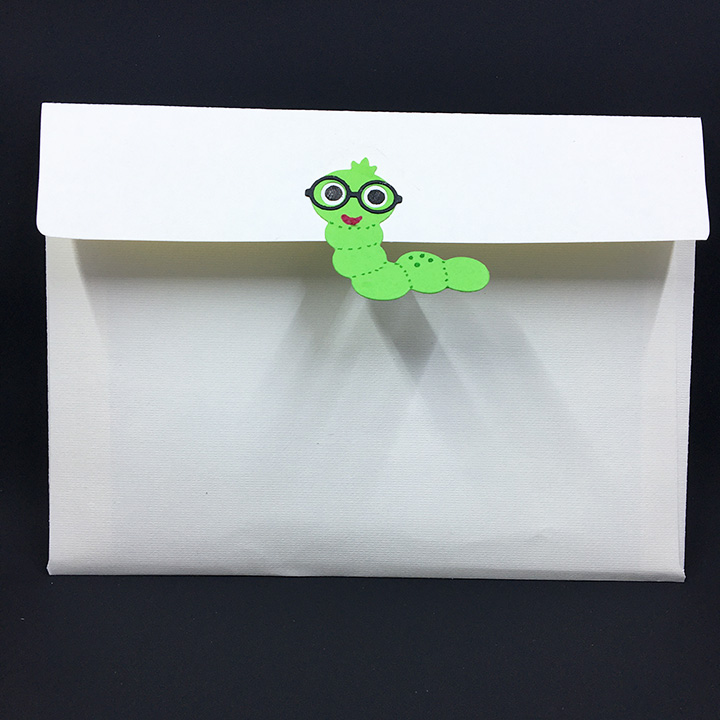
Envelope back

The envelope uses image stamps by Tim Holtz and sentiment stamps From Queen & Co. and Peebles.

If you enjoyed these cards, check out other creative cards on the Facebook page Karen Burniston Pop-Up Peeps.

Witchy Shoes

Sometimes there are crafting elements that just take you under their spell and make you play with them.

Queen & Co. Halloween shaker kits have me under their spell This card is made up of elements from two kits – Fright Fest (shoes and papers) and Witch Hat. These kits have the dies, foam shaker frames and acetate windows. Some come with the shaker elements (I added to them from my stash) and/or matching paper (Fright Fest for this card.)

I added two pop-up mechanisms by Karen Burniston from her Spinner Square Pop-ups die set to make the legs move.

The card took less than 2 hours to make.

Thank you for reading this blog post. Please like and leave comments 😊

A Hunting Cabin Birthday

A cabin in the woods, good times with friends and family are what this card is about.

This simple log cabin scene pop-up card uses Karen Burniston’s new fireplace die set and a die designed to cut out trapazoids for pop-up balls, but here I use it to cut a 6-pane window.

Card Base with Window: Starting with a 10 x 7 inch piece of cardstock, scored and folded in half to create a 5 x 7 inch top folded card base. Position the Mini-Ball Double-Ups die so that it will look good from the outside as well as the inside next to the fireplace. The orientation of the widow will be up-side down from what is on the opposite side of the card. Die-cut the window with the card open on a die-cutting machine. (This is the only time you’ll need a wide platform die-cutting machine. If you only have a 6-inch-wide machine you can cut you card base in half, cut your window and glue a strip of paper as the card hinge.)

Cut “logs” from wood grain paper, ink the edges to create roundness and glue in place both on the outside of the card and the inside wall. Cut thinner strips of the woodgrain paper for the floor of the cabin, ink edges and glue in place alternating the seams as a real floor would be installed. (I had left over pieces of woodgrain paper from cutting Karen Burniston’s Landscape Rectangle Accordion that I used to frame the window.)

The back of the card is covered with leftover pieces from this and other cards made from the Craft Consortium papers In The Forest by Clare Therese.

Fireplace:  Watch the assembly video before assembling. Cut TWO of the fireplace fronts and emboss them both to show the bricks.  I tried several different crayons until I found a three color-mixed crayon in the Crayola True-to-Life series of crayons that blended brown, black and burnt orange to color the bricks.

I glued one of the brick fireplace fronts upside down as the back wall of the fireplace. Next is the hearth piece colored to be sooty sandstone that glued to the floor of the card.

I find it easier to attach anything hanging from the fireplace mechanism before I install the mechanism. After experimenting with how best to attach the pot from the Good Luck Charms set, I ended with gluing the charm circle loop to the part of the mechanism where the Santa boots would dangle. I glued some flames to the bottom of the pot to make the fire be all around the pot. The pot moves a little when opening and closing the card.

Glue together the fire and logs and then attach the cube-like pop-up strip into the card base and attach the fire. Glue the fireplace mechanism into card base. Then attach brick fireplace front and mantel. I use thin foam squares to attach the mantel to the brick fireplace front.

Accessories:  Fireplace tools and fender are from the Fireplace Extras 1 set. The lantern is cut from silver holographic cardstock colored with black permanent marker using the small lantern die from the Camping Charms set. The fish is also cut using a die from the camping charms and uses shimmer cardstock with distress inks. The metal plate the fish is on uses the circle from the snowman set. The rugs are from the oval crosshatch set and the deer head is the Christmas animals set on a plaque cut from the smallest crosshatch labels’ set covered in Glossy Accents. The only die that is not Karen Burniston is the fishing rod by Tayored Expressions.

Card Front:  Large tree is from the Christmas trees pop-up set with the center tree inked with Mowed Lawn Distress ink. The inked small trees are from the evergreen pivot panels set. The wee birds are from the tiny trees pop-up set and the turkey is from the feathered animals set.

Sentiments:  “Happy Birthday” is a single die while “DAD” is double cut from the large alphabet dies from green and black and then slightly over-laid for a shadow effect.

Envelope:  A brown kraft paper envelope completes the card with stamped images from the companion stamps of the patterned papers by Craft Consortium.

Thank you for reading this blog post. Please like and leave comments 😊

Materials Used:

Dies

Stamps

  • Craft Consortium – Clear Stamps – In The Forest by Clare Therese

Papers

  • Craft Consortium – Premium Quality Papers – 12” x 12” – In The Forest by Clare Therese
  • Craft Consortium – Premium Quality Papers – 6” x 6” – In The Forest by Clare Therese
  • American Crafts – Peebles – Spooky – 12 x12 Double-sided – Candy Toss – 736981
  • Colored Cardstock Scraps
  • Park Lane – 6×6 Paper Pad – Silver Holographic
  • 100 lb. Yellow cardstock 7 x 10 inches
  • American Crafts- A7 Envelope – Brown Kraft Paper

Pens, Crayons, Inks & Coatings

  • Sharpie – Permanent Marker –Fine Point – Black
  • Gelly Roll 08 Pen – White
  • Pigma Micron 05 – Archival Ink .045mm – Dark Brown
  • Crayola – True to Life Crayons -Grand Canyon
  • Ranger – Tim Holtz – Distress Ink – Mowed Lawn, Fired Brick, Black Soot, and Walnut Stain
  • Ranger – Glossy Accents
  • Nuvo – Aqua Shimmer – Glitter Gloss
  • Stampin’Up – Classic Stampin’ Pad – Early Espresso

Miscellaneous

A Riley & Simon Birthday Flip-Book Pop-up

It’s Stamp-tember at Simon Says Stamp and today it’s Riley & Co’s turn to team up with them.

Moose Riley and pup Simon have decided to do an old-style, silent video using signs to give some birthday greetings which pop-up when you pull the tab.  They wanted to show off all their dress-up accessories in the stamp set, so each image has different accessories – from balloons to glasses, ties and hats.

My card base is a top fold mini slimline card, I cut in two pieces (3×6 inches and 3×6 ¼ inches) scored and folded the longer piece into a tab to be glued over the other piece.

To make the scenes change, I’ve use Karen Burniston’s Waterfall Card die set which makes it very easy to create a flip-book style card without having to do a lot of math. (Watch the assembly video before assembling.)

I’ve added two small mini-pop-up cubes behind each image. You can use any of the small pop-up tabs from other sets such as the Frame Pull-Pop-up. (I cut mine from a thin strip of matching paper about ¼ x 1 ¼ inches, folded into five sections of ¼ inch long. Glue fifth section as a tab to make cube.)

I’ve added a zig-zag border to one of the pages to help hid the small bit of moose antler that sticks out on the left side.

Leftover dress-up accessories were used to decorate the envelope flap hinting at what’s inside.

Thank you for reading this blog post. Please like and leave comments 😊

Materials Used:

Dies

Papers

Stamps

Miscellaneous

Mountain Train Ride

There is nothing so relaxing as a train ride through the mountains. Seeing the pine trees at the higher elevations and the babbling streams in the gullies. Hearing the chug-chug-chugging of the steam engine and experiencing the darkness of a mountain tunnel coming back into the sunlight.

In my challenge to myself to see how many different themed cards I can make with Karen Burniston’s new Fireplace die set; I decided on a mountain train tunnel with the mouth of the tunnel using the fireplace mechanism’s opening. All the dies used are by Karen Burniston.

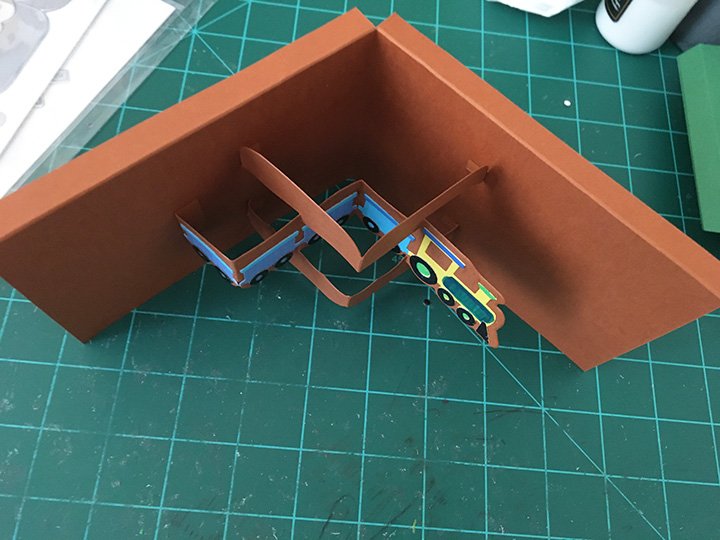
I had made multiple train cars and engines for an earlier project. (Watch the assembly video for the trains.) The train tracks are from a train elements set and I cut 4 of them to have enough pieces to form the track I needed for the front and inside of the card. For the smoke from the smokestack, I turned the smallest cloud from the Outdoor Scene set on its side and glued inside the stack.

The front of the card uses curving hillside with large pine trees from the Outdoor Scene set and the treeless curving stitched edger from the Long Nature Edges set for the foothills. I shaded the hillside tope edges with a pale brown ink.

For the card’s sentiment, I double cut the large words “Enjoy” and “ride” once from brown and again from black so that I could offset them to create a shadow. The oval cuts out the word “THE” so it is backed with a scrap of black.

The inside of the card requires some practice laying out to get the right placement of the mountains, so they won’t stick out of the card when closed. (Watch the fireplace assembly video before laying out and assembling.) I used scrap pieces of brown lightweight cardstock to cut my crosshatch ovals. (Largest oval die in set was used.) I cut off the bottom of the ovals to have varying heights. The largest oval I turned over on the back, traced the mechanism opening onto and then die-cut the opening using the second to smallest to fit inside the penciled opening.

The smaller ovals are glued to the sides and behind the oval with the tunnel opening. I then adhered the fireplace mechanism as shown in assembly video and glued the mountains onto mechanism matching up the openings. Next, I pieced together the train tracks to come out of the tunnel and near the side of the mountains. Using the pop-up strip from the Fireplace die set and the two angled pop-ups from the Mini Pops set, played with placement of the pop-ups with the train pieces to set spacing.  Glue the pop-ups first and once their glue has set, then adhere the train pieces. (I bent the pop-ups at their original scored folds, but you might play with other folds and or strips to get a more realistic alignment of the train cars.)

The babbling stream is created from strips of patterned paper cut with the Long Nature Edges curving stitched edger. The diagonal placement adds drama to the card and space in the corner to write a personal message.

Leftover pieces from the train track as well as pieces from other card projects complete the back of the card.

As is my habit, I decorated the envelope back flap with additional train pieces to hint at what’s inside.

Thank you for reading this blog post. Please like and leave comments 😊

Materials Used:

Dies

Papers

  • Colored, coated and glitter cardstock and patterned paper scraps
  • American Crafts – 5 x7 Kraft card & A7 envelope

Inks

  • Green fine-tipped marker
  • Ranger – Tim Holtz -Distress Ink – Antique Linen

Miscellaneous

A Gardening Birthday

The love of being outdoors and helping plants grow is what being a green thumb is all about. This is a birthday card for a lovely lady whose happy place is working with her plants.

Using Karen Burniston’s August 2022 release of the Label Charm Pop-Up die set makes it easy to add a hanging water can charm from her previously released Garden Charms set.  The double-sided papers are all from Craft Consortium’s Hackney & Co.’s Gardeners Delight collection. Watch an assembly video for a charm pop-up card before starting the card.

For the card base I used an 11 x 4.25-inch piece of patterned paper (strawberries on front and dark gray with flowers on the back.) With the pivot label dies, I like to use double-sided tape to adhere the decorative backing paper. If you put tape around the edges and pull back the tape’s backing paper at the corners only, you can re-position the decorative backing paper until it fits and then pull the all the tape’s backing paper.

Fold the card base in half and place the pivot label die in the center of the card front. Tape in place with removable tape and open the card base out to die-cut.  (Save the cut-out waste pieces to use as decorations for other parts of your card.)

Cut three of the label die from the patterned paper. Tape two of the labels together and then die-cut the oval from it. Trim the tab off one of the oval frames. Glue the tab from the solid label to one of the oval frames then glue the other oval frame to cover up the tab.  Punch a hole for the charm to hang from (The die has a hole to use a stencil.) I reverse cut the watering can to pour to the right from silver card stock. The metal jump ring I used has a rhinestone dangle. I find it easier to attach the jump ring with the charm to the oval frame before I glue the label and oval frame into the card.

Now to decorate the card. I had garden charms left from another project where I had “dirtied-up” the tools and gloves with brown ink dabbed on with a small finger sponge dauber.  The tiny hearts are from the heart eyeglasses in the Tiny Accessories 2 set. The plant is from the Garden Charms set. I used the cut-out waste pieces from the front pivot label to frame the inside label with slicing patterned with solid color pieces.

I felt the inside of the card need more decorative elements, so I cut strips of flowers from the Long Nature Edges 2 set from white and used yellow Nuvo drops to make them into strawberry blossoms. (Remember to let the Nuvo Drops dry at least 16-24 hours before gluing them into the card. They will stick to each other until totally dry.)

The Sentiments come from the Garden Charms set and Word set 2.  The various white labels are part of the Label Charms Pop-Up set as are the white outline flowers on the front of the card.

Thank you for reading this blog post. Please like and leave comments 😊

Materials Used:

Dies

Papers

Inks

  • Ranger – Tim Holtz’s Distress Ink – Vintage Photo
  • Fine-tipped green marker

Miscellaneous

Scandinavian Snowman

Thank you for joining the Karen Burniston Blog Hop for the August 2022 Release.

Such a joyful little snowman enjoying the snowy cozy Scandinavian countryside.

In her newest release, Karen Burniston has come out with some additional die sets that make putting together this snowman a snap. An add-on character set includes the top hat and band, carrot nose, large and small circles for eyes, mouth and buttons, as well as stick arms and a large snowflake. The Double-Ups for the all the pop-up balls have the side trapezoids linked together to cut 6 pieces all at once, so with the original individual trapezoid dies, you can cut all 12 side panels in one pass.

I started with a brown craft card base of 5 x 7 inches trimmed down to 5 x 6.5 inches. Next, the smaller side of the card was scored at 4.75 inches to form a gusset. Cut two of the Bitty Ball halves and two of the Mini Ball halves. I find watching the assembly videos for the balls very useful. (Bitty Balls, Mini-Balls) Numbering the order of gluing the tabs is useful for the assemble of the balls. I cut all the trapezoid panels from a white gold shimmer cardstock. And the ball halves are cut from a 100 lb. smooth white cardstock. Assemble the balls as shown on videos, including the brad in the bottom of the Bitty Ball.

The decorative papers are two layers. The measurements are listed in the photo. (Flap assembly video) I cut the the flap from another craft card blank and two decorative panels from scraps of the decorative papers. The flap dies set cuts six washers  of which three are glued together for each of the flower brad cover. Glue the front decorative panel onto the flap. Using a sharp piercing tool, punch a hole in the center of the flap.

Glue the washers and flower over the hole. Thread the twine into the brad legs and pull the twine and brad legs through the hole. Bend the legs onto the back of the flap and glue the twine inplace on back of flap.

Glue the back decorative panel over the brad legs and twine.  Glue flap tab to back of card base.  Cover back of card and flap tab with decorative paper.

Glue the front decorative papers to the card front. Mark the center of the front of the card base with pencil and pierce. Glue the second washer and flower over the hole. Thread another brad through the hole and fold the legs against inside of card. Glue the inside decorative papers to the card base covering the brad legs.

Adhere the snowman’s face. Glue the scarf pieces onto the bitty ball while flat. Cut a hexagon using the hexagon from the Surprize Ball Double-Up set or trace the center of the Bitty Ball die with a pencil and cut out. Assemble the top hat with a red hat band on front and back.

Mark the location of the hole to secure the snowman’s brad using the Bitty Ball die to fit within the card. Pierce the hole and thread the snowman brad through the hole. bend the brad legs to the back of the card. Glue the back decorative paper and white message label to cover the brad legs. Glue the hat onto snowman.

Decorate the front of the card using the faces from the Snowman, and Gnome and Santa sets Add the sentiment of “Merry Christmas” to inside. Large snowflakes are from the Snowman add-on set.

The card fits into an A7 envelope for hand delivery, but I would put the card in a padded envelope to mail.

Continue reading

Getting MORE From YOUR Dies

Just an heads up that in a few weeks I am doing a series on different ways you can use Karen Burniston’s new Fireplace Die set that you can see in this Sneak Peek photo of all the new dies that will be available September 5, 2022.

On September 12 will be a spooky room scene card using the fireplace as intended.

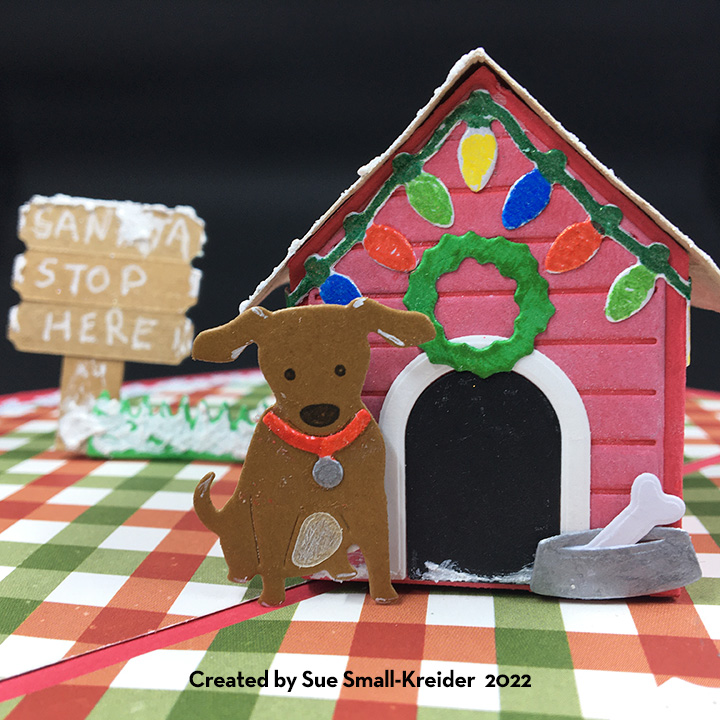
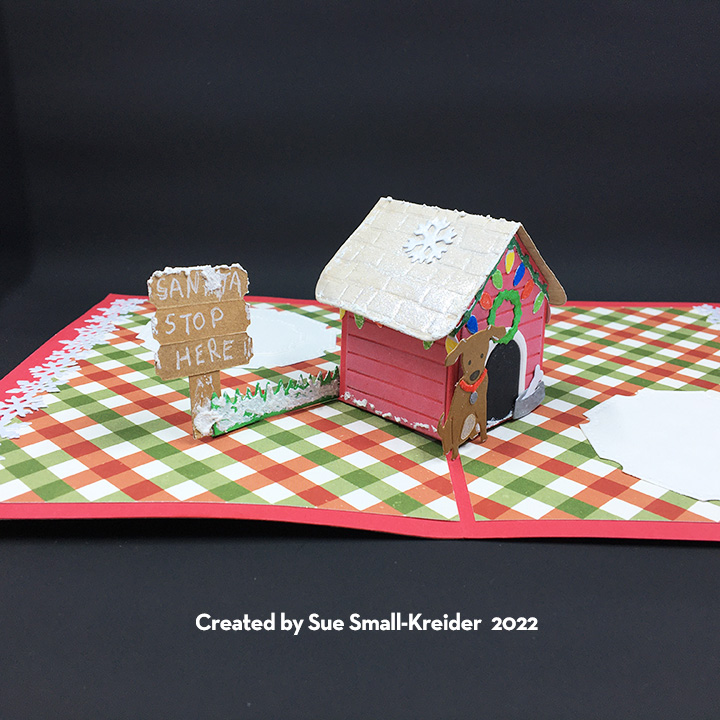
On September 13 will be a doghouse scene using the fireplace front and mechanism.

On September 14 will be a fun train tunnel scene card using the fireplace mechanism.

I hope you will follow me as I explore some of the creative and interactive things you can make with Karen Burniston Pop-Up dies.

Winter mail

Who doesn’t love getting mail! The most famous snowman, Frosty sure does enjoy his mail in this card celebrating wintertime mail. It uses dies by Karen Burniston to create a delightful pop-up card.

The main die sets used were the Mailbox Pop-Up and the Snowman Pop-Up. Watch the two assembly videos for tips on how to construct the pop-up snowman and mailbox by clicking on the links above before starting your card. (If I had been smart and followed my advice of watching the assembly videos before starting the card, I would have known I needed at least 5 inches from the card fold to have Frosty in his top hat and should have done a top fold card instead of a side fold vertical card.)

Because I constructed my card base before I watched the assembly videos, I had to make the snowman without his hat to fit in the card. I used the top hat and snowflake from another snowman die set by Karen Burniston.

My inspiration for this card was the Carta Bella paper pad that has a page of envelopes addressed to various North Pole and winter characters. I cut out several of the envelopes from the paper and scattered them throughout the card. The other patterned papers are from this paper pad as well.

I like creating an outer frame for my card bases covered in patterned papers. I used the medium sized crosshatched rectangle to cut the frames in the inside green plaid paper panels and I used one of these rectangles on the back of the card over a border made from paper leftovers from the inside of the card.

For the card front I constructed a background from three leftover pieces of the snowflake print. The snow in the foreground was cut using a nature edge die that cuts a stitched rolling hill with trees. The trees I cut off.

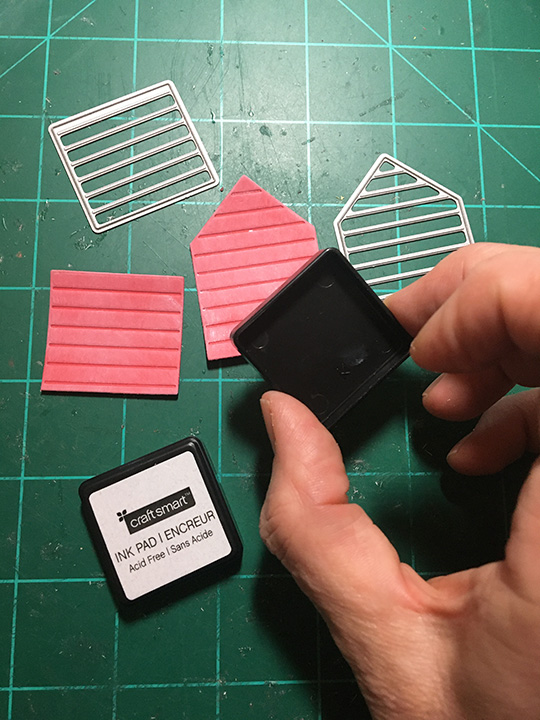
While the mailbox is designed to be inside the card as an interactive element, it can be simplified down to a flat element. I used the main mailbox, lid, flag and wood grained post dies. The brown wooden post I inked the dies with white ink to get it into the wood grain and then gently rubbed the piece over the ink cube to get a snowy effect. I added the Santa hat and snowflakes to give some hints, if the name on the mail box didn’t clue the viewer that it is Santa Claus’ mailbox. I leave it up to the viewer to decide if the small Rudolf is the real one or a winter decoration.

Using the die as a stencil, I colored with a white gel pen to shade Rudolph’s ears and tail and a black fine-tipped marker for his hooves. I used Glossy Accents over his red paper nose to look more like a light. For Rudolph’s eyes and the snowman’s coal eyes and buttons, I used Nuvo Drops. With both these products be sure to allow 12-24 hours for them to dry. (I swished Rudolph’s nose and didn’t notice until the glossy accents had almost set.)

Inside the card, the finishing touches include: a snowflake, a stitched heart, and the sentiment of “Season’s Greetings” from the Karen Burniston Word Set 3.  (I’ve been experimenting with various dies by Karen Burniston with the dotted outlines because they are easy to make stitched or embroidered charms and embellishments for cards. This heart is from the Circle Charm Pop-Up set.)

For the envelope, I made a snowman face with top hat from Karen Burniston’s Snowman set and glued all its pieces and back securely to the back flap of the envelope. Sometimes for thick cards to fit into a standard size envelope (A2 for this card) you need to trim a total of 1/4 of an inch off the non-fold sides of the card.

Thank you for reading. If you enjoyed this blog post, please like it and follow the blog. 😊

Dies:

stamps & Ink

  • Craft Smart – Ink Pad – White
  • Ink
  • Stamp
  • Sakura – Gelly Roll Pen– 08 -White
  • Sharpie – Ultra Fine-Tipped Marker – Black

Papers

  • Carta Bella – 6×6 Paper Pad of Double-Sided cardstock – Letters to Santa
  • Lightweight 8.5×11 inch white cardstock
  • Matte silver foil cardstock scrap
  • Colored cardstock scraps
  • A2 Envelope

Additional Supplies Used: