Happy Birthday Accordion Style

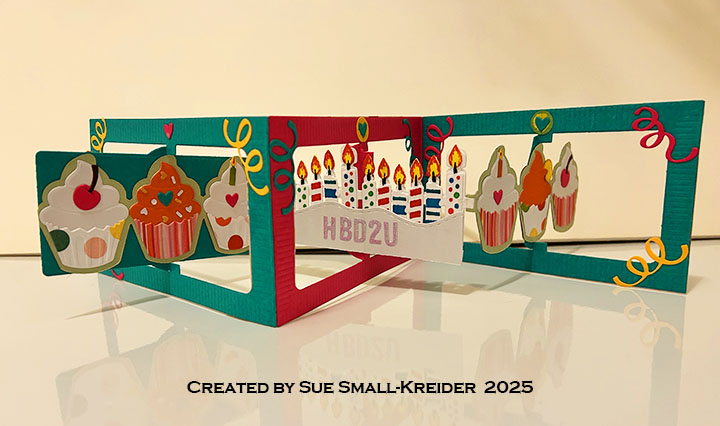
This card was made for a Scapp’n Savvy Card Challenge for KB Bundlers June 2025 using Karen Burniston’s Landscape Rectangle Accordion, Cupcake Add-Ons, Fence Add-Ons, Big Birthday Charms and Birthday Candle Add-Ons die sets.
Watch the video for instructions on the construction of the card.

Read more below on specifics of this card.

Cardbase:  Cut three of the Landscape Rectangle Accordion base frames. Cut from decorative paper, three to six frames. (Cut the frame base and cut out the inside panel and side tab.)

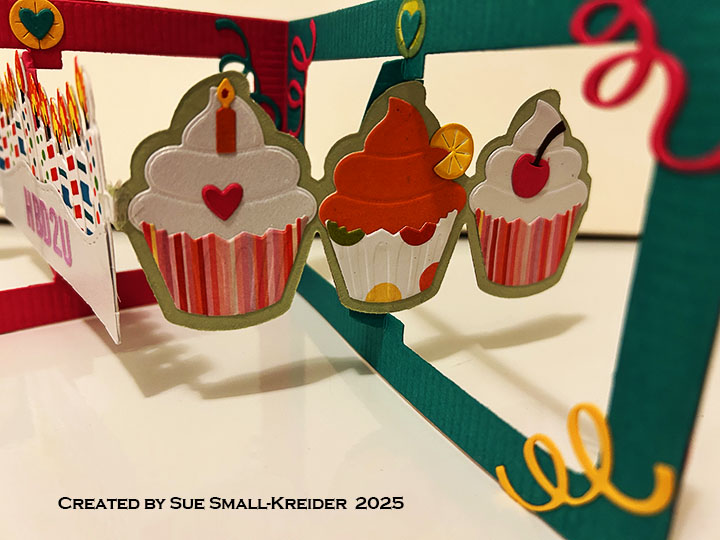
Cupcakes:  Watch the assembly video for the Cupcake Add-Ons located at the bottom of the linked page.

Candles:  The candles are cut from two die sets – Big Birthday Charms and Birthday Candle Add-Ons. Watch the video above for coloring details. The candles are glued to the Fence Add-Ons.

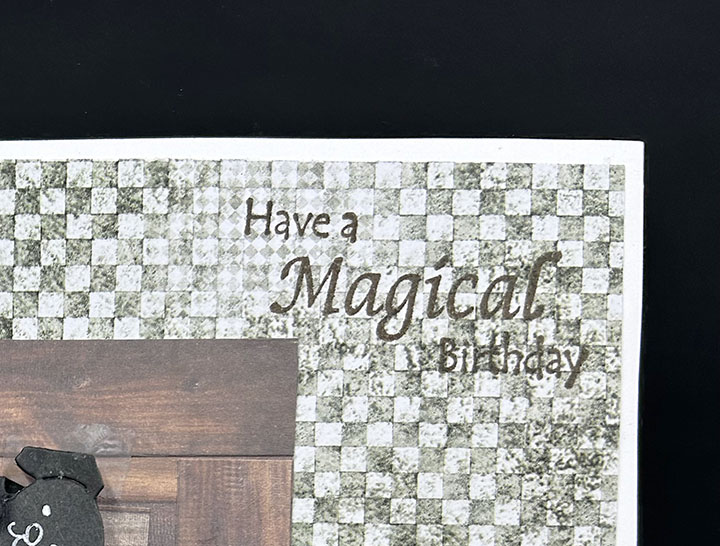
Sentiments:  The printed paper provides much of the sentiments, while the Mini Alphabet and Numbers were used to cut from pink glitter paper “HBD2U” (Happy Birthday to You.) The Streamer ribbons come from the Big Birthday Charms and Cupcake Add-Ons die sets.

Envelope:  This card fits into an A7 (5×7-inch) envelope.

___________________________________

Thank you for experiencing this blog post.

I hope this inspires you and makes you smile.

Please like and leave comments 😊

___________________________________

Disclaimer: Karen Burniston products are provided free of charge by the manufacturer for review and use. All other items were personally purchased. Compensated affiliate links used where or when possible, meaning I will receive a small percentage commission from these manufacturers at no cost to you. This will allow me to add more content to my YouTube channel and help out a lot. Thank you.

Materials Used:

Dies

Papers

  • Scapp’n Savvy – Card Challenge Paper Pack
  • 12X12-inch Solid Cardstock – Fuchsia, Teal Blue and Celery Green
  • PhotoPlay – 12×12 Double-Sided Cardstock – Birthday Sparkle
  • Recollections – 8.5×11 Shimmer Cardstock – White Gold
  • Pink Glitter Cardstock
  • Brown, Green, Orange, White & Yellow Cardstock Scraps

Ink

  • Pigma – Mircon 005 Fine Tip Pen – Black
  • Sharpie – Permanent Marker – Fine Tip – Lime Green, Pink, Red & Yellow
  • Sharpie – Permanent Marker – Ultra Fine Tip – Black, Blue, Green, Orange, Red & teal

Adhesives

Tools

  • Die Cutting Machine
  • Paper Trimmer
  • Bone Folder
  • Stamping Blocks used as paperweights
  • Scissors
  • Paper Masking Tape
  • We R Memories – QuickStick
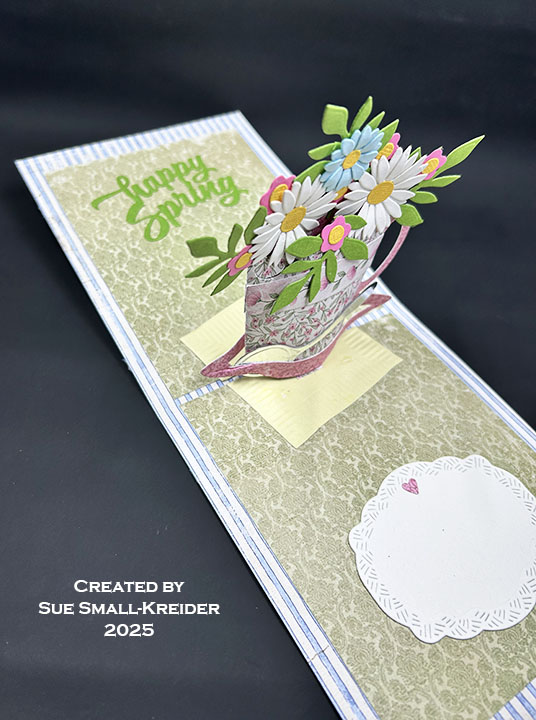
A Reminder- Teacup of Flowers

This thinking of you card was based off of Karen Burniston’s May 2025 Virtual class card #2 which uses her Coffee Cup Pop-Up as the base for the pop-up teacup with elements from her Tea and Coffee Pop-Up, Tea and Coffee Borders and Flowers and Bee die sets.

Watch the assembly video to see how I made this card.

Cardbase: The cardbase is a 5×12-inch piece of double-sided Maja Designs cardstock folded in half to form a 5×6-inch top-fold card. Inside two decorative panels were added near the fold. Four pieces of blue ribbon were attached to the outside panels using double-sided tape. The teacup on the back panel is from the Tea and Coffee Borders die set.

Teacup Pop-Up: Watch the assembly video for the Coffee Cup Pop-Up located at the bottom of the linked page. Then watch the video above to see how I modified the construction of the teacup using elements from the Tea and Coffee Pop-Up and Flowers and Bee die sets.

Sentiments: The card front sentiment was stamped in blue ink using a Scrapbook.com stamp. Inside are Karen Burniston die cuts of “Happy Spring” and a fancy label for a personal message. The tiny die-cut hearts throughout the card were made with a die from the Tea and Coffee Borders set that cuts three hearts at a time.

Envelope: The card fits into an A7 (5x 7-inches) size envelope with a die-cut teapot from the Tea and Coffee Borders glued to the back flap.

_____________________________________________

Thank you for experiencing this blog post.

I hope this inspires you and makes you smile.

Please like and leave comments 😊

_____________________________________________

Disclaimer: Karen Burniston products are provided free of charge by the manufacturer for review and use. All other items were personally purchased. Compensated affiliate links used where or when possible, meaning I will receive a small percentage commission from these manufacturers at no cost to you. This will allow me to add more content to my YouTube channel and help out a lot. Thank you.

_____________________________________________

Materials Used:

Dies
Karen Burniston in cahoots with Riley and Company – Tea and Coffee Borders- 1270
Karen Burniston in cahoots with Riley and Company – Tea and Coffee Pop-Up – 1269
Karen Burniston in cahoots with Riley and Company – Rectangles and Labels – 1233
Karen Burniston in cahoots with Riley and Company – Happy Spring – 1084
Karen Burniston in cahoots with Riley and Company – Coffee Cup Pop-Up – 1040
Karen Burniston in cahoots with Riley and Company – Flowers and Bee – 1026

Stamps
• Scrapbook.com – Clear Stamps – A Little Reminder

Papers
• Maja Design – 12×12 Double-Sided Cardstock – Enjoying Outdoors – Woodlands
• Maja Design – 12×12 Double-Sided Cardstock – Mum’s Garden – Memories
• Maja Design – 12×12 Double-Sided Cardstock – Seaside – Sea Thrift
• Blue, Cream, Green, Pink, White and Yellow Cardstock
• Recollections – A7 Envelope – Ivory

Ink
• Memento – Fade Resistant Dye ink – Paris Dusk

Adhesives
Neutral PH Adhesive by LINECO
Fine-Tip Glue Bottle
• Double-Sided Tape – 1/4-inch and 1/2-inch wide

Tools
• Die Cutting Machine
• Paper Trimmer
• Bone Folder
• Score Board
• Stamping Platform
• Scissors
• Pencil
• Paper Masking Tape
We R Memories – QuickStick
• Excel Blades – K71 Fingertip Craft Knife

Miscellaneous
• Blue Organza Ribbon – 1/4-inch wide

Letting Sleeping Dogs Lie

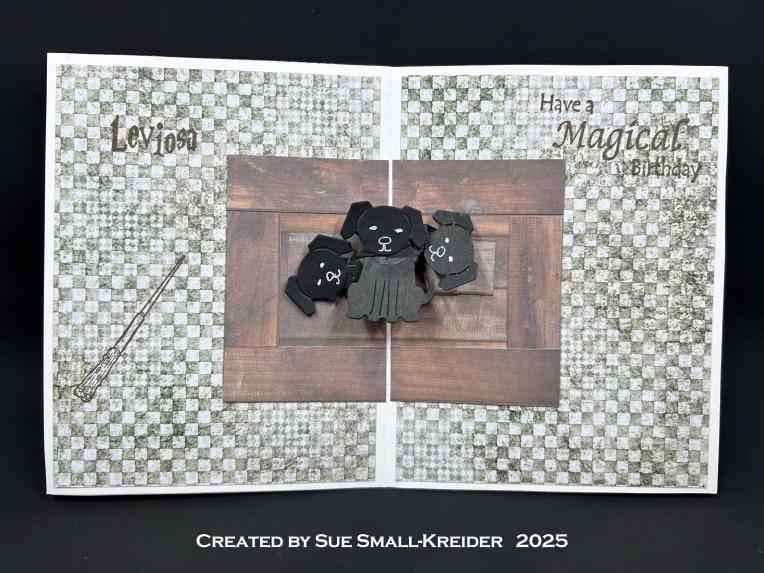
It’s the Karen Burniston design team challenge for May 2025 using the theme of fluffy. I chose to make a card celebrating the three-headed dog, Fluffy, from the book and movie Harry Potter and the Sorcerer’s Stone using the Heart Collage Pop-Up, Cat and Dog as well as the Paper People die sets.


Watch the process video to see how I made this card.

Cardbase: Start with a 8.5×5.5-inch piece of cardstock and fold in half to form a side-fold A2 (4.25×5.5-inch) card. Cover the four panels with decorative papers. (I used Ciao Bella’s Wizard Academy paper pad.)


Fluffy Pop-Up: Watch the assembly video for the Heart Collage Pop-Up. Cut out one of the collage mechanism from black cardstock as well as three dogs using the Cat and Dog die set. Assemble as instructed in the video above. Use a white gel pen to add eyes, nose and mouth to the dog’s heads before attaching.

Ron, Harry & Hermione: Watch the video above to see how I transformed the Paper People into these well-known characters. Harry’s glasses come from the Tiny Accessories 1 die set. (My academic robe pattern is pictured above.)


Sentiments: All the sentiments used on the card are stamped using brown ink and Crackerbox Stamps.


Envelope: The card fits into an A2 (4.25x 5.5-inches) size envelope stamped with a Crackerbox Stamps castle and an owl post stamp on the back in brown ink.

_________________________________________


Thank you for experiencing this blog post.

I hope this inspires you and makes you smile.

Please like and leave comments 😊


________________________________________

Disclaimer: Karen Burniston products are provided free of charge by the manufacturer for review and use. All other items were personally purchased. Compensated affiliate links used where or when possible, meaning I will receive a small percentage commission from these manufacturers at no cost to you. This will allow me to add more content to my YouTube channel and help out a lot. Thank you.

______________________________________


Materials Used:
Dies
Karen Burniston in cahoots with Riley and Company – Paper People – 1299
Karen Burniston in cahoots with Riley and Company – Heart Collage Pop-Up – 1193
Karen Burniston in cahoots with Riley and Company – Tiny Accessories 1 – 1025
Karen Burniston in cahoots with Riley and Company – Cat and Dog – 1024


Stamps
• Crackerbox Stamps – Rubber Stamps – Harry Potter Collection


Papers
• Bazzill – 8.5×11 Cardstock – Tiara -18-1002
• Ciao Bella – 8×8-inch Double-Sided Paper –Wizard Academy
• Concord & 9th – 8.5×11 Cardstock – Dove
• Craft Consortium -6×6-inch Double-Sided Paper – Wood textures
• Black, Blush, Browns, Orange and White Cardstock
• Fraser Papers for William House – A2 Envelope – Genesis Text Husk Smooth


Ink
• Memento – Fade Resistant Dye ink – Rich Cocoa
• Pigma – Mircon 005 Fine Tip Pen – Black
• Sakura – Gelly Roll Pen – Medium – White
• Sharpie – Permanent Marker – Ultra Fine Tip – Green, Red, Yellow


Adhesives
• Neutral PH Adhesive by LINECO
• Fine-Tip Glue Bottle
• Temporary runner dot tape


Tools
• Die Cutting Machine
• Paper Trimmer
• Bone Folder
• Score Board
• Stamping Platform
• LDRS – Stampendable Stamping Tool
• Stamping Blocks
• Scissors
• Pencil
• Paper Masking Tape
• We R Memories – QuickStick

Class Cards

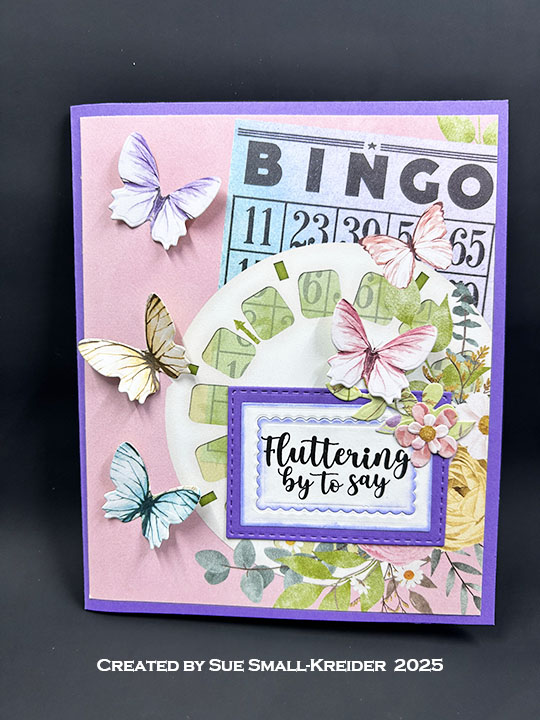
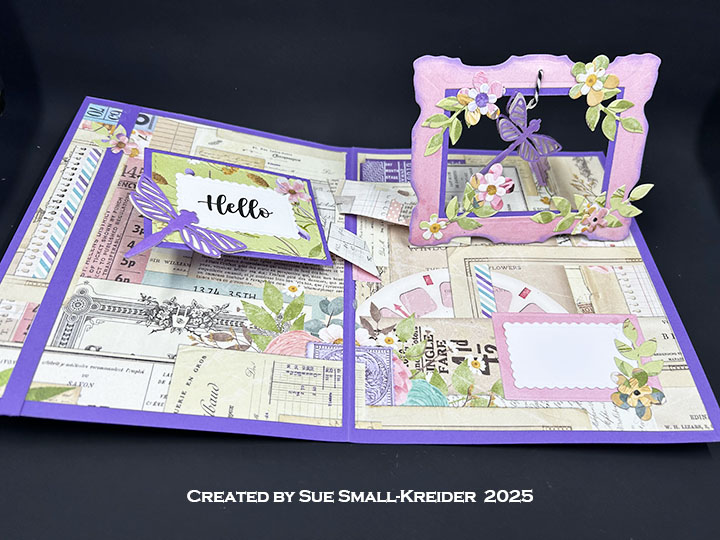
I made these cards in a Karen Burniston Zoom Class recently. They are Karen’s designs assembled with a few touches of my own.

The Dragonfly card uses primarily the Flip Frame Pop-Up and Flutter Charms.

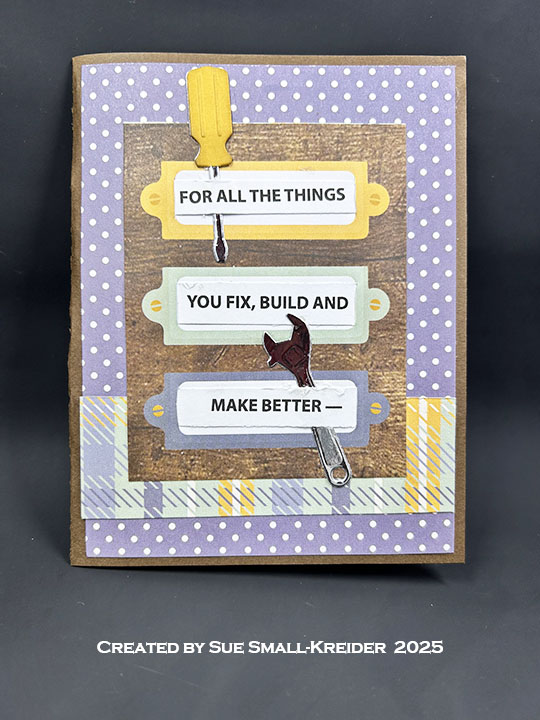
The Tool Box card uses primarily the Purse Pop-Up and Tool Charms.


_____________________________

Thank you for experiencing this blog post.

I hope this inspires you and makes you smile.

Please like and leave comments 😊

_____________________________


Disclaimer: Karen Burniston products are provided free of charge by the manufacturer for review and use. All other items were personally purchased. Compensated affiliate links used where or when possible, meaning I will receive a small percentage commission from these manufacturers at no cost to you. This will allow me to add more content to my YouTube channel and help out a lot. Thank you.

Cards For A Dog Lover

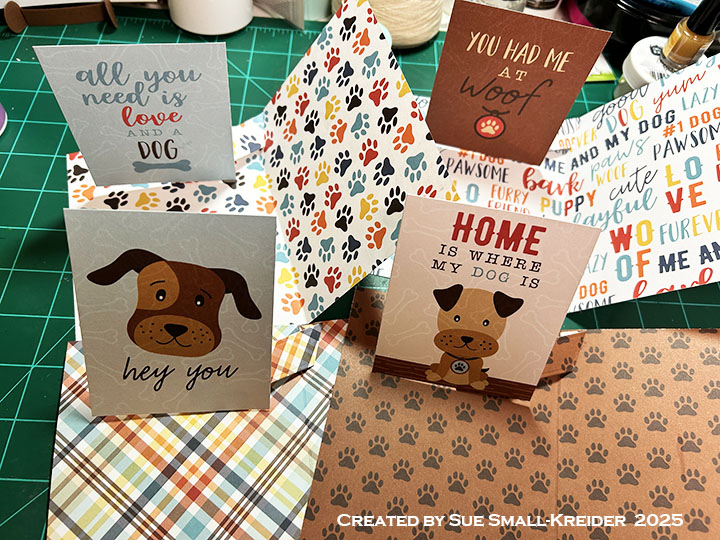
Needing multiples of the same card layout, I made 16 cards for a dog lover’s card swap using one Echo Park Paper Company’s collection kit I Love My Dog and Karen Burniston’s Flip Frame Pop-Up and Hello die sets.

Watch the video for instructions on the construction of the cards.

Read more below on specifics of this card layout.

Cardbase:  From each sheet of 12×12-inch cardstock, cut two 5.5×8.5-inch panels. Fold each panel in half to form a 4.5×5.5 cardbase.

Flip Frame Pop-Up:  Watch the assembly video for the Flip Frame Pop-Up located at the bottom of the linked page. Cut one mechanism from matching cardstock to the card inside. Cut the journaling card down to 3 .75-inches tall x 3 inches wide. Glue mechanism and journaling card into card base as shown in video above.

Sentiments:  The die cut shadow and word “Hello” on the card front are by Karen Burniston. All the flip panels with sentiments are journaling cards from the paper collection. A personalized inside sentiment panel will be added to the inside right panel.

Envelope:  These cards fit into an A2 (4.25×5.5-inch) envelope. The envelope flaps have been decorated with stickers from the kit.

___________________________________

Thank you for experiencing this blog post. I hope this inspires you and makes you smile. Please like and leave comments 😊

___________________________________

Disclaimer: Karen Burniston products are provided free of charge by the manufacturer for review and use. All other items were personally purchased. Compensated affiliate links used where or when possible, meaning I will receive a small percentage commission from these manufacturers at no cost to you. This will allow me to add more content to my YouTube channel and help out a lot. Thank you.

Materials Used:

Dies

Papers

  • Echo Park – 12×12-inch Double-Sided Cardstock – I Love My Dog

Ink

  • Pigma – Mircon 08 Fine Tip Pen – Black
  • Stampin’ Up – Stampin’ Write Double Tip Marker  -Chocolate Chip

Adhesives

Tools

  • Die Cutting Machine
  • Paper Trimmer
  • Bone Folder
  • Scissors
  • Paper Masking Tape

Celebrate with Flowers!

This card was made for a Scapp’n Savvy Card Challenge for KB Bundlers April 2025 using Karen Burniston’s Purse Pop-Up, Flip Frame Pop-Up, Flutter Charms and Celebrate die sets. I also used Karen Burniston’s Photo Memories clear stamp set.

Watch the video for instructions on the construction of the card.

Read more below on specifics of this card.

Cardbase:  Cut a 10 x7-inch rectangle of green cardstock, score at 5-inches, fold in half and burnish with a bone folder. Cover inside with two 4.5×6.5-inch rectangles of patterned paper. Save scraps of pattern paper to decorate card front. Die cut large frame from Flip Frame Pop-Up die set from red dotted paper. Cut bee and small flower pieces from Flutter Charms die set and assemble as shown in process video above.

Flower Planter Pop-Up:  Watch the assembly video for the Purse Pop-Up located at the bottom of the linked page. Cut one large, stitched rectangle from the Flip Frame Pop-Up die set from a journal card. Follow directions in the process video above for how to die cut tabs into red rectangle. Die cut one purse base from striped paper and follow directions in process video above. Using the flower and stem dies in the Flip Frame set, die-cut flowers from patterned paper and stems from green cardstock. (Save patterned paper with flowers cut out for card back.)

Sentiments:  Die cut the “Celebrate” once from, orange, red and black. (I use a shiny black piece of junk mail.) From the KB April Zoom class kit use the pre-printed “Happy Birthday” sentiment rectangle label. (Alternative is to stamp the sentiment using Karen Burniston’s Bouquet Sayings clear stamp set on to white cardstock.) Die cut sentiment label with smallest rectangle die from Flip Frame Pop-Up die set. Cut the smallest stitched rectangle from the same set, in pale blue. Glue sentiment label onto blue rectangle.

Envelope:  This card fits into an A7 (4.25×5.5-inch) envelope with “Celebrate your big awesome day” stamped in red on the back flap. Stamps is from Karen Burniston’s Photo Memories.

___________________________________

Thank you for experiencing this blog post.

I hope this inspires you and makes you smile.

Please like and leave comments 😊

___________________________________

Disclaimer: Karen Burniston products are provided free of charge by the manufacturer for review and use. All other items were personally purchased. Compensated affiliate links used where or when possible, meaning I will receive a small percentage commission from these manufacturers at no cost to you. This will allow me to add more content to my YouTube channel and help out a lot. Thank you.

Materials Used:

Dies

Stamps

Papers

  • Scapp’n Savvy – Card Challenge Paper Pack
  • 8X12-inch Cardstock – Orange, Pale Blue and Green
  • Journaling Cards with Red Polka Dots on Back
  • Patterned Paper with Clouds and Colorful Pinwheels/ Rainbow stripes
  • Red & Yellow Cardstock Scraps
  • Shiny Black Junk Mail
  • Clear Vellum

Ink

  • Pigma – Mircon 005 Fine Tip Pen – Black
  • Memento – Fade-Resistant Dye Ink – Rose Bud

Adhesives

Tools

  • Die Cutting Machine
  • Paper Trimmer
  • Bone Folder
  • Score Board
  • Stamping Blocks used as paperweights
  • Scissors
  • Pencil
  • Paper Masking Tape
  • We R Memories – QuickStick

Miscellaneous

  • Yellow Enamel Dots
  • Three Pre-Cut & Inked Flowers from Flutter Charms

Waterfall Wallet for Mother’s Day

It’s the Karen Burniston design team challenge for April 2025 using the theme of Designer’s Choice. I made a Mother’s Day Waterfall Wallet card to showcase photos and gift cards as well as Paper People charms.

Watch the following video for specifics on how I made this waterfall wallet.

Read more below on specific customizations I made to this wallet.

Cardbase: Cut a 7×10-inch rectangle of heavy 110 lb. cardstock. Score in the middle at 5-inches and fold in half. Emboss the card front using the Pattern Plate – Tiles and largest crosshatch rectangle in the Rectangles and Labels – Crosshatch die sets. (Check your die-cutting machine’s instructions for an embossing sandwich of plates for embossing with a die.  If you don’t have an embossing sandwich, die cut the elements with the dies and glue on the panels in a faux embossing method.) Emboss a 5.5×8.5-inch panel of the same cardstock using the same dies. Wait to glue on the second embossed panel until after the waterfall mechanism and the handle loop have been attached.

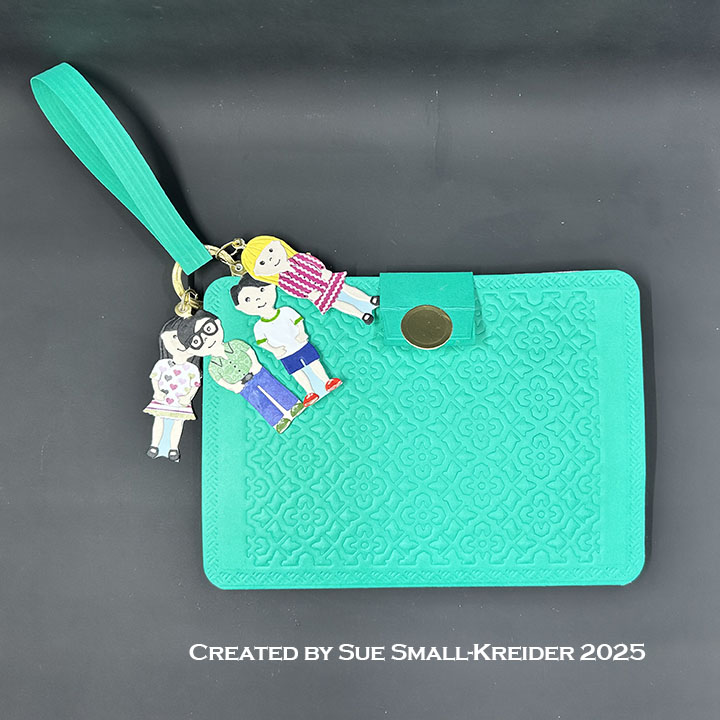
Handle Loop: Cut a strip of wallet colored cardstock a half-inch x 8.5-inches. (I scored an 1×8.5-inch stripe every 1/8” on my scoreboard and then trimmed it down to a half inch so it would have subtle stripes on it.) Die cut two 1-inch circle frame/ring from gold cardstock and another four out of heavy cardstock. Keep the center circle to use as decoration on the wallet clasp. Glue rings back to back for a sturdier ring with the gold rings as the outside layers. (I used the eyeball circles from the Animal Add-ons 4 die set to create the ring.) Loop the strip through the ring and glue closed. Press a fold into the loop near the glued end to form a tear drop shaped loop. Glue the loop together just above the ring. Glue the lower section of ring to wallet back, top left corner making sure there is room to attach charms to the ring.

Waterfall Card/Photo Holder: Create the waterfall wallet as shown in the video above. Cut the card holder rectangles, but before folding the rectangle around the card, die cut a window out of the center of the rectangle. (I used the second smallest rectangle in the set.) Back the window with a 2×3-inch piece of clear acetate or plastic packaging. (Adhere with double-sided tape.) Fold rectangle around gift card and seal the end using double-sided tape instead of glue. Attach into wallet as shown in video.

Paper People Charms: Using the Paper People and Charm Rings die sets, create people that look like the mother’s children. Once a figure is completely created, glue a charm base to the back of its head. Glue the entire figure to a backing paper and cut out with scissors. Thread the largest of the paper jump rings through the charm ring and wallet handle loop ring. Glue jump ring closed. Repeat for other people charms.

Watch the video for basic instructions on the construction of the card’s prototype.

Sentiments: For the prototype card, the outside letters spelling “MOM” came from the Alphabet die set while the small letters that are on the card/photo holder pockets are from the Mini Alphabet and Numbers set. For the customized card, the Happy Mother’s Day die set was used for the main sentiment.

Envelope: This card will be hand delivered or mailed in a large 9.5×12.5-inch cardboard envelope.

___________________________________

Thank you for experiencing this blog post.

I hope this inspires you and makes you smile.

Please subscribe, like and leave comments 😊

Follow my YouTube channel, Instagram and Pinterest as well.

___________________________________

Disclaimer: Karen Burniston products are provided free of charge by the manufacturer for review and use. All other items were personally purchased. Compensated affiliate links used where or when possible, meaning I will receive a small percentage commission from these manufacturers at no cost to you. This will allow me to add more content to my YouTube channel and help out a lot. Thank you.

Materials Used:

Dies

Papers

  • Recollections – 8.5×11-inch 110lb Cardstock – Oceans
  • Stampin’Up – 12×12-inch Designer Series Paper – Masterfully Made
  • Clear Plastic Packaging (2×3-inch rectangles)

Ink

  • Ranger – Tim Holtz – Distress Ink – Stormy Sky
  • Pigma – Mircon 005 Fine Tip Pen – Black
  • Sakura – Gelly Roll Pen – Medium – White
  • Scrapbook.com – Glitter Brush Marker – Mint Green
  • Sharpie – Permanet marker -Ulta Fine – Green

Adhesives

Tools

  • Die Cutting Machine
  • Paper Trimmer
  • Bone Folder
  • Stapler
  • Scissors
  • Paper Masking Tape
  • We R Memories – QuickStick
  • Reverse Tweezers
  • Corner Rounder Punch
  • 1/8-inch Hole Punch
  • Blending Brush

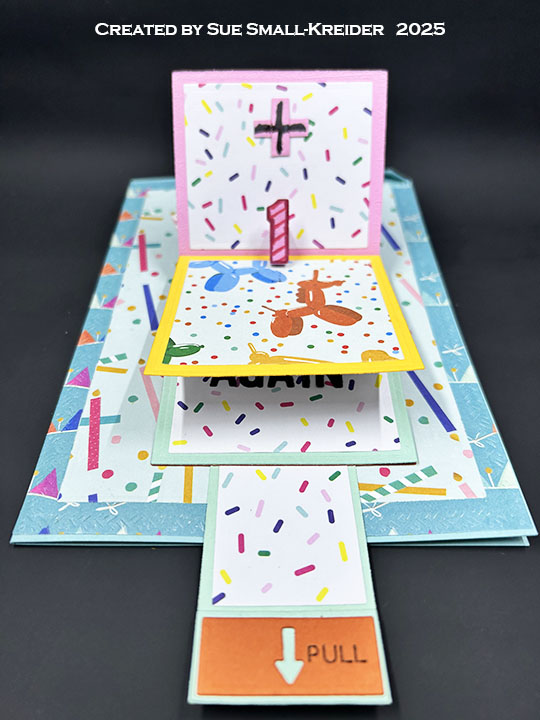
A Waterfall Card with Birthday Math

This card was made for Craft Roulette #259 whose parameters included a card with two folds, jelly bean colors, math element, and markers.

Watch the process video to see how I made this card.

Cardbase: Start with a 7 x 10-inch piece of cardstock and fold in half to form a side-fold A7 (7×5-inch) card. Cover the front and back panels with decorative papers. (I used the two largest rectangle dies in the Rectangles and Labels-Crosshatch die set to cut out a frame and two panels for the outside of the card.) Once the panels are covered, die-cut the thumb hole at the bottom center of both front and back panels.

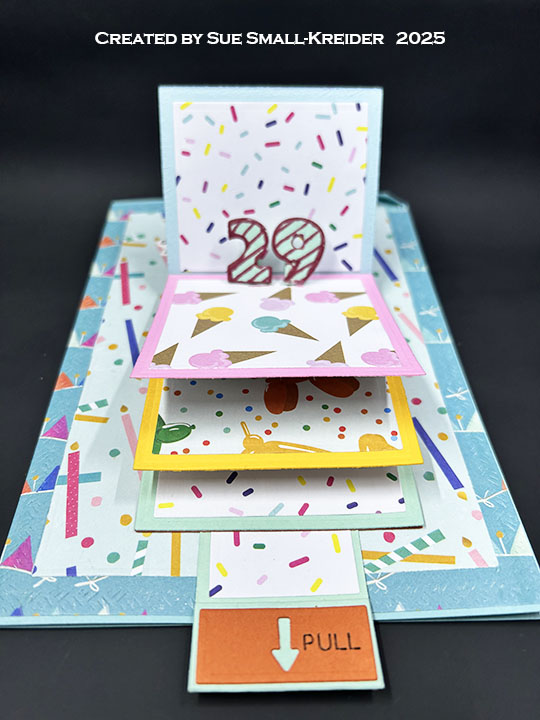
Waterfall Pop-Up: Watch the assembly video for the Waterfall Card located at the bottom of the linked page. Cut four base squares, one base piece and pull strip from heavy solid color cardstock. Cut four large decorative squares, three larger decorative rectangles and one pull strip decorator stripe from decorative papers. Assemble as shown in video.

Sentiments: All the sentiments used on the card Spellbinders BetterPress sentiment strips. Numbers and Happy Birthday are from Karen Burniston’s Numbers, Happy Birthday and Shadow. “Again” is spelled using Karen’s Mini Alphabet.

Envelope: The card fits into an A7 (5x 7-inches) size envelope stamped with a sentiment from Karen Burniston’s Photo Memories stamp set on the back flap in black ink.

___________________________________

Thank you for experiencing this blog post.

I hope this inspires you and makes you smile.

Please like and leave comments 😊

___________________________________

Disclaimer: Karen Burniston products are provided free of charge by the manufacturer for review and use. All other items were personally purchased. Compensated affiliate links used where or when possible, meaning I will receive a small percentage commission from these manufacturers at no cost to you. This will allow me to add more content to my YouTube channel and help out a lot. Thank you.

Materials Used:

Dies

Press Plates & Dies

  • Spellbinders – BetterPress Press Plate & Die Set – Cheers To You Sentiments
  • Spellbinders – BetterPress Press Plate & Die Set – Make A Wish Sentiments

Stamps

Papers

  • Concord and 9th – 8.5×11 inch 100lb Cardstock – Sea Glass
  • Spellbinders – 8.5×11 inch 100lb Cardstock – Saffron
  • Spellbinders – 8.5×11 inch 100lb Cardstock – Terra Cotta
  • Recollections – 8.5×11 inch 100lb Cardstock – Pinks
  • Recollections – 8.5×11 inch 100lb Cardstock – Blues
  • Roobee by Mara-Mi – – 8.5×11 inch Single-Sided Paper – Celebrations
  • Recollections – A7 Envelope – Cream

Ink

  • Memento – Fade Resistant Dye ink – Tuxedo Black
  • Pigma – Mircon 01 Fine Tip Pen – Black
  • Sharpie – Permanent Marker – Ultra Fine Tip – Black
  • Spectrum Noir – Tri-Blend Alcohol Markers – Dark Red Blend & Purple Blend

Adhesives

Tools

Miscellaneous

  • Nuvo – Aqua Shimmer – Glitter Gloss

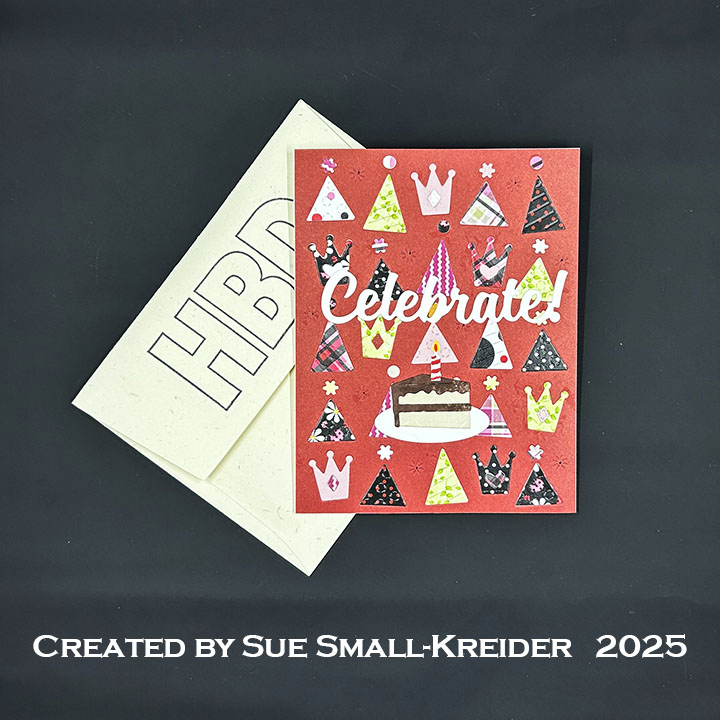
It’s A Party – Celebrate Your Birthday!

When needing a large number of birthday cards, making multiple inlay die-cut backgrounds is the way to go.

Watch the video below to see how I made these cards.

Cardbase:  I made eight A2 size cardbases by folding 8.5×5.5-inch rectangles of white cardstock in half.

Card Front: The card front uses Concord & 9th’s Party Hats inlay die along with the slice of cake from Karen Burniston’s Big Birthday Charms.

Sentiments:  The sentiments were stamped in black ink using the Craft Roulette’s Funn Sentiments #01 stamp set and Karen Burniston’s Celebrate, Happy Birthday and Shadow dies along with her Katherine Label Pop-Up die set.

Envelope:  The card fits into an A3 (4.25x 5.5-inches) size envelope stamped with a sentiment or a hand-drawn heart.

___________________________________

Thank you for experiencing this blog post. I hope this inspires you and makes you smile. Please like and leave comments 😊

___________________________________

Disclaimer: Karen Burniston products are provided free of charge by the manufacturer for review and use. All other items were personally purchased. Compensated affiliate links used where or when possible, meaning I will receive a small percentage commission from these manufacturers at no cost to you. This will allow me to add more content to my YouTube channel and help out a lot. Thank you.

Materials Used:

Dies

Stamps

  • Craft Roulette – Clear Stamps – Funn Sentiments #01

Papers

  • Craft Consortium – A4 Double-Sided Solid Colored Cardstock – Little Robin Redbreast
  • Craft Consortium – A4 Double-Sided Solid Colored Cardstock – ‘Tis the Season
  • Ink N’ Splatter – 6×6 Double-Sided Cardstock – Ladybug Days
  • Ink N’ Splatter – 6×6 Double-Sided Cardstock – Raspberry Crush
  • White Cardstock
  • Fraser Papers for William House – A2 Envelope – Genesis Text Milkweed Smooth

Ink

  • Memento – Fade Resistant Dye ink – Tuxedo Black
  • Pigma – Mircon 05 Fine Tip Pen – Black
  • Ranger – Letter It – Fineliner Pen – Yellow
  • Sakura – Gelly Roll Pen – Medium – White
  • Sharpie – Permanent Marker – Ultra Fine Tip – Red
  • Stampin’ Up – Stamp Write Marker – Chocolate Chip
  • Nuvo – Aqua Shimmer Brush Marker – Glitter Gloss

Adhesives

Tools