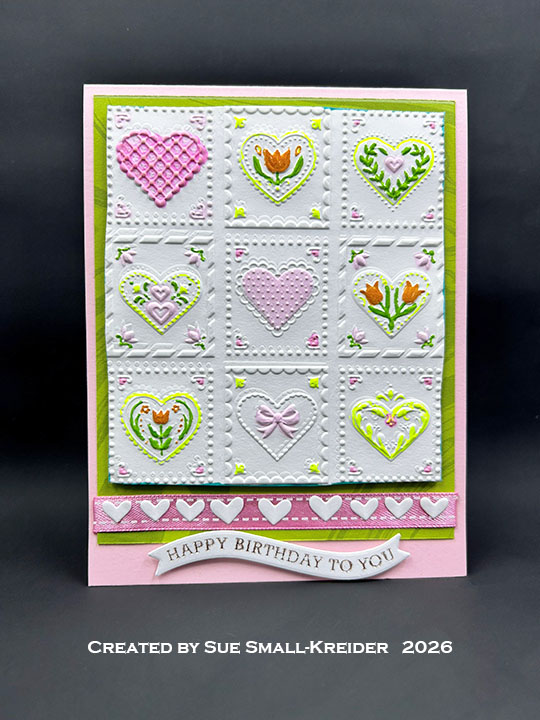
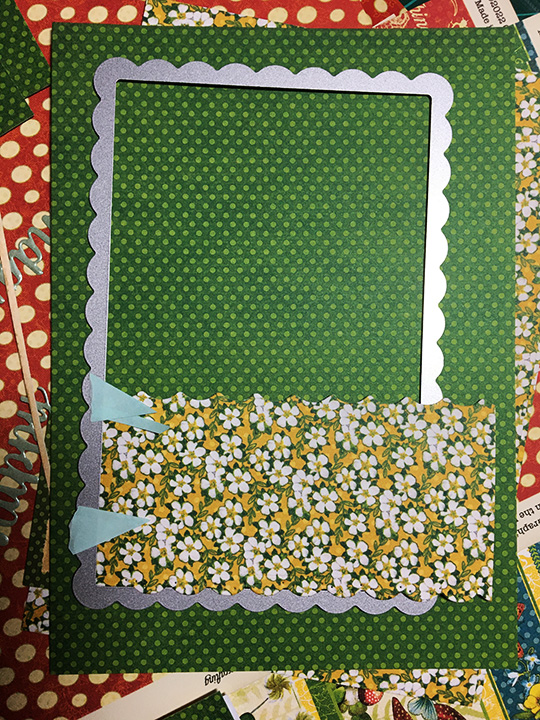
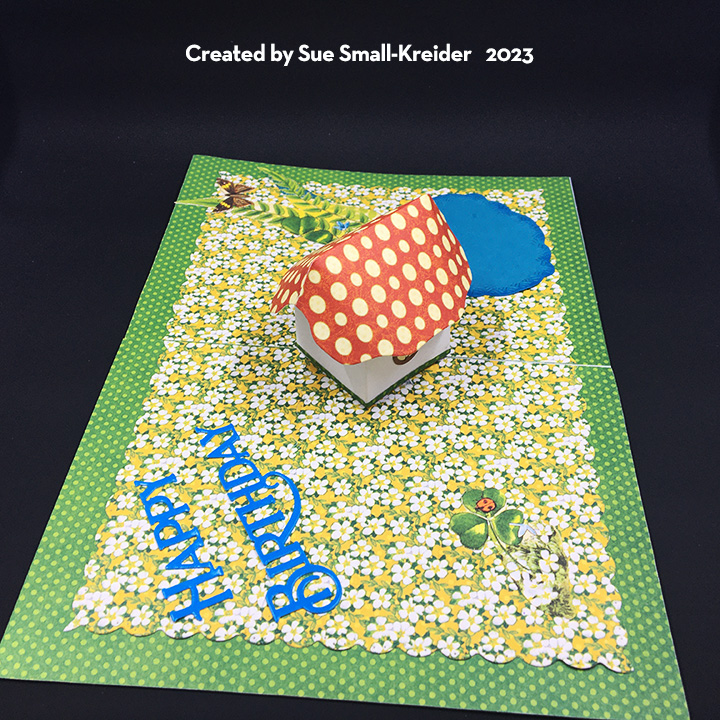
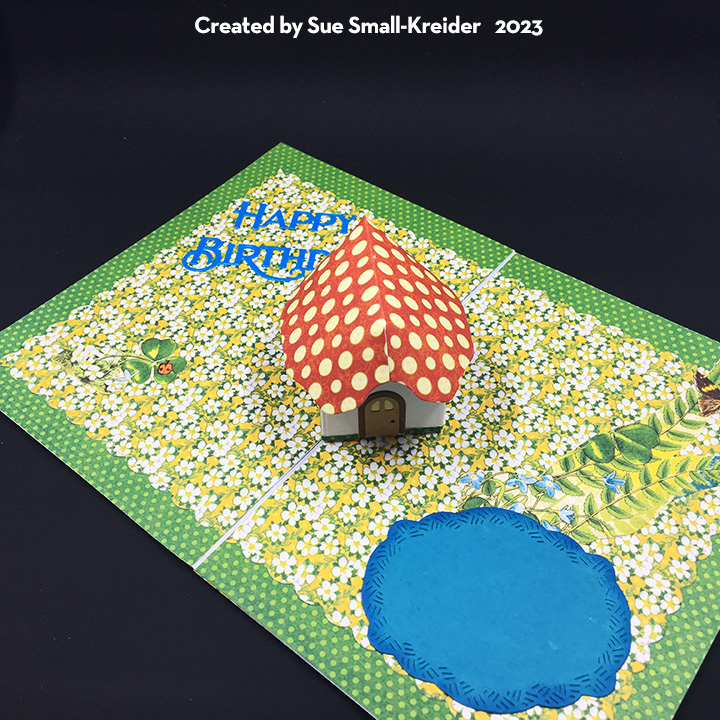
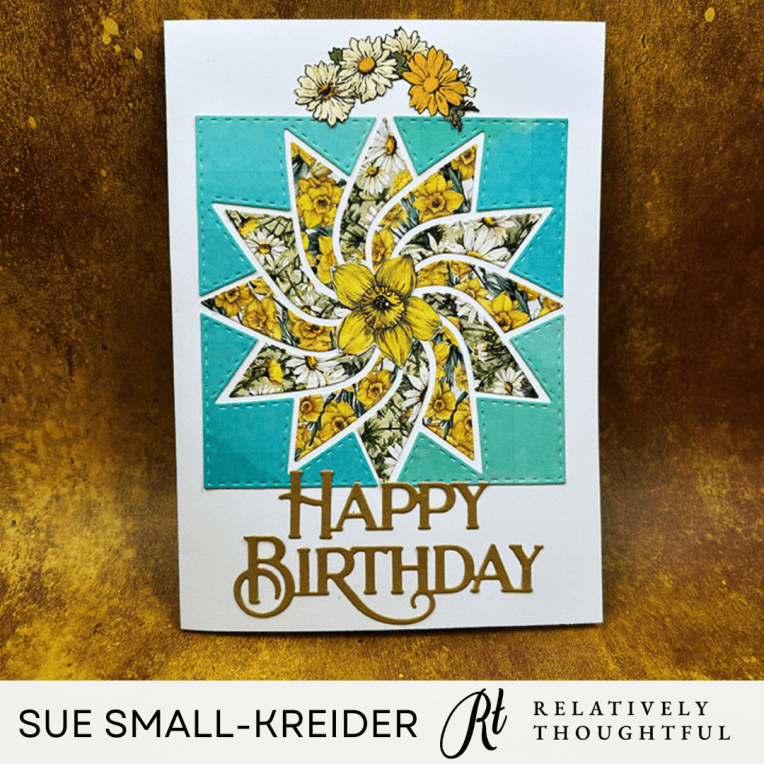
I’m here today with a 4.25×6-inch quilt square birthday card using Relatively Thoughtful digital papers – A collection called Walter Crane In The Garden.
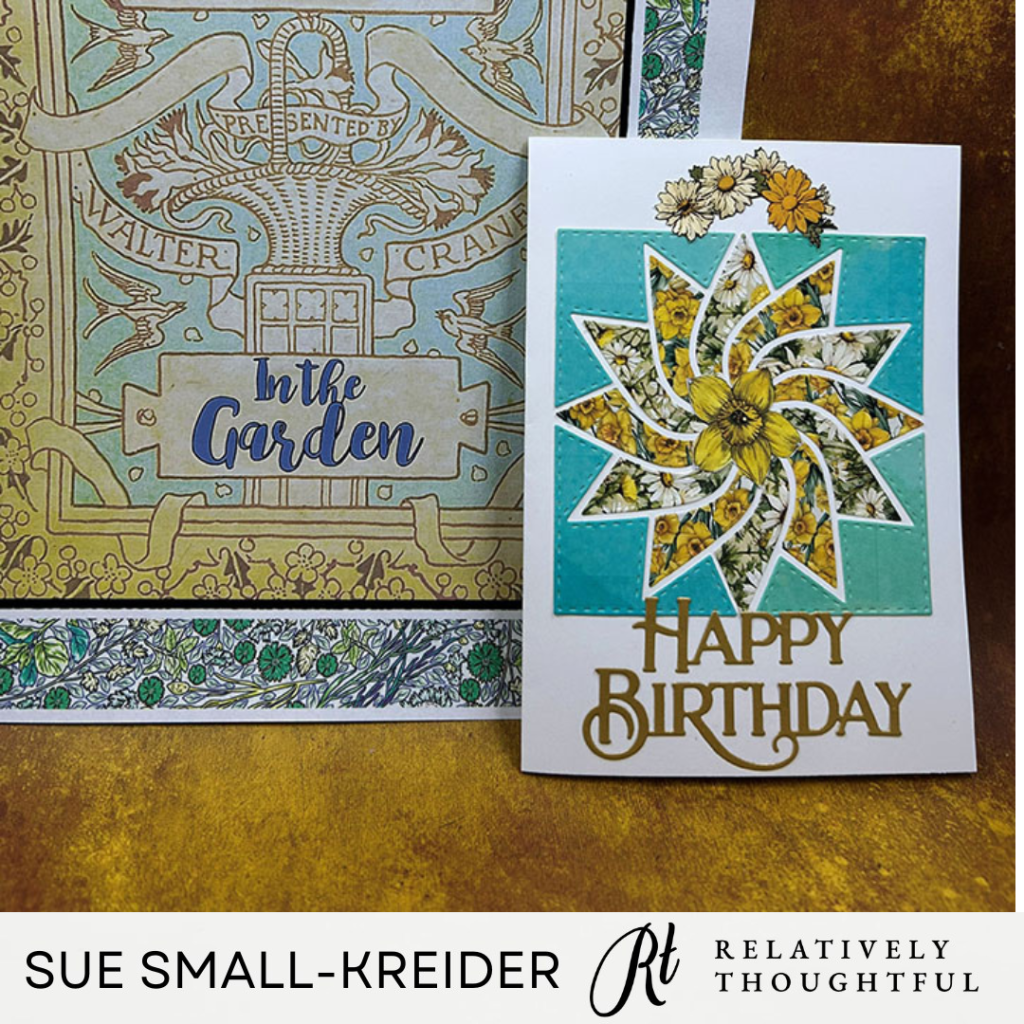
I printed three pages of 8.5×11-inch prints from the Walter Crane In The Garden collection (pages 3,7,18.) Next, I die cut one quilt square from each of the papers. I used the outline of the quilt square from one of the die-cuts to act as a template of where to place the various pieces, taping it down to the card front. Glued the pieces in and then removed the template. The top swag of daisies and the center daffodil were cut from other pages of elements in the collection.
___________________________________
Thank you for experiencing this blog post.
I hope this inspires you and makes you smile.
Please subscribe, like and leave comments 😊
Follow my YouTube channel, Instagram and Pinterest as well.
___________________________________
Disclaimer: Relatively Thoughtful and Karen Burniston products were provided for free or at a discount by the manufacturer for review and use. All other items were personally purchased. Compensated affiliate links used where or when possible, meaning I will receive a small percentage commission from these manufacturers at no cost to you. This will allow me to add more content to my YouTube channel and help out a lot. Thank you.
Materials Used:
Dies
- Divinity Designs – Craft Die – Flower Petal Quilt – CBD516
- Poppystamps.com – Craft Die – Happy Birthday Poe Script – 2437
Papers
- Relatively Thoughtful – Digital Collection – Walter Crane In The Garden.
- The Paper Studio – 8.5×11 Cardstock -65lb – White
- Gold Shimmer Cardstock
Adhesives
- Neutral PH Adhesive by LINECO
- Fine-Tip Glue Bottle
Tools
- Computer and Color Printer
- Scissors
- Scoreboard and Bone Folder