Disclaimer: Karen Burniston products are provided free of charge by the manufacturer for review and use. All other items were personally purchased. Compensated affiliate links used where or when possible, meaning I will receive a small percentage commission from these manufacturers at no cost to you. This will allow me to add more content to my YouTube channel and help out a lot. Thank you.
Cart Drawer:The cart is based around the Slider Box. Watch the assembly video before die-cutting pieces. I used kraft brown 65 lb. cardstock for the box and drawer. A piece of striped satin ribbon was used as a drawer pull.
A Bam Box (see assembly video) is what pops up the green hands and message of “BOO!” which are from the Halloween Elements die set. There is space to place a special treat in the drawer over the pop-up. When the treat is picked-up the pop-up hands will make a grab at the gift recipient.
Cart Base:The cart’s frame made by die-cutting two of the Fancy Label Accordion panels and removing the center pivot panel and side tab to create a square frame. Fold in half. Glue the u-shape together. I took the two smallest of the off-cuts from the die cut to make the cart handles. (Glue the pieces back-to-back for stability.) Glue handles on to slider box at open end before adhering the u-shape frame to slider box.
Roof Frame: The striped roof awning is cut from some digital striped paper using the large scalloped edged rectangle in the Rectangles and Labels – Crosshatch set. It is held up by a frame made by die-cutting two of the Fancy Label Accordion in white cardstock and cutting off the center pivot panel and side tab. Fold each of the frames at 2 3/4-inches. Glue the frames on to the sides of the cart base, lining up the bottom edge of the white frame to the inside edge of the blue cart frame.
Cut two strips of brown cardstock 1 1/2-inches long by 1/2-inch wide. Fold each strip in half. Pinch the top halves of the roof frames towards each other to form triangular frame. Glue the frame together with the two strips.
Pumpkins:The Halloween Border die set has a row of pumpkins that are the right size to layer onto the cart sides with glue and foam squares.
Jack-O-Lantern: The four-sided jack-o-lantern lights up with an EZ-Light. I created a cube from two strips of clear packaging each folded in half and creased with a bone folder and then folding each half to the middle and creasing so that each strip has four sections to it. Weave one strip over the other to form a cube. Snake the coil of wires of the EZ-Light into the center of the cube.
Position the lighted cube and control piece onto the cart and secure with double sided tape or foam tape. Cut a rectangle of 1 1/2 x 7/8 inches from kraft brown cardstock, center over the control piece and stamp “push here” on the end that has the button.
The large pumpkin die from the Autumn Elements was used to cut out four pumpkins for the jack-o-lantern. The face was cut out using the face insert die from the Halloween Elements set. The pumpkins were inked blended and the ridges outlined with a thin black pen. A green marker was used to color the stems. To lessen light leakage, an orange square was attached to the top of the clear plastic cube and the pumpkin faces attached with foam squares. As part of the final decorations. A small pumpkin from the Skeleton and Bat set was added to the top of the jack-o-lantern.
Roof and Sign: For the roof, the scalloped rectangle from the Rectangles and Labels – Crosshatch set was used with orange and white striped cardstock. (I created my own digital paper.) The sign was created by cutting two of the sentiment oval from the Halloween Charms from black cardstock and glued them onto orange cardstock and fussy cut around the oval frame.
A strip of white cardstock 5-inches long by 1/2-inch wide was folded in half and then the folded end was sandwiched between the two ovals and the ovals glued together. (You now have the equivalent of a large paper brad with two legs.) A slit was cut in the roof fold center for the legs of the sign to slide through and be glued to the underside of the roof.
Cut two of each of the bird dies in the Halloween Elements from black cardstock. Glue the bodies together leaving the legs free. Use the legs as the tabs to glue the birds to the roof ridge on either end of the roof.
Wheels: For the wheels I made a template using middle plain and crosshatched circles from the Circles – Crosshatch set. Cut the plain circle from scrap paper and the place the crosshatch circle die in the middle of the paper circle. Trace around the center of crosshatch die. Fold the paper in half, then half again and once more in half to come up with eight sections of the circle. Using a see-through ruler, mark and draw 5mm wide spokes interesting in the middle of the circle.
Die-cut from dark brown cardstock two plain circles. (Because my cardstock was thin, I cut four circles and glue two together before cutting the spokes.) On the back side of the circles use the paper template to trace the triangles that need to be cute out using a craft knife and straight edge.
Die cut two 1/2 inch circles from black cardstock. (I used the burner dies from the Oven Pop-up set because it was handy. You could use other dies to cover the wheel axle.) Adhere half rounded pearls over the black circles, glue each gem circle to the center of the wheels to make the axle caps.
Glue wheels onto cart’s front posts. Add large pumpkins to hide the cart leg behind the wheel. Additional pumpkins cut from the Autumn Elements (large pumpkin) and Halloween Elements (medium pumpkin) and two black cats from the Skeleton and Bat set, were added to the cart legs.
Finished Measurements: This is a card/gift box is designed to be hand-delivered and measures approximately 8-inches high, 6 1/2-inches wide and 3-inches deep.
Thank you for reading this blog post. I hope this inspires you and makes you smile. Please like and leave comments 😊
Before starting, I recommend watching the assembly videos of the pop-ups which are usually near the bottom of the linked pages for the various dies used.
Cardbase: I started with a rectangle of patterned cardstock 12×6 inches that was folded in half to form a 6-inch square, top fold card. The outside was left to the beautiful autumn trees (Photoplay Autumn Vibes-Crunchy Leaves) while the inside top panel with a teal blue leaf wallpaper and the bottom panel a brown textured cardstock.
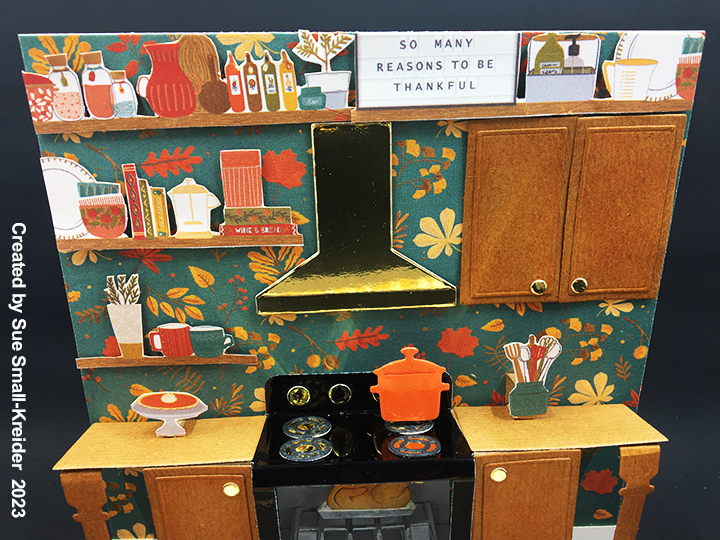
Oven/Stove: I was genuinely surprised at how easy the pop-up oven is assembled. It has just two pieces -the outer shell which I cut from black mirror cardstock and the inner platform which I cut from a gray cardstock. The platform attaches much like the Little Labels Pop-Up with the front tabs gluing to the floor of the card and the back tab gluing to the wall of the card. Before I attached the outer shell, I added a 1 3/8-inch square of clear plastic packaging to the back of the oven door with double-sided tape. Then I cut another oven door from gray cardstock trimming the bottom 1/8-inch shy of the fold line to cover the plastic inside when the door was opened. I also cut a 2-inch square of gray cardstock and glued it to the back wall just above the pop-up platform. This will be the inside wall of the oven. It is easier to add the items inside the oven before the outer shell is attached. I glued a silver rack to the platform and then added two pop-up cubes for the top oven rack which I trimmed one of the long edges from. Once the top rack was glued in place on the two cubes, I added another cube on top for the turkey pan which is in the Oven Extras set.
I find it easier to glue all the knobs, burners and door handle to the stove while it is still flat. (For this stove I cut all the knobs, burner base circles and door handle from gold foil cardstock). To attach the oven shell, glue the bottom to the center of the platform and then fold the oven flat and add adhesive to the back of the stove knob panel. Close the card and the top panel will be positioned on the card wall so that it forms the stove. On the tabs that come off the sides of the stove top add glue. Now position the squares of the cabinet pieces’ onto the tabs. Glue cabinet bottoms to the top edge of the platform, so that there is a toe kick below the cabinets.
Cabinets: Once the stove is attached, you can add the side cabinets. I cut the cabinets from some embossed wood grain cardstock and then inked them with Rusty Hinge ink to bring out the grain. The upper cabinets and lower cabinet door fronts are cut using the larger rectangle die in the Oven Extras set and then covered with the small rectangle die pieces.
To make the counter tops longer to fill the card, I followed Sandy Diller’s idea to use the larger rectangle door die for the countertops and two trimmed lampposts from the Street Lantern Pop-Up set for the turned legs that support the extended countertops.
Decorations: Between the two oven sets are lots of fun pieces that add dimension and realism to the pop-up scene. The Oven Pop-Up set includes the stove burners and knobs, oven rack and door handle. The Oven Extras set includes the turkey and roasting pan in the oven and pot on the stove as well as three pop-up cube strips that I used to pop-up the oven rack, pan inside the oven and pot on the stove. The turkey is cut in two pieces – leg bone base in pan and the bird body. The body I cut from kraft cardstock and inked with Fossilized Amber and Vintage Photo inks. The bone/pan base was cut from white cardstock and the pan colored with a silver marker, the body piece glued on so it sits in the pan and the bone was inked with rusty hinge ink.
For the orange pot, I used clear packing taper over orange cardstock to die-cut the pot. The plaid rug is cut from the second largest crosshatch die from the Rectangle Crosshatch set. I found a patterned paper (Photoplay Thankful Collection) with shelves of kitchen items and a message board that I fussy cut and adhered to the wall with foam squares. The cooking hood was cut from gold foil cardstock using the hood die from the Oven Extras set. The large pumpkin on the floor is from the Autumn Elements set.
Sentiments: The small strip sentiments of “give thanks with a grateful heart” (card front) and “thankful hearts” on envelope flap are from the same paper collection as the autumn trees paper used on the card front. “Happy Thanksgiving” was cut into the plaid rug with the waste pieces saved and glued on to the card floor once the rung was glued in place. These words are from Word Set 7.
Envelope: The sticker leaves and sentiment strip on the back of the envelope set the tone for the card inside and are from the Photoplay Autumn Vibes paper collection.
Thank you for reading this blog post. I hope this inspires you and makes you smile. Please like and leave comments 😊
Welcome to our Karen Burniston Products – KB Riley LLC September 2023 Release Blog Hop. (See details at the end of this post for blog list.) The Design Team have come together with Karen today for a fun blog hop to celebrate the release of 9 new dies. Sneak peeks of the new release started last week, and the dies are available to order NOW!
“Double, double, toil and trouble. Fire burn and cauldron bubble…. Eye of newt, and toe of frog,” The infamous words of Shakespeare’s trio of witches casting a spell over Macbeth are the inspiration for this Halloween card.
(Before starting to make a card, I recommend watching the assembly views for all of Karen Burniston’s interactive die sets. The videos are located near the bottom of any linked page in this blog post.)
Cardbase: I started with a purchased A7 (5 x 7 inches) cardbase and matching envelope. The outer panels were covered with a spider’s web paper and the inner panels with a coordinating pumpkin patch paper. The front panel also uses a border panel from the paper collection that says, “There’s magic in the air.” The back panel has a pumpkin fussy cut from the papers.
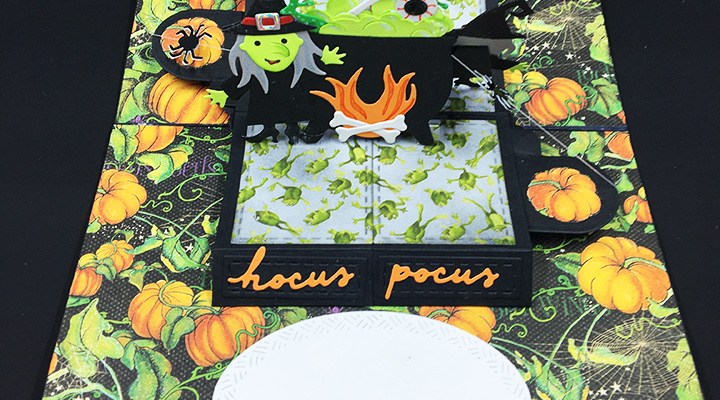
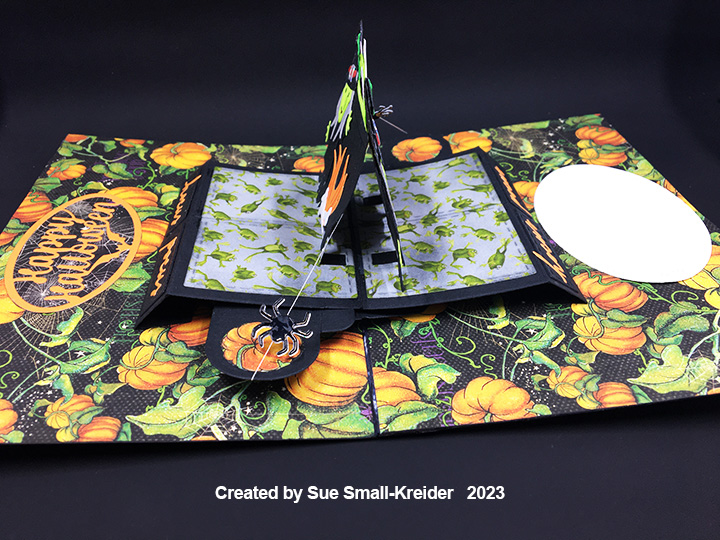
Cauldron Pop-Up: The Stocking Pop-Up is a versatile mechanism that can be used for more than Christmas cards. I doubled the mechanism which means placing the lower pop-up mechanisms moving in opposite directions and cutting two upper covering pieces joined to form a platform.
Adding pop-stands from either the Christmas Tree Pop-up or Barn Pop-Stand sets, to the decorative stitched rectangles, allows for a cauldron to set atop the platform with witches attached. Add fussy cut pumpkins to the pop-out tombstone pieces. (I ink blended the white frog paper with a gray ink to make it sooty from the fire.)
In the Witches and Cauldron die set are a strip of bubbles that a white pen can add highlights to as well as an eyeball, frog legs and a bone. The fire is the witch’s hair turned upside and stenciled flames with an orange maker.
Spiders: For the spiders crawling out of the cauldron, I cut four spiders from the Witch and Cauldron set from black mirror cardstock. A 12-inch piece of white polyester thread was threaded with two circles (eyeball center circles from Witch and Cauldron) and knotted to the cauldron. The circles were glued to the underside of the pop-out mechanisms from under the platform. Adjust the thread tension to be loosely taunt and test for catchpoints when opening and closing card before gluing spiders to the threads. (I found the best spots for the spiders were near the ends of the threads.)
Witches: I used the stencil features of the witch’s face die to color in the eyes and mouth. The nose can be folded out to ink the edges with green ink. I cut extra dress and hat pieces so that the backs of the witches would look complete. The blond witch has silver pieces from the hat buckle on her shoes. The cauldron witches’ hats have red hat bands cut from red cardstock covered with clear packing tape.
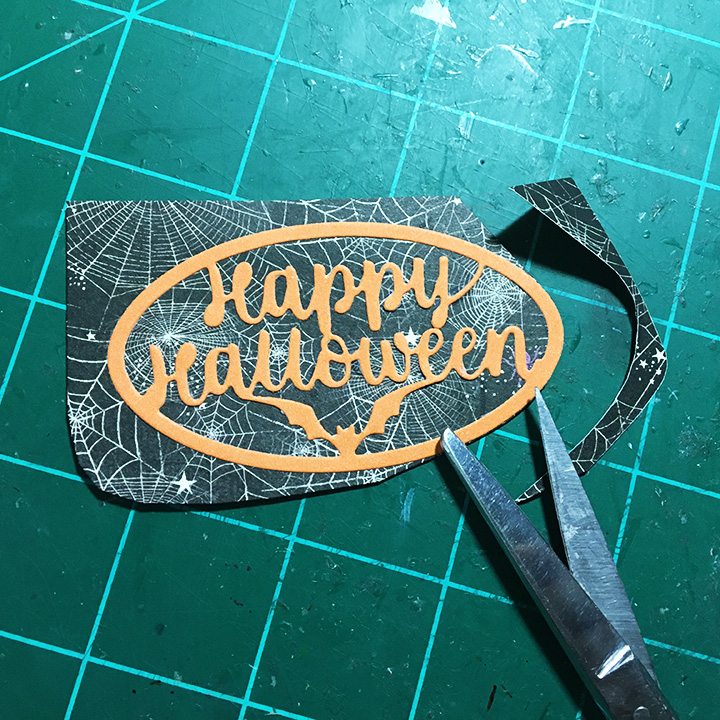
Sentiments: The card front sentiments are stamped sentiments fussy cut into tombstones and a bat shaped banner. Inside the “hocus pocus” on the platform ends are from the new Small Script- Halloween die set and the “Happy Halloween” is from the Halloween Charms set. A white oval for a personal message is cut using the Crosshatch Ovals.
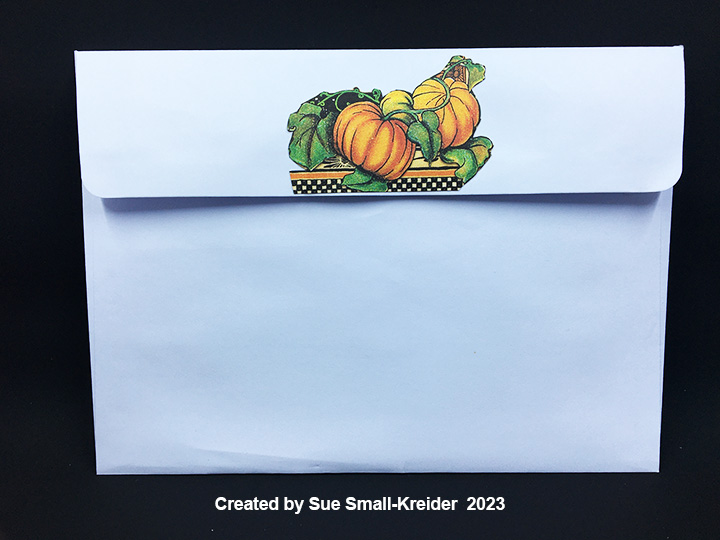
Envelope: The A7 white envelope has fussy cut pumpkins from the paper collection glued to its back flap.
Thank you for reading this blog post. I hope this inspires you and makes you smile. Please like and leave comments 😊
To celebrate the release Karen Burniston and each of the Karen Burniston – KB Riley LLC Design Team members will be giving away a $25 Gift Certificate to some lucky person who comments on our blog posts, so make sure you join the hop and comment on everyone’s blog post. Winners will be randomly chosen from ALL of the blog hop comments received on our blog posts by Monday, 25th September 2023. Lots of chances to win some goodies, so just leave a comment on this post or any other blog hop posts to enter!
Don’t forget to leave some way for us to contact you, in case you are a lucky winner!
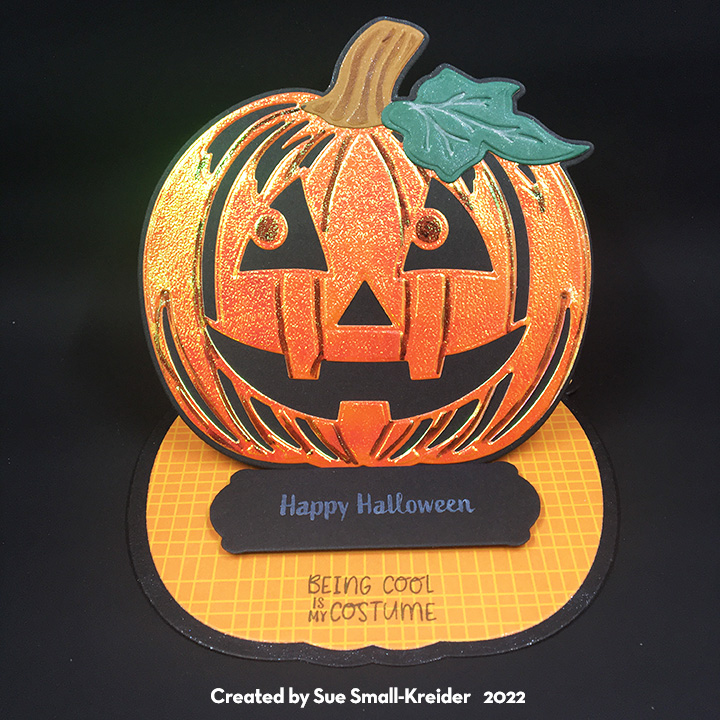
Halloween means so many different things to different people, but my favorite person to make Halloween cards for is a cat lover, likes to see children in their Halloween costumes, but hates to dress-up for the day. So, this vintage pumpkin card is perfect for them.
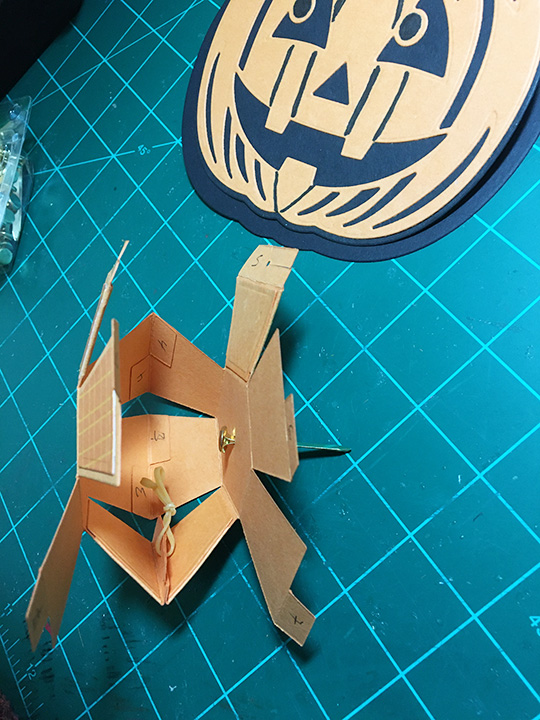
Pop-up ball cards always remind me of the jack-in-the-box toy when you open them and something pops up to make you smile. This pop-up pumpkin card was designed for a baby’s first Halloween.
The card front pumpkin and easel base are a die set by Anna Griffin and the pop-up pumpkin inside is made using dies by Karen Burniston.
I often add a CRX slip that helps the card recipient know how to open the interactive card. (You can download the sheet with four slips on it. for free.)
Thank you for reading this blog post. Please like and leave comments
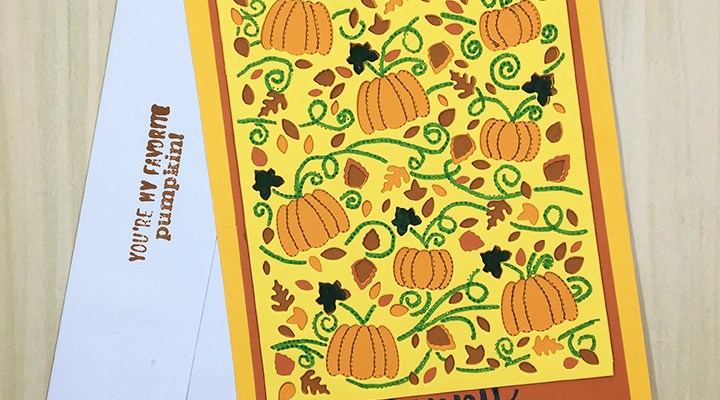
Here is a quick layered card for Halloween or Fall greetings using one of the Birch Press layered designs. It went together in less than an hour.
First decide on your colors. I knew orange for the pumpkins and then decided on autumn leaf colors for the four layers needed. The dies cut an A2 size panel (4 ¼ x 5 ½ inches), I decided to go for a 5 x 7 inches card, so I also cut a 5 x 7 inches rectangle of an orange card stock and a mat layer of Terra Cotta card stock at 4 ½ x 6 ½ inches.
I cut layer A from Lemon, layer B from Terra Cotta and layer C from Orange. All the layers will give you lovely small leaves as off-cuts, but layer B also gives you large, veined leaves that can be used to decorate your card or save for other projects. You will want to cut a fourth layer for the backing. I cut my 4 ¼ x 5 ½ inches backing from Pumpkin Bread cardstock.
Using a green fine-tip marker, I colored in the pumpkin vine leaves and vine once the layers were all glued up. (Another alternative would be to cut same green squares of paper to cover behind the lemon layer the pumpkin leaves.)
The sentiment was an extra one left from another project using Karen Burniston’s Halloween Charms.
Because the card has so many layers, I have opted to leave it as a single layer -postcard style card that will fit in an A7 envelope as it is too thick to send as a postcard.
Hope you enjoyed this quick card. If so, please comment and like and follow this blog. 😊
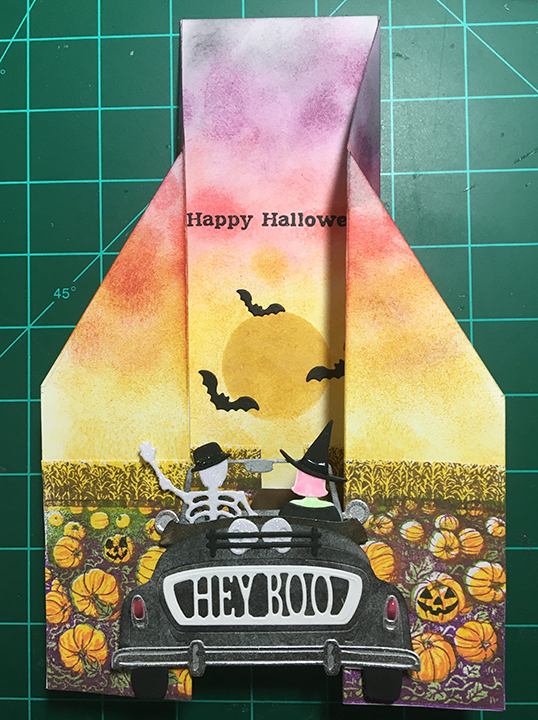
Halloween in the USA often means corn mazes and pumpkin patches as well as dressing up on Halloween evening and going to a party. I have tried to combine these things into a single slimline sliding bridge-fold card.
This card was a second prototype for trying new methods and materials for me. This was my second attempt at ink blending a setting sun sky using Distress Inks and blending sponges, so not as spotty as my first attempt, but not as smoothly blended as I would like. I made a stencil for the sun using scrap card.
The base of the card is 8 1/2 inches (21.6 cm) tall by 9 inches (22.7 cm) wide and scored at 4.5 cm, 8 cm, 15 cm and 18.5 cm. I cut the top corners diagonally from 9 cm down to the 8 cm scoring and the 15 cm scoring.
The small ghosts and bats lurking on the inside panel are die-cut pieces – the bats from the Halloween Sunday Drive and the “Squeaker Ghosts” by Poppy Stamps.
I used the Hero Arts September 2020 My Monthly Hero Kit to stamp the layered image of a field of pumpkins with a corn filed in the background. The kit includes five mini cubes of ink needed to stamp each layer as well as the layered stamps and sentiment stamps. Dies to cut out a few of the images and several sheets of glitter paper round out the kits. (You need to order early the monthly kits as they sell out fast. Hero Arts is one of the few companies that lets you order a single kit without taking out a subscription.)
I stamped four of the images on white copy paper and layered the pumpkin field to create a taller background image. I knew I wanted a road going down the middle of the card, and I cut a road from brown cardstock.
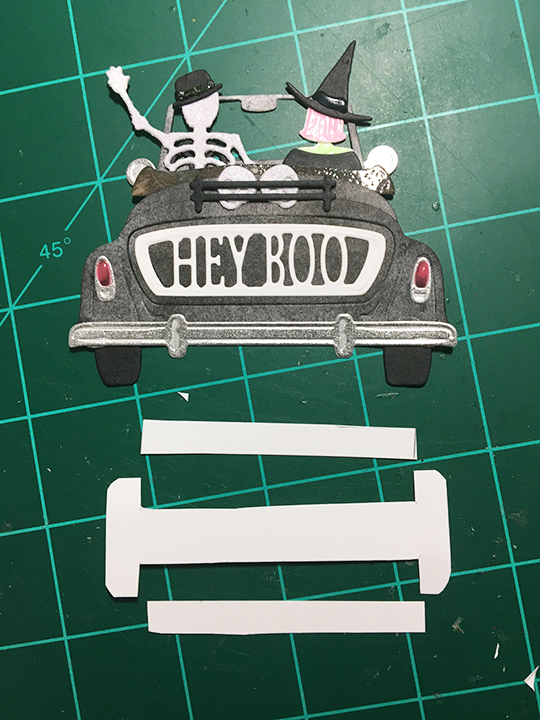
The sliding bridge is a mechanism under the car that involves a capital I piece and two folded rings.
The rings are glued to the folded edges of the card base around the I piece. The end stops of the I piece were adhered behind the car’s wheel wells and tires with foam pads.
The car driven by a white glitter paper skeleton with a glow-in-the-dark pink haired witch with glow-the-the-dark green skin, is die cut suing Spellbinder’s Sunday Drive car die set with the Halloween Sunday Drive add-on set. The car body was cut from white cardstock and then covered with Black Soot Distress ink. The taillights are Nuvo Glow Drops Neon – Shocking Pink and silver matt cardstock. Two glitter cardstock die cut skulls are in the car’s luggage rack. The brown folded down roof is colored cardstock heat embossed with clear embossing powder to get a faux leather look. The shiny hat bands on the two hats are made with Nuvo Glow Drops Neon – Blue Crush.
The sentiment and stamps used on the envelope flap are all from the Hero Arts kit stamped in Memento tuxedo Black and the wheel in the Hero Arts brown ink cube.
For another Halloween slimline card using the same supplies see Being Spooky.
Halloween in the USA often means corn mazes and pumpkin patches as well as dressing up on Halloween evening and going to a party. I have tried to combine these things into a single slimline z-fold card.
This card was my prototype for trying new methods and materials for me. I had never ink blended a setting sun sky using Distress Inks and blending sponges, so my sky is a bit “spotty.” I experimented with using Nuvo drops to cover an entire surface (car, witch’s hair and neck.) I like the effect that Nuvo drop spread thin has on small die cut pieces but getting an even coating on large pieces was difficult. I think using a glow in the dark embossing powder would work better for the car.
I used the Hero Arts September 2020 My Monthly Hero Kit to stamp the layered image of a field of pumpkins with a corn filed in the background. The kit includes five mini cubes of ink needed to stamp each layer as well as the layered stamps and sentiment stamps. Dies to cut out a few of the images and several sheets of glitter paper round out the kits. (You need to order early the monthly kits as they sell out fast. Hero Arts is one of the few companies that lets you order a single kit without taking out a subscription.)
I stamped four of the images and layered the pumpkin field to create a taller background image. I knew I wanted a road going down the middle of the card, but in hindsight, I have the perspective all off for the angle of the road. The road is made of three pieces of black cardstock. The design of the car is for the card to be standing open in a z-fold position, so you can read the “Happy Halloween.”
The base of the card is 8 5/8 inches tall by 7 5/8 inches wide and folded at 1 7/8 inches and 3 ¾ inches.
The car driven by a white glitter paper skeleton with a glow-in-the-dark pink haired witch with glow-the-the-dark green skin, is die cut suing Spellbinder’s Sunday Drive car die set with the Halloween Sunday Drive add-on set. The car body was cut from white cardstock and then covered with the Nuvo Glow Drops Neon – Sour Apple. The taillights are Nuvo Glow Drops Neon – Shocking Pink and silver matt cardstock. Two glitter cardstock die cut skulls are in the car’s luggage rack. The brown folded down roof is colored cardstock heat embossed with clear embossing powder to get a faux leather look. The shiny hat bands on the two hats are made with Nuvo Glow Drops Neon – Blue Crush.
The small ghosts and bats lurking on the inside panel are die-cut pieces – the bats from the Halloween Sunday Drive and the “Squeaker Ghosts” by Poppy Stamps.
The sentiment and stamps used on the envelope flap are all from the Hearo Arts kit stamped in Memento tuxedo Black and the wheel in the Hero Arts brown ink cube.
For another interactive Halloween slimline card using the same supplies see Driving into a Spooky Sunset(Set to be released on September 25).