Don’t Be Alarmed Birthday Card

This card was made for Craft Roulette #325 whose parameters were: flip fold card, tartan colors, time or clock element and add a bow random. I used This Calls for Confetti and Simon Says Stamp! dies & stamps and digital papers from Relatively Thoughtful for this A2 (4.25×5.5-inch) card and envelope.

Cardbase: Printed out three 8.5×11-inch sheets of digital papers from the Independent Women Authors collection by Relatively Thoughtful (two solid colors and one patterned paper.) From purple, I cut a 4.25×9.8125-inch an scored and folded at 5.5-inches. From green, I cut a 3.9375×5-inch rectangle. From the patterned paper I cut a 3.625×4.75-inch rectangle. I also cut a 1.5×4.25-inch purple rectangle.

To assemble, I centered and glued the patterned paper onto the green piece. Next, the small purple piece was glued at the bottom of the long side of the long purple cardbase over the white inside so that when the card is closed it looks like solid purple base. Center the green/pattern paper rectangle onto the short flap of the purple cardbase and glue. (Stamp the sentiments before adding the dimensional clock and bow to card back.)
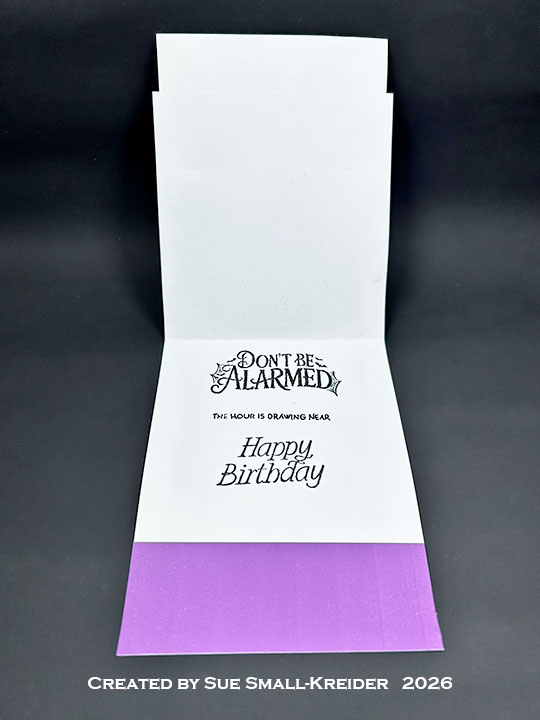
Sentiments: The inside sentiments of “Don’t be alarmed” and “The hour is drawing near,” come from This Calls For Confetti’s Don’t Be Alarmed stamp set. “Happy Birthday” and “Put a bow on it!” are in the Simon Says Stamp! Put A Bow On It stamp set.
Clock: Using the This Calls For Confetti Moments in Time dies, cut from silver all the clock pieces with the exception of the circle frame and clock face. Using both the circle frame and clock face dies together to cute the clock frame from silver holographic cardstock. Turn the holographic clock face over to the white back side and glue onto the clock back piece. Adhere the bells and decorative pieces to clock back piece. (I wish I had popped-up the bells with foam tape.) Using double-side tape adhere a piece of clear plastic acetate to the circle frame back and trim away the excess plastic. Double-up the foam tape to make it 2mm thick and place the tape onto the acetate so that it is hidden behind the circle frame. (I originally was going to make this a shaker card, but I decided to glue the Trinity Stamps – Sparkle Spots onto the clock face because it looked better.) Glue the completed clock onto the card front.

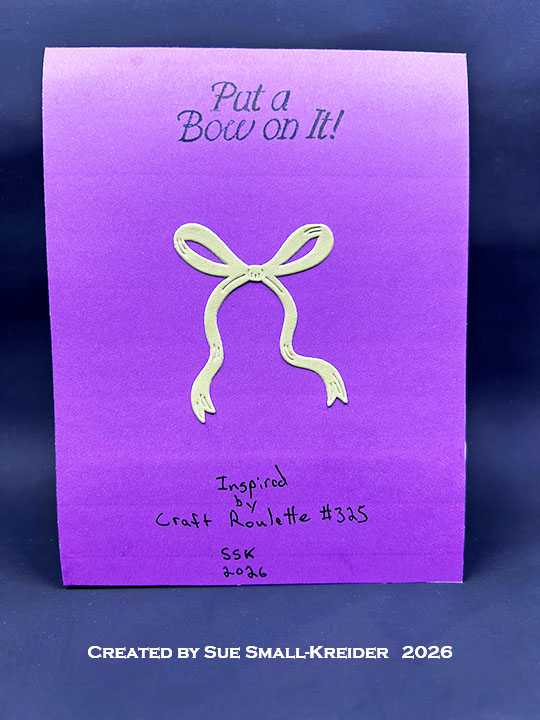
Envelope: The card fits into an A2 (4.25×5.5-inches) envelope with a bow and “Put a bow on it” stamped on the back flap in black ink. Stamps are from Simon Says Stamp!.

___________________________________

Thank you for experiencing this blog post.

I hope this inspires you and makes you smile.

Please subscribe, like and leave comments 😊

Follow my YouTube channel, Instagram and Pinterest as well.

___________________________________

Materials Used:

Dies

Stamps

Papers

Ink

  • Memento – Fade-Resistant Dye Ink – Tuxedo Black
  • Pigma – Mircon 005 Fine Tip Pen – Black

Adhesives

Tools

Miscellaneous

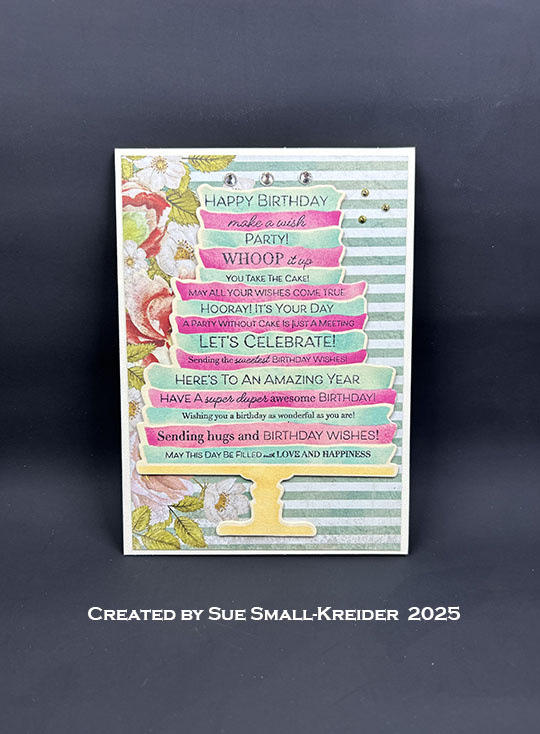
Stenciled Cake Pop-Up Birthday Card

Here are two birthday cards I made using a stamp and coordinating die and stencils set from This Calls For Confetti and Karen Burniston’s Katherine Label Pop-Up and Happy Birthday word die sets.

Watch the process video to see how I made this card.

I made two versions of the card – one using patterned paper as a background and the other with a stenciled card front.  Both started with a purchased A6 (4.5×6.25-inch) cardbase with matching envelope. Both have the pop-up sentiment inside with the words, shadow and mechanism being cut from an additional cardbase and colored with the same Distress Ink colors used to stencil the cake.

Envelope: Β The card fits into an A6 (4.5x 6.25-inches) size envelope stamped with a sentiment from Craft Roulette.

___________________________________

Thank you for experiencing this blog post.

I hope this inspires you and makes you smile.

Please like and leave comments 😊

___________________________________

Disclaimer: Karen Burniston products are provided free of charge by the manufacturer for review and use. All other items were personally purchased. Compensated affiliate links used where or when possible, meaning I will receive a small percentage commission from these manufacturers at no cost to you. This will allow me to add more content to my YouTube channel and help out a lot. Thank you.

Materials Used:

Dies

Stencils

  • Daisy Mae Designs – Dotty Stencil
  • This Calls For Confetti – Three Tier Cake Layering Stencil & Die

Stamps

  • Craft Roulette – Clear Stamps – Funn Sentiments #01
  • This Calls For Confetti – Clear Stamps – Alice’s Story Birthday Sentiments

Papers

  • Laserowe Love – 12×12 inch Double-Sided Paper – Vintage Trip by Renata Maslyk
  • Cream 65lb Cardstock
  • Park lane Paperie – A6 Textured Cardbases & Envelopes – Ivory

Ink

  • Memento – Fade Resistant Dye ink – Tuxedo Black
  • Pigma – Mircon 005 Fine Tip Pen – Black
  • Ranger – Tim Holtz – Distress ink – Dried Marigold, Peacock Feathers, Picked Raspberry

Adhesives

Tools

  • Die Cutting Machine
  • Paper Trimmer
  • Stamping Platform
  • LDRS – Stampendable Stamping Tool
  • Gelli Arts – Gel Plate
  • Scissors
  • Sponge Dauber
  • Paper Masking Tape
  • We R Memories – QuickStick

Miscellaneous

  • 3 Clear Rhinestones Flatback Gems
  • 3 Tiny Gold Flatback Gems

Egg Shaker Card for Easter

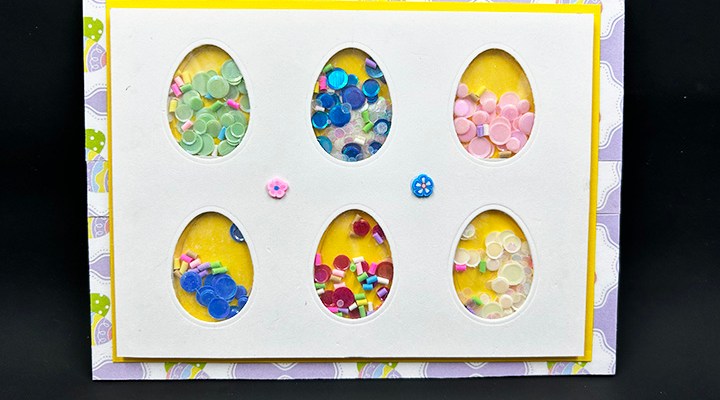
I saw a side-fold of like this card on social media and decided to make my own version using a top fold A6 (4 1/2 x 6 1/4-inches) purchased card base and the egg die from Karen Burniston’s Spring Animals die set.

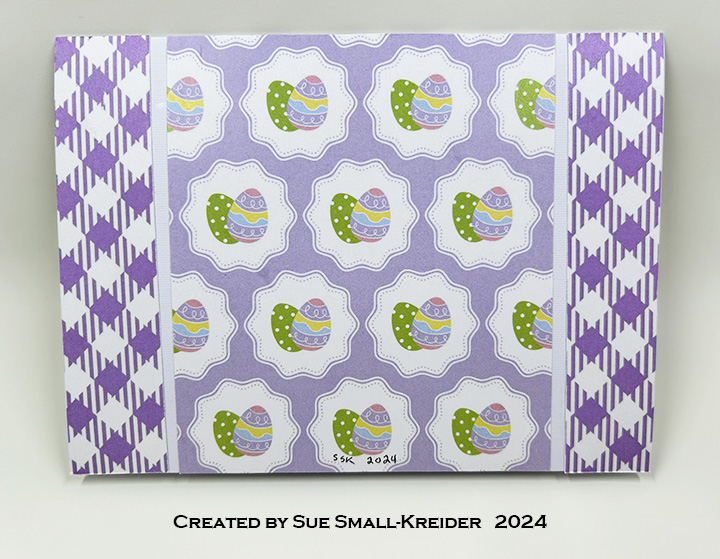
Cardbase: Using a purchased A6 card base, I used double sided patterned paper from Kat Scrappiness to make a mat frame on the front panel, piecing it together as the patterned paper was 1/2-inch smaller than the card height. Added a yellow 5 3/4 x 4 1/4-inches panel over mat frame. On the back panel, I used the leftover pieces to make an interesting symmetrical design utilizing both patterned sides of the paper.

Egg Panel: A 4×5 1/2-inches rectangle cut from white cardstock, I lightly marked in pencil lines at 1 1/8-inches, 2 3/4-inches and 4 3/8-inches. Along the tops and bottoms of these lines I marked 5/16-inches from the edge. These β€œT” marks where to center the top or bottom of the egg die. I used the center crack in the egg die to center on the vertical lines.  After die-cutting out the six eggs, I erased the pencil marks. (I found it easier to sketch out the egg placement on the back side of the card, tracing around the die to see if it looked right before die-cutting from the front of the panel.) (I added two clay flower shaker elements to the front of the card.)

Shaker Assembly: Position the white panel over the yellow panel and mark the corners of the white panel on the yellow as well as tracing the egg cut-outs onto the yellow. Using double-sided tape, adhere a 4×5 1/2-inches rectangle of clear acetate/film to the back of the white panel. Add strips of narrow foam tape to create boxes around the traced eggs on yellow panel. Using an anti static tool to apply powder to the inside of each box (including the sides of the sides of the foam tape) and back side of acetate/film on white panel. Add confetti and clay sprinkles to each box, avoid putting too much in each box and level out any high points to below the foam tape level. Holding the card base, carefully peel off the backing paper on the foam tape. Remove any confetti from tape. Using the corner marks on the yellow panel line-up the white panel and adhere to foam tape, sandwiching the confetti inside the boxes. (I like to use the confetti sequins from This Calls For Confetti who have a variety of colors, sizes and finishes and have wonderfully quick customer service/delivery time. They also have the best anti-static tool for making shaker cards.)

Sentiment: I cut out the words only using Karen Burniston’s Happy Easter word die from purple cardstock for the inside of the card.

Envelope: I cut out a sticker from the decorative paper to embellish the back of the envelope flap.

__________________________________________________________

Thank you for reading this blog post. I hope this inspires you and makes you smile.

Please like and leave comments 😊

__________________________________________________________

Materials Used:

Dies

Papers

  • Kat Scrappiness – Slimline Sized Patterned Paper (10.75×4 inches)– Easter on Parade
  • White and Yellow Cardstock
  • Dura-Lar .0005 Clear Film Acetate
  • Park Lane Paperie – A6 Cardbase and Envelope – White

Shaker Elements

  • This Calls For Confetti – Bokeh Bliss Teeny Tiny Mix
  • This Calls For Confetti – Crystal Metallic Aqua Violet
  • This Calls For Confetti – Opaque Iridescent Blue
  • This Calls For Confetti – Opaque Iridescent Blush
  • This Calls For Confetti – Opaque Iridescent Celadon
  • This Calls For Confetti – Opaque Iridescent Scarlet
  • This Calls For Confetti – Opaque Iridescent Vanilla
  • This Calls For Confetti – Opaque Iridescent Blue
  • This Calls For Confetti – Opaque Iridescent Blue
  • Hobby Lobby – Inclusions – Flowers
  • Spellbinders – Sweet Sprinkles

Adhesives

Tools

  • Die Cutting Machine
  • We R Memories – QuickStick
  • Tweezers
  • This Calls For Confetti – It’s No Secret Anti Static Powder
  • Stamping Blocks used as paperweights
  • Scissors
  • T-Ruler
  • Pencil
  • Tombow – Mono – Sand Eraser -512A

Spring Is Here Interactive Card

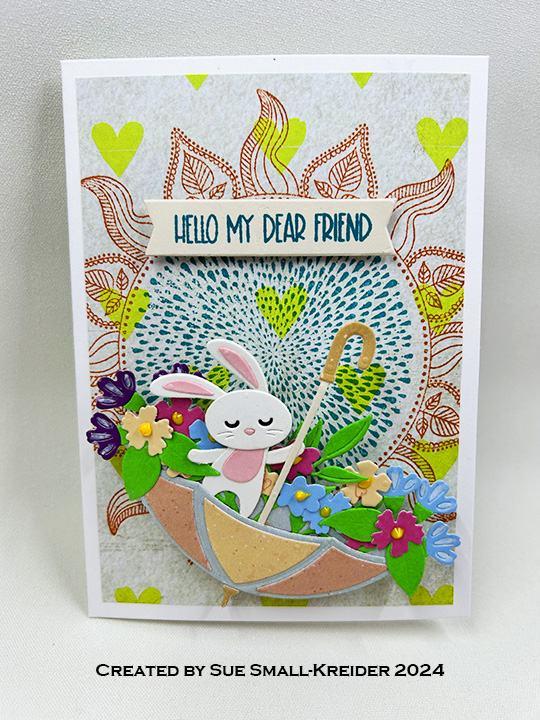
This card was made for Craft Roulette #204 whose parameters included: thinking of you project, fairy tale colors, hear(s) or ear(s) element and stamped background.

To learn how I made the card, watch this process video.

_________________________________________________________

Thank you for experiencing this blog post. I hope this inspires you and makes you smile.

Please like and leave comments 😊

__________________________________________________________

Materials Used:

Dies

  • Karen Burniston in cahoots with Riley and Company – Word Set 5 – Royalty – 1034
  • Spellbinders – Cutting Dies by Vicky Papaioannou – Umbrella Bloom – SS-554
  • Spellbinders –Small Die of the Month – March 2022 – Floating Bunny – DOM-MAR22

Stamps

  • Nellie’s Choice – Motive Stamps – Burst of Drops -TXCS016
  • Penny Black – Clear Stamps – My Universe – 30-796
  • Scrapbook.com – Clear Stamps – Sunshiney Day
  • Simon Says Stamp! – Unmounted Rubber Stamp – Sun and Moon Mandala – sss102337

Papers

  • This Calls For Confetti – 6×6 Single-Sided Papers – Speckled
  • American Crafts – 12×12 inch Single-Sided Papers – Everyday Papers
  • Colored and White Cardstock Scraps
  • Tonic Studios – Craft Perfect – A6 Cardbase and Envelope – Bright White

Ink

  • Catherine Pooler – Premium Dye Ink – Party Collection – All That Jazz
  • Catherine Pooler – Premium Dye Ink – Spa Collection – Mandarin Spice
  • Simon Says Stamp – Pawsitively Saturated Ink – SunBeam
  • Sharpie – Permanent Marker – Fine Tip – Black
  • Pigma – Mircon 01 Fine Tip Pen – Black
  • Faber-Castell – Pitt Artist Pen with Bullet Nib – White 101

Adhesives

Tools

  • Die Cutting Machine
  • Paper Trimmer
  • Stamping Platform
  • LDRS – Stampendable Stamping Tool
  • We R Memories – QuickStick
  • Scissors
  • Metal Ruler/Straight-Edge

Miscellaneous

  • Riley and Company – Mini Action Wobbles Spring
  • Nuvo – Vintage Drops – Yellow Brick Road