This card was made for Craft Roulette #168 whose parameters included a kid’s card, citrus colors, a spring scene and something metallic or foil. Maymay was the guest crafter and talked about her young nephew who writes books and has a series about Evil Chicken. Her card included Evil Chicken and she showed how to make him from scraps of cardstock.
This card was made using all Karen Burniston dies.

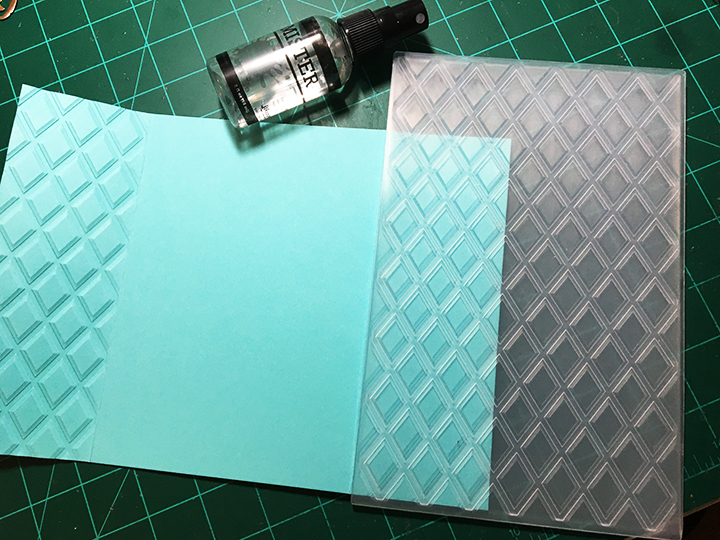
Cardbase: For this gatefold A7 (5×7-inches) card I started with a piece of cardstock 10×5-inches and scored and folded 2.5-inches from each of the ends longwise. Next, spritz the ends of the card before using an embossing folder to make the card front more interesting.
Chicken: The chicken is made up of a large white triangle, a tiny yellow triangle, a small dash of black, half a tiny red flower, and a thin strip of black cut into two legs and four toes. I added a wing from a scrap of white. Grass was cut using a die from the Nature Edges set.
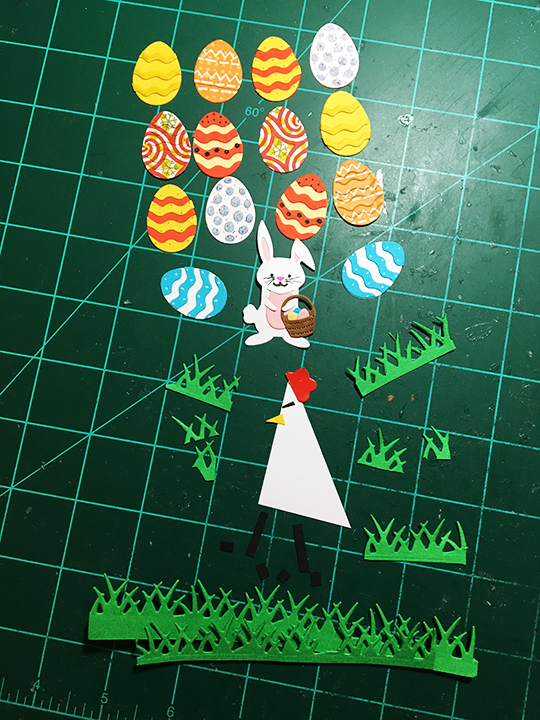
Rabbit: The Easter Bunny was made with white and pink scraps using the Spring Animals die set. A tiny basket and eggs are also part of the die set. I colored one of the eggs with a blue metallic marker. I made two baskets one is hung on the bunny’s arm and the other is on the envelope flap.
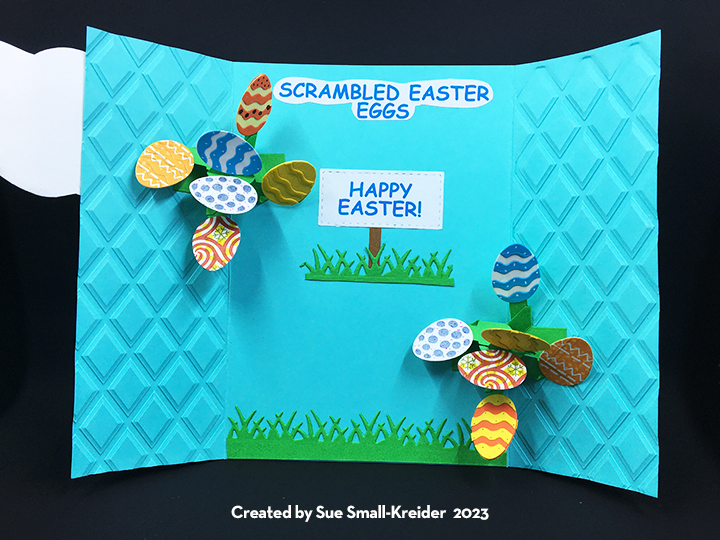
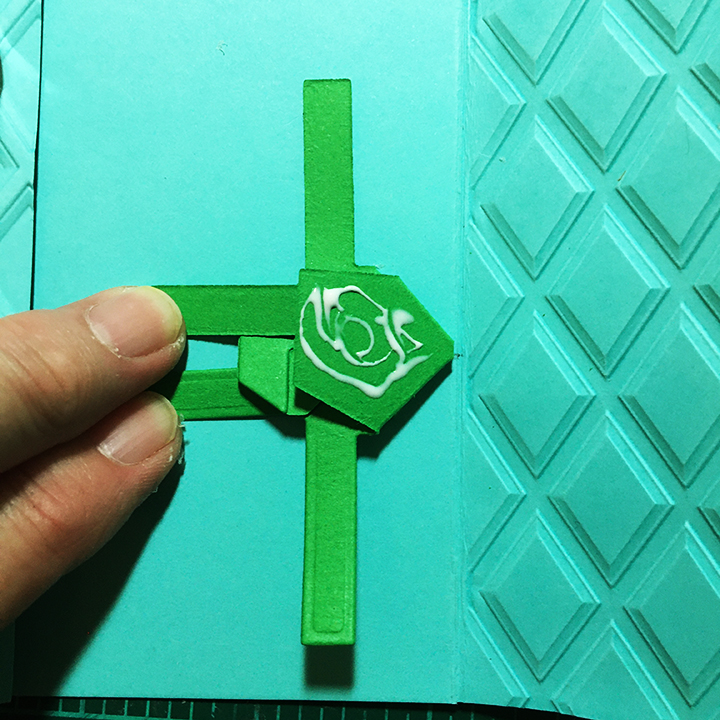
Eggs and Mechanism: I used some eggs I had made before using metallic ink with the stencil feature on the egg dies from the Easter Charms set as well as making some citrus colors (yellows and orange) eggs from solids and patterned paper scraps. For the two mechanisms that spin the eggs around when the card is opened, I used the Heart Collage Pop-up set. (Assembly video). The mechanism is glued into the card fold. I marked a spot 2-inches from the bottom of the left fold and 2-inches from the top of the right fold. Using the mark center a mechanism over the mark and line up the fold. Glue one tab to card and fold up the mechanism as instructed in the assembly video. Place glue on other tab and close card flap to glue in place to card. Repeat for other side.


Sentiments: I created the sentiments on Canva and then resized them in Publisher. You can download a copy. After printing them, I roughly cut the main question onto white cardstock and fussy cut a cloud shape around the words. A Velcro dot was used on the back side of the cloud as a card closure. The answer sentiment was cut directly from the paper in a cloud shape and glued to the inside cardbase. The “Happy Easter” was cut out with a stitched rectangle die from the Slim Frames die set. A post was cut from a scrap of brown with left over grass from the front of the card.

Envelope: The card fits into an A7 envelope. To give a hint as to what’s inside, a small Easter basket was glued to the back envelope flap.
Thank you for reading this blog post. I hope this inspires you and makes you smile. Please like and leave comments 😊
Materials Used:
Dies
- Karen Burniston in cahoots with Riley and Company – Heart Collage Pop-Up – 1193
- Karen Burniston in cahoots with Riley and Company – Slim Frames – 1150
- Karen Burniston in cahoots with Riley and Company – Easter Charms – 1078
- Karen Burniston in cahoots with Riley and Company – Spring Animals – 1074
- Karen Burniston in cahoots with Riley and Company – Flowers and Bee – 1026
- Karen Burniston in cahoots with Riley and Company – Nature Edges – 1006
Embossing Folder
- Spellbinders – 3D Embossing Folder 5.5×8.5-inches – Dimensional Diamonds
Papers
- White, Black, Red, Pink, Brown, Green, Orange, Blue and Yellow Cardstock
- Patterned Paper Scraps
- A2 ivory Envelope
Ink
- Neon Pink Gel Pen
- Crafter’s Square – Metallic Marker 1.2mm – Silver and Blue
- Sharpie – Permanent Marker – Fine Point – Yellow
- Pigma – Mircon 01 Fine Tip Pen – Black
- Sakura – Gelly Roll Pen – Medium – White
Adhesives
Tools
- Die Cutting Machine
- We R Memories – QuickStick
- We R Memories – Scoring Board and Trimmer
- Scissors
- Stamping Blocks/ Weights
- Ranger – Mister Bottle
- Bone Folder
Miscellaneous
- Velcro Closure
