Want a fun way to do a gender reveal for expectant parents? Here is a “Bun in the Oven” (which I must credit Kelly Marie Alvarez for the original 2D version of this interactive card idea.)
The card uses dies from Karen Burniston’s September 2023 release including Oven Extras, Oven Pop-Up and the Rectangles – Crosshatch, Baby Charms and Birthday Charms which were previously released.
(I recommend watching the assembly video for the Oven Pop-Up before starting your card.)
Cardbase: I started with a purchased A6 (4.75×6.5 inches) cardbase and envelope. The front and back panels were covered using two 6×6 sheets of pink and blue gingham checked papers, cut in 1-inch strips, and adhered alternating the colors. The inside panels are covered with wallpaper-like patterned paper and terra cotta colored floor paper.
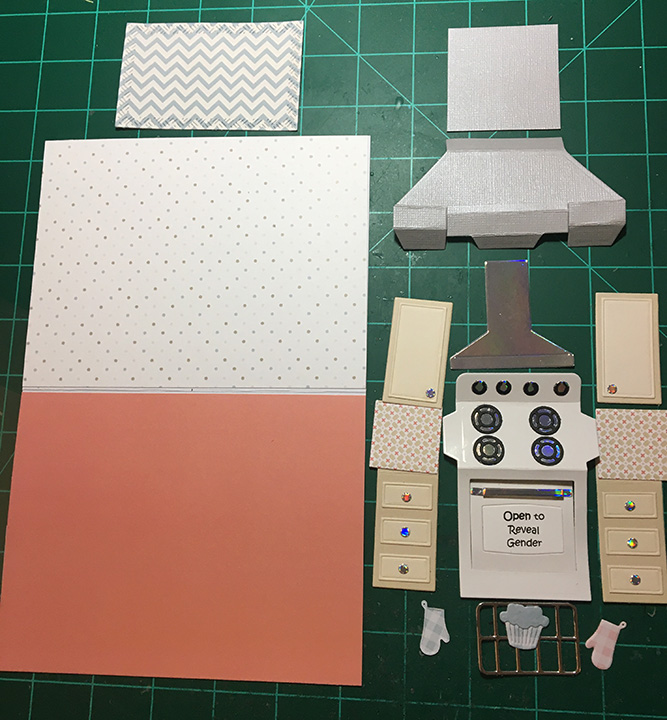
Oven/Stove: I was genuinely surprised at how easy the pop-up oven is to assemble. It has just two pieces -the outer shell which I cut from white glossy cardstock and the inner platform which I cut from gray metallic cardstock.

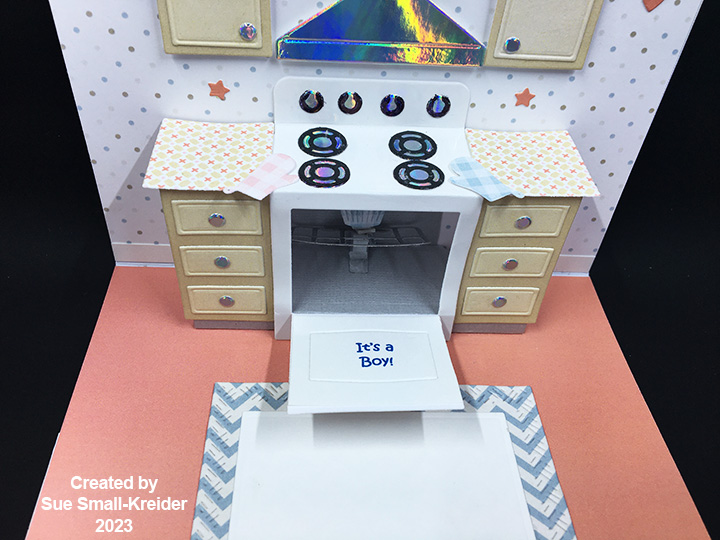
The platform attaches much like the Little Labels Pop-Up with the front tabs gluing to the floor of the card and the back tab gluing to the wall of the card. Before I attached the outer shell, I added two sentiments to the window of the oven door. (You can download these sentiments below.) and cut another oven door from white cardstock trimming the bottom 1/8-inch shy of the fold line. I also cut a 2-inch square of gray metallic cardstock and glued it to the back wall just above the pop-up platform. This will be the inside wall of the oven.


It is easier to add the items inside the oven before the outer shell is attached, but you can still add the two pop-up cubes – one for the oven rack and then the other for the bun. The bun cube is adhered to the rack cube sandwiching the rack in place. (I ended up using a foam square between the two cubes to get a strong bond.)
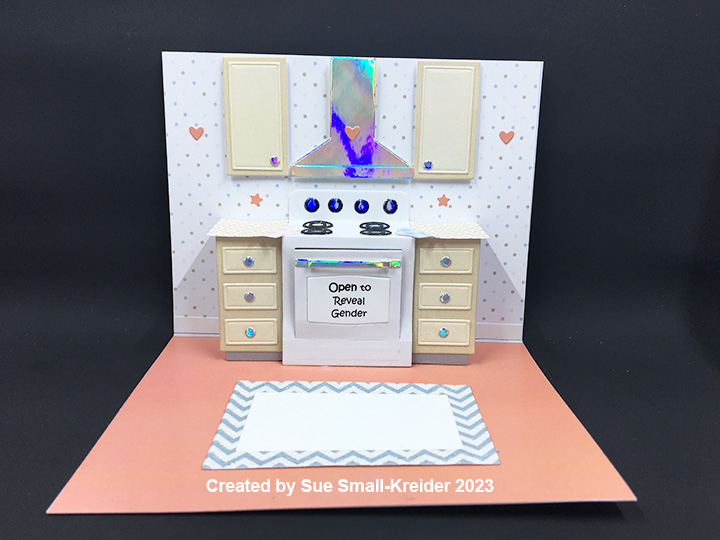
To attach the oven shell, glue the bottom to the center of the platform and then fold the oven flat and add adhesive to the back of the stove knob panel. Close the card and the top panel will be positioned on the card wall so that it forms the stove. On the tabs that come off the sides of the stove top add glue. Now position the cabinet pieces’ small squares onto the tabs. Glue cabinet bottoms to the top edge of the platform, so that there is a toe kick below the cabinets. The counter tops are glued on once cabinets are attached.
Cabinets and Vent Hood: Once the stove is attached; you can add the side cabinets of drawers. I cut the cabinets a pale brown cardstock. The drawer panels and knobs are part of the Oven Pop-Up set. Decorative paper was used for the countertops. The upper cabinets are cut using the larger rectangles dies in the Oven Extras set. The vent hood is in the same set. All the over the pop-up oven cabinets and vent hoof were adhered to the card with foam tape.
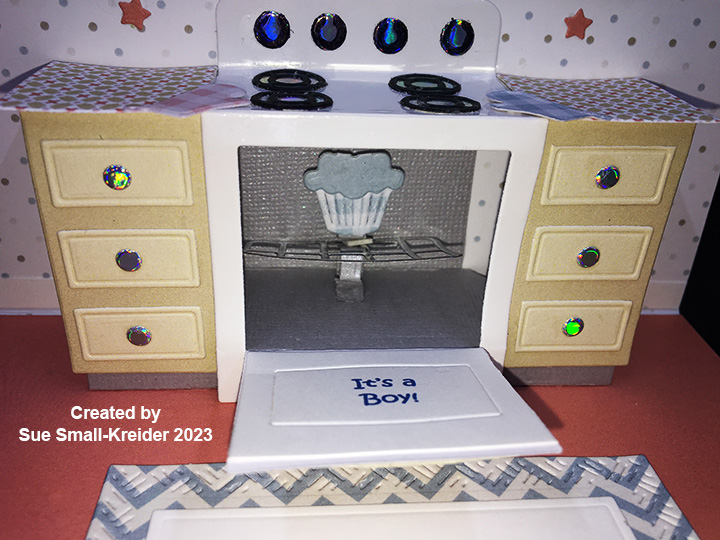
Decorations: The rug is made using two mid-size dies from the Rectangle Crosshatch set. On the back of the card is a yellow duck cut from the Baby Charms set and markers were used with the stencil die feature to make the bill and eye. The tiny hearts and stars on the wallpaper inside the card are from the Oven Pop-Up set. The bun in the oven was made by cutting off the charm loop on the cupcake die from the Birthday Charms set. The oven rack is from the Oven Pop-Up set as are the oven mitts.

Sentiments: All the sentiments were digitally created. You can download them here.
Envelope: An extra oven mitt was glued to the back flap of the envelope to set the tone for the card inside.
Thank you for reading this blog post. I hope this inspires you and makes you smile. Please like and leave comments 😊
Materials Used:
Dies
- Karen Burniston in cahoots with Riley and Company – Oven Extras – 1251
- Karen Burniston in cahoots with Riley and Company – Oven Pop-Up – 1250
- Karen Burniston in cahoots with Riley and Company – Baby Charms – 1086
- Karen Burniston in cahoots with Riley and Company – Rectangles – Crosshatch – 1054
- Karen Burniston in cahoots with Riley and Company – Birthday Charms – 1004
Papers
- Bazzill – 8.5×11 Textured Cardstock – Tiara -18-1002
- Divinity Designs – 6×6 Paper Pad – Baby Boy
- Divinity Designs – 6×6 Paper Pad – Baby Girl
- Paper Lane Paperie – Silver Holographic Cardstock
- White, Black and Yellow Cardstock
- Paper Lane Paperie – A6 Cardbase and Envelope – White
Ink
- Computer Printer
- Sharpie – Permanent Marker –Fine Tip – Black and Orange
Adhesives
- Neutral PH Adhesive by LINECO
- Fine-Tip Glue Bottle
- Double-Sided Tape -1/4-inch wide
- Foam Squares
Tools
- Die Cutting Machine
- We R Memories – QuickStick
- Bone Folder
- T-Ruler
- Scissors
- Tweezers

Amazing. I just saw your card for Craft Roulette and had to check on your blog to see your video. Just wonderful work!
LikeLiked by 1 person