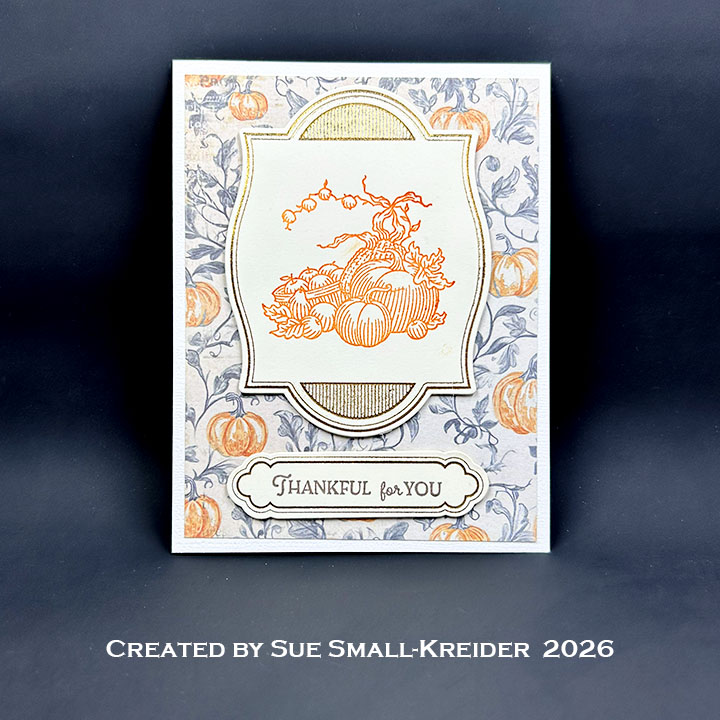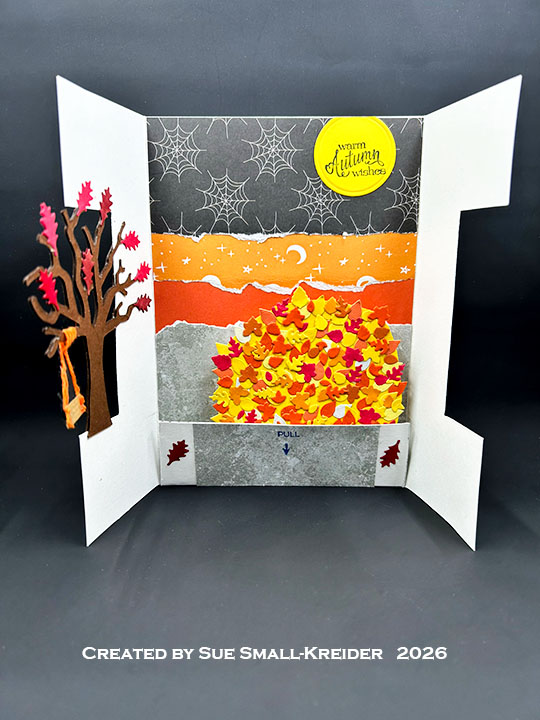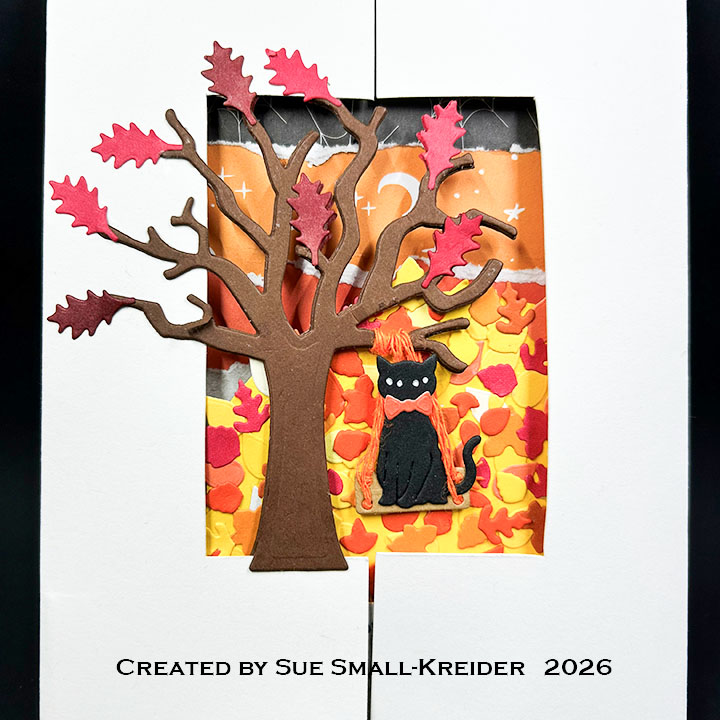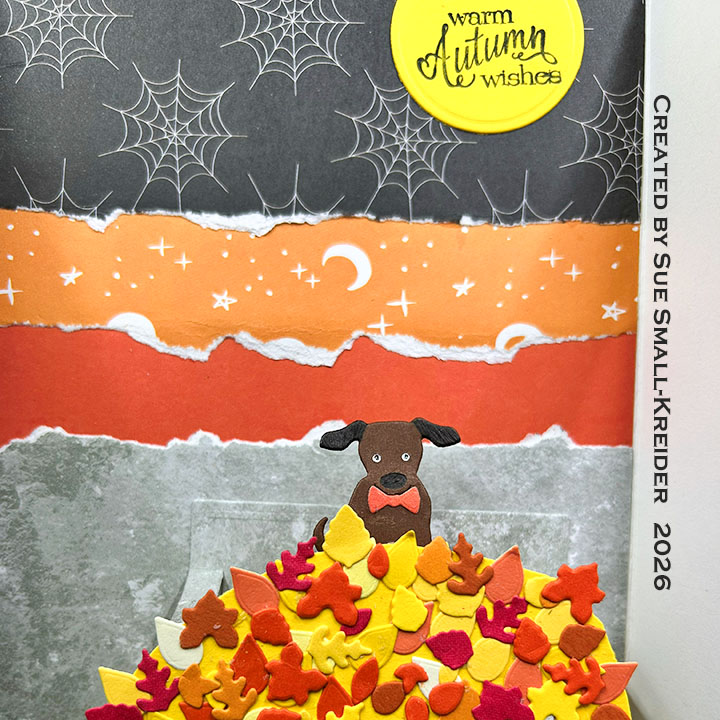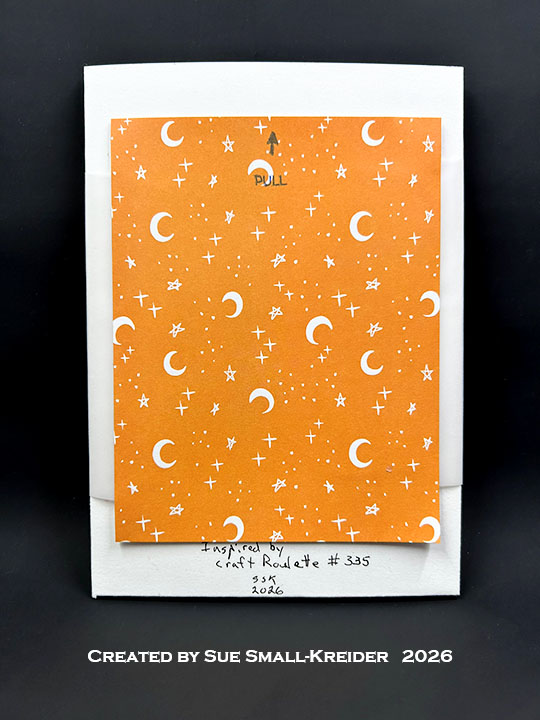
CAS’ed Autumn Gatefold Pop-Up Card

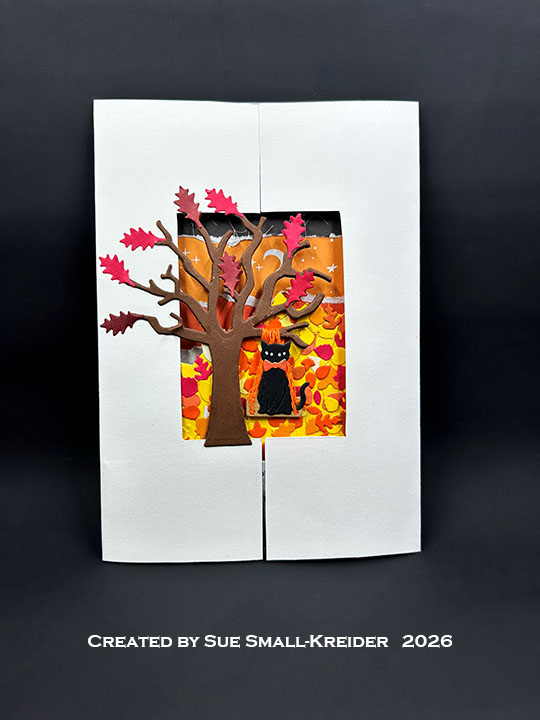
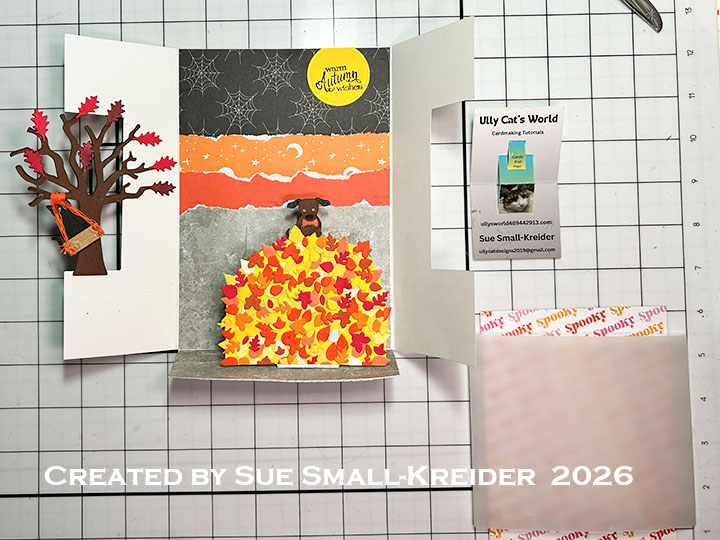
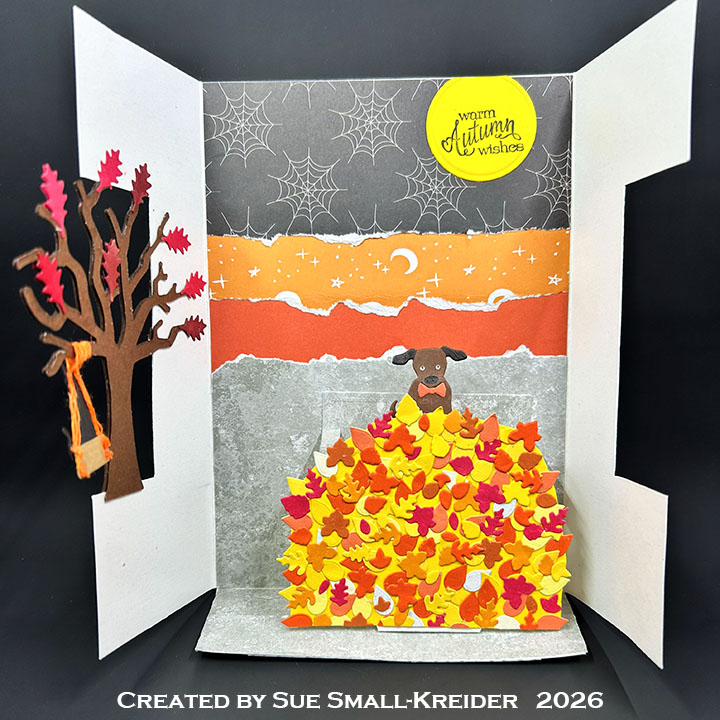
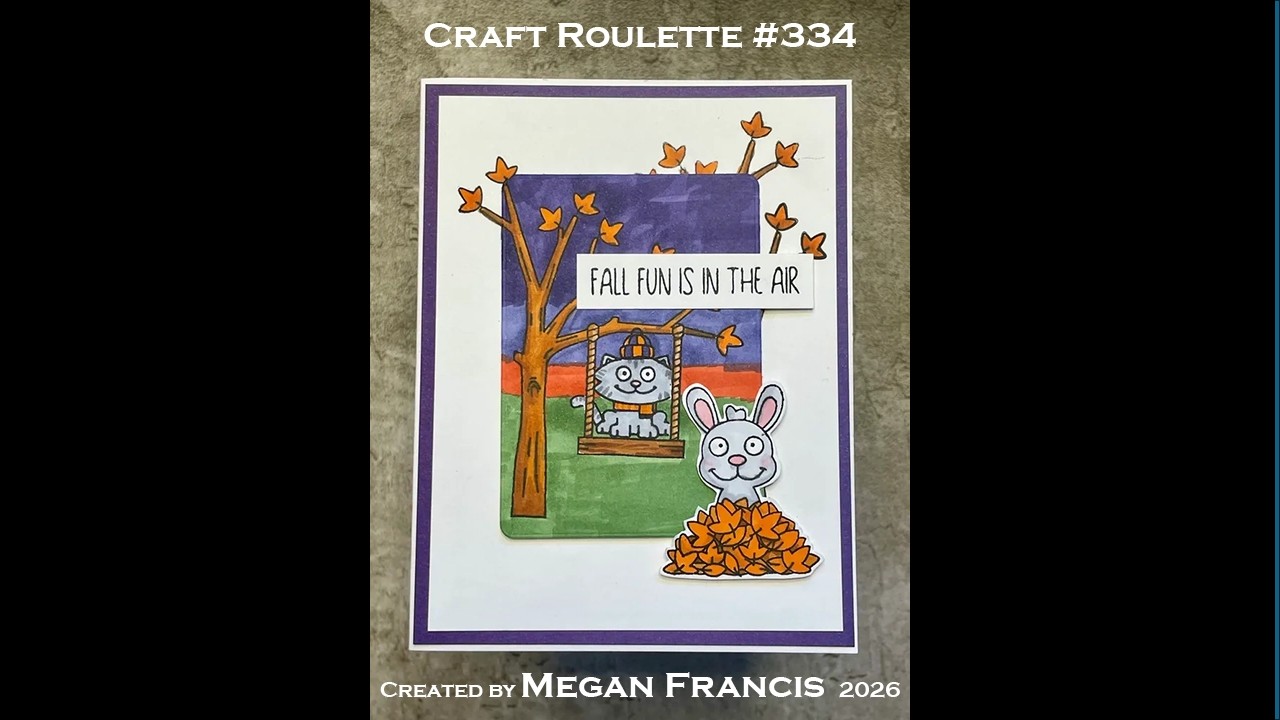
This card was made for Craft Roulette #335 whose parameters were include a gatefold project, vacation colors, CAS (copy and sample) from last week’s gallery as element and paper strip(s) as random. I used Karen Burniston dies and stamp set to CAS Megan Francis’s leafy card from Craft Roulette’s #334 galley.

Watch the video below to learn how I made this card.

Cardbase: Watch the video above for how to cut and score the cardbase. Cut an 8.5×11-inch sheet of white 65lb. cardstock down to 8.5×10-inches and scored at 2.5-inches and 7.5-inches along the long side and then flipped the cardstock sideways to score at 7-inches. Cut away the small rectangles at the sides of the long rectangle.

With the gatefold flaps closed, begin drawing the window aperture over the two flaps. Using a 2.5×3.5-inch rectangle of scrap paper, find the best placement for the ATC cut-out. With a T-square ruler, drawn in the lines to cut out with a craft knife as shown in the video. (My border measurements are 1.75-inches at the top, 1.25-inches at the sides and 2-inches at the bottom.)

Background: Using torn strips of decorative papers, create the 4.875x 6.875-inch background for the inside of the card. Cover the bottom flap on both sides with your grass-colored paper. (I ended up using scrapes for the flap, and some extra leaves to decorate the side of the flap with the β€œPull” and arrow stamped on it. I used My Favorite Things Interactive Labels stamp set.)

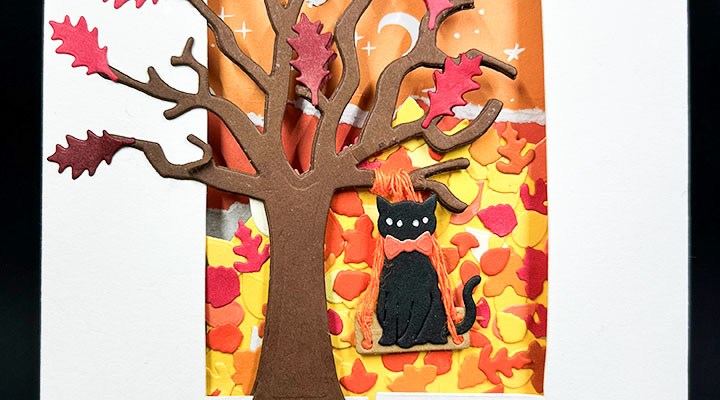
Tree: Cut six trees from brown using the Tree Pop-Up die set. Glue three trees together twice as shown in the video above and adhere them to the card. Add leaves cut from the same die set. (I cut three sets of leaves and colored some of the leaves to get three different shades of red using two shades of cardstock – kraft and red.)

Cat Swing: Cut two black cats from the Skeleton and Bat die set. Glue together. Use die stencil to color eyes. (Yes, the eyes on this cat can look like four eyes or very large cat eyes. Which did you see first?) Add bow tie also in the same die set. Cut two seat pieces from the Tree Pop-Up set and glue together. Glue cat to seat and add orange twine as shown in video above.

Leaf Pile with Pop-up Dog: Cut a squat arch large enough to cover the Parcel Pop-Up mechanism and cover it with die-cut leaves. Watch the assembly video at the bottom of the linked page for the Parcel Pop-Up . Cut the three pieces for the mechanism from white cardstock and assemble as shown in video above. Cut the upper half of the largest mechanism piece from grass colored paper. Trim and adhere it to the mechanism as shown in the video above. Cut two of the dog from Doghouse Tiny House Add-Ons set. Use die stencil to color eyes, nose and belly. Color ears black. Use bow tie from Skeleton and Bat die set in orange as collar. Glue dog onto pop-up strip.

Sentiments: Stamp β€œWarm Autumn Wishes” from Karen Burniston’s Fall Phrases stamp set onto a 1.5-inch circle of yellow. (My circle die slipped when cutting it out and so my moon goes was placed at the top edge of the card.)

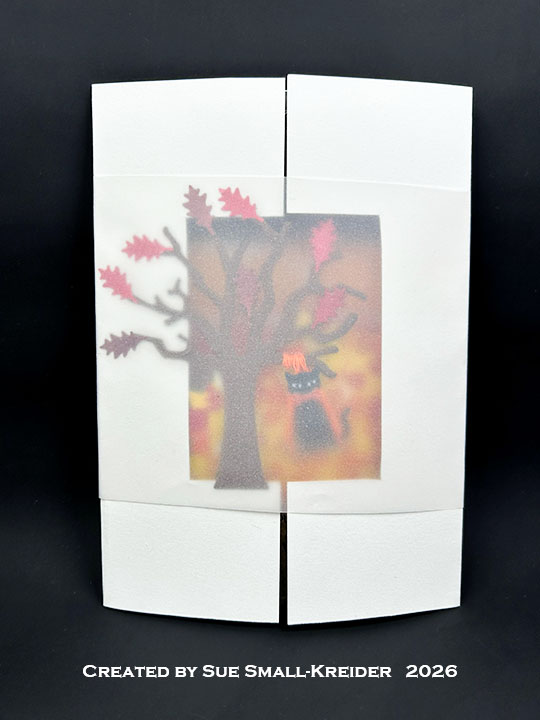
Belly Band: Using a sheet of 4×6-inch decorative paper and a scrap piece of clear vellum, I made the belly band to keep the card closed. Again, stamping the β€œPull” and arrow using My Favorite Things Interactive Labels stamp set.

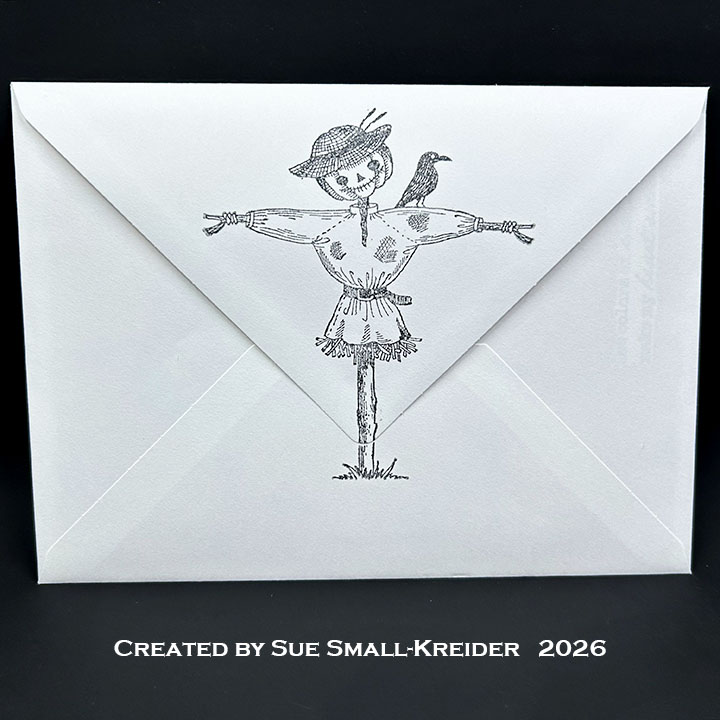
Envelope: The card fits into an A7 (5x 7-inch) size envelope.

Above is my pop-up card in the left two photos and Megan Francis’s card that I CAS’ed on the right. Can you see what elements from her card that I sampled?

___________________________________

Thank you for experiencing this blog post.

I hope this inspires you and makes you smile.

Please subscribe, like and leave comments 😊

Follow my YouTube channel, Instagram and Pinterest as well.

___________________________________

Materials Used:

Dies

Stamps

Papers

  • Scrapbook.com – 4.5×5.5-inches Double-Side Cardstock – Spooky and Willow Lane
  • My Favorite Things- 8.5×11 100 lb. Cardstock – White
  • The Paper Studio – 8.5×11 Clear Vellum
  • Brown, Greens, Kraft, Orange, Red and Yellow Cardstock

Ink

  • Memento – Fade Resistant Dye Ink – Tuxedo Black
  • OLO Marker – Dragon Fruit
  • Pigma – Mircon 05 Fine Tip Pen – Black
  • Sakura – Gelly Roll Pen – Medium – White
  • Sharpie – Permanent Marker – Fine Tip – Black

Adhesives

Tools

Miscellaneous

  • Bakers’ Twine – White & Orange
  • Tiny Leaf Die-Cuts from a variety of dies in my stash

Cascade Pop-Up Thanksgiving Day Card

It’s time for the Karen Burniston Design Team August 2026 Challenge whose theme is MEALTIME. I chose to make a pop-up Thanksgiving Day card in the form of a cascading feast using double Cascade Pop-Up mechanisms and the Dessert Elements and Mealtime Elements. The stamped sentiments come from the new Mealtime Phrase stamp set.

Watch the process video to see how I made this card.

Cardbase: Fold a 10×7-inch piece of cardstock in half to make a 5×7-inch top fold cardbase. Using the largest rectangle die in the Rectangles and Labels – Crosshatch, cut four panels to cover the cardbase inside and out. (I had to use scraps of my decorative papers to cover all of the back panel.)

Food: Watch the video above for the styling and assembly of the food using the die sets of Dessert Elements, Mealtime Elements, Big Birthday Charms and Happy Hour Charms as well as markers and Distress Inks.

Cascade Pop-Up: Watch the video above for the assembly of the two Cascade Pop-Up mechanisms. Cut two each of the large die and small strip dies from gray medium weight cardstock. Cut from heavy white cardstock, four large plates using the large plate die in the Mealtime Elements set. Cut two large slotted circles from the Cascade Pop-Up and then position the large plate die so that the plate has the slot still cut in it. Cut the two slotted plated from heavy white cardstock.

Card Front Kitchen: (Follow the instructions in the video above to assemble.) From the Oven Pop-Up, cut one oven piece from a white coated cardstock. Cut from silver foil cardstock one oven handle, four stove knobs and eight cabinet knobs. Also cut from silver cardstock, using the Oven Extras, one hood vent, two pots and one pan. From woodgrain cardstock, cut eight sets of the cabinet panels using the Oven Extras. From black cut two 1/2×1-inch strips for the stove burners. from gray metallic textured cardstock, cut a 2-inch square for inside of the oven and a strip that is at least 1/4×6-inches for the kick-plate at the base of the cabinets. (I used three different silver metallic cardstock/paper – one was mirror cardstock packaging, one was a matte silver envelope and the last was a textured, shimmer, gray cardstock.) Cut one turkey leg bone piece from white and one turkey from kraft cardstock using the Oven Extras. Color and shade with Distress Inks and markers.

Sentiments: The front β€œWhat’s cookin’?” and the inside “Hope your day is delicious” are from the Fall Phrases stamp set with the fancy labels cut using the Greeting Labels. “Happy Thanksgiving” inside the card uses Word Set 7 – Autumn die set. “Hope your day is Delicious” is from Mealtime Phrase.

Envelope: The card fits into an A7 (5x 7-inches) size envelope with “Thankful, Grateful, Blessed” stamped on the back flap from the Fall Phrases stamp set.

___________________________________

Thank you for experiencing this blog post.

I hope this inspires you and makes you smile.

Please subscribe, like and leave comments 😊

___________________________________

Disclaimer: Karen Burniston products are provided free of charge by the manufacturer for review and use. All other items were personally purchased. Compensated affiliate links used where or when possible, meaning I will receive a small percentage commission from these manufacturers at no cost to you. This will allow me to add more content to my YouTube channel and help out a lot. Thank you.

Materials Used:

Dies

Stamps

Papers

  • Bazzill – 8.5Γ—11 Cardstock – Tiara -18-1002
  • Carta Bella – 12×12 Double-Sided Cardstock Collection by Steven Duncan – Country Kitchen
  • Concord & 9th – 8.5Γ—11 80 lb. Cardstock – Dove
  • Grafix – 8.5Γ—11 Dura-Lar Acetate .005 – Clear Film
  • MemoryBoxCo – 8.5Γ—11 65 lb. Woodgrain Embossed Cardstock – Kraft
  • The Paper Cut – 8.5Γ—11 10 PT Kromekote Cardstock – White Glossy
  • The Paper Studio – 8.5Γ—11 65 lb. Cardstock – White
  • The Paper Studio – 8.5Γ—11 110 lb. Cardstock – White
  • The Paper Studio – 8.5Γ—11 – Clear Vellum
  • Matte Silver Paper Envelope
  • Silver Foil Cardstock Packaging
  • Multicolored Cardstock Scraps
  • Park Lane Paperie – A7 Envelope – White
  • Xcut – A5 Adhesive Vellum Sheets – White

Ink

  • OLO Markers – RV0.1 Cotton Candy, RV0.6 Dragon Fruit, Y1.1 Ginger, YG2.3 Muscat Grape
  • Pigma – Mircon 01 Fine Tip Pen – Black
  • Memento – Fade Resistant Dye Ink – Espresso Truffle & Tuxedo Black
  • Ranger – Tim Holtz – Distress Ink- Antique Linen & Vintage Photo
  • Sharpie – Permanent Marker – Ultra Fine Tip – Black & Green
  • Stampin’ Blends – Markers – Light & Dark Copper Clay
  • Stampin’ Write – Marker – Chocolate Chip

Adhesives

Tools

  • Bone Folder
  • Die Cutting Machine
  • Sponge Dauber
  • Paper Masking Tape
  • Ruler
  • Stamping Blocks used as paperweights
  • Scissors
  • Tweezers
  • We R – Precision Press Mini – Stamping Platform
  • We R Memories – QuickStick

Miscellaneous

  • Nuvo – Aqua Shimmer – Glitter Gloss

Autumn Pop-Up Card with Animals

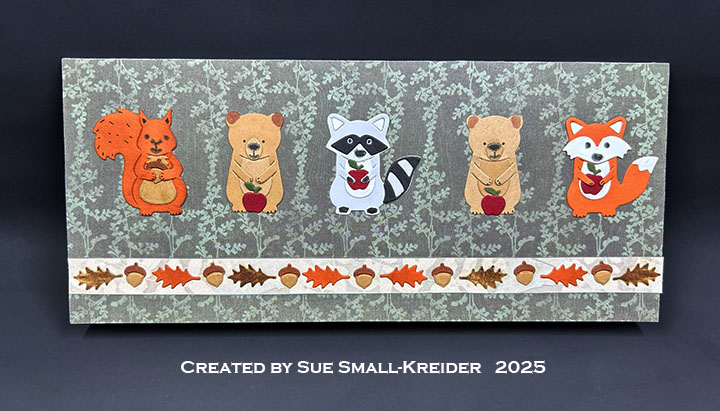
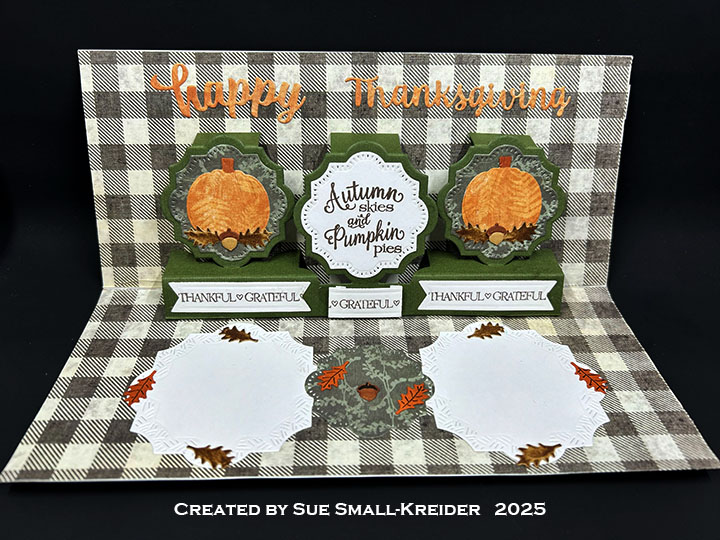
It’s time for the Karen Burniston Design Team November 2025 Challenge whose theme is FUN FACES. I made a slimline Thanksgiving card using two new stamp sets – Fall Phrases and Fun Faces 1.

Watch the process video to see how I made this card.

Cardbase: I cut a 7 1/2×8 5/8-inch rectangle from white 65lb. cardstock. Then I scored and folded in half to create a 3 3/4×8 5/8-inch slimline cardbase.

Animals: Using the Woodland Animals and Winter Animals die sets make two bears, one raccoon, one fox and one squirrel. Use the Fun Faces 1 to stamp on the animals eyes, noses and mouths. Make four red apples from the Tiny Fruit set and add to all the animals except the squirrel. Make an acorn for the squirrel using the tiny acorn die in the Woodland Animals set.

Leaf and Acorn Border: Cut eight oak leaves from the Tree Pop-Up set and seven acorns using the tiny acorn die in the Woodland Animals set. (I cut a bunch of leaves from orange and brown cardstock and four more acorns knowing I would use the leftovers to decorate the inside of the card.) adhere to front border strip as shown in the photos and video.

Pumpkins: Cut three pumpkins from orange patterned paper. Dry emboss them using the pumpkin die from the Autumn Elements set in your die cutting machine’s embossing sandwich. Cut two of the pierced labels for the Little Labels Pop-Up side labels from green patterned paper. Layer together a pumpkin onto the green label and decorate with leftover leaves and acorns. Adhere the remaining pumpkin to the card back.

Label Pop-Up: Cut one of the large die in the Little Labels Pop-Up set from green cardstock. (Watch the assembly video located at the bottom of the linked page.) Assemble as show in the video above.

Sentiments: The inside stamped sentiments are from the Fall Phrases set. The die cut β€œHappy Thanksgiving” is cut from orange pattern paper using the Word Set 7 – Autumn set. From white cardstock, cut two medium sized labels from the Labels – Crosshatch, the center label and three banners from the Little Labels Pop-Up set to stamp. Adhere the largest two labels as places to write a personal message.

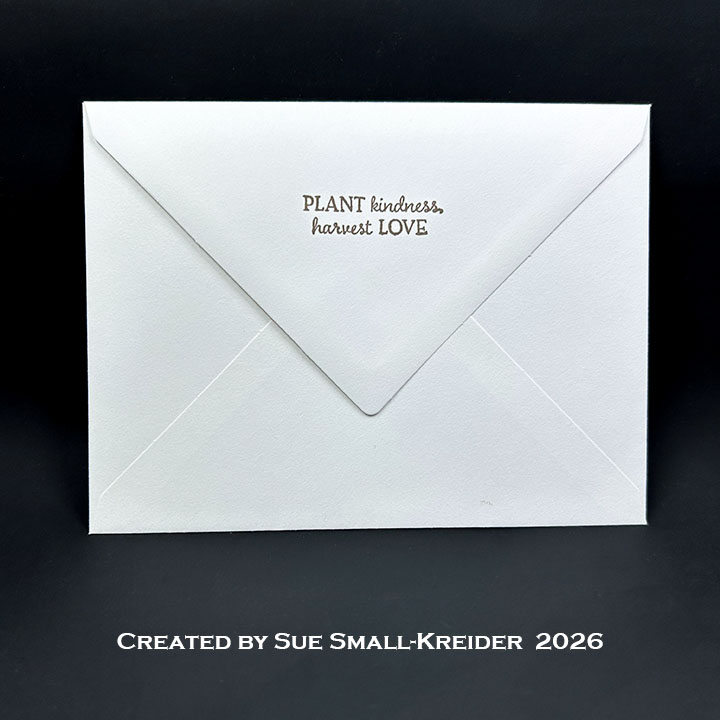
Envelope:  The card fits into a #10 business size envelope whose back flap was stamped in brown ink β€œThankful Grateful Blessed” from the Fall Phrases stamp set.

___________________________________

Thank you for experiencing this blog post.

I hope this inspires you and makes you smile.

Please subscribe, like and leave comments 😊

___________________________________

Disclaimer: Karen Burniston products are provided free of charge by the manufacturer for review and use. All other items were personally purchased. Compensated affiliate links used where or when possible, meaning I will receive a small percentage commission from these manufacturers at no cost to you. This will allow me to add more content to my YouTube channel and help out a lot. Thank you.

Materials Used:

Dies

Stamps

Papers

  • Bazzill – 8.5×11 Cardstock – Candy Corn
  • Bazzill – 8.5×11 Cardstock – Rain Forest
  • Hot Off The Press – 12×12 inch Single-Sided Papers – North Country
  • The Paper Studio – 8.5×11 65 lb. Cardstock – White
  • Black, Gray, Kraft and Red Cardstock
  • #10 Business Envelope – Kraft

Ink

  • Memento – Fade Resistant Dye ink – Rich Cocoa
  • Ranger – Tim Holtz – Distress Ink- Gathered Twigs
  • Pigma – Mircon 05 Fine Tip Pen – Black
  • Sakura – Gelly Roll Pen – Medium – White
  • Stampin’ Up – Stampin’ Blends Marker – Dual Tip – Light Copper Clay

Adhesives

Tools

  • Die Cutting Machine
  • Paper Trimmer
  • Bone Folder
  • Score Board
  • Stamping Platform
  • LDRS – Stampendable Stamping Tool
  • Stamping Blocks used as paperweights
  • Scissors
  • T-Ruler
  • Sponge Dauber
  • Paper Masking Tape
  • Tweezers
  • We R Memories – QuickStick

Autumn Leaves Accordion Card

This card was made for CRAFT ROULETTE #287 whose parameters included “saying hi”, crisp colors, sun/sunny(ies) element, and pennants. Today’s card uses Karen Burniston dies and her new Fall Phrases stamps.

Watch the video below to see how this card was made.

Cardbase: (Watch the assembly video for this die set located at the bottom of the linked page.) Cut three of the Landscape Rectangle Accordion frames from brown cardstock. From one frame die cut two apertures in the pivot panel using the stitched rectangle die in the set. Decorate the panels first and then glue the frames together as shown in the assembly video.

Leaf Pennants: From the Tree Pop-Up die set cut two sets of oak leaves – once from yellow and one from brown. Daub the leaf edges with brown ink and then splatter with white paint and bronze ink to age them. Sandwich a piece 8-10-inches of black sewing thread between two leaves (of the same color) and glue in place. Repeat with remaining leaves. (Note: I lost one of my leave pairs, so I only added five dangling leaves to my card.) Using a thin sewing needle, piece a hole into the top of one of the window apertures panel and pull the thread through the hole, adjust length of leaf thread and tie off the thread. (Make sure to only wrap thread one the window frame below the hole as any thread above the hole will be seen and won’t be covered by the decorative frame.) Repeat with other leaves. Cut four picture frames from dark brown using the wood embossed picture frame die in the set. Glue picture frames over the openings to be centered on panel and cover the thread knots.

Gourds and Leaves: Cut two of each of the leaves and pumpkin dies in the Autumn Elements die set. Daub the edges with brown ink and then splatter with white and black paint to age them. (Note: I cut the yellow leaves from a scrap of paper I had inked with red to get that orange mottling effect.) Cut two tiny pumpkin gourds from orange or white with brown stem vines using the dies from the Haunted Tiny House Add-Ons set. Decorate the first and last panels on both sides using the leaves and pumpkins and gourds.

Sentiments: Using the new Karen Burniston Fall Phrases stamp set, stamp “Hello Gourd-geous!” “Warm Autumn Wishes” and “May your fall be crisp, cozy and colorful” onto white cardstock. Die cut using the last two phrases using the two smallest label dies in the Rectangles and Labels – Crosshatch set. Using a paper trimmer, cut the first phrase into a .8-inch wide stripe and cut a triangle from each end to make it into a fishtail banner. Using the Tropical Scene die set, cut the sun rays from orange and the circle from yellow and glue together to illustrate “Warm Autumn Wishes.”

Card Assembly: Line up the accordion frames in the order you desire after decorating the panels front and back. Train the folds on the frames and panels. Glue the large frames tabs first. Trim off the unused tab. Once the glue has set on the tabs, train the pivot panels movement. Decide which way the panels will move when open and closed. Glue the panels together having one connection behind the joining frames and the other connection going in front of the joining frames. Trim off unused panel tab.

Envelope: The card fits into a mini slimline envelope.

___________________________________

Thank you for experiencing this blog post.

I hope this inspires you and makes you smile.

Please subscribe for email notices, like and leave comments 😊

___________________________________

Disclaimer: Karen Burniston products are provided free of charge by the manufacturer for review and use. All other items were personally purchased. Compensated affiliate links used where or when possible, meaning I will receive a small percentage commission from these manufacturers at no cost to you. This will allow me to add more content to my YouTube channel and help out a lot. Thank you.

Materials Used:

Dies

Stamps

Papers

  • Fun Stampers Journey – 8.5Γ—11 Cardstock – Pumpkin Bread
  • Brown, Oranges, Red, White and Yellows Cardstock Scraps

Ink

  • Memento – Fade Resistant Dye ink – Tuxedo Black
  • Hero Arts – Acrylic Spray – Opaque White
  • Hero Arts – Silk Ink – Bronze
  • Ranger – Tim Holtz – Distress Ink – Vintage Photo
  • Sakura – Gelly Roll Pen – Medium – White
  • Spellbinders – Splatter Effects – Black

Adhesives

Tools

  • Die Cutting Machine
  • Paper Trimmer
  • Riley and Company – Pick & Poke Tool
  • Stamping Blocks
  • Scissors
  • Paper Masking Tape
  • Sponge Dauber
  • Sewing Needle

Miscellaneous

  • Black Sewing Thread

Sweater Weather Pop-Up Card

There’s a new mini release of five new stamp sets from Karen Burniston. For this card I’ve used the new Fall Phrases sentiment stamps along with previously released die sets – Cupcake Pop-Up, Coffee Charms, Tiny Trees Pop-Up, Border Blends – Trims, Bam Box Pop-Up and Display Helpers.

Watch the video below to learn how I made this card.

Cardbase: Start with an 11×4.25-inch rectangle of cream colored cardstock. Score and fold at 5.5-inches to form an A2 (4.25×5.5-inch) side-fold card. Watch video above for how the four panels are covered.

Card Back

Card Front: Cut a 4.125×5.25-inch rectangle of cream cardstock. Cut .5-inch wide stripes of decorative paper to be used as a mat behind the rectangle above. Adhere strips as shown in video above to the front panel of the cardbase.

Watch the assembly videos at the bottom of each of the dies’ linked pages. Die cut from red and orange cardstock backed with double-sided tape (I had scraps from cutting rainbows) lots of the two types of leaves in the Tiny Trees Pop-Up set. Use brown ink to age the leaves.

From the Border Blends – Trims die set, cut six of the wave strands in die #1. Weave/braid two strands together as shown in the video above. Repeat with rest of strands to form the three cable sweater stripes that are on the front panel. Glue in the center of the cream panel. trim as needed.

Cut and assemble two coffee cups-to-go from the Coffee Charms set. (I used the package design to make mine.)

Once the leaves were added to the panel, I splattered some bronze ink onto the panel and then added some flat glitter spots. My leftover leaves were used to decorate the card back and the inside of the card.

Pop-Up Platform: Watch the assembly video at the bottom of the Cupcake Pop-Up linked page. Then follow the steps in the video above for how I glued the pop-up platform into the card. I added a display helper to keep the card open. Watch the assembly video for the Display Helpers to see how the “LIFT” piece is installed. (Circled in photo below.)

Card Front

Sentiments: All the sentiments were stamped in black ink using the Fall Phrases stamps set. They were cut and embossed using various dies in the Bam Box Pop-Up set. See the video above for how the labels were embossed.

___________________________________

Thank you for experiencing this blog post.

I hope this inspires you and makes you smile.

Please subscribe to the email notices, like and leave comments 😊

___________________________________

Disclaimer: Karen Burniston products are provided free of charge by the manufacturer for review and use. All other items were personally purchased. Compensated affiliate links used where or when possible, meaning I will receive a small percentage commission from these manufacturers at no cost to you. This will allow me to add more content to my YouTube channel and help out a lot. Thank you.

Materials Used:

Dies

Stamps

Papers

  • Stamperia – 12×12-inches Double-Sided Paper – Winter Botanic
  • Stampin’ Up – 8.5×11-inches Cardstock – Tea Room
  • Orange, Red and White Cardstock

Ink

  • Hero Arts – Silk Ink – Bronze
  • Memento – Fade Resistant Dye ink – Tuxedo Black
  • Ranger – Tim Holtz – Distress Ink – Rustic Wilderness, Vintage Photo
  • Sharpie – Permanent Marker – Ultra Fine Point – Black

Adhesives

Tools

  • Die Cutting Machine
  • Paper Trimmer
  • Stamping Platform
  • LDRS – Stampendable Stamping Tool
  • Stamping Blocks used as paperweights
  • Sponge Daubers
  • Scissors
  • Riley and Company – Pick & Poke Tool
  • Paper Masking Tape

Miscellaneous

  • Trinity Stamps – Flat Glitter Confetti Spots – Black, Orange

Hexagon Accordion Fold Birthday Card

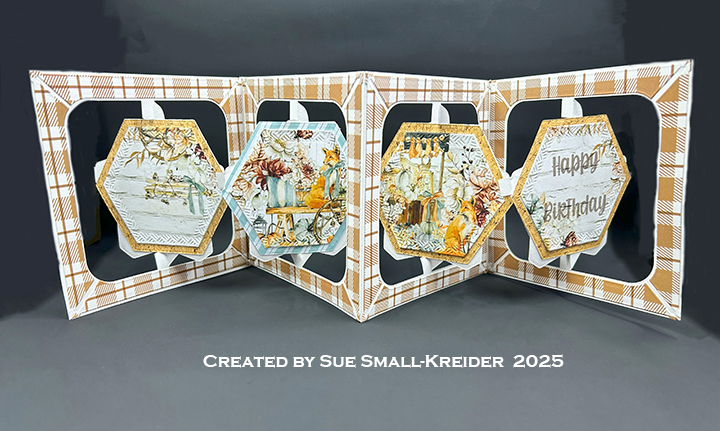
This card was made for CRAFT ROULETTE #285 whose parameters included a square card, birthday dairy aisle colors, leaves element, and hexagon. Today’s card uses Karen Burniston dies and stamps.

Watch the video below to see how this card was made.

________________________________

Thank you for experiencing this blog post.

I hope this inspires you and makes you smile.

Please like and leave comments 😊

___________________________________

Disclaimer: Karen Burniston products are provided free of charge by the manufacturer for review and use. All other items were personally purchased. Compensated affiliate links used where or when possible, meaning I will receive a small percentage commission from these manufacturers at no cost to you. This will allow me to add more content to my YouTube channel and help out a lot. Thank you.

Materials Used:

Dies

Stamps

Papers

  • Dress My Craft – 12Γ—12 in Single-Sided Cardstock – Baby Brown Gingham Checks
  • Mintay – 6×6 in Double-Sided Cardstock – Golden Days

Ink

  • Memento – Fade Resistant Dye ink – Rich Cocoa
  • Pigma – Mircon 005 Fine Tip Pen – Black

Adhesives

Tools

  • Die Cutting Machine
  • Paper Trimmer
  • Stamping Block
  • Scissors
  • Paper Masking Tape