Gift Card Holder Wallet

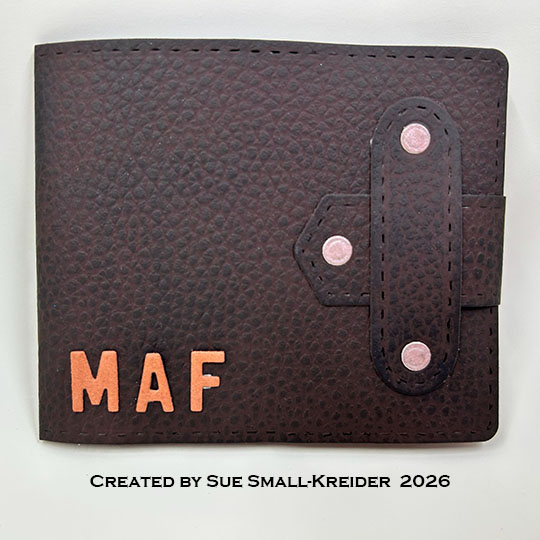
This card was made for Craft Roulette #326 whose parameters were: a dude’s card, sleigh ride colors, farm critter(s) element and pen random. I used Honey Bee Stamps Gallery Wall Gentlemen Add-On and Lovely Layers Wallet.
Watch the video below to learn how I made this card.

Wallet: I used brown, faux-leather, textured cardstock to create this wallet swiped with black ink to bring out the texture.The Wallet die set is used for all the pieces. From the faux leather cardstock, cut one of the long base piece, one of the frame pocket, one of the short strip and two of the plain pocket (trim one pocket 1″ shorter than the other.) Assemble as shown in the video above. Attach closure strip with adhesive only on the end ends of the strip and add as shown in video. Glue on brass brads/buttons to strip and tab.
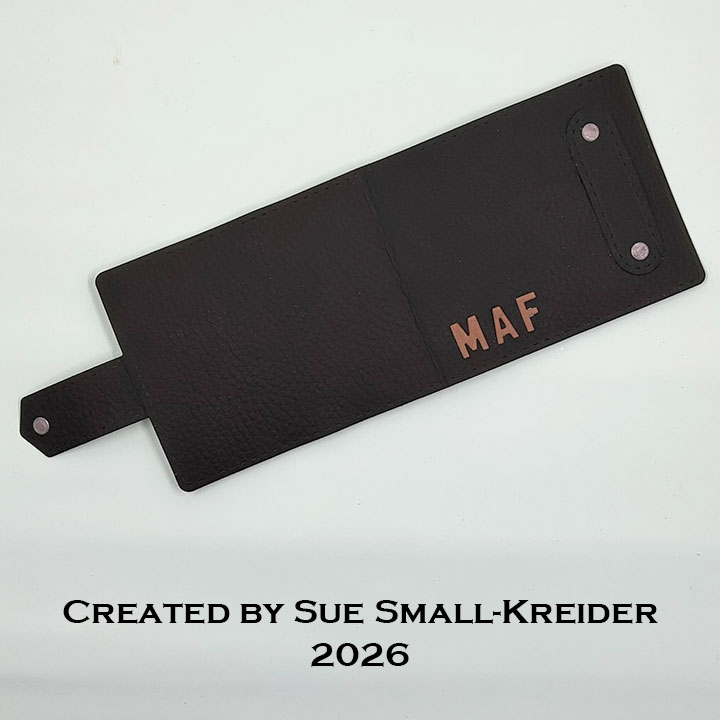
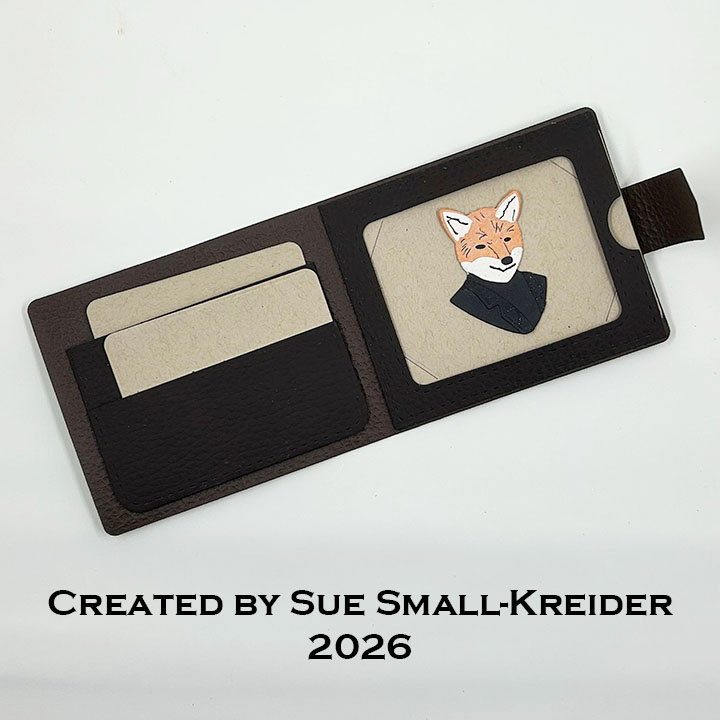
Gift Card Holder: From the Wallet die set, cut the rectangular gift card holder which has four slots from some kraft cardstock. (I added the gentleman fox image as a placeholder for a gift card.)
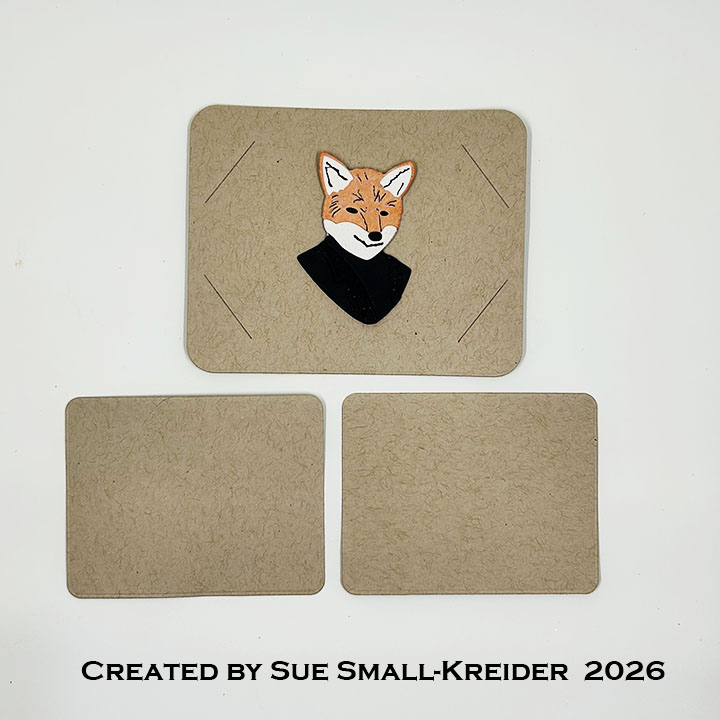
Sentiments: I left off any sentiments on this card to personalize it for a special occasion. The two inside cards are cut with the frame pocket die in the Wallet die set and could have sentiments stamped on them. The card recipient’s initials were added to the wallet from using Karen Burniston’s Mini Alphabet and Numbers.
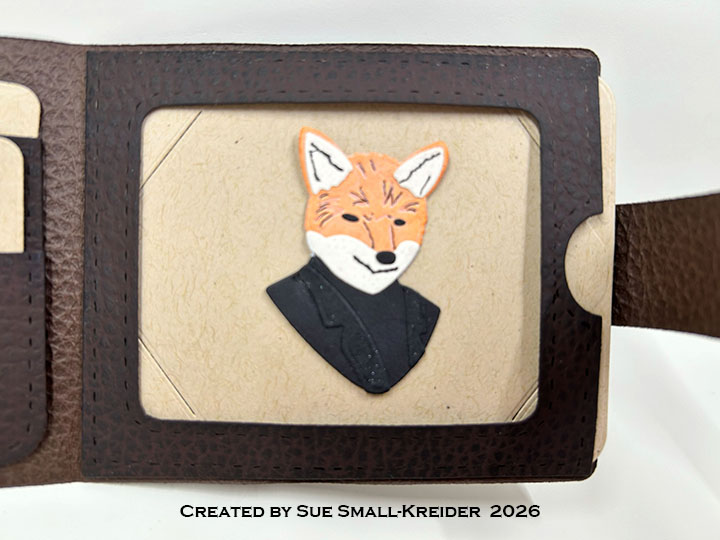
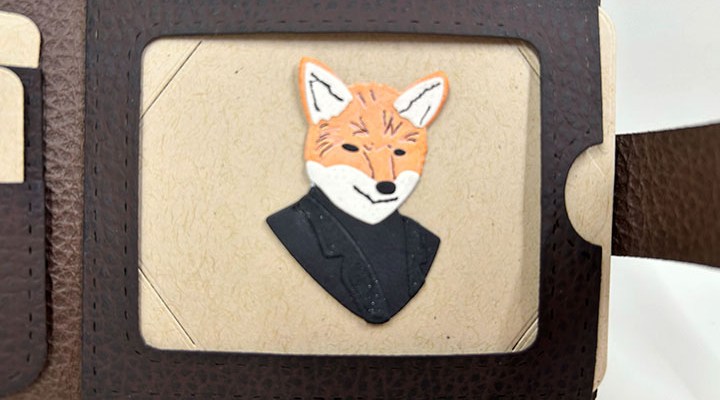
Gentleman Fox: Using Honey Bee Stamps Gallery Wall Gentlemen Add-On, cut one orange base silhouette, one black jacket and lapels, one set of creamy white neck and ears, one set of black nose and eyes. Assemble as shown on layering guide. Use a fine-tipped black pen to highlight the embossed details.

Envelope: The card fits into an A2 (4.25×5.5-inches) envelope.

___________________________________

Thank you for experiencing this blog post.

I hope this inspires you and makes you smile.

Please subscribe, like and leave comments 😊

Follow my YouTube channel, Instagram and Pinterest as well.

___________________________________

Materials Used:

Dies

Papers

Ink

  • Crafter’s Squares – Metallic Markers .05 in – Copper
  • Memento – Fade-Resistant Dye Ink – Tuxedo Black
  • OLO Marker – N-G 9 Neutral Gray
  • Pigma – Mircon 01 Fine Tip Pen – Black
  • Sakura – Gelly Roll Pen – Medium – White

Adhesives

Tools

Miscellaneous

  • Nuvo – Aqua Shimmer – Glitter Gloss

Autumn Pop-Up Card with Animals

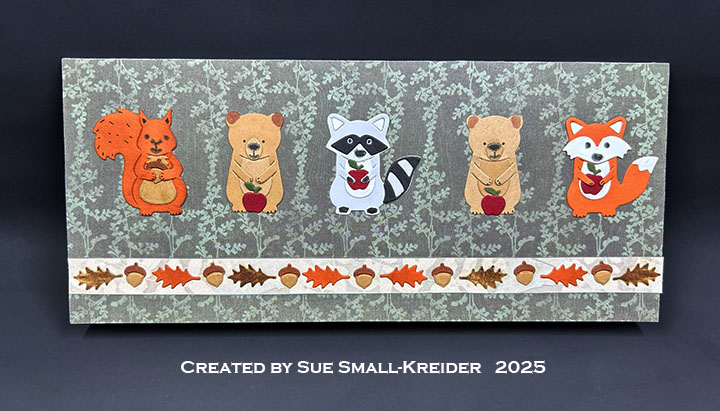
It’s time for the Karen Burniston Design Team November 2025 Challenge whose theme is FUN FACES. I made a slimline Thanksgiving card using two new stamp sets – Fall Phrases and Fun Faces 1.

Watch the process video to see how I made this card.

Cardbase: I cut a 7 1/2×8 5/8-inch rectangle from white 65lb. cardstock. Then I scored and folded in half to create a 3 3/4×8 5/8-inch slimline cardbase.

Animals: Using the Woodland Animals and Winter Animals die sets make two bears, one raccoon, one fox and one squirrel. Use the Fun Faces 1 to stamp on the animals eyes, noses and mouths. Make four red apples from the Tiny Fruit set and add to all the animals except the squirrel. Make an acorn for the squirrel using the tiny acorn die in the Woodland Animals set.

Leaf and Acorn Border: Cut eight oak leaves from the Tree Pop-Up set and seven acorns using the tiny acorn die in the Woodland Animals set. (I cut a bunch of leaves from orange and brown cardstock and four more acorns knowing I would use the leftovers to decorate the inside of the card.) adhere to front border strip as shown in the photos and video.

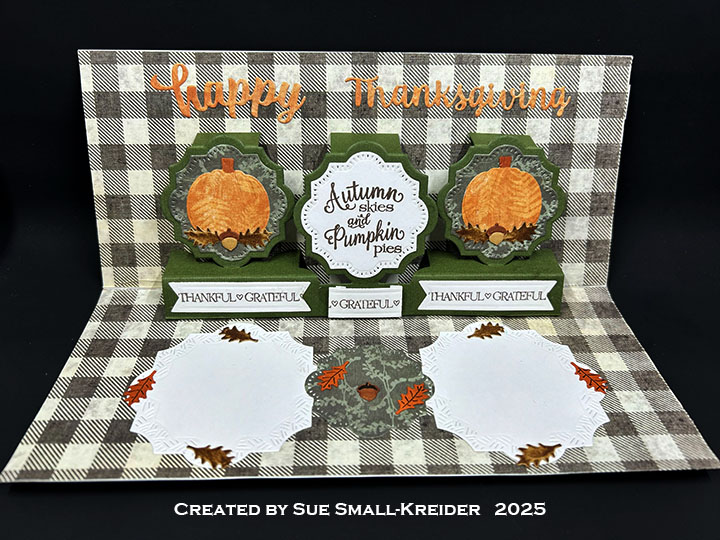
Pumpkins: Cut three pumpkins from orange patterned paper. Dry emboss them using the pumpkin die from the Autumn Elements set in your die cutting machine’s embossing sandwich. Cut two of the pierced labels for the Little Labels Pop-Up side labels from green patterned paper. Layer together a pumpkin onto the green label and decorate with leftover leaves and acorns. Adhere the remaining pumpkin to the card back.

Label Pop-Up: Cut one of the large die in the Little Labels Pop-Up set from green cardstock. (Watch the assembly video located at the bottom of the linked page.) Assemble as show in the video above.

Sentiments: The inside stamped sentiments are from the Fall Phrases set. The die cut β€œHappy Thanksgiving” is cut from orange pattern paper using the Word Set 7 – Autumn set. From white cardstock, cut two medium sized labels from the Labels – Crosshatch, the center label and three banners from the Little Labels Pop-Up set to stamp. Adhere the largest two labels as places to write a personal message.

Envelope:  The card fits into a #10 business size envelope whose back flap was stamped in brown ink β€œThankful Grateful Blessed” from the Fall Phrases stamp set.

___________________________________

Thank you for experiencing this blog post.

I hope this inspires you and makes you smile.

Please subscribe, like and leave comments 😊

___________________________________

Disclaimer: Karen Burniston products are provided free of charge by the manufacturer for review and use. All other items were personally purchased. Compensated affiliate links used where or when possible, meaning I will receive a small percentage commission from these manufacturers at no cost to you. This will allow me to add more content to my YouTube channel and help out a lot. Thank you.

Materials Used:

Dies

Stamps

Papers

  • Bazzill – 8.5×11 Cardstock – Candy Corn
  • Bazzill – 8.5×11 Cardstock – Rain Forest
  • Hot Off The Press – 12×12 inch Single-Sided Papers – North Country
  • The Paper Studio – 8.5×11 65 lb. Cardstock – White
  • Black, Gray, Kraft and Red Cardstock
  • #10 Business Envelope – Kraft

Ink

  • Memento – Fade Resistant Dye ink – Rich Cocoa
  • Ranger – Tim Holtz – Distress Ink- Gathered Twigs
  • Pigma – Mircon 05 Fine Tip Pen – Black
  • Sakura – Gelly Roll Pen – Medium – White
  • Stampin’ Up – Stampin’ Blends Marker – Dual Tip – Light Copper Clay

Adhesives

Tools

  • Die Cutting Machine
  • Paper Trimmer
  • Bone Folder
  • Score Board
  • Stamping Platform
  • LDRS – Stampendable Stamping Tool
  • Stamping Blocks used as paperweights
  • Scissors
  • T-Ruler
  • Sponge Dauber
  • Paper Masking Tape
  • Tweezers
  • We R Memories – QuickStick

Hexagon Accordion Fold Birthday Card

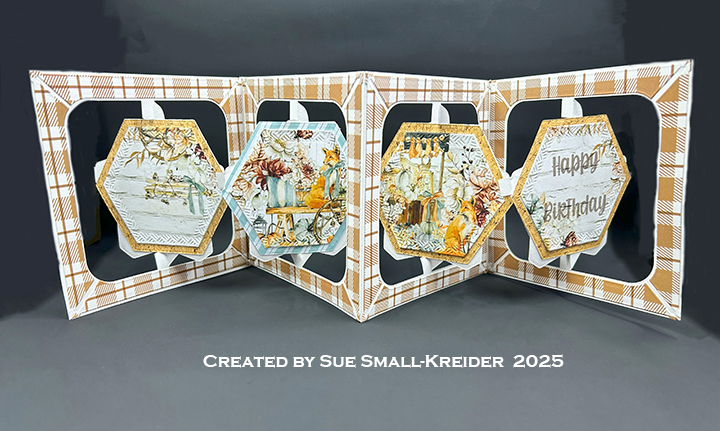
This card was made for CRAFT ROULETTE #285 whose parameters included a square card, birthday dairy aisle colors, leaves element, and hexagon. Today’s card uses Karen Burniston dies and stamps.

Watch the video below to see how this card was made.

________________________________

Thank you for experiencing this blog post.

I hope this inspires you and makes you smile.

Please like and leave comments 😊

___________________________________

Disclaimer: Karen Burniston products are provided free of charge by the manufacturer for review and use. All other items were personally purchased. Compensated affiliate links used where or when possible, meaning I will receive a small percentage commission from these manufacturers at no cost to you. This will allow me to add more content to my YouTube channel and help out a lot. Thank you.

Materials Used:

Dies

Stamps

Papers

  • Dress My Craft – 12Γ—12 in Single-Sided Cardstock – Baby Brown Gingham Checks
  • Mintay – 6×6 in Double-Sided Cardstock – Golden Days

Ink

  • Memento – Fade Resistant Dye ink – Rich Cocoa
  • Pigma – Mircon 005 Fine Tip Pen – Black

Adhesives

Tools

  • Die Cutting Machine
  • Paper Trimmer
  • Stamping Block
  • Scissors
  • Paper Masking Tape

Camping at the Lake

This card was made for Craft Roulette #208 whose parameters included a joy-fold card, buggy ride colors, sticks and stones element and trim(s) or trimming(s).

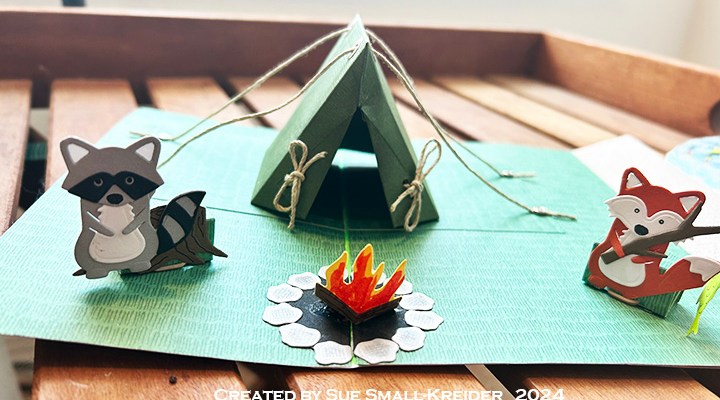
For this joy-fold card I used the colors of a buggy ride to the lake to go camping with a fishing stick and campfire stones. The lake is made of blue rick-rack trim on acetate. All dies used are by Karen Burniston.

Cardbase: A joy-fold is basically a smaller card that interleaves with a larger card. My smaller card is an oval cut from acetate and sandwiched between some kraft splattered cardstock with the cardstock folded and glued into the larger purchased 5×7 cardbase. The larger cardbase had its front panel trimmed to 4-inches wide. The larger cardbase was covered with green grass paper inside (covering over the kraft cardstock) and its front panel covered with blue dotted paper.

Lake: The front of the oval acetate flap was covered with rick-rack using double-sided tape. A kraft cardstock tab was added to make it easier to open the velco fastener that keeps the card close and the bam boxes from popping open. The tab is stamped with β€œLift the flap.” The sentiment of “Hello nature” is cut using the Word Set 6 – Summer set.

Tent: Watch the assembly video at the bottom of the linked page. The tent pop-up can be made with out the cording, but I chose to add the cording using tiny brads on another layer of grass green cardstock to attach it.

Animals: The racoon and fox are made with the Woodland Animals die set. They are glued to small bam boxes to make them pop-up. The fish are from the Camping Charms set and are colored with pink and mint green glitter brush markers. The fishing stick is also in the Camping Charms set.

Campfire: The pop-up campfire is made up of five dies that form the campfire pit and burning logs. It is part of the Tent Pop-Up set.

Thank you for reading this blog post. I hope this inspires you and makes you smile. Please like and leave comments 😊

Materials Used:

Dies

Stamps

  • Lawn Fawn – Photopolymer Clear Stamps – Push Here -LF1415

Papers

  • Bazzill – 8.5×11 Textured Cardstock – Tiara
  • Bazzill – 8.5×11 Textured Cardstock – Rain Forest
  • Keep It Simple – 12×12 Double-Sided Cardstock – Jade Collection Pack-Spearmint Grass
  • Spellbinders – 8.5×11 Textured Cardstock – Terra Cotta
  • The Paper Studio – 8.5×11 Printed Paper – Random Dot – Robin’s Egg Blue
  • Colored Cardstock
  • Mica Spray Splattered Kraft Cardstock
  • Dura-Lar .0005 Clear Film Acetate
  • Park Lane Paperie – A7 Cardbase and Envelope – White

Ink

  • Hero Arts – Intense Black
  • Ranger – Tim Holtz – Distress Ink – Black Soot
  • Scrapbook.com – Glitter Brush Marker – Blush Pink
  • Scrapbook.com – Glitter Brush Marker – Minty Green
  • Scrapbook.com – Glitter Brush Marker – Red
  • Sharpie – Permanent Marker – Fine Tip – Green
  • Pigma – Mircon 01 Fine Tip Pen – Black

Adhesives

Tools

  • Die Cutting Machine
  • Bone Folder
  • Craft Mat
  • We R Memories – QuickStick
  • Craft Clips
  • Sponge Dauber
  • Stamping Blocks used as paperweights
  • Scissors
  • Metal Ruler/Straight-Edge
  • Pencil
  • Tombow – Mono – Sand Eraser -512A

Miscellaneous

  • Velco Fastner Dots
  • Blue Rick-Rack Trim
  • Linen Cord
  • Four Tiny Silver Brads