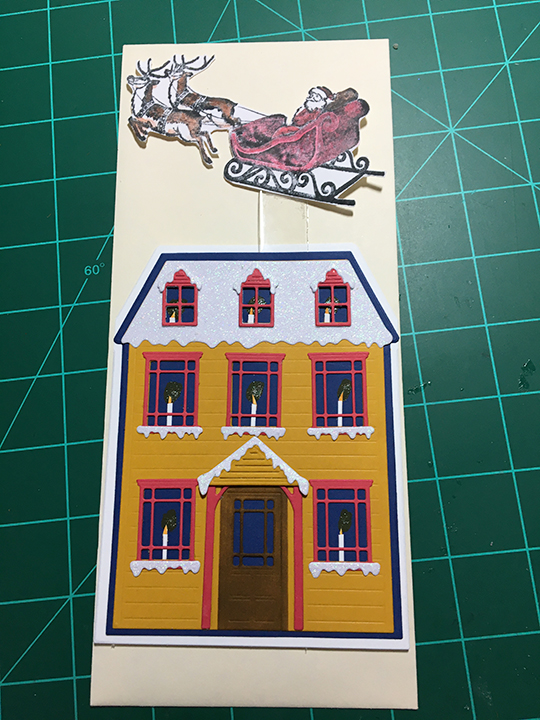
Sometimes we just need to believe that there once was a perfect Christmas Eve with Santa flying through the starry night.
This shimmering trifold Christmas card delivers on that idea. Based on the Spellbinders’ Christmas village vignette frame die set, the scene is set with Santa flying his sleigh through the air, over the tops of fir trees to the next house. Each screen frame holds another layer of the snowy scene.
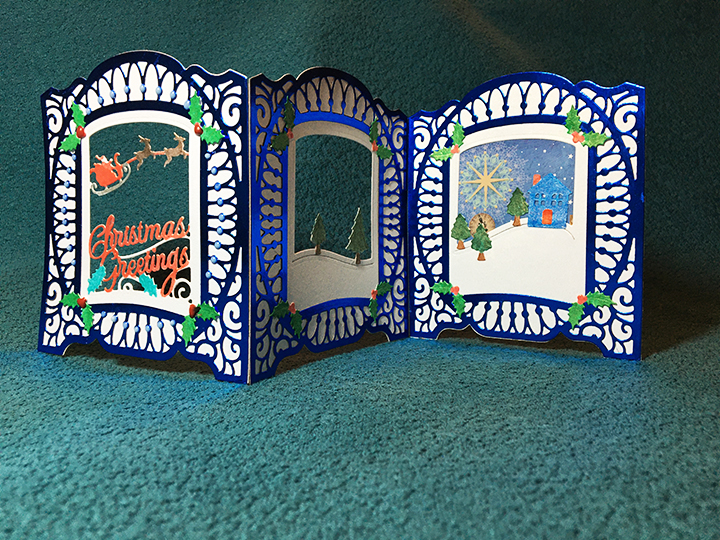
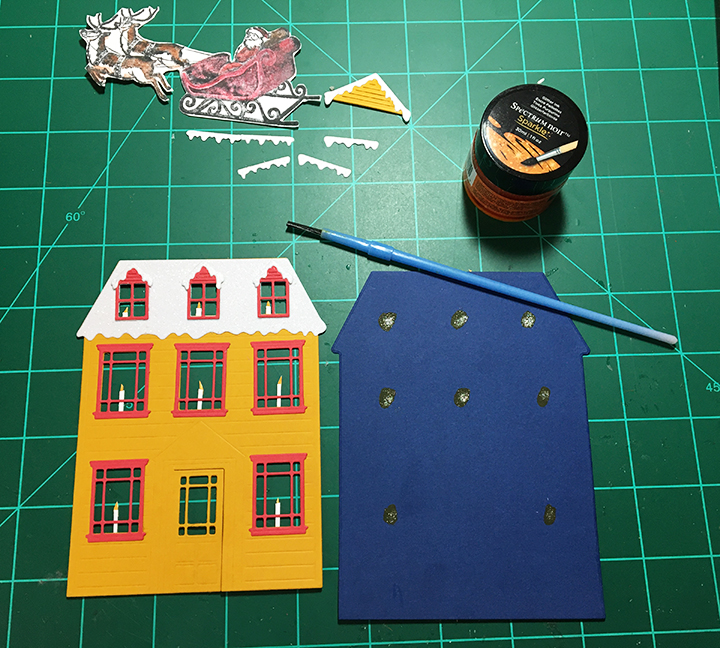
To make this card, I cut three of the lacy frames from bright blue foil cardstock and three backing panels from shimmer cardstock. I waited to cut the center openings in each back panel knowing that they had to line up for the scene to work. To cut the front panel opening I place the blue frame over the back panel and lined-up the “Christmas Greetings” die based off the blue frame center. To cut the lower hill window from the center panel, I use the front panel to line up the lower hill die on to the shimmer side of the cardstock. Using the first two panels to position the back panel’s higher hill die, I used the same technique to cut the final window.
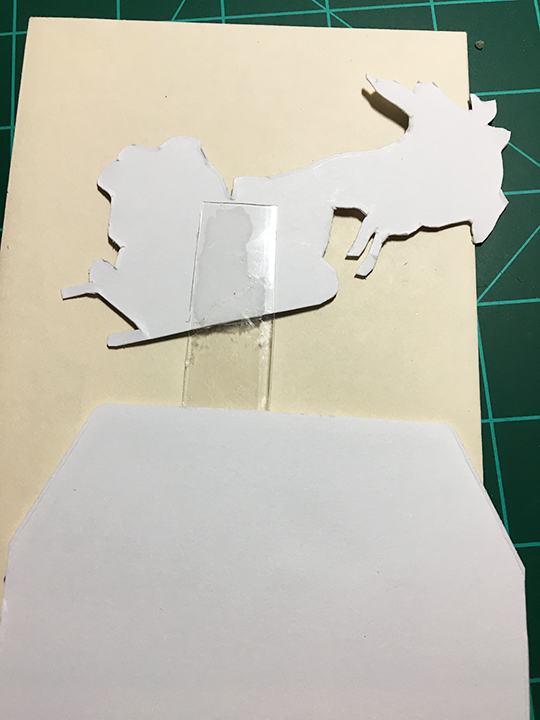
Assembling the card was easy, gluing the blue frames to the white shimmer side panels and using clear removable tape to join or hinge the panels together on the back side.
To decorate the scene, I die cut two large fir trees, five small fir trees, 12 holly springs, one house and one Santa’s sleigh from the scrap shimmer cardstock left from cutting the windows. (Hint: Always make sure you are cutting with the shimmer side of the cardstock up.) The shimmer card takes the water-soluble markers well giving the images a nice texture. Color can be layered-on allowing some shading. The trees on the center panel are glued with a tree on both front and backsides of the panel so that when folded shut they are visible. The back panel has a single layer of trees and house. I used a paper scrap from a Hunydory paper pad that had a starry night sky to be the backdrop for the final panel’s window.
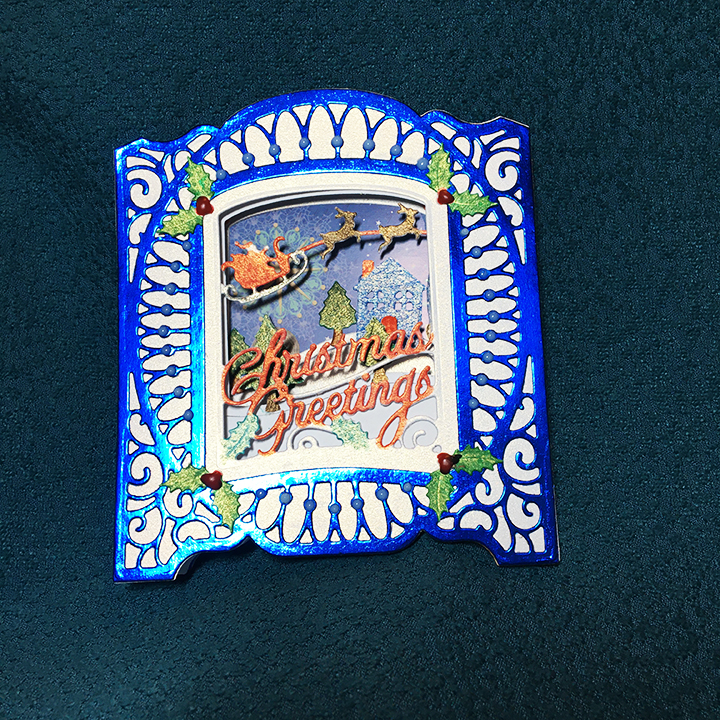
Holly springs were colored and glued to the frame inside corners of all the panels, but only the top panel had red Nuvo drops added to the berries. Nuvo drops were also added to the circle parts of the blue frame on the top panel only.
Finished card when folded shut measures 5 x 4.5 inches (127 x 113 mm).
Thank you for reading about this card. Please like and leave a comment. 😊
If you enjoyed this tri-fold card, check out some of my other trifolds:
Festive Foliage and Hearts – Trifold card
SUPPLIES
Dies/Punches
Ink
Paper
- Recollections – 65 lb. 4.5 in x 7 in Foil Cardstock Paper
- Recollections – 65 lb. 8.5 in x 11 in Shimmer Cardstock – White Gold
- Hunkydory – The Miracle of Christmas -Bitesize Book – CLUB-BSBK26
Miscellaneous
- Cosmic Shimmer Acrylic Glue
- Clear removable tape
- Nuvo Vintage Drops – Postbox Red
- Nuvo Crystal Drops Gloss- Blue Babe