Holiday Hearth

This is the first card in the Fireplace Christmas Card series.

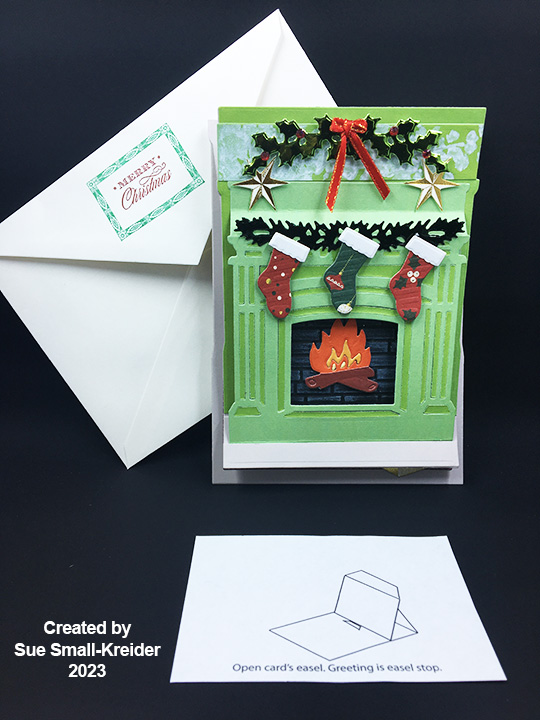
For this turn-of -the century fireplace easel card, Anna Griffin’s Holiday Hearth Easel die set is the star of the make along with some of her stamps and foiled embellishments.

Review the printed instruction sheet included in the fireplace die set before starting card.

Easel Base:  The easel base die cuts in one piece which I cut out in a heavy weight gray cardstock. I added a maroon carpet to the base using the fireplace outline die on a 6×6 inch piece of patterned paper.

Fireplace Mantelpiece:  The mantelpiece die cuts a detailed fireplace front. Because I used a double-sided cardstock that had different shades of green on each side, I was able to save the waste pieces and adhere them back inside the die-cut piece with the use of tape on the backside.

I die-cut the fireplace outline or back twice. Once from gray and once from light green. On the light green piece, I cut-off the bottom flap (and saved it to be stenciled in white to act as wallpaper above the mantel.) I also die-cut just the bottom flap of the fireplace in gray to become the hearthstone that will slide under the easel stopper. The green trimmed back piece was glued on top of the gray back piece. Next the bottom flap of the fireplace was adhered to bottom edge of the back piece and then covered with the gray hearthstone piece. Glue in black brick hearth and fire grate piece. Add glue to the back of the top fireplace tab and, with the entire fireplace flat, adhere to the back piece. Play with the positioning of the back piece on the easel base and then glue easel base tab to gray side of back piece.

Fireplace Grate with Fire:  For the back of the fireplace hearth, I cut a 3.75-inch square of black cardstock which I embossed with a brick wall embossing folder. The bricks were lightly colored with a white Distress Crayon and blended to make a smokey backdrop to the fire. The burning logs piece was cut twice from brown (logs) and once from red, yellow and orange (fire) respectively. I used tape and glue to assemble the fire and logs. To position the burning logs, open the card into the easel position and adhere the piece onto the bricks with foam squares. (When the card is closed flat, the burning logs will look slightly high inside the firebox.)

Decorations:  The die set comes with a stocking die as well as dies for holly and greenery garlands. I cut the stockings from three different decorative papers and then cut the just the cuffs from white cardstock having to do some fussy cut trimming after the die cutting. The garlands are cut from two different shades of green mirror/foil cardstock. The holly garland has red adhesive gems added along with a tiny red ribbon bow. The dark greenery garland is glued onto the mantel edge. All other decorations are adhered with foam squares. Two gold foil stars sit on the mantel shelf and a gold wrapped present sits on the floor. Both are from Anna’s Present Pop-Up Kit.

Sentiments:  A dimensional sentiment sticker from Anna’s Present Pop-Up Kit was popped-up on an additional layer of foam squares to allow the fireplace gray hearthstone to slide under and act as an easel stopper. A blank foiled sticker from the same kit was added to the card base for a personal message that will be hidden when the card is set-up as an easel. The red “Merry Christmas on the envelope flap and its green border are stamps from Anna’s Treasury of Stamps & Dies.

CRX Sheet:  With many interactive cards, the recipient needs instructions on how to open and set-up the card. I create CRX sheets (card recipient experience) to include in the envelope. You can download for free the easel/double easel CRX sheet.
Thank you for reading this blog post. I hope this inspires you and makes you smile. Please like and leave comments 😊

Other Fireplace Cards by designer/brand

Materials Used:

Dies

Stamps

Embossing Folder

  • Altenew – Geometric 3D Embossing Folder 6×6 – Brick Wall – ALT6206

Stencils

  • Funky Fossil Designs – Windy Day

Papers

  • Craft Consortium – A4 Solids Double-Sided Paper Pad – Candy Christmas
  • Echo Park – 6×6 Double-Sided 65 lb Cardstock – Homegrown by Alisha Gordon & Kasie Fry
  • Reminisce – 6×6 Double-Sided Papers – Christmas Wishes
  • Light Green and Dark Green Mirror/Foil Cardstock
  • Black, Gray and White Cardstock
  • Anna Griffin – Present Pop-Up Kit – A7 Envelope – Ivory

Ink

  • Ranger – Tim Holtz – Distress Crayon – Picket Fence
  • Stampin’ Up – Classic Stampin’ Pad – Cherry Cobbler and Emerald Envy
  • Craft Smart –Acid Free Ink Pad – White

Adhesives

  • Neutral PH Adhesive by LINECO
  • Fine-Tip Glue Bottle
  • Clear Tape
  • Foam Squares

Tools

  • Die Cutting Machine
  • We R Memories – QuickStick
  • Stamping Platform
  • LDRS – Stampendable Stamping Tool
  • Stamping Cloth
  • Scissors
  • Fork

Miscellaneous

Butterfly Tree Pop-UP

This card was made for Craft Roulette #175 whose parameters included a 4.25-inch project, Craft Roulette colors, a night element and a bottom border.

For this pop-up butterfly tree in a box, I used Karen Burniston’s large Bam Box Pop-Up, Butterfly Collage Add-ons, and leaves from Fun Flowers and Twist Flower Pop-Up. The tag is from the Tag Book Pop-Up. (I have made a Christmas tree like this project. Click here to see blog post.)

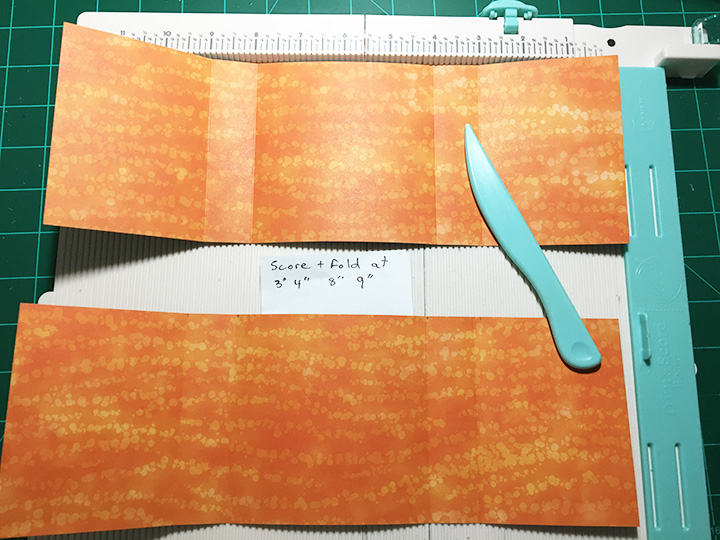
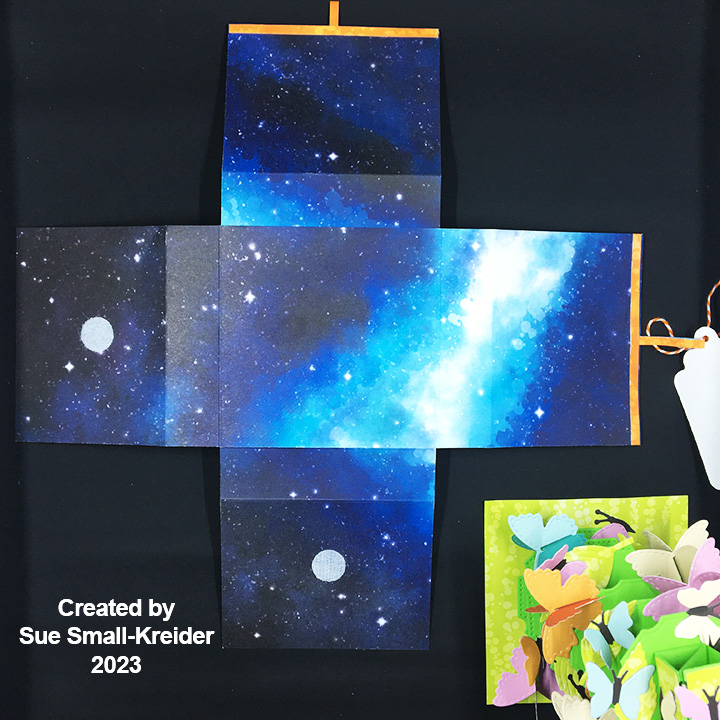
Box: The box is made of double-sided decorative cardstock cut into two 12 x 4 inches rectangles scored and folded at 3 inches, 4 inches, 8 inches and 9 inches. The middle squares are glued together to form a cross. Using strips of decorative paper for pull ribbons glued to the middle of each flap, I glued the remainder of the strips as a bottom flap border. Two adhesive-backed hook and ladder fasteners are the closures.

Tree: Utilizing the Bam Box die set, I cut six of the bam box strips, 13 of the bam box decorative rectangles and three each of the largest two fancy circles in the set from green cardstock. Because I like to let the glue dry before adding the rubber bands to bam boxes, I glue in stages. (See assembly video located at the bottom of the linked page and source of tiny rubber bands.)

Glue the decorative panels to the sides of each bam box for added thickness. (By sides I mean the sides that have the diagonal flap beside them. Not the side that has the smiley face or its parallel side.) These will be the sides seen between the layers of circles.

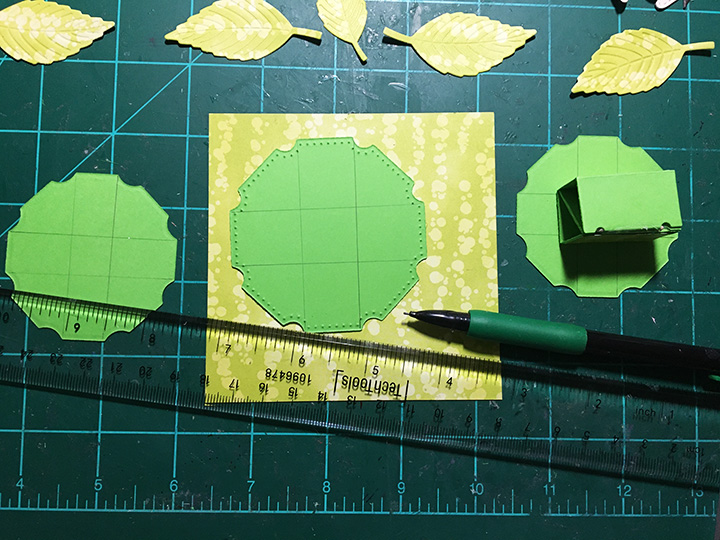
To assemble the tree, mark in pencil the location of the bam boxes on the bottom of each circle except one of the largest. Glue bam boxes to bottoms of five circles. The sixth bam box will be the top and the leftover, large circle will be the bottom.

To finish the tree assembly, alternate the direction of the diagonal inside flaps of the bam boxes, so that they make a zig-zag pattern when looked at from the side. By alternating the direction, the bam boxes will fold flat, and the tree will flatten into an oval shape. Use glue to attach each level. Once the tree is assembled, close or flatten the tree to position it on to a 4-inch square of green decorative paper that acts as the base for when the tree is in the box. Glue the tree to the square base.

Butterflies: (Watch the video at the bottom the linked page before starting.) Using the Butterfly Collage Add-ons die set, die cut all the dies from one color of doubled sided paper. Repeat with three other colors of paper. Die cut from black all non-moving butterflies four times.

Assembling the non-moving butterflies, use the black pieces as the base that the trimmed colored paper wings are glued to. On the double-winged one bend the wings up from the black body.

To attach the butteries to the tree, play with the positioning of the fluttering large butterflies on the tree in the closed position. If the butterfly stays within the green square base, it can be glued in place. I found that the flutter butterfly piece with the slot cut into it needs to be the piece glued to the tree, making sure the slot is not obstructed so the other piece can freely flutter.

I used green leaves cut from the decorative base paper to fill-in areas of the circles that were too close to the square’s edge when closed. Add in non-moving butterflies checking their position when tree is closed and that they are not creating catchpoints for fluttering butterflies.

Tag: My favorite gift tag to use for sentiments is in the Tag Book Pop-Up set. I stamped and heat embossed the sentiment. Baker’s twine was used to tie the tag onto the pull-up loop.
Thank you for reading this blog post. I hope it has provided some inspiration.

Materials Used:

Dies

Stamps

  • Waffle Flower – Clear Stamps – Sweet Sentiments -271296
Papers

  • Stampin’ Up – 12 x12 Double-sided Designer Series Papers – Stargazing
  • Craft Consortium – A4 Solids Double-Sided Paper Pad – Candy Christmas
  • Green 110 lb. Cardstock
  • Black Cardstock Scraps

Ink

  • VersaMark – Watermark Stamp Pad

Embossing Poweder

  • Cosmic Shimmer – Detail Embossing Powder – Detail Bright Gold

Adhesives

Tools

  • Die Cutting Machine
  • We R Memories – QuickStick
  • We R Memories – Scoring Board and Trimmer
  • Bone Folder
  • Small Clips
  • Stamping Platform
  • LDRS – Stampendable Stamping Tool
  • Stamping Cloth
  • Kat Scrappiness – Anti-Static Tool

Miscellaneous

Celebrate with Cupcakes!

This card was made for Craft Roulette #172 whose parameters included: Z-fold card, OLD, any colors and something from my mesk (messy desk.)

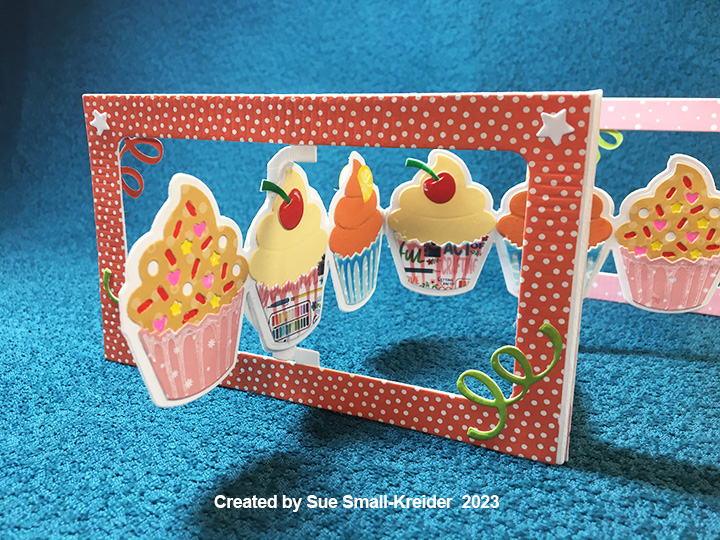
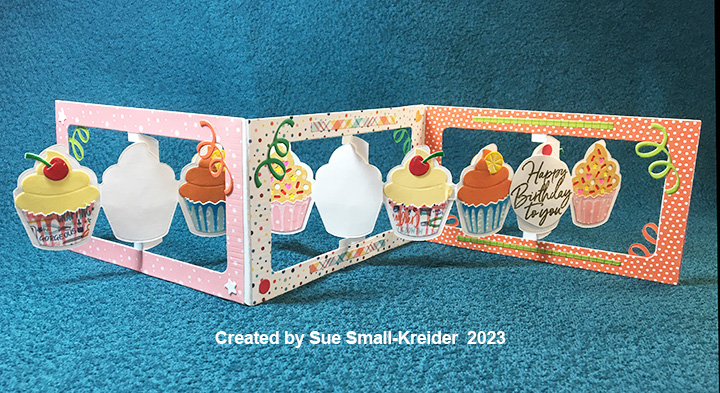
For this mini-slimline card, I used Karen Burniston’s dies to created a three panel accordion card with cupcakes. The main dies used are Cupcake Add-ons and Landscape Rectangle Accordion with decorations from Paper Frames Pop-Up and Happy Hour Charms.

Accordion Frame: (Watch assembly video at the bottom of link page.) Cut three frames from heavy white cardstock using the Landscape Rectangle Accordion set. Trim the rectangle panel to just a pivot post. Cut a total of six frames from patterned papers and cut out the pivot panels and tabs from all to have decorative frames. Glue the white frames together as shown in video. Adhere the decorative frames. Trim off unused tab.

Cupcake Panels: (Watch assembly video at the bottom of link page.) Cut four of the cupcake panel die from the Cupcake Add-ons set from white cardstock. Cut a total of 15 of the cupcake icing piece from different papers. (I cut six from three different papers coating the yellow and orange papers with a glitter gloss. the sprinkles were die cut into the icing piece and colored with fine-tipped markers and gel pens.) Cut a total of 15 of the cupcake paper piece from different papers. Using die, stencil shadows onto cupcake papers. The sprinkles die and cherry decoration dies are included in the Cupcake Add-ons. The orange slice is from the Happy Hour Charms set. Adhere cupcakes to fronts of three of the white panels. Cut fourth panel apart into thee separate cupcake outlines. Glue decorated panels to pivot posts on frames. Decorate backs of panels using the white cupcake outlines to cover the pivot posts and the remaining six cupcakes to cover ends of panels. Glue the panels together using tabs. trim off unused tab.
Decorations: The ribbon streamers are in the Cupcake Add-ons set along with the hearts. The stars and circles come from the Paper Frames Pop-Up. Strips of decorative papers were also used from my scrap bag.

Sentiment: The white cupcake panels on the back are for either personal messages or the heat embossed happy birthday sentiment. When the card is closed the main sentiment is visible.

Thank you for reading this blog post. I hope this inspires you and makes you smile. Please like and leave comments 😊

Materials Used:

Dies

Stamps

  • Waffle Flower – Clear Stamps – Sweet Sentiments – 271296

Papers

  • Carta Bella – 6×6 Double-Sided Paper Pad – Happy Crafting by Steven Duncan
  • Solid and Patterned Paper Scraps
  • White Heavy Cardstock 110 lb

Ink

  • Ranger – Tim Holtz – Distress Ink- Saltwater Taffy and Salty Ocean
  • Simon Says Stamp – Pawsitively Saturated Ink – Citrine and Sunbeam
  • Sharpie – Permanent Marker – Red and Yellow
  • Gel Pen – Pink
  • Sakura – Gelly Roll Pen – Medium – White
  • Nuvo – Aqua Simmer – Glitter Gloss
  • Papercrafting Society – Matte Metallic Embossing Powder – Gold

Adhesives

Tools

  • Die Cutting Machine
  • We R Memories – QuickStick
  • Stamping Platform
  • LDRS – Stampendable Stamping Tool
  • Stamping Cloth
  • Sponge Dauber
  • Craft Mat
  • Scissors
  • Craft Knife
  • Heat Tool

SHELL-ebrate!

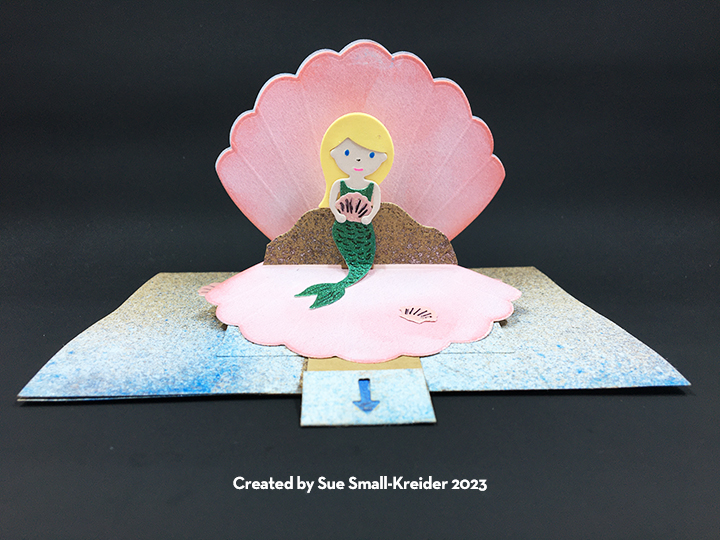
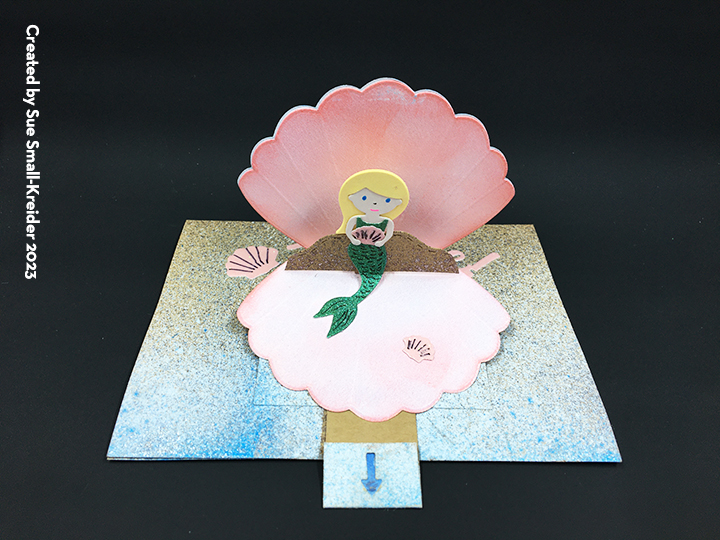
With a nod to Botticelli’s The Birth of Venus painting and Hans Christian Anderson’s The Little Mermaid story, this birthday card is full of birthday shell-ebration!

For this 4 1/4 X 5 1/2-inch card, I used one of Karen Burniston’s new die sets – Small Scenes Bam Box – along with the previously released dies of Happy Birthday, Happy Birthday Shadow, Princess and Mermaid, Celebrate!, Frame Pull-Pop-up and Sea Charms.

Card Base: Starting with a 5 1/2-inch by 8 1/2-inch rectangle of heavy kraft cardstock, Fold in half to form a top-fold A2 card. Create a finger hole in the center of the bottom edge, cut a half circle through both layers using a 3/4-inch circle punch. Spray both sides of the cardbase to create a sand effect with brown and gold mica and glitter sprays. Let card base dry for an hour or two and place between sheets of paper with weights on top to have it dry flat.

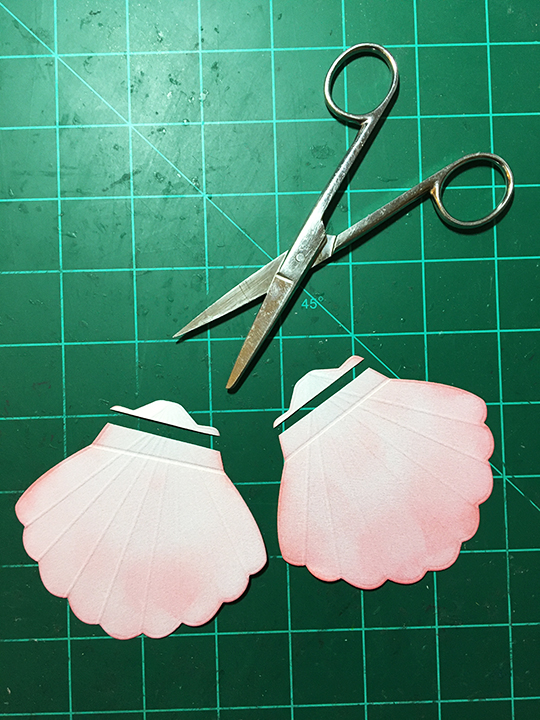
Pop-Up Shell: Cut three shell shapes from creamy white shimmer or pearlescent cardstock using a scalloped shell die approximately 3 1/2x 3 1/2-inches in size. (I used one by Frantic Stamper.) Ink the shimmer side of two of the shells pink and the remaining one blue. Using a score board with one channel marked in black, score the shells from center tip to dips between scallops on the shimmer side of the cardstock. Trim off the end of the pink shells to fit the flap of the mechanism.

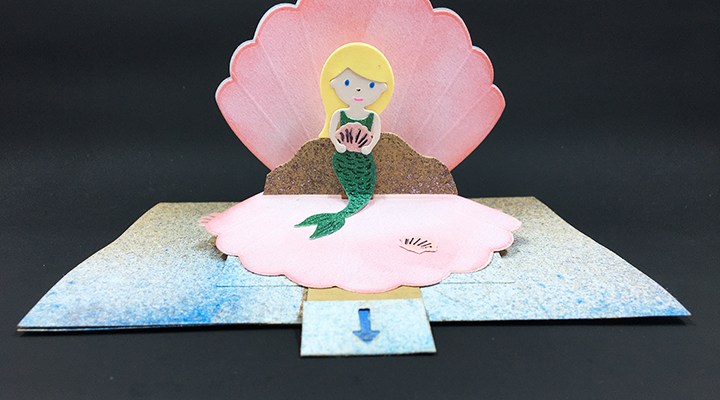
Pop-up Mechanism: Watch the die assembly video for the Frame Pull-Pop-up set located at the bottom of the link page. before, cutting the two pieces with smiley faces.  Glue the pull tab to the base piece. Trim off the corners as shown in photo. (I attached the brown kraft base to the card using strong doubled-sided tape instead of staples. Next, I did a light spray of white ink for sea form and a spritz of blue for water along the bottom edge of the card to blend in the base to the card.) Glue one of the pink trimmed shells to the base piece matching the trimmed edge to the tab. Put glue on base shell tab. Add the second pink shell with pink sides together to form top half of pop-up pull frame. Make sure shells are perfectly aligned overreach other. Test to make sure mechanism works properly and let glue dry. Glue blue shell to back of top shell, aligning all the edges. Test mechanism and adjust as needed.

Mermaid on Rocks: Follow the images on the Princess and Mermaid packaging to create mermaid. (I used stencil feature of the die to draw on fish scales on glitter cardstock using a permanent ink marker.) Cut the small pop-up mechanism in the Frame Pull-Pop-up set and glue inside pop-up shell. Glue on rocky backdrop from Small Scenes Bam Box. (I spritzed my rock with brown paint and had to trim the ends to fit inside my shell.) Fold mermaid to fit into the shell and glue in place. Add shell(s) from the mermaid set for decorations.

Sentiments: For “Shell-ebrate!” I used a shell charm from the Sea Charms set and trimmed off “Cel” from the Celebrate! die. The hyphen is cut from the “l.” Inside the card is “Happy Birthday using both the Happy Birthday and Happy Birthday Shadow sets. I cut two large shells from plain white cardstock and scored as shown before for personal message labels on the inside and back of card.

Envelope: The card fits into an A2 invitation envelope. I decorated the back flap with a glitter shell cut using the Sea Charms set.

Thank you for reading this blog post. I hope this inspires you and makes you smile. Please like and leave comments 😊

Materials Used:

Dies

Papers

  • Recollections – 8.5×11 White Gold Shimmer Cardstock
  • Kraft, White, Yellow and Cream Cardstock
  • Glitter Cardstock – Greens and Pink
  • A2 Blue Envelope

Ink

  • Ranger – Tim Holtz – Distress Ink- Abandon Coral and Salty Ocean
  • Sharpie – Permanent Marker – Ultra Fine Tip – Black
  • Gel Pens – Blue, Pink and Black
  • Nuvo – Mica Mist – Antique Gold and Nebula Blue
  • Nuvo – Sparkle Spray – Cocoa Powder
  • Avery Elle – White Ink Spray

Adhesives

Tools

  • Die Cutting Machine
  • We R Memories – QuickStick
  • We R Memories – Scoring Board and Trimmer
  • Sponge Dauber
  • Craft Mat
  • Craft Knife
  • Scissors
  • Stapler
  • 3/4-inch Circle Punch
  • Clips
  • Flat Weights – Stamp Blocks and Cell Phone

Miscellaneous

  • Scrap Newsprint or Cardboard Spray Box

Rolling A Happy Father’s Day

We play a lot of Yahtzee, a dice game marketed by Hasbro, at our house. When someone rolls five of the same number, you yell out Yahtzee! We make a big deal of it.

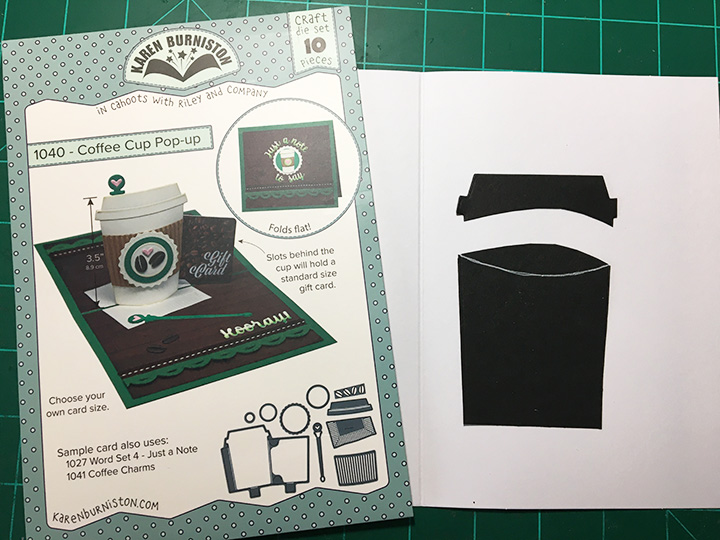
So, for my husband’s Father’s Day card this year, I made a Yahtzee card using some of Karen Burniston’s June 2023 dies – Fun Flowers, Game Charms, Word Set 17 – Congratulations, and the Twist Flower Pop-Up, along with some previously released dies – Coffee Cup Pop-Up, Happy Father’s Day, Border Blends – Trims, Heart Collage Pop-Up, and Rectangles and Labels – Crosshatch.

Cardbase: I started with a purchased 5×7-inch gatefold cardbase so that I would have two folds for two pop-up mechanisms. For the green background panels on the front and inside of the card, I cut three panels using the largest rectangle die from the Crosshatch Rectangles and Labels set. Two of the panels I cut long-ways in half and glued to the front and inside of the card flaps. The last panel was glued inside the card.

Cup and Mechanism: For the Yahtzee cup that is in our game set, I die-cut the coffee cup and trimmed off the top. I added a white line with a gel pen. The mechanism comes from the Twist Flower Pop-Up which is a smaller version of the Snowman Twist Circle mechanism. (I watched the assembly videos for the Twist Circle and the Heart Collage Pop-up before making the card.) I used a two-sided green printed cardstock that I cut two of the mechanisms from and trimmed pieces from one mechanism to cover the back sides of the mechanism that would show when open. The most difficult part of the card was finding the layout that looked the most realistic and still allowed all the elements on the two mechanisms to fold inside the card and not be sticking out. Temporary tape was extremely useful for this process as positions were tweaked.

Dice and Mechanism: Five white dice were die-cut using the die with the largest numbers and five of the black backing were also cut from the Game Charms set. The small charm loop was trimmed off each one. Like the Twist Flower mechanism, I cut the Heart Collage Pop-Up from the same green cardstock as the background panels cutting two mechanisms using one for pieces to cover the reverse-sides that show when installed. Because there was no easy way to place dice on the center platform of the mechanism that didn’t involve catch points, I used a circle from the Fun Flowers set to cover the center platform.

Decorations: From my family’s stash of used Yahtzee score sheets, I took one that had several Yahtzees on it and trimmed it to size to add to the background. I fussy cut the logo to add to the cup. On the card front I used some leftover silver ribbons and tiny foil hearts cut using the Border Blends – Trims set.

Sentiments: Two die sets were used to create the card front sentiment. The Happy Father’s Day set comes with a shadow die which I cut in white. For the “you’re a Big Deal,” I used Word Set 17, but without the shadows for “Big” and “Deal.”

Thank you for reading this blog post. I hope this inspires you and makes you smile. Please like and leave comments 😊

Materials Used:

Dies

Papers

  • Keep It Simple – 12×12 Double-Sided Cardstock Collection Pack – Lucky Day
  • Hot off the Press– 8 1/2 x 11-inches Foil Cardstock – Fireworks Blue Holographic
  • Hot off the Press– 8 1/2 x 11-inches Foil Cardstock – Stars Silver Holographic
  • Recollections – 8.5×11 White Gold Shimmer Cardstock
  • Gold and Silver Foil Cardstock
  • Black and White Cardstock
  • Park Lane Paperie – A7 Gatefold Cardbase and Envelope – White

Adhesives

Tools

Miscellaneous

  • Vintage Yahtzee Score Sheet

A Gingham Fence Birthday

It’s Sneak Peek Week for Karen Burniston’s June 2023 Release.

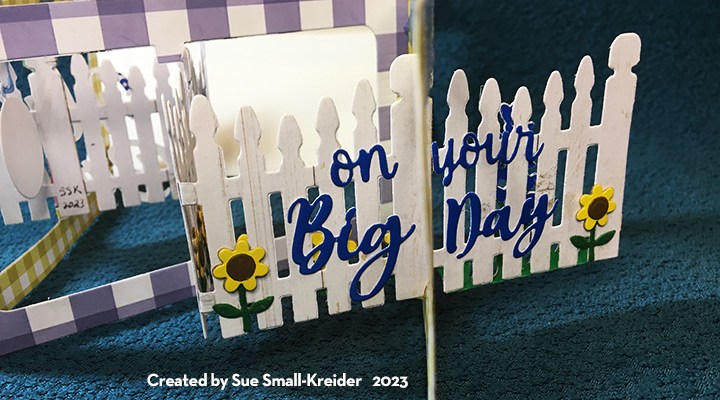
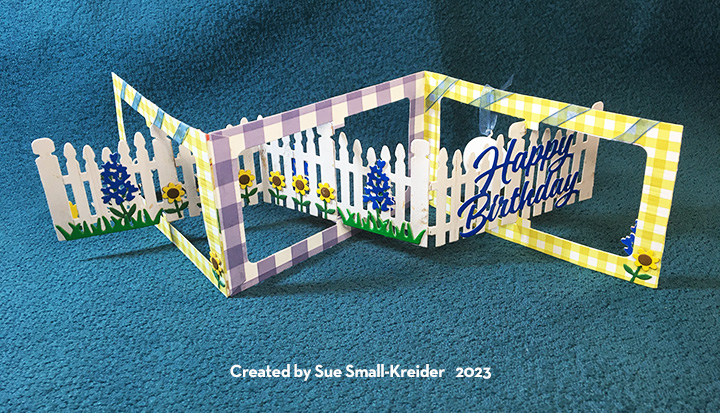
Today I’m featuring a picket fence accordion card using the new Fence Landscape Accordion Add-On die set which includes two kinds of flowers and some grass. Along with the previously released Landscape Rectangle Accordion set, this add-on lets you make a two or more panel interactive card. (I have made a similar card before, but I had to fussy cut the fence out. This die is a time saver.)

Watch the assembly video for the Landscape Rectangle Accordion (at the bottom of link page) before starting this card.

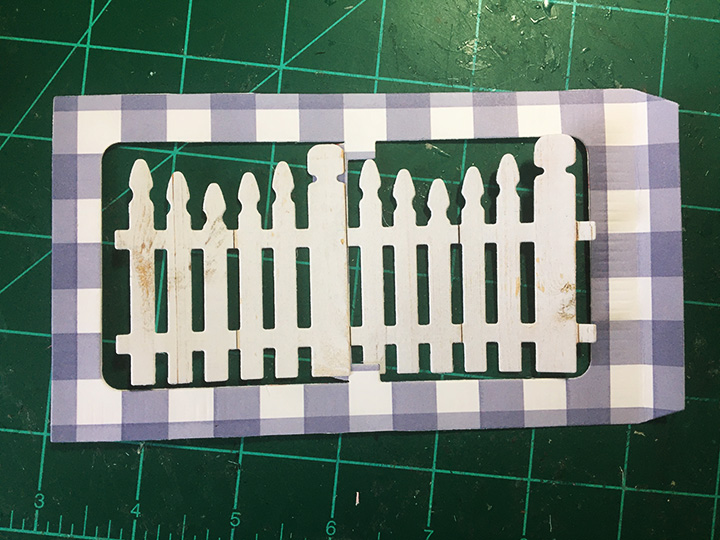
Cardstock needed for fence and frame should be of a heavyweight if cut in one layer, but lighter weight patterned papers can be used, but you will need to back them with more cardstock. (I used double-sided cardstock for my gingham frames and a single sided woodgrain paper for my fence and cut two layers for fence and frame.)

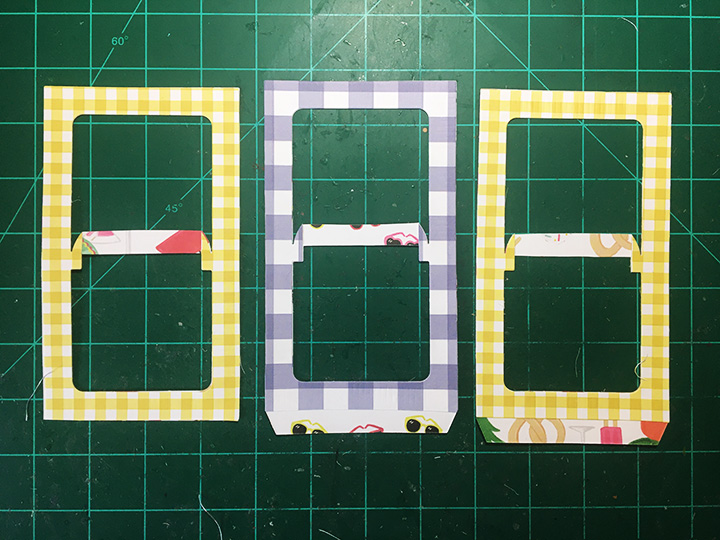
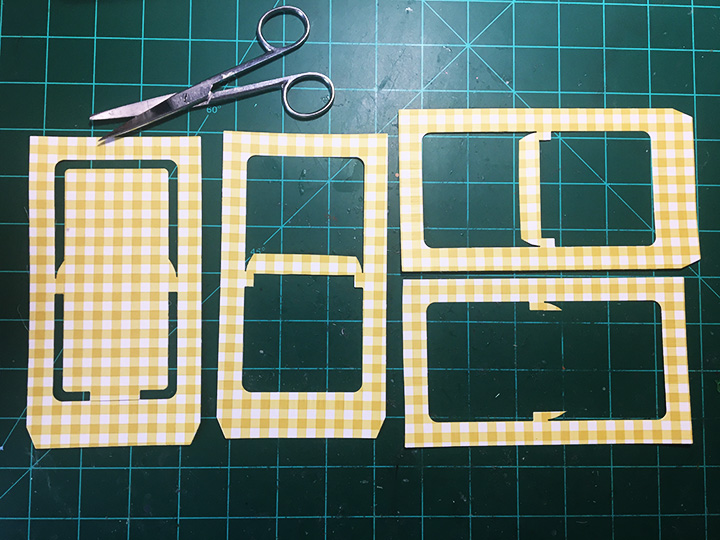
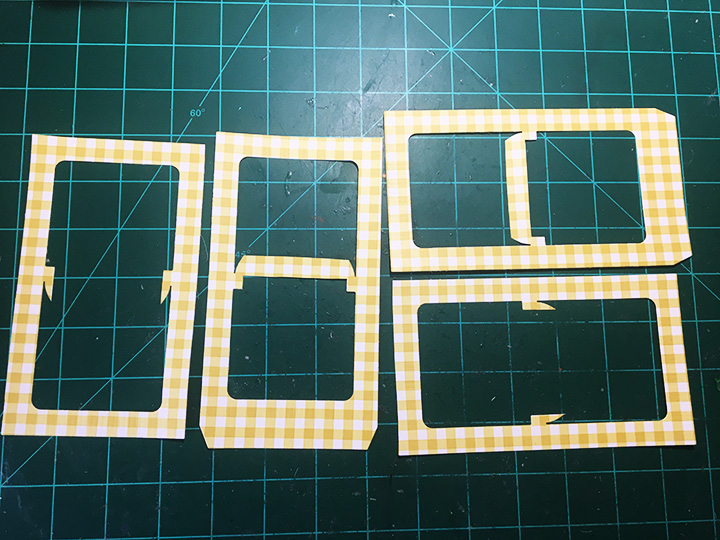
Accordion Frames: I cut four frame panels from a yellow-green gingham cardstock and two frame panels from a larger blue gingham cardstock. Two of the frame panels I trimmed the inside rectangle panel down to a center bar for the fence post to be glued onto. The other two panels I cut away the entire rectangle, leaving only the small pivot wings. (While I cut off the tabs on the pivot wings only frames, I would recommend waiting to trim off the tabs until you are ready to assemble the three panels together. I made a mistake in my assembly and had to patch in a tab that I had cut off earlier.)

The other two panels I cut away the entire rectangle, leaving only the small pivot wings. (While I cut off the tabs on the pivot wings only frames, I would recommend waiting to trim off the tabs until you are ready to assemble the three panels together. I made a mistake in my assembly and had to patch in a tab that I had cut off earlier.)

Repeat the trimming of the blue checked frames to have one frame with the center bar and one frame with the pivot wings.

Glue three sides of each set of frames (one center bar and one pivot wings) together leaving the tab side with no glue. (You will need to be able to hide the tab of the adjacent panel by gluing it between the layers of the frame.)

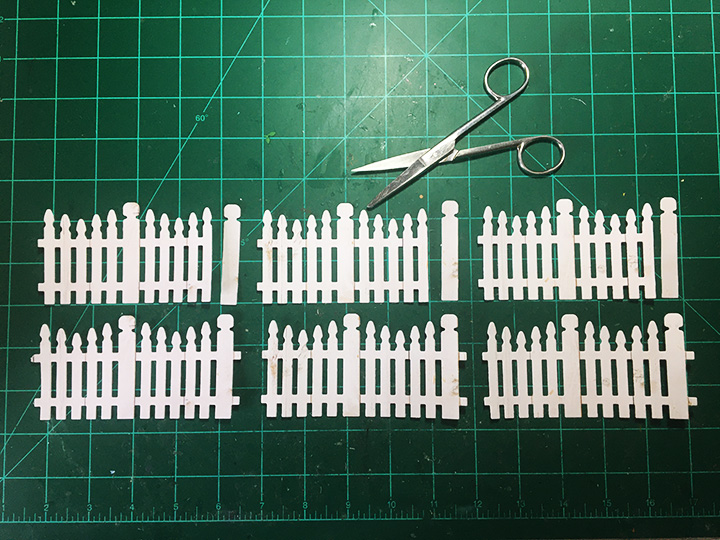
Fence: I cut six fence panels from woodgrain paper. (If I had to do it again, I would use a single layer of solid white card stock to eliminate the need for the next step.)

I trimmed of the end fence post on the three fence pieces that would be backing pieces, removing the tabs as shown.

Glue the front fence piece to the center bar. You may want to trim the center bar some to be hidden behind the fence post. Turn over panel and glue the back fence piece to the front piece, piecing in the separted post.

Place weights over glued fence layers so they dry flat. (I used clear stamping blocks and my cell phone as weights.)

I forgot and glued shut my layers on the frames, so I covered over the tabs with the tabs that had been cut off. I recommend decorating the fence before you glue the fence tabs together.

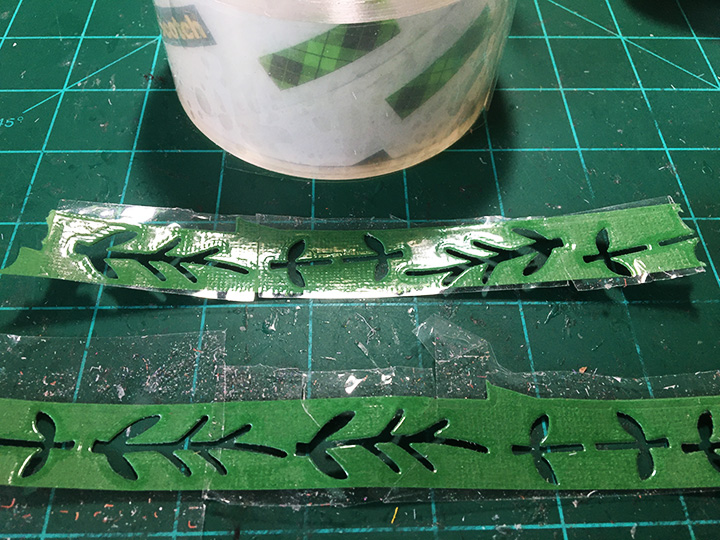
Flowers:  I tried something I had seen Karen Burniston do in one of her videos where she covered her cardstock with clear packing tape before die-cutting into it to get shiny pieces. I did this for my green leaves and stems. For the grass I used shiny green cardboard packaging.

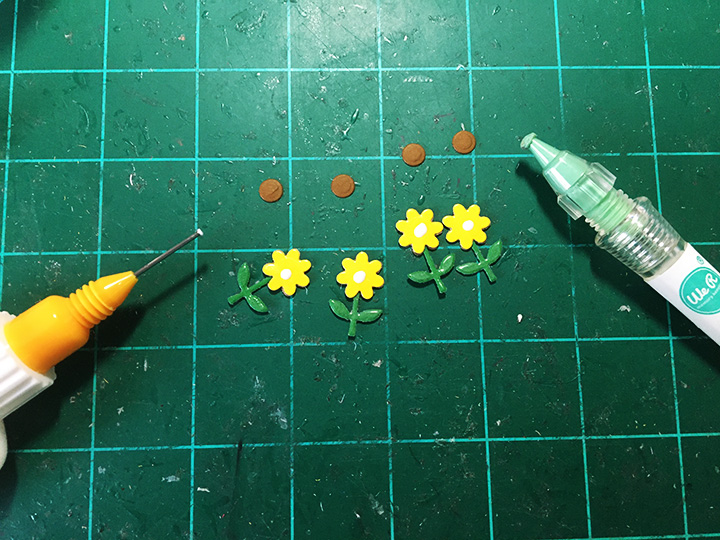
For the flower heads, I used shiny cardboard packaging from a well know yellow cereal box and a shiny piece of blue junk mail. I cut a front and a back for each flower head as some will show through the fence. (This made for thick, dimensional flower heads.) The stems were sandwiched between the flower heads’ front and back layers. I made an assembly line for making the 12 yellow flowers using glue and a Quikstick to pick-up and place the tiny brown centers on the flowers.  When placing your flowers on the fence, remember not to place anything that will be a catchpoint below the fence or above the fence post. (I had thought about adding a small bird to the top of the fence, but it was too tall.)

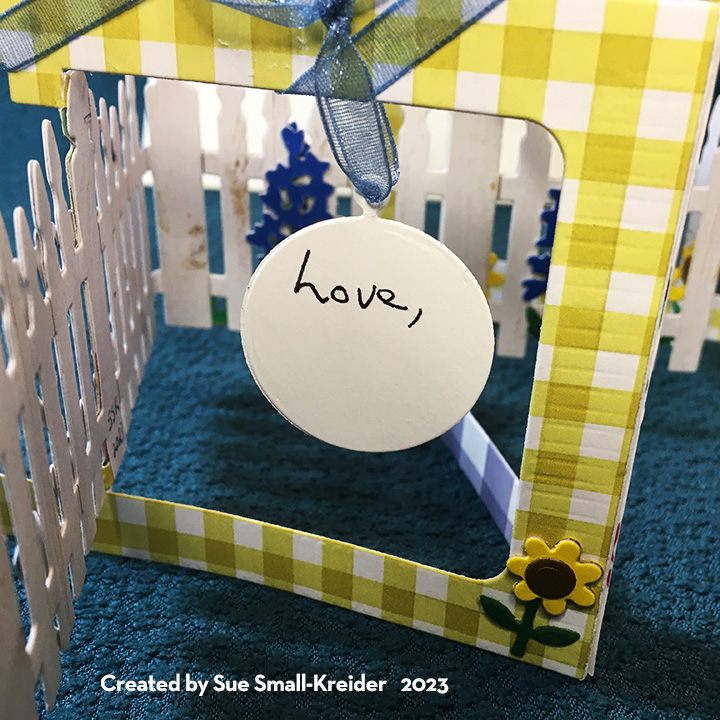
Sentiments: For the front of the card, I used the “on your Big Day” from the newly released Word Set 17 – Congratulations. On the back of the card, I used the previously released “Happy Birthday” die set.  I also added a circle charm from the new Game Charms to write a personal message with a piece of ribbon. (You could also use the large circle charm in the Sports Charm set.)

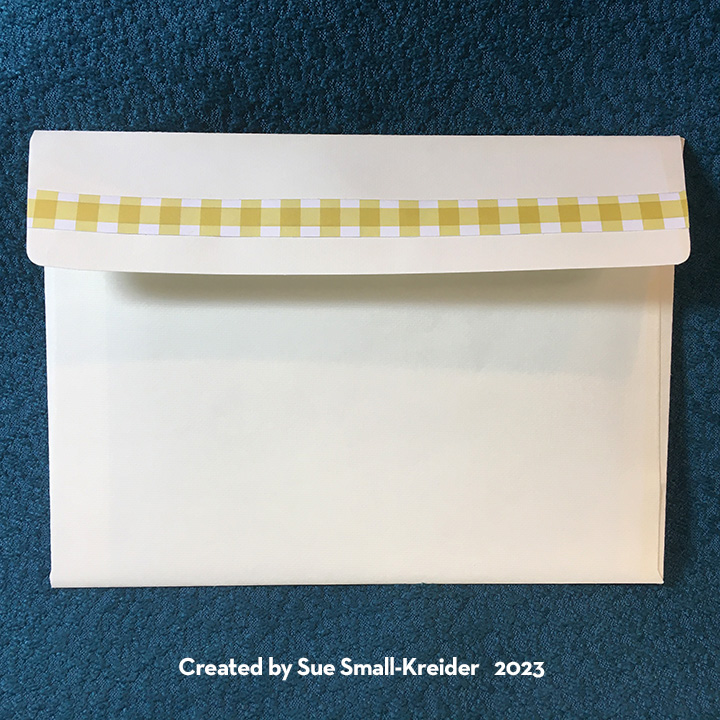
Envelope: This card fits into an A6 envelope that I glued a strip of gingham cardstock to its back flap.

Thank you for reading this blog post. I hope this inspires you and makes you smile. Please like and leave comments 😊

Materials Used:

Dies

Papers

  • Echo Park – 12×12 Double-Sided Paper Collection – Best Summer Ever
  • Honey Bee Stamps – 6×8.5 Double-Sided 65# Cardstock – Grain and Grunge
  • Brown, Green and White Cardstock
  • Shiny Yellow and Blue Upcycled packaging and Junk Mail
  • A6 Ivory Envelope

Adhesives

Tools

Miscellaneous

  • Grey Blue Organza Ribbon- 1/4” wide
  • Clear Packing Tape

A Knight In Shining Armor

It’s Sneak Peek Week for Karen Burniston’s June 2023 Release.

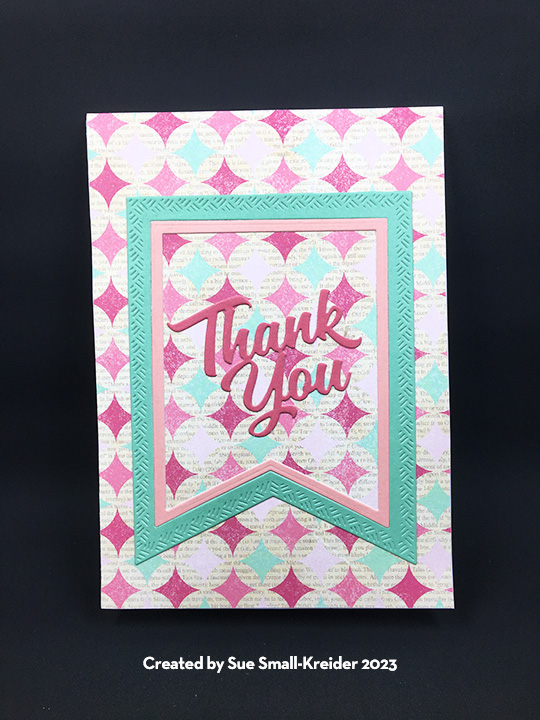
Sometimes you need a little help. Saying “Thank You” for a kindness given is what this card is all about.  It uses Karen Burniston’s new House of Cards Pop-Up die set along with some previously released dies including:  Banners – Crosshatch, Thank You, Princess and Mermaid, and last, but not least Knight and Dragon.

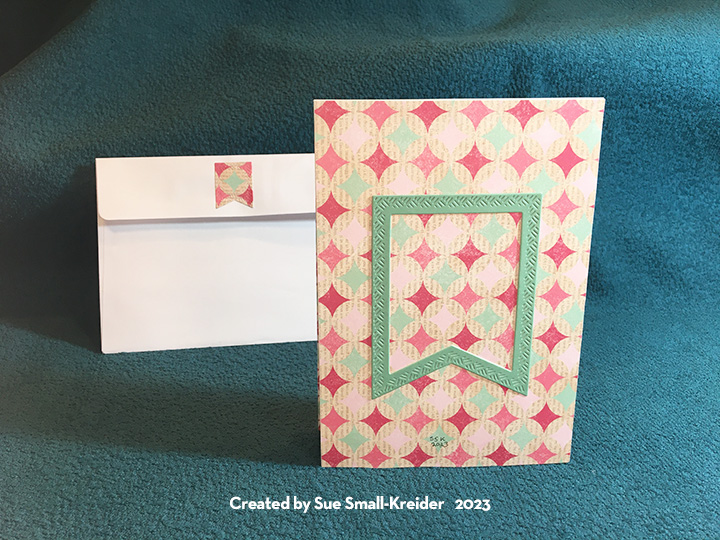
Cardbase: I started with a purchased 5×7 cardbase and cut it on its scored fold-line to make two panels that I reattached with paper tape at the short edge sides to make a top fold card. I used tape on both sides of the cardbase. Next, I covered all four panels with decorative papers.

Banners: Three colors of solid cardstock came in the paper collection, and I cut a nested set of banner shapes using the five largest dies in the Banners – Crosshatch set from each color. After playing with mixing and matching the various color combinations, I settled on my choices and glued the frames onto the cardbase allowing some of the patterned papers to show through.

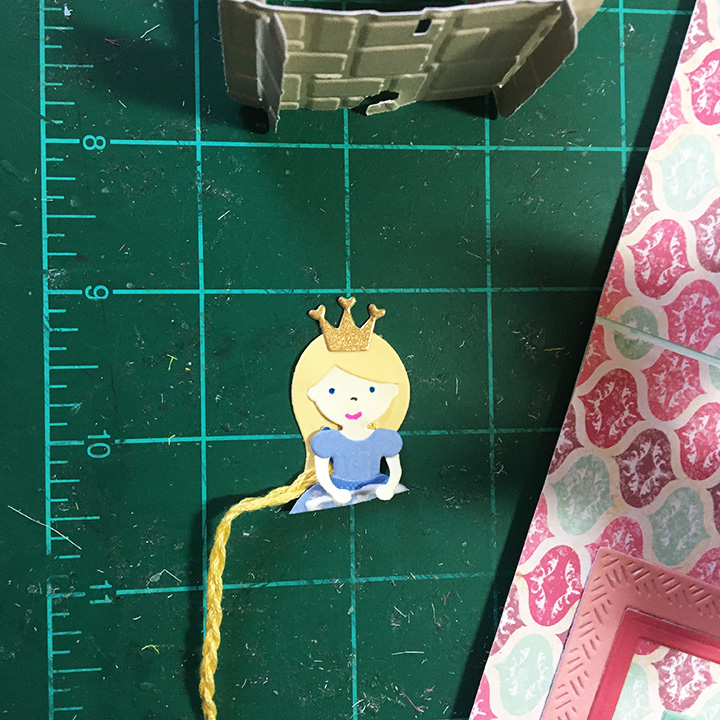
Princess and Knight:  The princess, I had made some time ago, from scraps using the Princess and Mermaid die set. I braided three strands of yellow embroidery floss that matched the princess’ hair color and glued it between her hair and the back of her dress. The knight was cut from two types of silver foil cardstock and some blue scraps using the Knight and Dragon die set. (You can watch the assembly video for these dies by clicking on their dies and looking for video on the link page towards the bottom of the website page.)

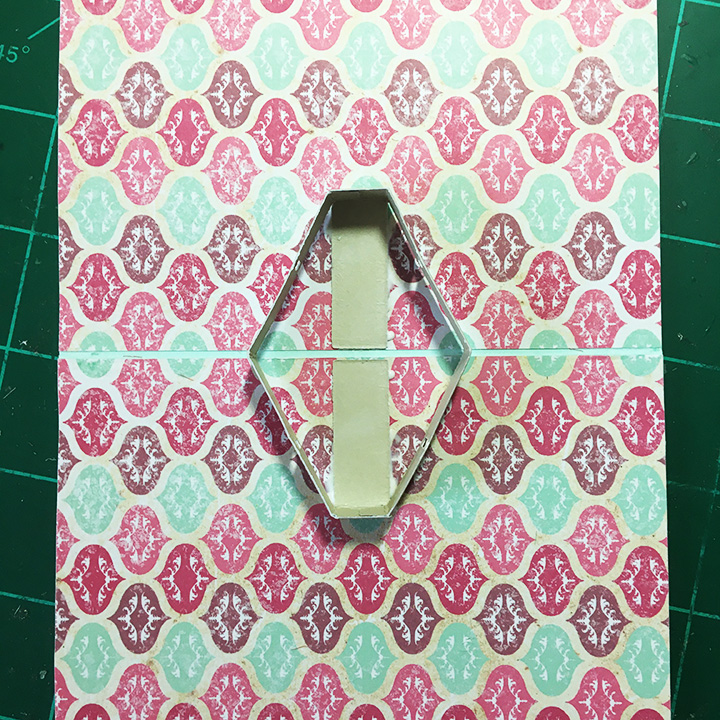
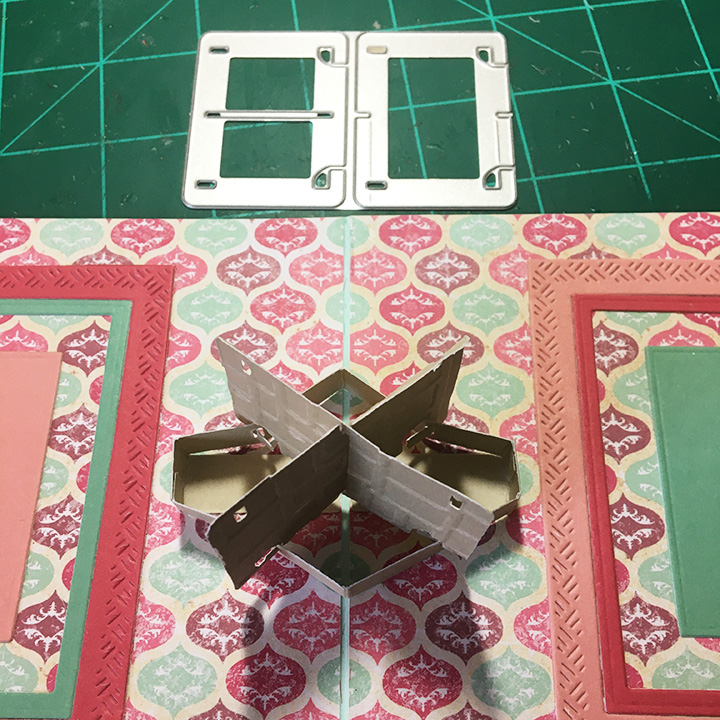
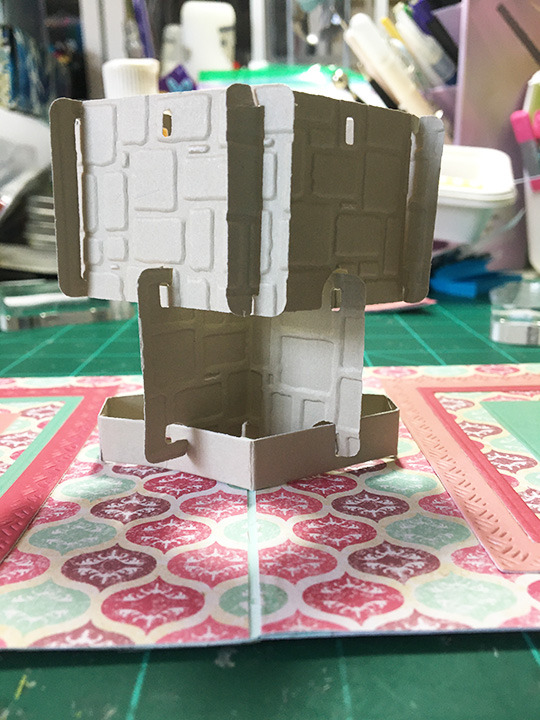
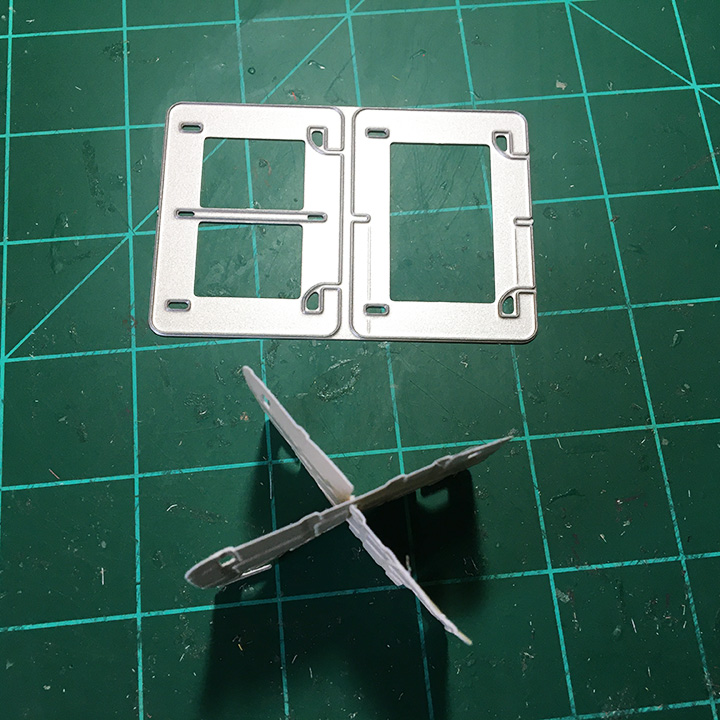
Tower: For the four-story tower, I cut each of the card panel dies twice from heavy gray cardstock using the House of Cards Pop-Up die set. Next, I embossed each card using a cobble stone embossing folder. I cut the two base pieces and glued the small tabs to the other piece to for a six-sided polygon. The long tabs I glued inside the card along the fold. (This base is much like Karen Burniston’s palm tree or Christmas tree bases and the attachment of what goes on top of them involves tabs poked through holes. For an assembly video check the bottom of the page linked.)

To build the tower assemble two “Xs” and two squares. Attach one “X” to the base, then attach a square followed by an “X.” Loosely attach the last square and place the princess in it with temporary tape. Close card and if the princess sticks-out of the card, you will need to cut a window in one panel of the top square. (I cut a lip/tab that folded over and was glued to give strength to the card.) You will have to trim off the lower half of the princess to fit in the window and the card. Glue her onto the window lip making sure her gown does not cover the notch used to attach the square to the tower. Make sure her long braid does not hamper the opening and closing of the tower. 

Glue the knight to the small side of the tower base making sure he is not attached to any of the playing card panels. Test opening and closing the card to look for catch-points before the glue dries.

Sentiments: “Thank You” is die-cut using a die set of the same name. The inside sentiment “For coming to my aid” was computer generated, printed on thin printer paper and then die cut with a banner die. A blank banner was also cut from printer paper for a personal message.

Envelope: The smallest banner in the die set was used to cut the printed paper banner glued to the back envelope flap. It hints at the heraldry to come inside.

Thank you for reading this blog post. I hope this inspires you and makes you smile. Please like and leave comments 😊

Materials Used:

Dies

Embossing Folders

  • Darice – A2 Size – Cobble Stones

Papers

  • Craftwork Cards – 8×8 Solid Colors and Printed Papers – Flying High Collection
  • Colored Cardstock Scraps
  • Silver Foil Cardstock
  • Printer Paper
  • A7 Cardbase and Envelope – White

Ink

  • Pink and Blue Fine Tipped Markers
  • Pigma – Mircon 01 Fine Tip Pen – Black
  • Computer Printer

Adhesives

Tools

  • Die Cutting Machine
  • Scissors
  • Stamping Blocks or Other Flat Weights
  • Computer

Miscellaneous

  • Yellow Embroidery Floss

Easter Card For A Child

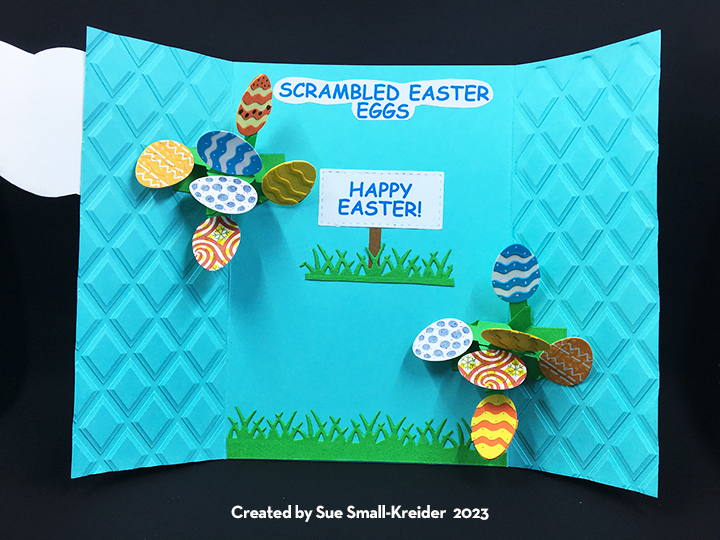
This card was made for Craft Roulette #168 whose parameters included a kid’s card, citrus colors, a spring scene and something metallic or foil. Maymay was the guest crafter and talked about her young nephew who writes books and has a series about Evil Chicken. Her card included Evil Chicken and she showed how to make him from scraps of cardstock.

This card was made using all Karen Burniston dies.

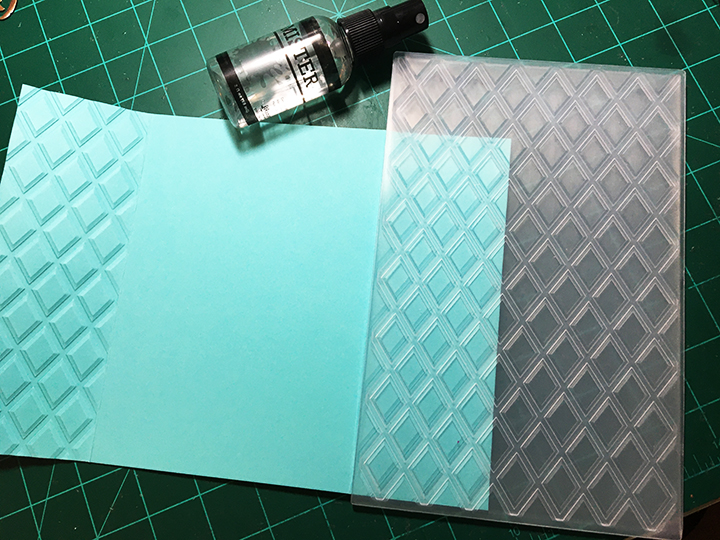
Cardbase: For this gatefold A7 (5×7-inches) card I started with a piece of cardstock 10×5-inches and scored and folded 2.5-inches from each of the ends longwise. Next, spritz the ends of the card before using an embossing folder to make the card front more interesting.

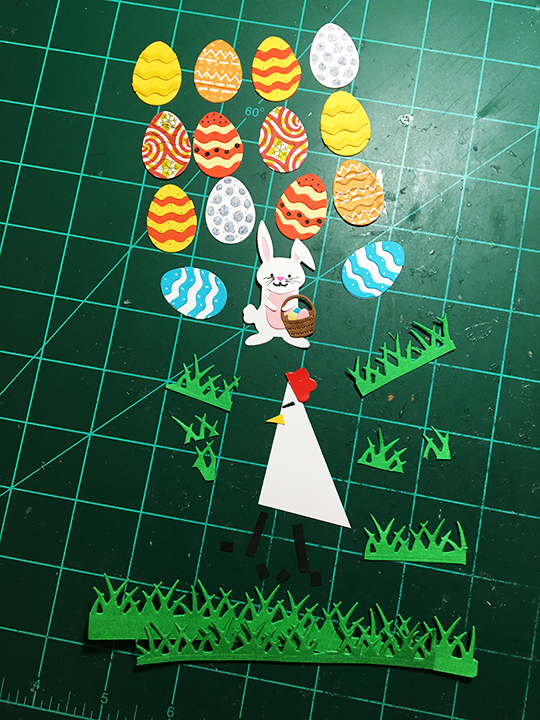
Chicken: The chicken is made up of a large white triangle, a tiny yellow triangle, a small dash of black, half a tiny red flower, and a thin strip of black cut into two legs and four toes. I added a wing from a scrap of white. Grass was cut using a die from the Nature Edges set.

Rabbit: The Easter Bunny was made with white and pink scraps using the Spring Animals die set. A tiny basket and eggs are also part of the die set. I colored one of the eggs with a blue metallic marker. I made two baskets one is hung on the bunny’s arm and the other is on the envelope flap.

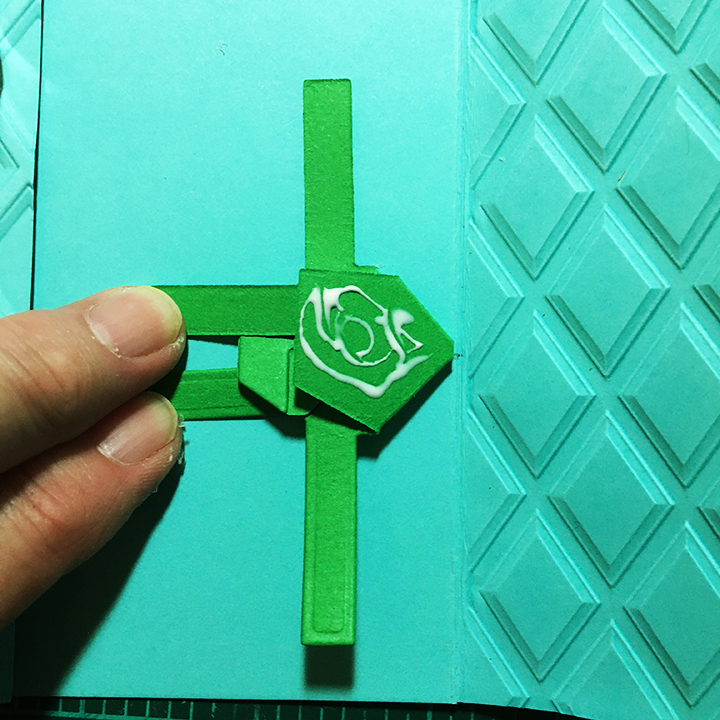
Eggs and Mechanism: I used some eggs I had made before using metallic ink with the stencil feature on the egg dies from the Easter Charms set as well as making some citrus colors (yellows and orange) eggs from solids and patterned paper scraps. For the two mechanisms that spin the eggs around when the card is opened, I used the Heart Collage Pop-up set. (Assembly video). The mechanism is glued into the card fold. I marked a spot 2-inches from the bottom of the left fold and 2-inches from the top of the right fold. Using the mark center a mechanism over the mark and line up the fold. Glue one tab to card and fold up the mechanism as instructed in the assembly video. Place glue on other tab and close card flap to glue in place to card. Repeat for other side.

Sentiments: I created the sentiments on Canva and then resized them in Publisher.  You can download a copy. After printing them, I roughly cut the main question onto white cardstock and fussy cut a cloud shape around the words. A Velcro dot was used on the back side of the cloud as a card closure. The answer sentiment was cut directly from the paper in a cloud shape and glued to the inside cardbase. The “Happy Easter” was cut out with a stitched rectangle die from the Slim Frames die set. A post was cut from a scrap of brown with left over grass from the front of the card.

Envelope: The card fits into an A7 envelope. To give a hint as to what’s inside, a small Easter basket was glued to the back envelope flap.

Thank you for reading this blog post. I hope this inspires you and makes you smile. Please like and leave comments 😊

Materials Used:

Dies

Embossing Folder

  • Spellbinders – 3D Embossing Folder 5.5×8.5-inches – Dimensional Diamonds

Papers

  • White, Black, Red, Pink,  Brown, Green, Orange, Blue and Yellow Cardstock
  • Patterned Paper Scraps
  • A2 ivory Envelope

Ink

Adhesives

Tools

  • Die Cutting Machine
  • We R Memories – QuickStick
  • We R Memories – Scoring Board and Trimmer
  • Scissors
  • Stamping Blocks/ Weights
  • Ranger – Mister Bottle
  • Bone Folder

Miscellaneous

  • Velcro Closure

Mother’s Day Blossoms

It’s Sneak Peek Week for Karen Burniston’s June 2023 Release.

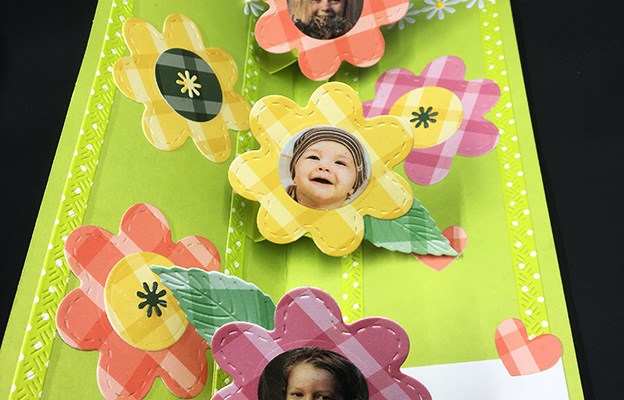
Mother’s Day is a special time to send photos of one’s children. What better way than to include their smiling faces in a garden themed card. This card features Karen Burniston’s new Twist Flower Pop-Up die set as well as two previously released sets – Happy Mother’s Day and the Long Rectangles – Crosshatch.

Cardbase: Cut a 7 1/4 inch x 8 1/2 inch rectangle of lime green cardstock. Fold in half longways to form a 8 1/2 inch tall by 3 5/8 inch wide side-fold card.

Flowers: Cut three sets of the large flower die in the Twist Flower Pop-Up set once in yellow, again in pink and lastly in reddish orange. (Total of nine flowers.) Cut four center circles from yellow and two center circles from dark green. Cut six of the tiniest flower die from dark green and three from yellow. (You may wish to cut enough pieces to assemble one more, large flower for the back of the card. I used some of my leftover pieces for the flower on the card back.) Glue the tiny flower to the circle and then the circle onto a large flower. Repeat until six flowers are assembled. Save the remaining three tiny flowers to decorate the envelope.

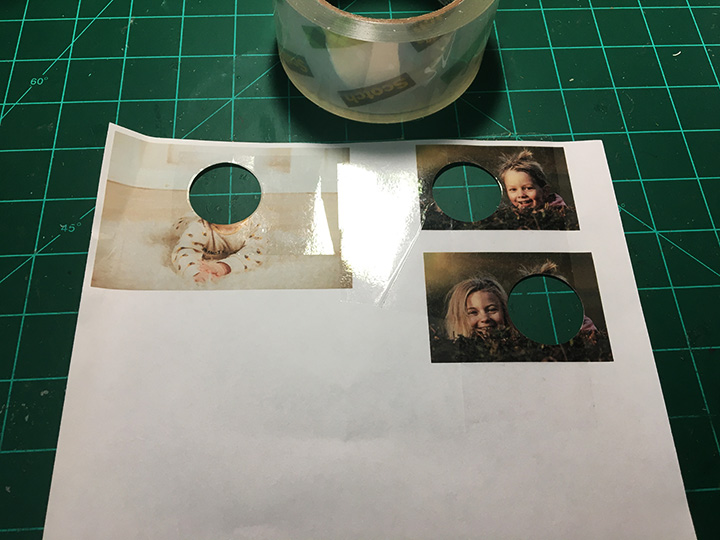
Print photos of faces that have been sized to fit inside a 1-inch square. (I used the software Publisher to make a 1-inch grid and then insert the photos to the correct size and printed onto an 8 1/2 x 11 inch sheet of printer paper.) Cover the printed faces entirely with clear packing tape. Cut faces out using the center circle die.  Glue faces to three different colors of the large die-cut flowers.

Twist Bases: Cut three of the twist mechanisms from lime green cardstock using die in Twist Flower Pop-Up set.  Train all the folds. Fold mechanism into the bunny face (middle of photo) and glue the small tab at the end of an ear onto the other ear. When unfolded it should look like a basket handle (left in photo.)

Using temporary tape attach the flowers to mechanisms. Layout the mechanisms making sure nothing goes outside the cardbase when folded closed. Glue one triangular side of the mechanism and then close card to glue the second triangle side. Add leaves to flowers using temporary tape to check for catch-points. Glue flowers and leaves in their final spots after decorating the rest of the card. (I found that flower petals can rub against the mechanism making the card creak as it is open and closed, so check for catch-points before gluing the flowers onto the mechanism. My finished card has several catch-points or creaky points as noted in red on the photo below.)

Decorations:  Die-cut a border for the card front using the two largest dies in the Long Rectangles – Crosshatch set. The leftover center rectangle can be used on the back of the card. (Because my remaining piece of the green dotted cardstock was not big enough to cut a whole new frame, I just cut four stripes using the dies still taped together for the frame.) These border stripes are used inside the card to cover the mechanism edges and create a trellis effect for the three large flowers used as decoration beside the pop-up flowers.  Along with the sentiment, three of the large flowers with leaves are used on the card front. Cut three hearts using the die in the Twist Flower Pop-Up set to place above a white personal message label. (I cut my label using the fourth largest die in the Long Rectangles – Crosshatch set and trimmed it to needed width.) From the Twist Flower set cut two of the daisy border from white cardstock. Add flower centers either by die-cutting tiny circles using the die that will cut 12 circles or use enamel drops. (I used Nuvo drops that I had to let dry overnight before gluing them in place.) The back of the card is decorated with leftover pieces.

Sentiment:  Using the shadow die from the Happy Mother’s Day set, cut one from shimmer cardstock. Cut the words from green cardstock. Glue together.

Envelope: Glue the three tiny flowers to the back of the envelope flap.

Thank you for reading this blog post. I hope this inspires you and makes you smile. Please like and leave comments 😊

Materials Used:

Dies

Papers

  • Catherine Pooler – 6×6 Single-Sided Paper Pad – Zen Plaid
  • Recollections – 8.5×11 White Gold Shimmer Cardstock
  • Green Heavyweight Cardstock
  • White Lightweight Cardstock
  • Lime Green Polka-Dotted Cardstock
  • #10 Business Envelope – Cream

Ink

Adhesives

Tools

Miscellaneous

  • Nuvo Crystal Drops – Dandelion Yellow
  • Clear Packing Tape