Spooky Parlor

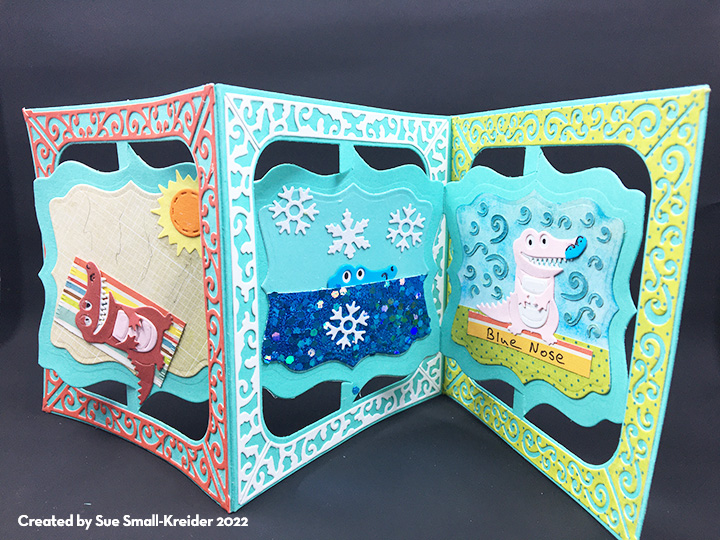
Halloween can be spooky and fun. Using the new Halloween themed dies along with the new fireplace pop-up and extras sets in the August 2022 release by Karen Burniston, made making this card fun from start to finish.

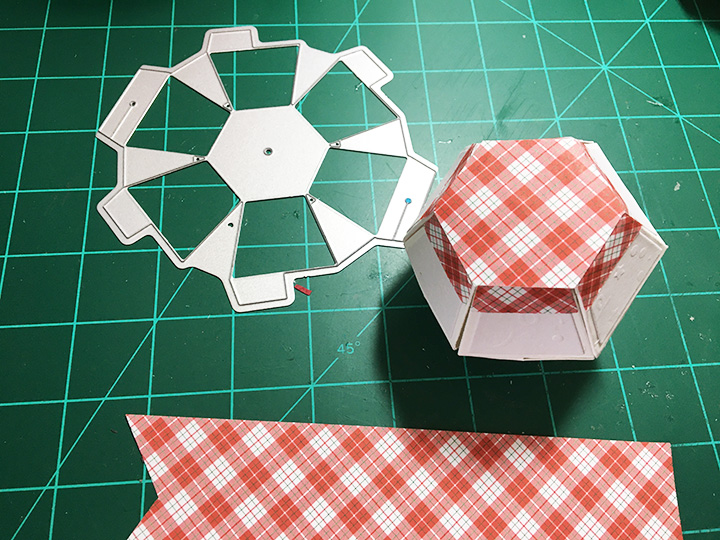
(Watch the assembly video before starting your card.) The pop-up fireplace is a bit different from other fireplace pop-ups that cut directly into the card base.  For this fireplace, the pop-up mechanism is a separate glue in piece that could be used with other covers than the fireplace. With two sets of fireplace and room decor accessories, making a cute room scene is a snap. The same die is used for the mantel and the heath. I cut them from brown and black cardstock respectively and used black ink on mantel to age it and a white shimmer watercolor crayon on the black hearth to similar slate. The white shimmer crayon was also used on the fireplace brick to highlight the embossed brick.

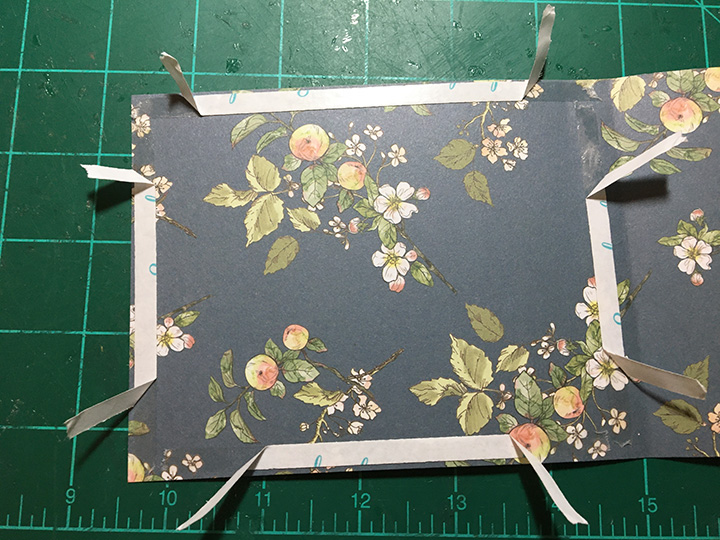
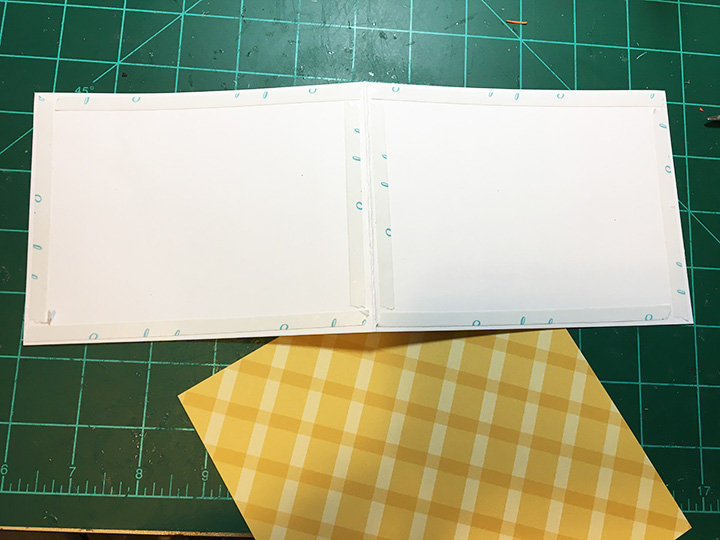
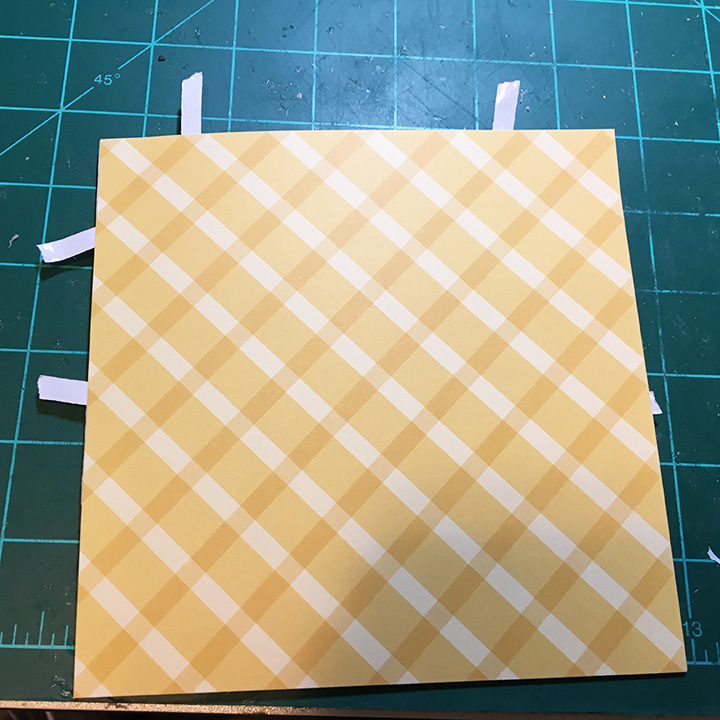
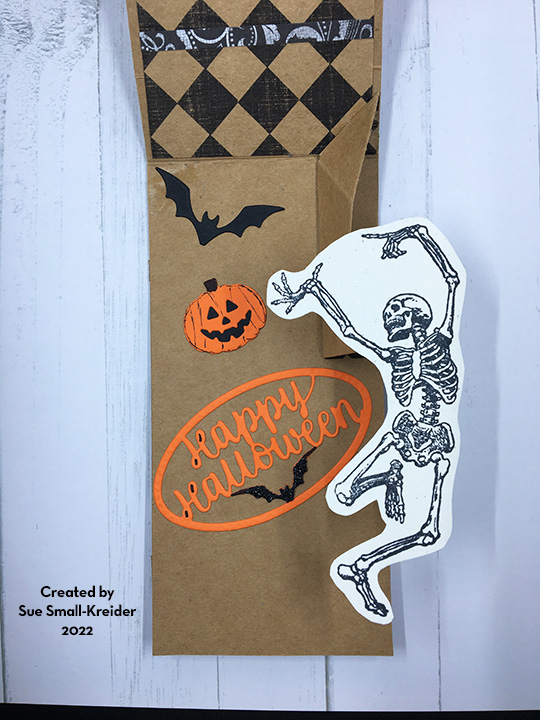
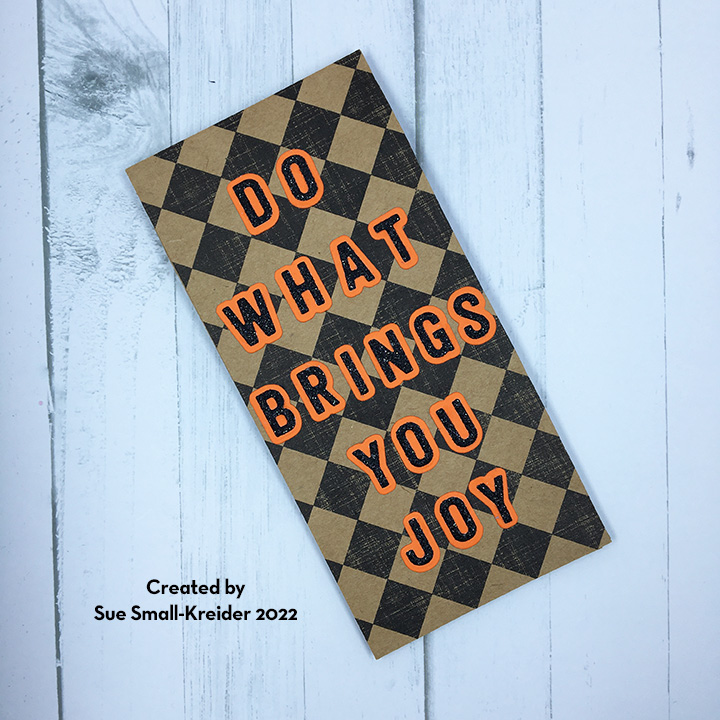
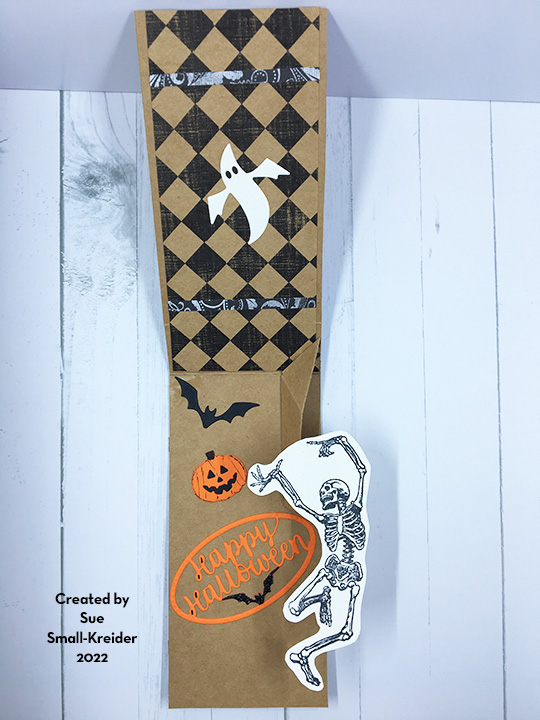
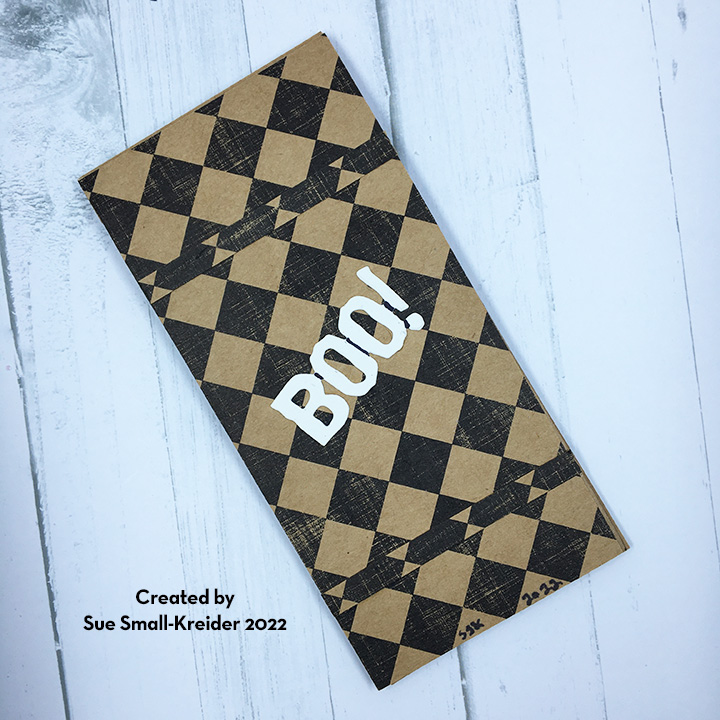
There are lots of great Halloween themed dies in this release. The large bat, skeleton, small pumpkins and bow tie cat are all from the Skeleton Bat set. (I cut the handles off the pumpkins and used one to make the bat smile.) The slim pattern plates were used on the front and back of the card. (I find that the weight of the front and back of the card need to be equal or the back heavier for the pop-up fireplace to work properly.) For the spiders and webs on the card front I used a pearlescent vellum. On the flurry of bats on the back, I used a white gel pen to dot eyes on all the bats.

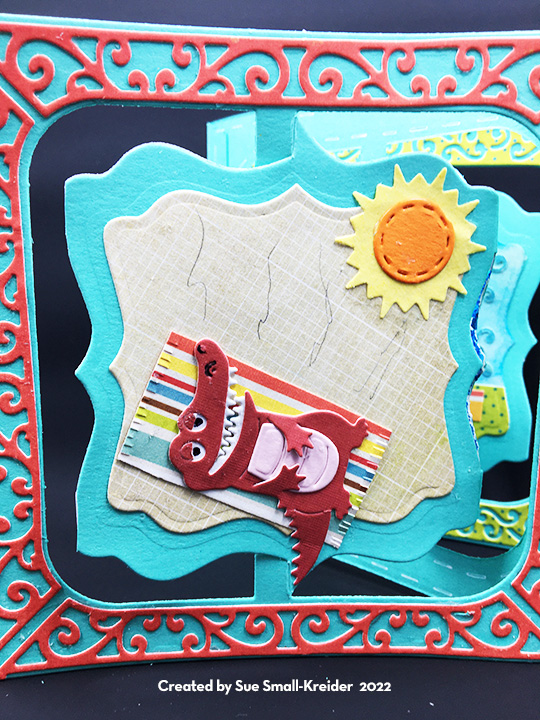
To make the candles and clock on the mantel pop-up along with the planters, cat and skeleton on the floor stand up, I used the tiny pop-up strip from the fireplace set. When folded into a cube, the pop-up mechanism has a long side and a short side with allow you to have different dimensions for your objects on the mantel and floor. The Fireplace Extras 1 is Christmas themed. I used the candles from this set. Fireplace Extras 2 has more everyday items like the clock, planter, picture frames and fireplace fender or fence that I used. (I couldn’t resist putting some skeletons in the picture frames!)

If you notice the vellum spider web and dangling spider in the fireplace, they are from the previously released Halloween Scene set. I cut one of the dangling boots in the fireplace set down to use as a base to glue a piece of thread to and then the spider.

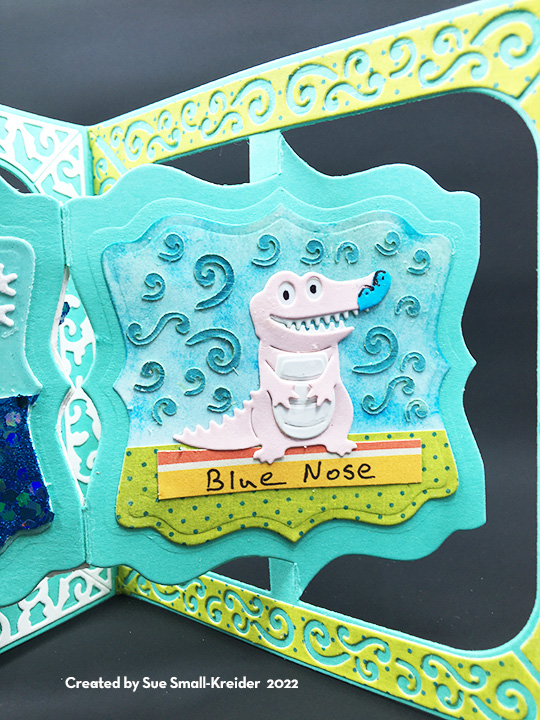
I used previously released sentiments for the card front and inside. β€œBoo!” is from Halloween Elements and the β€œHappy Halloween” is its own set.

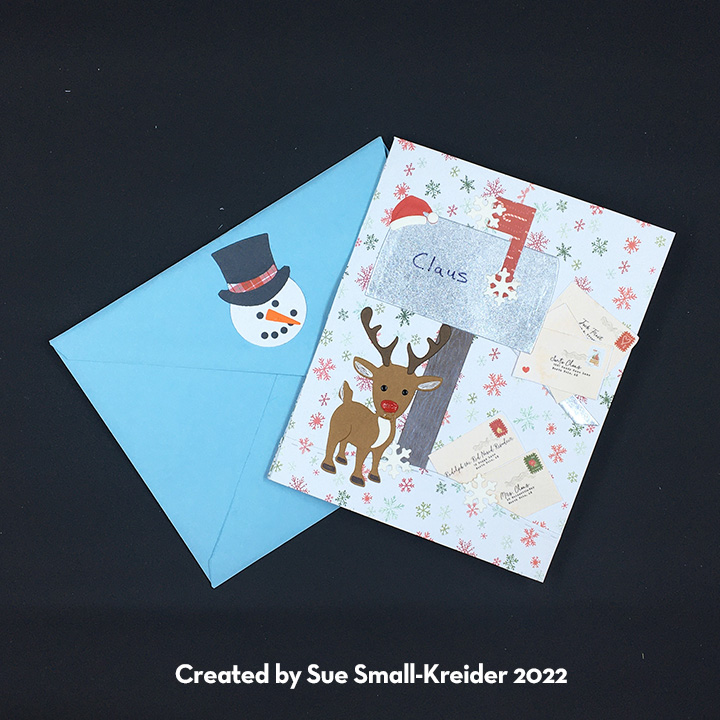
The card was made with a 5×7 inch kraft card base that fits into an A7 kraft envelope stamped with my favorite dancing skeleton.

Thank you for reading this blog post. Please like and leave comments 😊

Materials Used:

Dies

Papers

  • Hot off the Press – Paper Pizazz – Heart Flourish Black – HOTP-10407
  • Hot off the Press – Black Glitter Cardstock
  • The Paper Studio – Everyday Kraft 12×12 paper pad
  • American Crafts – 12×12 paper – 348962 (skeleton parts)
  • Orange, brown, red, silver, black and white cardstock and clear vellum scraps
  • Upcycled packaging – coated gray spackled cardstock
  • Lawn Fawn – Pearlescent Vellum 8.5×11 – LF2088
  • American Crafts – 5 x7 Kraft card & A7 envelope

Pens, Crayons, Inks & Coatings

  • Sharpie – Permanent Marker – Ultra Fine Point – Black
  • Sakura – Gelly Roll Pen– 08 -White
  • Sakura – Gelly Roll Pen– 06 -Black
  • Hello Hobby – Fineliner Pens – .04 mm tip – Red
  • Recollections – Watercolor Crayons – White
  • Ranger – Tim Holtz – Distress Ink – Vintage Photo and Black Soot
  • Memento – Fade-Resistant Dye Ink – Tuxedo Black
  • Nuvo – Aqua Shimmer – 882 – Glitter Glass

Stamps

Miscellaneous

A Gardening Birthday

The love of being outdoors and helping plants grow is what being a green thumb is all about. This is a birthday card for a lovely lady whose happy place is working with her plants.

Using Karen Burniston’s August 2022 release of the Label Charm Pop-Up die set makes it easy to add a hanging water can charm from her previously released Garden Charms set.Β  The double-sided papers are all from Craft Consortium’s Hackney & Co.’s Gardeners Delight collection. Watch an assembly video for a charm pop-up card before starting the card.

For the card base I used an 11 x 4.25-inch piece of patterned paper (strawberries on front and dark gray with flowers on the back.) With the pivot label dies, I like to use double-sided tape to adhere the decorative backing paper. If you put tape around the edges and pull back the tape’s backing paper at the corners only, you can re-position the decorative backing paper until it fits and then pull the all the tape’s backing paper.

Fold the card base in half and place the pivot label die in the center of the card front. Tape in place with removable tape and open the card base out to die-cut.  (Save the cut-out waste pieces to use as decorations for other parts of your card.)

Cut three of the label die from the patterned paper. Tape two of the labels together and then die-cut the oval from it. Trim the tab off one of the oval frames. Glue the tab from the solid label to one of the oval frames then glue the other oval frame to cover up the tab.  Punch a hole for the charm to hang from (The die has a hole to use a stencil.) I reverse cut the watering can to pour to the right from silver card stock. The metal jump ring I used has a rhinestone dangle. I find it easier to attach the jump ring with the charm to the oval frame before I glue the label and oval frame into the card.

Now to decorate the card. I had garden charms left from another project where I had β€œdirtied-up” the tools and gloves with brown ink dabbed on with a small finger sponge dauber.  The tiny hearts are from the heart eyeglasses in the Tiny Accessories 2 set. The plant is from the Garden Charms set. I used the cut-out waste pieces from the front pivot label to frame the inside label with slicing patterned with solid color pieces.

I felt the inside of the card need more decorative elements, so I cut strips of flowers from the Long Nature Edges 2 set from white and used yellow Nuvo drops to make them into strawberry blossoms. (Remember to let the Nuvo Drops dry at least 16-24 hours before gluing them into the card. They will stick to each other until totally dry.)

The Sentiments come from the Garden Charms set and Word set 2.  The various white labels are part of the Label Charms Pop-Up set as are the white outline flowers on the front of the card.

Thank you for reading this blog post. Please like and leave comments 😊

Materials Used:

Dies

Papers

Inks

  • Ranger – Tim Holtz’s Distress Ink – Vintage Photo
  • Fine-tipped green marker

Miscellaneous

JUST SEWING A HELLO

Karen Burniston Design Team September Challenge “JUST…”

Just sewing a hello to you all. The fun new sewing charms from Karen Burniston’s August 2022 release make for a cute card.  Paired with the Label Charm Pop-Up and Word Set 15, this 4.25×5.5-inch card is a quick make. 

I started with a 4.25-inch by 11-inch card base folded in half. Using double-sided tape, I covered the inside and outside panels with yellow and blue plaid paper. (My favorite technique for using double-sided tape is to place around the edge of the card, lift the ends of the tape so corners are sticky, position the covering paper, you can shift the top paper a bit before you pull all the tape backing paper strips.)

Since I used 6-inch by 6-inch paper, I opted to trim it to size after adhering it to the card.

I centered the pivot label charm pop-up die over the front of my card and die cut through all three layers of paper and cardstock. Because of its thinkness, I ran it throught my die cutting machine twice. 

Because I did not adhere the center of my decorative papers to the card base, when I die cut the front label pivot, I could snip away the decorative labels from the paper and use them to decorate my card.

I cut two blue and one yellow tabbed labels. One of the blue labels, I glued the tab to the back of the yellow label and the adhered the other blue label over the back of the yellow label to hide the glued tab. Next, I used the label frame die with the hole to cut the frame from which the charm will hang from the double decorative papers side. Mark the hole to be pierced before cutting. (I would adhere the charm to the frame using a metal jump ring at this point, but you can add it as I did after the frame and label is glued into the card. It is harder to manipulate once the card is assembled.)

Fold the charm frame and attached label together as they will go into the card. Place a drop of glue on the frame’s tab and adhere to the back side of the card front label. Glue the blue label to the inside card back panel.

I cut three white charms. Two of the charms I cut the dotted oval from to form a charm frame and an oval. I stitched around the center oval of the charm with blue embroidery floss. To assemble glue the charm frame to the solid charm and then adhere one of the stitched ovals. Turn solid charm over and repeat.

I used four word sets for this card. The word sewing, I had to splice together from the words “wish” and “sending.” β€œWish” is from Word Set 2. β€œSending” is from Word Set 14. You can see in the photograph the sections circled in red where glued together to form the word “sewing.”

β€œJust” is from Word Set 15 and β€œHello” is a single large die that embossed the stitch marks for you to color in with a fine -tipped marker.

The sewing charms (assembly video) can have their loops cut off and glued in place. I free-handed the stitch marks around the label and the label window with white and blue fine-tipped pens. For the back of the card I used the white waste from cutting the front pivot label to frame, and the leftover yellow label also cut from the front. The button and thimble cover the gaps in the frame.

As with all my cards that are sent in an envelope, I have stamped the back flap to hint at what’s inside. This is an A2 envelope. The card will require extra postage in the USA because of the thickness and the added metal charm may mean I’ll send the card in a padded envelope.

Thank you for reading this blog post. Please like and leave comments 😊

Materials Used:

Dies

Papers

  • Catherine Pooler – Zen Plaid 6×6” Pattern Paper
  • Silver packaging
  • Blue and white cardstock scraps
  • White gold shimmer cardstock
  • Light weight white cardstock base 4.25 x11 inches folded in half
  • A2 white envelope

Pens, Inks & Stamps

Miscellaneous

Scandinavian Snowman

Thank you for joining the Karen Burniston Blog Hop for the August 2022 Release.

Such a joyful little snowman enjoying the snowy cozy Scandinavian countryside.

In her newest release, Karen Burniston has come out with some additional die sets that make putting together this snowman a snap. An add-on character set includes the top hat and band, carrot nose, large and small circles for eyes, mouth and buttons, as well as stick arms and a large snowflake. The Double-Ups for the all the pop-up balls have the side trapezoids linked together to cut 6 pieces all at once, so with the original individual trapezoid dies, you can cut all 12 side panels in one pass.

I started with a brown craft card base of 5 x 7 inches trimmed down to 5 x 6.5 inches. Next, the smaller side of the card was scored at 4.75 inches to form a gusset. Cut two of the Bitty Ball halves and two of the Mini Ball halves. I find watching the assembly videos for the balls very useful. (Bitty Balls, Mini-Balls) Numbering the order of gluing the tabs is useful for the assemble of the balls. I cut all the trapezoid panels from a white gold shimmer cardstock. And the ball halves are cut from a 100 lb. smooth white cardstock. Assemble the balls as shown on videos, including the brad in the bottom of the Bitty Ball.

The decorative papers are two layers. The measurements are listed in the photo. (Flap assembly video) I cut the the flap from another craft card blank and two decorative panels from scraps of the decorative papers. The flap dies set cuts six washers  of which three are glued together for each of the flower brad cover. Glue the front decorative panel onto the flap. Using a sharp piercing tool, punch a hole in the center of the flap.

Glue the washers and flower over the hole. Thread the twine into the brad legs and pull the twine and brad legs through the hole. Bend the legs onto the back of the flap and glue the twine inplace on back of flap.

Glue the back decorative panel over the brad legs and twine.  Glue flap tab to back of card base.  Cover back of card and flap tab with decorative paper.

Glue the front decorative papers to the card front. Mark the center of the front of the card base with pencil and pierce. Glue the second washer and flower over the hole. Thread another brad through the hole and fold the legs against inside of card. Glue the inside decorative papers to the card base covering the brad legs.

Adhere the snowman’s face. Glue the scarf pieces onto the bitty ball while flat. Cut a hexagon using the hexagon from the Surprize Ball Double-Up set or trace the center of the Bitty Ball die with a pencil and cut out. Assemble the top hat with a red hat band on front and back.

Mark the location of the hole to secure the snowman’s brad using the Bitty Ball die to fit within the card. Pierce the hole and thread the snowman brad through the hole. bend the brad legs to the back of the card. Glue the back decorative paper and white message label to cover the brad legs. Glue the hat onto snowman.

Decorate the front of the card using the faces from the Snowman, and Gnome and Santa sets Add the sentiment of β€œMerry Christmas” to inside. Large snowflakes are from the Snowman add-on set.

The card fits into an A7 envelope for hand delivery, but I would put the card in a padded envelope to mail.

Continue reading

A Candy Winter Card

Gingerbread, candy canes and snowmen make this accordion card a treat for the eyes and imagination. The papers are all by Heitz Cuppleditch for Craft Consortium. The accordion-fold card base dies, words and frame dies are all by Karen Burniston.

I followed the assembly video for the accordion fold card. (I found it useful to layout the card and its decorative pieces before gluing as sometimes a tab that connects the various panels needs to be hidden by a decorative piece so the order of gluing all the tabs together needs to be thought through before assembly.) The base is cut twice – once from solid pink cardstock and again from decorative papers and glued together.

Leftover striped pieces and decorative frames are the finishing touches along with narrow washi tape make the accordion frames standout. The one fancy frame was gilded using Distress Foundry Wax which requires a heat tool to set the gilding.

The card fits into a A7 envelope which has been stamped on the back with a stamp of the gingerbread train in pink ink. The stamp is also from the Candy Christmas Collection by Heitz Cuppleditch for Craft Consortium.

Thank you for reading this blog post. Please like and leave comments 😊

Here is a sneak peak of the August 2022 Release of Karen Burniston dies.

Materials Used:

Dies

Stamps

Inks

  • Simon Says Stamp – Pawsitively Saturated Ink – Sweets
  • Ranger – Tim Holtz – Distress- Foundry Wax – Gilded

Papers

Miscellaneous

  • Die cutting Machine
  • Neutral PH Adhesive by LINECO
  • Fine-tipped Bottle
  • Tim Holtz – Tonic Studios – Stamping Platform
  • LDRS Creative – Stampendable Stamping Tool
  • Stamp Cleaning Cloth
  • Poking Tool
  • Scissors
  • Small Paint Brush
  • Craft Mat
  • Heat Tool
  • Narrow pink and red washi tapes from my stash

Winter mail

Who doesn’t love getting mail! The most famous snowman, Frosty sure does enjoy his mail in this card celebrating wintertime mail. It uses dies by Karen Burniston to create a delightful pop-up card.

The main die sets used were the Mailbox Pop-Up and the Snowman Pop-Up. Watch the two assembly videos for tips on how to construct the pop-up snowman and mailbox by clicking on the links above before starting your card. (If I had been smart and followed my advice of watching the assembly videos before starting the card, I would have known I needed at least 5 inches from the card fold to have Frosty in his top hat and should have done a top fold card instead of a side fold vertical card.)

Because I constructed my card base before I watched the assembly videos, I had to make the snowman without his hat to fit in the card. I used the top hat and snowflake from another snowman die set by Karen Burniston.

My inspiration for this card was the Carta Bella paper pad that has a page of envelopes addressed to various North Pole and winter characters. I cut out several of the envelopes from the paper and scattered them throughout the card. The other patterned papers are from this paper pad as well.

I like creating an outer frame for my card bases covered in patterned papers. I used the medium sized crosshatched rectangle to cut the frames in the inside green plaid paper panels and I used one of these rectangles on the back of the card over a border made from paper leftovers from the inside of the card.

For the card front I constructed a background from three leftover pieces of the snowflake print. The snow in the foreground was cut using a nature edge die that cuts a stitched rolling hill with trees. The trees I cut off.

While the mailbox is designed to be inside the card as an interactive element, it can be simplified down to a flat element. I used the main mailbox, lid, flag and wood grained post dies. The brown wooden post I inked the dies with white ink to get it into the wood grain and then gently rubbed the piece over the ink cube to get a snowy effect. I added the Santa hat and snowflakes to give some hints, if the name on the mail box didn’t clue the viewer that it is Santa Claus’ mailbox. I leave it up to the viewer to decide if the small Rudolf is the real one or a winter decoration.

Using the die as a stencil, I colored with a white gel pen to shade Rudolph’s ears and tail and a black fine-tipped marker for his hooves. I used Glossy Accents over his red paper nose to look more like a light. For Rudolph’s eyes and the snowman’s coal eyes and buttons, I used Nuvo Drops. With both these products be sure to allow 12-24 hours for them to dry. (I swished Rudolph’s nose and didn’t notice until the glossy accents had almost set.)

Inside the card, the finishing touches include: a snowflake, a stitched heart, and the sentiment of β€œSeason’s Greetings” from the Karen Burniston Word Set 3.  (I’ve been experimenting with various dies by Karen Burniston with the dotted outlines because they are easy to make stitched or embroidered charms and embellishments for cards. This heart is from the Circle Charm Pop-Up set.)

For the envelope, I made a snowman face with top hat from Karen Burniston’s Snowman set and glued all its pieces and back securely to the back flap of the envelope. Sometimes for thick cards to fit into a standard size envelope (A2 for this card) you need to trim a total of 1/4 of an inch off the non-fold sides of the card.

Thank you for reading. If you enjoyed this blog post, please like it and follow the blog. 😊

Dies:

stamps & Ink

  • Craft Smart – Ink Pad – White
  • Ink
  • Stamp
  • Sakura – Gelly Roll Pen– 08 -White
  • Sharpie – Ultra Fine-Tipped Marker – Black

Papers

  • Carta Bella – 6×6 Paper Pad of Double-Sided cardstock – Letters to Santa
  • Lightweight 8.5×11 inch white cardstock
  • Matte silver foil cardstock scrap
  • Colored cardstock scraps
  • A2 Envelope

Additional Supplies Used:

Blue Nose, the Pink Alligator

As young children my father would tell my siblings and I, stories about Blue Nose the pink alligator. They generally began with β€œHave you ever seen a pink alligator with a blue nose?” We would discuss how an alligator could live in the American Midwest where there is snow and ice as well as hot humid summers and how the alligator came to be pink and received his blue nose.  This card tells that story.

I used Karen Burniston’s Fancy Label Accordion die set for the card base and the alligator from her Bayou Animals set as well as other elements from a mixture of her designs.

The alligator is ingeniously designed using three pieces – the body, the tummy pad and the teeth/eyes piece. I colored the eye on the teeth piece while still in the dies with a fine-tipped black marker. Then gluing the teeth onto the back of the alligator head and slightly opening the teeth. To get the half asleep red sunburnt alligator, I used the oval that came out of the eye and cut it in half and glued it over the eyes. I glued the tummy pad in place, but it is tightly snug between the arms even without glue.

For the sunbathing scene, I used striped paper cut into a rectangle and then fringed the short edges to make it look like a beach towel. The sun is from the Tropical Scene set.

For swimming in a snowy frozen river, I only used the head of the alligator with large spec glitter paper for the water and white glitter paper snowflakes cut with dies from the Sleigh and Winter Charms sets. The background is a coated blue glitter cardstock. The decorative frame is from a frame set KB had previously released with another company.

The last panel with Blue Nose, the pink alligator, used the waste from the decorative Fancy Flourish frame. (I save the tiny swirls to add to shaker element mixes for variety.) The sky is inked with a tiny make-up brush and blue ink.

The back panels explain the story and use scraps from the front. Stitch marks decorate the back frames and are made using the die as a stencil with a white gel pen.

Because of its bulk, the card can be mailed in an A7 envelope.

Thank you for reading this blog post. Please like and leave comments 😊

Materials Used:

Dies

Papers

  • Echo Park Paper Co. – 6×6 Paper Pad Double-sided Papers – Paradise Beach by Michelle Coleman
  • Recollections – 12×12 glitter cardstock -deep blue
  • Heavy teal blue cardstock
  • Orange, yellow, and white cardstock scraps
  • White litter card scrap
  • Coated baby blue glitter cardstock

Ink

Miscellaneous

Do What Brings You Joy

Sometimes you just have to do what brings you joy and the dancing skeleton stamp by Riley and Company’s Funny Bones Collection brings me joy.

I designed this mini slimline card to measure 3×6 inches to fit inside a 3.5×6.5-inch coin-style envelope using scraps from other Christmas and Halloween card makes.

The pop-up mechanism is from the previously released Katherine Label Pop-Up die set by Karen Burniston (assembly video) and works well inside a top-fold mini slimline as long as the label or stamped image fits within the dimensions of the card. I practiced laying out the card elements with removable tape to get the best placement before gluing in place.

Because I felt the card was joyful inside, it needed just a tiny scary element, so the back of the card has the word β€œBOO!” in white. The lettering on the front has the base letters cut from black glitter cardstock with orange shadows behind. They are cut using Karen Burniston’s mini alphabet set.

All of the die-cuts are designed by Karen Burniston. The skeleton was stamped on creamy white cardstock and fussy cut around it.

Thank you for reading this blog post. Please like and leave comments 😊

Materials Used:

Dies

Papers

  • Hot off the Press – Paper Pizazz – Heart Flourish Black – HOTP-10407
  • Hot off the Press – Black Glitter Cardstock
  • The Paper Studio – Everyday Kraft 12×12 paper pad
  • Brazzill – 12×12 sheet of cardstock – Beach Dunes – 300142/PS1067
  • Orange and black cardstock scraps
  • American Crafts – 5 x7 Kraft card
  • Simon Says Stamp – Mini Slimline envelope – Grocery Gag

Pens, Crayons, Inks & Coatings

  • Sharpie – Permanent Marker – Ultra Fine Point – Black
  • Sakura – Gelly Roll Pen– 06 -Black
  • Memento – Fade-Resistant Dye Ink – Tuxedo Black

Stamps

  • Riley & company – Funny Bones – RWD-492

Miscellaneous

Sweet Queen Bee

This fun easel card was inspired by Sharon-Elaine Jones’s floral wreaths and spinner cards on Craftworld.com, Sandy Diller’s recent crosshatch label and tag book card and a challenge to myself to make an interactive card with Karen Burniston’s fancy shaped labels that didn’t involve them being used as flat labels.

This spinning honeycomb with bees in a floral wreath easel card, uses the label dies in three different ways. The largest dis where used to create the wreath and its white inner frame. The smallest die was cut four times, each folded in half and glue together around a string. The second smallest die was used to cut the raised β€œQueen BEE” label that acts as the easel stop.

Using Karen Burniston’s Flutter Charms die set cut enough pieces for two bees and four honeycombs. Cut two of the largest label crosshatch die in pink. From Karen’s tag book die set cut two of the tags and one of the rectangle spine piece in pink.  

Cut from black the words β€œQueen” from Karen’s Word Set 5 and β€œsweet” from Word Set 6. Cut β€œQueen” a second time from orange and β€œsweet” from white. Ink the white β€œSweet into a dark pink with Distress Ink. Glue the pair of words to create shadows or highlights by off-setting the words slightly.

Cut eight of the daisy flowers and four of the smaller butter cup flowers. Cut four pairs of the bee wings in green for leaves. Glue two of the daisy flowers one on top of the other alternating the petals. Repeat with remaining daisy flowers to end with four flowers.  Add flower centers using contrasting colors of Nuvo drops. Keep the flowers on a flat surface for at least 12 hours until they are hardened. (I was glad I had made a few extra as I accidentally flatten one of the orange daisy centers before it had hardened.)

Trim off the excess honeycomb to leave a 6 petal flower-like honeycomb that will fit inside the small yellow labels.

Glue honeycomb flowers to yellow labels.

Fold labels in half.

Glue two labels together on one folded half. Repeat with other two labels.

Glue piece of twine in the middle of the joined label halves.

Glue the other half of label to sandwich the twine in the middle. Let dry. Glue the egg shapes to the back of the bee bodies. Trim the charm circle off antenna.  Glue vellum wings to the bee body. (See assembly video.)

Position one of the large pink labels on the front of a tag. Using a pencil trace the outline of the tag onto the back of the label.

With removable tape, attach the tag to label.

On the front of the label, tape the third largest die to center of label.  Die cut through both label and tag. Using the first cut label as a guide to cut the second label’s center out.

I had to photoshop this picture to let you know to cut the entire label out and not partial as I did for my original picture.)

Fold the tag book so that the cut-out is fold in half. put glue only below the fold on the tag book piece. Glue the large label with pencil markings to the wreath to the front tag.

Glue the two tags together with the rectangle spine piece. (You can review the tag book assembly video for tips in assembling the book.)

Spread glue on the inside of pink wreath that is glued to card base. Stretch the twine centering the honeycomb with the bees glued to it. Using small pieces of permanent tape, adhere the twine in place making sure the twine is moderately taunt. Place the top pink wreath in place and press together make a tight seal to the two layers of wreath especially around the twine.

(Tip: Glue the bees on opposite sections of the honeycomb labels to have balanced weight. I made the mistake of gluing them both on the same side and it spins a bit lopsided.)

For the easel stop, cut two of the second smallest label dies once in pink and once in black. Die cut the word β€œBEE” from Word Set 5 in the pink label. Glue the black label to back.

I used half of the label that I cut from the large label, fold in half and half again to use as the spacer under the Bee label. (You could also use foam tape or foam dots.)

The card folds flat to fit into an A2 size envelope which I stamped the back flap with a bee in flight from Apple Blossom in black ink.

Thank you for reading this blog post. Please like and leave comments 😊

Materials Used:

Dies

Stamps

  • Apple Blossom – Bee Happy stamp set from Die-Cutting Essentials magazine issue 89

Inks & Pigments

  • Ranger – Jim Holtz Distress Ink – Saltwater Taffy
  • Memento Fade -Resistant Dye Ink – Tuxedo Black

Papers

  • Heavy weight pink cardstock from my stash
  • Yellow, orange, green and black cardstock scraps
  • White-gold shimmer paper scrap
  • Clear vellum

Miscellaneous