The Swan – Sending Love

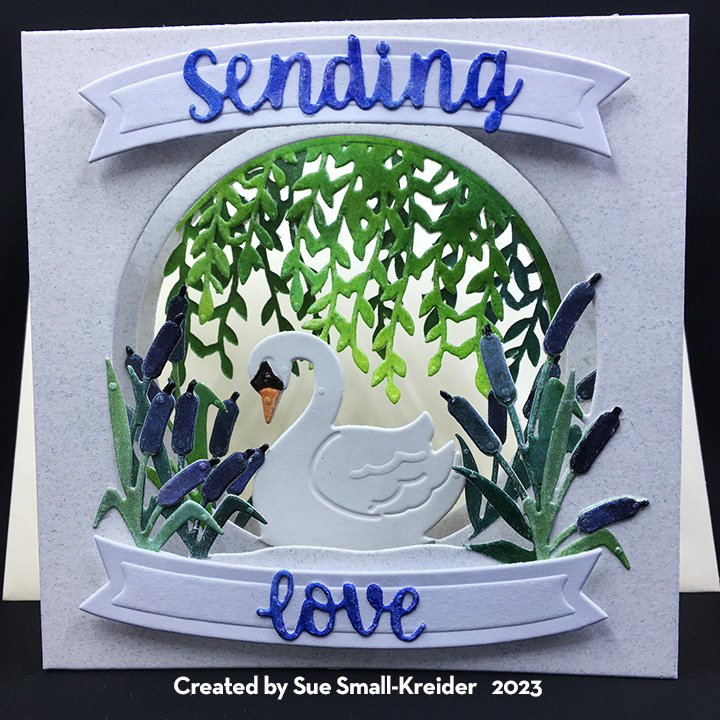
There are some situations where words just don’t seem enough. This is a tunnel card for someone experiencing loss.

It uses the i-crafter Tunnel Card Base, Swan die set designed by Lynda Kinase. It assembles quickly although the detailed cattails and swan head do require some detailed coloring or in my use, paper piecing. Watch the assembly video before die-cutting.

The card base is cut three times using a different circle insert for each layer. I cut my bases from some white and gray craft cardstock. I cut two banners from pure white cardstock.

By using some printed watercolored papers, I was able to get the look of watercolors without having to get out my paints. The cattails and hanging green leaves were cut from various parts of one sheet of the Funky Fossil Design’s Watercolour Rainbow paper utilizing the various shades and hues on the green/blue/purple sheet. The swan’s beak and part of its head were cut from orange and the black band colored with black fine tip pens and a white gel pen for its eye, then trimmed down to the black band and beak. This was glued to the swan cut in pure white. The completed swan was attached to the middle box layer with the swan circle cut in the middle. The seven cattail pieces that I cut were added first to the front layer and then the leftover three pieces were added to the middle swan layer.

I didn’t have any stamps that fit the banners with a sentiment that I liked, so I used words from two of Karen Burniston’s word sets to say “sending love” cut from some of the purple/blue watercolor paper. The words were glued to the banners and the banners were attached to the front layer with foam squares.

As is my way, I decorated the back flap of an A2 cream envelope with some of the leftover light green vining leaves to hint as to what is inside the envelope.

See other other i-crafter projects below:

Thank you for reading this blog post. I hope it brought you comfort and inspiration.  Please like and leave comments 😊

Materials Used:

Dies

Papers

  • Funky Fossil Design – Watercolour Rainbow Printed Papers 180 gsm
  • Pure White Cardstock
  • A2 Envelope – Cream

Inks & Pigments

  • Pigma Micron 01 – Black
  • Pigma Micron 05 – Black
  • Sakura – Gelly Roll 08 – Gel Pen – White

Miscellaneous

A Twist and Pop Valentine

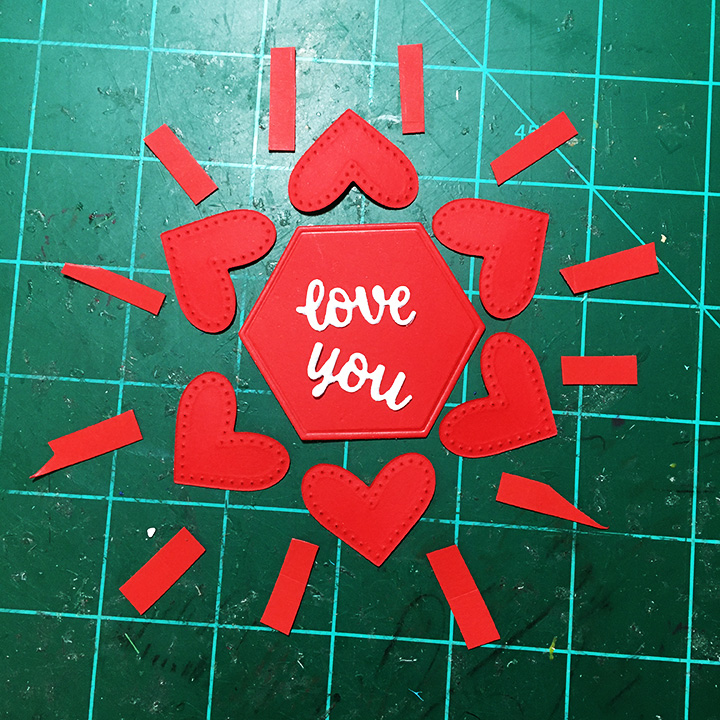
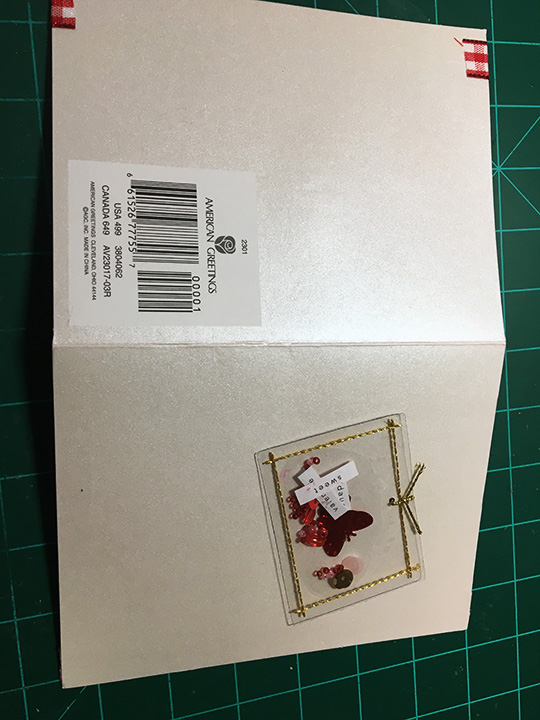
In cleaning up my craft room after the holidays, I came across a purchased Valentine I’d been sent many years ago with a stitched see-thru pouch with beads, sequins and the words “daughter,” sweet” and “valentine.” I decided to upcycle the card base with the pouch attached for a new Valentine.

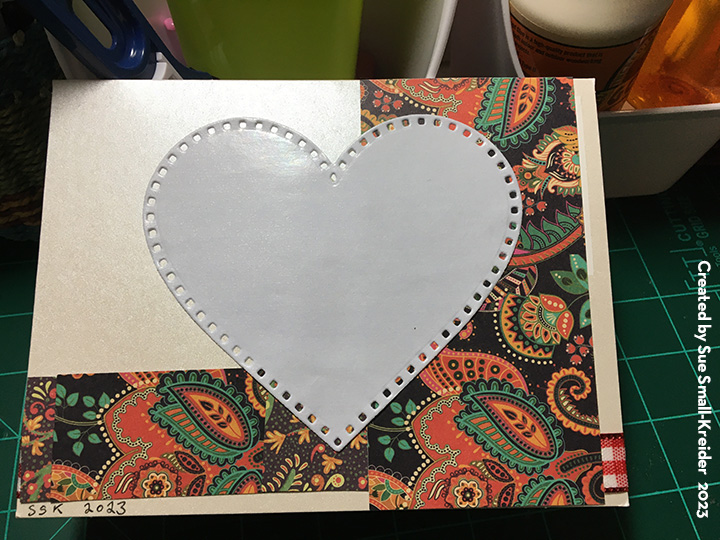
The card base was an A6 size (5×6.5 inches). Ivory pearlescent on the outside and red on the inside. There were some tears of white on the inside where a sentiment sheet had been removed. (I hid the tears with red gingham ribbon adhered with double-sided tape.)

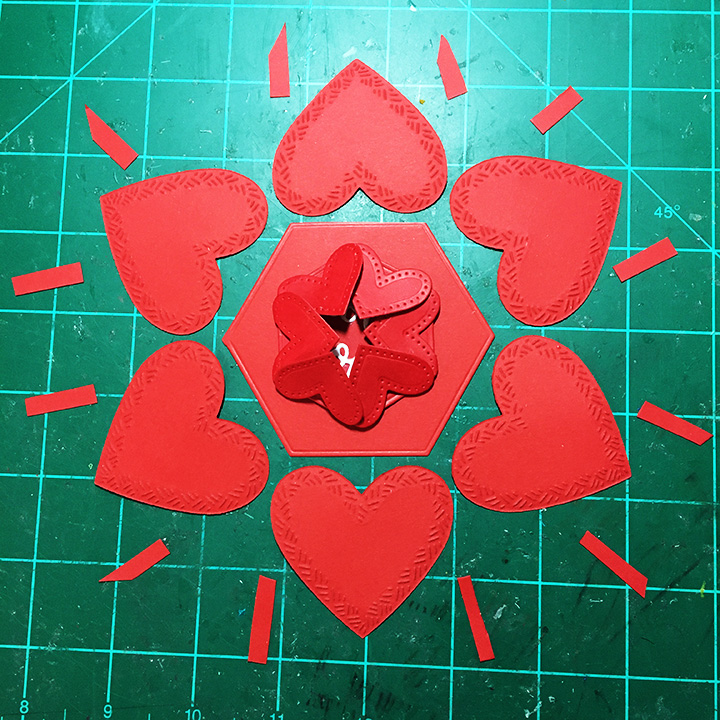
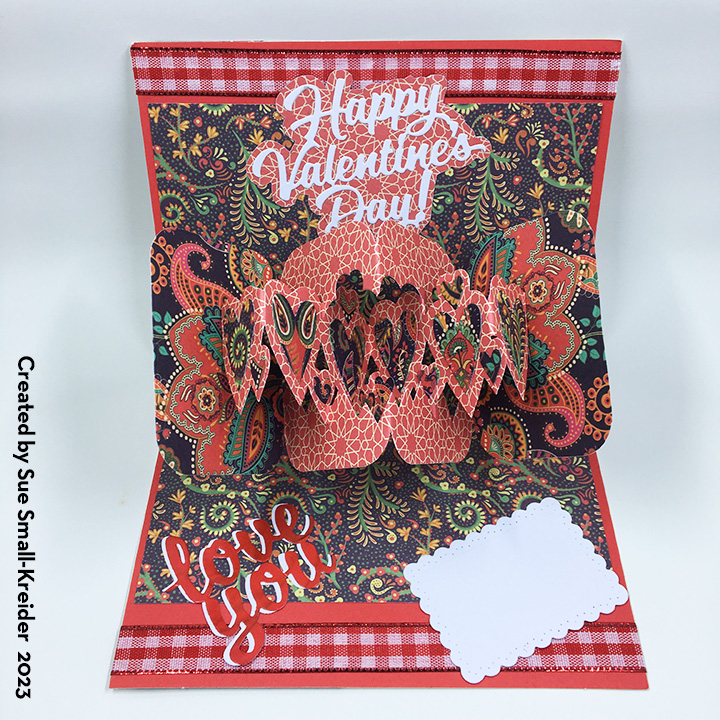
Using Karen Burniston’s Twist Panel Pop-Up and Heart Pivot Panels along with some of her word set dies, I recreated the card using two sheets of double-sided, printed cardstock from Craft Consortium.

I watch the assembly videos for both the Heart Pivot Panels and the Twist Panel Pop-Up before cutting and assembling my pop-up features.

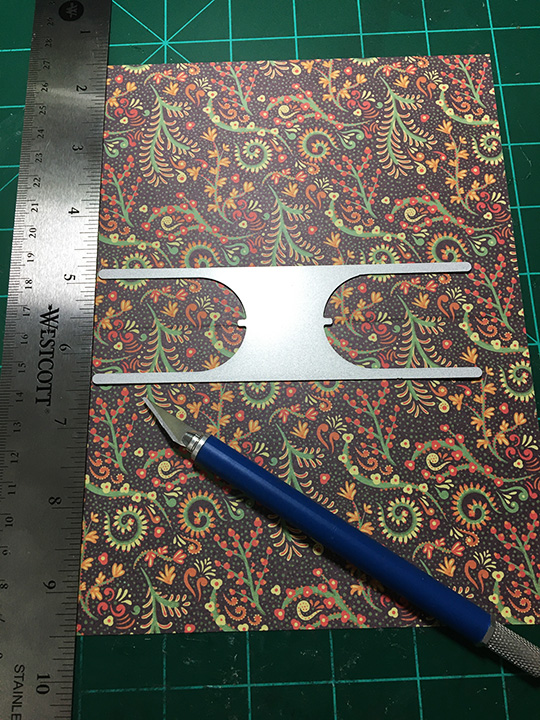
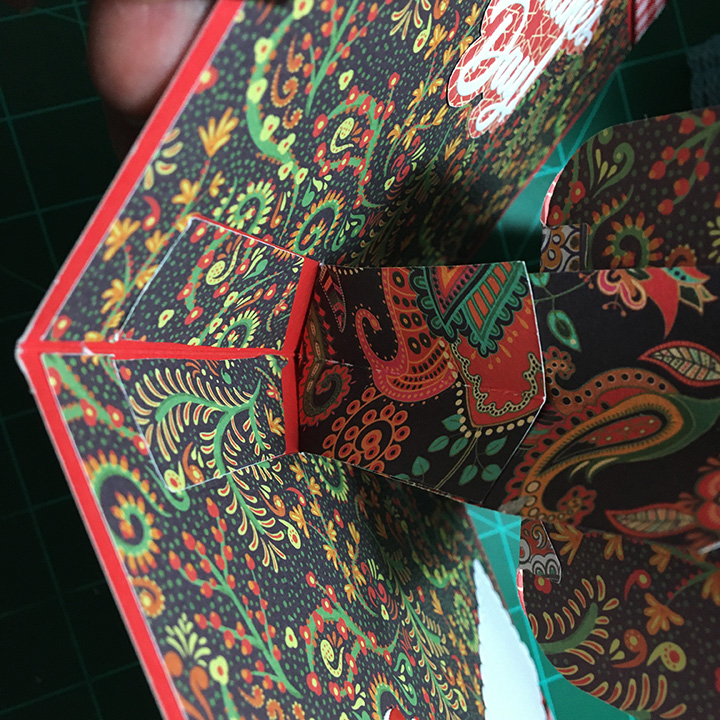
Because I opted for an 8 x6 1/4-inches cardstock insert, I had to use a craft knife with a metal ruler to cut the ends of the mechanism arms free from the insert. I also die-cut a third arm from the insert cardstock which I cut-in half twice to make four strips to cover the red card base where the insert mechanism arms are cut from.

The assembly of the end panels and heart pivot panels were done as per the assembly video.  Cutting the decorative hearts from the intricate paisley cardstock makes for a somewhat non-traditional Valentine.

The sentiments inside were both cut from white cardstock but finished differently. The “love you” was also cut from a red glossy magazine page and glued off-set with the white underneath. The “Happy Valentine’s Day” had a shadow added underneath it. The shadow is cut by tracing the outside of the sentiment die on the back side of the decorative cardstock and fussy cutting. The white scalloped rectangle is cut using a decorative panel die from the Twist Panel Pop-Up set. It serves as a place for a personal message.

The outside of the card was decorated with leftover scraps of decorative cardstock and a die-cut heart I had in my stash. Because I changed the orientation of the card from a side-fold to a top-fold, I secured the see-thru pouch with glue dots and added tiny hearts to reflect the orientation.

The card will fit in an A6 size envelope. (I used an A7 envelope as I was out of A6s.) It may require extra US postage for its thickness.

You can see more Valentines by clicking here.

Thank you for reading this blog post. Please like and leave comments 😊

Materials Used:

Dies

Papers

  • Craft Consortium – 12×12 Double-Sided Premium Paper Pad – Eastern Influences
  • A6 Recycled Card Base with Valentine Pouch
  • White Cardstock
  • Red Glossy Paper Scrap
  • A7 Envelope – Ivory

Miscellaneous

Puppy Love

Puppy love… a dog in your life brings great joy. This is a card from a fur baby.

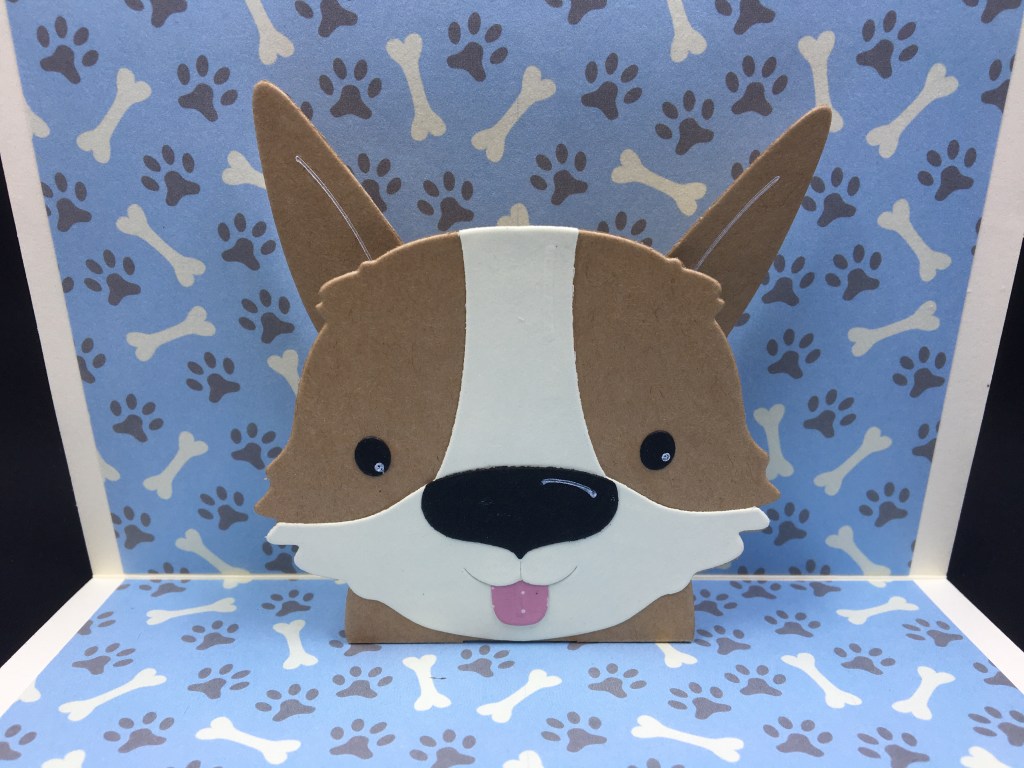
The adorable dog face with its moving ears, along with the front sentiment die and large paw print die-cut are all from Lynda Kanase’s i-crafter Puppy Face Wiper Inset set.

Watch the assembly video before putting together. The video recommends decorating the front and back of the card before adding items to the inside.

I masked off a banner on the front of the card using low tack paper tape. Next, I did a light spritz of a brown sparkle spray to create a sand like texture. Remove the tape and glue die-cut sentiment strip in place.

I used a left-over strip of decorative paper and two 1/8-inch tall strips of cream cardstock to finish the front of the card.

The card back uses another decorative paper scrap and a die-cut paw print that has its paw pads inked. I found that by attaching the tiny paws pads to a piece of low tack tape, I could easily ink the pieces with a sponge dauber.

I found that the puppy face dies have stencils within them that I used to ink with a white gel pen make highlights.

I added the “love you” inside the card using a Karen Burniston word set.

As with all my cards that are sent in an envelope, I have decorated the back flap with an embossing folder and a paw die-cut. Both the embossing and die-cut were inked with a dark brown ink. The card fits into an A6 envelope.

Thank you for reading this blog post. I the card made you smile and gave you inspiration. Please like and leave comments 😊

Materials Used:

Dies

Papers

  • & Papercraft, issue 204 – Pawfect Pals designed by Adam Prescott
  • Brown Craft and Cream Cardstock
  • Blue, Pink and Black Cardstock Scraps
  • A6 Card and Envelope – Ivory

Inks & Pigments

  • Nuvo Sparkle Spray – Coca Powder
  • Ranger – Tim Holtz Distress Ink – Walnut Stain
  • Sakura – Gelly Roll 08 – Gel Pen – White

Miscellaneous

Celebrate a Poppin’ 2023!

It is the Karen Burniston Design Challenge for January 2023 featuring pop-ups using a rubber band!

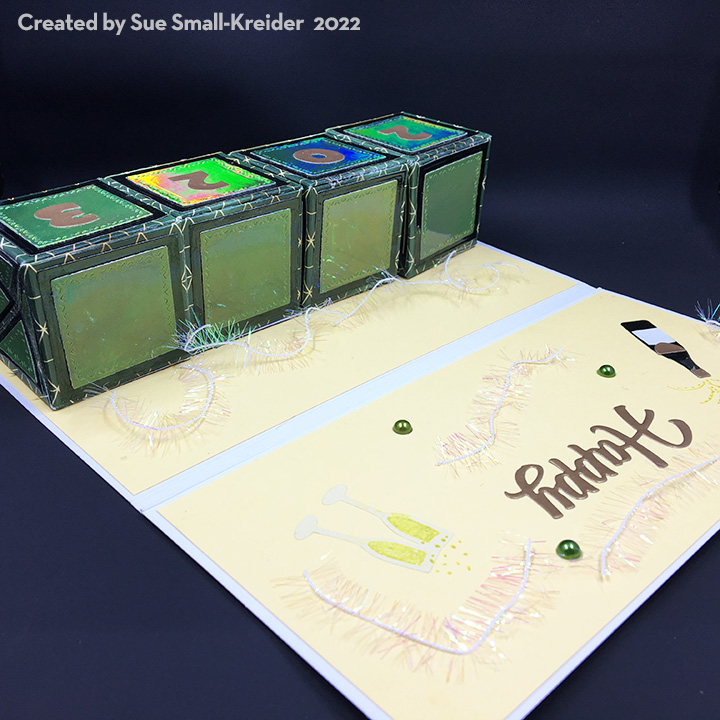
For this New Year’s card, I featured Karen Burniston’s Surprise Cube Pop-Up in a slimline card.

For the pop-up cubes I watched the assembly video before starting. Because I used specialty printed cardstock and mirror cardstock all of which have slick finishes, I had to glue, clamp, wait for glue to dry before moving onto the next step. Double-sided tape ended up working better on these cardstocks. I decorated the sides while the main pieces were still flat.

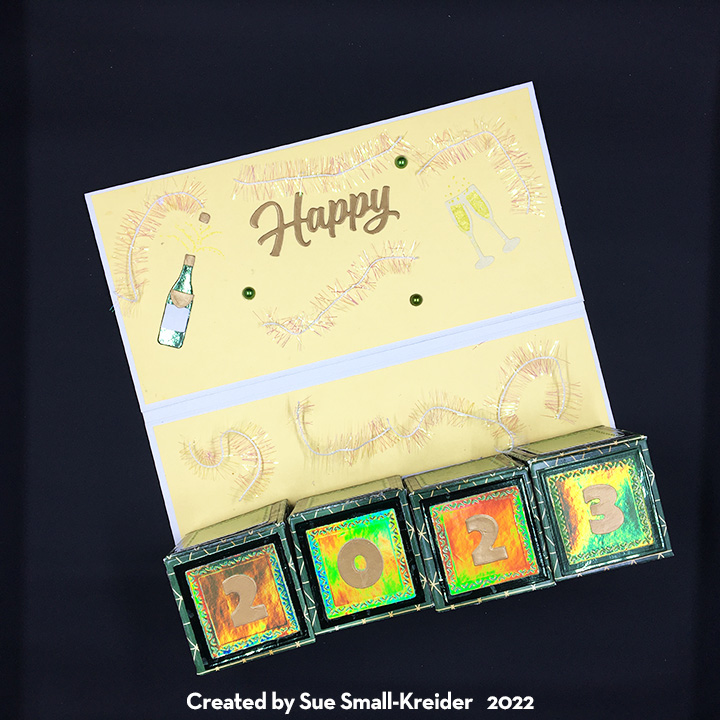
I cut two sets of the numbers for “2023” from a scrap of matte gold paper. These were glued on the top and sides of the cubes once I had glued the cubes to the card base.

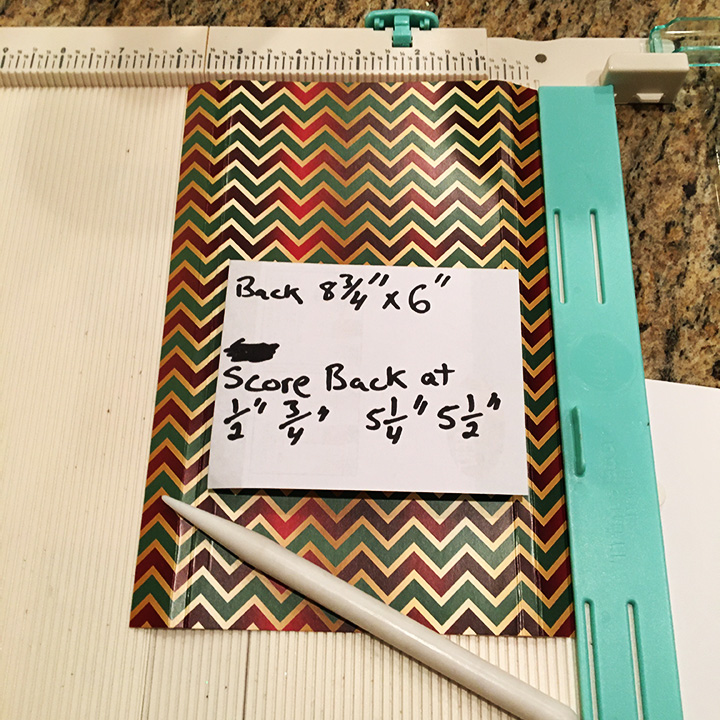
The card base is custom made from two pieces of the patterned specialty cardstock. The front piece is 4 x 8 3/4 inches while the back piece is 6 x 8 3/4 inches. The back piece is scored at 1/2 inch, 3/4 inch, 5 1/4 inches and 5 1/2 inches.

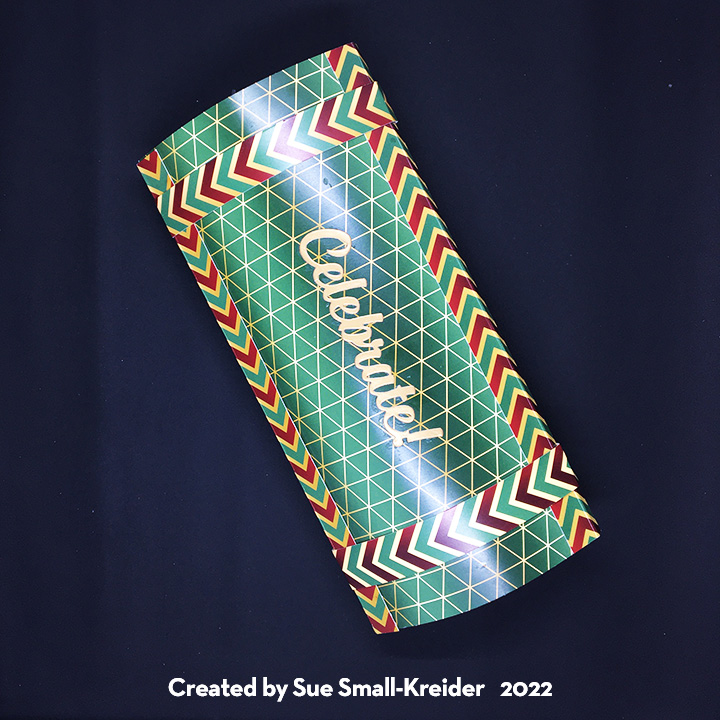
The front piece is glued under the back’s tab. When closed, the back piece’s front tab wraps over the front’s bottom edge. Two bands hold the card shut. Instructions to slide the bands off are on the back of the bands.

Celebrate” is the front sentiment that hints at what’s to come when the card is opened. I used the largest of all the “Happy”s in Karen Burniston’s dies. It comes from the Happy Birthday die set. The champagne bottle comes from the Wine Charms set while the clicking champagne glasses are from the Wedding Charms set. The bubbly effects of the popping cork and from the glasses were made with a gold gel pen. Some holographic strands of tinsel finish off the decorations inside.
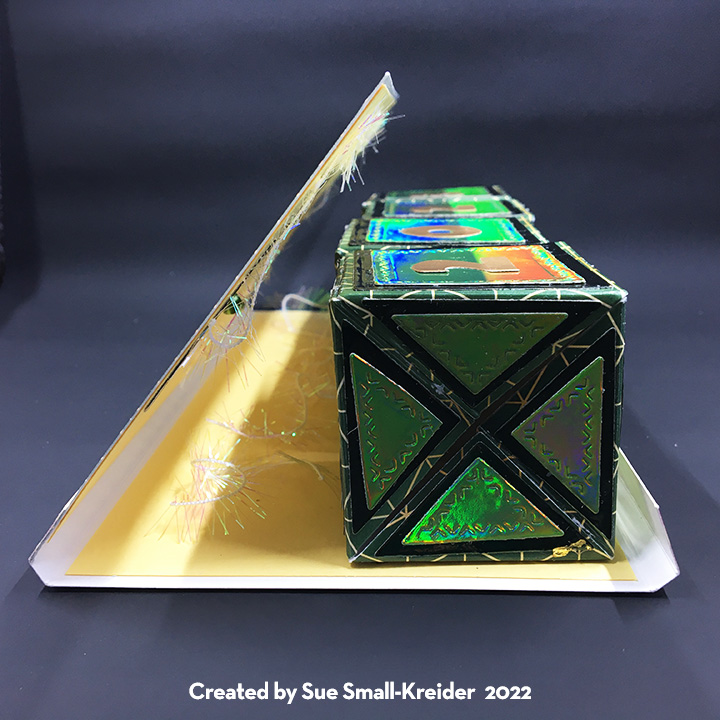
There is space behind the cubes to write a personal message and then place the loose tinsel strands over it.
Thank you for reading this blog post. Please like and leave comments 😊

Materials Used:

Dies

Papers

  • Hunkydory  – A4 size – Adorable Scorable Pattern Pack – Heavy Cardstock- Festive Foils
  • Tonic Studios – 8.5’x11” Craft Perfect Mirror Cardstock – Seafoam Green
  • Joy Craft – Mirror Cardstock – Dark Green
  • Yellow Cardstock
  • Matte Gold Paper Scrap

Miscellaneous

Tired Santa

This is a holiday card for a busy Santa. It features the Bam Box dies from Karen Burniston’s December 2022 release. It also uses previously released die sets of the Fireplace Pop-up die set, Fireplace Extras 1, Fireplace Extras 2Gnome and Santa, Slim Frames and Family Room die set.

Card Base:  The card base is an A7 size (5 x 7 inches) with a top fold. The base was what I glued decorative papers to as well as attaching the fireplace pop-up mechanism.

Bam Box:  The bam box is a rubber band powered spring box that allows the sofa to pop-up. Watch the assembly video before assembling. Heavy weight cardstock is recommended and allowing glue to dry at each step will make for the best working bam box.

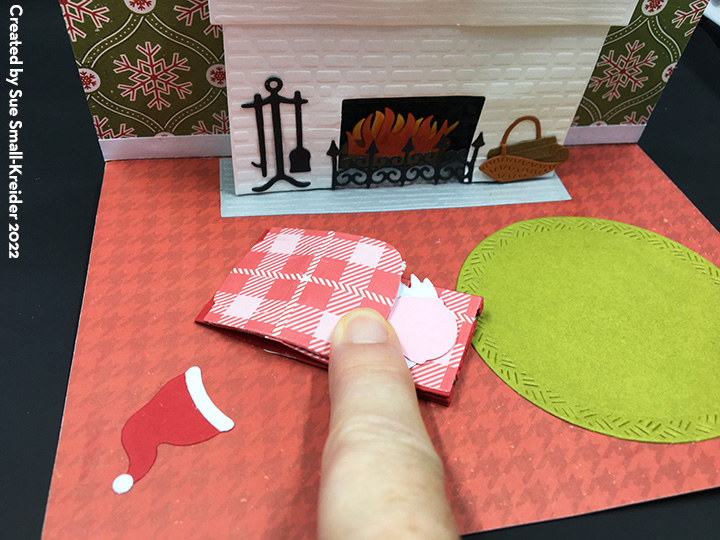
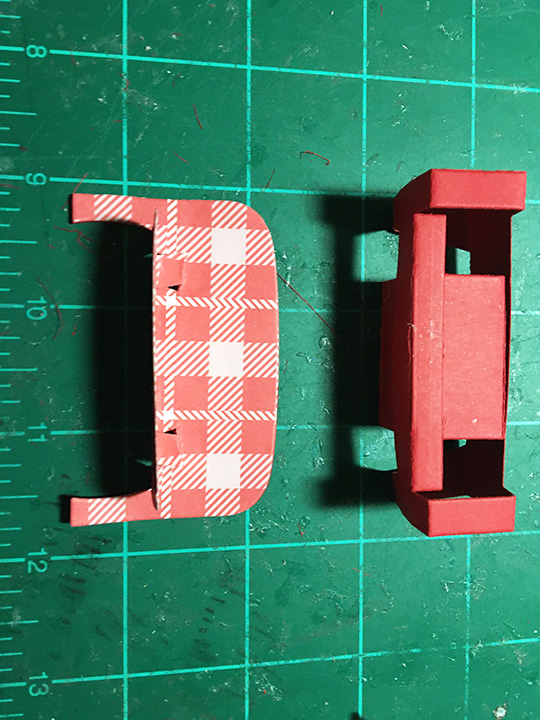
Chair:  A bam box is covered with the chair from the Family Room die set. The back of the chair is just the seat portion left flat. I cut a bam box decorative rectangle to cover the front base of the chair and hid the bam box. The pillow is attached as per assembly video directions. Santa is made from the Gnome and Santa set coloring the boots to look like socks and adding a pair of pants so his legs can stretch out onto the ottoman. Santa is glued to the pillow and his pants are glued to the Santa suit edge. The ottoman is just a bam box covered with decorative paper. (I originally was going to have a sofa in the scene as well, but decided on a chair and ottoman foot rest. The photos below depict the sofa assembly. The chair is made similarly.)

Fireplace and accessories:  For the fireplace cut two of the fireplace brick front – one in white and one in black as well as two of the lined mantle/hearth pieces – one white and one gray. The black brick is colored with a white crayon and the fire and logs are also cut twice and colored with watercolor pencils.

To assemble the fireplace, watch the assembly video first. You will need to attach the gray hearth and black brick pieces to the card base before adding the mechanism. There are two fireplace extra sets. I used the clock, fireplace fender and basket of logs from set 2 and the fireplace tools and candles from set 1. The tiny pop-up mechanisms for the objects on top of the mantel are from the fireplace die set. I also add strips of white cardstock to the wall on either side of the fireplace as floor moldings.

Rugs and Wall Decoration:  Using patterned papers that suggest wallpaper or carpeting make this type of card pop. The picture molding strip above the fireplace is a scrap trimmed off the patterned paper and the reverse side used. Slim Frames is the die set that the gold frame comes from while “Happy Boxing Day” and the calendar page are computer generated. The large green round rug is cut from the second largest circle crosshatch die. It can be used to write a personal message.

Card Front:  The card front uses a mat of silver glitter paper overlayed with the snowflake pattern plate cut from white handmade paper that has silver glitter swirls on it. The Holiday House is cut from papers used on the inside of the card. “SANTA” has been written on the door mat to hint at who is inside the card. “Happy Holidays” was cut three times with the top layer colored with silver gel pen.

Envelope: The back flap of the A7 brown kraft paper envelope has Santa’s sleigh and reindeer stamped in white to hint at what’s to come.

Thank you for reading this blog post. Please like and leave comments 😊

Materials Used:

Dies

Papers

  • Echo Park Paper Co. – 12 x12 Double-sided coated cardstock – A Perfect Christmas by Lori Whitlock – Berry Merry Christmas – APC135003
  • Echo Park Paper Co. – 12 x12 Double-sided coated cardstock – I Love Christmas by Lori Whitlock – Glad Tidings – ILC114009
  • American Crafts – The Color of memories 12 x12 Red Plaid Paper – 348968
  • Recollections – Signature Especial 12×12 Foil Paper – Silver Glitter -220520
  • White Glitter Handmade Paper
  • Colored scraps of cardstock
  • A7 Kraft Card and Envelope

Pens, Crayons & Inks

  • Pink, Red and Black Fine-Tipped Markers
  • Ranger – Tim Holtz – Distress Ink – Walnut Stain
  • Ranger – Tim Holtz – Distress Crayon – White
  • Simon Says Stamp – Premium Pigment Ink – White

Stamps

  • LeCrea Design by Leane de Graaf – Combi Stamps – Santa & Small Christmas Trees – 55.3707

Miscellaneous

A Merry Little Christmas

Sometimes you just need to cheer someone up at Christmas time.

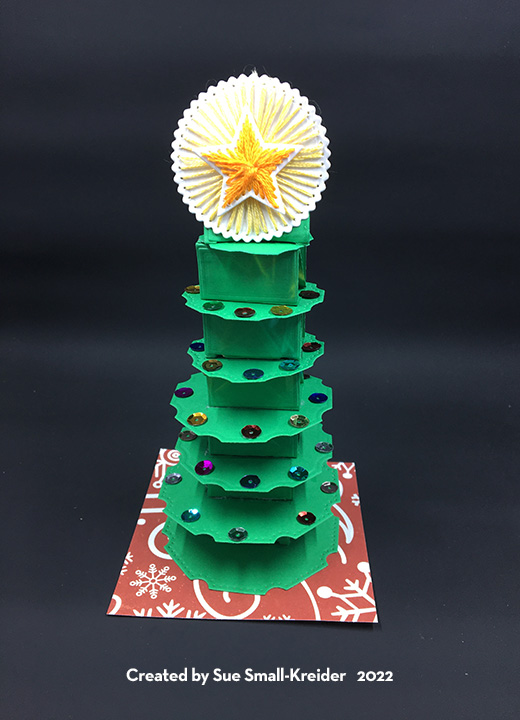
This was a quick make for a friend who found out that they would be unable to be with family over the holiday weekend. It uses the Bam Box die set from Karen Burniston’s December 2022 release and a tag die from a previously release die set. The stitched star and circle were leftover from a previous project. They were die cut from Karen’s Circle Charm Pop-Up die set.

I cut seven of the bam box strips, 14 of the bam box decorative rectangles and two of each of the four different sized fancy circle labels in the set from green cardstock. Because I like to let the glue dry between before adding the rubber bands to bam boxes, I glue in stages. (In the photo the middle flaps have been glued.) (See website for assembly video and source of tiny rubber bands.)

Glue the decorative panels to the sides of each bam box for added thickness. (By sides I mean the sides that have the diagonal flap beside them. Not the side that has the smiley face or its parallel side.) These will be the sides seen between the layers of circles.

To assemble the tree, mark in pencil the location of the bam boxes on the top and bottom of each circle except one of the smallest. Add double-sided tape to the tops of the circles and bam boxes. (By top of the bam box I mean the side where the smiley face is glued to the last flap of the box.)

Alternate the direction of the diagonal inside flaps of the bam boxes, so that they make a zig-zag pattern when looked at from the side. By alternating the direction, the bam boxes will fold flat and the tree will flatten into an oval shape.

The stitched star and circle are thick (1/4 inch each) with the three strands of embroidery floss stitched through the punched holes that the die makes and a center hole made with a needle. They are backed with the smallest fancy circle label and glued to the top bam box on its side.

Sequins are glued to the edges of the circles to represent ornaments or colored lights.

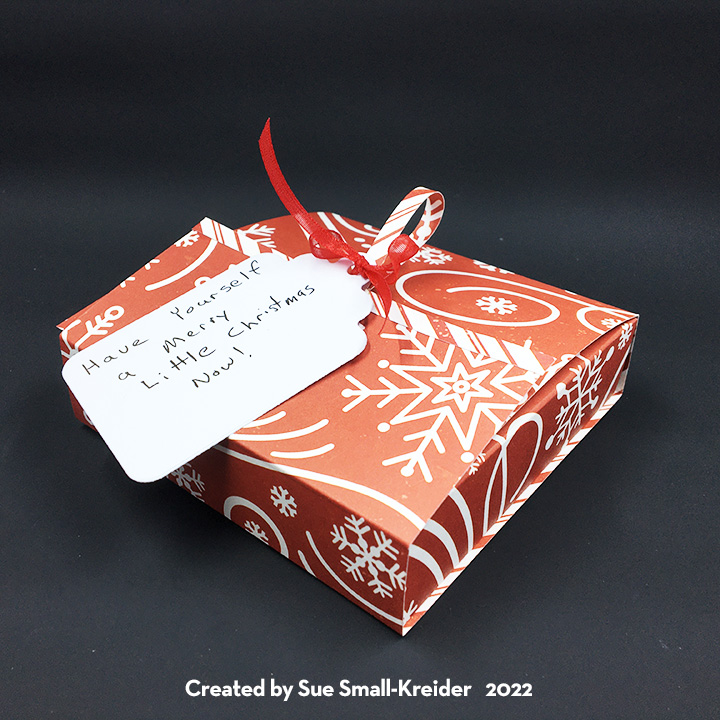
The outer box is made of two 12 x 4 inches rectangles scored at 4 inches, 5 inches, 9 inches and 10 inches. The middle squares are glued together to form a cross. Using strips of the decorative paper for pull ribbons glued to the middle of each flap, I glued the remainder of the strips as decorative trim. Two adhesive-backed hook and ladder fasteners are the closures.

Thank you for reading this blog post. I hope it has provided some inspiration.

Materials Used:

Dies

Papers

  • Echo Park Paper Co. – 12 x12 Double-sided cardstock – A Perfect Christmas by Lori Whitlock – Snowflake Swirl – APC135009
  • Green Cardstock
  • White Cardstock Scraps

Miscellaneous

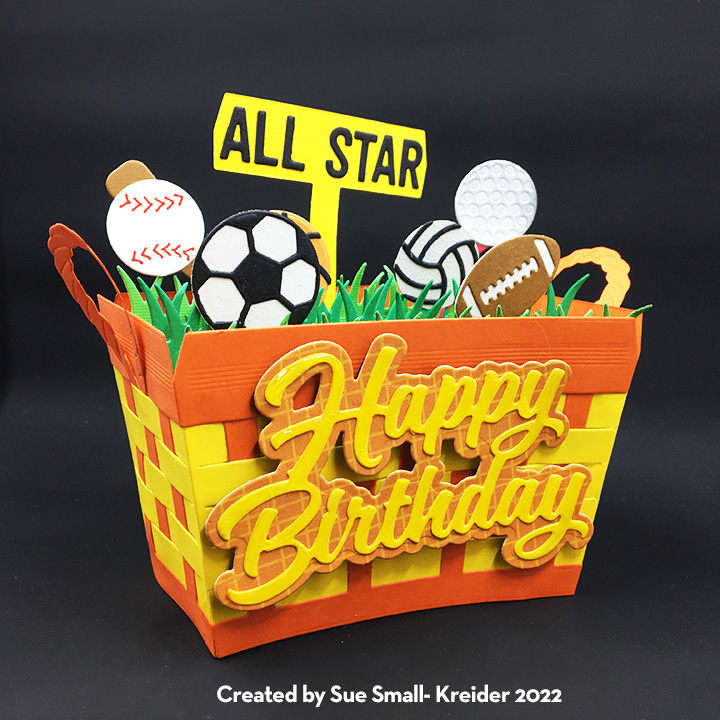
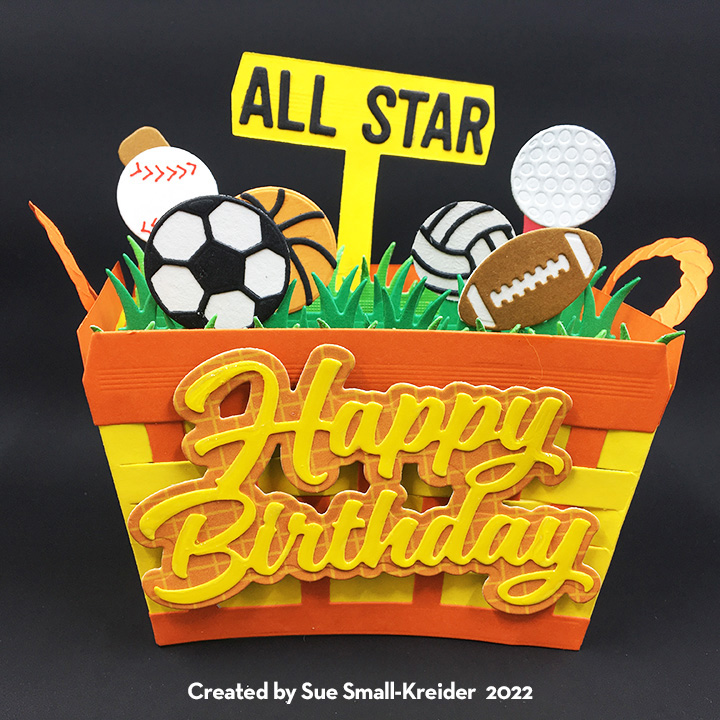
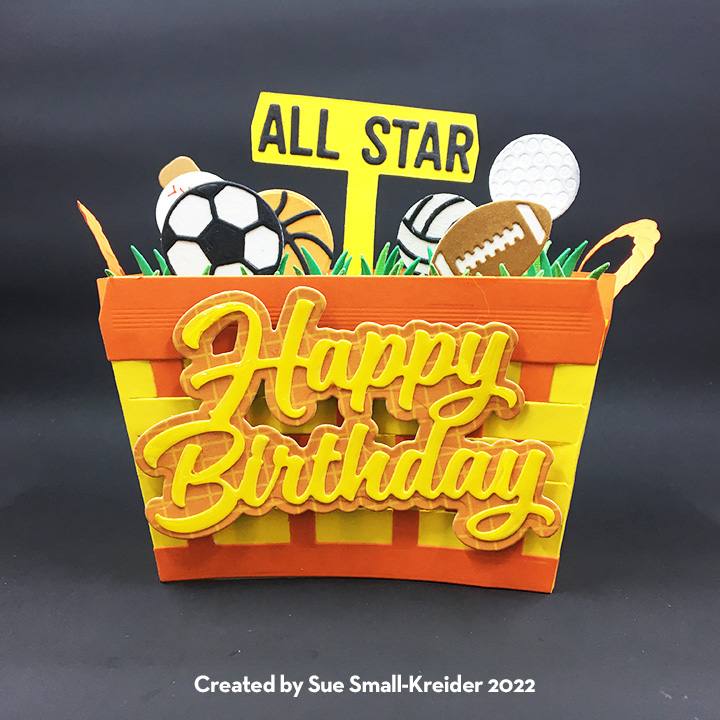
ALL STAR Birthday Basket

What to give to an all-star athlete who enjoys playing a variety of team sports? A basket of sport balls of course.

This pop-up birthday card features some of Karen Burniston’s December 2022 release die sets – Wide Woven Basket Box Card, Bam Box and Sports Charms.

Wide Woven Basket: This die set makes it easy to create a rectangular pop-up basket. (Prior to this set you had to die cut an extra set of pieces to widen the basket sides and grass. See video.) When used with the previously released Woven Basket Box Card, you cut two sets of the original size sides and two sets of the wide size sides. Follow the directions on the package or the assembly video to weave the basket and join the sides together. (I choose to leave the top decorative full width rather than folding over as directed in the video.)

Adding Crossbars of Grass: The Wide Woven Basket Box Card includes the wide grass crossbars used to attach the various balls. (I cut four to make a full basket.)

Sports Charms: In the Sports Charm set there are a softball and bat, a golf ball and tee, a basketball, a volleyball, a soccer ball and an American football. All but the softball and golf ball use two dies to create the stitching patterns of the various balls. The softball has embossed stitching lines that I highlighted with a fine-tipped red marker. I inked the golf ball’s indentations lightly with a black ink. (See assembly video for Sports charms.)

Sentiments: I cut an extra set of the weaving panels from the original basket set and folded the two-prong piece in half to glue behind the “T” piece to create a signpost to glue “ALL STAR” from the mini alphabet set. When I glued the signpost onto the back of the basket, I laid it out over the A7 envelope to know how tall I could make it and still fit into the envelope. The “Happy Birthday” used both the sentiment set and its matching shadow set cut from a contrasting color. (I used Glassy Accents on the “Happy Birthday” to make it have some shine which doesn’t show very well in the photos.) The shadow piece is popped up on two foam dots to give some dimension from the basket.

Bam Boxes: To animate the basket when it comes out of the envelope and pops into shape, two small “Bam Boxes” were used. (Assembly video) These easy to make rectangular boxes are powered by a small rubber band. (I used #8 size bands.) These go in diagonally opposite corners of the basket. Once glued in, the basket will only fold flat in one direction.

Envelope: As with all my cards that are sent in an envelope, I have stamped the back flap to hint at what’s inside. This is an A7 envelope.

Thank you for reading this blog post. Please like and leave comments 😊

Materials Used:

Dies

Papers

  • Colored Cardstock Scraps
  • Light-Weight Yellow and Orange Cardstock
  • A7 White Envelope

Pens, Inks & Stamps

  • Red Fine-Tipped Marker
  • Catherine Pooler – Premium Dye Ink – Spa Collection – Mandarin Spice
  • Fun Stampers Journey – Rubber Stamp – Winners -SS-0362

Miscellaneous

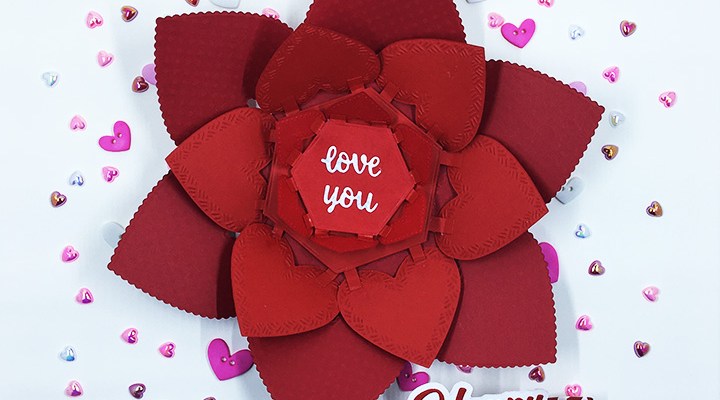
Poppin’ Hexagon Flower

Karen Burniston’s December 2022 release of new dies has a lot of pop in it. This hexagon flower card is a cross between an explosion box and a flower bud slowly opening.

To make cut eight of the largest hexagons in the Hexagons – Crosshatch die set and six hinges from the Tag Book Pop-Up set which are 1 x 2 inch rectangles. Fold the hinges at the score lines.

Pick one hexagon to be the flower center. Begin gluing one hinge to the underside of the center hexagon matching the edge of the hexagon to the lowest fold on the hinge. Glue a petal hexagon to the hinge matching the petal edge to the highest fold of the hinge.  Continue attaching hinges and petals to center hexagon until all sides are completed.  Glue the remaining hexagon over the hinges on the underside of the center hexagon. (This will be where a personal message can be written.)

Using the smaller crosshatch hexagon dies, cut decorative papers to attach to the petals and center hexagons.

Make a Mini Ball Pop-Up in yellow.  Glue to center hexagon. Make and attach a bee from Flutter Charms die set.

The sentiment uses both the Happy Birthday and its shadow die cut in the polka-dot paper. I used some Nuvo Aroma Drops to cover the words and to add some scent to this flower card.

For the sentiment band I used two pieces of decorative cardstock one piece long enough to wrap around the closed flower and the second piece cut to the width of the closed flower.

Thank you for reading this blog post. Please like and leave comments 😊

Materials Used:

Dies

Papers

  • American Crafts – The Color of Memories – 12×12 patterned paper -320473
  • Crafter’s Companion – Vintage Tea Party from Cardmaking & Papercraft magazine
  • Hot Off The Press – 12 x12 double-sided paper – Dotted Duos #2 – pink
  • Echo Park – Happy Easter by Laura Passage and Nicole Seitler – Easter Eggs
  • Pink lightweight cardstock
  • Yellow heavyweight cardstock

Miscellaneous

Patchwork Birthday Pop-Up

Quilts are cozy and so is this patchwork pop-up birthday card.

This card uses newly released Karen Burniston Hexagon Crosshatch dies to create both the patchwork both inside and outside. It also uses the pop-up mechanism from the Oval Frames Pop-up set. The sewing charms finish the card with decorative elements.

I wanted to create the effect of a flapping fabric quilt on the inside when the card opens. Cheese cloth is the inside patchwork’s backing. Glue stiffened the piece, but it has some movement. A white gel pen was used to add the stitching and sentiment of “Happy Birthday!”

Baker’s twine was threaded through the buttons from the charm set. The buttons are popped-up on foam dots to allow for motion from the twine.

The outside of the card is covered with large crosshatch hexagons and the overhanging pieces are trimmed and the scraps are used to fill in the other half hexagon edges of the card.

The front sentiment is one I used on another card that uses “word surgery” to create the word “sewing”.

I like to decorate the back panel of my cards using elements from the card.

As with all my cards that are sent in an envelope, I decorated the back flap with a birthday sentiment and a note that it was made with love.

Thank you for reading this blog post. Please like and leave comments 😊

Materials Used:

Dies

Stamps

  • Lawn Fawn – Clear Stamp – made with love
  • Waffle Flower – Clear Stamps – Sweet Sentiments – 271296

Inks

  • Stampin’ Up – Classic Stampin’ Pad – Cherry Cobbler and Crushed Curry

Papers

  • DCWV – 8.5 x 11 inches Printed paper – The Everyday Essentials Stack
  • Craft Consortium – A4vPremium Quality Papers – Double-sided Solids – Candy Christmas
  • A7 White Envelope

Miscellaneous