Popping The Question

Hi Crafty Friends,

Welcome to our Karen Burniston Products – KB Riley LLC December Release Blog Hop. The Design Team have come together with Karen today for a fun blog hop to celebrate the release of 11 new dies. Sneak peeks of the new release started last week, and the dies are available to order NOW!

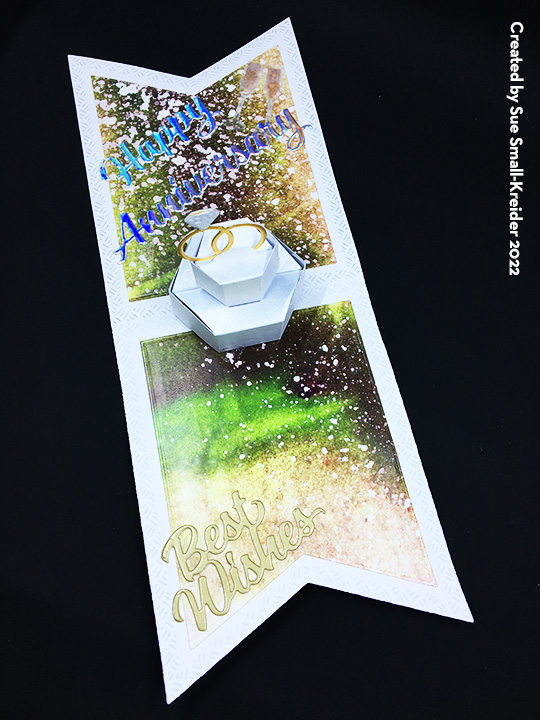
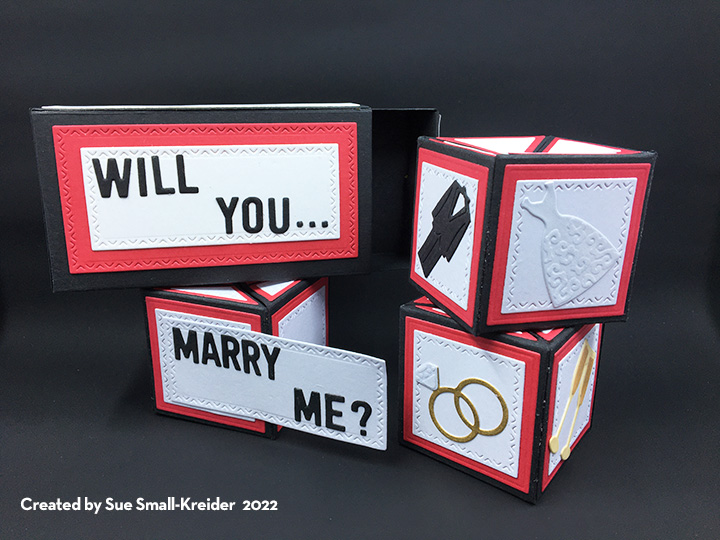
This proposal is literally popping the question!

Karen Burniston’s December 2022 release includes the Surprise Cube Pop-Up, Slider Box and Wedding Charms die sets used to make this proposal box.

Three decorated Surprise Cubes comfortably fit inside the slider drawer. (See assembly video for Surprise cubes.) Using the smallest crosshatch rectangle from the Slider Box set to hold the big question, it was glued to one side of a cube when flat. Placing this cube in the bottom of the drawer it tends to stay inside the drawer when the other cubes pop out. (Slider Box assembly video)
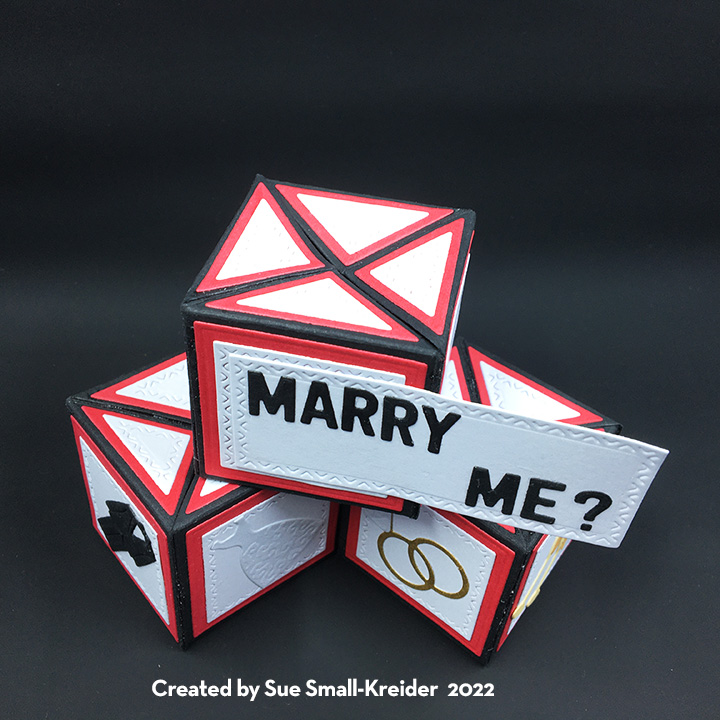
Four different charms- groom tux, bride wedding dress, double wedding rings and clicking champagne glasses – from the Wedding Charms set cover the sides of the cubes.

The tiny crosshatch squares and triangles included in the Surprise Cube set along with matting squares and triangles make for quick decorating. The Mini Alphabet letters spell out the proposal.

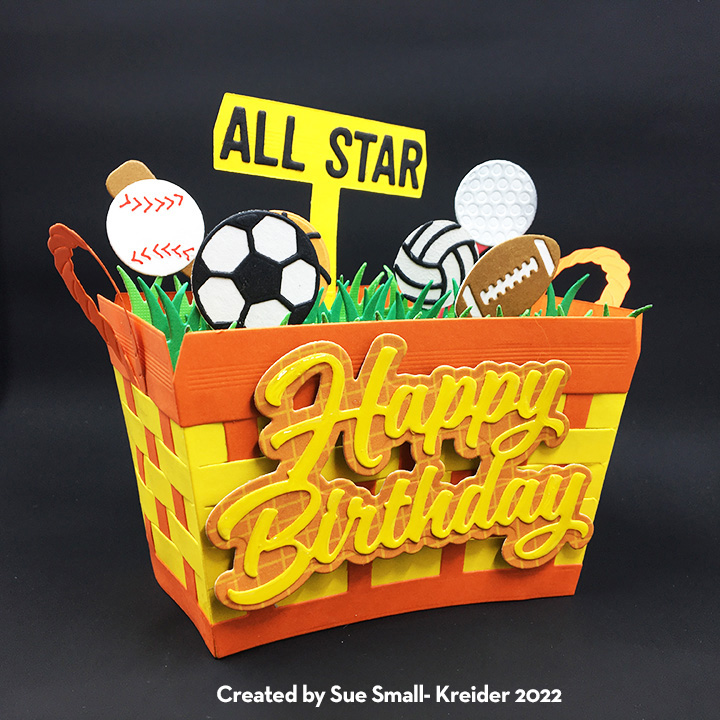
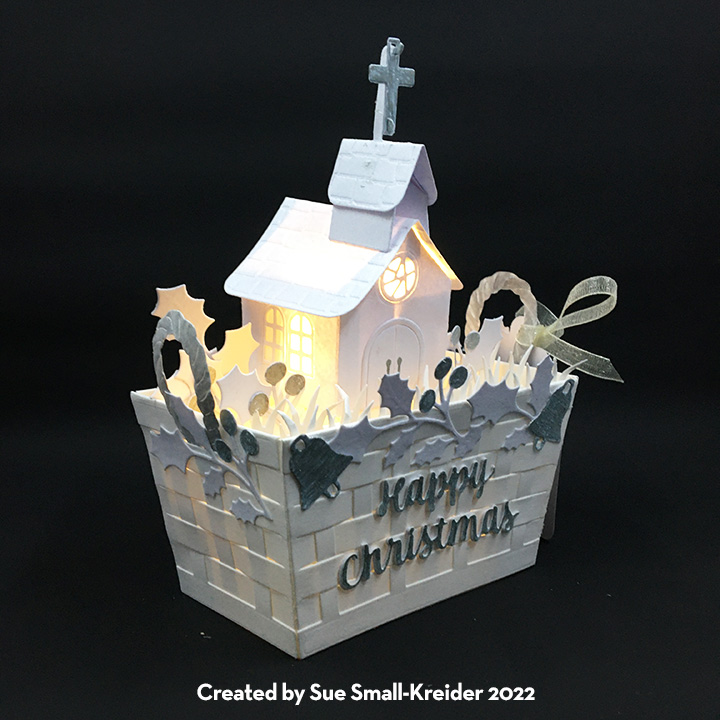
Not ready to pop the big question? Then try these die sets for asking someone to the prom, wishing a Happy Birthday or a Happy Christmas. The drawer will fit a gift card under the three cubes.

This release includes:

  • 2 new charm die sets
  • 1 new stand alone die set
  • 2 new Tiny House Add-Ons sets
  • 2 new Pop-up die sets
  • 1 new Woven Box Basket die set
  • 2 new Crosshatch die sets
  • 1 new Box die set

Dies are available to order now on the website.

GIVEAWAY:

To celebrate the release Karen Burniston and each of the Karen Burniston – KB Riley LLC Design Team members will be giving away a $25 Gift Certificate to some lucky person who comments on our blog posts, so make sure you join the hop and comment on everyone’s blog post. Winners will be randomly chosen from ALL of the blog hop comments received on our blog posts by Monday, 19th December 2022. Lots of chances to win some goodies, so just leave a comment on this post or any other blog hop posts to enter! Don’t forget to leave some way for us to contact you, in case you are a lucky winner!

Karen Burniston 

Lois Bak 

Sue Small-Kreider – YOU are HERE

Karen Aicken 

Jennifer Webster 

Frances Byrne 

Nicky Foden 

Sandy Diller  

Suzanne Smit

Fran Sabad 

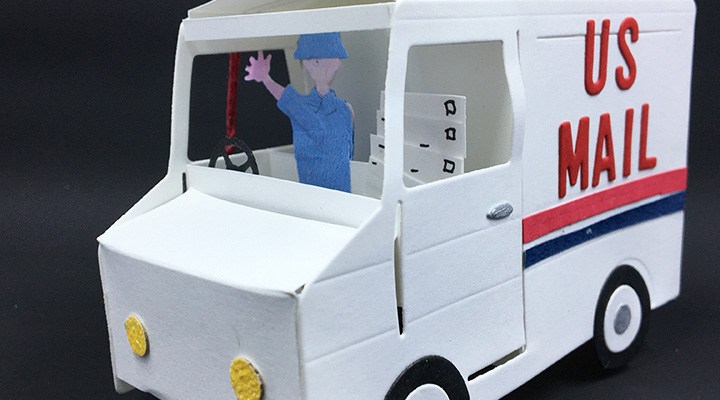
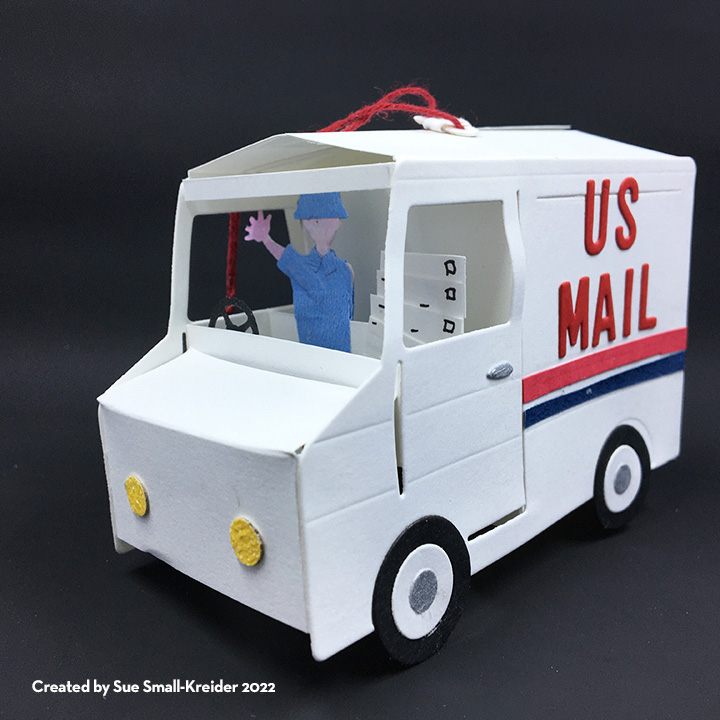
Thank You To Our Mail Carrier

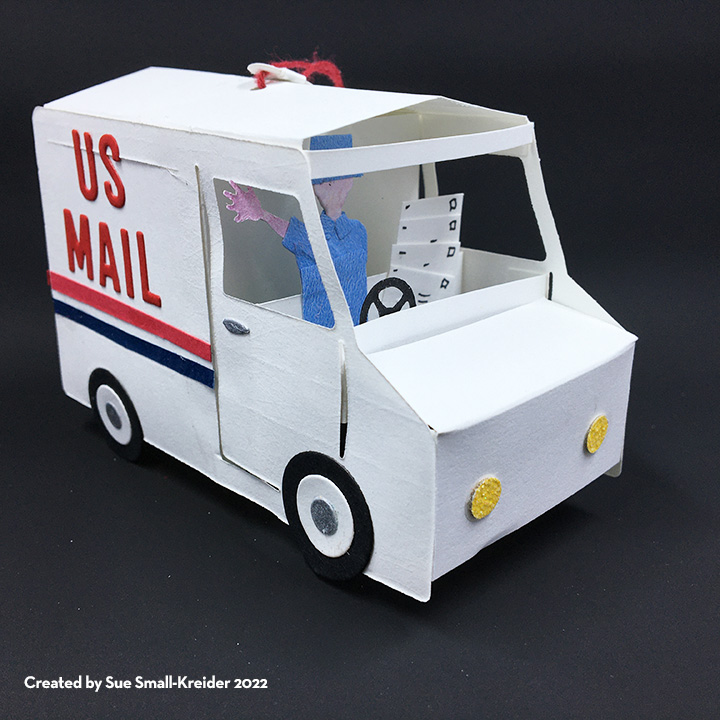
For all the packages and envelopes that our mail carrier has so carefully placed in our mail box or placed by our front door, I wanted to say thank you to her. So, a mail truck thank you ornament was created.

I primarily used Spellbinder’s Food Truck and Sunday Drive collection dies to create this mail truck.

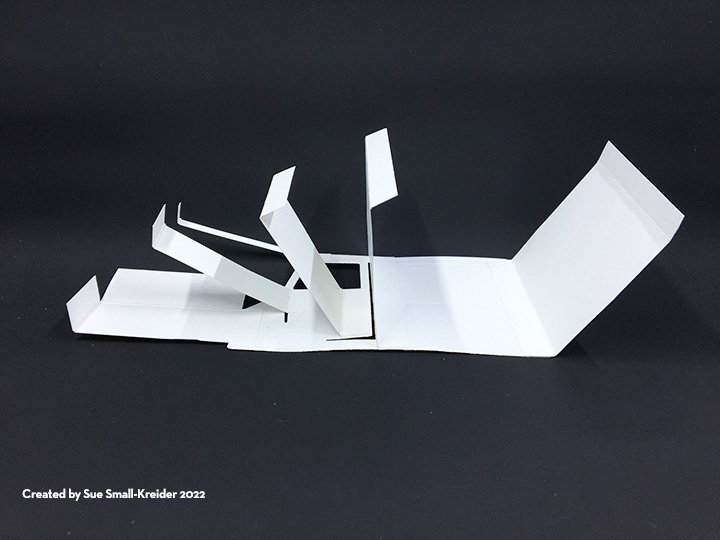
I cut two of the food truck die from an 8.5 x 11-inch sheet of white cardstock. I next cut panels that were 2.75 inches wide and scored at 3/8 inches on each side. (See downloadable PDF file of templates.)

The top of the windshield strip is .25 inches tall which is not on the template. The front panel is scored across at .875 inches and the side tabs are cut away. This forms the front slanted hood.

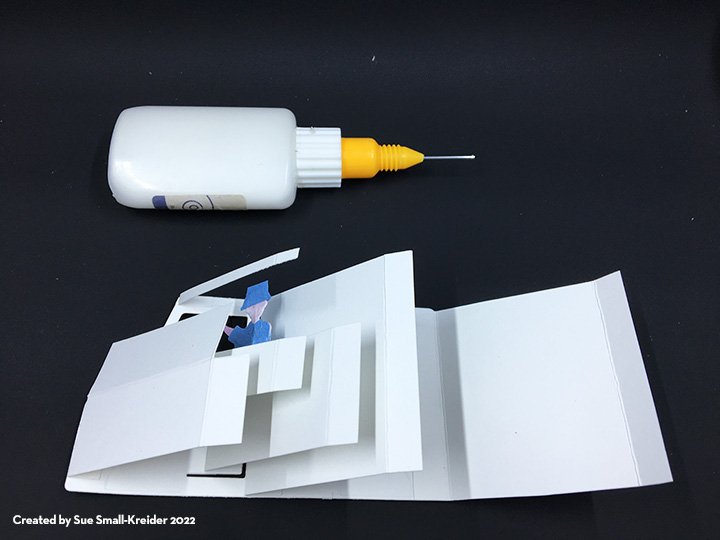
Glue all the panels to one of the truck pieces as shown in the photo making sure that all panels are parallel to each other and tabs are all on the inside of the truck.

Glue up a mail carrier using people dies from the Sunday Drive collection (I used the Sunday Sunset Drive for this and freehand cut the hat which our mail carrier wears.) Attach mail carrier to seat panel. (It is easier at this point to letters and packages to the seat panel at this point than to add them once the truck side is attached to the panels.)

Glue the panels to the second truck piece starting at the front and working towards the back.

The roof panels as shown on the template have tow holes punched into them for a string to tie them shut and form a loop to hang the truck from.  I had to notch my tabs to fit over the cab panel. You could avoid this by attaching the roof panels first and then the other panels.

The truck is designed to fold flat, so allow enough string to allow for it being flat.

I decorated the truck using the circle dies in the Food Truck set and the steering wheel from the Sunday Drive set. The strips were cut from some scrap strips of red and blue papers. The headlights and taillights use the smallest circle die from the Food truck set. (I used yellow glitter cardstock for the headlights.)

The “US MAIL” on the sides and the “THANK YOU” on the back were cut using Karen Burniston’s Mini Alphabet.  (I cut three “O”s glued together to make a slider on the string to help keep the roof shut.)

Thank you for reading this blog. Please like and leave comments. 😊

Go Bears Father’s Day Card

It’s time for another Karen Burniston Design Team Challenge. This month we were asked to use the Fireplace Pop-up die set to celebrate a specific holiday.

I have Father’s Day, which in the USA is in June which is not necessarily when American football is played, but once a fan of a sports team, always a fan of a team. GO Bears!

Card Base: The card base is an A7 size. I took a medium weight piece cardstock cut to 10 x 7 inches and folded in half. The base was what I glued decorative papers to as well as attaching the fireplace pop-up mechanism and floor flap.

Bears and Accessories: The bears, their football helmets and footballs, beer mug, and pizza are all Karen Burniston dies – colored to match the Chicago bear’s uniforms. Beer mug is made from Coffee Charms (mug) and Happy Hour Charms (foam) and a pizza (circle from a snowman set). Pizza box is my own creation. (You could change up the sport by using any of the new Sports Charms.)

TV:  The TV is the fireplace mechanism with a print of bears game covering the top portion while the bottom portion acts a table.

Flip Floor: I have made another flip floor for a Halloween card using the furniture from the family room die set. What I learned from my previous card is to use strong tape. I used duct tape on this card and full pieces of suede paper (for carpet) and wood-grain to make the flap have a sturdy hinge. The flap is cut to stop just before the TV table and locks under the right end table.

Lamps:  To make the lamps feel in proportion to the size of the room, I placed them on end table cubes which also act as the locking device for the flip floor. The lamps are part of the Karen Burniston Family Room die set. I placed a thin foam square under the lamp shades to made them curve round.

Furniture: I turned the chair of the Family Room dies set into a table by gluing a rectangle over the arm rests instead of adding the seat back. The back of the sofa is just the seat portion left flat. I cut pieces to cover the black base of the sofa.

Sentiments: Using contrasting colors to cut background plaques for the front sentiment of “GO Wild!” makes them standout on the busy patterned paper. The Father’s Day sentiment comes with its own shadow background in the die set.

CRX Sheet: Because of the flip floor and locking mechanism being atypical for what most card recipients expect, I have included a sheet with directions for opening and locking the card open. (You can download for free.)

Thank you for reading this blog post. Please like and leave comments 😊

Materials Used:

Dies

Papers

  • Photoplay Paper – 12 x12 Double-sided coated cardstock – 1st and Goal-FBL3192
  • Hot Off The Press – 8.5 x 11 – Smoke Suede – 10434
  • Spellbinders – Santa Lane – 6×6 Paper Pad – Wood Boards
  • EKSuccess – Martha Stewart Crafts – 12×12 Double-sided Paper Pad – Gothic Manor – 48-20301Colored Cardstock Scraps
  • Computer and color printer
  • White A7 Envelope

Pens & Inks

  • Blue, Red, Yellow and Blue Fine-Tipped Markers
  • Gelly Roll 08 Pen – White
  • Pigma Micron 05 – Archival Ink .045mm – Dark Brown
  • Ranger – Tim Holtz – Distress Ink – Antique Linen and Fossilized Amber

Miscellaneous

Sneak Peak – Bam Boxes

Here are some sneak peaks at next week’s release of new Karen Burniston dies. Dies will be available on December 12, 2022.

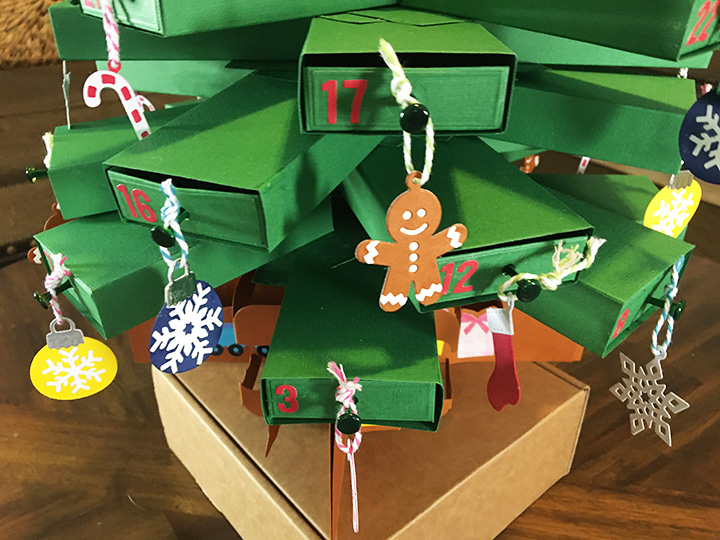
Bam Boxes are small (1 1/2 x 3/4 inches) that are pop-up cubes that make it possible to animate a basket or tiny house open instantly when removed from an envelope. They also allow for objects to be placed almost anywhere inside on a scene card and pop-up instantly when the card is opened. Below are some examples.

Gingerbread Holidays

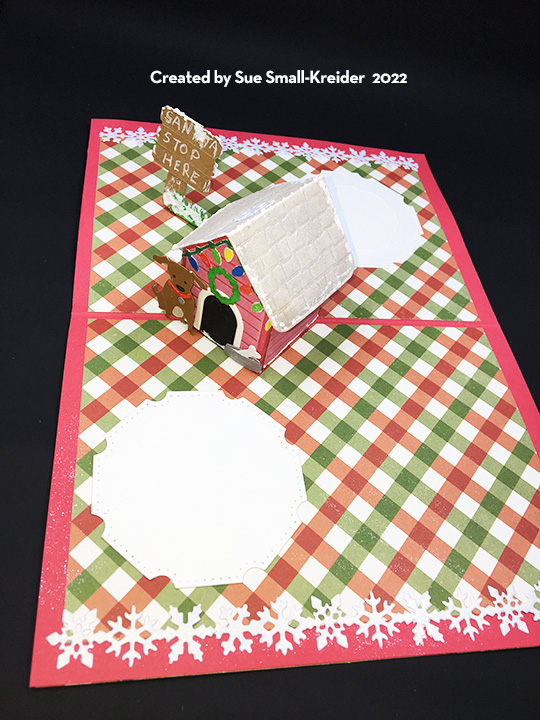
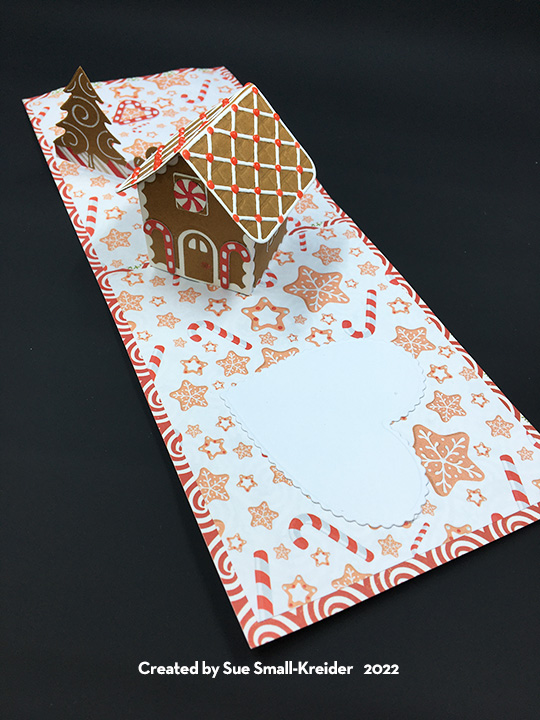
Gingerbread is a sweet treat and holiday cards that smell of sweet baked goods make these two variations on gingerbread house pop-up cards a treat for the senses.

Karen Burniston’s Tiny House Pop-up die set and add-ons feature strong in these two cards. Primarily the Gingerbread add-ons are used, but the rounded door is from the Mushroom add-ons set.

The main difference to these two cards is the position of the two tabs that attach the tiny house to the card base and therefore, where the extension bar is attached on the house – front or back. The tree is a Winter Charm.

White hearts cut from the crosshatch hearts die set are places to write a personal message.

To give the cards their sweet scents, Nuvo Aroma Drops were used – red Strawberry Tart as the red candies on the roof and Vanilla Cupcake as light brown icing on the window panes and door frame.

Card backs are just as important as fronts. These are decorated with left over strips to mimic ribbon on gift boxes.

The envelope back hints at what’s to come when the card is opened. The stamps are from the same Lisa Horton Crafts Premium Magazine kit as the inside cookies and candy canes paper and front foiled paper sentiment topper.

Like the Tiny House? See more tiny house sets by clicking here.

Thank you for reading this blog post. Please like and leave comments 😊

Materials Used:

Dies

Papers

  • Echo Park Paper Co. – 12 x12 Double-Sided Cardstock – I Love Christmas by Lori Whitlock – Here Comes Santa
  • Stampin’ Up – Doubled-Sided Cardstock from my stash –
  • Colored Cardstock Scraps
  • Pink A2 Envelope

Pens, Inks & Embellishment Drops

Miscellaneous