Burning Logs TV

This is the fifth card in the Fireplace Christmas Card series.

In the good old-days of the 1950s and 1960s, the winter holidays meant snow, winter sports like ice skating on a homemade ice ring made in the backyard of 2×4 boards and a few inches of water frozen. On Christmas day the TV stations broadcast images of burning logs to replace the normal programing.

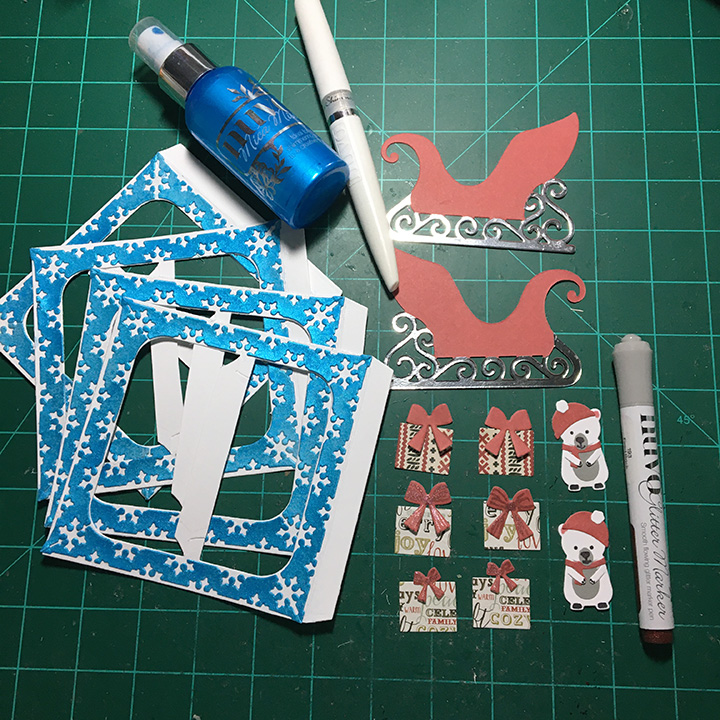
This card commemorates those childhood memories using dies by Hero Arts along with basic dies and stamps by other companies.

Cardbase: I used a purchase A7 (5×7 inch) cardbase and envelope. I covered the inside with papers that represent wallpaper and carpeting. The card back is also covered with patterned paper. Because I used 6×6 inch patterned paper and some designs I only had one piece, I placed borders of contrasting paper.

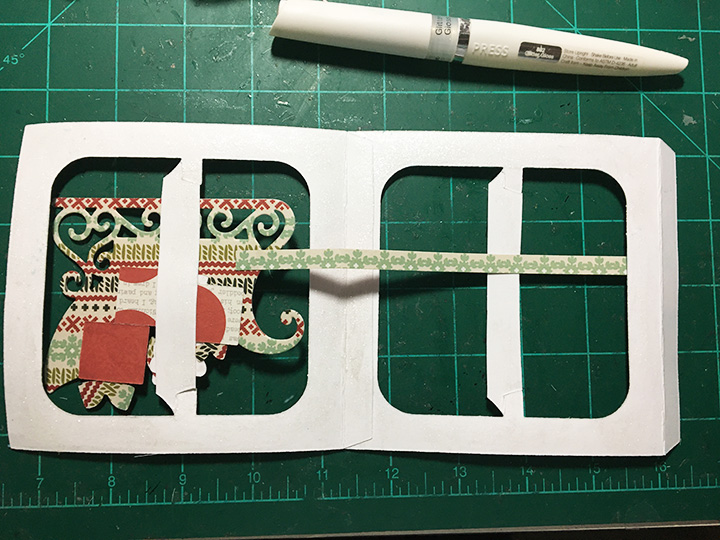
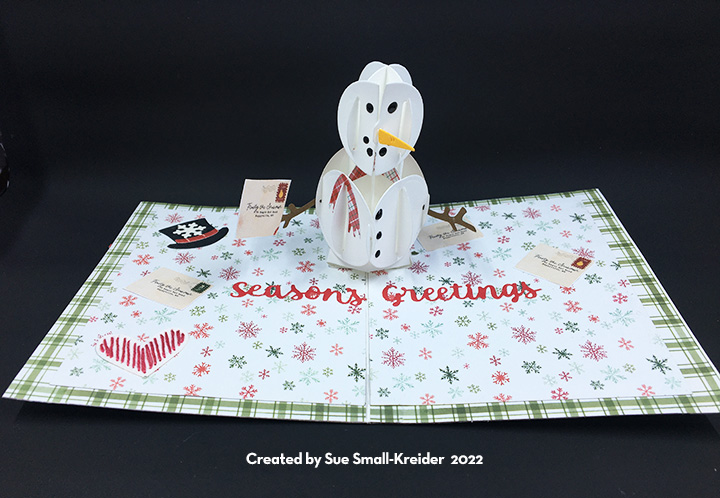
Pop-Up: I wanted this television set to pop-up inside the card, so once it was assembled, I made my own pop-up cube from scrap carpeting patterned cardstock (I would have used the wallpaper, but I had no more of it.) The pop-up cub is made from strip 2.5×7 inches, folded at .5-inches, 3-inches, 3.5-inches and 4-inches, and the .5-inch tab is glued onto the carpet panel inside the card, butted up against the fold and the other 3-inch end of the strip glued to the wallpaper panel.  The TV is glued to the front of the pop-up.

TV: As with many Hero Arts dies, you have to cut them multiple times and then fussy cut with scissors the decorative pieces such as the TV knobs, speaker box and legs. I cut the knobs, speaker and screen frame from a textured metallic gray cardstock and legs from woodgrain paper.

The whole television I cut once from black and twice from a thick cardstock in my junk mail recycling. The junk mail pieces I glued together. On the back of the black piece, I attached a piece of clear acetate using thin double-sided tape. Next, I trimmed the excess acetate. (Don’t attach black front to junk mail back piece until burning log screen is attached.)

White cardstock that was colored with markers and covered with glitter gloss was used for the flames while recycled kraft cardboard packaging was what the logs were cut from. Once the burning logs were assembled, they were glued to star patterned paper TV screen piece. Place a piece of wide clear packing tape over the backside of the junk mail piece and place the finished screen inside the junk mail frame. Glue the black front to the junk mail piece.

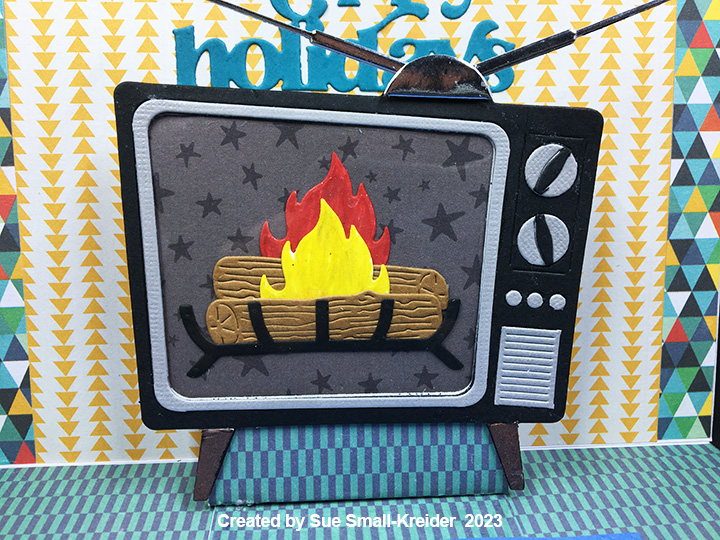
Attach the TV to the pop-up inside card. Play with the antenna placement so they won’t show when the card is closed. (I cut the antenna once from silver foiled packaging and once from the thick junk mail cardstock and glued together.)

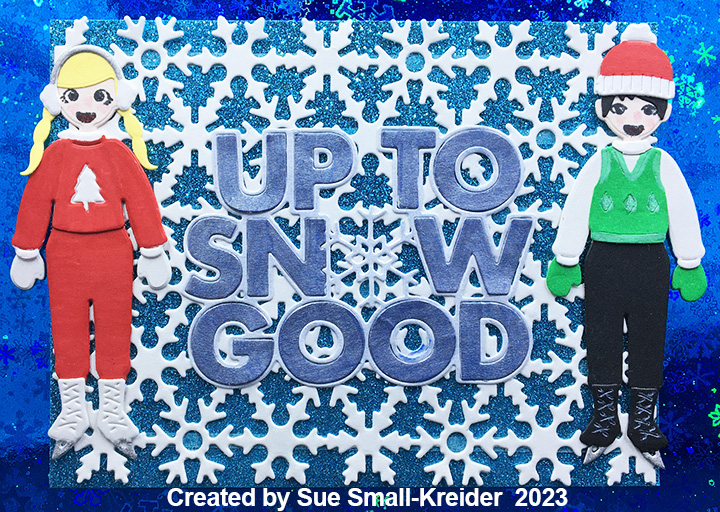
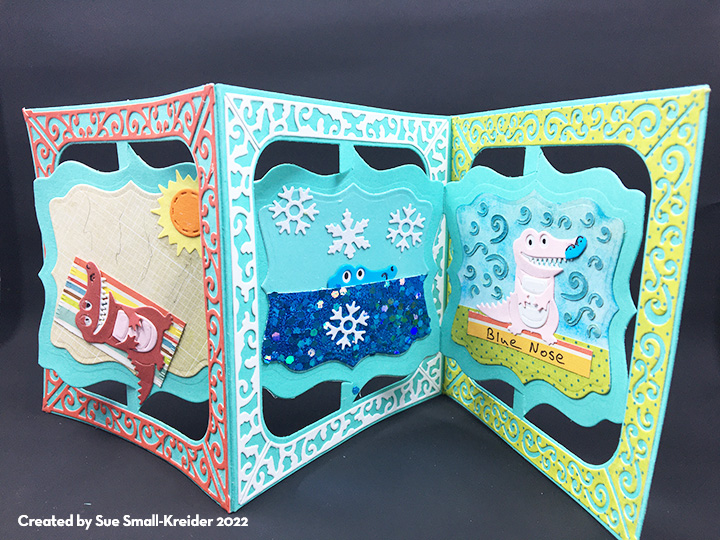
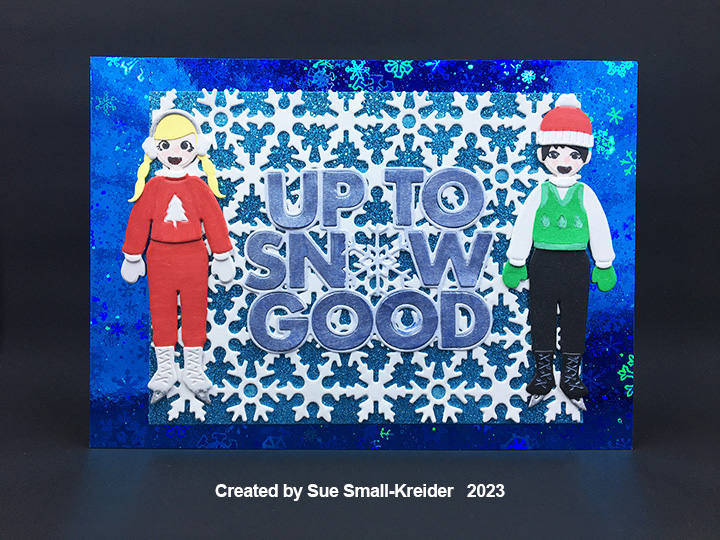
Card Front: For this layered mat front, I used a 5×7 inch rectangle of holographic snowflake cardstock that I cut a 4×5.25 inch crosshatch rectangle out of the center. A 4.25 x 5.5 inch piece of glitter cardstock was covered with a snowflake pattern plate attached with 1/8-inch wide double-sided tape. The open places in the center of some snowflakes had stickiness from the tape adhesive and was covered with an anti-static brush and powder.

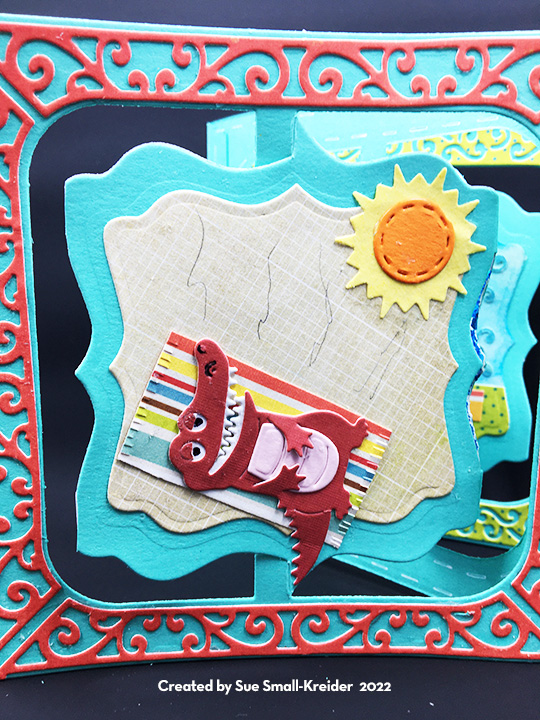
Skaters: Hero Arts makes a paper doll die-cut series complete with a variety of hair and facial expressions as well as clothing and accessories. These mid-century styles ice skaters use the Winter Accessories set along with the basic Hero Lifestyle Forms and Faces sets. Markers were used to color the clothing.

Sentiments: Two die cut sentiments were used on this card. On the front is “Up To Snow Good” a pieced die set by Riley & Company. I cut it once from heavy white cardstock and colored the letters with a blue metallic marker. I used glue to attach all pieces to the snowflake pattern plate. Inside the card is “Happy holidays” a die set by Simon Says Stamp. The lavender rug inside the card is a place for a personal message.

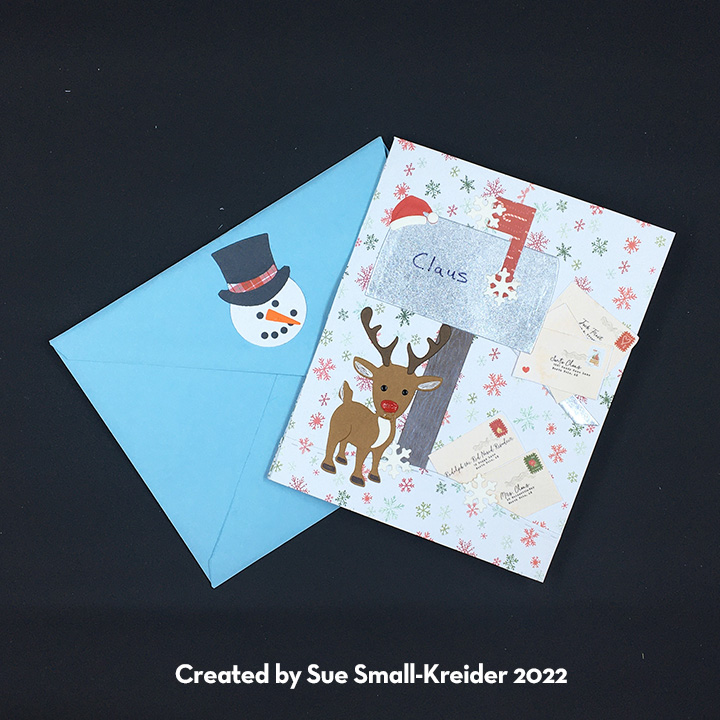
Envelope: To hint at what is to come, the back flap of the envelope was stamped with an Art Impressions’ sentiment stamp in blue ink.

Thank you for reading this blog post. I hope this inspires you and makes you smile. Please like and leave comments 😊

Other Fireplace Cards by designer/brand

Materials Used:

Dies

Stamps

  • Art Impressions – Unmounted Rubber Stamp – Scrapbook.com Exclusive – Sending a Flurry of Holiday Wishes! – 5085
  • Hero Arts – Fancy Dies – Hero Lifestyle Faces – CM500

Papers

  • Bazzill – 8.5×11 Textured Cardstock – Tiara -18-1002
  • Crate Paper – 6×6 Single-Sided Patterned Paper Pad – Cool Kid
  • Grafix – 8.5×11 Acetate .0075 – Clear
  • Honey Bee Stamps – 6×8.5 Double-Sided Paper Pad – Grain and Grunge
  • Hot Off the Press – 8.5×11 Holographic Cardstock – Snowflakes Blue – HOTP-10460
  • Recollections – 8.5×11 White Gold Shimmer Cardstock
  • Thick Smooth Cardboard Junk Mail
  • Thick Kraft Cardstock Packaging
  • Blue Glitter Cardstock
  • White, Black, Blue, Lavendar and Cream Cardstock
  • Park Lane Paperie – A7 Cardbase and Envelope – White

Ink

  • Stampin’ Up – Classic Stampin’ Pad – Misty Moonlight
  • Memento – Fade-Resistant Dye ink – Tuxedo Black
  • Ranger – Tim Holtz – Distress Watercolor Pencil – Kitsch Flamingo
  • Crafter’s Square – Metallic Marker – Blue and Silver
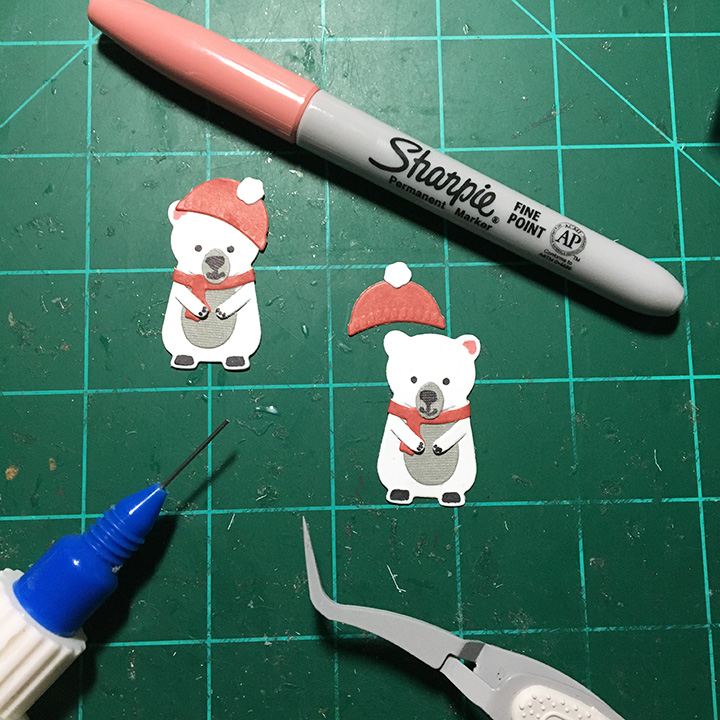
  • Sharpie – Permanent Marker –Fine Tip – Black, Red and Yellow
  • Sharpie – Permanent Marker – Ultra Fine Tip – Brown
  • Nuvo – Aqua Shimmer -Glitter Gloss
  • White Gel Pen

Adhesives

Tools

  • Die Cutting Machine
  • We R Memories – QuickStick
  • Stamping Platform
  • LDRS – Stampendable Stamping Tool
  • Stamping Cloth
  • Scissors
  • Kat Scrappiness – Anti-Static Tool

Sleighing It Accordion Style

It’s time for the Karen Burniston Design Team Challenge for August 2023 with the theme of ACCORDION dies.

I choose to use the Fancy Label Accordion die with the sleigh from the Sleigh Pop-Up and reindeer from the Christmas Animals set as add-ons similar to the new Cupcake or Fence Add-ons for the Landscape Rectangle Accordion set. I also used the snowflake frames from the Fancy Winter Frames set.

There are several ways of assembling this accordion card – prepare frames and attach them all together and then add the sleigh and reindeer – OR – prepare frames (adding snowflake frames to fronts of accordion frames only), make all the animals, sleigh and gifts and assemble each panel as you go adding the back snowflake frame pieces after you attach the accordion frames. The latter is the method I choose to follow. Watch the assembly videos for the Fancy Label Accordion and the Fence Add-ons (located towards the bottom of the linked pages.)

Frames: Cut four accordion frames from the Fancy Label Accordion set from heavy white cardstock. With scissors cut off the sides of the fancy label to form a pivot post on each accordion frame. Cut a total of 16 snowflake frames pieces from the Fancy Winter Frames set from blue cardstock. (I sprayed my frames with mica spray to get the metallic shiny frames.) Brush the accordion frame sides and the pivot post with glitter gloss. (I recommend doing both sides of the frame at this stage.) Glue blue snowflake frames onto the fronts only of the accordion frames. (Watch assembly video for the Fancy Winter Frames.)

Sleigh: Using red cardstock cut two sleighs. (If using decorative cardstock with a different pattern on each side, cut one red in reverse.) Cut two more of the lower portions, of the sleigh from silver foil cardstock making sure one is the reverse of the other. Fussy cut off just the sleigh runners. Glue runners to red sleigh bases.

Gifts: From the Sleigh Pop-Up set, cut a total of six gift boxes and four bows, making sure you have pairs of matching papers for each box and bow. (I used a glitter marker to add some accents to the bows.) Play with the layout of where the packages and bear will go in the sleigh and still fit inside the accordion frame.

Bear: Cut two bears from white cardstock and two of the tummy and nose pieces from gray using the Winter Animals set. Cut from red two hats and scarves and two pompoms from white. Assemble as shown on the package. Use the main die to stencil the pink ears and black eyes, and the nose die to draw the mouth and nose in black. Assemble with the hat covering the opposite ear from the other bear.

Reindeer: Cut 12 reindeer from brown cardstock and 12 pairs of antlers from darker brown cardstock using the Christmas Animals die set. With a fine tipped black marker use the reindeer die as a stencil to color hooves and faces of the six of the deer and a white gel pen to color the ears. Repeat with the remaining six reindeer, but on the reverse side. Color all the tail as shown on package with white gel pen. Glue on antlers to one set of six reindeer. You will glue the remaining six pairs of antlers on when you assemble the card matching up the fronts and backs of them. (I made one reindeer have a red nose by using red Nuvo drops.) Cut six strips of red cardstock 6-inchs long and 1/4-inches wide for the sleigh shafts that the reindeer will be harnessed to.

Assembly: Play with the layout of where the packages and bear will go in the sleigh and still fit inside the accordion frame. Glue the packages and bear to the back of sleigh. Start with the first frame and position the sleigh so that the front curling tip of sleigh is just inside the frame and a small portion of the back of the sleigh is over the other side of the accordion frame. (I placed my sleigh so that the shaft that will connect the sleigh to the reindeer will be approximately in the middle of the frame.) Glue the frame tab to the second frame. ( I used crafting clips to hold the frames together until the glue set-up.

Flipping the two frames over, I glued a shaft onto the back of the sleigh making sure it was long enough to reach the edge of the next frame. Next, before I glued the blue frames on , I brushed all the accordion frame sides with a glitter gloss then I attached the blue snowflake frames to the back sides of the accordion frames covering over where the tab is. Use weights to keep the frames from curling as the glue dries.

Cut two pieces of baker’s twine 6-inches long and ten pieces 5-inches long. (Use the 6-inch piece of twine for the rein deer that attach to the sleigh.) To make the harness on the reindeer start with the end of the twine on the back side going over the neck and back under the belly. Glue the end and bend to back of reindeer. Pull twine around the front of the animal and with a dot of glue, adhere the twine to the rear end of the reindeer. Glue the lead reindeer to to the second frame and glue the end of the harness twine to where it will be covered with the reindeer with with a 6-inch harness. Adhere second reindeer and wrap end of twine around the bear’s paw.

Add the next two frames following the same instructions for the second frame and reindeer. (In hindsight, I think it may be easier to assemble all the accordion frames together, adding one sleigh and attaching all the shaft pieces together. Then you can start adding the reindeer starting with Rudolph in the front, gluing down his twine harness, and adding the next reindeer and so on with each frame.)

When all the frames have been added with blue frames on both sides and front side of reindeer added, flip over and cut off the unused tab on fourth frame. Glue red shafts to the back side of shafts. (This covers the different patterned paper for my card, but also adds some strength to the folding mechanism.)

Glue the packages to the backs of the first packages matching them up. Then adhere the bear. Finally glue the sleigh in place matching up the edges and runner swirls. Use clips to keep the pieces in place until the glue dries.

Glue the remaining reindeer in place. Train all the folds. (I decided that the back side of the reindeer would look better with faces so I stenciled them on after the card was assemble.)

This card will easily fit into an A7 envelope, but it is thick, so a padded envelope or hand delivery is recommended.

Thank you for reading this blog post. I hope this inspires you and makes you smile. Please like and leave comments 😊

Click here to see other Accordion cards

Materials Used:

Dies

Papers

  • My Mind’s Eye – 6×6 Double-Sided Paper Pad – Cozy Christmas
  • White, Brown, Gray, and Light Blue Cardstock
  • A7 ivory Envelope

Ink

  • Sharpie – Permanent Marker – Fine Tip – Pink
  • Sharpie – Permanent Marker – Ultra Fine Tip – Black
  • Sakura – Gelly Roll Pen – Medium – White
  • Nuvo – Glitter Marker – Fired Brick – 193
  • Nuvo – Aqua Shimmer – Glitter Gloss
  • Nuvo – Mica Mist – Nebula Blue

Adhesives

Tools

Miscellaneous

  • Baker’s Twine – Red/White
  • Nuvo – Vintage Drops – Postbox Red

Tired Santa

This is a holiday card for a busy Santa. It features the Bam Box dies from Karen Burniston’s December 2022 release. It also uses previously released die sets of the Fireplace Pop-up die set, Fireplace Extras 1, Fireplace Extras 2Gnome and Santa, Slim Frames and Family Room die set.

Card Base:  The card base is an A7 size (5 x 7 inches) with a top fold. The base was what I glued decorative papers to as well as attaching the fireplace pop-up mechanism.

Bam Box:  The bam box is a rubber band powered spring box that allows the sofa to pop-up. Watch the assembly video before assembling. Heavy weight cardstock is recommended and allowing glue to dry at each step will make for the best working bam box.

Chair:  A bam box is covered with the chair from the Family Room die set. The back of the chair is just the seat portion left flat. I cut a bam box decorative rectangle to cover the front base of the chair and hid the bam box. The pillow is attached as per assembly video directions. Santa is made from the Gnome and Santa set coloring the boots to look like socks and adding a pair of pants so his legs can stretch out onto the ottoman. Santa is glued to the pillow and his pants are glued to the Santa suit edge. The ottoman is just a bam box covered with decorative paper. (I originally was going to have a sofa in the scene as well, but decided on a chair and ottoman foot rest. The photos below depict the sofa assembly. The chair is made similarly.)

Fireplace and accessories:  For the fireplace cut two of the fireplace brick front – one in white and one in black as well as two of the lined mantle/hearth pieces – one white and one gray. The black brick is colored with a white crayon and the fire and logs are also cut twice and colored with watercolor pencils.

To assemble the fireplace, watch the assembly video first. You will need to attach the gray hearth and black brick pieces to the card base before adding the mechanism. There are two fireplace extra sets. I used the clock, fireplace fender and basket of logs from set 2 and the fireplace tools and candles from set 1. The tiny pop-up mechanisms for the objects on top of the mantel are from the fireplace die set. I also add strips of white cardstock to the wall on either side of the fireplace as floor moldings.

Rugs and Wall Decoration:  Using patterned papers that suggest wallpaper or carpeting make this type of card pop. The picture molding strip above the fireplace is a scrap trimmed off the patterned paper and the reverse side used. Slim Frames is the die set that the gold frame comes from while “Happy Boxing Day” and the calendar page are computer generated. The large green round rug is cut from the second largest circle crosshatch die. It can be used to write a personal message.

Card Front:  The card front uses a mat of silver glitter paper overlayed with the snowflake pattern plate cut from white handmade paper that has silver glitter swirls on it. The Holiday House is cut from papers used on the inside of the card. “SANTA” has been written on the door mat to hint at who is inside the card. “Happy Holidays” was cut three times with the top layer colored with silver gel pen.

Envelope: The back flap of the A7 brown kraft paper envelope has Santa’s sleigh and reindeer stamped in white to hint at what’s to come.

Thank you for reading this blog post. Please like and leave comments 😊

Materials Used:

Dies

Papers

  • Echo Park Paper Co. – 12 x12 Double-sided coated cardstock – A Perfect Christmas by Lori Whitlock – Berry Merry Christmas – APC135003
  • Echo Park Paper Co. – 12 x12 Double-sided coated cardstock – I Love Christmas by Lori Whitlock – Glad Tidings – ILC114009
  • American Crafts – The Color of memories 12 x12 Red Plaid Paper – 348968
  • Recollections – Signature Especial 12×12 Foil Paper – Silver Glitter -220520
  • White Glitter Handmade Paper
  • Colored scraps of cardstock
  • A7 Kraft Card and Envelope

Pens, Crayons & Inks

  • Pink, Red and Black Fine-Tipped Markers
  • Ranger – Tim Holtz – Distress Ink – Walnut Stain
  • Ranger – Tim Holtz – Distress Crayon – White
  • Simon Says Stamp – Premium Pigment Ink – White

Stamps

  • LeCrea Design by Leane de Graaf – Combi Stamps – Santa & Small Christmas Trees – 55.3707

Miscellaneous

Santa Stop Here

Fur babies can enjoy the winter holidays as much as their human parents. This little pup doesn’t want Santa to forget her. She’s got her Santa hat and lights on her house as well as a sign asking Santa to stop.

The card front uses the dog from the Dog House Tiny House Add-Ons cut three times to make her stand out from the busy background paper. Dog bones from this set were also added to hint at what is to come on the inside.

To create the dog house, cut out and assemble a red Tiny House. (See assembly video.) I used the same red lightweight cardstock for the side panels from the add-ons. I choose not to ink the dies to print the siding lines, but rather to emboss them and then, using a white ink cube, to add a powdery dusting of snow.

For the colorful lights, use the lights from the Holiday House die set. (I used shimmer paper and colored them with fine-tipped markers.) The wreath is also from the Holiday House. Pup is added to the front of the dog house with a thick foam dot.

The snowy look on the roof was created by painting a thick coating of glitter gloss and using Effect Snow around the edges. To hold up the “Santa Stop Here” sign, a grassy strip from the Mushroom Tiny House Add-Ons set was cut, Effect Snowed, and glued to the card base and dog house. The sign is made from three of the school signs from the Church and School Tiny House Add-Ons set.

White octagons from the Bam Box Pop-Up die set are placed in opposing corners like snowballs for personal messages. Snowflake borders cut from shimmer paper using the Long Nature Edges 2 set.

Card backs are just as important as fronts. This one is decorated with left over strips.

The back flap of the envelope hints at what’s to come with the Santa capped pup.

Thank you for reading this blog post. Please like and leave comments 😊

Materials Used:

Dies

Papers

  • Echo Park Paper Co. – 12 x 12 Double-Sided Cardstock – A Perfect Christmas by Lori Whitlock – Christmas Collage – APC135008
  • Red Light-Weight Cardstock – 8.5 x 11
  • Colored Cardstock Scraps
  • White A7 Envelope

Pens & Inks

  • Blue, Red, Yellow and Blue Fine-Tipped Markers
  • Gelly Roll 08 Pen – White
  • Pigma Micron 05 – Archival Ink .045mm – Dark Brown
  • American Crafts – Metallic Markers – Silver

Miscellaneous

Santa’s Sleigh Pop-Up

A wet snowy night for Christmas Eve and Santa and his reindeer are feeling a bit blue with the weather, but whoever receives this card will be cheerfully surprised when Santa pops-up.

This is a slimline card version of a non-traditional color scheme Santa scene that I used on another project that will be unveiled during the sneak peak week of Karen Burniston’s December 2022 release.

To create the the inside pop-up scene, I used four of Karen Burniston’s previously released die sets – Sleigh Pop-Up, Christmas Animals and Gnome and Santa. I had to reverse the direction of the sleigh to make it work with the reindeer dies. The reindeer are each made up of two die cuts that are glued together at their antlers and have the face colored on the front side only, but with narrow strips of cardstock forming “U” shaped bases for the feet to be glued onto. Blue and white baker’s twine is glued on to the reindeer for the harness and reins.

The front sentiment and pine branches are all by Karen Burniston. The tiny bows are from the sleigh die set while the pine branch is from the Holiday Charms set.

Velvety flocked paper lines the inside of the card with crisp white snowflakes (from holiday charms and sleigh die sets) and a fancy edged label for a personal message finish the inside scene.

As per my usual, I like the back of the envelope to hint at what is to come. The stamps are by Paper Discovery.

Materials Used:

Dies

Papers

  • Recollections – Signature Especial 12×12 Foil Paper – Silver Glitter -220520
  • Spellbinders -8.5×11″ sheets of 100lb. Cardstock – Waterfall – CS-017
  • Stampin ‘Up – 12×12″ Specialty Vellum – Snowflakes
  • Stampin’ Up – 12×12″ Snowy White Velvet Sheets
  • Brazzill – 12×12″ Cardstock -Coconut Swirl
  • Pink, Black and Yellow Cardstock Scraps

Inks

  • Blue and Pink Fine-Tipped Markers
  • Sakura – Gelly Roll Pen – Silver -XPG#744
  • Ranger – Tim Holtz – Distress Ink – Salty Ocean
  • Stampin’ Up – Classic Stampin’ Pad – Blueberry Bushel

Stamps

  • Paper Discovery by Olga Direktorenko – A5 Clear Stamps – Rustic Christmas – Christmas Sentiments

Miscellaneous

Brr, It’s Cold Outside!

Sometimes it’s nice just to watch it snow with a warm cup of coffee or hot coco.

This fun mini-slim sized card is a blend of stenciled coffee cups and a die-cut snowflake collage pop-up. All the dies used are by Karen Burniston while the layered stencil is by Pretty Posh Pink. The coffee cups by both designers are similar in size and work well together.

I went through all my Karen Burniston die sets to find as many different single snowflakes as possible to use for the swirling collage mechanism inside the card. (I recommend watching the assembly video before starting your card. The video has useful tips and card base minimum sizes that will help you design your card.)

The sentiments all come from Karen Burniston’s Word Set 13 – Snow and include the shadow dies for the large words of “Brr!” and “Snow.” The mug and travel coffee cup inside are all die-cuts inked similar to the stenciled ones on the card front.

As with all my cards that are sent in an envelope, I have decorated the back flap with a hint of what’s inside. This time I stenciled a coffee mug on the flap.

See more coffee themed cards by clicking here.

Thank you for reading this blog post. Please like and leave comments 😊

Materials Used:

Dies

Stencils

  • Pretty Pink Posh – 6×6 Stencil – Layered Coffee Cups

Ink

  • Ranger – Tim Holtz – Distress Oxides – Festive Berries, Saltwater Taffy, Ground Espresso, Pumice Stone, Hickory Smoke, Mowed Lawn, Crushed Olive, Prize Ribbon and Tumbled Glass

Papers

  • Stampin’ Up – 6’ x6” Specialty Designer Series paper – Lights Aglow
  • Blue and White Medium Weight Cardstock
  • Simon Says Stamp – Mini Slimline envelope – Grocery Gag

Miscellaneous

Winter mail

Who doesn’t love getting mail! The most famous snowman, Frosty sure does enjoy his mail in this card celebrating wintertime mail. It uses dies by Karen Burniston to create a delightful pop-up card.

The main die sets used were the Mailbox Pop-Up and the Snowman Pop-Up. Watch the two assembly videos for tips on how to construct the pop-up snowman and mailbox by clicking on the links above before starting your card. (If I had been smart and followed my advice of watching the assembly videos before starting the card, I would have known I needed at least 5 inches from the card fold to have Frosty in his top hat and should have done a top fold card instead of a side fold vertical card.)

Because I constructed my card base before I watched the assembly videos, I had to make the snowman without his hat to fit in the card. I used the top hat and snowflake from another snowman die set by Karen Burniston.

My inspiration for this card was the Carta Bella paper pad that has a page of envelopes addressed to various North Pole and winter characters. I cut out several of the envelopes from the paper and scattered them throughout the card. The other patterned papers are from this paper pad as well.

I like creating an outer frame for my card bases covered in patterned papers. I used the medium sized crosshatched rectangle to cut the frames in the inside green plaid paper panels and I used one of these rectangles on the back of the card over a border made from paper leftovers from the inside of the card.

For the card front I constructed a background from three leftover pieces of the snowflake print. The snow in the foreground was cut using a nature edge die that cuts a stitched rolling hill with trees. The trees I cut off.

While the mailbox is designed to be inside the card as an interactive element, it can be simplified down to a flat element. I used the main mailbox, lid, flag and wood grained post dies. The brown wooden post I inked the dies with white ink to get it into the wood grain and then gently rubbed the piece over the ink cube to get a snowy effect. I added the Santa hat and snowflakes to give some hints, if the name on the mail box didn’t clue the viewer that it is Santa Claus’ mailbox. I leave it up to the viewer to decide if the small Rudolf is the real one or a winter decoration.

Using the die as a stencil, I colored with a white gel pen to shade Rudolph’s ears and tail and a black fine-tipped marker for his hooves. I used Glossy Accents over his red paper nose to look more like a light. For Rudolph’s eyes and the snowman’s coal eyes and buttons, I used Nuvo Drops. With both these products be sure to allow 12-24 hours for them to dry. (I swished Rudolph’s nose and didn’t notice until the glossy accents had almost set.)

Inside the card, the finishing touches include: a snowflake, a stitched heart, and the sentiment of “Season’s Greetings” from the Karen Burniston Word Set 3.  (I’ve been experimenting with various dies by Karen Burniston with the dotted outlines because they are easy to make stitched or embroidered charms and embellishments for cards. This heart is from the Circle Charm Pop-Up set.)

For the envelope, I made a snowman face with top hat from Karen Burniston’s Snowman set and glued all its pieces and back securely to the back flap of the envelope. Sometimes for thick cards to fit into a standard size envelope (A2 for this card) you need to trim a total of 1/4 of an inch off the non-fold sides of the card.

Thank you for reading. If you enjoyed this blog post, please like it and follow the blog. 😊

Dies:

stamps & Ink

  • Craft Smart – Ink Pad – White
  • Ink
  • Stamp
  • Sakura – Gelly Roll Pen– 08 -White
  • Sharpie – Ultra Fine-Tipped Marker – Black

Papers

  • Carta Bella – 6×6 Paper Pad of Double-Sided cardstock – Letters to Santa
  • Lightweight 8.5×11 inch white cardstock
  • Matte silver foil cardstock scrap
  • Colored cardstock scraps
  • A2 Envelope

Additional Supplies Used:

Blue Nose, the Pink Alligator

As young children my father would tell my siblings and I, stories about Blue Nose the pink alligator. They generally began with “Have you ever seen a pink alligator with a blue nose?” We would discuss how an alligator could live in the American Midwest where there is snow and ice as well as hot humid summers and how the alligator came to be pink and received his blue nose.  This card tells that story.

I used Karen Burniston’s Fancy Label Accordion die set for the card base and the alligator from her Bayou Animals set as well as other elements from a mixture of her designs.

The alligator is ingeniously designed using three pieces – the body, the tummy pad and the teeth/eyes piece. I colored the eye on the teeth piece while still in the dies with a fine-tipped black marker. Then gluing the teeth onto the back of the alligator head and slightly opening the teeth. To get the half asleep red sunburnt alligator, I used the oval that came out of the eye and cut it in half and glued it over the eyes. I glued the tummy pad in place, but it is tightly snug between the arms even without glue.

For the sunbathing scene, I used striped paper cut into a rectangle and then fringed the short edges to make it look like a beach towel. The sun is from the Tropical Scene set.

For swimming in a snowy frozen river, I only used the head of the alligator with large spec glitter paper for the water and white glitter paper snowflakes cut with dies from the Sleigh and Winter Charms sets. The background is a coated blue glitter cardstock. The decorative frame is from a frame set KB had previously released with another company.

The last panel with Blue Nose, the pink alligator, used the waste from the decorative Fancy Flourish frame. (I save the tiny swirls to add to shaker element mixes for variety.) The sky is inked with a tiny make-up brush and blue ink.

The back panels explain the story and use scraps from the front. Stitch marks decorate the back frames and are made using the die as a stencil with a white gel pen.

Because of its bulk, the card can be mailed in an A7 envelope.

Thank you for reading this blog post. Please like and leave comments 😊

Materials Used:

Dies

Papers

  • Echo Park Paper Co. – 6×6 Paper Pad Double-sided Papers – Paradise Beach by Michelle Coleman
  • Recollections – 12×12 glitter cardstock -deep blue
  • Heavy teal blue cardstock
  • Orange, yellow, and white cardstock scraps
  • White litter card scrap
  • Coated baby blue glitter cardstock

Ink

Miscellaneous

Sweet Christmas Greetings

Can you smell the fresh baked gingerbread straight from the oven?  This card is made for a child’s Christmas and depicts a gingerbread house complete with white sugar icing, cinnamon drops, peppermint drops and candy canes.

This was my first attempt making Karen Burniston’s Tiny House Pop-Up and I made some mistakes that created a catch point on a roof corner. (I highly recommend watching the assembly video to avoid some of my mistakes such as making the front door of the house on the end with the bottom attachment flaps and gluing the roof unevenly on top of the house.)

Overall, the Gingerbread Tiny House Add-ons set is easy to use with the Tiny House set. The cane canes and peppermint drops are tiny and may require tweezers to assemble. (I added Glossy Accents to the tops of the candy canes and peppermint drops to give them a shiny coating.) There are other decorative die pieces for gum drops and tiny dots in the set, but I opted to use some Nellie’s Effect Snow media for dimensional icing and Nuvo Drops for red cinnamon drops. (The Effect Snow made the roof curl up some creating more of a catchpoint on the roof corner.)

The card base is an A2 size card (5 ½ x 4 ¼ inches) made of heavy white cardstock and covered with patterned papers for smooth surfaces for the house to slide over. The sweets decorations are placed so that they don’t hinder the house mechanism opening.

Merry Christmas has a shadow die cut background of patterned paper and all the sentiments are cut from red paper so there are less chances of creating catchpoints. (I used some fancy nested label dies to create areas for a personal message.)

As is my style, I stamped the back of the envelope with hints of what’s inside using two colors of ink and a gingerbread house stamp set from Hero Arts.

Thank you for reading. If you enjoyed this blog post, please like it and follow the blog. 😊

Other cards that use the Tiny House Pop-up die Set

Dies:

Stamps & Ink

  • Memento -Fade-resistant Dye Ink – Rich Cocoa
  • Stampin’ Up Classic Stampin’ Pad – Melon Mambo
  • Hero Arts – Clear Stamp Set – Color Layering Gingerbread House -CM462

Papers

  • Heavy white card stock
  • Brown cardstock
  • Patterned papers from Carnation Crafts – Merry & Bright
  • Colored papers from my stash
  • A2 green envelope

Additional Supplies Used: