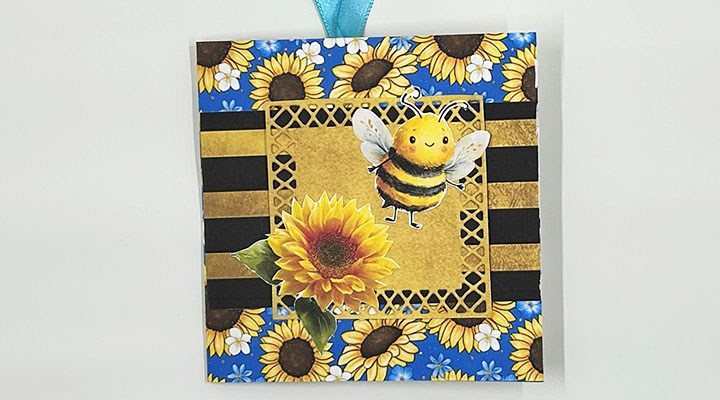
Bee-utiful Square Card

This card was made for Craft Roulette #332 whose parameters were a square card, excited colors, country element and frame(s) as random. I used Relatively Thoughtful’s Craft Challenge – The Wonderful Life of Bees free digital papers and Paper Discovery Card Builder Die Set to create this card.
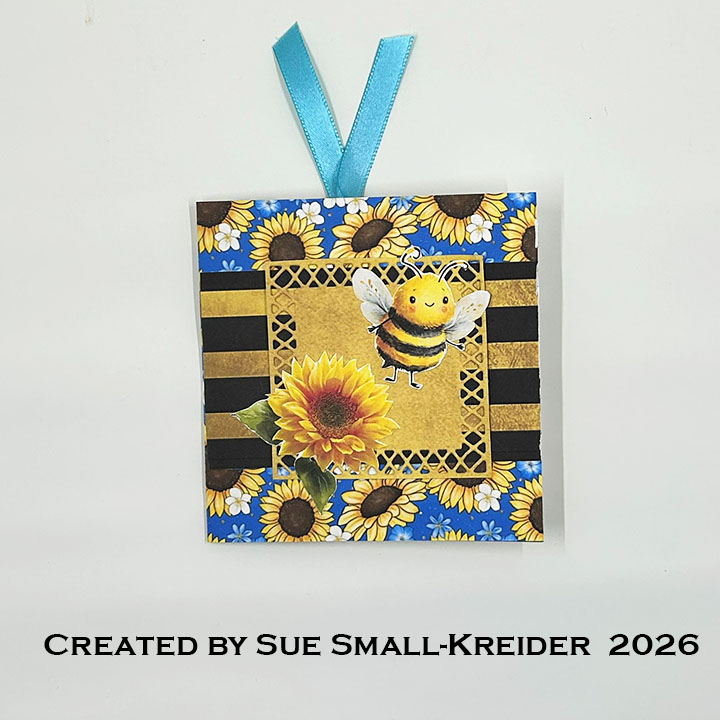
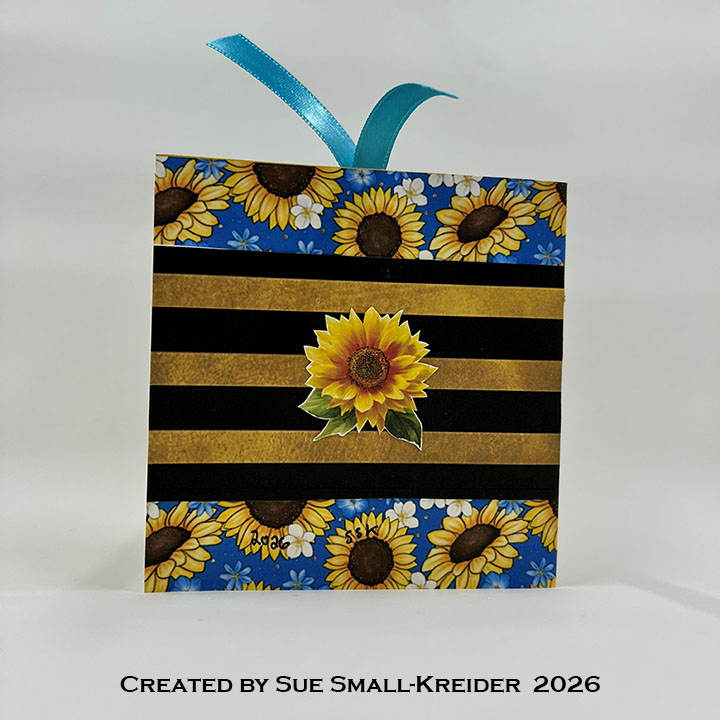
Cardbase: Print the two pages of Relatively Thoughtful’s Craft Challenge – The Wonderful Life of Bees free digital papers onto two sheets of white cardstock. (I printed the two pages back-to-back on one sheet of cardstock as well as a single-sided page of elements.) Cut the three decorative patterned paper apart. Fold the blue sunflower paper in half and trim down to 4×4-inch cardbase. Cut the striped paper to fit the front and back card panels.

Lattice Framed Square & Decorations: Using the Paper Discovery Card Builder set’s smallest lattice square die, cut one square from the yellow paper. Glue to card front. Fussy cut two sunflowers and one bee from element page. Adhere large sunflower and bee to card front and smaller flower to card back.
Tag In Pocket: Cut the two tags from the element page and glue together. punch hole and add some ribbon.Cut a 1×3.875-inch piece of clear plastic (I up-cycled some packaging). Using .25-inch wide double-sided tape on three sides of the plastic, attach pocket to left inside panel of the card.
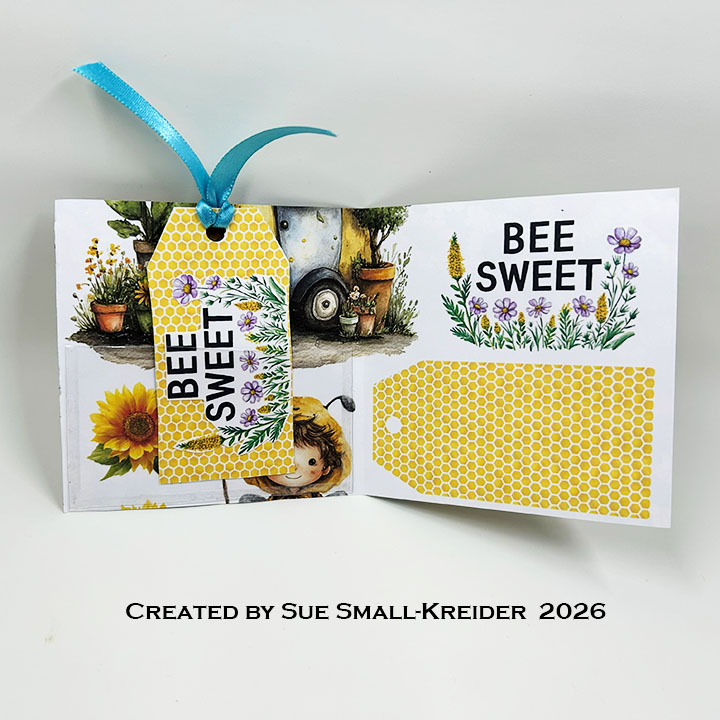
Sentiments: The “Bee Sweet” sentiment is from the element page of the paper collection. Fussy cut the sentiment and glue to tag.

___________________________________

Thank you for experiencing this blog post.

I hope this inspires you and makes you smile.

Please subscribe, like and leave comments 😊

Follow my YouTube channel, Instagram and Pinterest as well.

___________________________________

Materials Used:

Dies

  • Paper Discovery Card Builder Die Set

Papers

Ribbon

  • Teal Satin Ribbon .25-inch wide

Adhesives

Tools

  • Computer Printer
  • Die Cutting Machine
  • Paper Trimmer
  • Scrapbook.com – Magic Mat
  • Scissors
  • Scrapbook.com – Mint Tape
  • Tweezers
  • Stamping Blocks as paper weights
Pop-Up Tag Book Robot Card

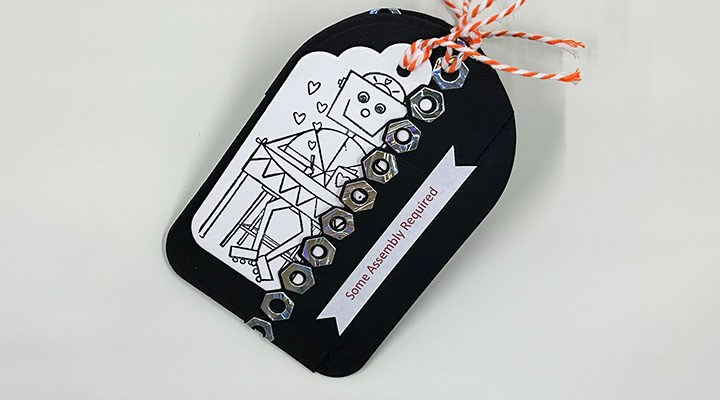
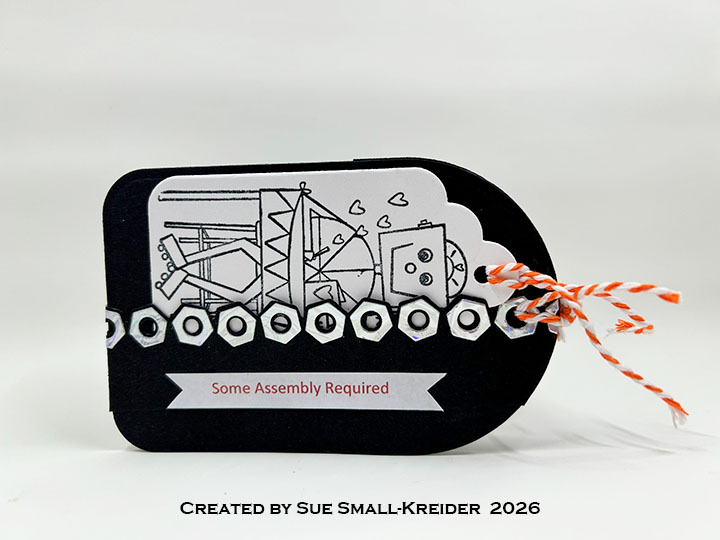
This card was made for Craft Roulette #330 whose parameters were: a tag with pocket, Trick or Treat colors, robot (s) element and three strips of paper as random. I used Karen Burniston’s Circle Tag Book Pop-Up and her new Tool Time Stage Add-Ons along with Trinity Stamps Robot Builder die sets to make this interactive card.

Watch the video below to learn how I made this card.

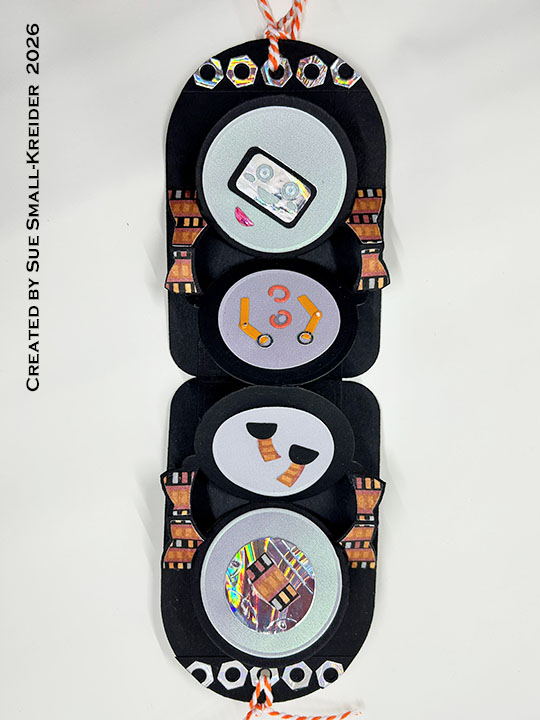
Cardbase: Follow the assembly video at the bottom of the linked page for how to make the tag book pop-up cardbase using the Circle Tag Book Pop-Up die set. I added from the Tool Time Stage Add-Ons a front pocket using the large side die and inside borders using the border dies.

Robots: The outside white has the Craft Roulette Mug Club stamp of a robot. Inside the card are the head, arms, legs and body of the Trinity Stamps Robot Builder die set.

Sentiments: I used my computer to create the “Some Assembly Required” sentiment and used my trimmer and scissor to cut the fishtailed banner.

Envelope: The card fits into an A2 (4.25×5.5-inches) envelope.

___________________________________

Thank you for experiencing this blog post.

I hope this inspires you and makes you smile.

Please subscribe, like and leave comments 😊

Follow my YouTube channel, Instagram and Pinterest as well.

___________________________________

Materials Used:

Dies

Stamps

  • Craft Roulette – Clear Stamps – Mug Club

Papers

  • Graphic 45 – 12×12 Double-Sided Cardstock – Ghostly Greetings – Sit For A Spell
  • Lawn Fawn – 8.5×11 Vellum – Pearlescent
  • Black, and White Cardstock
  • Paper Insider – Silver Holographic Envelope

Ink

Adhesives

Tools

Miscellaneous

  • Orange and White Bakers Twine

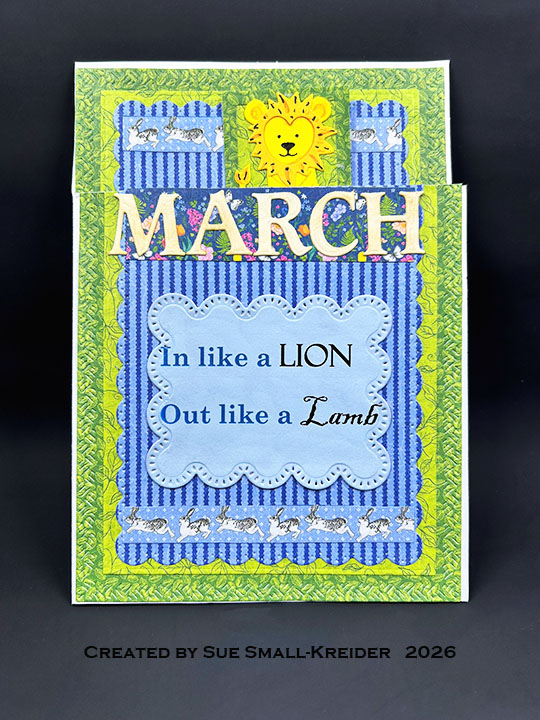
March Themed Pop N’ Swap Card

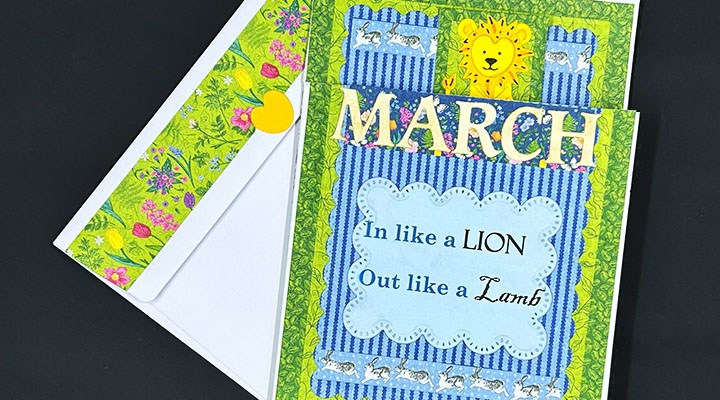
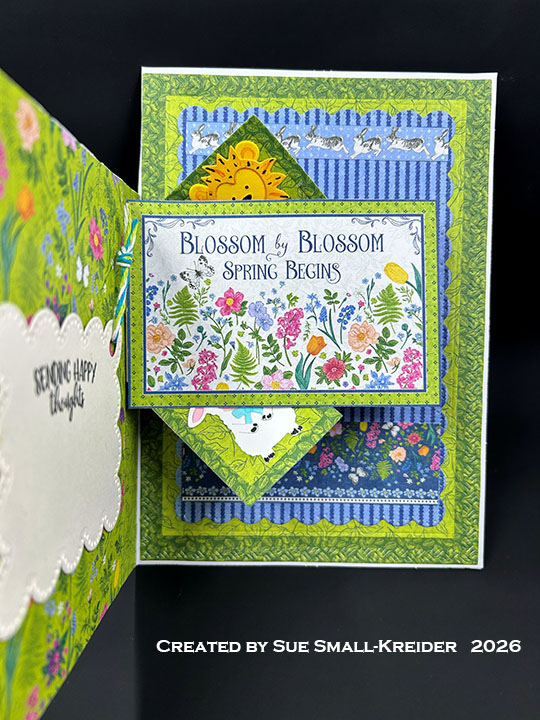
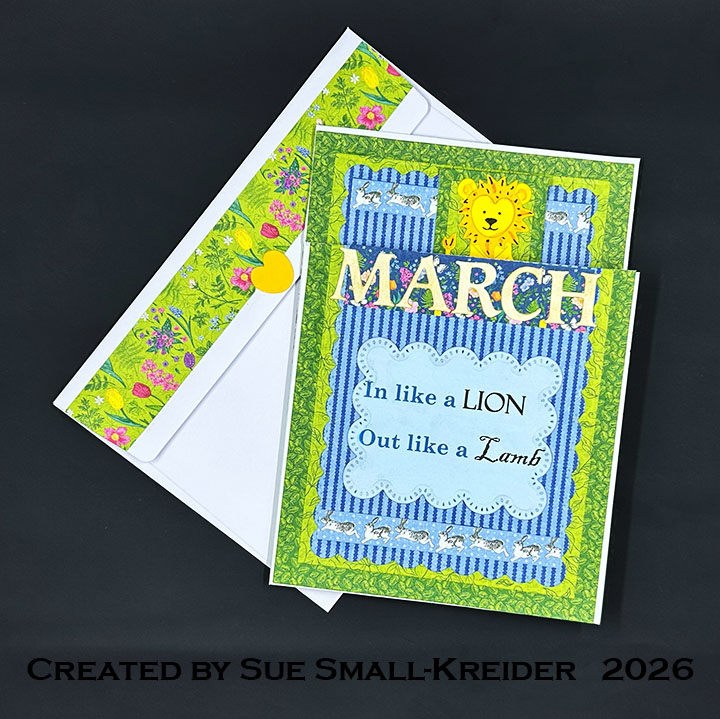
This card was made for Craft Roulette #311 whose parameters were: a card with a tag, aquarium colors, march/March element and twist(s). I created this 5×7-inch card using Karen Burniston stamps and dies as well as Graphic 45 papers.

Watch the process video to see how I made this card.

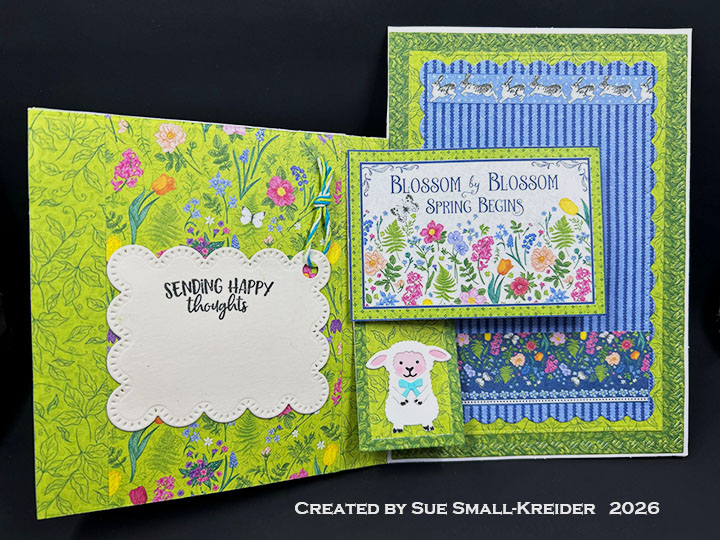
Cardbase: Watch the assembly video above for how to create the cardbase from a purchased 5×7 cardbase. I trimmed off 1.75-inches from the top of the card front. From the paper collection I used three different designs to cut the mats used on the front and inside of the card. Using the Rectangles and Labels – Crosshatch die set, I cut two of the largest crosshatch border die from dark green, two of the largest plain die from light green and the scalloped rectangle from blue. From the green rectangles I used the medium plain rectangle die to cut out the centers for use elsewhere in the card.The paper collection has a sheet of borders that I cut apart and used to decorate the card.

Lion and Lamb: Watch assembly videos at the bottom of the linked pages for the Chicken, Pig and Lamb and the Monkey and Lion die sets. I used markers to add dimension and texture to the animals.

Pop N’ Swap Mechanism: (Watch the assembly video at the bottom of the linked Pop N’ Swap page.) Cut one of the mechanism from a light to medium weight cardstock. Using the two small rectangle dies in the Pop N’ Swap, cut two of the large die from light green and another two using the smaller die inside the larger die to cut frames of dark green. Assemble the framed rectangles with the lion and lamb as shown in the video above. Test placement of rectangles and trim as necessary before gluing the rectangles onto the mechanism arms.

Sentiments: The front sentiment of “March – In like a lion and Out like a Lamb” was originally from the Farmer’s Almanac. I die cut the word “MARCH” using a retired Spellbinder’s Font One – Upper Case and digitally created the rest of the sentiment and then die cut it out using the scalloped edge rectangle die in the Pop N’ Swap die set. Inside, a journaling card was used from the Graphic 45 Spring Is In The Air collection pack for the “Blossom by Blossom, Spring begins.” The tag was cut using the same die as on the card front with a stamped sentiment of ” Sending Happy Thoughts” from Karen Burniston’s Stage Scenes stamp set. I used a hole punch to have a spot to thread some baker’s twine through to make a tag.

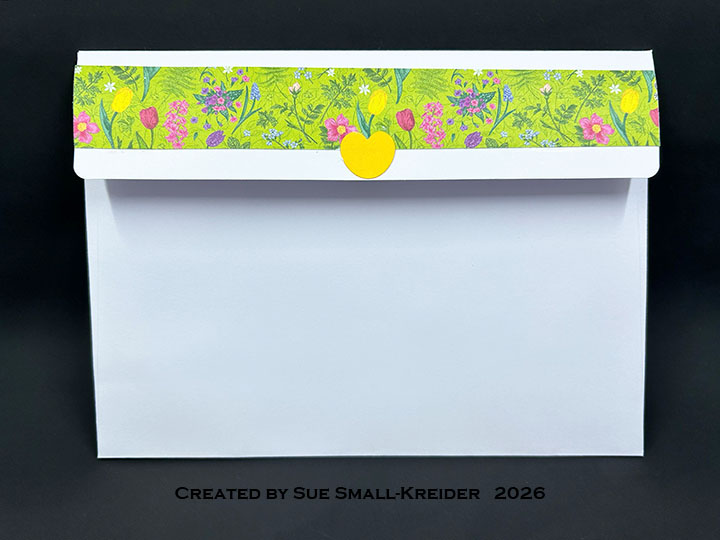
Envelope:  The card fits into an A7 (5×7-inch) size envelope with a strip of decorative paper and leftover heart on the back of the envelope.

___________________________________

Thank you for experiencing this blog post. I hope this inspires you and makes you smile.

Please subscribe, like and leave comments 😊

Follow my YouTube channel, Instagram and Pinterest as well.

___________________________________

Disclaimer: Karen Burniston products are provided free of charge by the manufacturer for review and use. All other items were personally purchased. Compensated affiliate links used where or when possible, meaning I will receive a small percentage commission from these manufacturers at no cost to you. This will allow me to add more content to my YouTube channel and help out a lot. Thank you.

Materials Used:

Dies

Stamps

Papers

  • Graphic 45 – 8×8 Double-Sided Cardstock – Spring Is In The Air
  • Cream, Pink and White Cardstock
  • Park Lane Paperie – A7 (5×7-inch) Cardbase and Envelope – White

Ink

  • Memento – Fade Resistant Dye Ink – Tuxedo Black
  • OLO Markers – Cotton Candy and Sky
  • Pigma – Mircon 08 Fine Tip Pen – Black
  • Ranger – Tim Holtz Distress Ink – Gathered Twigs
  • Ranger – Letteri Fineliner 03 Marker – Yellow-Orange

Adhesives

Tools

  • Die Cutting Machine
  • We R – Precision Press Mini – Stamping Platform
  • Scissors
  • Paper Masking Tape
  • Pencil
  • Sponge Dauber
  • Tweezers

Miscellaneous

  • Baker’s Twine -Blue, Green & White

A Rosy Tag Book Birthday Card

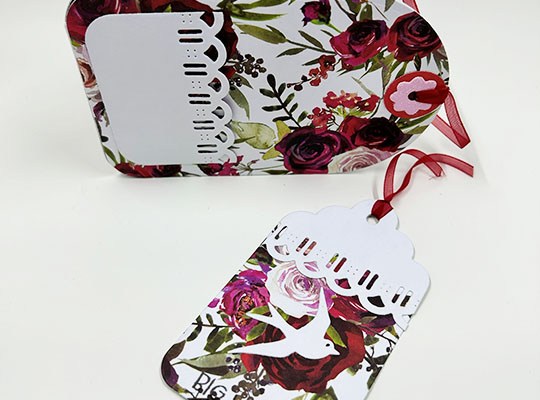
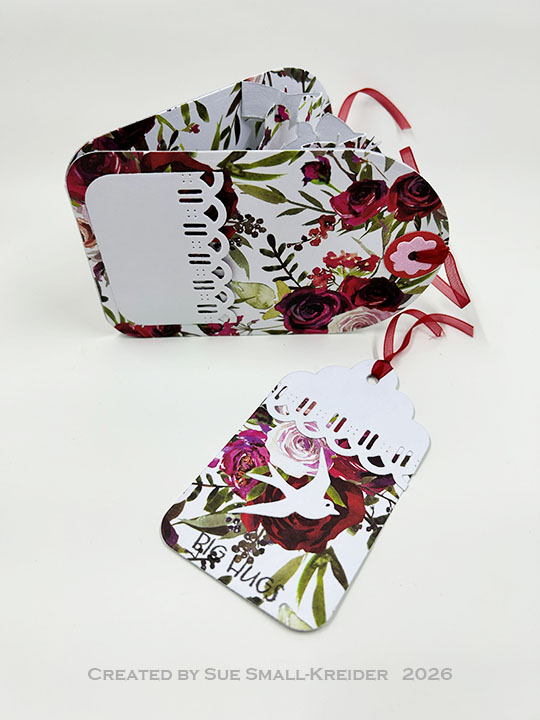
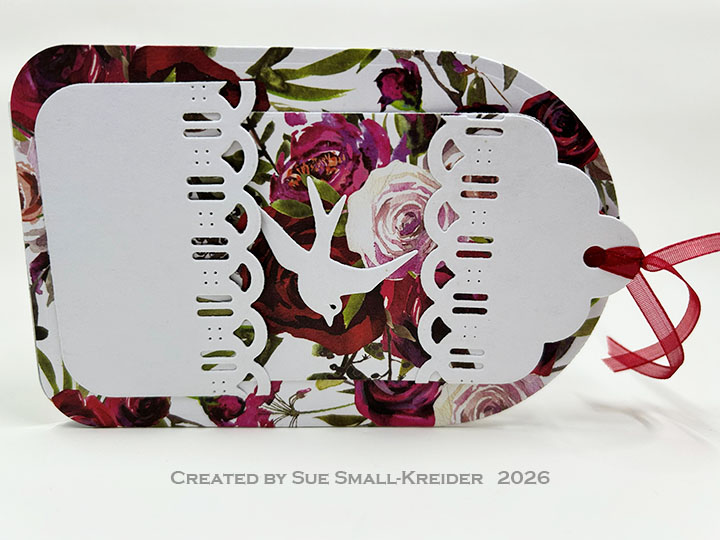
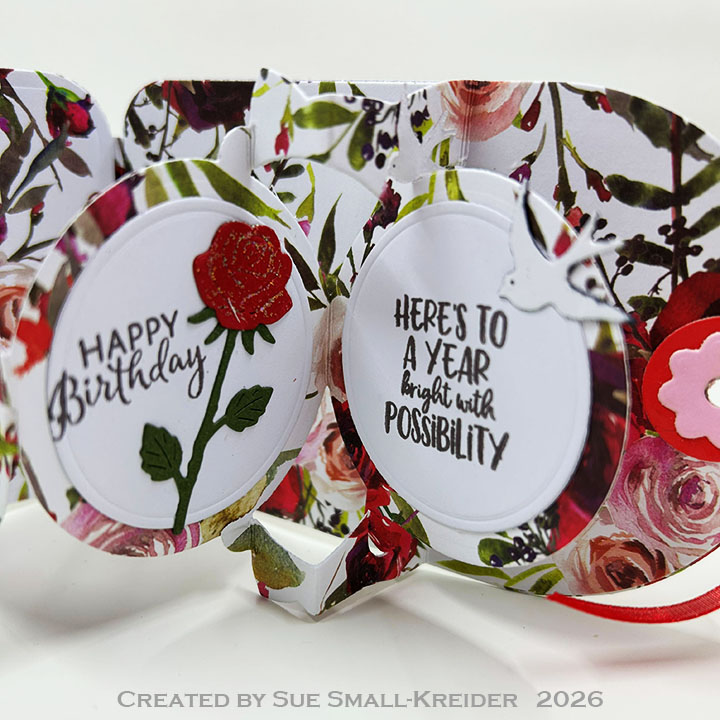
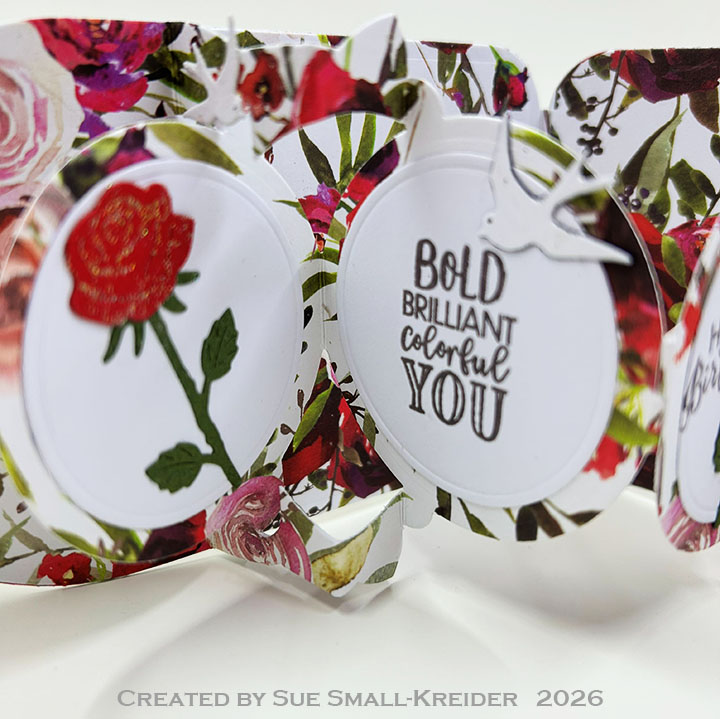
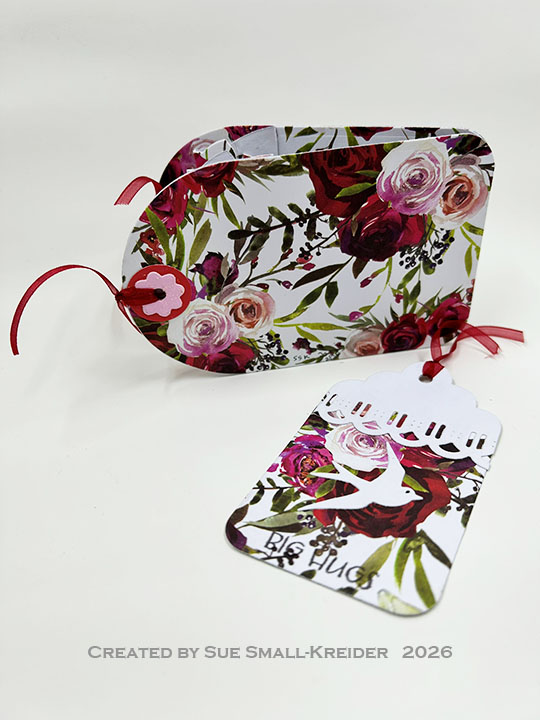
It’s time for the Karen Burniston Design Team March 2026 Challenge whose theme is For The Birds.I’ve chosen to make a Circle Tag Book Pop-Up card using rose patterned paper with bird embellishments from the Outdoor Scene die set and long stem roses from the Love Is In The Air Charms. There is also a tag bookmark feature to the card using the Topper Tags die set.

Watch the process video to see how I made this card.

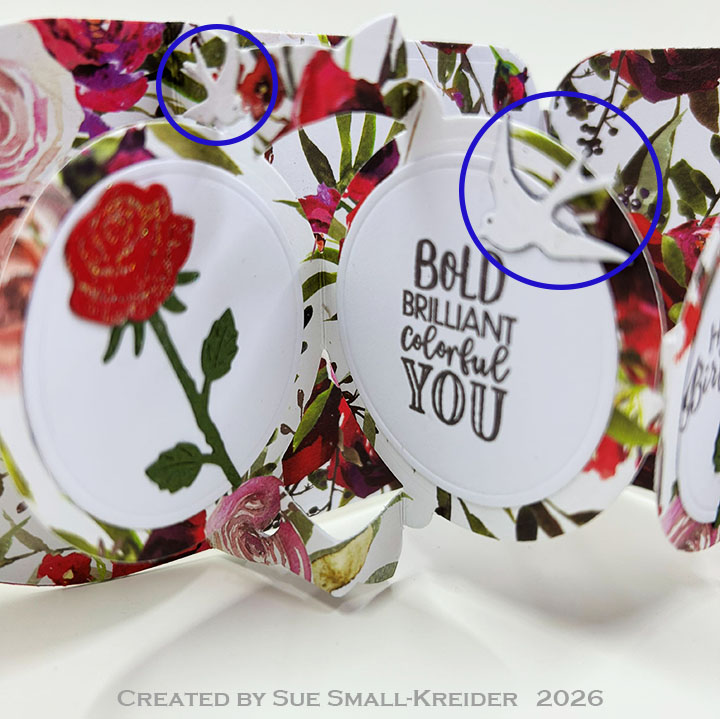
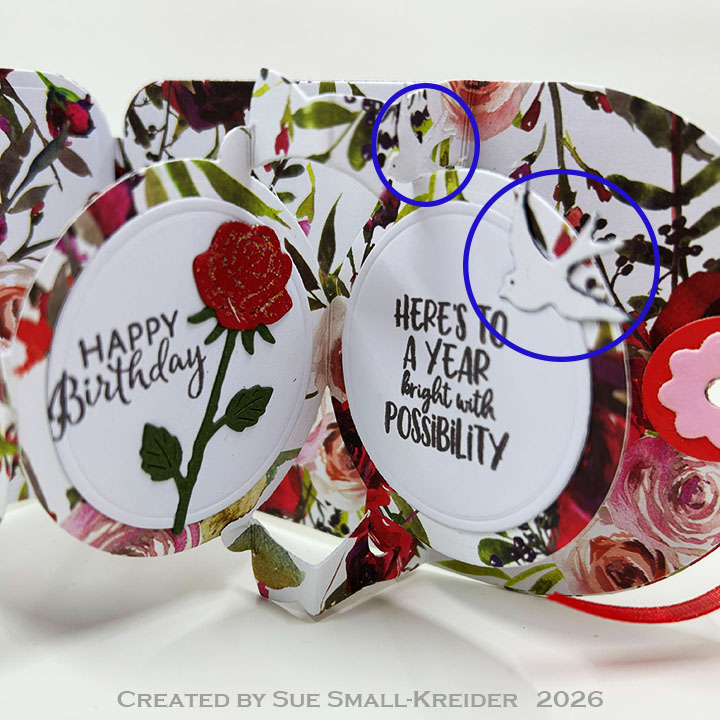
Cardbase: Watch the assembly video at the bottom of the linked page for the Circle Tag Book Pop-Up. Cut four of the tag die from patterned paper. Cut one hinge piece and two of the pop-up mechanism piece from the same patterned paper. Cut four of the circles from white cardstock. Also from white cardstock, cut two each of the medium and small birds in the Outdoor Scene set. Cut from red and pink cardstock four each of the circle and flower hole protectors from the Circle Tag Book Pop-Up set. Follow the video above for the assembly of card and placement of small birds.

Bookmark: The bookmark and lacy pocket were made by cutting the smallest tag die in the Topper Tags set from patterned paper. The white trim was cut from the backside of a scrap of the patterned paper with the decorative edge die in the same set and trimmed with the smallest tag die. The pocket was made in a similar way, but using the next largest tag die to cut to size. The flying bird was cut from white cardstock using the largest bird die in the Outdoor Scene set.

Sentiments: Using a stamping platform with the white circles cut using the Circle Tag Book Pop-Up circle dies, sentiments were picked from the following Karen Burniston stamp sets: Bouquet Sayings, Stage Scenes and Strut Your Stuff. “Big Hugs” on the bookmark comes from the Cat Sayings set. The long stem roses come from the Love Is In The Air Charms set.

Envelope:  The card fits into an A2 (4.25×5.5-inch) size envelope.

___________________________________

Thank you for experiencing this blog post. I hope this inspires you and makes you smile.

Please subscribe, like and leave comments 😊

Follow my YouTube channel, Instagram and Pinterest as well.

___________________________________

Disclaimer: Karen Burniston products are provided free of charge by the manufacturer for review and use. All other items were personally purchased. Compensated affiliate links used where or when possible, meaning I will receive a small percentage commission from these manufacturers at no cost to you. This will allow me to add more content to my YouTube channel and help out a lot. Thank you.

Materials Used:

Dies

Stamps

Papers

  • Park Lane Paperie – 8.5×11 110lb. Cardstock – Roses
  • Red & Pink Cardboard Packaging
  • Red & Green Cardstock

Ink

  • Memento – Fade Resistant Dye ink – Espresso Truffle
  • Pigma – Mircon 005 Fine Tip Pen – Black
  • Sharpie – Permanent Marker – Fine Tip – Black

Adhesives

Tools

  • Die Cutting Machine
  • We R – Precision Press Mini – Stamping Platform
  • Scissors
  • Paper Masking Tape
  • Plastic Palette Knife

Miscellaneous

  • Ranger – Simon Hurley’s Astro Paste – Phoenix Feathers
  • Red Organza Ribbon 1/4-inch wide

Junk Journal Folio Pop-Up Card

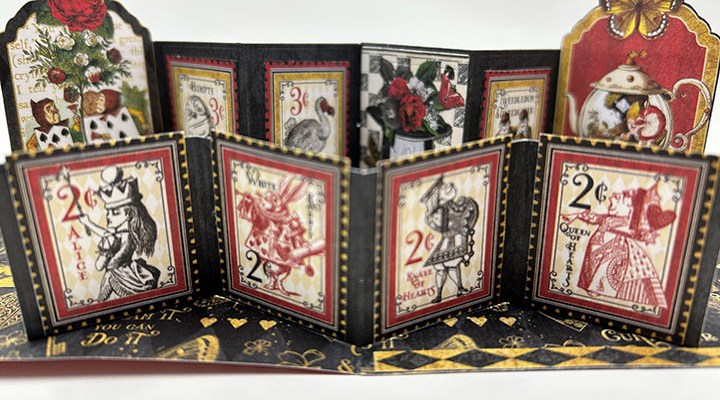
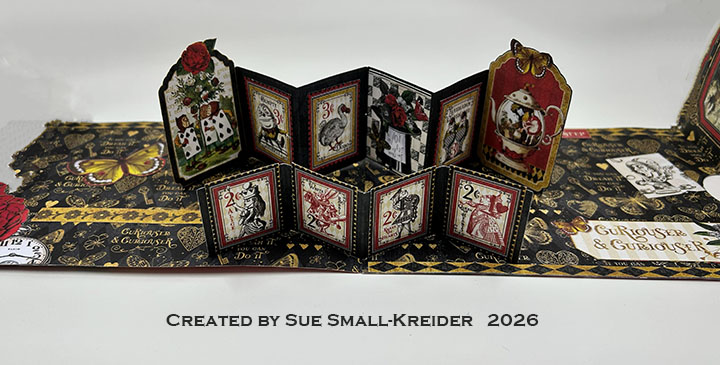
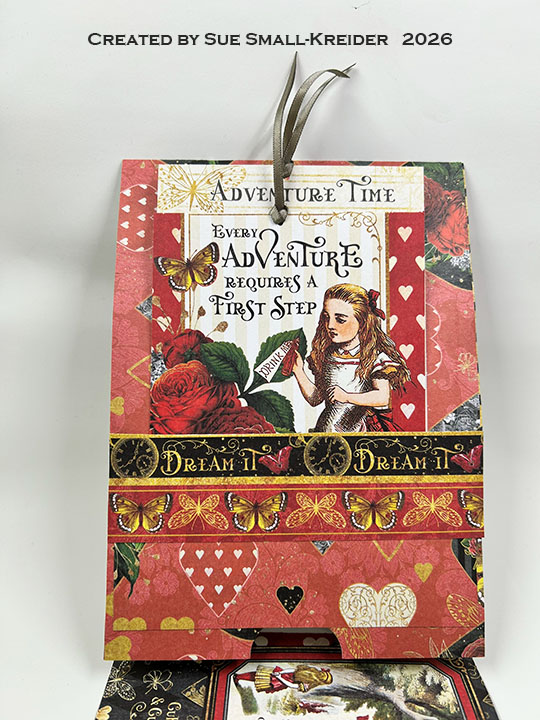
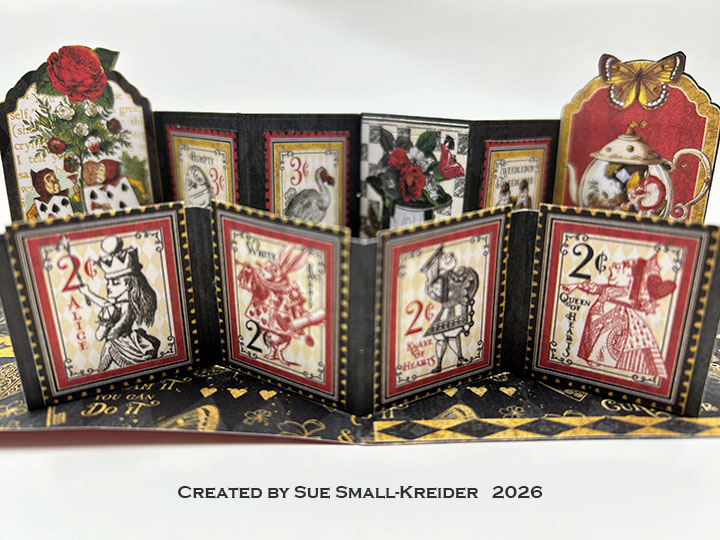
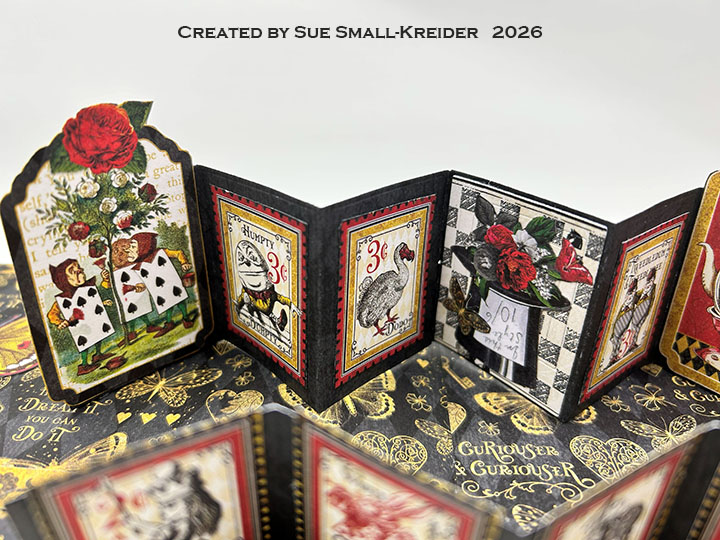
Wanting to make a project with the Graphic 45 Curiouser & Curiouser paper collection, I used the new Karen Burniston Photo Gallery Pop-Up die set along with her previously released Waterfall Card dies to make this Alice in Wonderland themed junk journal folio card.

Watch the process video to see how I made this card.

Cardbase: (Watch the video above for assembly instructions.) Cut a 5×12-inch rectangle from double-sided cardstock. Cut another rectangle at 5×7 1/4-inches from the same cardstock. Score both pieces at 6 7/8-inches. Glue tab of short piece to long piece on the 7-inch side to form a 19-inches long trifold cardbase.

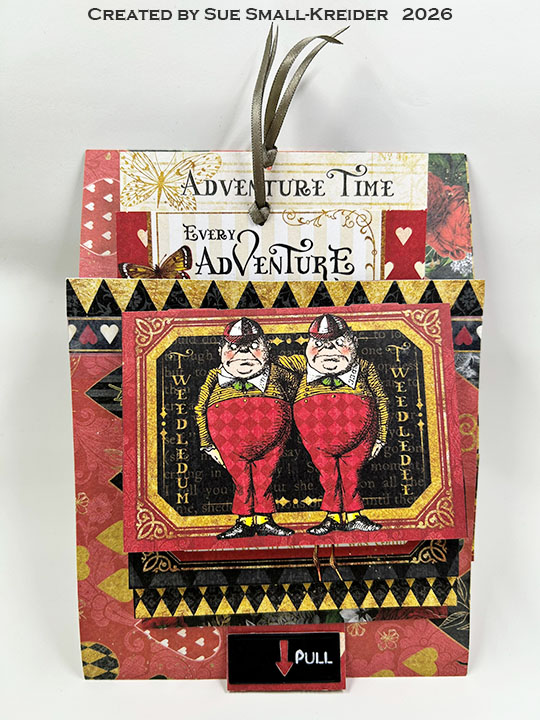
Waterfall Card Front: (Watch the video above for assembly instructions.) on the 5×12-inches cardbase piece, using the half-circle die in the Waterfall Card set, cut the thumb hole in the center of the fold. Cut the waterfall pull strip and base piece from the same patterned cardstock, train the folds and glue the smiley face tabs together. Centering the pull strip over the thumb hole, staple the base piece in place at the bottom corners.Cut four images from the double-sided papers so that they are 2 3/4-inches tall and less than 4-inches wide. Glue images to waterfall base as shown in the video. Attach the “pull” arrow rectangle die cut from the Waterfall Card set to the end of the pull strip.

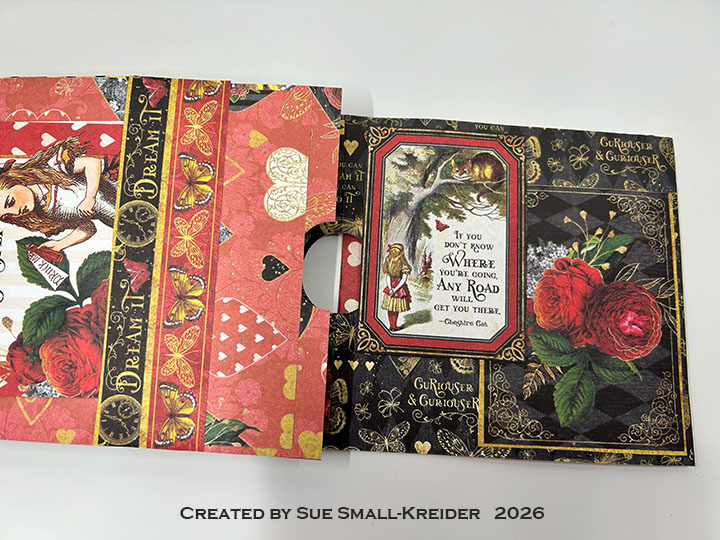
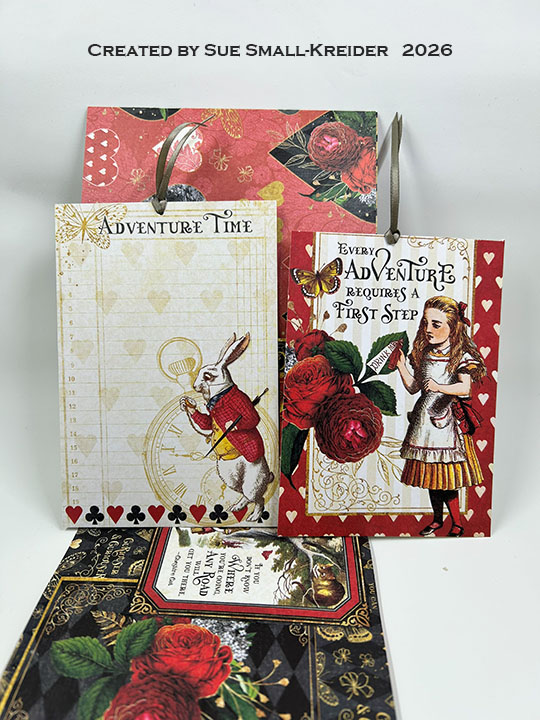
Pocket Tags: Cut one or two images to be tags for the second cardbase panel (My images are 3 3/4×5-inches and 3 3/4×5 1/2-inches.) Punch holes and thread through ribbon as pull strings. Cut and decorate a 2 1/5×4 3/4-inch piece of the same cardstock as the cardbase and glue on three sides to make the tags’ pocket.

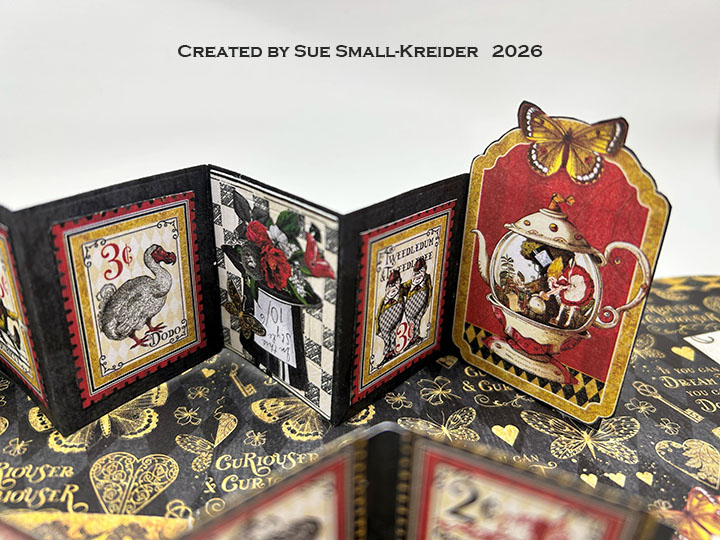
Photo Gallery Pop-Up: (Watch the video above for assembly instructions.) Using the Photo Gallery Pop-Up die set, cut two of the large gallery pieces matching the direction of the pattern paper so that when glued together the pattern is all going the same way. Cut the two triangle tabs from the same paper as the cardbase. Cut one of the smaller galley piece. From the patterned paper cut enough images to fit the two gallery pieces. (Note that many of my images stick up over the top edge of the gallery pieces.) Attach the gallery pieces as shown in the video above. Decorate the cardbase with extra images taking care to not cover folds or create catchpoints.

Envelope: This junk journal folio card fits into an A7 (5×7-inches) envelope.

___________________________________

Thank you for experiencing this blog post.

I hope this inspires you and makes you smile.

Please subscribe, like and leave comments 😊

Follow my YouTube channel, Instagram and Pinterest as well.

___________________________________

Disclaimer: Karen Burniston products are provided free of charge by the manufacturer for review and use. All other items were personally purchased. Compensated affiliate links used where or when possible, meaning I will receive a small percentage commission from these manufacturers at no cost to you. This will allow me to add more content to my YouTube channel and help out a lot. Thank you.

Materials Used:

Dies

Papers

  • Graphic 45 – 12×12-inch Double-Sided Paper – Curiouser & Curiouser Collection Pack
  • Graphic 45 – 12×12-inch Double-Sided Paper – Curiouser & Curiouser Patterns & Solids Pack
  • Black Coated Cardstock Packaging

Ink

Adhesives

Tools

Miscellaneous

Photoplay – Nutcracker Tags

Welcome to Day 6 of my Nutcracker series using a variety of stamps and die sets to make some nutcracker themed cards. My card today uses a die set by PhotoPlay – Nutcrackers Layered and Karen Burniston’s Topper Tags die set.

Watch the process video below to learn how this card was made.

Cardbase: Cut tags that will allow for a 4-inch figure using Karen Burniston’s Topper Tags die set. cut the decorative hole reinforcers in a contrasting color and thread a piece of baker’s twine through the hole and tie off.

Nutcrackers: Using PhotoPlay’s Nutcrackers Layered die set, create your nutcrackers as shown on packaging or create your own uniforms and hair styles.

___________________________________

Thank you for experiencing this blog post.

I hope this inspires you and makes you smile.

Please subscribe, like and leave comments 😊

___________________________________

Disclaimer: Karen Burniston products are provided free of charge by the manufacturer for review and use. All other items were personally purchased. Compensated affiliate links used where or when possible, meaning I will receive a small percentage commission from these manufacturers at no cost to you. This will allow me to add more content to my YouTube channel and help out a lot. Thank you.

Materials Used:

Dies

Papers

  • Scrapbook.com – BetterPress – 6×8-inch Double-Sided Cardstock – Nutcracker
  • Matte Gold Cardstock
  • Black, Blue, Pinks Cardstock

Adhesives

Tools

Pop-Out Birthday Tag Card

This card was made for Craft Roulette #265 whose parameters included gift card, train colors, science element, and add a flower. I used a Craft Roulette stamp set and three Karen Burniston dies die sets.

Watch the process video to see how I made this card.

Cardbase:  Using Karen Burniston’s Tag Book Pop-Up die set, I cut two of the large tag frames from oxidized blue mirror cardstock and two more from oxidized copper-colored mirror cardstock. The rectangular hinge die I cut once from white cardstock.

Pop-Up Panels: I glued my thin decorated paper to a piece of thin white cardstock and let dry before cutting out the Flower Pivot Panels piece. (Follow the assembly instructions in her video on the die set’s linked page.) The six small flowers are cut from solid colored cardstock scraps using the dies from the same die set as the panels.

Sentiments:   The framed “Happy Birthday” on the tag front is from the Happy Birthday Lorna Add-Ons die set. The stamped “itty bitty gift” on the back tag pocket is in brown ink using the Craft Roulette Funn Sentiments #01 stamp set.

Envelope:  The card fits into a purchased A6 (4.5x 6-inches) size envelope or larger.

___________________________________

Thank you for experiencing this blog post.

I hope this inspires you and makes you smile.

Please like and leave comments

___________________________________

Disclaimer: Karen Burniston products are provided free of charge by the manufacturer for review and use. All other items were personally purchased. Compensated affiliate links used where or when possible, meaning I will receive a small percentage commission from these manufacturers at no cost to you. This will allow me to add more content to my YouTube channel and help out a lot. Thank you.

Materials Used:

Dies

Stamps

  • Craft Roulette – Funn Sentiments Clear Stamps – #01

Papers

  • Hunkydory – A4 Mirri Sheets of Cardstock – Oxidised Metals Collection
  • Hot Off The Press – Paper Pizazz – 12×12 Single-Sided Paper – Burgundy Collage
  • My Favorite Things – 8.5×11 65 lb. Cardstock – White
  • Green, Orange, Red and Yellow Cardstock

Ink

  • Memento – Fade Resistant Dye ink – Rich Cocoa
  • Pigma – Mircon 005 Fine Tip Pen – Black
  • Sharpie – Permanent Marker – Fine Tip – Black

Adhesives

Tools

  • Spellbinders – Platinum Die Cutting Machine
  • Scrapbook.com – Magic Mat
  • i-crafter – Shim
  • Paper Trimmer
  • Stamping Platform
  • LDRS – Stampendable Stamping Tool
  • Stamping Blocks used as paperweights
  • Scissors
  • Paper Masking Tape
  • Tweezers
  • We R Memories – QuickStick

Miscellaneous

  • Cording or Twine 8-inches long

A Pop-Up Tag Card with a Nautical Theme

This card was made for Craft Roulette #248 whose parameters included a tag(s) , Disney colors, January element, and branch (es) or (ing). I used a Craft Roulette stamp set and two Karen Burniston dies die sets.

Watch the process video to see how I made this card.

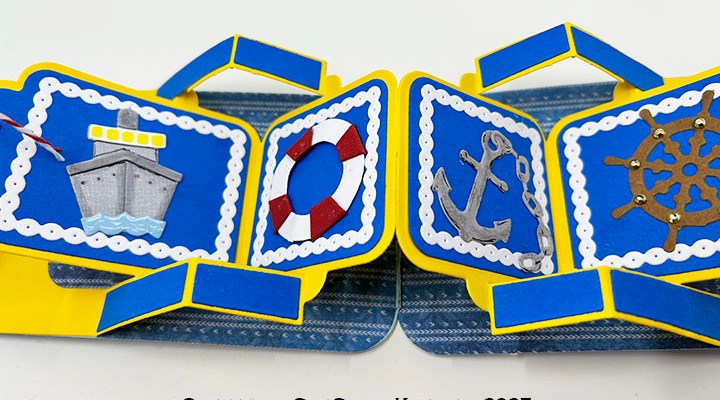
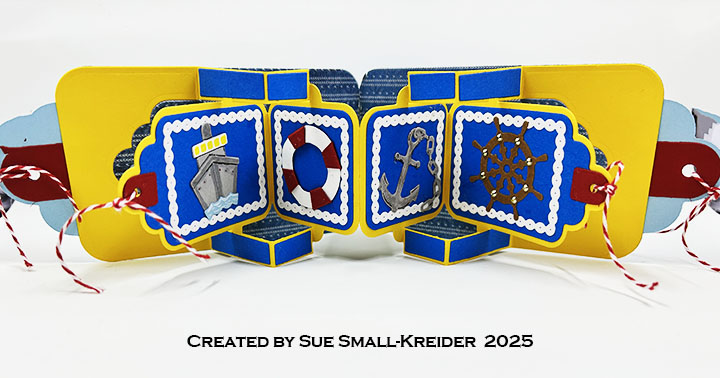
Cardbase:  Using Karen Burniston’s Tag Book Pop-Up die set, I cut two of the large tag frames from heavy weight light blue cardstock and two more from darker blue lightweight cardstock. The rectangular hinge die I cut once from light blue cardstock. The dark blue pieces I trimmed a 1/16-inch off all edges and then glued the dark blue on top of the light blue. The hinge was glued onto the inside of the light blue panels. (Watch Karen’s assembly video for her Tag Book Pop-Up.) You can cut two of the large tags from patterned paper to cover over the hinge on the inside. (It is easier to do the patterned paper background now than after you’ve glued in the yellow pop-up piece as I show in the process video above.) There are a number of decorator dies that come in the Tag Book Pop-Up Set such as the chain rope and hole protectors.

Pop-Up Panels: Cut two of the inside die piece from lightweight yellow cardstock. Cut two sets of the decorating strips die from dark blue. Follow the assembly instructions in her video.

Nautical Elements: The nautical elements of a ship, life preserver, anchor and ship’s wheel are all die cut and stenciled using dies from Karen Burniston’s Cruse Charms. (You can watch Karen’s assembly video for these charms at the bottom of this linked page Cruse Charms.) The chain rope borders and dark blue background mats are all dies in the Tag Book Pop-Up die set. The tags have red and white baker’s twine tied to them.

Sentiments:   The “Happy Birthday” and HBD sign are stamps in the Craft Roulette Funn Friend #1 stamp set. The “HBD” letters and yellow shade were cut using the stamp set’s coordinating dies.

Envelope:  The card fits into a purchased A6 (4.5x 6-inches) size envelope or larger.

Below is the Craft Roulette Community Showcase show on which I originally made this card.

___________________________________

Thank you for experiencing this blog post.

I hope this inspires you and makes you smile.

Please like and leave comments 😊

___________________________________

Disclaimer: Karen Burniston products are provided free of charge by the manufacturer for review and use. All other items were personally purchased. Compensated affiliate links used where or when possible, meaning I will receive a small percentage commission from these manufacturers at no cost to you. This will allow me to add more content to my YouTube channel and help out a lot. Thank you.

Materials Used:

Dies

Stamps

  • Craft Roulette – Funn Sentiments Clear Stamps – #1

Papers

  • Bazzill – 8.5×11 Cardstock – Tiara -18-1002
  • Concord & 9th – 8.5×11 Cardstock – Harbor
  • Graphic 45 – 12×12 Double-Sided Pattern and Solids Paper – Let’s Get Cozy
  • Recollections – 8.5×11 65 lb. Cardstock – White
  • Dark Blue, Red and Yellow Cardstock

Ink and Watercolors

  • Memento – Fade Resistant Dye ink – Tuxedo Black
  • Pigma – Mircon 005 Fine Tip Pen – Black
  • Ranger – Tim Holtz – Distress Watercolor Pencils – Hickory Smoke
  • Sakura – Gelly Roll Pen – Medium – White
  • Sharpie – Permanent Marker – Ultra Fine Tip – Red & Yellow
  • Stampin’ Up – Classic Ink Pad – Real Red

Adhesives

Tools

  • Spellbinders – Platinum Die Cutting Machine
  • Paper Trimmer
  • Bone Folder
  • Stamping Platform
  • LDRS – Stampendable Stamping Tool
  • Stamping Blocks used as paperweights
  • Scissors
  • Paper Masking Tape
  • Waterbrush

Miscellaneous

  • Red & White Baker’s Twine

Tag Birthday Card

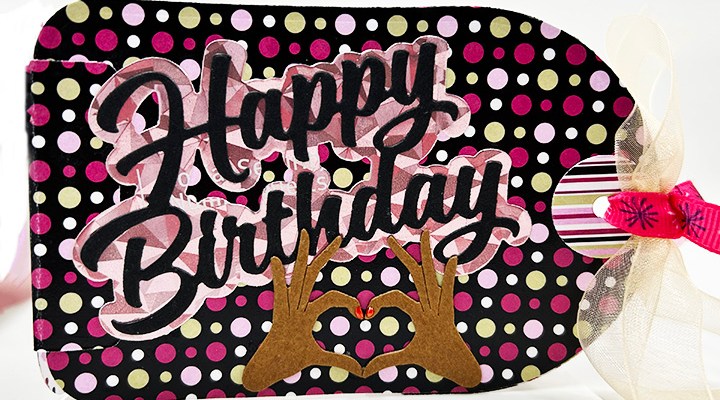
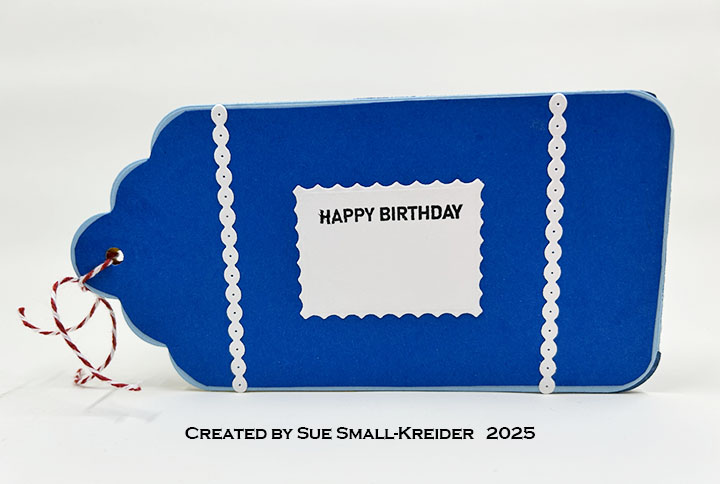
This tag birthday card was made for Craft Roulette #197 whose parameters included a card with two tags, happy colors, nail(s) and “outside the line.”

I followed the directions on Karen Burniston’s assembly video for making this Circle Tag Book Pop-Up (which is on the bottom of the linked page for this die set.)

The Nuvo Dream Drops that I used were fairly easy to apply as finger nails on the hands that were die-cut using a set by Karin Joan’s Missees collection.

For sentiments, I used Karen Burniston’s Happy Birthday with its shadow cut from a holographic pink paper. I added heart hands cut from the same die set as the inside hands. The back white label is a place for a personal message. A gift card could be tucked inside for a manicure.
Thank you for reading this blog post. I hope this inspires you and makes you smile. Please like and leave comments 😊

Materials Used:

Dies

Papers

  • Ink N’ Splatter – 6×6 Double-Sided Cardstock – Raspberry Crush

Ink

  • Nuvo Dream Drops – Rudolph’s Nose

Adhesives

Tools

  • Die Cutting Machine
  • Scissors

Miscellaneous

  • Pink Gingham Ribbon – 1/4-inch wide
  • Peach Organza Ribbon – 1/2-inch wide