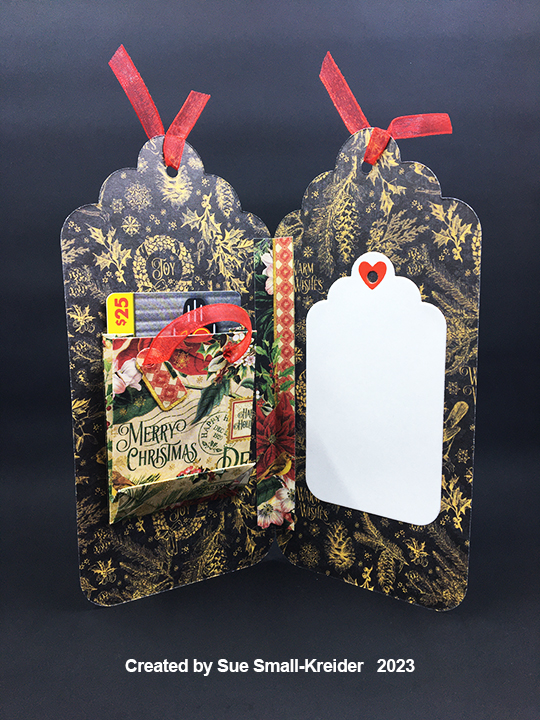
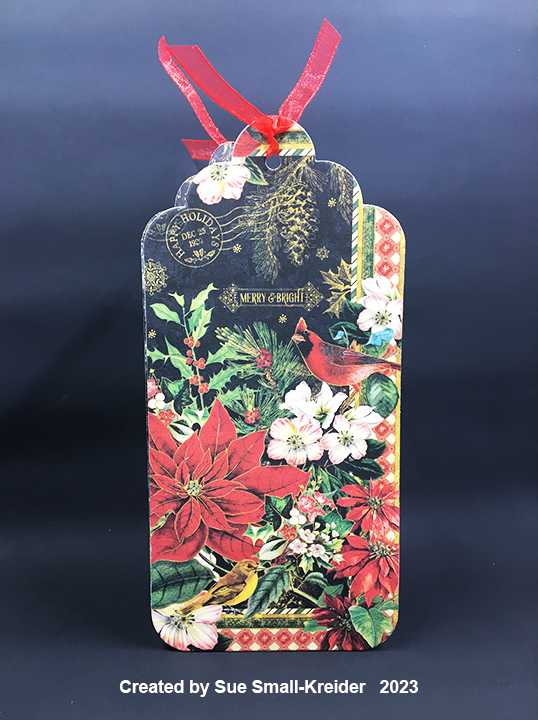
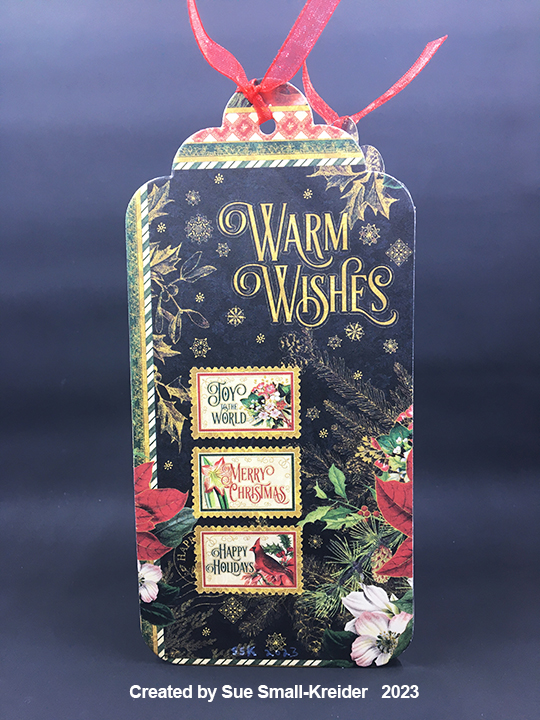
Cardbase: Cut two tags using the largest die in the topper tags set from decorative paper. From the same double-sided paper cut a strip 5×1/2-inch and fold lengthwise in half for the card hinge. Glue the hinge to the tag edges to form the inside of the card. Tie ribbon through the tag hole on each side of the card.
Card FrontCard Back
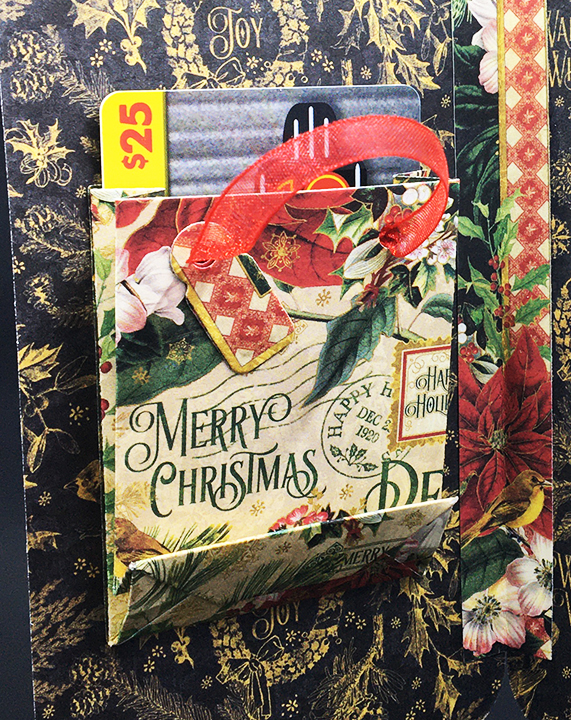
Gift Bag: Plan out what images you want to see on the mini giftbag when it is attached. Center the larger of the two bag dies using the square opening over your desired image making sure the top flat die edge with holes is at the top of your image. (I have a few upside-down paper bags in my stash.) Assemble bag as shown on the packaging. Glue the flat side of the bag to the inside of the card. Add the ribbon handle by threading ribbon through the holes and knotting it inside the bag.
Sentiments: The main sentiments of “Merry & Bright,” “Merry Christmas,” and “Warm Wishes” are all on the decorative cardstock. The white tag label inside for a personal message is cut from smallest tag in the tag set and uses the heart hole protector also in the set.
Envelope: The tag card easily fits into a #10 business envelope.
Thank you for reading this blog post. I hope this inspires you and makes you smile. Please like and leave comments 😊
Growing a year older should be celebrated. This show-stopper card is for a 9-year-old.
For this card I used two new dies from Karen Burniston’s December 2023 release – Birthday Candle Add-Ons and the Topper Tags – as well as her Fancy Label Accordion, Fancy Winter Frames, and a few other previously released die sets to decorate.
Before starting, watch assembly videos for the linked die sets. The videos are towards the bottom of the linked pages.
Accordion Frames: Cut four accordion frames using the Fancy Label Accordion die set. They will be decorated AND THEN assembled. It is much harder to decorate a fully assembled accordion card when you cannot flatten the various moving panels and frames. (I assembled this card as I would normally, but the candle and heart add-ons are designed to be assembled with with the accordion frame behind the add-on panel and not as I did by putting the frame’s center post in front of the panel.)
Candles Add-Ons: The Birthday Candles Add-On cut a pivot panel that attaches to two Fancy Label Accordion panels. It also has dies to cut and stencil four candles and their flames. Cut one candle panel from a solid color cardstock. Cut another from decorative paper. Train the folds on the solid color panel as directed on the packaging. Using the largest decorator label from the Fancy Label Accordion set, cut a frame from the decorative paper. (The section between the two label cut outs will fall out and the frame can be cut down the center fold.) Glue the frame onto the panel matching up the edges.
Assemble and decorate the candles using the die stenciling feature or use decorative papers. (Because I needed to celebrate a 9-year-old’s birthday, I did not use all twelve candles that the panel will hold. I decided to add a number 9 as another candle by cutting a “9” using the Numbers die set and cut the top of a candle with the flame attached to the back top of the number.) The flames I cut from a background paper I had made using glitter ink and drew the black burnt wick onto them.
Once the panel is fully decorated, work on the accordion frames that it will be glued onto. Glue two frames together using the outer long tab. From one panel cut the label panel along the pivot point making sure to keep the label attached to the pivot bar. Cut the other label, but the cut will look different than the other panel. See photo below. Add glue to the back side of the candle panel and attach it to one of the label panels. Add glue to the other end of the candle panel and attach it to the other label panel. (See 2nd photo under tags for what the back side of the attached candles panel into the accordion frames.)
Tags: Cut two tags using the second from the smallest tag die in the Topper Tags. (If your paper is a single-sided decorative paper like mine was, cut two more tags that cover at least the part of the tag that will not be covered by the fancy label panel. Glue the tags together as shown in the photo below.) Attach the back of the tags to the fancy label panels on their backsides.
Decorations: The Birthday Charms die set are used for balloons, party hats and cupcake. Three colors of bakers twine are used for the balloon strings and for tag ties. A thin black pen was used to draw the balloon strings onto card back. The frame borders are cut from white copier paper backed with a wide double-sided tape using the polka-dot frame die from the Fancy Winter Frames.
Once the frame borders are adhered, attach the end accordion frames to the candle frames. Add balloons to the folds and then glue the fancy labels together.
Sentiments: Add the sentiments once the accordion frames and fancy labels are all attached together. “Happy Birthday” uses two dies – Happy Birthday Shadow and Happy Birthday. “Just for You” uses three die sets – Word Set 15, Word Set 8 and Mini Alphabet. The “You” is cut from a phrase die and its shadow is created by tracing the outside of the die and fussy cutting. (You could use other word dies for the “You.”)
Envelope: The closed card fits into an A7 (5×7-inch) envelope.
Thank you for reading this blog post. I hope this inspires you and makes you smile. Please like and leave comments 😊
Materials Used:
Dies
Karen Burniston in cahoots with Riley and Company – Birthday Candle Add-Ons – 1258
Karen Burniston in cahoots with Riley and Company – Topper Tags – 1253
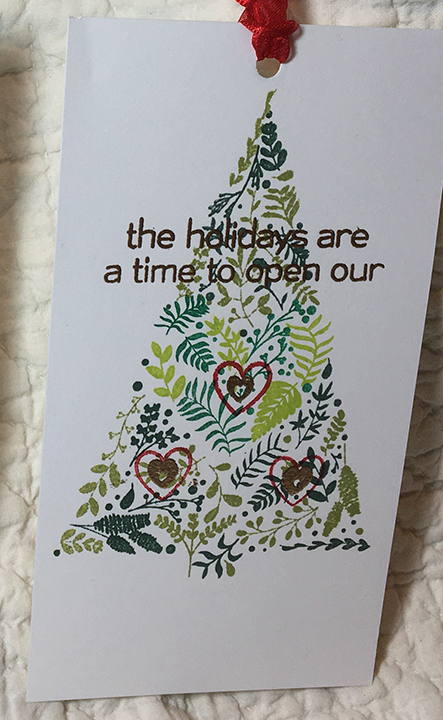
“The holidays are a time to open our hearts” is the sentiment that these festive gift tags have. These tags were stamped with the Alte New stamp set Festive Foliage which allows you to stamp a fir tree with two to four colors. There is a heat in the center of the tree foliage.
I stamped these tags from a scrap piece of heavy white cardstock 5 ½ inches x 3 inches using a stamping platform so that I could position the stamps once and turn the card to stamp a second image. The stamps are labeled tree 1, tree 2, heart1, and heart 2. I used a different green ink for each stamp. The tree is Pear Pizzazz and Tranquil Tide, and the heart is Lemon Lime and Emerald Envy. Two tiny heart stamps from my stash are stamped over the foliage. The smallest and most solid heart stamp was stamped with VersaMark-Watermark ink and heat embossed with a gold embossing powder as was the sentiment. The outline stamp is inked with Real Red.
Using a hole punch at the top of the tree I was able to add some red organza ribbon to finish the tag.
Also see the trifold card made from this same stamp set using the full tree and heart stamps.