Tea Party Card Sneak Peek

It’s time for Sneak Peek Week for Karen Burnistons July 2026 release of ten new die sets and five new stamp sets. This card features the new Cascade Pop-Up, Square Cascade Add-Ons, Dessert Elements and Little Bench Pop-Up die sets as well as Sweet Life Sayings stamp set. New dies and stamps will be available on July 23, 2026 on Karen Burniston’s website.
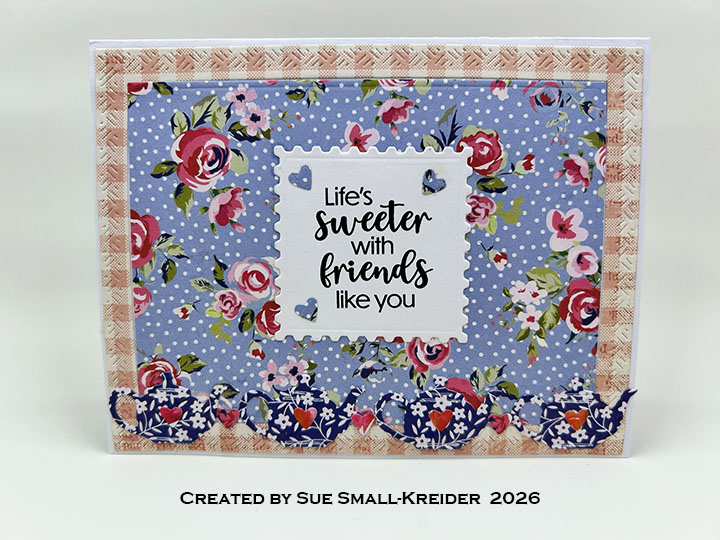
Cardbase: I used a purchased (4.25×5.5-inch) cardbase and covered the four panels, inside and out, with frames and rectangles of patterned paper cut using the the two largest dies in the Rectangles – Crosshatch set.
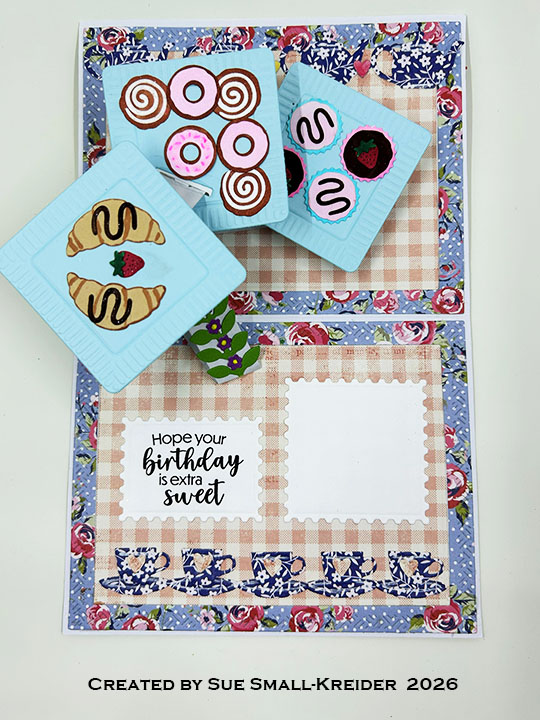
Tea Party: The teapot and tea cup borders used inside and out on the card are from the previously released Tea and Coffee Borders die set. The square plates of cupcakes, doughnuts and sticky buns along with the croissants are cut using the Dessert Elements dies. (I used white cardstock and alcohol markers to colour the food.) The square plate dies have an emboss feature which works well with heavy cardstock.
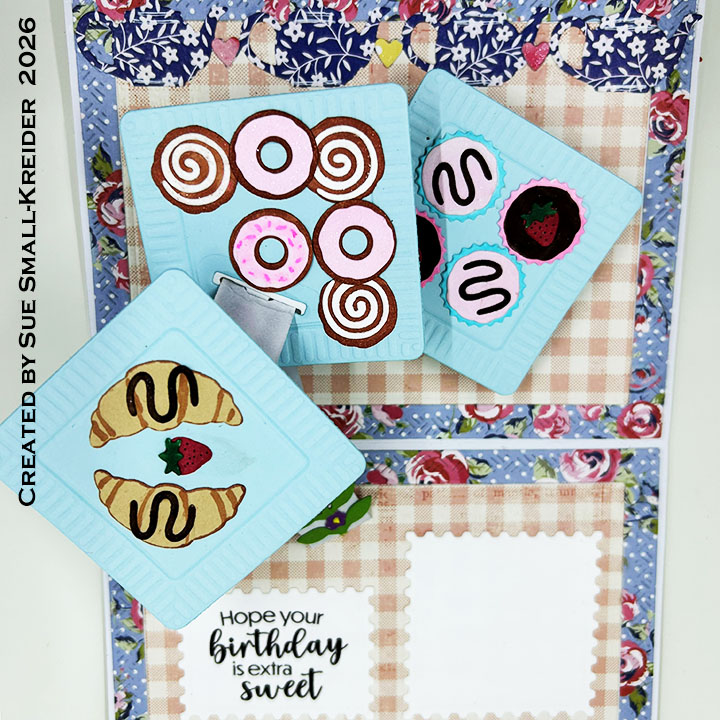
Cascading Circles Pop-Up: From medium to heavy cardstock, cut one of the large mechanism piece, and one of the small strip using the Cascade Pop-Up die set. (I cut these pieces from white and colored them with a gray marker.) Following the directions on the packaging, install the mechanism. (I cut the slotted square from the Square Cascade Add-Ons and then used one of the smaller squares in the set to make the platform smaller, but still retaining the slot. I positioned one large square plate die with the movable slot die to fit on the middle platform and still stay inside the card when closed.) Next, add the three square plates with the slotted square on the middle platform with the strip going through the slot. Decorate with food and flowers. ( I used the green leafy stem from the Cascade Pop-Up die set, with leftover tiny purple and yellow flowers that I had from the Little Bench Pop-Up set.)
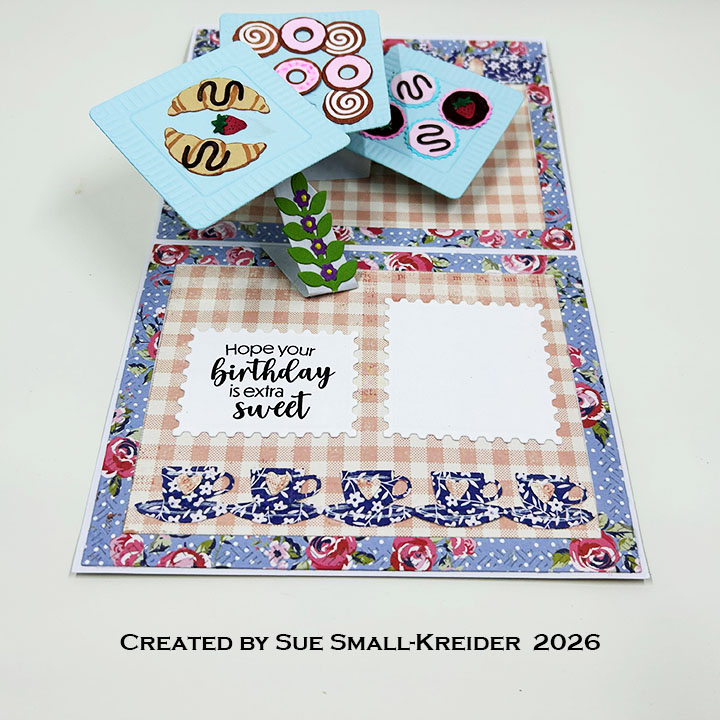
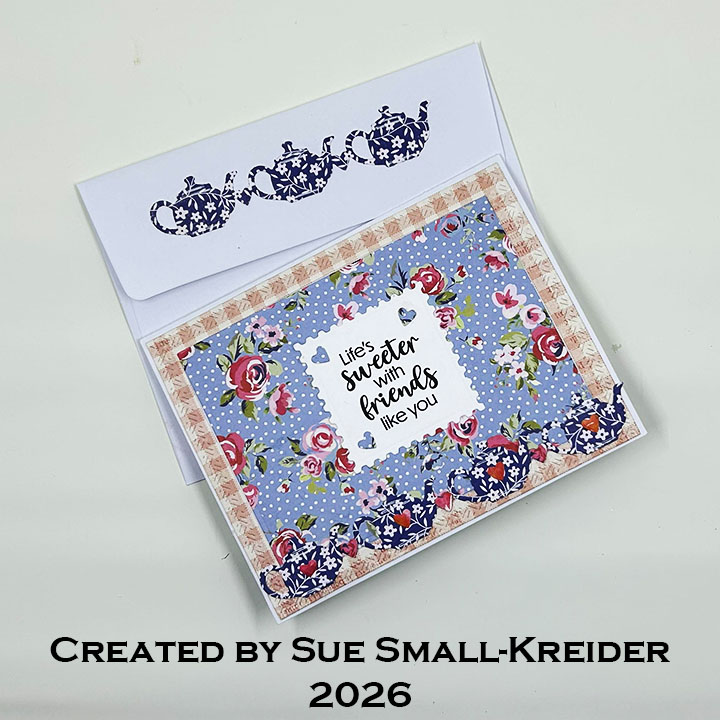
Sentiments: All the stamped sentiments come from the Sweet Life Sayings stamp set. They are cut out with the postage edged dies from the Square Cascade Add-Ons set.
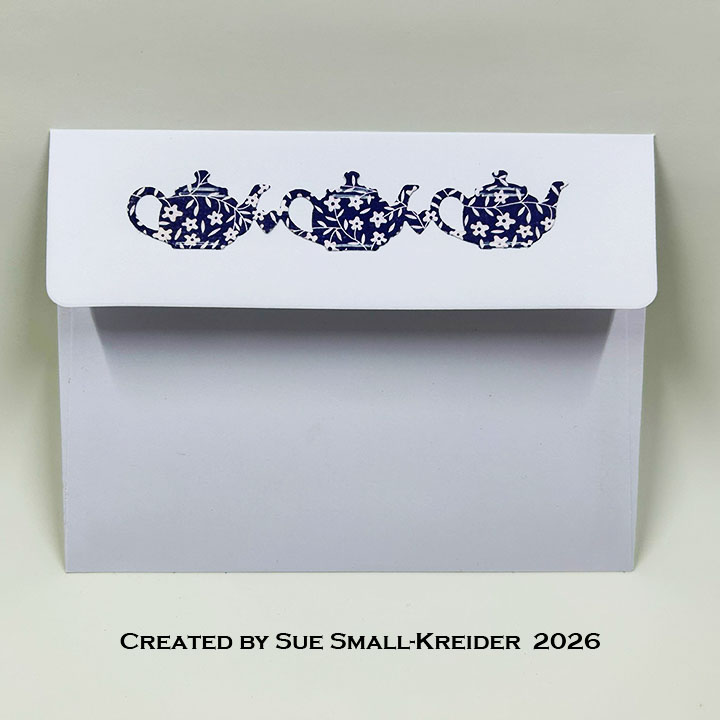
Envelope: This card fits into an A2 size envelope decorated with teapots cut from the Tea and Coffee Borders die set..

___________________________________

Thank you for experiencing this blog post.

I hope this inspires you and makes you smile.

Please subscribe, like and leave comments 😊

Follow my YouTube channel, Instagram and Pinterest as well.

___________________________________

Disclaimer: Karen Burniston products are provided free of charge by the manufacturer for review and use. All other items were personally purchased. Compensated affiliate links used where or when possible, meaning I will receive a small percentage commission from these manufacturers at no cost to you. This will allow me to add more content to my YouTube channel and help out a lot. Thank you.

Materials Used:

Dies

Stamps

Papers

  • Simple Stories – 6×8 inch Double-Sided Cardstock – Simple Vintage Linen Market
  • Blue, Green and Purple Cardstock
  • David Tutera – A2 (4.25×5.5-inch) Cardbase and Envelope – White

Ink

  • Memento – Fade-Resistant Dye Ink – Tuxedo Black
  • OLO Marker – Neutral Gray 1, Bubble Gum, Cotton Candy, Dragon Fruit, Sky
  • Pink Gel Pen
  • Pigma – Mircon 01 Fine Tip Pen – Black
  • Sakura – Gelly Roll Pen – Medium – White
  • Sharpie – Permanent Marker – Ultra Fine Tip – Green
  • Stampin’ Up – Stampin’ Blends – Marker – Light Copper Clay
  • Stampin’ Up – Write – Marker – Cholocate Chip

Adhesives

Tools

  • Die Cutting Machine
  • Paper Trimmer
  • Bone Folder
  • Stamping Platform
  • Stamping Blocks used as paperweights
  • Scissors
  • Tweezers
  • Paper Masking Tape
  • We R Memories – QuickStick

Miscellaneous

  • Nuvo – Aqua Shimmer – Glitter Gloss
  • Scrapbook.com – Pops of Color – Sunshine
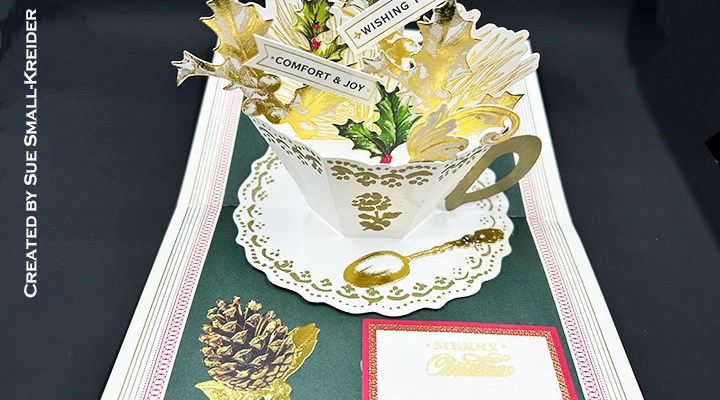
Day 4 – Week of Good Cheer Christmas Cards

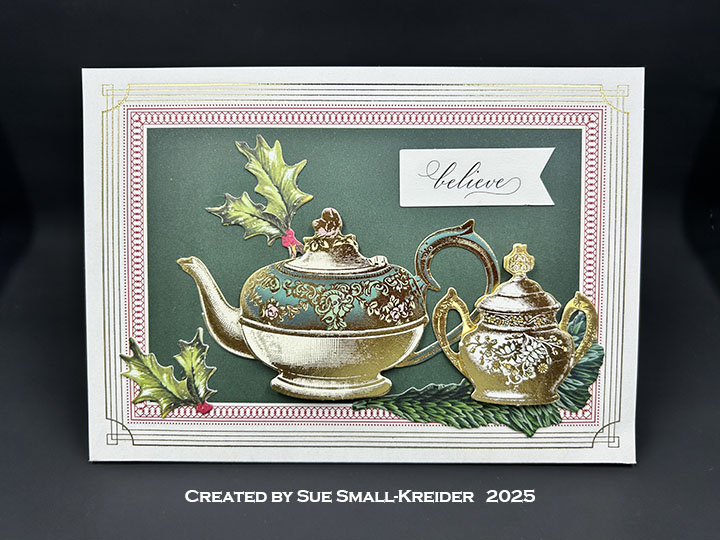
This is Day 4 in the Week Of Good Cheer Christmas Card series featuring cups and mugs of winter cheer as beverages or as in today’s card, a floral arrangement using all Anna Griffin products. (GIVEAWAY opportunity near end of post.)

Watch the video below to see how the card was made.

Cardbase:  I started with an A7 sized (5×7-inches) cardbase and matching envelope from Anna Griffin’s Present Pop-Up Card Making Kit.

Card Front:  Embellishment pieces from Anna Griffin’s Favorite Tea Embellishments, Present Pop-Up Card Making Kit, Finishing School Carte Noel Craft Box, and Holiday Home Slider Card Making Kit were used to decorate the card front.

Teacup Pop-Up:  The tea cup’s six pieces were die cut using the Anna Griffin Tea Cup Pop- Up Dies. The dies have an embossing/stenciling feature which I used to color the floral embossings with a gold metallic marker. Watch the video above for the assembly of the piece. The cup is filled with embellishment pieces from the aforementioned kits above.

Sentiments:  The card front, envelope back flap and inside floral flag sentiments are from the aforementioned kits above. The red label inside has been heat embossed with “Merry Christmas” in gold.

___________________________________

Thank you for experiencing this blog post.

I hope this inspires you and makes you smile.

Please subscribe to the email notices, like and leave comments 😊

___________________________________

GIVEAWAY

I’m cleaning out my dies and stamps and will be giving away crafting bundles to 8 lucky crafters who follow, subscribe and comment on my Week of Good Cheer Christmas Cards posts on Facebook, Instagram, YouTube and my website. (If you comment on all 4 platforms, each day, you have over 28 opportunities to be picked for a crafting bundle.)

Tell me why you like each cup or which is your favorite cup. Winners will be picked by September 2, 2025.

___________________________________

Disclaimer: Karen Burniston products are provided free of charge by the manufacturer for review and use. All other items were personally purchased. Compensated affiliate links used where or when possible, meaning I will receive a small percentage commission from these manufacturers at no cost to you. This will allow me to add more content to my YouTube channel and help out a lot. Thank you.

Materials Used:

Dies

  • Anna Griffin – Metal Dies – Tea Cup Pop-Up Dies

Stamps

  • Anna Griffin – Clear Stamps – Treasury of Stamps and Dies

Papers

  • Anna Griffin – Favorite Tea Embellishments, Present Pop-Up Card Making Kit, Finishing School Carte Noel Craft Box, and Holiday Home Slider Card Making Kit
  • White Cardstock

Ink

  • Versamark – Watermark Stamp Pad
  • Cosmic Shimmer – Embossing Powder – New Gold Lustre
  • Crafter’s Square – Metallic Marker – .05in/1.2 mm Point – Gold

Adhesives

Tools

  • Die Cutting Machine
  • Paper Trimmer
  • Stamping Platform
  • LDRS – Stampendable Stamping Tool
  • Stamping Blocks used as paperweights
  • Tweezers
  • Scissors
  • Heat Gun
  • Kat Scrappiness – Anti-Static Tool
  • Paper Masking Tape

Pop-Up Birthday Card for A Bookworm

It’s the Karen Burniston design team challenge for February 2025 using the theme of Bouquets. We were asked to make a card with a bouquet using some of the new Bouquet Bits and Flower Pot Add-ons. For this challenge I chose to make a birthday card for someone who enjoys reading. (You can see other bouquet pop-ups by clicking here.)

Watch the process video to see how I made this card.

Cardbase: The card base is made from a lightweight white cardstock measuring 5.5×8.5-inches and folded in half to for a side fold A2 (5.5×4.25-inch) card. I covered all four panels with library themed papers from Stamperia.

Pop-Up: For the brown pot of fern-like seedlings is made with the Flower Pot Pop-Up die set. (Follow the assembly video at the bottom of the linked page.)

Decorations: Tea and books often go together and the Tea and Coffee Borders set has both teapots and teacups. The green picks that the sentiment and books are attached to come from the Bouquet Bits die set. The green foliage pieces come from the Flower Pot Add-ons set. The books and bookworm are all from the Bookworm set.

Sentiments: The square stamped sentiments use the Photo Memories stamp set and the square dies to cut them out from the Photo Fan Pop-Up.

Envelope: The card fits into an A2 (4.25×5.5-inch) envelope. The same sentiment from the card front is stamped on the envelope back flap.

___________________________________

Thank you for experiencing this blog post.

I hope this inspires you and makes you smile.

Please like and leave comments 😊

___________________________________

Disclaimer: Karen Burniston products are provided free of charge by the manufacturer for review and use. All other items were personally purchased. Compensated affiliate links used where or when possible, meaning I will receive a small percentage commission from these manufacturers at no cost to you. This will allow me to add more content to my YouTube channel and help out a lot. Thank you.

Materials Used:

Dies

Stamps

Papers

  • B
  • Stamperia – 6×6 Double-Sided Paper – Lady Vagabond Lifestyle
  • Stamperia – 8×8 Double-Sided Paper – Background Selections – Voyages Fantasiques
  • Recollections – 8.5×11 65 lb. Cardstock – White
  • Multicolored Scarps of Cardstock and Packaging
  • Fraser Papers for William House – A2 Envelope – Genesis Text Milkweed Smooth

Ink

  • Memento – Fade Resistant Dye ink – Tuxedo Black
  • Pigma – Mircon 01 Fine Tip Pen – Black
  • Pigma – Mircon 005 Fine Tip Pen – Black
  • Sakura – Gelly Roll Pen – Medium – White
  • Sharpie – Permanent Marker – Fine Tip – Black
  • Sharpie – Permanent Marker – Ultra Fine Tip – Black, Blue, Green, Orange, Red, Yellow

Adhesives

Tools

  • Die Cutting Machine
  • Paper Trimmer
  • Bone Folder
  • Score Board
  • Stamping Blocks
  • Scissors
  • Paper Masking Tape