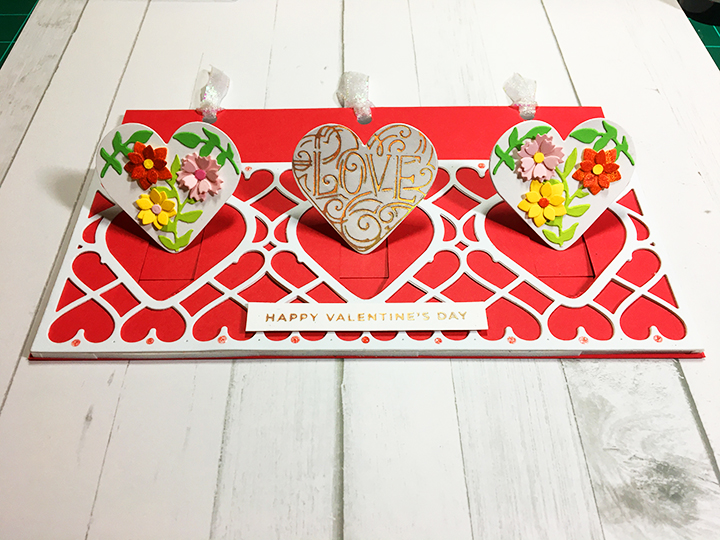
CRX – Card Recipient Experience is a topic I’ve written on before. (CRX-Card Recipient Experience) Today I am including some some free downloads to help you with your interactive cards being displayed as you intended them to be displayed.
You’ve made a beautiful easel or double easel card that you fold into its envelope and mail off to your friend. When your friend opens the envelope and tries to open the easel card as if it were a tent fold card, it makes no sense or worse the card gets torn. To alleviate this problem why not include a small drawing of how the easel card opens and stands in the envelope as the first things your friend will see when they open the envelope.
Four panel cards with elements to allow light to shine through such as a house luminaria card can be displayed several ways – as a zig-zag or as a box around a battery powered candle.
I hope this helps you as you go forward with your interactive card making. Please like and write a comment to let me know what other types of CRX issues you’ve had.
This card was created to compliment an autumn birthday teepee card I had made earlier which was done in oranges and browns. This one plays off the orange by using the contrasting color of blue with accents of browns and green. The recipient likes to fish so I used a fishing stamp set by Stampin’ Up and papers from my storage box of “masculine papers” (brands listed under supplies.)
Teepee cards-so named because of the shape, are easy cards to construct from three squares of cardstock that are all the same. You score each diagonally from one point to the opposite point and fold in half to form a triangle. Then you glue one of the squares to the left side triangle and another square to the right side of the triangle/center square. I recommend watch Sam Calcott’s Mixed up Crafts video for a step by step. (My card base is made up of three 5 ¾ inches squares of double-sided paper by Craft Consortium.) I cut three 5 ½ inch squares of green paper by Graphic 45 and then diagonally cut the square to get the 5 triangles I needed for the middle mat layer.
Once again, I want to have peek-a-boo-doors on the teepee card, so I added two flaps using the smallest and the medium circle dies in the Lawn Fawn circle flaps dies set cut into the top layer of triangular cut paper. Because I wanted to use the doors as platforms to set a hook and a large fish on, I used pop-out cubes to make them stand away from the card base.(My card used patterned blue paper by Authentique cut from 5 ¼ inch squares.) I also cut two additional circle flaps from the same blue paper to cover the back sides of the flap doors and squares to inlay behind the flap door matching the pattern. The pop-up cube to support an object is common, but I really learned the power of it from Karen Burniston’s Frame Pull Pop-up.
I fussy cut all of the card’s stamped images and sentiments after I had use watercolor pencils to color them. The happy Birthday rosette is made from a foiled topper from a card kit and ribbon gathered by needle and thread and then glued to the back of the topper.
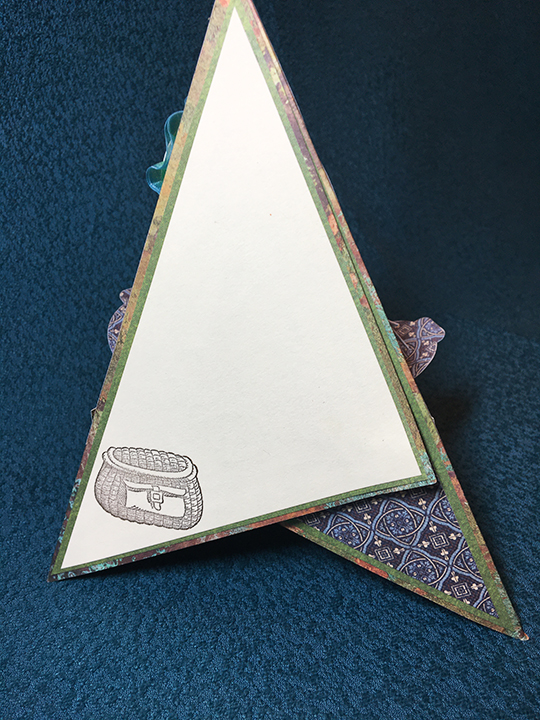
The back side of the card has a cream-colored triangle for a personal message. The card is secured with a hook and loop square glued to one corner of the back flap and the connecting triangle.
I intended to have this card fold flat to fit inside a catalog envelope (9 inches x 6 inches) but I put the fisherman with his long pole and fishing line on the wrong panel. (Yes, it is real fishing line glued between two layers of the stamped fisherman and pole). The fisherman and the fish should have been where the other is, so that when folded flat the overlap lays on the cream panel so it will fit into a 9 x 6 inch envelope. But this card will be mailed in a larger padded envelope with a small diagram so the recipient will know how to stand it up for display and for good CRX. The back of the envelope is stamped with a fish.
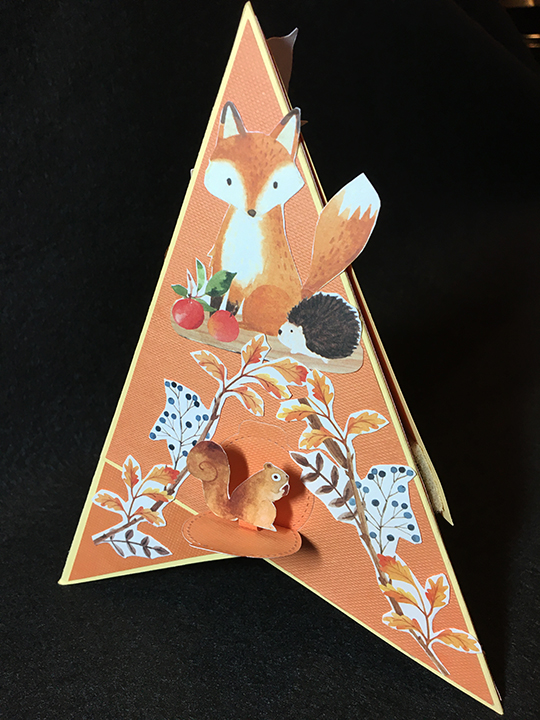
This card was inspired by my curiosity about making a teepee card and for a Craftworld.com challenge to make an autumn birthday card. Video influences include Karen Burniston, Sam Calcott and Jennifer Mcguire’s takes on pop-up cards, teepee cards and peek-a-boo doors.
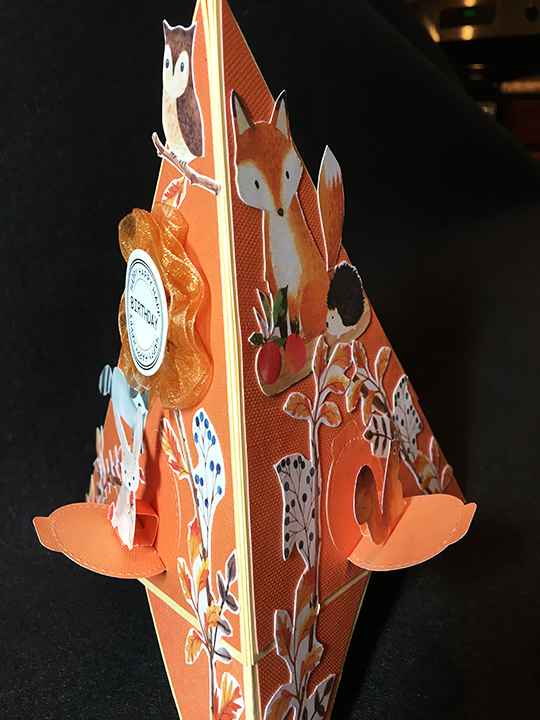
Teepee cards-so named because of the shape, are easy cards to construct from three squares of cardstock that are all the same. You score each diagonally from one point to the opposite point and fold in half to form a triangle. Then you glue one of the squares to the left side triangle and another square to the right side of the triangle/center square. I recommend watch Sam Calcott’s Mixed up Crafts video for a step by step. (My card is based on three squares of 5 ¾ inches squares.)
I wanted to add something new to the teepee card concept and having just watch Jennifer McGuire’s video on Peek-A-Boo Doors, I decided to add some flaps using the smallest circle die in the Lawn Fawn circle flaps dies. Because I wanted to use the flaps as a platform to set a small animal on using a pop-out cube, I needed another layer of paper on the card over my card base. (My card used textured orange paper cut from 5 ½ inch squares.) I also cut two additional circle flaps from the same orange paper to inlay behind the flap door. The pop-up cube to support an object is common, but I really learned the power of it from Karen Burniston’s Frame Pull Pop-up.
I fussy cut all of the card’s flat decorative critters and foliage form one page out of the Craftsmart Spiced Pumpkin paper pad. The happy Birthday rosette is made from a foiled topper from a card kit and ribbon gathered by needle and thread and then glued to the back of the topper.
The back side of the card has a white triangle for a personal message. The card is secured with a hook and loop square glued to one corner of the back flap and the connecting triangle.
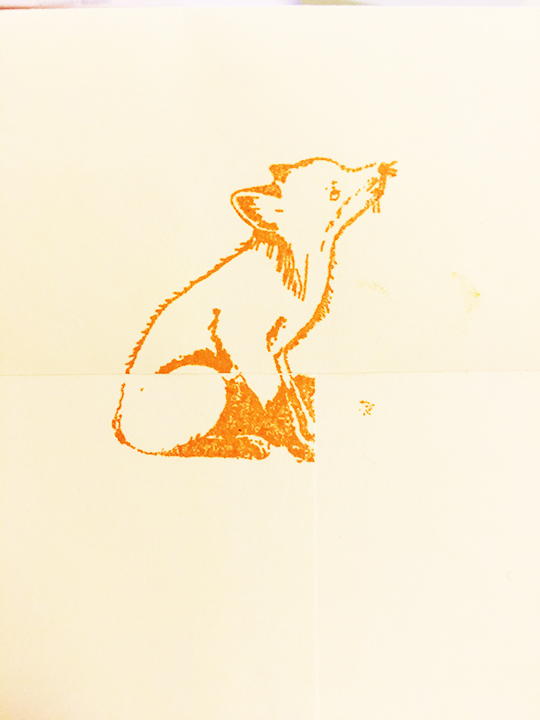
Designed for a catalog envelope (9 inches x 6 inches), the card will fold flat to fit into the envelope. A small diagram is enclosed with the card so the recipient will know how to stand it up for display. The back flap of the envelope was stamped with a fox.