
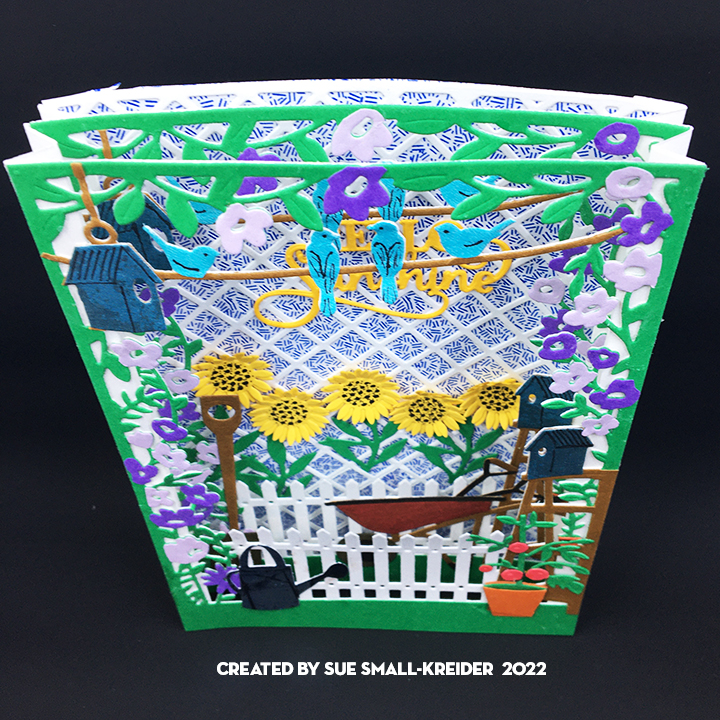
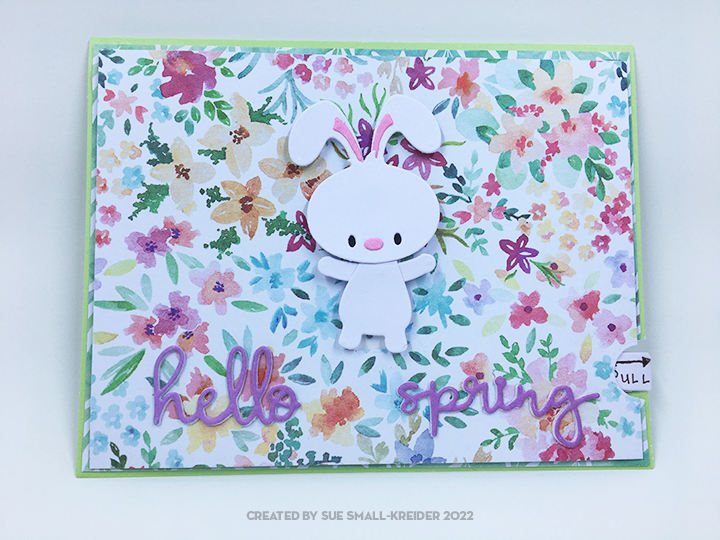
This fun easel card was inspired by Sharon-Elaine Jones’s floral wreaths and spinner cards on Craftworld.com, Sandy Diller’s recent crosshatch label and tag book card and a challenge to myself to make an interactive card with Karen Burniston’s fancy shaped labels that didn’t involve them being used as flat labels.
This spinning honeycomb with bees in a floral wreath easel card, uses the label dies in three different ways. The largest dis where used to create the wreath and its white inner frame. The smallest die was cut four times, each folded in half and glue together around a string. The second smallest die was used to cut the raised “Queen BEE” label that acts as the easel stop.
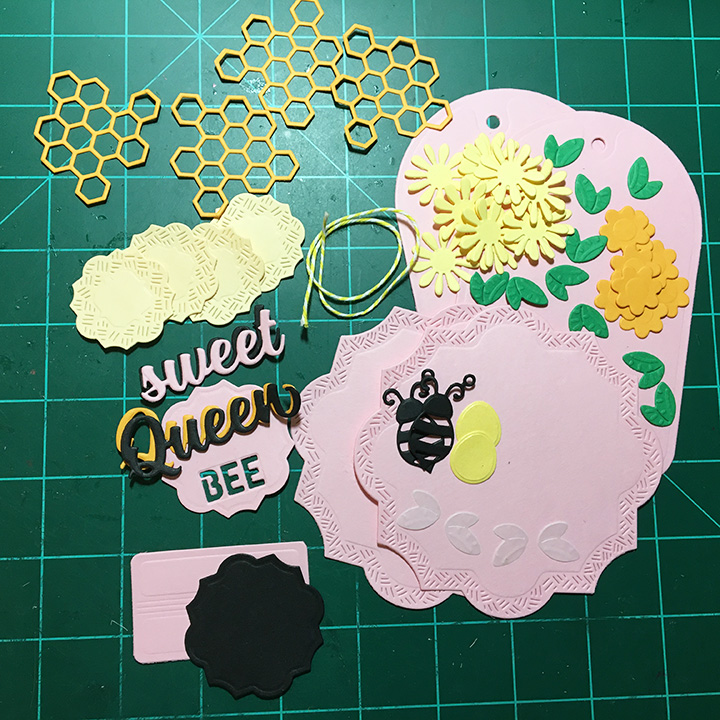
Using Karen Burniston’s Flutter Charms die set cut enough pieces for two bees and four honeycombs. Cut two of the largest label crosshatch die in pink. From Karen’s tag book die set cut two of the tags and one of the rectangle spine piece in pink.
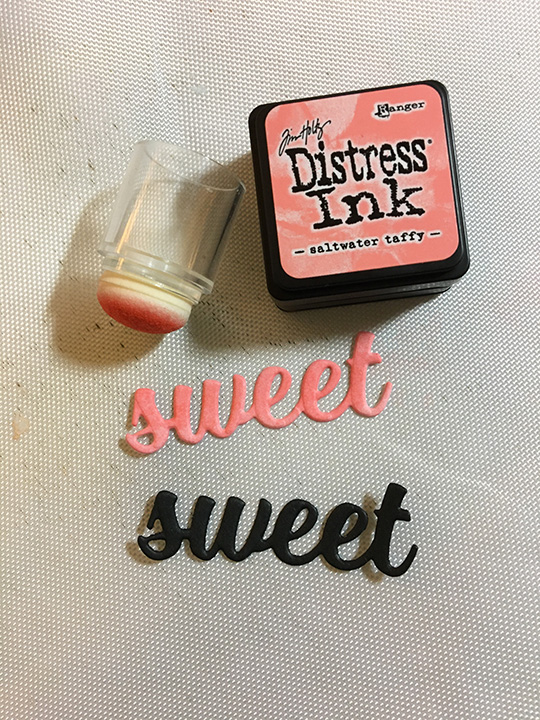
Cut from black the words “Queen” from Karen’s Word Set 5 and “sweet” from Word Set 6. Cut “Queen” a second time from orange and “sweet” from white. Ink the white “Sweet into a dark pink with Distress Ink. Glue the pair of words to create shadows or highlights by off-setting the words slightly.

Cut eight of the daisy flowers and four of the smaller butter cup flowers. Cut four pairs of the bee wings in green for leaves. Glue two of the daisy flowers one on top of the other alternating the petals. Repeat with remaining daisy flowers to end with four flowers. Add flower centers using contrasting colors of Nuvo drops. Keep the flowers on a flat surface for at least 12 hours until they are hardened. (I was glad I had made a few extra as I accidentally flatten one of the orange daisy centers before it had hardened.)

Trim off the excess honeycomb to leave a 6 petal flower-like honeycomb that will fit inside the small yellow labels.
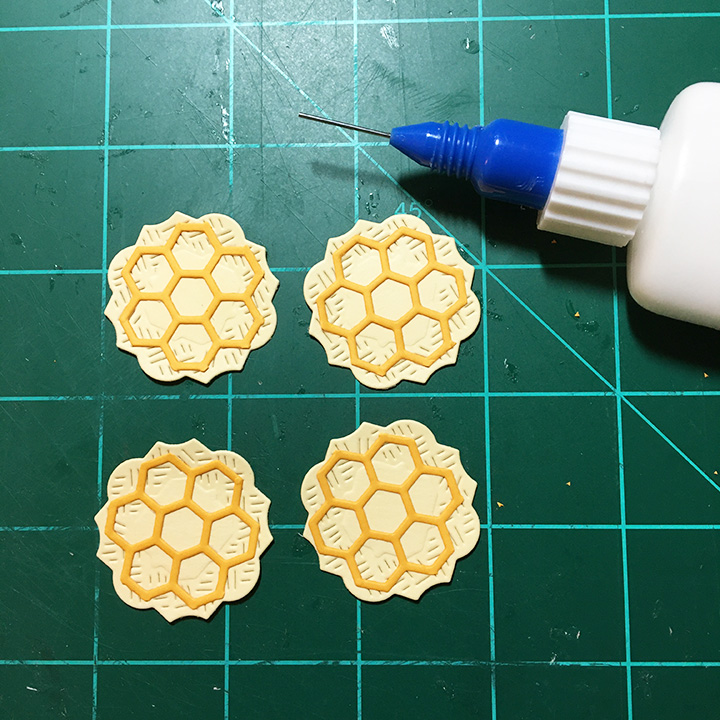
Glue honeycomb flowers to yellow labels.

Fold labels in half.

Glue two labels together on one folded half. Repeat with other two labels.

Glue piece of twine in the middle of the joined label halves.
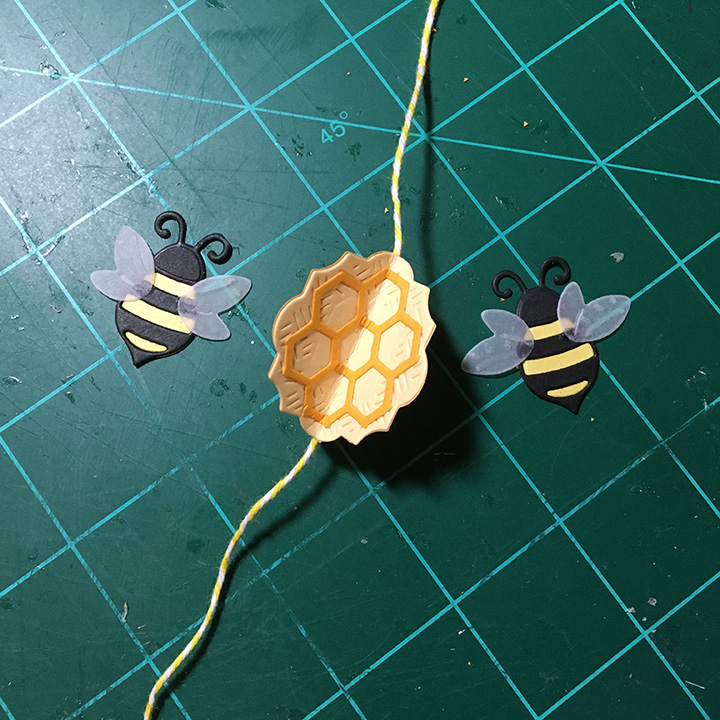
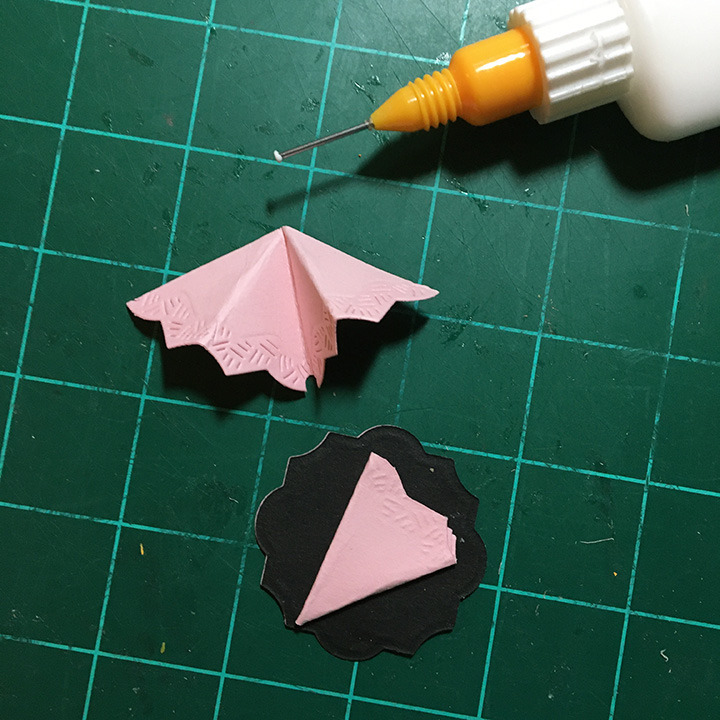
Glue the other half of label to sandwich the twine in the middle. Let dry. Glue the egg shapes to the back of the bee bodies. Trim the charm circle off antenna. Glue vellum wings to the bee body. (See assembly video.)

Position one of the large pink labels on the front of a tag. Using a pencil trace the outline of the tag onto the back of the label.

With removable tape, attach the tag to label.
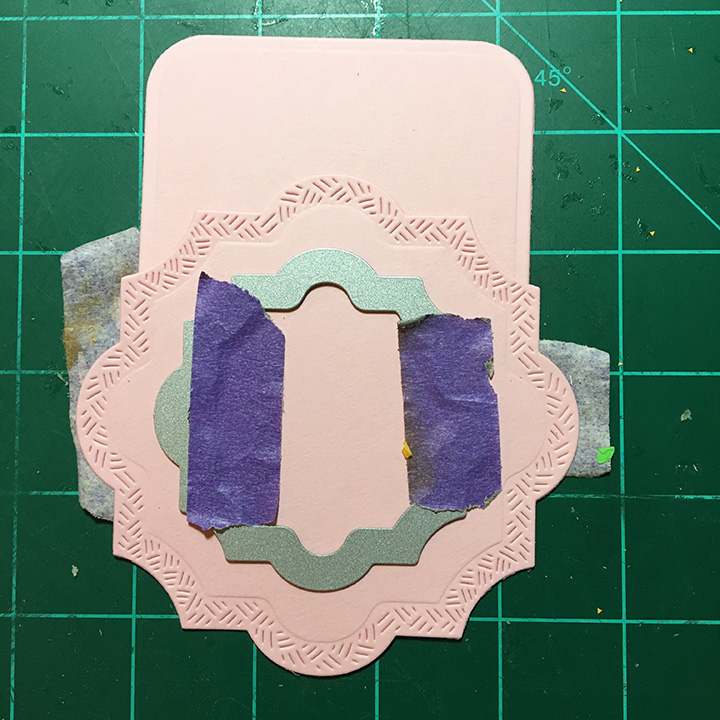
On the front of the label, tape the third largest die to center of label. Die cut through both label and tag. Using the first cut label as a guide to cut the second label’s center out.

Fold the tag book so that the cut-out is fold in half. put glue only below the fold on the tag book piece. Glue the large label with pencil markings to the wreath to the front tag.
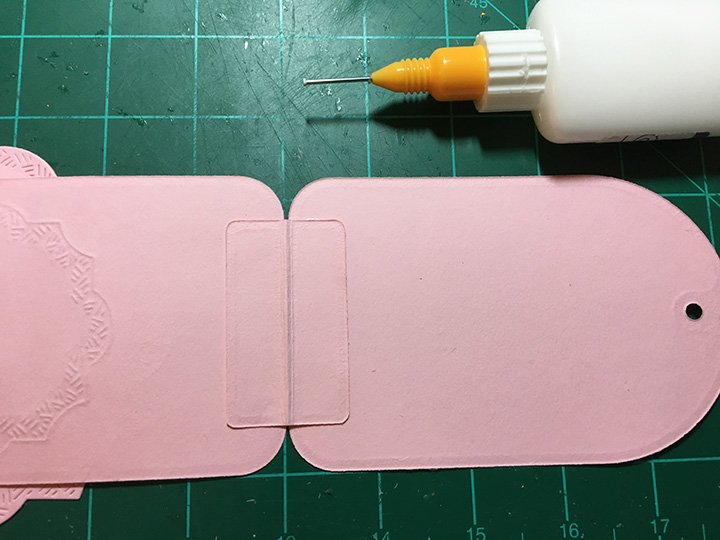
Glue the two tags together with the rectangle spine piece. (You can review the tag book assembly video for tips in assembling the book.)

Spread glue on the inside of pink wreath that is glued to card base. Stretch the twine centering the honeycomb with the bees glued to it. Using small pieces of permanent tape, adhere the twine in place making sure the twine is moderately taunt. Place the top pink wreath in place and press together make a tight seal to the two layers of wreath especially around the twine.
(Tip: Glue the bees on opposite sections of the honeycomb labels to have balanced weight. I made the mistake of gluing them both on the same side and it spins a bit lopsided.)
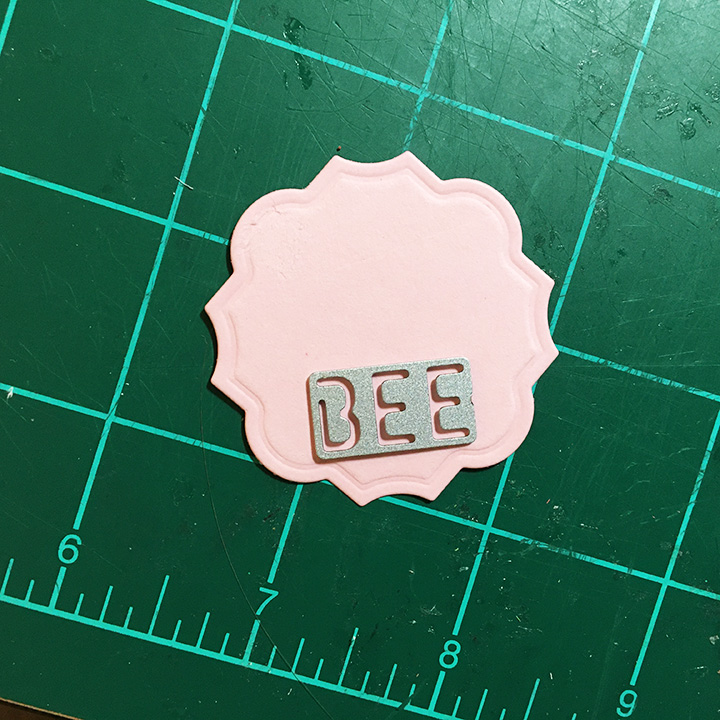
For the easel stop, cut two of the second smallest label dies once in pink and once in black. Die cut the word “BEE” from Word Set 5 in the pink label. Glue the black label to back.
I used half of the label that I cut from the large label, fold in half and half again to use as the spacer under the Bee label. (You could also use foam tape or foam dots.)
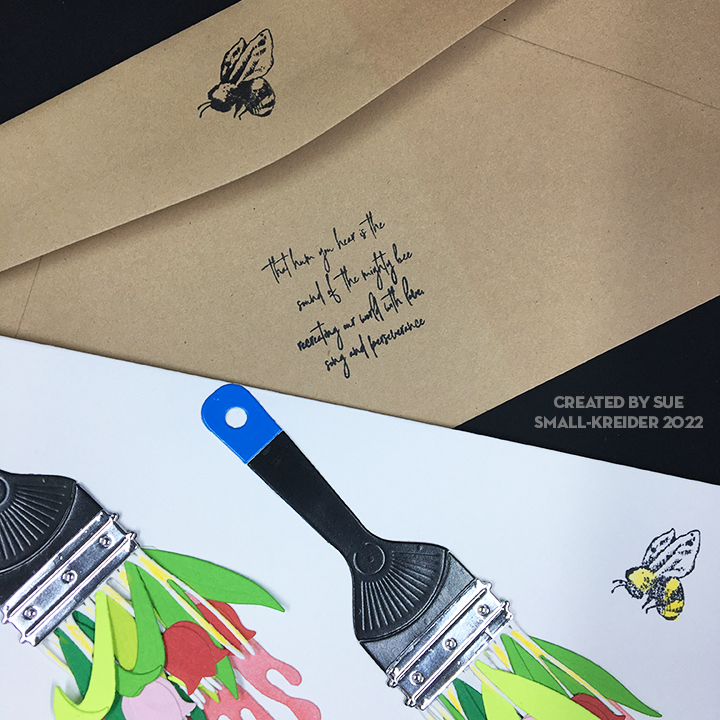
The card folds flat to fit into an A2 size envelope which I stamped the back flap with a bee in flight from Apple Blossom in black ink.
Thank you for reading this blog post. Please like and leave comments 😊
Materials Used:
Dies
- Karen Burniston in cahoots with Riley and Company – Flutter Charms – 1196
- Karen Burniston in cahoots with Riley and Company – Labels – Crosshatch – 1184
- Karen Burniston in cahoots with Riley and Company – Circle Tag Book Pop-Up – 1081
- Karen Burniston in cahoots with Riley and Company – Word Set 6 – Summer – 1052
- Karen Burniston in cahoots with Riley and Company – Word Set 5 – Royalty – 1034
Stamps
- Apple Blossom – Bee Happy stamp set from Die-Cutting Essentials magazine issue 89
Inks & Pigments
- Ranger – Jim Holtz Distress Ink – Saltwater Taffy
- Memento Fade -Resistant Dye Ink – Tuxedo Black
Papers
- Heavy weight pink cardstock from my stash
- Yellow, orange, green and black cardstock scraps
- White-gold shimmer paper scrap
- Clear vellum
Miscellaneous
- Neutral PH Adhesive by LINECO
- Fine-Tip Glue Bottle
- Yellow and White Bakers Twine
- Nuvo Crystal Drops – Dandelion Yellow and Ripened Pumpkin
- Die Cutting machine
- Poking Tool
- Tim Holtz – Tonic Studios – Stamping Platform
- LDRS Creative – Stampendable Stamping Tool
- Stamp Cleaning Cloth
- Ink Sponge Dauber
- Craft Mat


