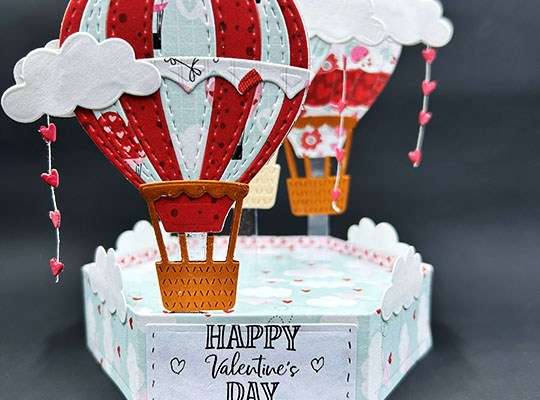
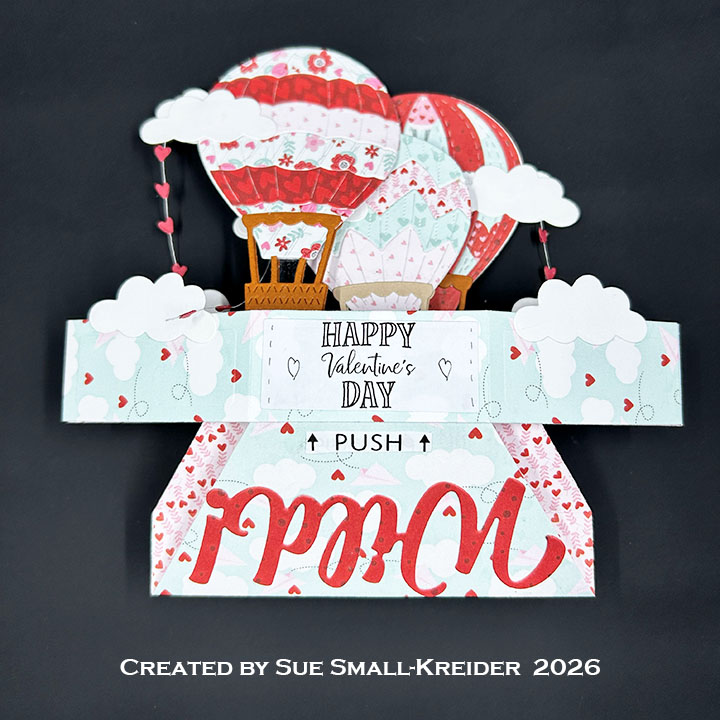
This card was made for Craft Roulette #304 whose parameters were: drop down project, mahjong colors, go wild element and hand drawn border. I used new Karen Burniston dies and stamps for this airy, pop-up Valentine. (Dies will be available for sale on February 2, 2026)
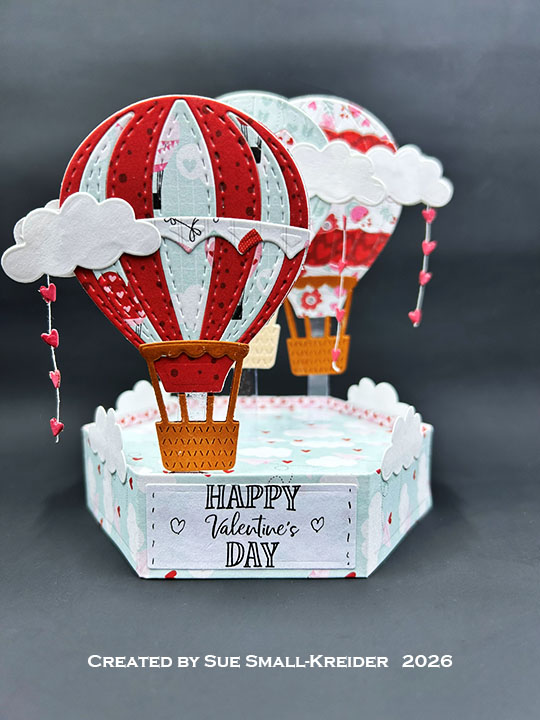
Watch the process video to see how I made this card.
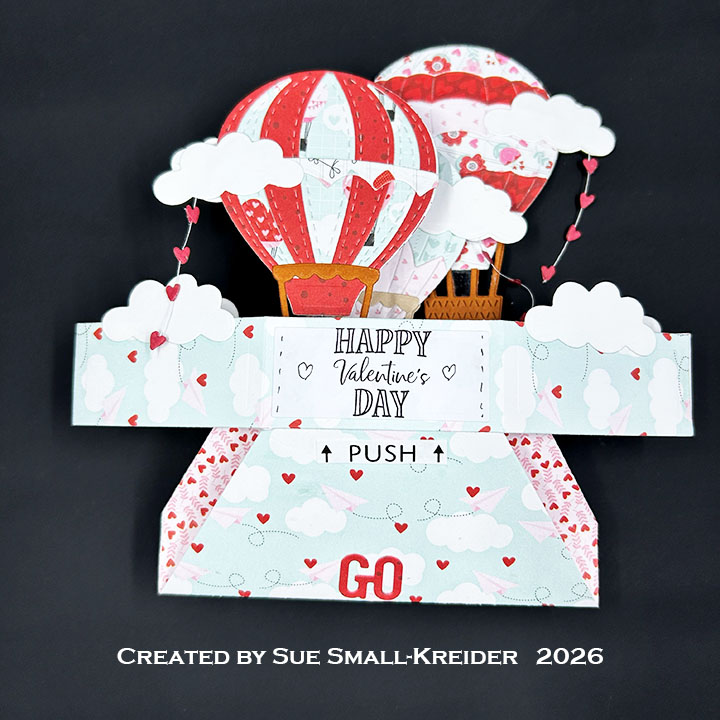
Pop-Up Stage Base: (Watch the video above for assembly instructions.) Cut two base pieces and two side strips from the Stage Pop-Up die set.
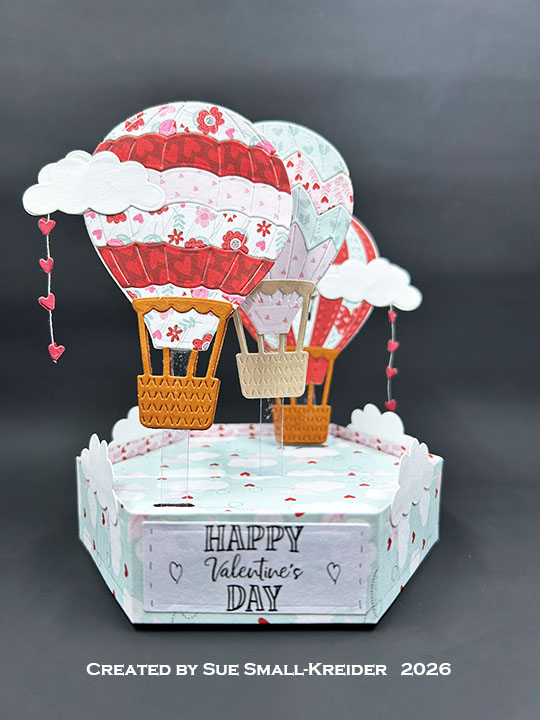
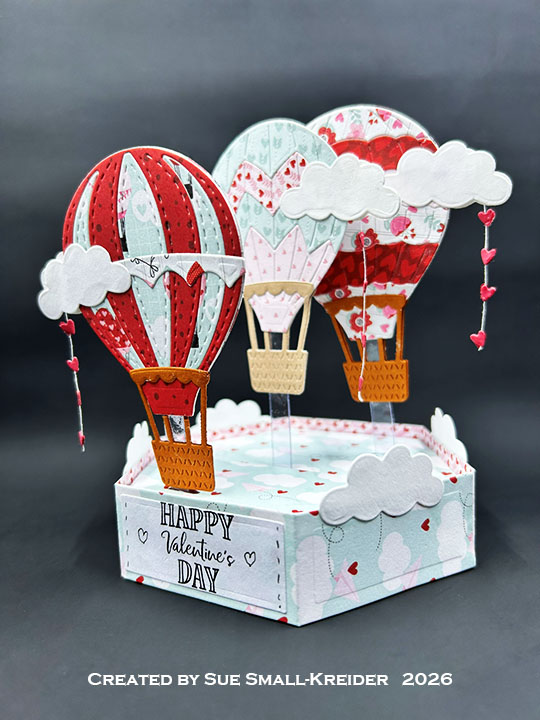
Hot Air Balloons and Raining Hearts: (Watch the video above for assembly instructions.) The Hot Air Balloons die set along with the tiny hearts from the Love Is In The Air Charms set are the key dies used. The hearts are sandwiched with dots of glue to pieces of cotton thread. The cloud die used is the largest one in the Hot Air Balloons set. Cut the different balloon designs several times from different patterned papers to get the different colored stripes.
Sentiments: “Go Wild!” is a previously released Karen Burniston die cut in red patterned paper. The “Happy Valentine’s Day” is part of the new Love Notes clear stamp.The stitching and hearts were hand-drawn onto the label. Stage Scenes stamps set was used for the “Push” on the bottom of the stage.
Envelope: The card fits into a 6×9-inches envelope.
___________________________________
Thank you for experiencing this blog post.
I hope this inspires you and makes you smile.
Please subscribe, like and leave comments 😊
Follow my YouTube channel, Instagram and Pinterest as well.
___________________________________
Disclaimer: Karen Burniston products are provided free of charge by the manufacturer for review and use. All other items were personally purchased. Compensated affiliate links used where or when possible, meaning I will receive a small percentage commission from these manufacturers at no cost to you. This will allow me to add more content to my YouTube channel and help out a lot. Thank you.
Materials Used:
Dies
- Karen Burniston in cahoots with Riley and Company – Stage Pop-Up – 1332
- Karen Burniston in cahoots with Riley and Company – Hot Air Balloons – 1327
- Karen Burniston in cahoots with Riley and Company – Love Is In The Air Charms – 1326
- Karen Burniston in cahoots with Riley and Company – Go Wild! – 1128
Stamps
- Karen Burniston in cahoots with Riley and Company – Clear Stamps – Love Notes
- Karen Burniston in cahoots with Riley and Company – Clear Stamps – Stage Scenes
Papers
- Echo Park – 6×6-inch Double-Sided Paper – Love Notes
- Stampin’ Up – 8.5×11 80 lb. Cardstock – Copper Clay
- Red, Tan and White Cardstock
- Clear Plastic Packaging
- 6×9-inch Catalog Envelope – White
Ink
- Memento – Fade-Resistant Dye Ink – Tuxedo Black
- Pigma – Mircon 005 Fine Tip Pen – Black
Adhesives
Tools
- Die Cutting Machine
- Scrapbook.com – Magic Mat
- Stamping Block
- Stamping Platform
- Paperweight
- Scissors
- Scrapbook.com – Mint Tape
- Tweezers
- We R Memories – QuickStick
Miscellaneous
- White Cotton Sewing Thread