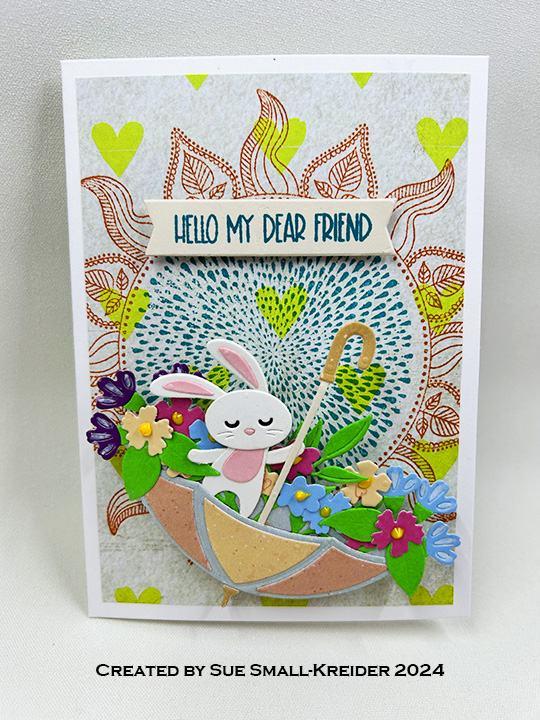
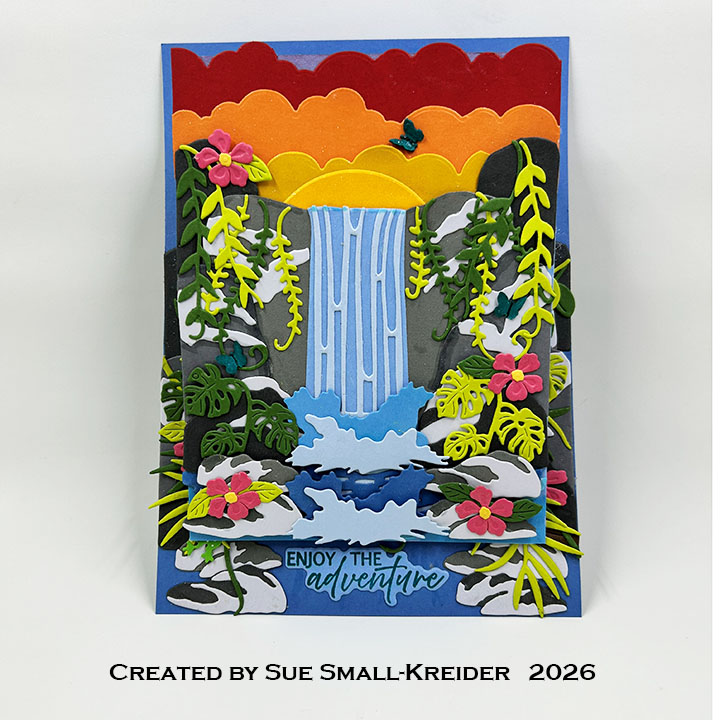
This card was made for Craft Roulette #323 whose parameters were: A7 card, pretty colors, photo booth element and geometric shapes for random. I used Spellbinders Weekender 2026 dies and stamps for an A7 easel (5×7-inch) card with a photo strip bookmark with photos of how to open and display the card.
Watch the process video to see how I made this card.
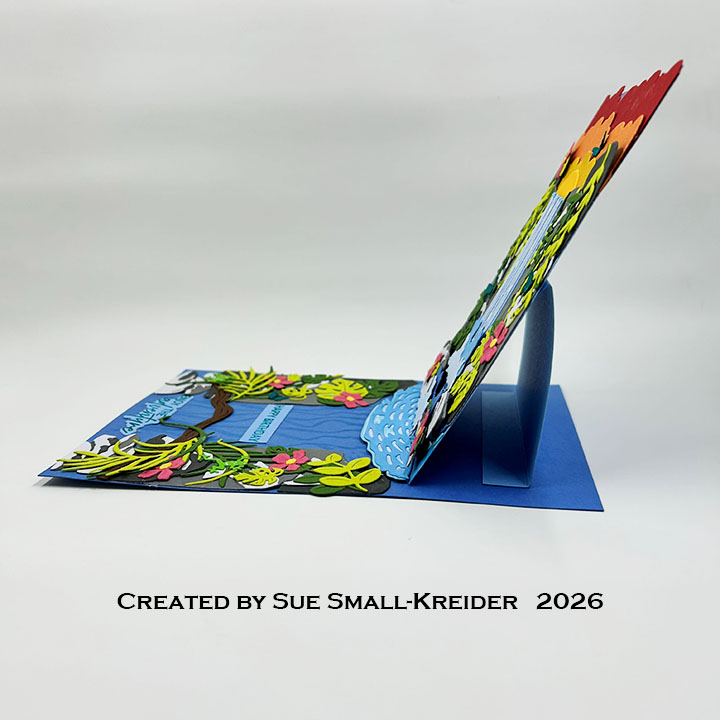
Cardbase: I cut three rectangles to make the cardbase: Dark Blue – 5×7-inches, Light Blue – 4.25×5.5-inches and 4×6-inches. Score and fold the 4×6 rectangle at .5-inches and 3-inches as shown in the video above.
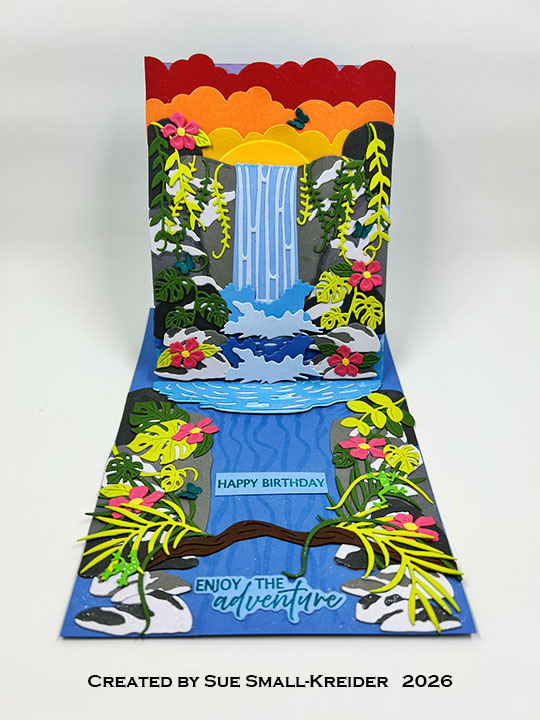
Waterfall: Using the Rainforest Falls die set and instruction PDF, cut two sets of all the rock pieces using four to five shades of gray cardstock. Make a total of three of each of the two smallest rocks. (I used gray markers to get my extra shades of gray to make the rocks look different from each other.) Make two sets of the water splashes and pooling water using several shades of blue cardstock. Make one of the waterfall. (I added more contrast to my water features with a blue marker. I also brushed on Nuvo Glitter Gloss shimmer over all the water and areas on the rocks that might be splashed.)
Sky: Using the cloud edging dies in the Rainforest Falls die set, tape together the two dies to make a continuous cut on 5×1.5-inch strips of red, orange and yellow cardstock. Cut one semi-circle from the brightest yellow. Assemble card as shown in the video above. (I inked the top edge of my 4.25×5.5-inch rectangle panel to have a purplish hue to peak though behind the clouds.)
Decorations: Decorate the rocks with vines, foliage and flowers cut from the Jungle Blooms and Tiki Toucan die sets.I cut one of each foliage and vine dies in each set – once from light green and once from dark green. (I cut four each of the pink flowers with their yellow centers from the Jungle Blooms set.) In addition, I used Memory Box’s Tiny Frogs and Tonic Studio’s Tropical Rain Forest Silhouette‘s tiny butterfly die as embellishments. (There are three tiny frogs on the card and four tiny butterflies. Can you find them all?) Cut one brown branch from the Tiki Toucan die set to go across the stream.
Sentiments: The stamped sentiments come from the Go Wild stamp & die set and were stamped in a teal blue ink.
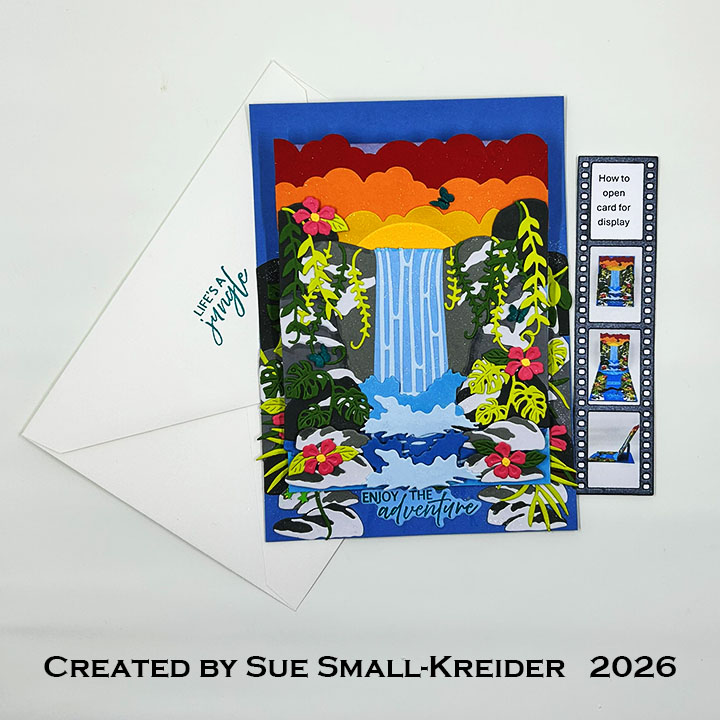
Photo Strip Bookmark: Once the card was finished I photographed it in the closed and open positions with a side view to demonstrate the easel. Next, I printed the photos as 1-inch wide and generated the title “How to open card for display.” Using Karen Burniston’s Movie Night Charms, I cut from black shimmer cardstock, the filmstrip. Next, I trimmed the photos and title to fit the film strip and glued them into the frames. I backed the entire strip with thin white computer paper. (For more Card Recipient eXperience slips (CRX) check out these posts on my blog.)
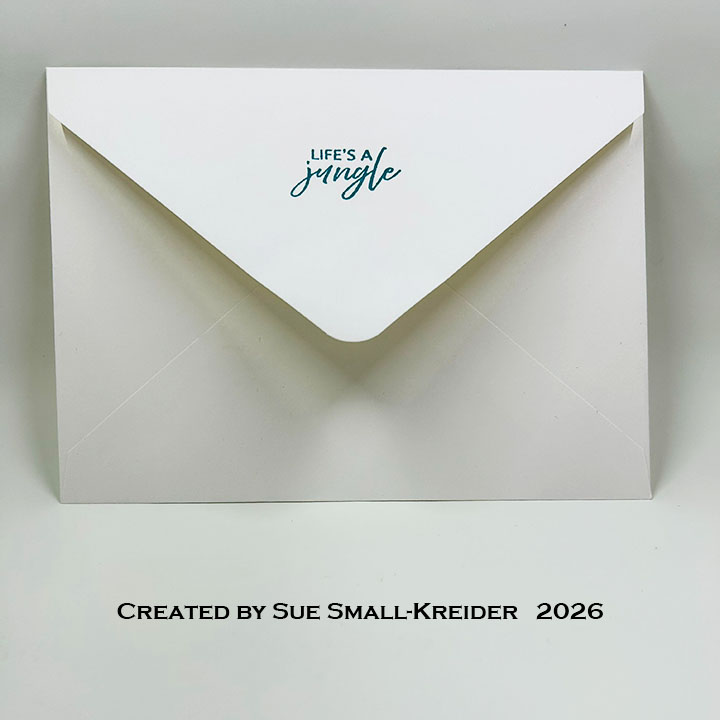
Envelope: The card fits into an A7 (5×7-inch) envelope with the sentiment from the Go Wild stamp set that says “Life’s a jungle.”
___________________________________
Thank you for experiencing this blog post. I hope this inspires you and makes you smile.
Please subscribe, like and leave comments 😊
Follow my YouTube channel, Instagram and Pinterest as well.
Check out Craft Roulette too!
___________________________________
Disclaimer: Karen Burniston products are provided free of charge by the manufacturer for review and use. All other items were personally purchased. Compensated affiliate links used where or when possible, meaning I will receive a small percentage commission from these manufacturers at no cost to you. This will allow me to add more content to my YouTube channel and help out a lot. Thank you.
Materials Used:
Dies
- Karen Burniston in cahoots with Riley and Company – Movie Night Charms – 1305
- Memory Box/PoppyStamps – Craft Dies – Tiny Frogs
- Spellbinders – Cutting Dies – Jungle Blooms – S3-575
- Spellbinders – Cutting Dies – Rainforest Falls – S7-2750
- Tonic Studios – Dimensions Dies – Tropical Rain Forest Silhouette
Stamps
- Spellbinders – Clear Stamps & Cutting Dies – Go Wild – STP-272, S4-1526
Papers
- Fun Stampers Journey – 8.5×11 Cardstock – Tin Pail
- Seguras – 5.5×4.25 105lb Cardstock – Anthracite
- Spellbinders – 8.5×11 Color Essentials Cardstock – Graphite, Lunar Gray, Raindrop
- Spellbinders – 8.5×11 Colorwheel Cardstock – Saffron, Tuscan, Malibu, Windy, Cascade, Celestial, Pomegranate, Dahlia, Carrot, Truffle, Anchor
- A7 (5×7-inch) Envelope – Cream
Ink
- Catherine Pooler – Premium Dye Ink – All That Jazz
- OLO Markers – B2.2 Sky, BG2.5 Viridian, NG3 Neutral Gray 3, NG5 Neutral Gray 5
- Pigma – Mircon 005 Fine Tip Pen – Black
- Ranger – Tim Holtz – Distress Ink – Victorian Velvet
- Sakura – Gelly Roll Pen – Medium – White
Adhesives
- Neutral PH Adhesive by LINECO
- Fine-Tip Glue Bottle
- Foam Tape – 1mm thick
Tools
- Die Cutting Machine
- Paper Trimmer
- Bone Folder
- Score Board
- Stamping Blocks used as paperweights
- Scissors
- Pencil
- Riley and Company – Pick & Poke Tool
- Sponge Dauber
- Tweezers
- We R – Precision Press Mini – Stamping Platform
- Scrapbook.com – Mint Tape
Miscellaneous
- Nuvo – Aqua Shimmer – Glitter Gloss