Faux Leather Bag

A favorite leather bag has a certain smell and memories of all the fun times with friends and family. This little faux tooled leather bag can add to those memories.

Made with the tote die set by Divinity Designs, a crafting company based out of Ohio, the bag goes together relatively easily. I looked at the assembly video before making, but I assembled the bag mesh pockets a little differently.

Cut two each of the front/back, side, mesh pocket, handle, pocket pleat, front/back layer and handle layer from brown Kraft cardstock. Cut one each of front pocket flap, front pocket flap layer, pocket layer, and stitched belt buckle set from brown Kraft cardstock. Cut two front/back layers from brown paper. Cut one each of the buckle and pin from orange foil cardstock.

Using the tote embossing insert plate and your embossing sandwich for your die-cutting machine emboss the two front/back layers and pocket flap and pocket layers.

With an ink blending sponge, darken the edges of all pieces, especially the stitched areas with brown ink.  Rub the embossed layering pieces to highlight the β€œtooled” design.  Glue the layers onto their base pieces.

To assemble, I glued the mesh pocket tabs on to the side tabs first, bowing out the mesh pocket. Next, I adhered the bottom side tabs to the bottom rectangle of one of the front/back pieces. Glue the other bottom rectangle over the top of the first rectangle to hide the side tabs. Next adhere the side tabs to the front/back pieces. Take your time to hold the tabs in place until the glue sets.

Shape the handles by running them through your fingers to bend them into an arch shape. Glue rounded ends of on handle to the front of the bag. Repeat with handle for the back side of bag.

To assemble the front pocket, pleat the two pocket pleats and glue one tab to the inside of the front pocket tab. Repeat with the other pocket pleat. Fold the bottom tab of Front pocket over the ends of pleats and glue corners. Fold over the front pocket flap tab and glue its corners to the top pleat corners.  Glue assembled pocket to front of bag.  Thread large brown stitched belt piece through foil buckle and glue pin in place. Fold tiny stitched brown piece around larger piece as the loop that holds the belt tongue in place. Glue top of belt piece to pocket flap and loop tabs to pocket. This belt with hold the pocket flap securely closed.

I used some tiny star brads that I had in my stash to reinforce the handles to the bag. I punched the starter holds with an old ice pick or awl and a sanding block inside the bag. Once the brads were in place, I glued the front/back layer over the inside of the bag to hide the brads and side tabs.

All of the glued layers make for a study bag that measures 6 ΒΌ inches high x 5 inches wide and 2 inches deep.  I plan to gift a lovely scarf and earrings in this bag.

Thank you for reading. If you enjoyed this blog post, please like it and follow the blog. 😊

Dies

Ink

  • Ranger – Tim Holtz’s Distress Ink – Vintage Photo

Papers

  • Heavy weight 8 Β½ inches x 11 inches brown cardstock
  • Brown kraft paper
  • Orange foil cardstock scraps

Additional Supplies:

Nativity Ornament

Sometimes an ornament can be a fun Christmas card.  A traditional nativity scene makes for a special greeting and gift.

Memory Box dies and Distress Inks make for a quick make with brown kraft cardstock and white card stock scraps. While you can purchase a bundle of the Memory Box dies from Craftstash, I purchased my dies from several stores and skipped using the House Frame base die.

Cutting Pieces:

Cut from brown kraft cardstock:

  • 3 of the Nativity house frame
  • 2 of K-shaped crossbars
  • 2 sets of palm trees
  • 1 of the house frame background
  • 1 strip 3/8 inch x 2 3/8 inches

Cut from green paper:

  • 2 sets of palm leaves

Cut from white cardstock:

  • 2 of human figures

Cut from gold glitter cardstock:

  • 1 of star

Cut a 9-inch piece of linen twine

Creating Sturdy Pieces:

Glue the palm trees together to form a study pair of trees with green leaves on the front and back of trees.

Glue one of the K-shaped crossbars to the back side of a house frame. Cut the tab off another of the house frames. Glue the trimmed frame to the back of the first frame sandwiching the crossbar between the two frames.

Glue the two human figures together.

Creating Middle Frame:

Trim 1/8 inch of the remaining house frame’s tab.

Glue human figures onto strip positioning them to fit inside the frame opening.

Inking House Pieces:

Using Walnut Stain Distress Ink, cover the front and middle frames. 

Ink just the roof of the House background.

Inking with Lighter Brown:

Ink the palm tree trunks with Vintage Photo ink. Lightly tap some brown on the green leaves.

Ink around the sides, floor and eaves of house background.

Using washi tape or low tack tape mask the human figures off and ink the white ground to blend into the brown strip.

Inking with Yellow Ink:

Using Fossilized Amber Distress Ink, Blend the center of the house background into the darker edges.

Mask off all but the halo, baby’s head and straw and solidly color it yellow.

Inking with Green Ink:

Mask the hands and face. Using Mowed Lawn Distress Ink, color the male figure.

Inking with Blue Ink:

Mask the hands of female figure and manger/crib. Ink with Mermaid Lagoon ink.

Painting Flesh:

Tap a small amount of Abandoned Coral or other flesh toned ink on to a craft mat. Using a waterbrush pick-up some ink and experiment on scrap paper to get the desired flesh tone before painting the human figures.

Inking Manger/Crib:

Using both brown inks, color the crib to be darker than the ground.

Inked Details:

Using a fine-tipped brown pen, draw in man’s beard and add woodgrain to crib.

Golden Sparkle Detail:

Color the halo and baby’s head with a gold gel pen.

Attaching Figures to Middle Frame:

Add glue to back of middle frame and glue brown strip with human figures to house frame.

Attaching Middle Frame to House Background:

Fold back 1/8-inch tab on middle frame and glue to folded tab of house background. (A fine-tipped glue bottle makes this so much easier.)

Attaching Front Frame to House Background:

Fold back front house frame tab. Place glue on inside of tab and adhere to the bottom of house background tab.

Adding Twine Hanger:

Thread twine through all three holes in top of the roofs.

Knotting Twine:

Fold out the house frames flat to create slack in the twine before double knotting the twine at the roof pinicale.

Finishing Hanger:

Loop twine ends into a solid knot and trim ends to be even.

Glue star tips to house frame and twine.

Mailing Ornament:

The ornament fits into an A2 envelope. (I plan to seal mine into small plastic bags to go through the mail safely. You could also seal the entire piece with a spray acrylic sealer to stop the inks from running with if exposed to moisture.)

Thank you for reading. If you enjoyed this blog post, please like it and follow the blog. 😊

Dies

Inks

  • Ranger – Tim Holtz’s Distress Ink – Mowed Lawn, Mermaid Lagoon, Walnut Stain, Vintage Photo, Fossilized Amber, Abandoned Coral
  • Brown fine-tipped pen
  • Gold gel pen

Papers

  • Brown Kraft cardstock
  • White cardstock scrap
  • Recollections – 8.5 x 11 glitter card stock – Cashmere Glitter
  • A2 envelope

Additional Supplies:

Snowy Hourglass

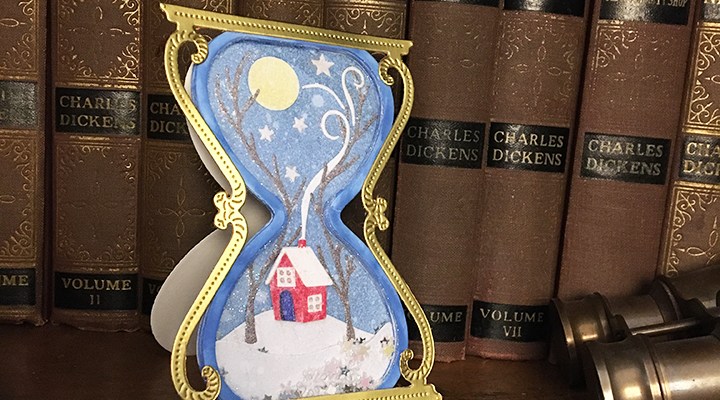
I loved playing with my grandmother’s small egg timer filled with white sand as a child and when I saw The Greetery’s Hourglass dies, I knew I wanted to make several.

To begin, I watched the how to video for the hourglass to get ideas on how to use the die sets. I decided on the cut-out version and cut out 11 hourglass frames from white cardstock. Then I cut out a out a whole hourglass insert using the larger die from the insert set. By mistake I cut the tent fold hourglass from the smaller inset die, but I made it work as I assembled the card. (To cut the tent fold hourglass, fold your cardstock in half and place the top edge just over the fold, so that it won’t cut into the cardstock when cut.) Cut one piece of acetate using the largest insert die.

Next, I adhered sheets of matte gold adhesive foil onto the front and back of a piece of white cardstock before cutting the frame of the hourglass from it. The last items I cut where the Christmas Time in the Country trees, cabin, smoke, snowflakes, stars, and snowbanks from colored scraps of cardstock. Using watercolor pencils and a water brush to color the cabin before assembling it with a scrap of yellow foil paper to go behind the windows. I popped the cabin up on another square cardstock scrap to give it dimension in the hourglass. The trees were cut from brown paper.

The ink blending of the large hourglass insert was done with a large ink blending brush which I also used to ink up the insert 10 insert frames that I had glued together and the eleventh frame that would be the frame to go over the acetate. Once the large insert piece was dry, I glued down the scene pieces weaving the smoke around the tree branches. Next, I sprayed the scene with white ink spray to create the snow fall. (The ink goes on thick, but it becomes translucent as it dries, so let it dry before going to the next set.)

Before assembling the card, stamp and heat emboss the inside sentiment on the tent fold hourglass piece. I used a Catherine Pooler stamp that was the correct size to fit in the smaller hourglass shape. (My stamping was not as solid as I had hoped, so once it was heat embossed, I had to go back and fill in the missing places with a gold gel pen.)

To assemble the hourglass, first glue the large, inked hourglass to the tent fold hourglass. Next, glue the stacked hourglass frames onto the large, inked hourglass. Add any extra snowflakes and stars die cut along with snowflake sequins and stars to the inside of the hourglass with a dash of fine glitter. Adhere the acetate to the top of the stacked frame and then the eleventh inked frame over the acetate. Glue the gold frame over the top of the hourglass. Shake to distribute the glitter to all parts of the hourglass scene. 

Because of the thickness of the card, I will make a small box to deliver it in from faux leather cardstock.

Thank you for reading. If you enjoyed this blog post, please like it and follow the blog. 😊

Dies

Stamps

Inks & Embossing Powder

  • VersaMark – Watermark Stamp Pad
  • Cosmic Shimmer – Detail Embossing Powder – Bright Gold
  • Ranger – Tim Holtz’s Distress Ink – Salty Ocean
  • Avery Elle White Ink Spray
  • Nuvo Highly Pigmented Watercolor Pencils – Cardinal Red and Imperial Jade

Papers

  • Heavy weight 8 Β½ inches x 11 inches white cardstock
  • Colored cardstock scraps
  • Xcut – Xtras Adhesive Foil Sheets A5 – Gold – XCU 174419
  • A2 envelope

Shaker Elements

  • Prima Glitter – White
  • Button Galore & More – Sparkletz – Snowflake Sequins
  • Silver Star Sequins

Additional Supplies:

Home for the Holidays

Going home to be greeted by family and friends is a Christmas tradition since the mid-1800s.  This slimline tower card uses Spellbinder’s Open House dies to an interactive card that emotes the feeling of being welcomed home. (I must give credit to @DebsyG of Craftworld and Sam Calcott’s Made to Surprise tower cards for the inspiration for this card.)  

Spellbinder’s Open House collection has a number of add-on sets for various holidays, but none include a door wreath. (I had to use an older Lawn Fawn Mini Wreath from their door collection to complete my card.) I did use the side panel set to add more windows to the doorway.

Card base: Using heavyweight white cardstock that is 8 ΒΎ inches tall x 8 Β½ inches wide, I scored and folded at 1 1/8 inches, 2 2/8 inches, 6 1/8 inches and 7 3/8 inches. Next, I stenciled the card base with brick colored ink, a brick stencil and a small make-up brush (I find these inexpensive contour make-up brushes from Dollar Tree work as well as the expensive ink brushes.) The folds should go to the back of the card, to form a jut-out entryway often found on townhouses.

Stairs: A gray cardstock was used to cut the main steps with the sentiment β€œMerry Christmas.” The sentiment was backed with scraps of red paper. I found an old envelope that was just a shade darker gray that the cardstock for the step tops. The railing is cut from heavy black cardstock and glued only at the rod tips to the steps.  The stairs where then adhered to the center of the card base, which when folded shut is 3 ΒΎ inches.

Door and Windows: The door was die cut with the windowpane dies in one pass. The side panels had to be cut and then cut with the window die. The top transom windows were also die cut from white cardstock.

I positioned the die cut door over the stairs and used a pencil to trace where the windows and the door edges.

Using the pencil lines, I cut out the windows and three side of the door with a craft knife.

Positioning the side panels next to the door, I traced the window positions with pencil and cut out and did the same with windows over the door and panels.

I saved the window frames to be glued in place to scrap pieces of clear vellum on the back side of the door and side panels and transom windows. Then I glued the vellum backed door onto the card base door. The vellum backed panels and transom windows where also glued in place so that the vellum was sandwiched between the case base and the white window and panel frames.

Inside Mechanism:  To create the set-back house interior, I cut a 8 Β½ inches tall x 5 Β½ inches wide piece of lightweight white cardstock. I scored and accordion folded at ΒΌ inch, Β½ inch ΒΎ inch, 1 inch, 4 Β½ inches, 4 ΒΎ inches, 5 inches and 5 ΒΌ inches. Next, I cut a floor from some woodgrain paper and the wallpaper from a small, patterned paper.  These piece where adhered to the center of the inside mechanism. 

The woman is an older Spellbinder’s small die of the month that can hold a pie, a present or a small fir tree. I chose a present popped-up on a foam square. The woman is glued to the wallpaper and floor before the inside mechanism is glued onto the back side of the card base.

The finishing touches are a tiny wreath I had in my stash that is glued over the door and attaching the mail slot and doorknob (cut twice and glued together for depth) to the door front.

The back of the envelope is stamped in red using a Tim Holtz rubber stamp β€œHave Yourself a Merry Little Christmas.”

Thank you for reading. If you enjoyed this blog post, please like it and follow the blog. 😊

Dies:

Stencil & Stamp

Inks

Papers

  • Colored cardstock scraps
  • Pattered papers from Colorbok and Mrs. Sparkle paper pads
  • White cardstock
  • Clear vellum
  • #10 Business envelope

Additional Supplies:

A Silent Night in the Village

A cold winter’s night looking out from a window safe and warm onto a sleepy village is the scene this card suggests with hints of happy Christmas memories and the main reason for looking forward to Christmas eve.

The card is a happy mix of papercrafting products from both the USA and UK. The decorative papers and Bethlehem stamps are from Hunkydory. (Christmas papers from Hunkydory sell-out quickly, so I purchase them when I first see them generally on Craftstash as they have the best shipping rates from the UK to the USA.) The window frame is a cut and embossing folder from Memory Box. (I fussy cut two of these window frames and glued together for stability. After cutting out the basic window opening from the patterned paper.) My village is made from the hero Arts Tri-fold Edge Village dies and colored with watercolor pencils. At the top of the window is a wreath cut from thick packaging cardboard using an older Lawn Fawn mini wreath die set. The village and patterned paper are layered with foam tape.

For sentiments on this card I heat embossed β€œSilent Night” from the Bethlehem stamp set onto vellum using my favorite gold embossing powder. Inside the card is a Christmas tree shaped sentiment by Tim Holtz from Stampers Anonymous. The card back features the Bethlehem stamp in Crumb Cake ink that is similar to gold.

The envelope flap is stamped with one of my favorite round Christmas stamps from the Love Cardmaking magazine in a dark green ink mimicking the wreath on the card.

Thank you for reading. If you enjoyed this blog post, please like it and follow the blog. 😊

Dies & Embossing Folder:

Stamps, Ink, Embossing Powder

Papers

  • Park Lane A7 card base and envelope
  • Hunkydory – Duo Designs Paper Pad 8×8 – All Wrapped up & Festive Foil
  • Hunkydory – Adorable Scorable pattern Pack – Snowflakes Splendour
  • White card stock
  • Clear vellum

Additional Supplies:

  • Nuvo Watercolour Pencils
  • Waterbrush
  • Foam tape

A Clean and Simple Pop-Up

A simple and clean stamped card is not my usual style so I added a pop-up mechanism to make Santa fly.  The mechanism is Karen Burniston’s Spinner Square Pop-Up and the scene stamps are by Leane de Graaf.

Before assembling this card, I rewatched the two assembly videos Karen Burniston has made for the Spinner Square Pop-Up. Once I understood how to fold the mechanism, I folded it backwards from the video so that it would move its arm upwards instead of downwards.

I wanted a slimline card, so I cut a front panel with a Β½ inch tab (9 x 3 ΒΎ inches) from heavy white cardstock. The back panel is 8 Β½ x 3 ΒΎ inches also cut from heavy white cardstock.  The inside panel that floats up is 7 Β½ x 3 ΒΎ inches cut from light weight white cardstock. I die-cut the mechanism and its arm (3 Β½ x 1 ΒΌ inches) from lightweight white cardstock. The stamping was completed before assembling the card.

Stamping the trees on the front and inner panels, required creating masking papers to cover the trees that were to be in front of the other trees. The back trees are the darker color and stamped after the front tree.  A white pigment ink was used to stamp the snow onto the trees. The moon was stamped in Citrine with the crescent specks in Sunbeam. The “Winter Wonderland” sentiment is by Stampendous! while the inside “Magical Christmas Wishes” is by Sheena Douglass.

To assemble, the front tab was folded and glued on the back panel. Next, the pop-up mechanism was folded backwards and glued into the inside of the card. The arm was glued onto the square spinner as directed in the assembly video. With the card closed I positioned the fussy cut Santa’s sleigh and reindeer onto the arm top so that it would not be visible when the card was closed and played with the positioning before the glue set-up. Last to glue, is the inside stamped panel that hides the mechanism. It is glued on to the small raised platform on the mechanism.

The card fits into a #10 business envelope with the Sheena Douglass β€œWinter Wonderland” sentiment stamped on its back flap in black ink.

Thank you for reading. If you enjoyed this blog post, please like it and follow the blog. 😊

Dies:

Stamps & Inks

  • LeCrea Design by Leane de Graaf – Combi Stamps – Santa & Small Christmas Trees – 55.3707
  • Winter Woodland by Sheena Douglass, Creative Stamping, issue 62, December 2018
  • Winter Stags by Stampendous!, Creative Stamping, issue 90, December 2020
  • Memento – Fade-Resistant Dye Ink Pad – Tuxedo Black
  • Stampin’ Up – Stampin’ pad – Pear Pizzazz and Lemon Lime Twist
  • Simon Says – Pawsitively Saturated Ink – Citrine and Sunbeam
  • Simon Says – Premium Pigment Ink – White

Papers

  • White Cardstock in both light weight and heavy weight
  • Cream #10 Business Envelope

Additional Supplies:

Brick Easel House

β€œFrom our home to yours” is a sentiment that is often seen during the winter holidays. House cards are one of my favorite types of cards to make.Β  The cards shown in today’s blog were made using new Creative Expressions Craft Dies by Sue Wilson.

To die cut a large solid die like the house front, it is best to angle it so that it goes through the die cutting machine at a diagonal rather than straight across. (See picture below.)

For the red brick house, I used leftover stenciled cardstock that was stenciled with Distress Ink in Fired Red Brick, a brick stencil and a small make-up brush (I find these inexpensive contour make-up brushes from Dollar Tree work as well as the expensive ink brushes.)

For the brown brick house, I used a digital image of a brick wall to create a tiled pattern to print on an 8 Β½ x 11 sheet of white cardstock using a computer and ink jet printer.

The windows, door and roofs were all cut from lightweight white cardstock and then fussy cut. The roof and door were colored with watercolor pencils and a water brush and allowed to dry under the dies’ plastic packaging so they would be flat. Once the door was dry, I added a drop of a gold Nuvo drop for the door knob and set it aside to dry overnight.

Solid colored scraps of red and green papers were used for the bows and wreath. The topiary trees were cut from white cardstock and colored with watercolor pencils. Their pots are cut from scrap patterned paper.

To glaze the windows, I used shiny organza ribbon glued to the back of the house die-cut. (I had ΒΌ inch wide ribbon so had to use two stripes for each window. You could use wider ribbon.) After the ribbon has set, the decorated house front was glued to a solid house frame cut with the largest die in the set. The top of the this die has a non-cutting edge which has to be hand-cut.

The tiny decorations can be attached at this stage in the assembly.

While the die set is designed to cut a tent fold card, I decided to make it an easel card using a 5 ΒΌ inch by 11-inch sheet of heavy white cardstock to score and fold along the long edge at 3 inches and at 3/8 inches. I then die-cut the base, folded at the 3 inches scoring with the non-cutting top of the house die at the fold. (See photo below for how the easel base looks opened up after being cut.)

Next, I used a stamping platform, clear VersaMark watermark ink to stamp the inside greeting after rubbing clean the cardbase with an anti-static powder pad. (I like to use the round stamping tool Stampendable with my stamping platform for uniform pressure on my stamps. I also use scrap copier paper under my items being stamped to add more pressure and to keep the platform clean.) The greeting from Lou Collins’ Text{ures} Seasonal Sentiments set was heat embossed with my favorite gold detail embossing powder from Cosmic Shimmer.

To adhere the house to the easel base, fold the short roof piece closed and add glue to the 3/8 inch tab. Position the house front to match-up with folded base and press at the tab area to adhere to glued tab. Open card up to see if positioned correctly, before attaching welcome mat (stamped and heat embossed from a retired Stampin’ Up front door stamp set) with foam tape.

I used two more stamps from the Text{ures} Seasonal Sentiments set on the envelope flap with Stampin’ Up’s Crumb Cake ink, which looks very much like gold embossing on the cream-colored envelope.

Thank you for reading. If you enjoyed this blog post, please like it and follow the blog. 😊

See the more of Houses of Christmas

From Our House to Your House

Santa is Coming

A Baby is Coming

Keeping the Home Fires Burning

Red Four-Square

Santa Delivers to the Tropics

Supplies

Dies

Stamps

  • Text{ures} by Lou Collins – Seasonal Sentiments from Creative Stamping, issue 101, November 2021
  • Stampin’ Up – At Home with You – stamps & die set 143681 (Retired)

Ink & Embossing Powder

  • Stampin’ Up – Classic Stampin’ Pad – Crumb Cake
  • VersaMark – Watermark Stamp Pad
  • Cosmic Shimmer – Detail Embossing Powder – Bright Gold
  • Ranger -Embossing Powder – Black Sparkle
  • Ranger – Distress Ink – Antique Linen
  • Ranger – Distress Ink – Fired Brick
  • Brown Fine-Tipped Pen
  • Nuvo Watercolour Pencils

Paper

Miscellaneous

A Stately Home for the Holidays

Victorian mansions of Italianate design fit so well into the Currier and Ives world of 19th Century images of Christmas, suggesting the warm and good cheer to be found inside such homes.

This card was made with Anna Griffin dies and stamps as well as printed card base and envelope.

While the mansion is intended to be used as a Halloween haunted house, the tower and arched windows reminded me of numerous red brick houses in the Midwestern United States. I cut the house twice from red cardstock, once from cream colored cardstock, and once from slate gray cardstock. Using the detailed window dies, I cut just enough of the different windows to match the various windows on the house from cream cardstock. From one of the red houses, I cut the porch walls with stairs attached, pillars, porch roof and tower above. I adhered the tower with thin foam squares and the porch brick walls with thick foam squares onto the other red house. From the cream-colored house, I cut the top porch wall decorations, front steps, porch pillars and porch roof. These were glued onto the red house.  From the slate gray house, I cut all the roof pieces including the porch roof. These were glued on to the base bouse. From the cream-colored house, I cut the eaves trim and tower fence railings. These railings and the top roof railings I colored with a gold metallic marker. The cream window frames were the last bits glued on to the house base.

Using the outline die of the Halloween house die, I cut a yellow patterned paper back for the house and glued the house onto it. 

For the Christmas wreaths and evergreen trees, I used dies from the Holiday Home Ease Card dies. Tiny scraps of patterned and textured papers add life to these wee decorations.

To turn the beautifully foiled card base into a slider card, I measured the finished house and lightly traced around the shape to know here the slider easel needed to be cut into the card base. (See this earlier slider card blog for more details.) The slider arm was cut using the door outline die from the Slimline Door die set and trimmed to fit the card base. A small hole punch was used to have a place to tie a ribbon pull onto the slider card which is hidden when the card is closed. A thumb hole was cut through both layers of the closed card base at the card top in the center using a 1-inch hole punch.

Before assembling the card, the sentiments were stamped with watermark ink and heat embossed on a cream piece of paper for the β€œMerry Christmas” and β€œHappy New Year” on to the top of the slider arm.

To assemble, the slider arm was glued to the backside of the lower tab of the slider easel. Next, using two layers of double-sided tape on the inside of the card base, along the two sides and bottom of the slider frame, the card was adhered shut.

The house was attached to the slider easel with foam pads on the front half of the easel. Ribbon was tied to the slider arm as well as a tiny tag saying β€œPULL” to ensure good CRX. (For more on good CRX see earlier blogs.)

Envelopes should never be left plain. They are the first hint as to what is inside. For this card I used a holly sprig stamped in dark green ink to set the Victorian mood of the card to come.

Thank you for reading. If you enjoyed this blog post, please like it and follow the blog. 😊

Click here for a list of other house cards on my blog.

Dies:

Stamps

Inks & Embossing Powders

  • VersaMark – Watermark Stamp Pad
  • Stampin’ Up – Classic Stampin’ Pad – Tranquil Tide
  • Nuvo Embossing Powder – Crimson Gloss
  • CraftStash – Gold Embossing Powder – from 2020 Advent Calendar
  • Gold metallic marker

Papers

  • Colored and white cardstock
  • Pattered paper from Mrs. Sparkle paper pads
  • Card base and envelope from Anna Griffin’s Present Pop-Up Card Making Kit

Additional Supplies:

An Autumn Day in the Park

Sometimes spending a holiday alone in a place far from home means that one must adapt and make new traditions, friends and feasts.

This penta-fold aperture card opens out to form a park scene complete with a water fountain and squirrels sharing acorns. Karen Burniston dies are used for all but the 4 inch square apertures.

Card base: Cut four pieces of heavy weight cardstock 6 inches x 6 ΒΌ inches and one piece 6 inches by 3 inches. Score and fold all the 6 ΒΌ inches sides at ΒΌ inch to form tabs.

Adhere decorative papers to the front and back of two of the tabbed squares. (I used double-sided tape at the outer edges of paper.) Center a 4-inch square die over the patterned paper and secure with removable tape. (Remember if you are using different papers for the inside and outside of your card to test that you have the papers on the correct sides of your tabbed card base panels before you cut the apertures.) 

Glue the aperture side panels to the 6-inch sides of the back panel whose tab is glued to the floor panel. The floor panel’s tab is glued to the 6-inch side of the 6 inch x 3inch piece. Adhere decorative paper onto all panels on the card base.

Trees: Cut four tree trunks using Tree Pop-Up die set.  Cut four leaves dies. Glue trunks to leaves. Use a fence piece to position each tree trunk on the sides of the apertures, gluing the overlapping leaves together in the aperture opening. Repeat all steps for other aperture panel.

Fence: Cut ten fence panels from the Iron Fence Pop-Up die set. (I cut twelve fence piece incase I made a mistake in cutting, which I did.) Trim five fence panels at the sixth post from the left. Trim the remaining fence panels at the sixth post from the right. Trim off sixth post tip and scrolls at the right of post on left panel as shown in photo. Glue right panel over left panel. Take one elongated fence panel and adhere to the back panel. Glue fences over aperture panels front and back matching up fence tips. 

Bench: Stamp with woodgrain stamp onto brown kraft card stock and heat emboss with white embossing powder.

Die cut one whole bench using the Garden Bench Pop-Up die set. Cut the seat section again with the woodgrain going with the seat planks. Save two of the scrolling out-cuts from the bench back to glue onto the front of bench arms. Glue seat onto bench matching up planks. Follow package directions to attach the bench to the back and floor panels.

Fountain: Cut one of each of the two pieces of tree trunk from Tiny Trees Pop-Up die set of blue card stock. Cut tree base from gray card stock.  Cut two sets of rocks from Tent Pop Up die set.

Assemble tree as per package directions. Trim the tips of branches off

Trim two colors of mylar foil into 1/8 inch wide strips. (I used the Spellbinders Quick Trimmer) Glue two color strips to each side of the trimmed tree trunk.

Cut a circle of blue foil and glue to fold made by the floor panel and the 6×3 inch panel. Cover edges with gray rocks. Attach the tiny tree foundation per directions on package.

Squirrels: Cut two squirrels and the tummy fur from two different colors. Cut two acorns from a light brown and two acorn tops from a dark brown. Assemble squirrels and acorns per package directions.  Cut one of the long pop-up platforms from the bench pop-up die set. Attach to bench per directions on package. Glue squirrel to platform.

Sentiments: “autumn colors”, “happy autumn” , “Happy Thanksgiving” and “Thinking of you” are sentiments from two of Karen Burniston Word die sets – Greetings and Autumn Word Set.

Thank you for reading. If you enjoyed this blog post, please like it and follow the blog. 😊

Other Bench Cards

VALENTINE SWING

A SWINGING ANNIVERSARY

SWING GATE FOLD

The Secret Garden

Dies:

Stamps & Heat Embossing

  • VersaMark – Watermark Stamp Pad
  • Stampin’ Pad – Rubber Stamp – Hardwood
  • Recollections – Detail Embossing Powder – Snow

Papers

  • Heavy weight white card stock
  • The Paper Studio – traditions Floral paisley – 112094
  • Authentique – Pioneer Plaid – THA005
  • Brown kraft cardstock
  • Colored cardstock and specialty paper scraps from my stash

Additional Supplies: