
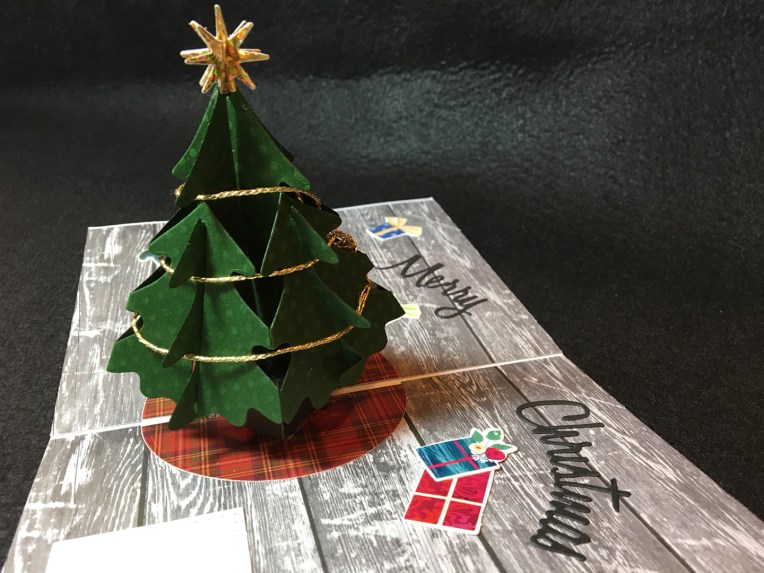
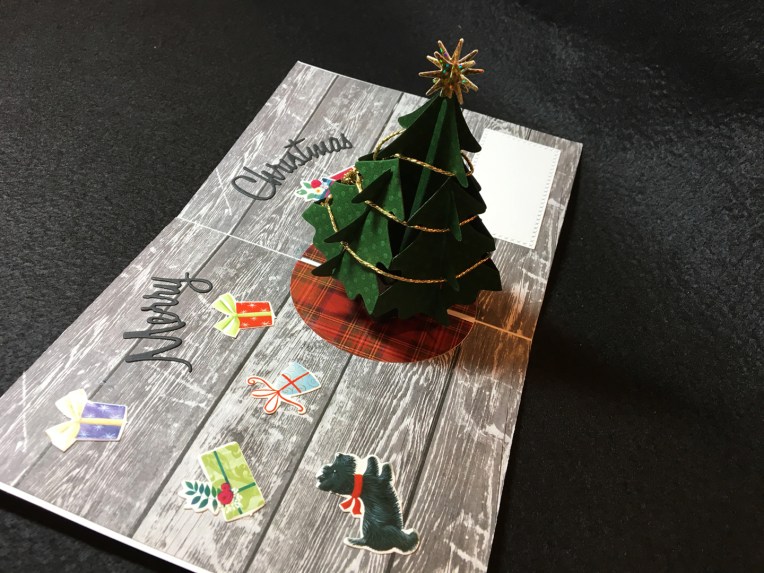
Each day for 12 days, I will be showing card variations made with Karen Burniston’s Christmas Tree Pop-up die. I recommend watching her assembly video before attempting to cut and assemble the pop-up tree.
For all of these cards I started with an A7 size card base (10 x 6 ½ inches), but because my die cutting machine can only accommodate 6-inch-wide pieces of paper, I had to trim the cards down to 10 x 6 inches.
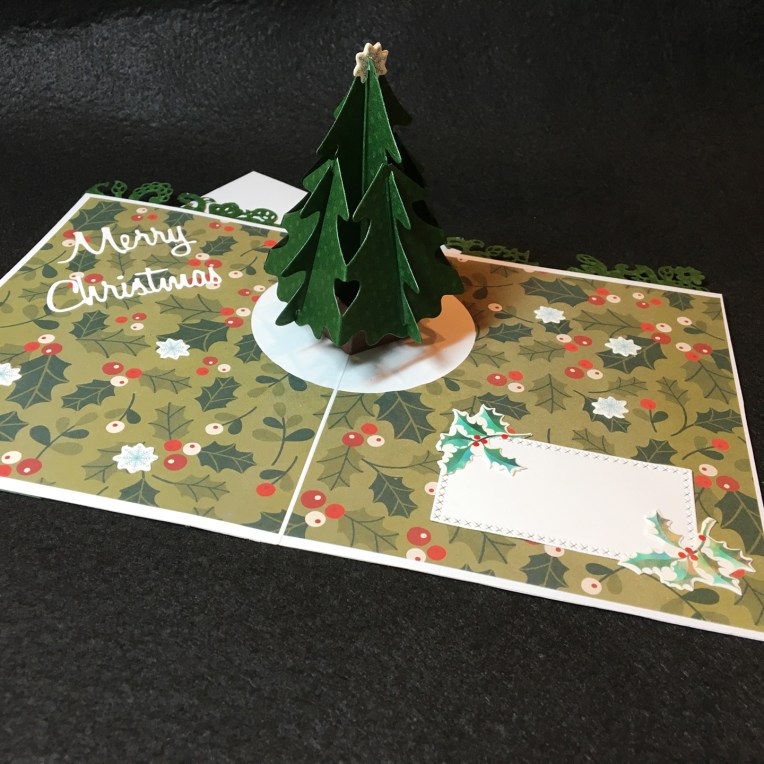
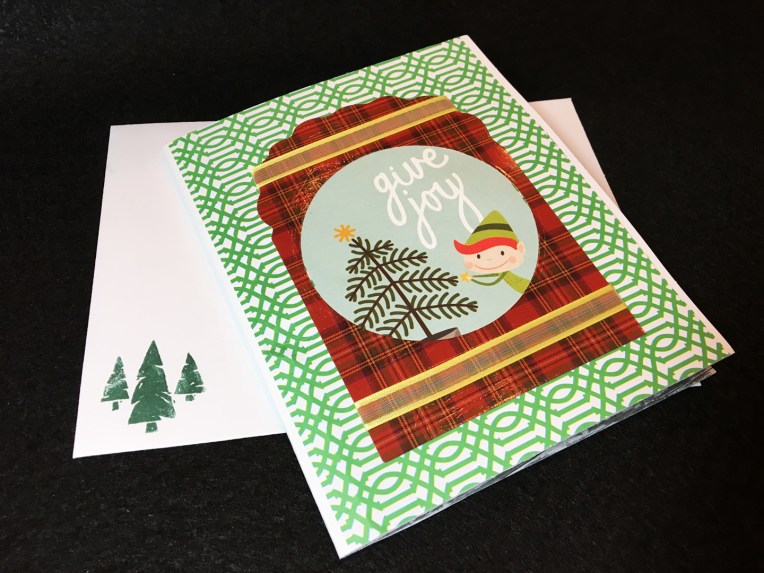
Day 5 – Give Joy – Holly

This card was inspired by the desire to use the snowflakes and holly embellishments from Papercrafter Issue 126 Snowglobe Shaker Card Kit and mistakes I made in cutting the pop-up mechanism.

Because I placed the die that cuts the two flaps to hold the tree stand upside-down, I ended with the assembled tree sticking out of the top of the card. To cover the half inch of tree that showed, I cut a border from Angela Poole’s Flutterfly’s die set. (Another fun pop-up card to make!). Next I cut the border apart using the top section for the front of the card and the bottom section for the back of the card. Left over pieces were used to embellish the front of the card.
I made a second mistake when cutting the two flaps into the card base. I had covered the front of the card before I had cut the flaps leaving a hole which I patched with a matching piece of holly paper and then covered with the holly and snowflake embellishments.
Follow the rest of the 12 Days of Christmas Trees with a new post tomorrow.
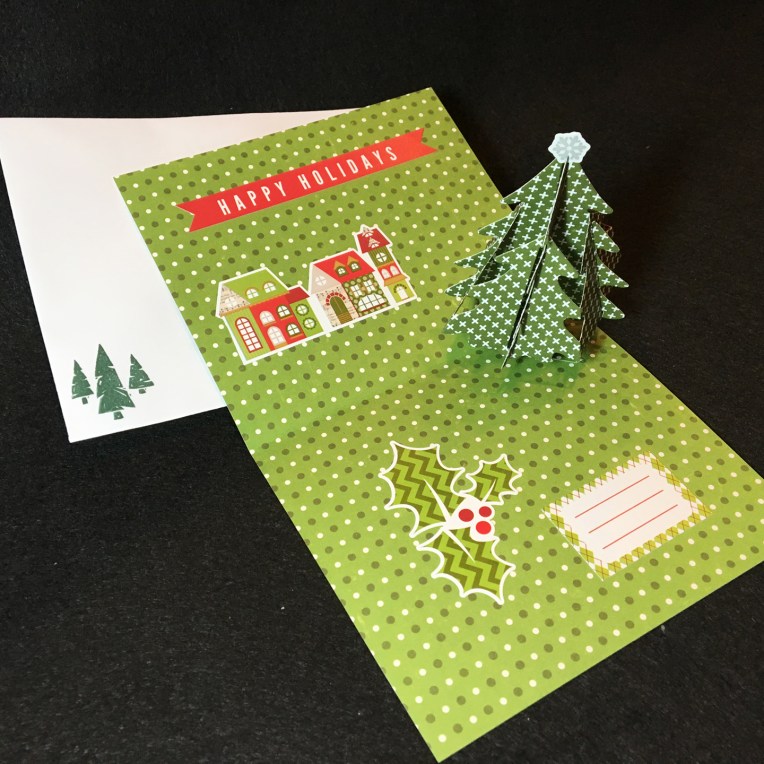
Day 2 – Home for the Holidays-Village
Day 7 – Home for the Holidays-Joy to the World
Day 10 – Home for the Holidays-Let It Snow
Day 12 – Home for the Holidays-Peace and Joy
Bonus Day – Tropical Christmas
Click Here for video of all 12 trees
SUPPLIES USED:
Dies
- Karen Burniston in cahoots with Riley and Company 1020 – Christmas Tree Pop-up
- Card Deco Essentials Merry Christmas CDECD0003
- Scrapbook.com Wafer Thin Metal Die Set-Nested Circles
- Oriental Trader – Pattern Rectangle Cutting Die 13829169
- Border die from Angela Poole’s Flutterings Die Set-Butterfly.
Stamps & Ink (on envelope)
- Studio 112 – Mini-Assortment -5 – Evergreen Trees
- Disney Vintage Micky Mouse & Friends A6 Stamp
- Stampin’ Up Classic Stamin’ Pad – Tranquil Tide
Paper
- Brazzill Thicket 12 x 12 inches embossed polka-dotted cardstock
- American Crafts 341345 Holly Berries 12 x 12 inches paper
- Printed die cuts from Papercrafter Issue 126 Snowglobe Shaker Card Kit
Miscellaneous
- American Crafts’ Sticky Thumb Double-sided Super Sticky Red Tape
- Tombow Aqua Mono Liquid Glue
- ½ inch white double-sided tear tape
- Tombow Mono Permanent Adhesive Tape Runner


![TZXT2727[1]](https://ullysworld489442913.com/wp-content/uploads/2019/07/tzxt27271.jpg?w=764)
