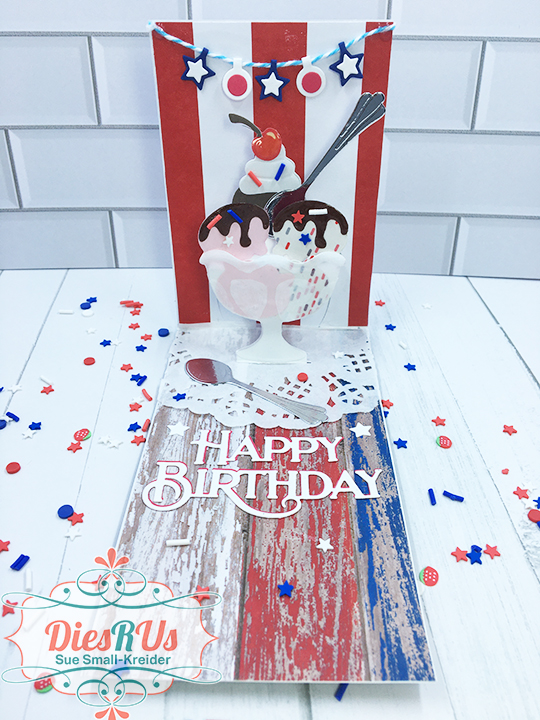
Some of my favorite birthday cards have been about food. Here is a look back at some of them.

Triple The Fun With Mini Mini Slimline Pop-Up Cards

Popcorn Lover’s Birthday Card From All of Us


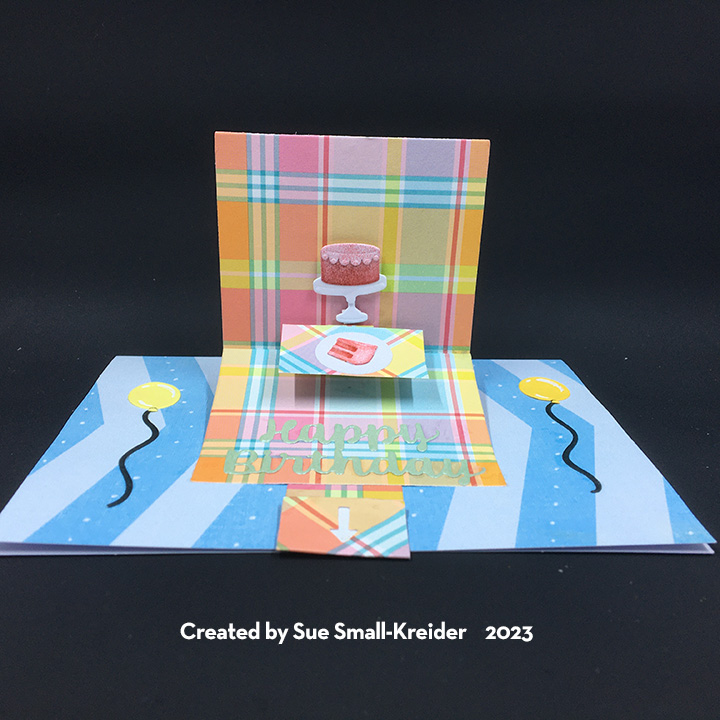
A Party Without Cake Is Just A Meeting


Some of my favorite birthday cards have been about food. Here is a look back at some of them.
Triple The Fun With Mini Mini Slimline Pop-Up Cards
Popcorn Lover’s Birthday Card From All of Us
A Party Without Cake Is Just A Meeting

It’s time to see more of Karen Burniston’s February 2024 release of new dies.

There is a wonderful scene in the Julie Andrew’s movie Mary Poppins, where she takes measure of the children with her tape measure and when her measure is taken it says “practically perfect.” This is a birthday card for the “practically perfect” person in everyone’s life.
Cardbase: I used a purchased A7 (5×7-inch) cardbase and envelope. Cut four 5×7 panels of decorative paper. (I used a Mary Poppins themed paper collection from Carta Bella.) Glue two to the outside and two to the inside of the cardbase leaving the center fold uncovered. (I used two panels of striped paper inside the card, matching up the stripes at the fold.) Decorate the front and back with journaling cards from the paper collection. (I used two heart paper doilies to go under the front journaling card which was popped-up with foam tape, while the back had a copier paper scalloped border cut using the scalloped rectangle die in the Rectangles and Labels – Crosshatch set and trimmed to fit.)

Double Lorna Platform: Fold a piece of pink decorative cardstock 4×8-inches to form a 4-inch square. Using a bone folder, make the fold crisp. With the paper folded, place the largest die from the Lorna Label Pop-Up set with the open tab above the fold matching the score line with the fold. (I found that I had to use a shim to cut through the double thickness of the cardstock to get the die to cut through both layers. You may have to adjust the sandwich for your die cutting machine. Test first before cutting your decorative cardstock.)

Train the folds. Place the center fold of the double mechanism along the inside center fold of the cardbase. Tuck the tiny tabs on either side of the label base under and glue to the cardbase with both the mechanism and cardbase flat. Close card to train label base to pop-out. (I used a pencil to pop the tube-like base out the first time.) Glue the upper tabs to cardbase as shown on package directions.
Cut a label from white copier paper using the largest stitched label die and glue to the bottom label platform.
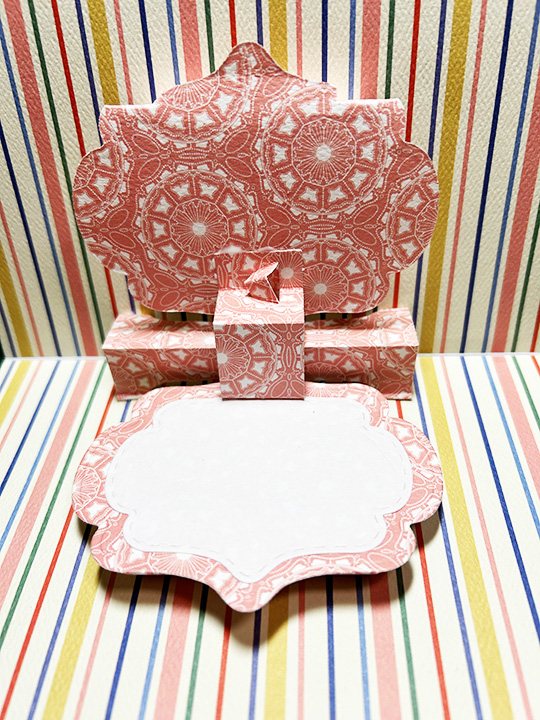
Tea Cup and Spoon Mechanism: When gluing the mechanism from the Tea and Coffee Pop-Up set onto the double Lorna platform, a strip the width of the Lorna platform must be cut from the bottom tab of the mechanism.

Spoon: Cut from a heavy silver foil cardstock using the spoon die in the Tea and Coffee Pop-Up set. (I used some silver packaging.) Glue the back of spoon to angled top mechanism making sure the position will be within the cup when open and within the card when closed.

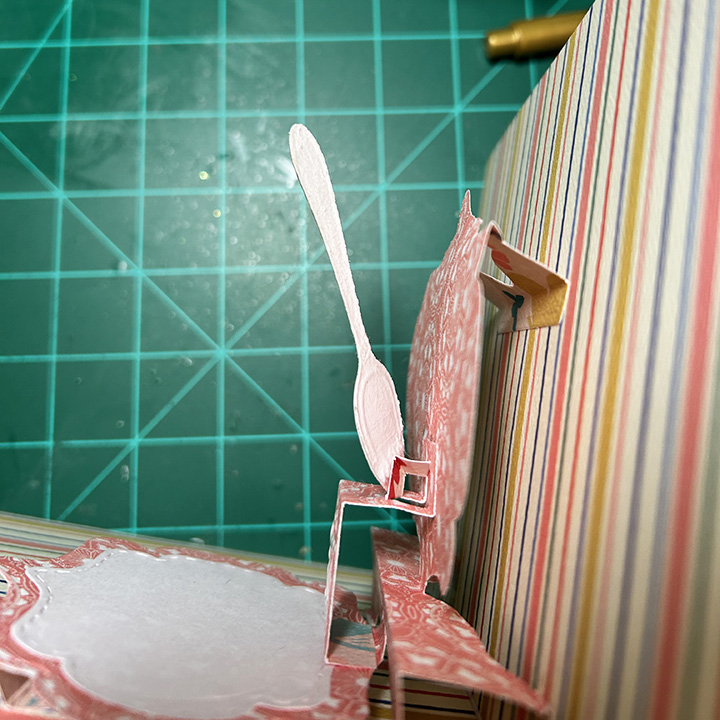
Tea Cup and Saucer: Emboss the cup and saucer onto lightweight pink cardstock the die cut using the cup and saucer dies in the Tea and Coffee Pop-Up set. Leaving the cup in the die, ink through the stencil feature with pink ink. Remove from die and ink the cup’s handle, base and rim stripe with pink ink. Ink saucer base. With gold marker trace embossed lines on cup and saucer. Glue to front of mechanism.

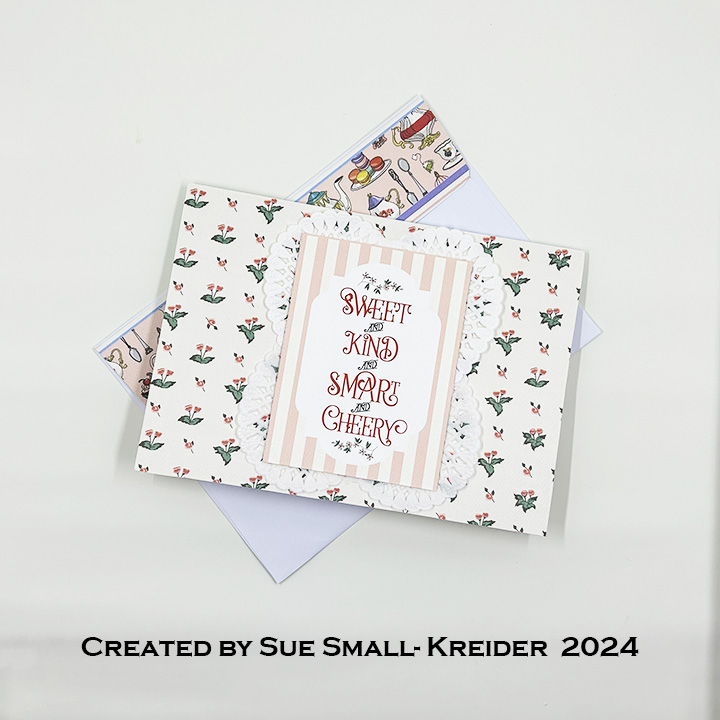
Sentiments: A journaling card with “Sweet and Kind and Smart and Cheery” and a word tape measure border from the paper collection were used for the front and back of the card. “Happy Birthday” was cut from light blue cardstock using Word Set 2 – Birthday.
Envelope: The back flap of the envelope is covered with a border strip of a tea party.
Thank you for reading this blog post. I hope this inspires you and makes you smile. Please like and leave comments 😊
Materials Used:
Dies
Papers
Ink
Adhesives
Tools

It’s Sneak Peek Week for Karen Burniston’s February 2024 release. These dies will be available for purchase on February 19, 2024 on the KB Riley LLC website.
Inspired by a little girl who loves to pretend she is a mermaid in her backyard pool, this birthday card features not only mermaids, but also a blow-up flamingo float in a pop-up pool.
This card was made with Karen Burniston dies including the newly released Tiny Accessories 4 set, the previously released dies of Cake Pop-Up, Princess and Mermaid, Beach Borders, Beach Charms, Rectangles and Labels – Crosshatch and a number of word sets.

Cardbase: I used a purchased 5×7 white cardbase that I covered all four panels with polka dot papers- blue on outside and green inside – using the largest rectangle in the Crosshatch Rectangles and Labels die set. This will be a top-fold card.

Mermaids: Using the Princess and Mermaid set to cut three of the mermaid’s body from green glitter cardstock – one was cut on the reserve side of the glitter cardstock. Cut three long hair pieces from pale yellow cardstock and two head and shoulders from a skin shade of cardstock. The mermaid on the inside needs to have both the front and back finished, hence the reverse cut body and extra hair pieces. Ultra fine tipped markers were used to draw on the face and a light blending of pink ink along with a dots of pink glitter gloss to the checks. Sandwich the head and shoulders between the mermaid body pieces and then attach the hairpieces. Add clear glitter gloss to hair. Make mermaid for card front in similar manner, but do not finish the backside. Cut a small shell from the die set and tint with pink ink. Have front mermaid hold the shell.
Flamingo Float: Using the flamingo float dies in the Tiny Accessories 4, cut one float and two wings. Decorate both sides of float and one front of wing and back of wing. Shade the float and wings with pink ink and add white highlights with gel pen. Color the beak with a black marker and add white highlights. Cut two tiny white circles and with black marker make small circles and add a white dot highlight for the eyes. Glue eyes on either side of float. Slip mermaid into float and then attach wings.

Pool: (Watch assembly video above for this modification of the Cake Pop-Up.) Cut two of the largest cake layer in the Cake Pop-Up die set from water patterned paper. Cut another two using the same die piece from a pattern paper that will be the outside of pool. Trim off bottom tab and four-sided trapezoid top flap from each of the outside pool pieces to form a tabbed strip. Using the four-sided trapezoid as a pattern trace and cut out two pieces from water patterned paper. Assemble as directed adding mermaid on flamingo float. Attach to inside of top-fold card. Decorate the inside cardbase with a beach ball from Beach Charms and tiny flamingo from Beach Borders.

Sentiments: The card front sentiments come from two different sets – Word Set 9 – Love and Word Set 5 – Royalty. “Love you” was cut from white patterned paper and brushed with clear glitter gloss. The “My Little” banner has in-laid letters that are also brushed with glitter gloss. Sequins, acrylic drops and heart are the dimensional accents to the card front.

For the inside sentiment of “Happy Birthday,” both the word set and shadow dies were used with the shadow cut from white patterned paper and the words cut from pink cardstock brushed with pink glitter gloss. The framed label for a personal message has three frames and one label cut using the largest frame die in the Rectangles and Labels – Crosshatch die set. Green sequins were added to the corners of the label.
Thank you for reading this blog post. I hope this inspires you and makes you smile. Please like and leave comments 😊
Materials Used:
Dies
Papers
Ink
Adhesives
Tools
Miscellaneous

This birthday card was made for Craft Roulette #199 whose parameters included card with a bookmark, bakery colors, large animal element and horizontal lines.
For this card I used dies from two of my favorite crafting companies – Karen Burniston Pop-Ups and Rubbernecker Stamps (rebranded as Brass & Bliss). The front carousel, as well as the animals and lattice work used on the inside cake are from Rubbernecker’s retired Carousel set. The other dies used are Karen Burniston’s Happy Birthday Shadow, Happy Birthday, Cake Trims and Cake Pop-Up.

Cardbase: I used a purchased A7 (5×7-inch) cardbase and envelope. Cut four 5×7 panels of decorative paper. Glue two to the outside and two to the inside of the cardbase leaving the center fold uncovered. (I used two panels of a London park map paper inside the card, matching up the design at the fold.)

Card Front: The background paper, green border and journaling quote card are all from a Mary Poppins themed paper collection. The carousel is a bookmark tucks into the journaling card pocket. To create the pocket, I used thin strips of foam tape on three sides of the journaling card.
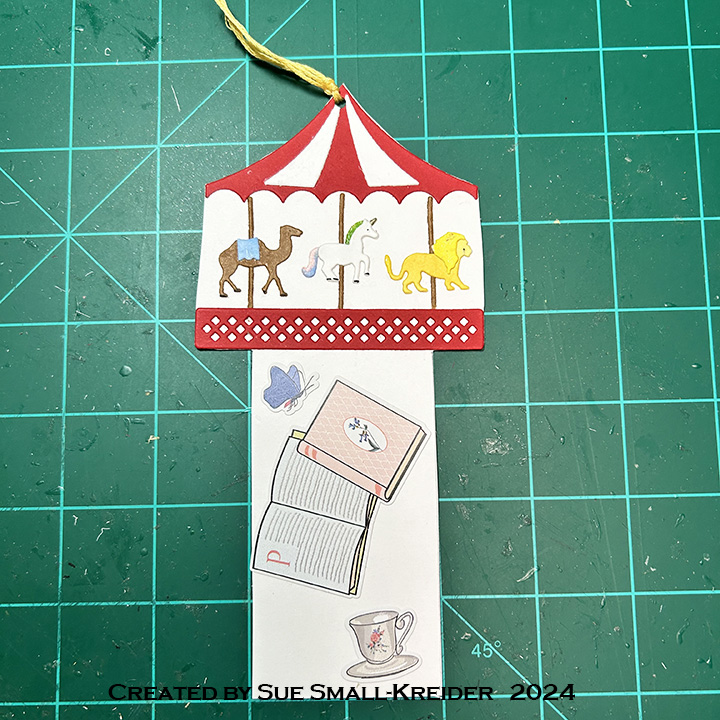

Bookmark: Because the carousel die is one piece, I cut it three times from white cardstock and once from red cardstock. For the animals I used markers to color them and glitter markers to add some magic to each critter. Once all the elements for the carousel were cut, colored and assembled, I glued them together at the top of a 4×8-inch rectangle of heavy white cardstock. Using a ruler, draw with a pencil the bookmark base as a 2-inch wide column centered at the bottom of the carousel. Fussy cut around the carousel and bookmark base. Punch a hole in the top point of the carousel. Thread two 6-strand pieces of yellow embroidery floss through hole for a bookmark pull. Decorate base and back with stickers from the paper collection.

Card Back: keeping with the bookmark theme, more of the collection paper was used to cover the card back featuring books and a sticker related to reading.

Pop-Up Cake: Watch the assembly video at the bottom of the link page for the Cake Pop-Up before die cutting. I wanted the cake to resemble the carousel, so the middle layer is white with the animals from the carousel die attached. The base layer is red and uses the carousel base cut in white trimmed to fit the sides of the cake. The top layer uses the Cake Trims set’s scalloped swag trim and the candle from the Cake Pop-Up set to suggest the roof and flag of the carousel.
Sentiments: Happy birthday uses two dies – the shadow cut in pink patterned paper and the words cut in matte gold.
Envelope: The back flap of the envelope has a carousel tent top.
Thank you for reading this blog post. I hope this inspires you and makes you smile. Please like and leave comments 😊
Materials Used:
Dies
Papers
Ink
Adhesives
Tools
Miscellaneous

This tag birthday card was made for Craft Roulette #197 whose parameters included a card with two tags, happy colors, nail(s) and “outside the line.”
I followed the directions on Karen Burniston’s assembly video for making this Circle Tag Book Pop-Up (which is on the bottom of the linked page for this die set.)

The Nuvo Dream Drops that I used were fairly easy to apply as finger nails on the hands that were die-cut using a set by Karin Joan’s Missees collection.


For sentiments, I used Karen Burniston’s Happy Birthday with its shadow cut from a holographic pink paper. I added heart hands cut from the same die set as the inside hands. The back white label is a place for a personal message. A gift card could be tucked inside for a manicure.

Thank you for reading this blog post. I hope this inspires you and makes you smile. Please like and leave comments 😊
Materials Used:
Dies
Papers
Ink
Adhesives
Tools
Miscellaneous

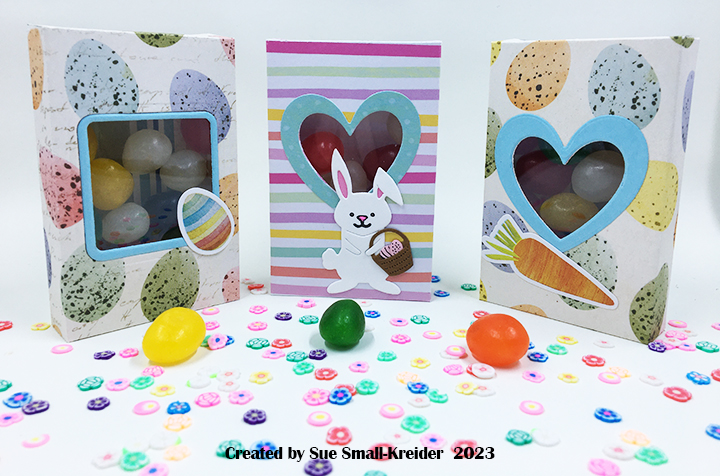
I’ve had some flat back fish embellishments in my stash for awhile and the Candy Hearts Box in the December 2023 release by Karen Burniston begged to be the container for these candy-like fish.

The box is cut in one piece. (I was able to cut it from an A5 (5.83 x 8.27 inches/14.8 x 21 cm) piece of blue water patterned paper.) Before assembling, cut out the window with the largest of the square dies in the set and back it with a scrap of clear acetate or plastic packaging. Then, adhere the cut-out inside the box as a backdrop for the window.

The sentiment of “HB2U” (Happy Birthday to You) are cut using the Mini Alphabet and Numbers die set. Use the stitched medium size square die from the box set for the white label on the back of the box.

Thank you for reading this blog post. I hope this inspires you and makes you smile. Please like and leave comments 😊
Materials Used:
Dies
Papers
Adhesives
Tools
Miscellaneous

Growing a year older should be celebrated. This show-stopper card is for a 9-year-old.
For this card I used two new dies from Karen Burniston’s December 2023 release – Birthday Candle Add-Ons and the Topper Tags – as well as her Fancy Label Accordion, Fancy Winter Frames, and a few other previously released die sets to decorate.

Before starting, watch assembly videos for the linked die sets. The videos are towards the bottom of the linked pages.
Accordion Frames: Cut four accordion frames using the Fancy Label Accordion die set. They will be decorated AND THEN assembled. It is much harder to decorate a fully assembled accordion card when you cannot flatten the various moving panels and frames. (I assembled this card as I would normally, but the candle and heart add-ons are designed to be assembled with with the accordion frame behind the add-on panel and not as I did by putting the frame’s center post in front of the panel.)
Candles Add-Ons: The Birthday Candles Add-On cut a pivot panel that attaches to two Fancy Label Accordion panels. It also has dies to cut and stencil four candles and their flames. Cut one candle panel from a solid color cardstock. Cut another from decorative paper. Train the folds on the solid color panel as directed on the packaging. Using the largest decorator label from the Fancy Label Accordion set, cut a frame from the decorative paper. (The section between the two label cut outs will fall out and the frame can be cut down the center fold.) Glue the frame onto the panel matching up the edges.

Assemble and decorate the candles using the die stenciling feature or use decorative papers. (Because I needed to celebrate a 9-year-old’s birthday, I did not use all twelve candles that the panel will hold. I decided to add a number 9 as another candle by cutting a “9” using the Numbers die set and cut the top of a candle with the flame attached to the back top of the number.) The flames I cut from a background paper I had made using glitter ink and drew the black burnt wick onto them.

Once the panel is fully decorated, work on the accordion frames that it will be glued onto. Glue two frames together using the outer long tab. From one panel cut the label panel along the pivot point making sure to keep the label attached to the pivot bar. Cut the other label, but the cut will look different than the other panel. See photo below. Add glue to the back side of the candle panel and attach it to one of the label panels. Add glue to the other end of the candle panel and attach it to the other label panel. (See 2nd photo under tags for what the back side of the attached candles panel into the accordion frames.)


Tags: Cut two tags using the second from the smallest tag die in the Topper Tags. (If your paper is a single-sided decorative paper like mine was, cut two more tags that cover at least the part of the tag that will not be covered by the fancy label panel. Glue the tags together as shown in the photo below.) Attach the back of the tags to the fancy label panels on their backsides.


Decorations: The Birthday Charms die set are used for balloons, party hats and cupcake. Three colors of bakers twine are used for the balloon strings and for tag ties. A thin black pen was used to draw the balloon strings onto card back. The frame borders are cut from white copier paper backed with a wide double-sided tape using the polka-dot frame die from the Fancy Winter Frames.


Once the frame borders are adhered, attach the end accordion frames to the candle frames. Add balloons to the folds and then glue the fancy labels together.

Sentiments: Add the sentiments once the accordion frames and fancy labels are all attached together. “Happy Birthday” uses two dies – Happy Birthday Shadow and Happy Birthday. “Just for You” uses three die sets – Word Set 15, Word Set 8 and Mini Alphabet. The “You” is cut from a phrase die and its shadow is created by tracing the outside of the die and fussy cutting. (You could use other word dies for the “You.”)

Envelope: The closed card fits into an A7 (5×7-inch) envelope.
Thank you for reading this blog post. I hope this inspires you and makes you smile. Please like and leave comments 😊
Materials Used:
Dies
Papers
Ink
Adhesives
Tools
Miscellaneous
It’s SNEAK PEEK Week for Karen Burniston’s December 2023 Release. Today we’ll focus on the Birthday Candle Add-Ons die set.

Look for tutorial on this project in the coming weeks.

Thank you for reading this blog post. I hope this inspires you and makes you smile. Please like and leave comments 😊

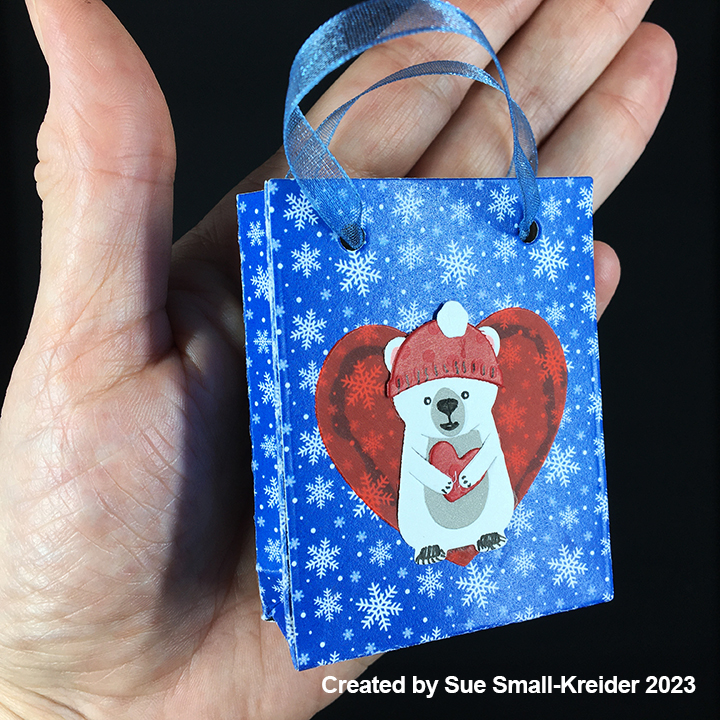
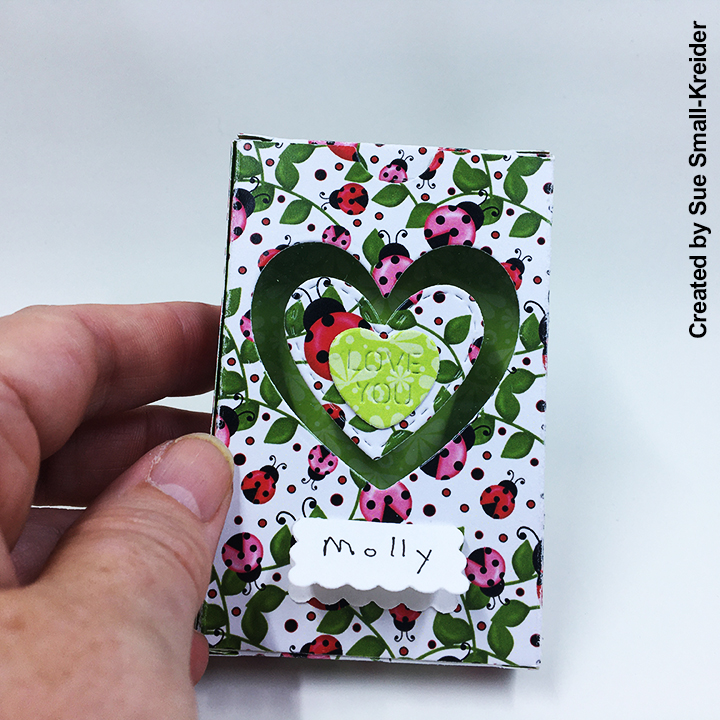
It’s the start of SNEAK PEEK Week for Karen Burniston’s December 2023 Release. Today we’ll focus on the Mini Gift Bag and the Candy Heart Box die sets.
These bags and boxes go together quickly and have two main surfaces that allow for creative decorations. It doesn’t matter whether you use solid colored cardstock or decorative patterned papers, the bags are great fun for tucking in gift cards and other small items like jewelry, small toys, car keys, candy, or crafting supplies.


Look for tutorials on these projects in the coming weeks.
Thank you for reading this blog post. I hope this inspires you and makes you smile. Please like and leave comments 😊
