A Modern Halloween

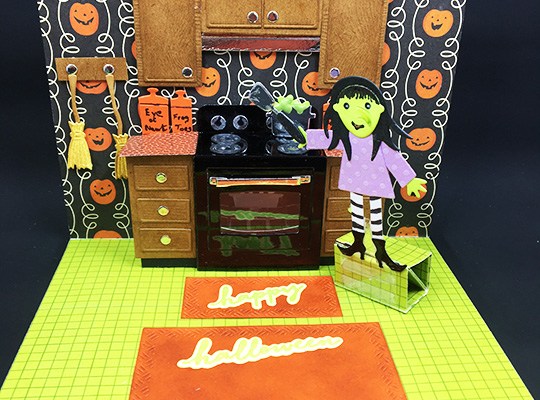
Casting a spell of delight is this Halloween card depicting a modern-day witch cooking up a green bubbling brew on her shiny new stove.

The card uses dies from Karen Burniston’s September 2023 release including Oven Extras, Oven Pop-Up, Witch and Cauldron, Halloween Borders and Small Script – Halloween, a word set. A few other die sets from Karen Burniston were also used.

Cardbase: I started with a rectangle of white cardstock 10×6.5 inches that was folded in half to form a 5-inch tall by 6.5-inch wide, top fold card. The outside two panels were covered with black and white night sky paper. The inside top panel with a pumpkin wallpaper and a green grid cardstock.
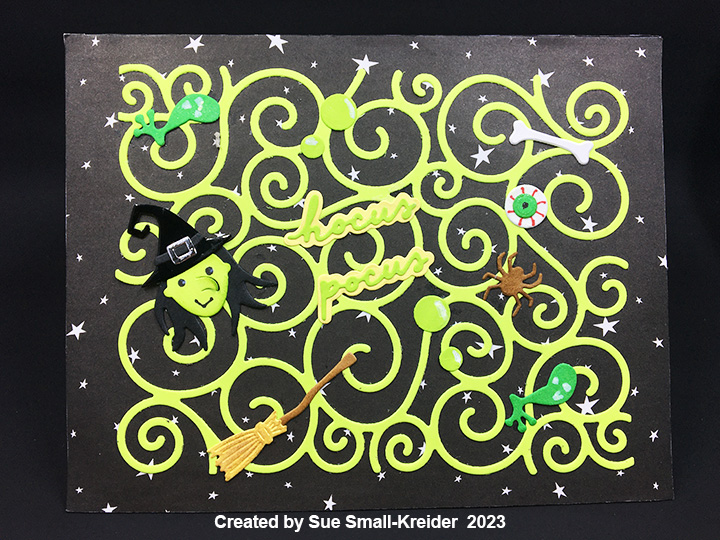
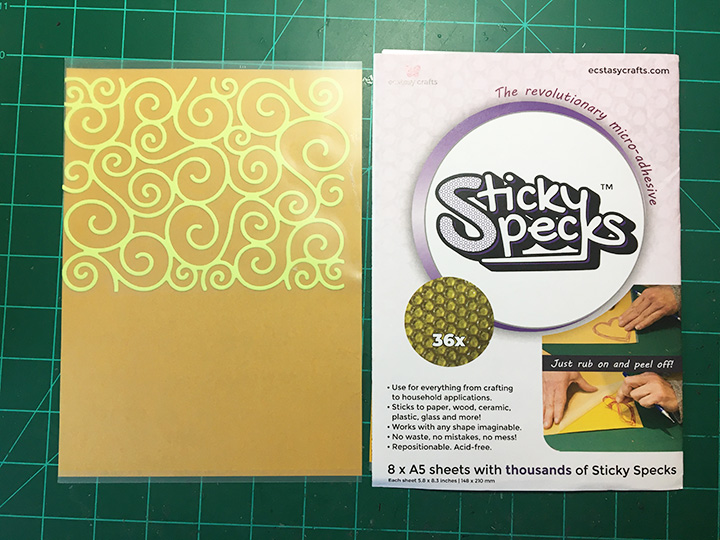
Card Front: I used the Swirl Pattern Plate to create green, wispy steam swirls that encircle a witch’s face and elements of a spell casting brew – all of which come from the Witch and Cauldron die set. (I cut the swirl pattern and then used pressed the piece onto Sticky Specks, an adhesive sheet that can be applied after die-cutting.) I used the stencil features of the witch’s face die to color in the eyes and mouth. The nose can be folded out to ink the edges with green ink. The bubbles, eyeball and frog legs also have stencil features. With the exceptions of the face, bone, eyeball and broom, all other elements have been brushed with a glitter gloss to give them some subtle sparkle.
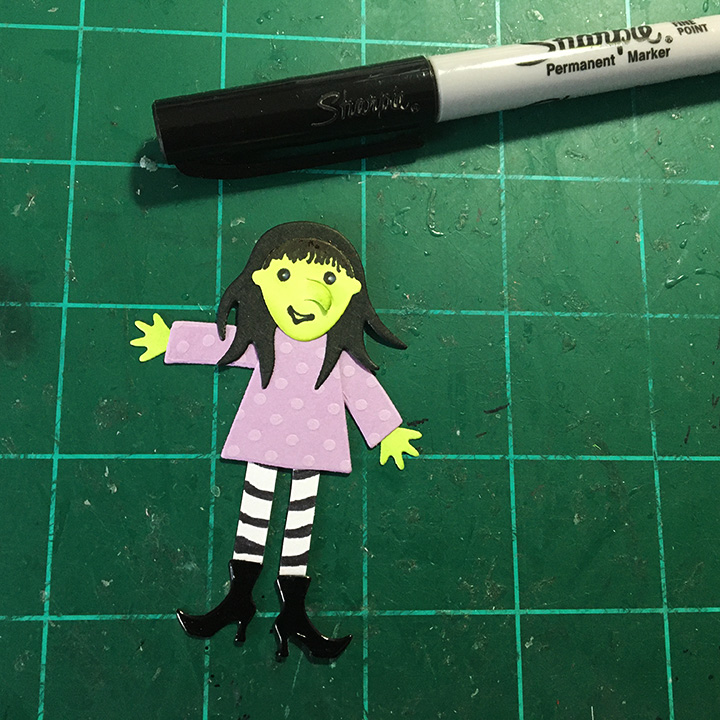
Standing Witch: Using the Witch and Cauldron die set; I used all the witch dies except the hat dies to create this long-legged witch with bangs.  Because she is seen both the front and the back, I cut two sets of her dress and sleeves. Her legs are two strips of 3/8-inch by 1-inch that I drew stripes on with a black marker. After I glued her head to her hair, I used an ultra-fine tipped black marker to draw in her bangs. She is adhered to a piece of clear plastic packaging with doubled sided tape so that she appears to be standing on the large bam box. When positioning the bam box, make sure that in the closed position the witch is within the closed card. (An assembly video of the bam box is located at near the bottom of the linked bam box page.)

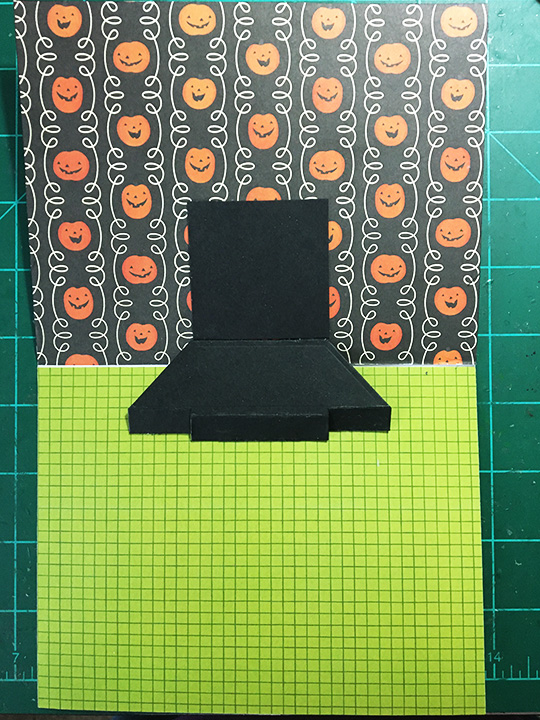
Oven/Stove: I was genuinely surprised at how easy the pop-up oven is assembled. It has just two pieces -the outer shell which I cut from black mirror cardstock and the inner platform which I cut from 100 lb. black cardstock.

The platform attaches much like the Little Labels Pop-Up with the front tabs gluing to the floor of the card and the back tab gluing to the wall of the card. Before I attached the outer shell, I added a 1 3/8-inch square of clear plastic packaging to the back of the oven door with double-sided tape.
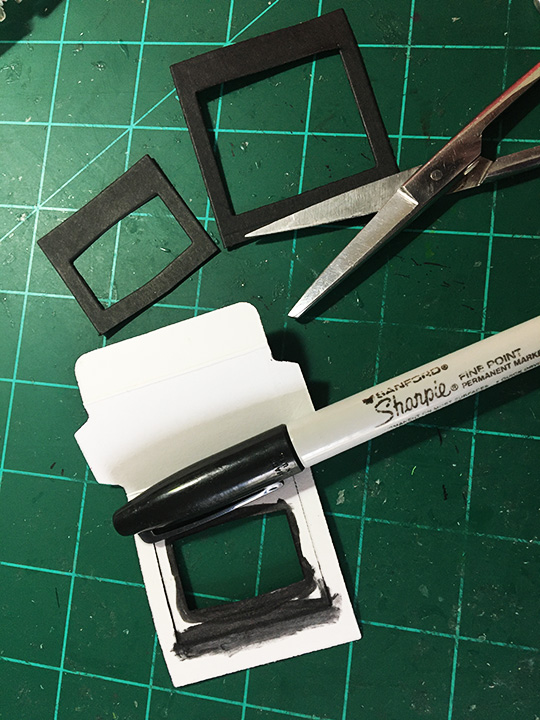
Then I cut another oven door from black cardstock trimming the bottom 1/8-inch shy of the fold line. Using a black marker, I colored the space around the oven door fold on the back (to hide the white) and the edges of the mirrored cardstock. I also cut a 2-inch square of black cardstock and glued it to the back wall just above the pop-up platform. This will be the inside wall of the oven. It is easier to add the items inside the oven before the outer shell is attached, but you can still add the two pop-up cubes – one for the oven rack and then the other for the pan. The pan cube is adhered to the rack cube sandwiching the rack in place. (I ended up using a foam square between the two cubes to get a strong bond.)

To attach the oven shell, glue the bottom to the center of the platform and then fold the oven flat and add adhesive to the back of the stove knob panel. Close the card and the top panel will be positioned on the card wall so that it forms the stove. On the tabs that come off the sides of the stove top add glue. Now position the cabinet pieces’ small squares onto the tabs. Glue cabinet bottoms to the top edge of the platform, so that there is a toe kick below the cabinets.

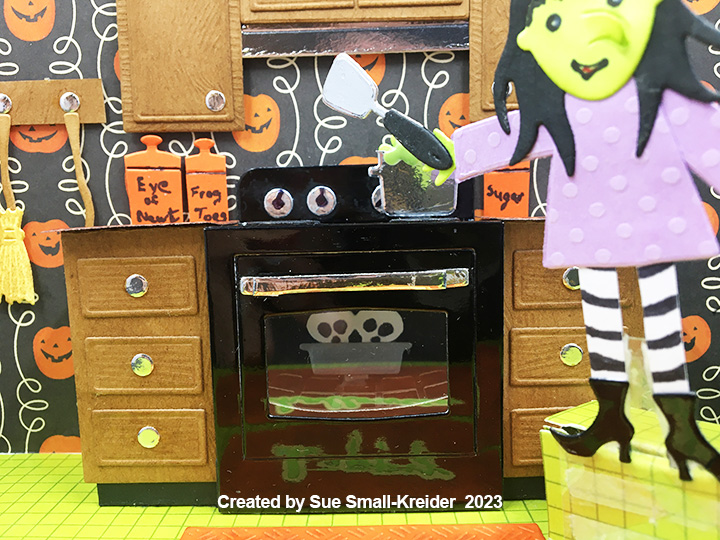
Cabinets: Once the stove is attached; you can add the side cabinets of drawers. I cut the cabinets from some embossed wood grain cardstock and then inked them with brown ink to bring out the grain. The drawer panels and knobs are part of the Oven Pop-Up set. Decorative paper was used for the countertops. The upper cabinets are cut using the larger rectangles dies in the Oven Extras set. For the cabinet doors over the vent hood (also in the Oven Extras set) I turned the rectangle on its side and cut the smaller decorative panel in half. Setting these small doors slightly apart, creates the illusion of two doors with silver knobs. The three upper cabinets were joined together with a strip of cardstock glued to their backs. They then were adhered to the card with foam tape.
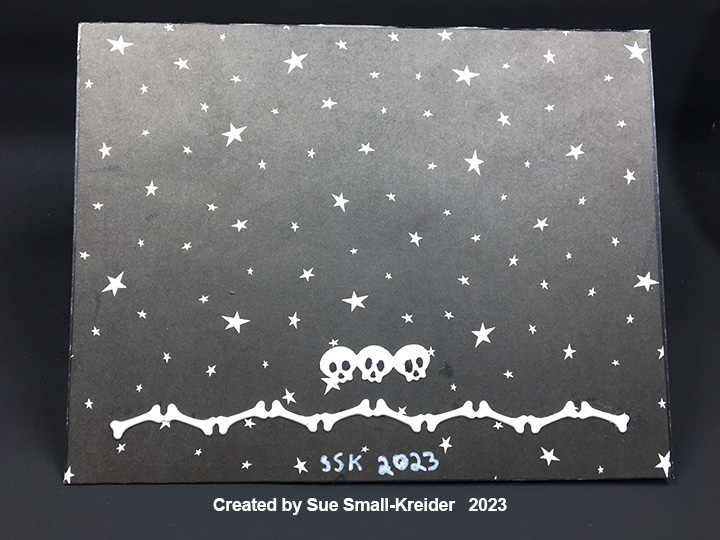
Decorations: Between the two oven sets are lots of fun pieces that add dimension and realism to the pop-up scene. The Oven Pop-Up set includes the stove burners and knobs, oven rack and handle. The Oven Extras set includes the pan in the oven and pot on the stove as well as three pop-up cube strips that I used to pop-up the oven rack, pan inside the oven and pot on the stove. For the green bubbles in the pot, I used the hearts in the Oven Pop-Up set glued to the back of the pot which has its lid cut off. The bubbles are covered with green Nuvo Drops for dimension and slime factor. The orange canisters are the pot cut narrower and the lid glued on. They are adhered with foam squares to the wall. The orange rugs are from the Rectangle Crosshatch set. The brooms are from the Witch and Cauldron set and attached to the wall with foam squares as is the woodgrain scrap with silver knobs. The cooking utensil in the witch’s hand is from the Oven Pop-Up set. From the Halloween Borders set, I used the skulls and bones on the back of the card as well as two skulls inside the oven in a pan.
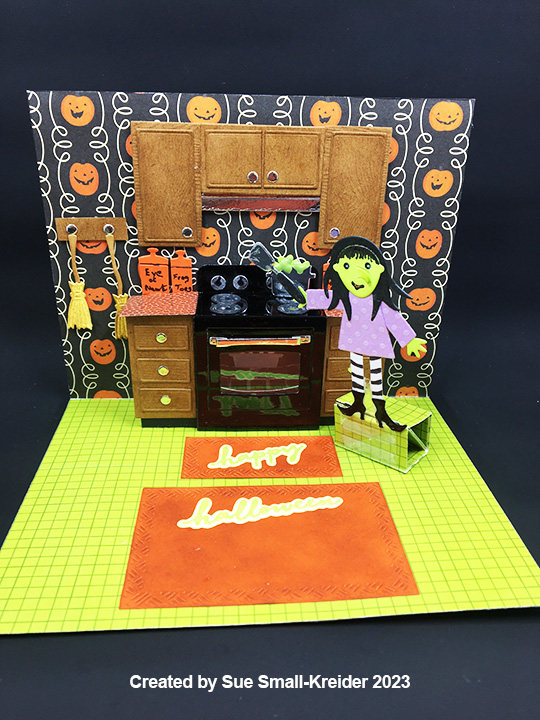
Sentiments: The new Small Script Halloween word set has the “hocus pocus” used on the card front as well as the “happy halloween” used inside on the kitchen rugs. The larger rug has space to add a personal message.

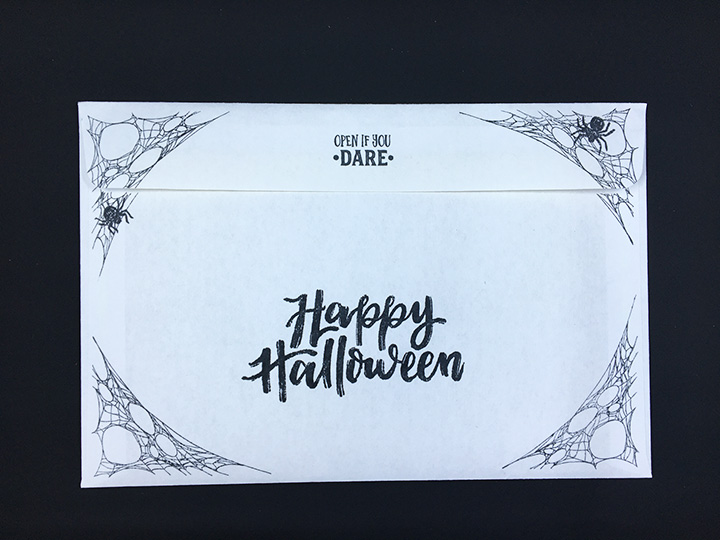
Envelope: “Cast A Spell” and a bubbling cauldron are stamped in black on the back of the envelope to set the tone for the card inside.

Thank you for reading this blog post. I hope this inspires you and makes you smile. Please like and leave comments 😊

Materials Used:

Dies

Stamps

  • Fun Stampers Journey – Rubber Stamps – Witches Brew – SS-0388

Papers

  • Bazzill – 12×12 Raised Dot Cardstock – Berry Pretty
  • Bazzill – 8.5×11 Textured Cardstock – Tiara -18-1002
  • American Crafts – 12×12 Patterned Paper – Pumpkin Wallpaper – 320459
  • American Crafts – 12×12 Patterned Paper – Night Sky – 320409
  • American Crafts – 12×12 Embossed Wood Grain Cardstock – Dark Kraft
  • The Paper Studio – 12×12 Textured Paper – Football – 5241435
  • Keep It Simple – 12×12 Double-Sided Cardstock
  • Silver and Black Mirror Cardstock
  • Woodgrain Embossed 12
  • White, Black, Kraft, Orange, Green and Yellow Cardstock
  • Clear Plastic Packaging
  • A7 envelope – White

Ink

  • Memento – Fade-Resistant Dye ink – Tuxedo Black
  • Ranger – Tim Holtz – Distress Ink- Gathered Twigs and Mowed Lawn
  • Sharpie – Permanent Marker – Ultra Fine Tip – Black and Red
  • Sharpie – Permanent Marker –Fine Tip – Black
  • Farber-Castell – Pitt Artist Pen – 1.5 Bullet Nib – White-101 Marker – Snow
  • Sakura – Gelly Roll Pen – Medium – White
  • Nuvo – Aqua Shimmer – Glitter Gloss

Adhesives

Tools

  • Die Cutting Machine
  • We R Memories – QuickStick
  • Bone Folder
  • Sponge Dauber
  • Craft Mat
  • Scissors
  • Kat Scrappiness – Anti-Static Tool
  • Tweezers
  • Stamping Platform
  • LDRS – Stampendable Stamping Tool
  • Stamping Cloth

Miscellaneous

Macbeth’s Witches – A Halloween Card

Welcome to our Karen Burniston Products – KB Riley LLC September 2023 Release Blog Hop. (See details at the end of this post for blog list.) The Design Team have come together with Karen today for a fun blog hop to celebrate the release of 9 new dies. Sneak peeks of the new release started last week, and the dies are available to order NOW!

“Double, double, toil and trouble. Fire burn and cauldron bubble…. Eye of newt, and toe of frog,” The infamous words of Shakespeare’s trio of witches casting a spell over Macbeth are the inspiration for this Halloween card.

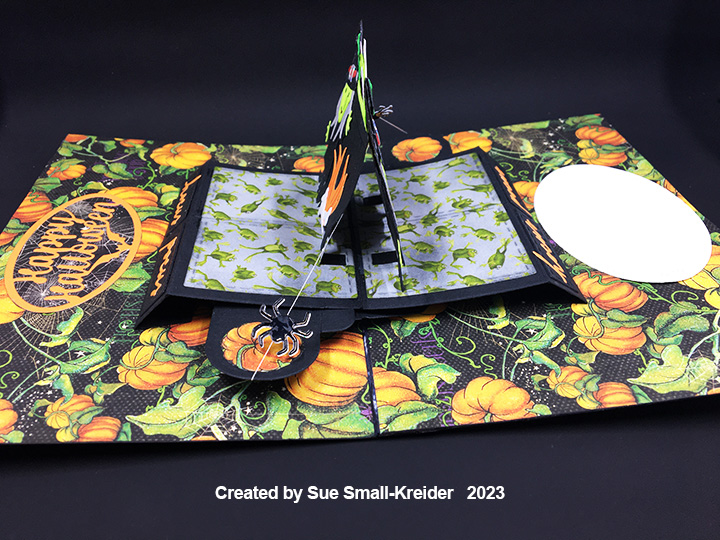
This card uses a new pop-up mechanism in Karen Burniston’s September 2023 release – Stocking Pop-Up as well as her new Witch and Cauldron and Small Script- Halloween die sets.

(Before starting to make a card, I recommend watching the assembly views for all of Karen Burniston’s interactive die sets. The videos are located near the bottom of any linked page in this blog post.)

Cardbase: I started with a purchased A7 (5 x 7 inches) cardbase and matching envelope. The outer panels were covered with a spider’s web paper and the inner panels with a coordinating pumpkin patch paper. The front panel also uses a border panel from the paper collection that says, “There’s magic in the air.” The back panel has a pumpkin fussy cut from the papers.

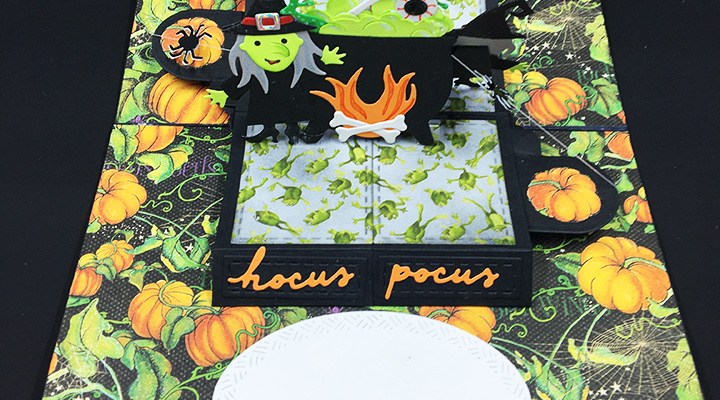
Cauldron Pop-Up: The Stocking Pop-Up is a versatile mechanism that can be used for more than Christmas cards. I doubled the mechanism which means placing the lower pop-up mechanisms moving in opposite directions and cutting two upper covering pieces joined to form a platform.

Adding pop-stands from either the Christmas Tree Pop-up or Barn Pop-Stand sets, to the decorative stitched rectangles, allows for a cauldron to set atop the platform with witches attached. Add fussy cut pumpkins to the pop-out tombstone pieces. (I ink blended the white frog paper with a gray ink to make it sooty from the fire.)

In the Witches and Cauldron die set are a strip of bubbles that a white pen can add highlights to as well as an eyeball, frog legs and a bone. The fire is the witch’s hair turned upside and stenciled flames with an orange maker.

Spiders: For the spiders crawling out of the cauldron, I cut four spiders from the Witch and Cauldron set from black mirror cardstock. A 12-inch piece of white polyester thread was threaded with two circles (eyeball center circles from Witch and Cauldron) and knotted to the cauldron. The circles were glued to the underside of the pop-out mechanisms from under the platform. Adjust the thread tension to be loosely taunt and test for catchpoints when opening and closing card before gluing spiders to the threads. (I found the best spots for the spiders were near the ends of the threads.)

Witches: I used the stencil features of the witch’s face die to color in the eyes and mouth. The nose can be folded out to ink the edges with green ink. I cut extra dress and hat pieces so that the backs of the witches would look complete. The blond witch has silver pieces from the hat buckle on her shoes. The cauldron witches’ hats have red hat bands cut from red cardstock covered with clear packing tape.

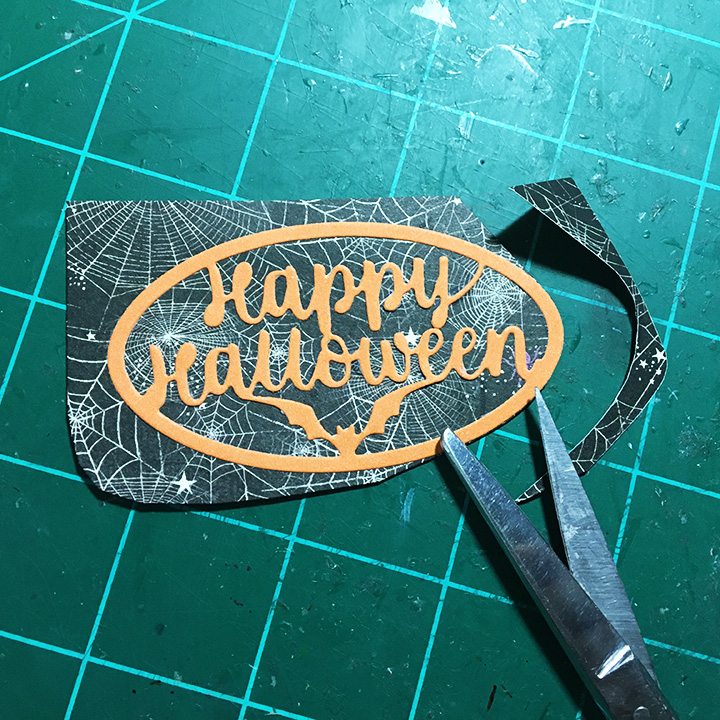
Sentiments: The card front sentiments are stamped sentiments fussy cut into tombstones and a bat shaped banner. Inside the “hocus pocus” on the platform ends are from the new Small Script- Halloween die set and the “Happy Halloween” is from the Halloween Charms set. A white oval for a personal message is cut using the Crosshatch Ovals.

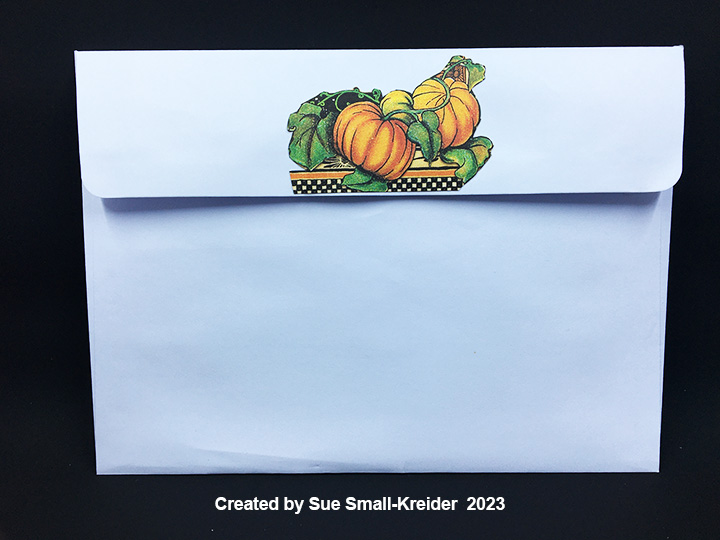
Envelope: The A7 white envelope has fussy cut pumpkins from the paper collection glued to its back flap.

Thank you for reading this blog post. I hope this inspires you and makes you smile. Please like and leave comments 😊

Materials Used:

Dies

Stamps

  • Fun Stampers Journey – Witches Brew – SS-0388

Papers

  • Graphic 45 – 8×8 Double-Sided Papers – Midnight Tales Collection – Abracadabra &Pumpkin Patch
  • Stampin’ Up – 12×12 Double-Sided Designer Series Papers – Toil & Trouble
  • Paper Lane Paperie – Holographic Cardstock – Silver
  • Black Mirror Cardstock
  • White, Orange, Green, Red, Yellow and Black Cardstock
  • Paper Lane Paperie – A7 Cardbase and Envelope – White

Ink

  • Ranger – Tim Holtz – Distress Ink- Mowed Lawn
  • Ranger – Tim Holtz – Distress Oxide – Lost Shadow
  • Memento – Fade-Resistant Dye ink – Tuxedo Black
  • Sharpie – Permanent Marker –Fine Tip – Black, Red and Orange
  • Farber-Castell – Pitt Artist Pen – 1.5 Bullet Nib – White-101 Marker – Snow
  • Nuvo – Aqua Shimmer – Glitter Gloss

Adhesives

Tools

  • Die Cutting Machine
  • We R Memories – QuickStick
  • Bone Folder
  • Stamping Platform
  • LDRS – Stampendable Stamping Tool
  • Stamping Cloth
  • Songe Dauber
  • Blending Brush
  • Bone Folder
  • T-Ruler
  • Scissors
  • Needle
  • Thimble
  • Stamping Blocks for Paper Weights
  • Tweezers
  • Craft Clip

Miscellaneous

  • White Polyester Thread

This release includes:

  • 2 new Script Sentiment Die Sets
  • 3 new Border Die Sets
  • 2 new Pop-up Die Sets
  • 1 new Add-on Die Sets
  • 1 stand alone Die Set

Dies are available to order now on the website.

GIVEAWAY:

To celebrate the release Karen Burniston and each of the Karen Burniston – KB Riley LLC Design Team members will be giving away a $25 Gift Certificate to some lucky person who comments on our blog posts, so make sure you join the hop and comment on everyone’s blog post. Winners will be randomly chosen from ALL of the blog hop comments received on our blog posts by Monday, 25th September 2023. Lots of chances to win some goodies, so just leave a comment on this post or any other blog hop posts to enter!

Don’t forget to leave some way for us to contact you, in case you are a lucky winner!

Karen Burniston

Lois Bak

Sue Small-Kreider – YOU ARE HERE

Frances Byrne

Jennifer Webster

Suzanne Smit

Sandy Diller

Nicky Foden

Being Cool is My Costume

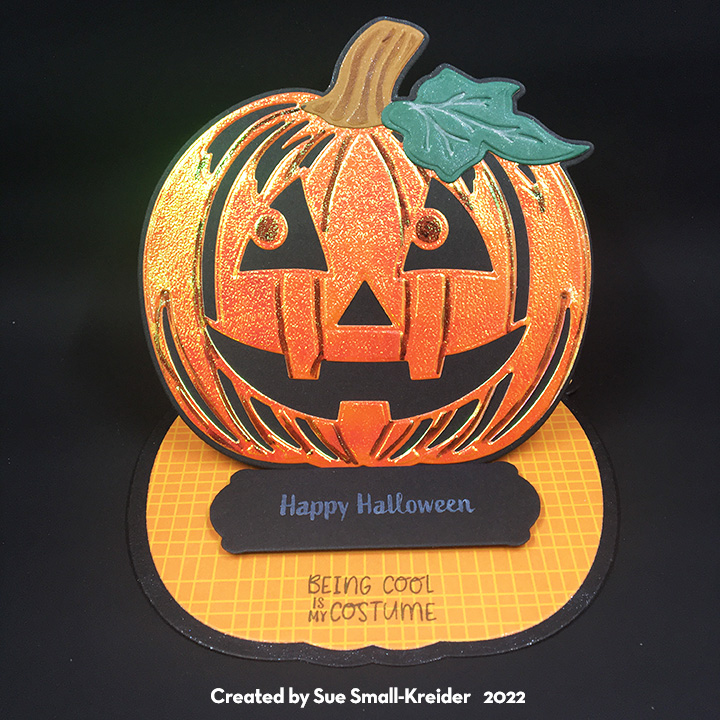
Halloween means so many different things to different people, but my favorite person to make Halloween cards for is a cat lover, likes to see children in their Halloween costumes, but hates to dress-up for the day. So, this vintage pumpkin card is perfect for them.

The pumpkin easel card is a die set by Anna Griffin. It is super easy to make with decorative papers.

I used two different stamp sets that were on my worktable to stamp the card and envelope.

The card fits into a 6”x9” envelope which has been stamped with designs by Miss Ink Stamps and colored with fine-tipped makers.

Thank you for reading this blog post. Please like and leave comments

Materials Used:

Dies

Stamps

Inks & Pigments

  • Memento Fade-resistant Dye Ink – Tuxedo Black
  • Craft Smart – White Ink Cube
  • Sharpie Permanent Marker – Fine Point – Black
  • American Crafts – Metallic Marker – Silver
  • Nuvo – Aqua Shimmer – Glitter Gloss
  • Fine-tipped makers

Papers

  • American Crafts – Peebles – Spooky – 12 x12 Double-sided – Candy Toss – 736981
  • Heavy Black Cardstock
  • Brown and Green Cardstock Scraps
  • Shiny Holographic Sparkle Cardstock – Orange (maker unknown)
  • 6” x 9” Envelope – White

Miscellaneous

All Wrapped Up In You

My spouse and I joke that neither of us can remember our wedding anniversary. We know it is in late October but we always have to look it up. This year I decided to just make a sweet Halloween card for my spouse for our anniversary.

I used the Spellbinders’ Dancin Mummy dies as well as the stamp set from the Boo Dance Party collection to make the card. The card base is a mini-slimline card made from double-sided cardstock from a 2013 Martha Stewart 12 x 12 paper pad called Gothic Manor. The legs swing on circle foam dot.

Thank you for reading this blog post. Please like and leave comments 😊 You can also follow this site.

Pop-Up Ghost Card

Pop-up ball cards always remind me of the jack-in-the-box toy when you open them and something pops up to make you smile. This pop-up ghost card was designed for a three-year-old boy for Halloween.

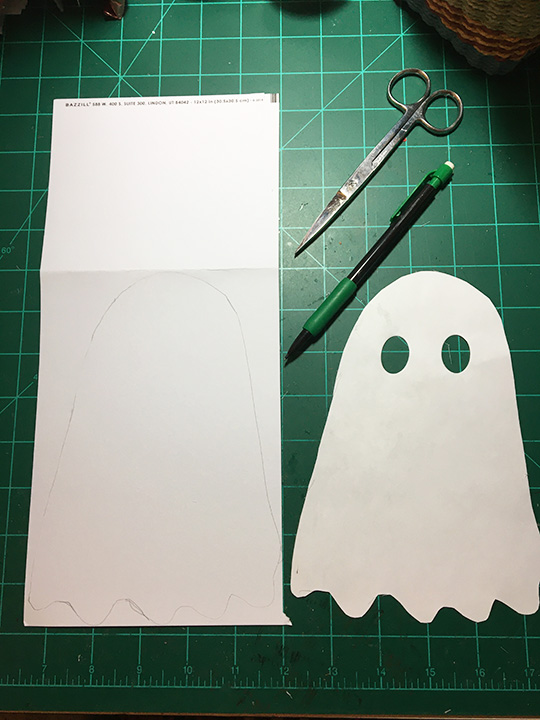
The card front and easel base are my design. (You can download the full-size scan I made of the ghost card front for free.)

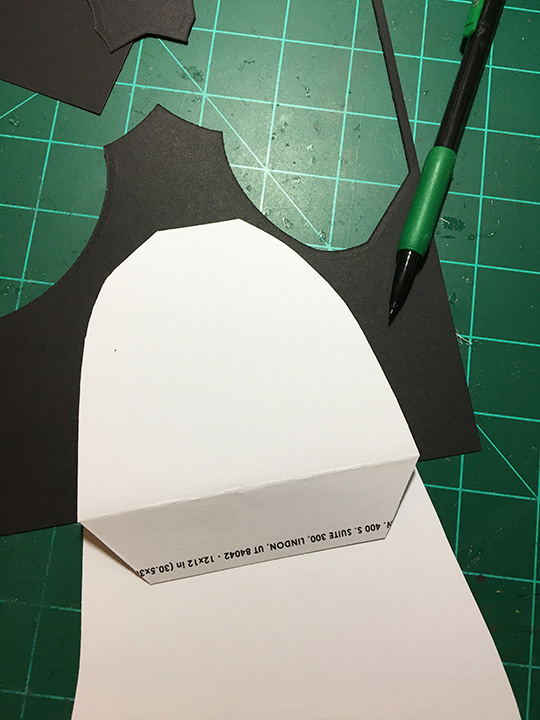
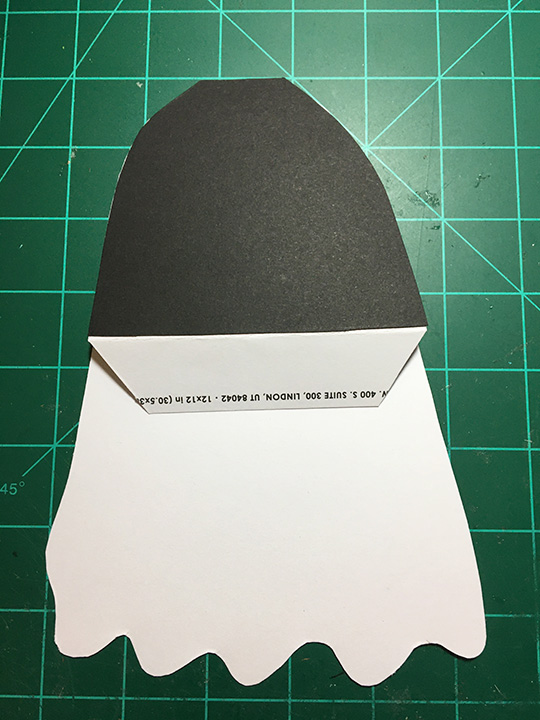
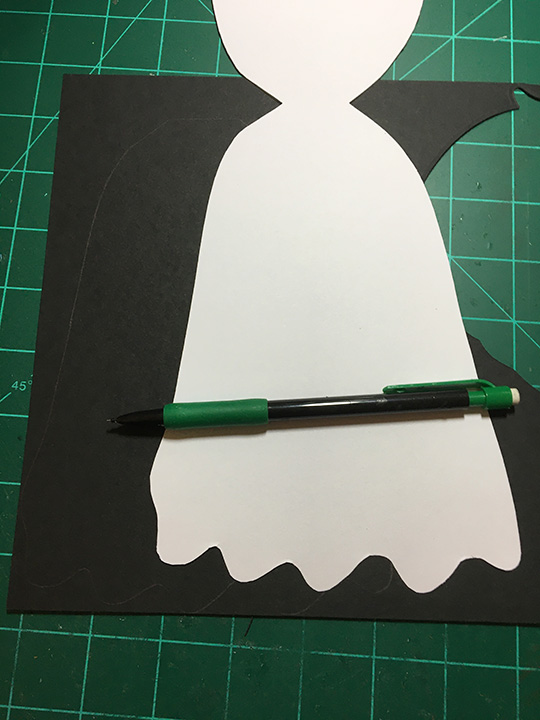
I traced the ghost onto a 12 x 12 inch sheet of cardstock twice. Next, I cut the cardstock between the ghosts and fold the card stock at the top of the ghost’s head and cut out two layers of the ghost leaving the top of the ghost’s head attached as a fold.

This will be the card base and easel prop.  The second ghost I cut all the way around and used the largest oval die from the Karen Burniston Bitty Ball die set to cut out the eyes for the card front ghost.

I traced the easel piece as well as the whole ghost back onto black cardstock and cut both pieces out. The easel back piece needs to be glued so that when the white ghost card front is glued onto easel flap the eyes show through as black.

(Don’t glue the whole black ghost shape onto the back of the card until after the pop-up balls have been attached to the card base. This piece hides the brad legs.)

For the pop-up ghost inside I covered two mini pop-up balls (made using dies by Karen Burniston) with four layers of cheesecloth cut into a 6-inch circle and glued to the top pop-up ball. (Follow the assembly video for the pop-up balls.) Cut all pieces from white cardstock. Cut two black eyes using the same oval die used for card front ghost.

I made a band to hold the card closed from a leftover piece of white cardstock. The “BOO!” on the ghost as well as the band sentiment are by Karen Burniston from the two Halloween die sets listed below.

The card fits into a 6 x 9 inch envelope. I stamped the front and back of the envelope with ghost stamps by Julie Ebersole.

I often add a CRX slip that helps the card recipient know how to open the interactive card. (You can download the sheet with four slips on it. for free.)

Thank you for reading this blog post. Please like and leave comments

Materials Used:

Dies

Stamps

Inks

  • Memento Fade-resistant Dye Ink – Tuxedo Black

Papers

  • Brazzill –12 x12 Inch Cardstock – Coconut Swirl
  • Heavy Black Cardstock
  • 6” x 9” Envelope – White

Miscellaneous

  • Cosmic Shimmer – Specialist Acrylic Glue – 125ml
  • Sizzix – Big Shot PLUS die cutting Machine
  • Fineline 20 Gauge Applicator & Bottle
  • LDRS Creative – Stampendable Stamping Tool
  • Stamp Cleaning Cloth
  • Poking Tool
  • Cheese Cloth – 6 inch Circle
  • Brad with Long Legs

Pop-Up Pumpkin Card

Pop-up ball cards always remind me of the jack-in-the-box toy when you open them and something pops up to make you smile. This pop-up pumpkin card was designed for a baby’s first Halloween.

The card front pumpkin and easel base are a die set by Anna Griffin and the pop-up pumpkin inside is made using dies by Karen Burniston.

Follow the assembly video to make the mini pop-up ball

I made a band to hold the card closed from leftover pieces of decorative cardstock. The sentiment is by Karen Burniston.

The card fits into a 6 x 9 inch envelope. I stamped the front and back of the envelope with stamps by Tim Holtz.

I often add a CRX slip that helps the card recipient know how to open the interactive card. (You can download the sheet with four slips on it. for free.)

Thank you for reading this blog post. Please like and leave comments

Materials Used:

Dies

Stamps

  • Stampers Anonymous – Tim Holtz Halloween Collection – THMM127

Inks

  • Memento Fade-resistant Dye Ink – Tuxedo Black
  • Sharpie Permanent Marker – Fine Point – Black
  • Ranger – Tim Holts Distress Ink – Walnut Stain and Mowed Lawn

Papers

  • American Crafts – Peebles – Spooky – 12 x12 Double-sided – Candy Toss – 736981
  • Heavy Black and Orange Cardstock
  • Brown and Green Cardstock Scraps
  • 6” x 9” Envelope – White

Miscellaneous

  • Cosmic Shimmer – Specialist Acrylic Glue – 125ml
  • Sizzix – Big Shot PLUS die cutting Machine
  • Fineline 20 Gauge Applicator & Bottle
  • LDRS Creative – Stampendable Stamping Tool
  • Stamp Cleaning Cloth
  • Poking Tool
  • Sponge Finger Daubers
  • Brad with Long Legs

Interactive Money Holder Halloween Cards

These two cards are for a 12-year-old girl and her 14-year-old brother. The card sender requested that they be money holders as well as interactive Halloween cards.

Both cards are variations of previous Halloween cards I’ve done this year, but with money holders. They also show how adding a second Karen Burniston pop-up mechanism and reversing the direction of it can really make a card jump for joy or reveal hidden treasure.

The original card called Witchy Shoes and this card are made with dies and papers from Queen & Co. Halloween collections – Fright Fest (shoes, pumpkin & papers) and Witch Hat die.

The money holder is an orange jack-o-lantern Trick or Treat pail intended as a shaker, but I taped the pumpkin frame to the center cutout and used the matching foam frame behind the jack-o-lantern, cutting off the top bar, so rolled paper money could be placed in it.

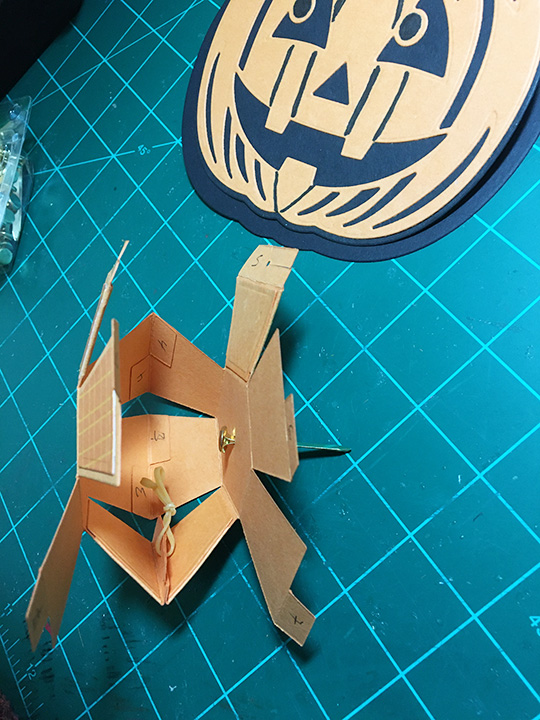
I added two pop-up mechanisms by Karen Burniston from her Spinner Square Pop-ups die set to make the legs move.(Assembly video). I reversed the direction of one of the mechanisms to make them move away from each other.

Envelope back

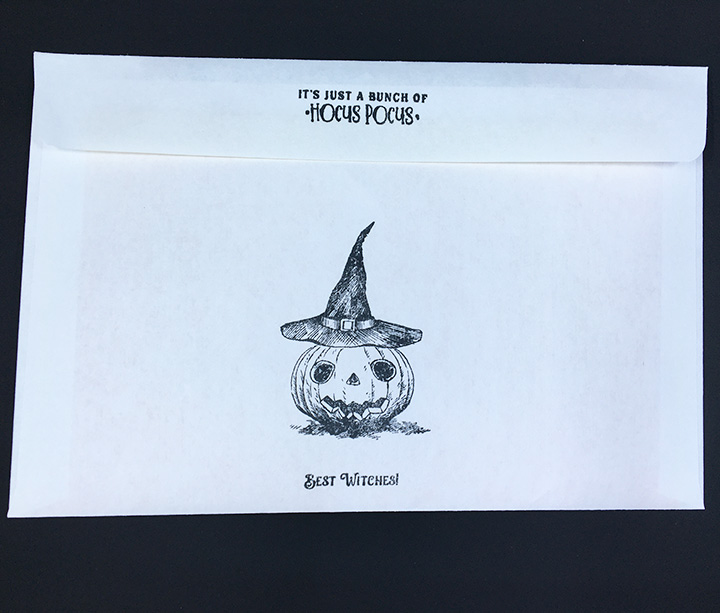
The envelope uses image stamps by Tim Holtz and sentiment stamps From Queen & Co.

Card front and front of envelope

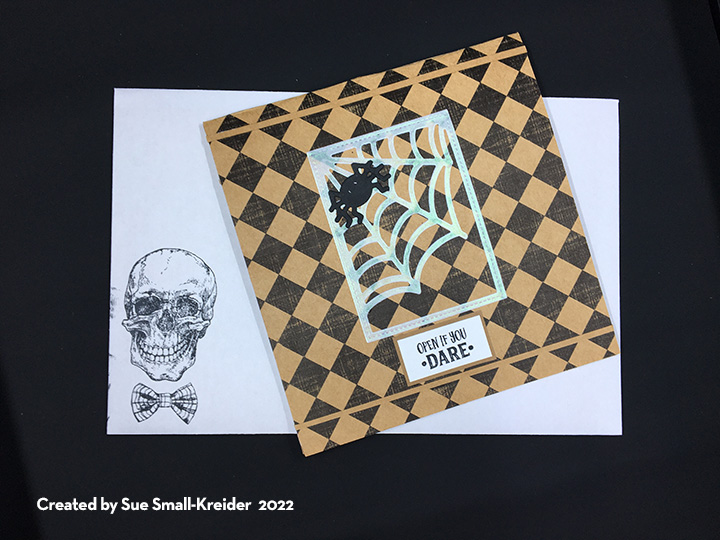
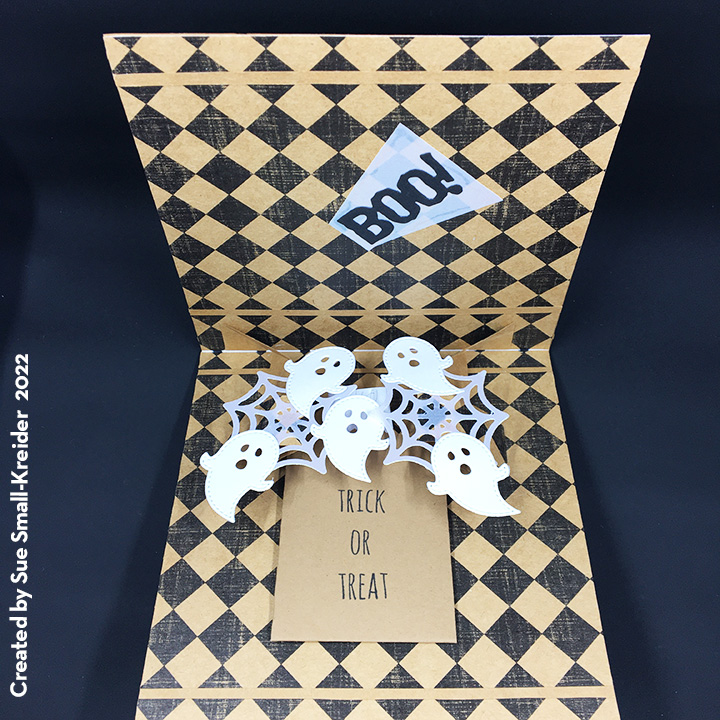
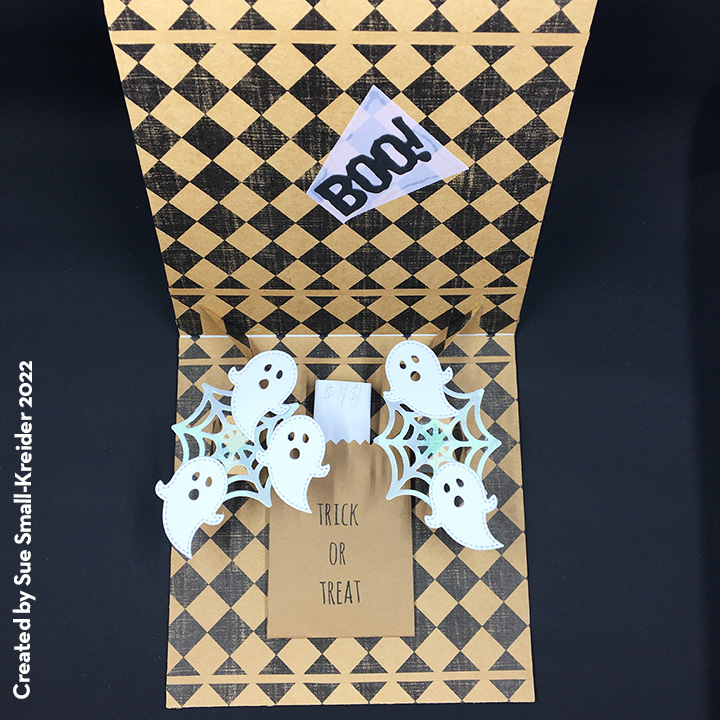
For the Open If You Dare card I based it off the card Do What Brings You Joy using two of the pop-up mechanisms from the Katherine Label Pop-Up die set by Karen Burniston (assembly video). I reversed the direction of one of the mechanisms to make them move away from each other.

The ghosts and spiderwebs are from the Queen & Co Halloween Foundation Dies and the Paper Studio checkerboard brown craft paper has been in my stash for a while.

The Trick or Treat bag is a rectangle that was accordion folded at the sides and the bottom edge folded up into a tab. The edge of the bag was cut with pinking shears and then the bag was stamped in black using a stamp by Tim Holtz.

Card back

All other stamps used on the card are from the Queen & Co Fright Fest collection.

Envelope back

The envelope uses image stamps by Tim Holtz and sentiment stamps From Queen & Co. and Peebles.

If you enjoyed these cards, check out other creative cards on the Facebook page Karen Burniston Pop-Up Peeps.