Sometimes there are crafting elements that just take you under their spell and make you play with them.
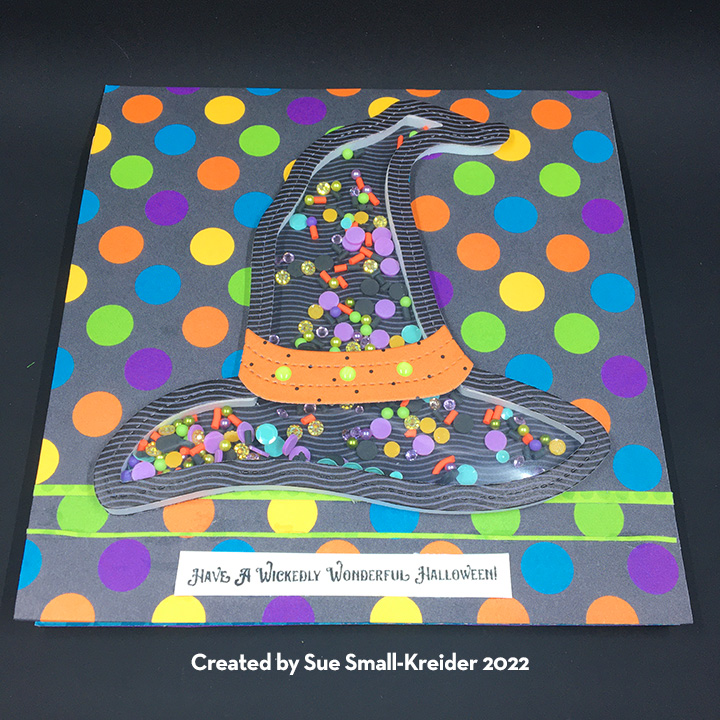
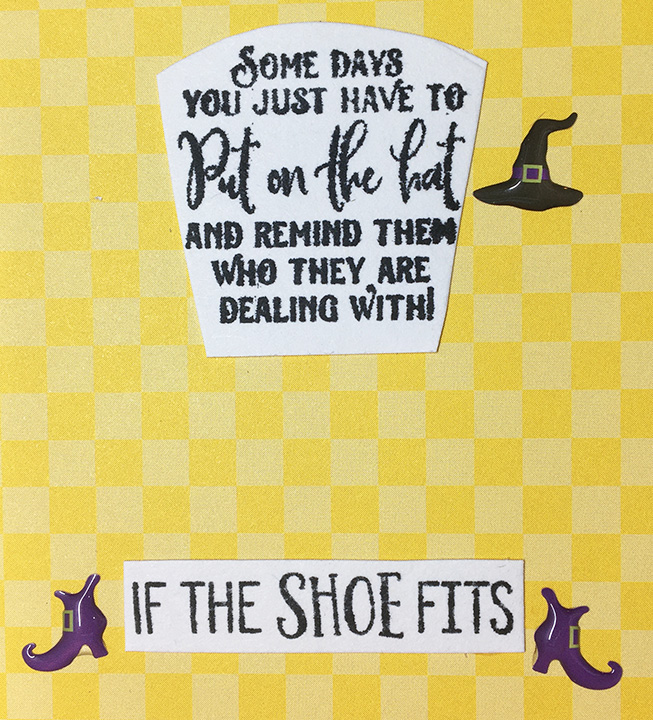
Queen & Co. Halloween shaker kits have me under their spell This card is made up of elements from two kits – Fright Fest (shoes and papers) and Witch Hat. These kits have the dies, foam shaker frames and acetate windows. Some come with the shaker elements (I added to them from my stash) and/or matching paper (Fright Fest for this card.)
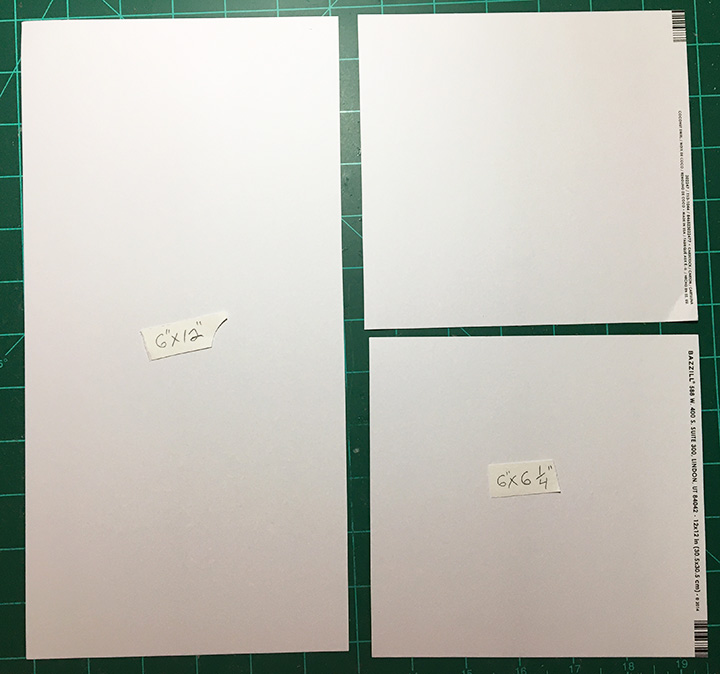
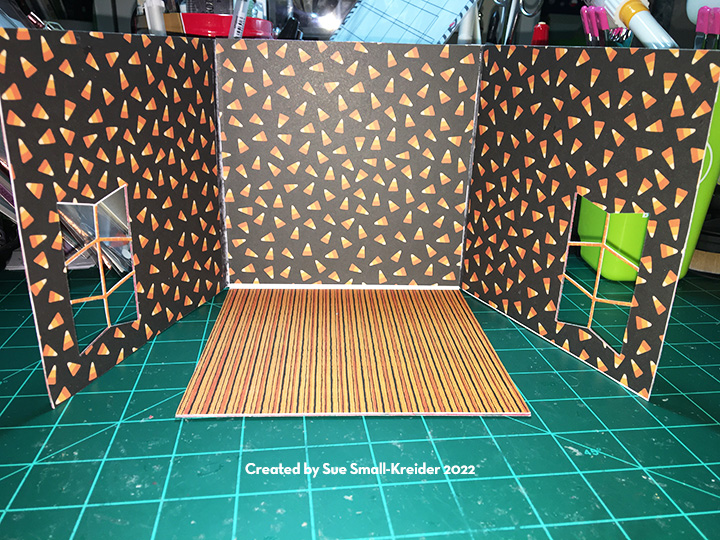
Card Base: There are three pieces that need to be cut and assembled to make the card base. Lightweight to medium weight cardstock is ideal as there will be decorative papers glued to all sides of the card which will strengthen the base. Cut one piece 6×12 inches and fold at center into a 6×6 card. Cut two 6 x 6 1/4 inch squares. Score and fold 1/4 inch to make the squares into 6 x 6 inches.
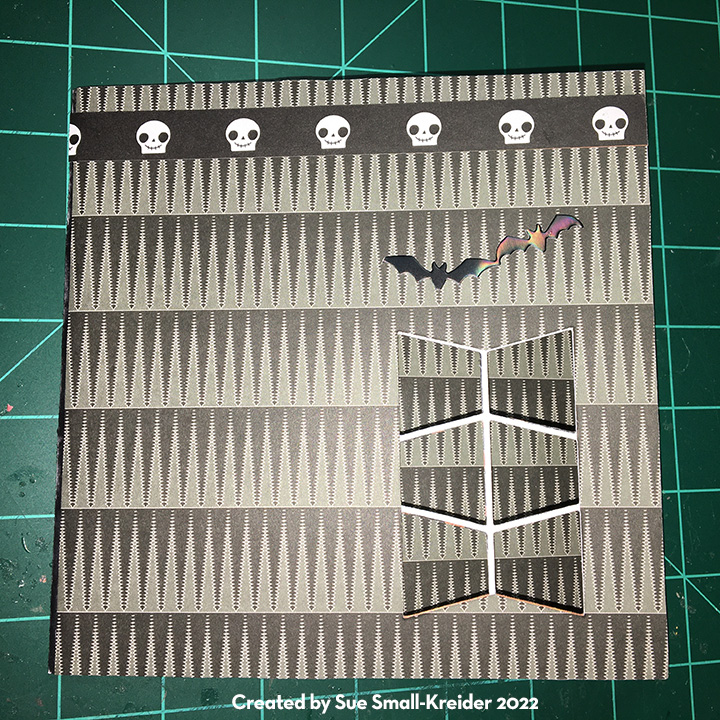
Cut nine decorative papers 6×6 inches to cover the inside and outside of the card. (Three of the same pattern for the inside walls and three of the same pattern for the outside walls, two of the inside floor and one for the Back of the card.)
Glue the thinnest of the papers that will cover the side squares and cut the windows into these pieces using the six-trapezoid cutting die from the Mini Ball Pop-up Double-Ups. Use the side panels to mark the location to cut the window in the thickest of the decorative papers. Glue all the decorative papers onto the side squares. Glue the flaps on to the top half of the folded card base. Glue the remaining decorative papers onto the card base. (I made a mistake when I glued the decorative bat pattern plate onto the orange back of the card and ended up with them upside down. The glue set before I noticed my mistake.)
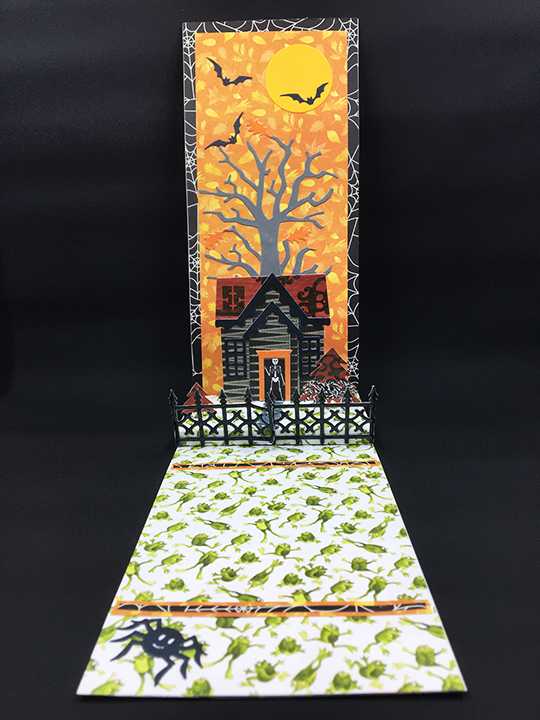
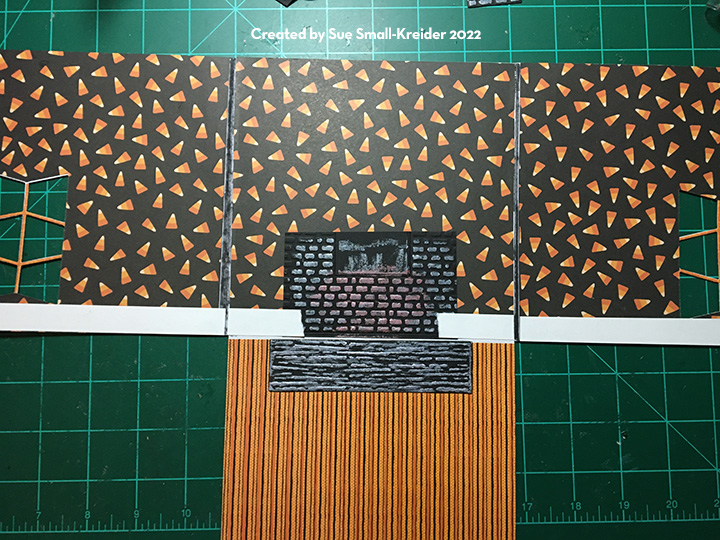
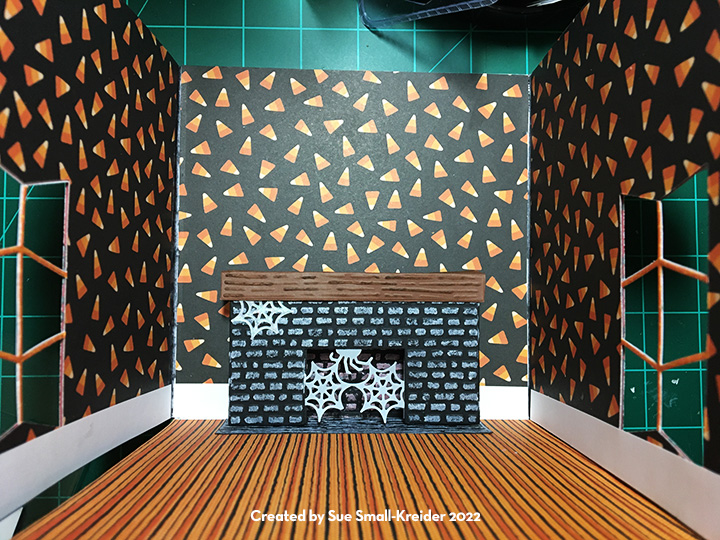
Fireplace: Watch the assembly video before assembling. Cut one of the fireplace fronts and a rectangle the size of the fireplace front. Emboss them both to show the bricks. Use a white crayon to highlight the bricks on both pieces. Trim the rectangle to be a 1/8 inch shorter on each side. Turn the rectangle upside down and glue to the back wall of the card base. Die cut and emboss one health/mantel in a stone color. Color the heath stone and glue to the floor of the card base. Glue the fireplace mechanism as directed in the assembly video to the fireplace back.
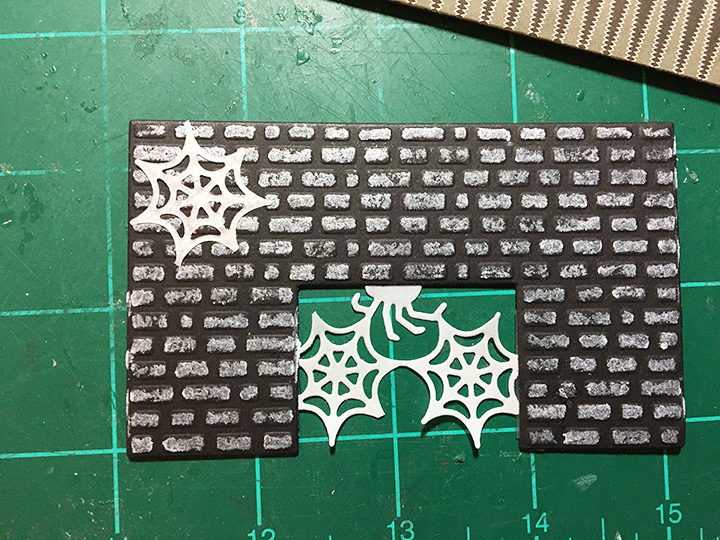
Die cut a partial patterned plate of spiders and webs of vellum. Separate some webs and spiders. To decorate the fireplace and other parts of the room. (I used some thin foam squares to make the mantel standout over a web.)
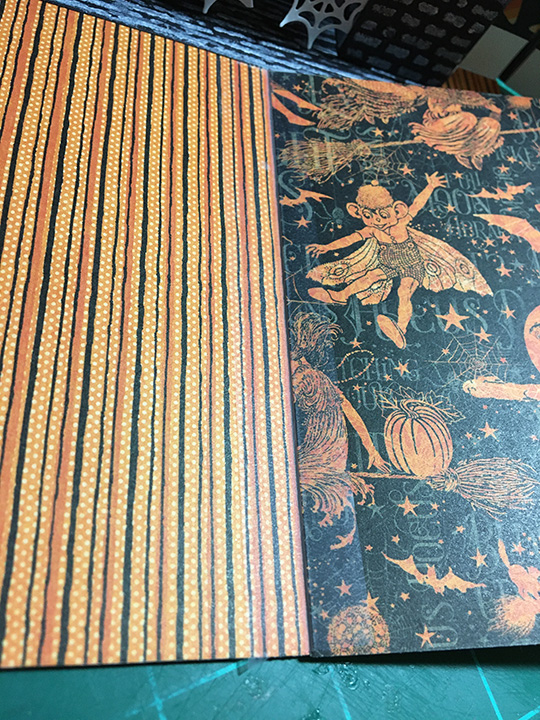
Floor Flap: Take the remaining floor square of decorative paper and cut it in half. I had to match the pattern on my card’s floor. (Because I glued two pieces together, I was able to attach a ribbon loop to act as a pull tab for the floor flap.) The flap is cut to stop just at the fireplace heath. Use STRONG clear tape to attach the flap to the card base floor. (I made the mistake of using removable tape which broke when the card was being opened by the card recipient.)
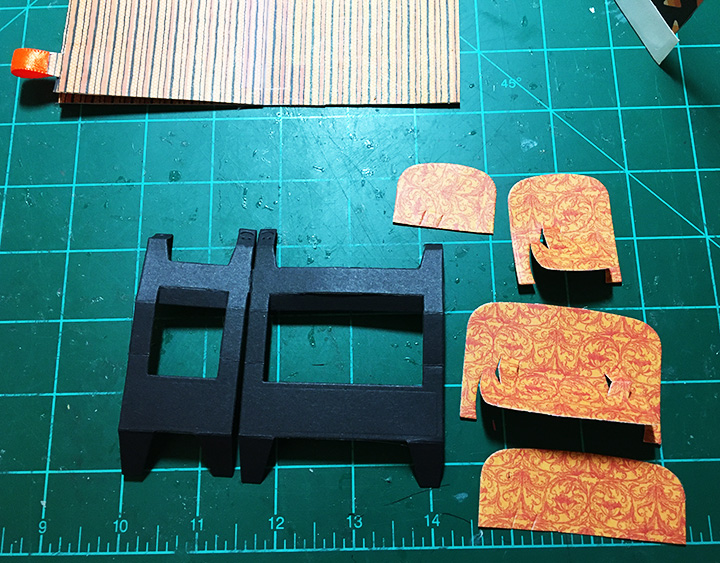
Furniture: Watch the assembly video for the furniture before assembling. (Once I had assembled the sofa and chair, used double-sided removable tape to find the best placement of the furniture on the floor flap so that when closed no parts of the furniture can be seen. Also, you may want to temporarily tape a skeleton to the back o the furniture as you figure out the placement of the furniture.)
Skeletons: Cut nine whole skeletons and the heads of three more. Use the die as a stencil to color the skeletons faces with a fine-tipped black marker. Use the tiny accessories die sets to dress out the skeletons. For the seated skeletons, bend them at the hips. Glue an extra head piece to the back if the skeleton if the marker has bled through. Glue the seated skeletons to the pop-ups on the sofa and chair and the feet to the seat. You can raise an arm to the armrest as well. Glue other skeletons to walls, fireplace, window frames and backs of furniture. (I used double-sided, removable tape to do a layout of the skeletons before gluing them, to make sure they didn’t hinder any mechanism.)
Banner: The “Happy Halloween” banner is made from black glitter cardstock and thinner orange and yellow papers. The mini alphabet die set and the flag bunting from the Twist Panel Pop-Up die set are used to cut the banner pieces. Two strands of baker’s twine are threaded with the letters.
Envelope: While the card is 6 x 6 inches, its thickness makes it too thick to fit into a stand envelope. An envelop was created from a 12 x12 inch sheet of double-sided paper from the Martha Stewart paper pad. The center point of each edge was marked in pencil, scored and folded using a metal straight edge. The seams were glued and a Velco fastener covered with a flat back gem.
Thank you for reading this blog post. Please like and leave comments 😊
(Watch the assembly video before starting your card.) The pop-up fireplace is a bit different from other fireplace pop-ups that cut directly into the card base. For this fireplace, the pop-up mechanism is a separate glue in piece that could be used with other covers than the fireplace. With two sets of fireplace and room decor accessories, making a cute room scene is a snap. The same die is used for the mantel and the heath. I cut them from brown and black cardstock respectively and used black ink on mantel to age it and a white shimmer watercolor crayon on the black hearth to similar slate. The white shimmer crayon was also used on the fireplace brick to highlight the embossed brick.
There are lots of great Halloween themed dies in this release. The large bat, skeleton, small pumpkins and bow tie cat are all from the Skeleton Bat set. (I cut the handles off the pumpkins and used one to make the bat smile.) The slim pattern plates were used on the front and back of the card. (I find that the weight of the front and back of the card need to be equal or the back heavier for the pop-up fireplace to work properly.) For the spiders and webs on the card front I used a pearlescent vellum. On the flurry of bats on the back, I used a white gel pen to dot eyes on all the bats.
To make the candles and clock on the mantel pop-up along with the planters, cat and skeleton on the floor stand up, I used the tiny pop-up strip from the fireplace set. When folded into a cube, the pop-up mechanism has a long side and a short side with allow you to have different dimensions for your objects on the mantel and floor. The Fireplace Extras 1 is Christmas themed. I used the candles from this set. Fireplace Extras 2 has more everyday items like the clock, planter, picture frames and fireplace fender or fence that I used. (I couldn’t resist putting some skeletons in the picture frames!)
If you notice the vellum spider web and dangling spider in the fireplace, they are from the previously released Halloween Scene set. I cut one of the dangling boots in the fireplace set down to use as a base to glue a piece of thread to and then the spider.
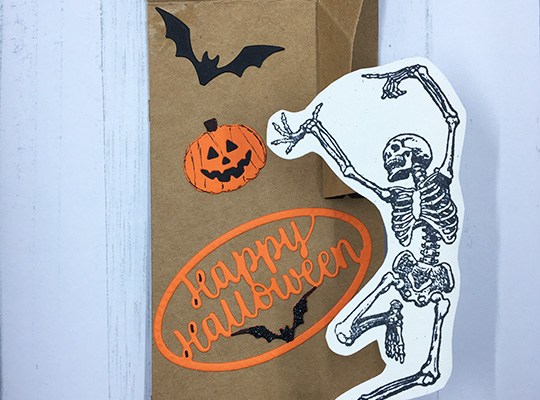
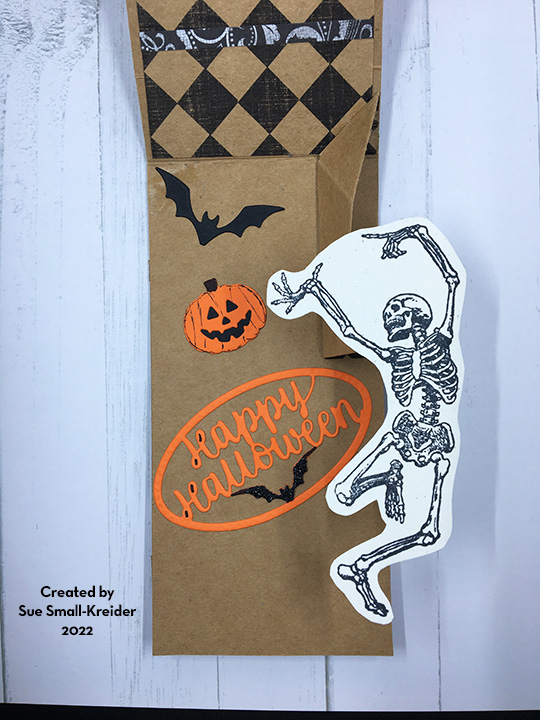
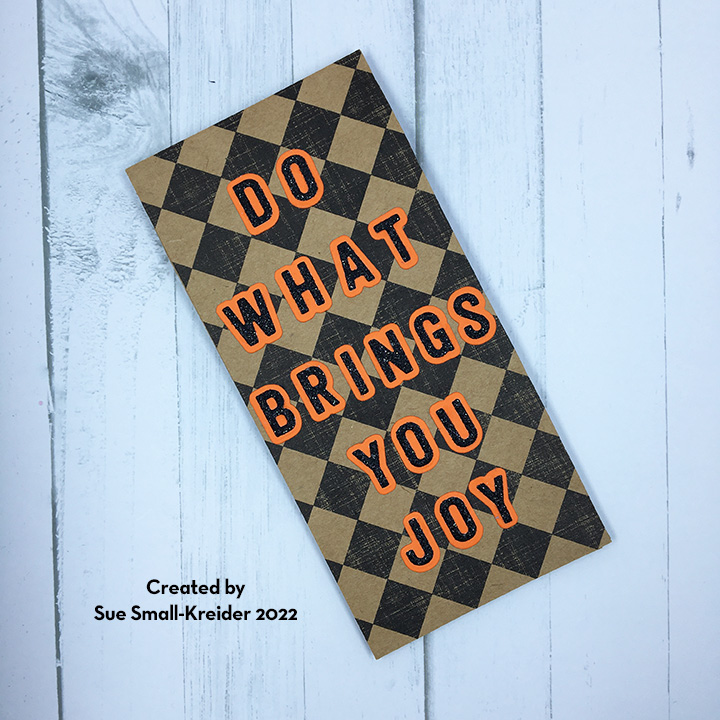
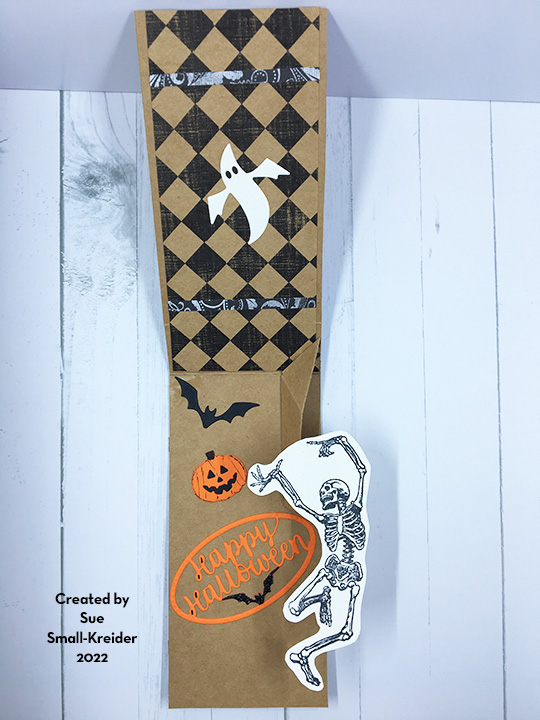
Sometimes you just have to do what brings you joy and the dancing skeleton stamp by Riley and Company’s Funny Bones Collection brings me joy.
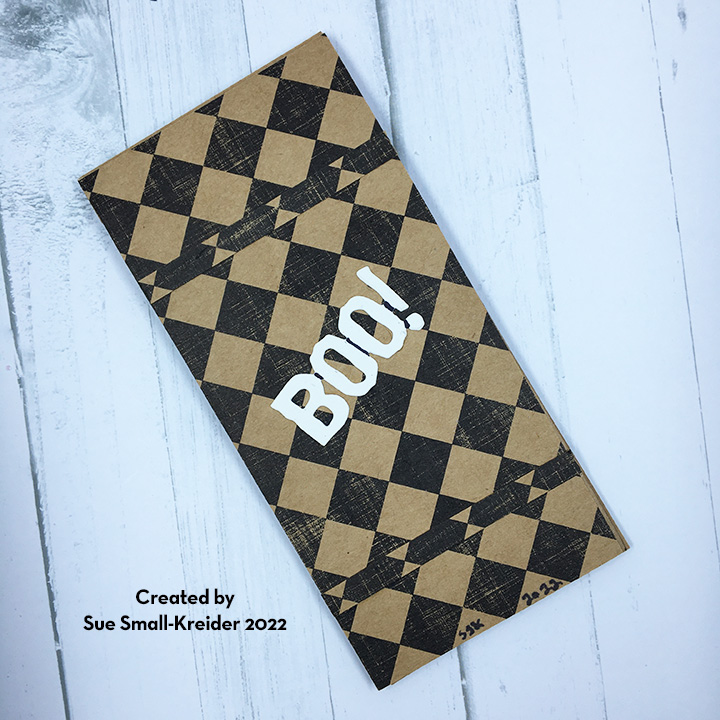
I designed this mini slimline card to measure 3×6 inches to fit inside a 3.5×6.5-inch coin-style envelope using scraps from other Christmas and Halloween card makes.
The pop-up mechanism is from the previously released Katherine Label Pop-Up die set by Karen Burniston (assembly video) and works well inside a top-fold mini slimline as long as the label or stamped image fits within the dimensions of the card. I practiced laying out the card elements with removable tape to get the best placement before gluing in place.
Because I felt the card was joyful inside, it needed just a tiny scary element, so the back of the card has the word “BOO!” in white. The lettering on the front has the base letters cut from black glitter cardstock with orange shadows behind. They are cut using Karen Burniston’s mini alphabet set.
All of the die-cuts are designed by Karen Burniston. The skeleton was stamped on creamy white cardstock and fussy cut around it.
Thank you for reading this blog post. Please like and leave comments 😊
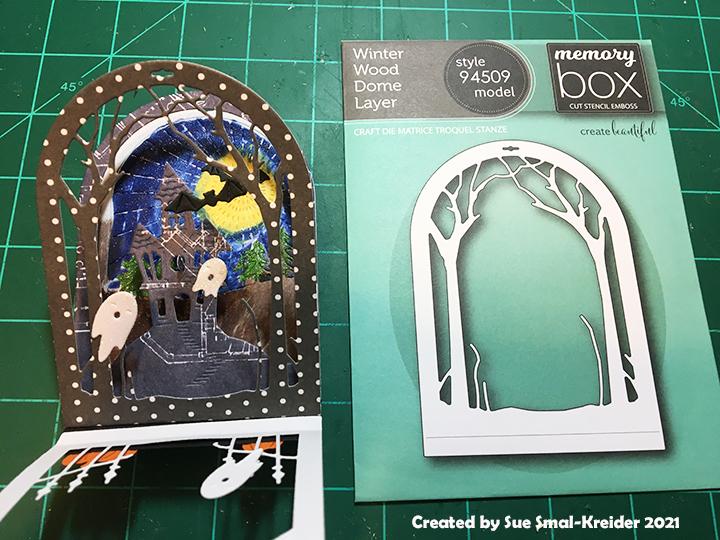
What do you get when you cross a snowglobe with a haunted house? A Haunted Home Dome!
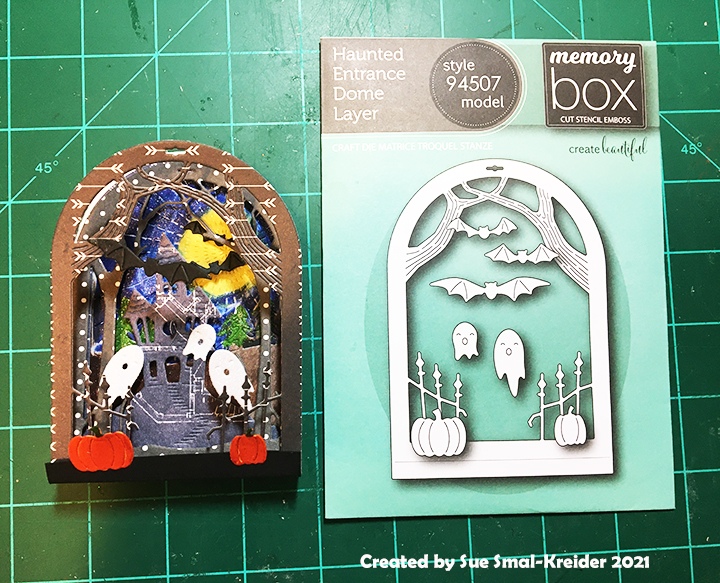
This cute small Halloween card is also a Halloween decoration. The dies to make the dome are all from Memory Box. The Snowglobe Backer is the base which all four layers are glued to and needs to be cut from a sturdy cardstock. The sky background is also part of the earlier snowglobe release. The front three layers are part of the newer dome release. The tiny ghosts, bats and pumpkins are all from the Haunted Entrance Dome set.
I used patterned paper for all the layers except the backer which is a heavy weight black cardstock. The Radiant die cuts out the sky section which I taped on the backside into its frame and then glued the black backer pieces to it. Using glitter ink pens by Spectrum Noir, I colored in the night sky leaving a hazy yellow moon for the bats to fly in front of for contrast.
Each of the layers has a tab at the bottom that is folded back and glued onto the backer base flap. The front fold of the backer, I trimmed down to show more of the iron fence.
The tiny ghosts are cut from white glitter cardstock while the pumpkins are cut from orange cardstock and then colored with glitter ink pens. These tiny elements are glued onto the various layers to add depth and dimension to the open card. I used a white gel pen to highlight the tiny embossed cut features of the haunted house layer.
The die-cut “Happy Halloween” is from Karen Burniston and colored with glitter ink pens as well before being glued on to the card. (I find a fine-tipped glue bottle makes the gluing process of these tiny intricate sentiments easier.)
A piece of spider ribbon from my stash holds the top of the dome layers together. (I found it is better to tie the ribbon as a loop rather than at the hole, so that the card and easily open and close.)
A personalized message can be added to the back using a white gel pen.
The card will fit into an A2 size envelope, but I used a mini-slimline envelope. The back of the envelope is stamped with “Spooky Halloween” using a bat to hint at what is inside.
Thank you for reading. If you enjoyed this blog post, please like it and follow the blog. 😊
Hello, it’s Sue from the Dies R Us design team and today we are making a slimline pop-up Halloween card.
You will need:
One lightweight white cardstock 8 3/4 inches x 3 7/8 inches
One lightweight white cardstock 9 inches x 3 7/8 inches scored and folded 1/4 inch from top
Two black spider web paper 8 3/4 inches x 3 7/8 inches
Two orange leaf paper 8 1/4 inches x 3 7/16 inches
One orange leaf paper8 3/4 inches x 3 7/8 inches
Two 1 1/2-inch circles
Cut from House & Fence Pop-Up set
One green patterned cardstock platform
Two black fences coated with clear gloss
Two path stones from gray or black inked with white
Cut from Holiday House Set
Two houses complete houses including roof, trim, windows and door(I cut the door from a skeleton paper. The orange and red papers had a shiny coating on them.)
Cut from Tree Pop-Up Set
Two trees from gray paper
One set of oak leaves from orange sparkle paper
Cut from Halloween Charms set
One Happy Halloween from black paper
Three blacks from Happy Halloween oval in black
Two spiders from black and use die stencils and white gel pen to ink in face
Cut from Winter Charms set
One large fir tree
One small fir tree
Save trimmed strips for additional decorations
Do a practice layout before adhering pieces to front panel (I decided I didn’t want the windows boarded up if the skeletons lived there.)
Use strong red double-sided tape on the platform tabs and on the top tab of longest white card base piece. See photo for exact location of tape. Adhere the longest card base to shorter base. The tab will be on the card back.
Use Scor-tape on the decorative paper panels, placing in one the backside of panel on all edges. To make the panels easier to position, peel back tape at all corners and fold backing paper so the tails stick out from edges as shown in the photos. Once positioned where you want press down corners and then peel off backing paper on each side and press don to adhere.
Once all layers of decorative papers have been adhered to cover all four sides of card base, place the platform on the bottom inside of card with taped edges just below the case base fold as shown in photo. Hold center tab down and peel off tape from it and the two platform tabs. Fold down card base top and adhere base to it. Fold down front tab of platform to desired position. Peel backing off tape and adhere to base. Platform should pop up when card is opened. Fold the two strips cut with platform die and glue into slots as shown in photo.
You can now decorate the card. Assemble houses as shown on packaging. Glue trees to inside top panel before gluing house to pop-up piece on platform. Glue fir trees to strips on platform. One of the orange circles is glued behind the Happy Halloween sentiment on the front. Trim fence to fit the edge of platform and bend back one section to be a gate. Trim off the gate’s “foot” as it will be a catching point when the card is opened and closed. It is easier to glue down the stone path before gluing on the fence.
The finished card will fit into a #10 business envelope. (I stamped the back of my envelope with a dancing skeleton.)
Hope this fun card has put a smile on your face and provided some inspiration for your crafting. 😊
Papers from Stampin’ Up, Martha Stewart Crafts, American Crafts, Craftsmart
#10 Business envelope – kraft paper
Memento Tuxedo Black ink pad
Dancing skeleton stamp from Riley & Company
Don’t forget to come join in the fun at the Dies R Us Challenge Blog. There’s a new challenge theme offered on the 1st and 15th of each month and one lucky randomly drawn winner will receive a gift voucher prize to the Dies R Us Store.
For your convenience, all the important Dies R Us links are provided below.
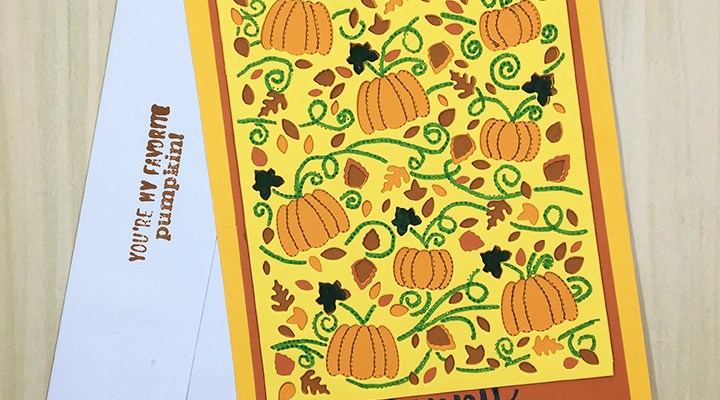
Here is a quick layered card for Halloween or Fall greetings using one of the Birch Press layered designs. It went together in less than an hour.
First decide on your colors. I knew orange for the pumpkins and then decided on autumn leaf colors for the four layers needed. The dies cut an A2 size panel (4 ¼ x 5 ½ inches), I decided to go for a 5 x 7 inches card, so I also cut a 5 x 7 inches rectangle of an orange card stock and a mat layer of Terra Cotta card stock at 4 ½ x 6 ½ inches.
I cut layer A from Lemon, layer B from Terra Cotta and layer C from Orange. All the layers will give you lovely small leaves as off-cuts, but layer B also gives you large, veined leaves that can be used to decorate your card or save for other projects. You will want to cut a fourth layer for the backing. I cut my 4 ¼ x 5 ½ inches backing from Pumpkin Bread cardstock.
Using a green fine-tip marker, I colored in the pumpkin vine leaves and vine once the layers were all glued up. (Another alternative would be to cut same green squares of paper to cover behind the lemon layer the pumpkin leaves.)
The sentiment was an extra one left from another project using Karen Burniston’s Halloween Charms.
Because the card has so many layers, I have opted to leave it as a single layer -postcard style card that will fit in an A7 envelope as it is too thick to send as a postcard.
Hope you enjoyed this quick card. If so, please comment and like and follow this blog. 😊
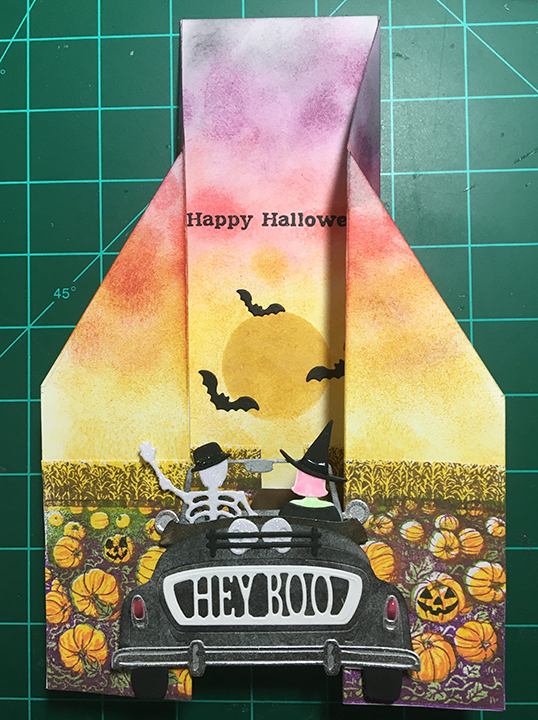
Halloween in the USA often means corn mazes and pumpkin patches as well as dressing up on Halloween evening and going to a party. I have tried to combine these things into a single slimline sliding bridge-fold card.
This card was a second prototype for trying new methods and materials for me. This was my second attempt at ink blending a setting sun sky using Distress Inks and blending sponges, so not as spotty as my first attempt, but not as smoothly blended as I would like. I made a stencil for the sun using scrap card.
The base of the card is 8 1/2 inches (21.6 cm) tall by 9 inches (22.7 cm) wide and scored at 4.5 cm, 8 cm, 15 cm and 18.5 cm. I cut the top corners diagonally from 9 cm down to the 8 cm scoring and the 15 cm scoring.
The small ghosts and bats lurking on the inside panel are die-cut pieces – the bats from the Halloween Sunday Drive and the “Squeaker Ghosts” by Poppy Stamps.
I used the Hero Arts September 2020 My Monthly Hero Kit to stamp the layered image of a field of pumpkins with a corn filed in the background. The kit includes five mini cubes of ink needed to stamp each layer as well as the layered stamps and sentiment stamps. Dies to cut out a few of the images and several sheets of glitter paper round out the kits. (You need to order early the monthly kits as they sell out fast. Hero Arts is one of the few companies that lets you order a single kit without taking out a subscription.)
I stamped four of the images on white copy paper and layered the pumpkin field to create a taller background image. I knew I wanted a road going down the middle of the card, and I cut a road from brown cardstock.
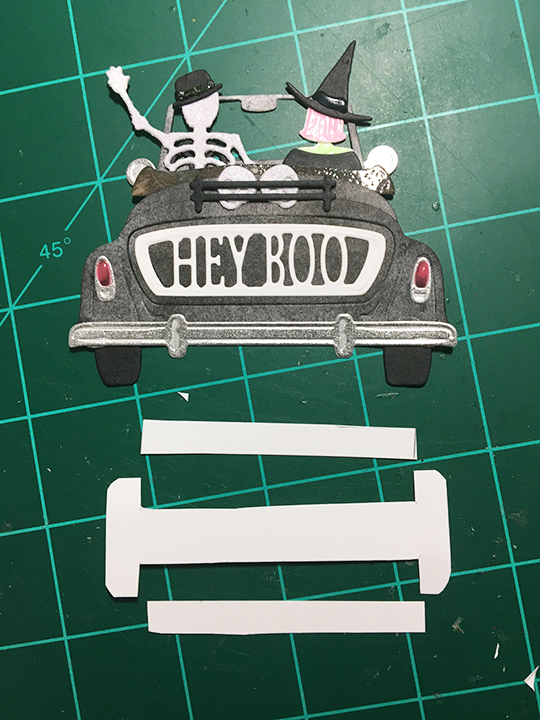
The sliding bridge is a mechanism under the car that involves a capital I piece and two folded rings.
The rings are glued to the folded edges of the card base around the I piece. The end stops of the I piece were adhered behind the car’s wheel wells and tires with foam pads.
The car driven by a white glitter paper skeleton with a glow-in-the-dark pink haired witch with glow-the-the-dark green skin, is die cut suing Spellbinder’s Sunday Drive car die set with the Halloween Sunday Drive add-on set. The car body was cut from white cardstock and then covered with Black Soot Distress ink. The taillights are Nuvo Glow Drops Neon – Shocking Pink and silver matt cardstock. Two glitter cardstock die cut skulls are in the car’s luggage rack. The brown folded down roof is colored cardstock heat embossed with clear embossing powder to get a faux leather look. The shiny hat bands on the two hats are made with Nuvo Glow Drops Neon – Blue Crush.
The sentiment and stamps used on the envelope flap are all from the Hero Arts kit stamped in Memento tuxedo Black and the wheel in the Hero Arts brown ink cube.
For another Halloween slimline card using the same supplies see Being Spooky.
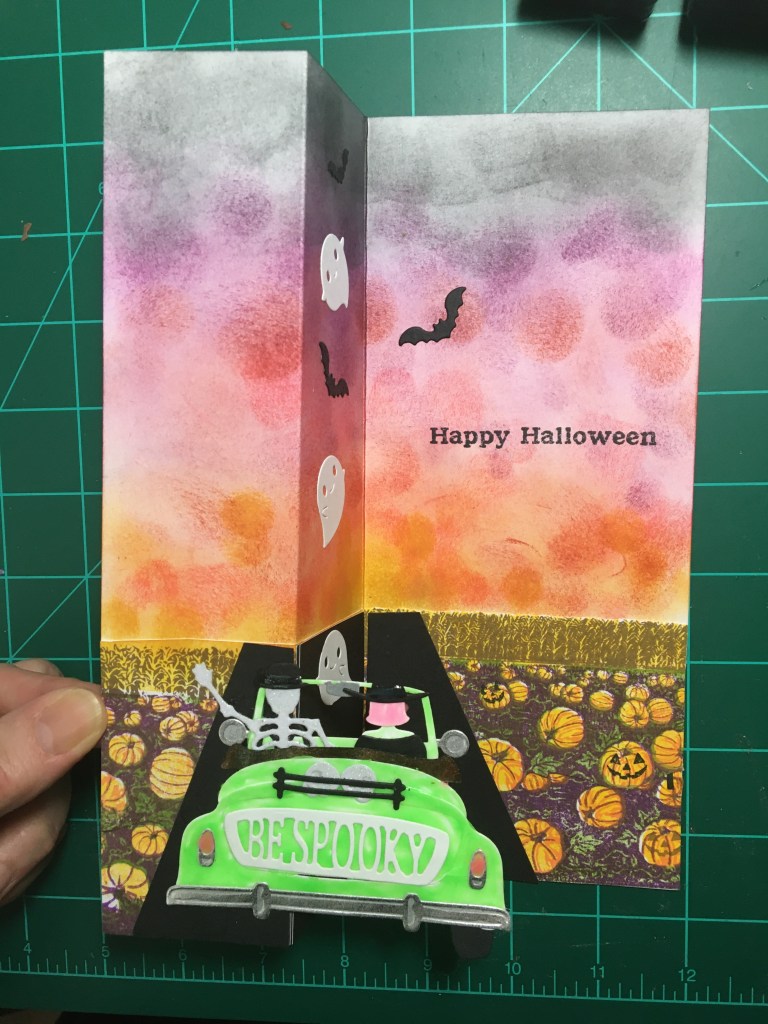
Halloween in the USA often means corn mazes and pumpkin patches as well as dressing up on Halloween evening and going to a party. I have tried to combine these things into a single slimline z-fold card.
This card was my prototype for trying new methods and materials for me. I had never ink blended a setting sun sky using Distress Inks and blending sponges, so my sky is a bit “spotty.” I experimented with using Nuvo drops to cover an entire surface (car, witch’s hair and neck.) I like the effect that Nuvo drop spread thin has on small die cut pieces but getting an even coating on large pieces was difficult. I think using a glow in the dark embossing powder would work better for the car.
I used the Hero Arts September 2020 My Monthly Hero Kit to stamp the layered image of a field of pumpkins with a corn filed in the background. The kit includes five mini cubes of ink needed to stamp each layer as well as the layered stamps and sentiment stamps. Dies to cut out a few of the images and several sheets of glitter paper round out the kits. (You need to order early the monthly kits as they sell out fast. Hero Arts is one of the few companies that lets you order a single kit without taking out a subscription.)
I stamped four of the images and layered the pumpkin field to create a taller background image. I knew I wanted a road going down the middle of the card, but in hindsight, I have the perspective all off for the angle of the road. The road is made of three pieces of black cardstock. The design of the car is for the card to be standing open in a z-fold position, so you can read the “Happy Halloween.”
The base of the card is 8 5/8 inches tall by 7 5/8 inches wide and folded at 1 7/8 inches and 3 ¾ inches.
The car driven by a white glitter paper skeleton with a glow-in-the-dark pink haired witch with glow-the-the-dark green skin, is die cut suing Spellbinder’s Sunday Drive car die set with the Halloween Sunday Drive add-on set. The car body was cut from white cardstock and then covered with the Nuvo Glow Drops Neon – Sour Apple. The taillights are Nuvo Glow Drops Neon – Shocking Pink and silver matt cardstock. Two glitter cardstock die cut skulls are in the car’s luggage rack. The brown folded down roof is colored cardstock heat embossed with clear embossing powder to get a faux leather look. The shiny hat bands on the two hats are made with Nuvo Glow Drops Neon – Blue Crush.
The small ghosts and bats lurking on the inside panel are die-cut pieces – the bats from the Halloween Sunday Drive and the “Squeaker Ghosts” by Poppy Stamps.
The sentiment and stamps used on the envelope flap are all from the Hearo Arts kit stamped in Memento tuxedo Black and the wheel in the Hero Arts brown ink cube.
For another interactive Halloween slimline card using the same supplies see Driving into a Spooky Sunset(Set to be released on September 25).