Honey Bee Stamps – Nutcracker card

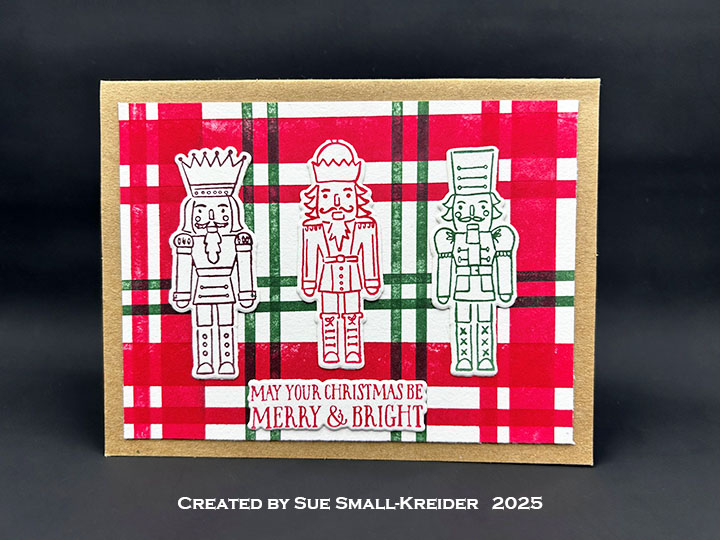
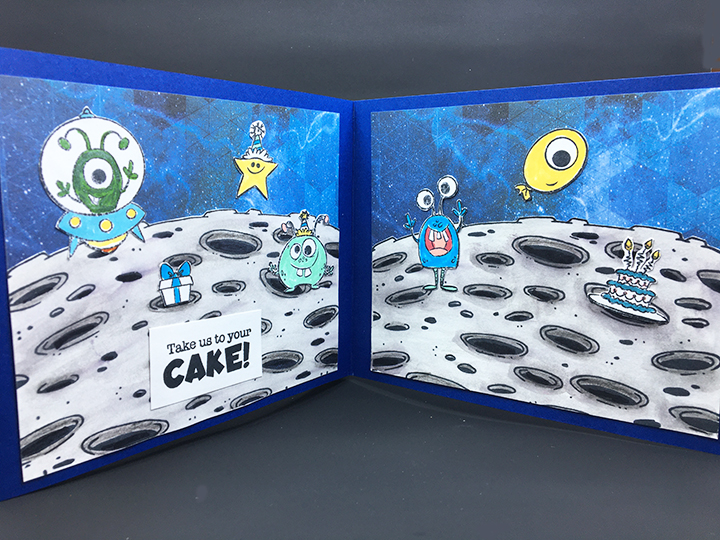
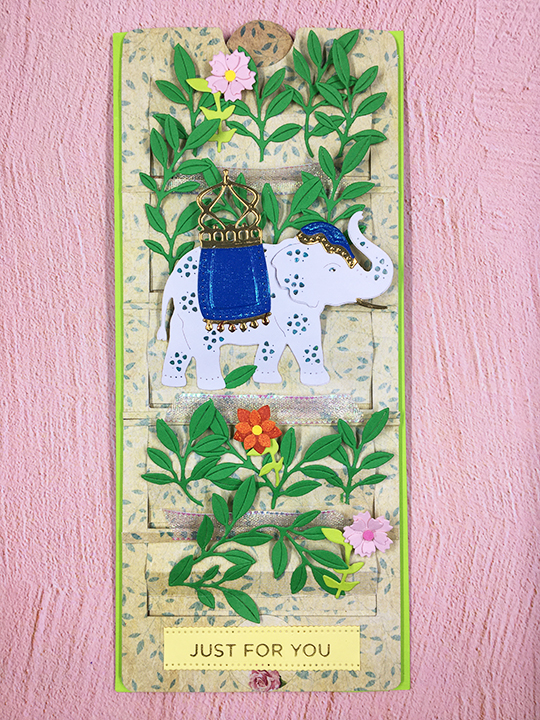
Welcome to Day 8 of my Nutcracker series using a variety of stamps and die sets to make some nutcracker themed cards. My card today uses products by Honey Bee Stamps – Nutcracker die set as well as The Greetery’s 3D embossing folder – Shortbread Shapes Snowflake, Spellbinders’ Happy Holidays die set and Art Impressions Nutcracker stamp.

Watch the process video below to learn how this card was made.

Cardbase: (I used a purchased A7 (5×7-inches) cardbase and matching envelope in white for this card.) Emboss a 6×8-inch piece of lightweight white cardstock using The Greetery’s Shortbread Shapes Snowflake 3D embossing folder, misting the folder before inserting the cardstock to emboss, following the sandwich instructions for your die-cutting machine. Once embossed, let the piece dry under the weight of the embossing fold with a large stamping block on top. Next, trim the embossed piece down to its embossed edges. Placing the trimmed edge at the folded edge of the cardbase, glue the embossed piece to the card front. Trim off excess of the embossed panel.

Nutcracker: Using Honey Bee Stamps’ Nutcracker die set, create your nutcracker as shown on the packaging or in the video above.. (There are many tiny pieces, so I found it easiest to glue pieces together as I cut them so I wouldn’t loose them.)

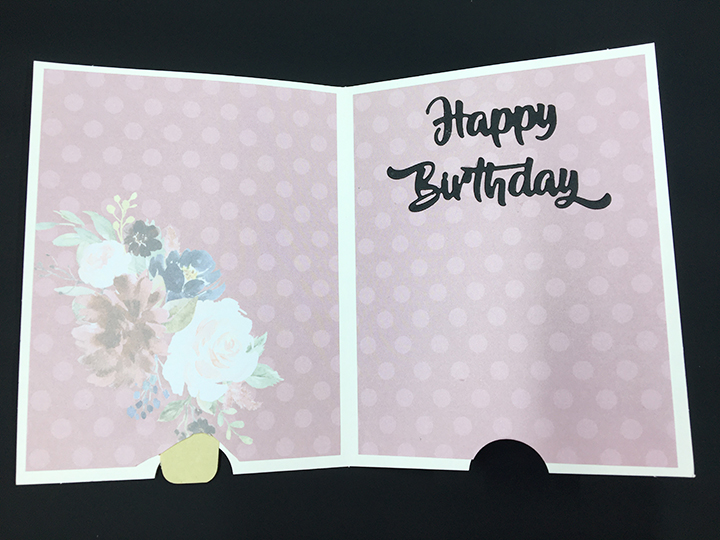
Sentiments: The inside sentiment of “Happy Holidays” was die cut from red cardstock using the Spellbinders’ die set of the same name.

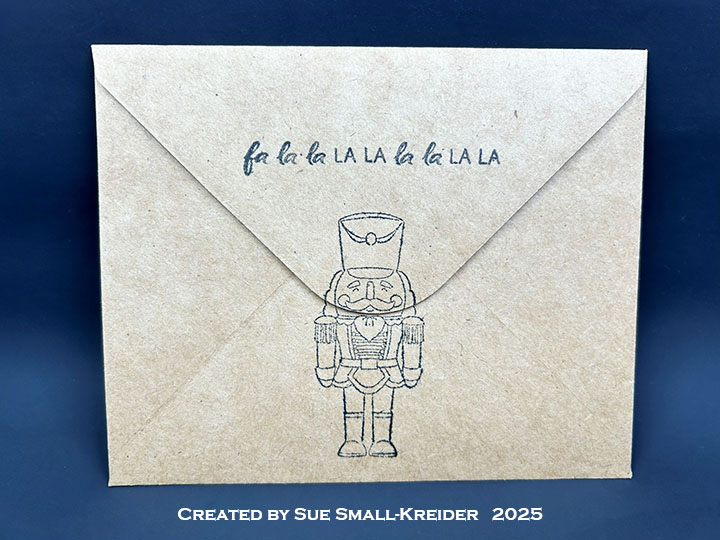
Envelope: The panel card fits into an A7 size envelope with a nutcracker on the envelope back using Hero Art’s Nutcracker stamp stamped in black ink.

___________________________________

Thank you for experiencing this blog post.

I hope this inspires you and makes you smile.

Please subscribe, like and leave comments 😊

___________________________________

Disclaimer: Karen Burniston products are provided free of charge by the manufacturer for review and use. All other items were personally purchased. Compensated affiliate links used where or when possible, meaning I will receive a small percentage commission from these manufacturers at no cost to you. This will allow me to add more content to my YouTube channel and help out a lot. Thank you.

Materials Used:

Press Plates & Dies

  • Honey Bee Stamps – Lovely Layers Dies – Nutcracker
  • Spellbinders – Scrapbook.com Dies – Happy Holidays

Embossing Folders

  • The Greetery – 3D embossing folder – Shortbread Shapes Snowflake

Stamps

  • Art Impressions – Unmounted Rubber Stamp – Nutcracker – 6139

Ink

  • Memento – Fade Resistant Dye ink – Tuxedo Black
  • OLO – Marker – Bubble Gum & Cotton Candy
  • Pigma – Mircon 01 Fine Tip Pen – Black
  • Sharpie – Permanent Marker – Fine Tip – Black

Papers

  • Black, Pink, Red, and White Cardstock
  • Matte Gold Junk Mail Scraps
  • Park Lane Paperie – A7 Cardbase and Envelope – White

Adhesives

Tools

  • Die Cutting Machine
  • Paper Trimmer
  • Stamping Platform
  • Riley and Company – Pick & Poke Tool
  • Tweezers
  • Stamping Blocks used as paperweights
  • Spellbinders – Mighty Mister Spray Bottle
  • We R Memories – QuickStick
  • Scissors

Scrapbook.com – Ballerina & Nutcracker Card

Welcome to Day 7 of my Nutcracker series using a variety of stamps and die sets to make some nutcracker themed cards. My card today uses products by Scrapbook.com – Nutcracker paper collection and Nutcracker and Ballerina die set as well as and Spellbinders’ 3D embossing folder – Waffle Cone, Simon Hurley’s Better Press press plates & dies set Nutcracker Trio and Art Impressions Nutcracker stamp.

Watch the process video below to learn how this card was made.

Cardbase: I turned a top-folding A2 (4.25×5.5-inches) cardbase in white on its side to make a short side-fold horizontal card. Start with an 8.5×4.25-inch rectangle and fold in half. Cover the front and back with panels of patterned paper embossed with the Spellbinders’ 3D embossing folder – Waffle Cone.

Nutcracker & Ballerina: Using Scrapbook.com’s Nutcracker and Ballerina die set, create your nutcracker and ballerina as shown on packaging or in the video above.. (There are many teenie tiny pieces, so I found it easiest to glue pieces together as I cut them so I wouldn’t loose them.)

Sentiments: The sentiments are from Simon Hurley’s Better Press press plates & dies set Nutcracker Trio printed in red BetterPress ink and cut out using the matching dies in the set.

Envelope: The panel card fits into an A2 size envelope with a nutcracker on the envelope back using Hero Art’s Nutcracker stamp stamped in red ink.

___________________________________

Thank you for experiencing this blog post.

I hope this inspires you and makes you smile.

Please subscribe, like and leave comments 😊

___________________________________

Disclaimer: Karen Burniston products are provided free of charge by the manufacturer for review and use. All other items were personally purchased. Compensated affiliate links used where or when possible, meaning I will receive a small percentage commission from these manufacturers at no cost to you. This will allow me to add more content to my YouTube channel and help out a lot. Thank you.

Materials Used:

Press Plates & Dies

  • Scrapbook.com – Shape Dies – Nutcracker and Ballerina
  • Spellbinders – Simon Hurley’s BetterPress Press Plates & Dies – Nutcracker Trio

Embossing Folders

  • Spellbinders – 3D embossing folder – Waffle Cone

Stamps

  • Art Impressions – Unmounted Rubber Stamp – Nutcracker – 6139

Ink

  • Gel Pens – Pink & Red
  • Memento – Fade Resistant Dye ink – Rose Bud
  • OLO – Marker – Cotton Candy
  • Pigma – Mircon 005 Fine Tip Pen – Black
  • Spellbinders – Dina Wakley Media’s BetterPress Ink – Ruby

Papers

  • Scrapbook.com – BetterPress – 6×8-inch Double-Sided Cardstock – Nutcracker
  • Spellbinders – BetterPress – 5.5 x 4.25” (A2) Cotton Card Panels – Porcelain & Pebble
  • Black, Pinks, Red, White and Yellow Cardstock
  • Fraser Papers for William House – A2 Envelope – Genesis Text Milkweed Smooth

Adhesives

Tools

  • Die Cutting Machine
  • Paper Trimmer
  • Bone Folder
  • Stamping Platform
  • Stamping Block
  • Tweezers
  • Stamping Blocks used as paperweights
  • We R Memories – QuickStick

BetterPress-Nutcracker Christmas Card

Welcome to Day 5 of my Nutcracker series using a variety of stamps and die sets to make some nutcracker themed cards. My card today uses products by Spellbinders – Simon Hurley’s BetterPress press plates & dies set Nutcracker Trio and Dina Wakley Media’s BetterPress inks of Eggplant, Fir and Ruby.

Watch the process video below to learn how this card was made.

Cardbase: I used a purchased kraft paper A2 (4.25×5.5-inch) cardbase and matching envelope.

Nutcrackers & Plaid Background: The plaid background was created using the Spellbinder’s BetterPress of the Month – Design A Plaid press plate set using red and green ink. The nutcrackers and sentiment are from Simon Hurley’s Better Press press plates & dies set Nutcracker Trio printed in purple, red and green. The inside sentiment banner is from the Design A Plaid set.

Envelope: The panel card fits into an A2 size envelope with a nutcracker and “fa la la la la la la la la” on the envelope back using Karen Burniston’s Season of Cheer and Hero Art’s Nutcracker stamp.

___________________________________

Thank you for experiencing this blog post.

I hope this inspires you and makes you smile.

Please subscribe, like and leave comments 😊

___________________________________

Disclaimer: Karen Burniston products are provided free of charge by the manufacturer for review and use. All other items were personally purchased. Compensated affiliate links used where or when possible, meaning I will receive a small percentage commission from these manufacturers at no cost to you. This will allow me to add more content to my YouTube channel and help out a lot. Thank you.

Materials Used:

Press Plates & Dies

  • Spellbinders – Simon Hurley’s BetterPress Press Plates & Dies – Nutcracker Trio
  • Spellbinders – BetterPress of the Month Press Plates & Dies – Design A Plaid

Stamps

Papers

  • Spellbinders – BetterPress – 5.5 x 4.25” (A2) Cotton Card Panels – Porcelain & Pebble
  • Target – A2 Cardbase and Envelope – Kraft

Ink

  • Pigma – Mircon 01 Fine Tip Pen – Black
  • Spellbinders – Dina Wakley Media’s BetterPress Ink – Eggplant, Fir and Ruby

Adhesives

Tools

  • Die Cutting Machine
  • Spellbinders – BetterPress Letterpress System
  • Paper Trimmer
  • Stamping Blocks used as paperweights
  • Spellbinders – Best Ever Craft Tape

No Calorie Birthday Cards

Some of my favorite birthday cards have been about food. Here is a look back at some of them.

Triple The Fun With Mini Mini Slimline Pop-Up Cards

Popcorn Lover’s Birthday Card From All of Us

A Party Without Cake

When the Zoo Comes to You

There’s Always Room for Cake

Just For You

A July 4th Birthday

One in a Melon

Over the Moon Birthday

Tiered Cupcakes

The Best Baking Birthday Card

Celebrate with Cupcakes!

A Party Without Cake Is Just A Meeting

Carousel Birthday Card

A Practically Perfect Birthday Card

A Small Album of Encouragement to Chase Away the Winter Blues

This mini album was made for Craft Roulette #195 whose parameters included Project type of Encouragement, calm colors, stuffed element and ticket(s).

I have made one other journal similar to this one in a virtual workshop by Kim Hein from Art Impressions using their Mini Journal Template and stamps. In thinking about the layout, I decided that I wanted a positive affirmation for the center back page and all the interleaving pages to it to be wintery and joyful. The theme is chasing the winter blues away.

Watch a painting tutorial before coloring any of the watercolor pieces.

Window Journal Cover:  Using the window frame and window arch dies from the Mini Journal template set, cut the arch opening into the left album cover and two of the window frames from white cardstock.

Cut a piece of clear acetate/plastic slightly larger than the window frame. Using narrow double-sided tape on the backside of one window frame, adhere the frame to the acetate piece. (Hint: If the double-sided tape is wider than the frame, peel off the backing paper and fold the tape over on itself to fit the frame.) Trim off the excess acetate around the frame. Add double sided tape to the back of the acetate and adhere over the cover opening. Attach the second frame to the back of the cover over the opening.

Room Scene Journal Cover:  Stamp onto patterned paper the chair from the Matchbook Den stamp and die set. Cut out using the matching die and trim off the tab with scissors. Stamp the fireplace onto watercolor paper using a alcohol based ink and color using water-soluble inks with a water brush. Die cut fireplace and trim off tabs. Die cut picture frame and color with ink. Write the word “JOY” in the frame’s picture area with a fine-tipped blue marker. Cut a scalloped edge rectangle from a wallpaper-like patterned paper using die from the Mini Journal Template set. Assemble room scene onto the right cover panel.

Pocket of Encouragement and Ticket Pages: The blue ticket was computer generated. The yellow tags with affirming statements were from my stash of batch foiling using Spellbinder Glimmer System products. A large needle was used to pierce and thread the embroidery floss through the tags. The scalloped background piece and white lacy pocket were die cut using dies from the Mini Journal Template set.

Joy and Snowman Twister Pages: Stamp the fronts and backs of the twister Joy and snowman using the Mini Christmas Twister stamp and die set. Watercolor them. (I used glitter gloss and glitter brush markers on the twisters.) Watch a twister assembly video before assembling. Die cut two of the rectangles from patterned paper for each page using the large straight edge rectangle die in the Mini Journal Template set. Position the decorative papers onto the white page base pieces making sure not to cover the tabs. Secure the papers to page with removable tape and tape in place the smaller of the twister oval dies. Die cut through all three layers. (I had to recut the bottom layer of decorative paper, but the impression of the die was there to show me the position.) Glue patterned paper to page. (I die cut two oval frames for the “JOY” page using the two twister oval dies. They made the opening too thick to get good action with the twister, so I had to trim some of the notch away. I would not use frames unless they were from very thin paper.)

Snowman and House Pages: Using the WC Snow Globe stamp and die set, stamp the house and snowman on to 2×2 1/2-inch rectangles of watercolor paper. (I watercolored the images after viewing a number of the Art Impression painting videos.) Use the frame die in the Mini Journal Template set to cut out the images. (You can use the rest of the image that is die cut as I did with the house, or die cut a frame from decorative paper as I did with the snowman.)

Little Birds Pages:  Die cut two scalloped circles using the die from the Mini Journal Template set. Stamp two birds from the Matchbook Garden set. Watercolor as shown in the opening video of this blog post. Using two of the oval cut outs from the patterned papers used for the Joy Twister page, and two scalloped rectangles of patterned paper, assemble the two bird pages. Stamp and die-cut the “hello Sunshine” banner from the Matchbook Garden set to place on the back center page.

Back Message and Ribbon Closure: I computer generated the back cover sentiment and used dies from the Mini Journal Template set to cut it out, frame and mat it. This panel is glued over the 24-inch piece of ribbon to hold it in place. Trim ribbon as needed once tied into a bow.

Thank you for reading this blog post. I hope this inspires you and makes you smile. Please like and leave comments 😊

Materials Used:

Dies

  • Art Impressions – Steel Dies – Mini Journal Template – 5718
  • Art Impressions – Steel Dies – Mini Christmas Twister Set – 5815
  • Art Impressions – Steel Dies – Matchbook Den Set – 5322

Stamps

  • Art Impressions – Clear Stamps – Mini Christmas Twister Set – 5815
  • Art Impressions – Clear Stamps – Matchbook Den Set – 5322
  • Art Impressions – Clear Stamps – Matchbook Garden – 5444
  • Art Impressions – Clear Stamps – WC Snow Globe Set – 5791

Foiling Plates

  • Spellbinders – Glimmer Hot Foil Plate – Mini Everyday Sentiments

Papers

  • Art Impressions – 6×6 Double-Sided 80lb Cardstock – Mini Journal Series -Mini PP -5835
  • Studio Light – 6×6 inch/15.2×15.2 cm Single-Sided Papers – Let it Snow
  • Master’s Touch – Watercolor Cold-Press Surface, Acid-Free Paper- 140lb/300gsm
  • White Cardstock

Ink

  • StazOn – Solvent Ink – Jet Black
  • Ranger – Tim Holtz – Distress Ink- Walnut Stain, Salvaged Patina, Salty ocean, Prize Ribbon, Mowed Lawn, Fossilized Amber, Forest Moss, Fired Brick and Black Soot
  • Dr. Ph. Martin’s Bleed Proof White
  • Scrapbook.com – Glitter Brush Marker – Frosty Blue
  • Sharpie – Permanent Marker – Ultra Fine Tip – Turquoise
  • Pigma – Mircon 01 Fine Tip Pen – Black
  • Nuvo – Aqua Shimmer – Glitter Gloss

Adhesives

  • Neutral PH Adhesive by LINECO
  • Fine-Tip Glue Bottle
  • Scor-Tape – Double-Sided Tape -1/8-inch wide

Tools

  • Die Cutting Machine
  • Bone Folder
  • Stamping Platform
  • LDRS – Stampendable Stamping Tool
  • Water Brushes
  • Craft Mat
  • Scissors
  • Spellbinders – Glimmer Hot Foil System
  • Large Needle

Miscellaneous

  • Gingham Ribbon – 5/8-inch wide – Blue
  • Embroidery Floss – Blue #824, Yellow #3822, Green #906

Burning Logs TV

This is the fifth card in the Fireplace Christmas Card series.

In the good old-days of the 1950s and 1960s, the winter holidays meant snow, winter sports like ice skating on a homemade ice ring made in the backyard of 2×4 boards and a few inches of water frozen. On Christmas day the TV stations broadcast images of burning logs to replace the normal programing.

This card commemorates those childhood memories using dies by Hero Arts along with basic dies and stamps by other companies.

Cardbase: I used a purchase A7 (5×7 inch) cardbase and envelope. I covered the inside with papers that represent wallpaper and carpeting. The card back is also covered with patterned paper. Because I used 6×6 inch patterned paper and some designs I only had one piece, I placed borders of contrasting paper.

Pop-Up: I wanted this television set to pop-up inside the card, so once it was assembled, I made my own pop-up cube from scrap carpeting patterned cardstock (I would have used the wallpaper, but I had no more of it.) The pop-up cub is made from strip 2.5×7 inches, folded at .5-inches, 3-inches, 3.5-inches and 4-inches, and the .5-inch tab is glued onto the carpet panel inside the card, butted up against the fold and the other 3-inch end of the strip glued to the wallpaper panel.  The TV is glued to the front of the pop-up.

TV: As with many Hero Arts dies, you have to cut them multiple times and then fussy cut with scissors the decorative pieces such as the TV knobs, speaker box and legs. I cut the knobs, speaker and screen frame from a textured metallic gray cardstock and legs from woodgrain paper.

The whole television I cut once from black and twice from a thick cardstock in my junk mail recycling. The junk mail pieces I glued together. On the back of the black piece, I attached a piece of clear acetate using thin double-sided tape. Next, I trimmed the excess acetate. (Don’t attach black front to junk mail back piece until burning log screen is attached.)

White cardstock that was colored with markers and covered with glitter gloss was used for the flames while recycled kraft cardboard packaging was what the logs were cut from. Once the burning logs were assembled, they were glued to star patterned paper TV screen piece. Place a piece of wide clear packing tape over the backside of the junk mail piece and place the finished screen inside the junk mail frame. Glue the black front to the junk mail piece.

Attach the TV to the pop-up inside card. Play with the antenna placement so they won’t show when the card is closed. (I cut the antenna once from silver foiled packaging and once from the thick junk mail cardstock and glued together.)

Card Front: For this layered mat front, I used a 5×7 inch rectangle of holographic snowflake cardstock that I cut a 4×5.25 inch crosshatch rectangle out of the center. A 4.25 x 5.5 inch piece of glitter cardstock was covered with a snowflake pattern plate attached with 1/8-inch wide double-sided tape. The open places in the center of some snowflakes had stickiness from the tape adhesive and was covered with an anti-static brush and powder.

Skaters: Hero Arts makes a paper doll die-cut series complete with a variety of hair and facial expressions as well as clothing and accessories. These mid-century styles ice skaters use the Winter Accessories set along with the basic Hero Lifestyle Forms and Faces sets. Markers were used to color the clothing.

Sentiments: Two die cut sentiments were used on this card. On the front is “Up To Snow Good” a pieced die set by Riley & Company. I cut it once from heavy white cardstock and colored the letters with a blue metallic marker. I used glue to attach all pieces to the snowflake pattern plate. Inside the card is “Happy holidays” a die set by Simon Says Stamp. The lavender rug inside the card is a place for a personal message.

Envelope: To hint at what is to come, the back flap of the envelope was stamped with an Art Impressions’ sentiment stamp in blue ink.

Thank you for reading this blog post. I hope this inspires you and makes you smile. Please like and leave comments 😊

Other Fireplace Cards by designer/brand

Materials Used:

Dies

Stamps

  • Art Impressions – Unmounted Rubber Stamp – Scrapbook.com Exclusive – Sending a Flurry of Holiday Wishes! – 5085
  • Hero Arts – Fancy Dies – Hero Lifestyle Faces – CM500

Papers

  • Bazzill – 8.5×11 Textured Cardstock – Tiara -18-1002
  • Crate Paper – 6×6 Single-Sided Patterned Paper Pad – Cool Kid
  • Grafix – 8.5×11 Acetate .0075 – Clear
  • Honey Bee Stamps – 6×8.5 Double-Sided Paper Pad – Grain and Grunge
  • Hot Off the Press – 8.5×11 Holographic Cardstock – Snowflakes Blue – HOTP-10460
  • Recollections – 8.5×11 White Gold Shimmer Cardstock
  • Thick Smooth Cardboard Junk Mail
  • Thick Kraft Cardstock Packaging
  • Blue Glitter Cardstock
  • White, Black, Blue, Lavendar and Cream Cardstock
  • Park Lane Paperie – A7 Cardbase and Envelope – White

Ink

  • Stampin’ Up – Classic Stampin’ Pad – Misty Moonlight
  • Memento – Fade-Resistant Dye ink – Tuxedo Black
  • Ranger – Tim Holtz – Distress Watercolor Pencil – Kitsch Flamingo
  • Crafter’s Square – Metallic Marker – Blue and Silver
  • Sharpie – Permanent Marker –Fine Tip – Black, Red and Yellow
  • Sharpie – Permanent Marker – Ultra Fine Tip – Brown
  • Nuvo – Aqua Shimmer -Glitter Gloss
  • White Gel Pen

Adhesives

Tools

  • Die Cutting Machine
  • We R Memories – QuickStick
  • Stamping Platform
  • LDRS – Stampendable Stamping Tool
  • Stamping Cloth
  • Scissors
  • Kat Scrappiness – Anti-Static Tool

When Pigs Fly

In honor of all newly minted sixty-year-olds, this card is in tribute to you (whether you want to believe it or not.)

Flying Pig:  Bonnie Krebs has designed this delightful flying pig as one of Art Impressions Flutters cards. The set comes with dies to cut out the pig and the two wings as well as punching holes in the pull strip and cutting the slot for the pull arm. This pig and wings were stamped in permanent black ink and colored with watercolor pencils. The instructions on the packaging are good, but watching a video or two helps with the exact assembly using the tiny brads that are included in the stamp and die set and either twine or thread. The pull arm is a piece of heavy cardstock that is ¾ inch wide and at least 6 inches long. (You can trim the arm shorter once the card is assembled.)

Card base:  The foiled pink plaid card base is one from a boxed set of 50 cards and envelopes size A2. Once the pig was assembled onto its pull arm, a slot was cut using the slot die and the half circle finger hole was cut through the front and back of the card base. (I recommend laying-out and pencil marking where the inside insert papers will be and cutting the half circles on them, before you do the final assembly of the flying pig pull arm onto the card base.) The pig is adhered to the card front using tiny foam squares, once the pull arm is through the slot in the card base.

Front decorations – 60 and Pull Here:  The 60 was cut from a foiled chocolate box using dies designed to be birthday cake candles. The flame and stand were trimmed off the 6 and 0. Once the pull arm has been installed to the card base, trim it off to fit inside the card base and round the corners with a corner punch. Stamp or write “Pull” with a directional arrow. (The stamp used here was from Concord & 9th)

Inside:  With the flying pig mechanism installed, adhere the inside papers using double-side tape making sure to leave a gap for the pull arm to move through freely. Add the die-cut birthday sentiment using glue.

Envelope:  I stamped the back of the envelope with birthday cake stamp to set the stage for this milestone birthday card.

Thank you for reading this blog post. Please like and leave a comment. 😊

Supplies

Dies/Stamps

Ink

Paper

Miscellaneous

Crafty Friends

Crafty Friends are fun to have and making special cards for such friends is both challenging and rewarding. This slimline mini-sliders card was made for an animal lover who appreciates interactive cards.

Instead of using my split slider template for this 9 inches x 4 inches card, I hand drew the five mini sliders and cut using a craft knife and metal ruler. (I miss cut and ended up having to reinforce the narrow bars between the sliders with additional patterned cardstock bars.) The coated Dress My Craft patterned cardstock was my last sheet of this vintage leafy print, so I had to make the slider panel work. Assembly is very similar to the assembly of the split slider template.

The foliage and floral dies used to decorate are a mishmash of dies from my collection. The elephant is one that I had assembled when I made another elephant card.

The foiled sentiment strip is one I had made during batch foiling session a while back. I used a die from a different Glimmer plate set to die cut the decorative scalloped edges.

Scraps of holographic ribbon were added between sliders to add some subtle sparkle to the card.

Inside the card I added a vellum strip to hid some tears around the half circle cut for a finger grip on the pull panel. A personal note will be added inside.

I glued 1-inch circles on the two points where the card recipient needs to place their fingers to hold and pull the slider panel up. A CRX instruction sheet is enclosed with the card to explain how to use the card.

Stamped on the back flap of a #10 business sized envelope in blue ink is a small elephant from Bus Cubbies stamp set sitting under the sentiment “Hello Friend” from Hello Friend stamp set.

Thank you for reading this blog post. Please like and leave comments. 😊

If you enjoyed this card, check-out my original Split-Slider Slimline Series:

Day 1 – Split Sea Slider

Day 2 – Cloud Dreams

Day 3 – Triple Hearts

Day 4 – A Valentine for A Baseball Fan

Materials Used:

Dies

Stamps

Inks/Polish

Foiling

Papers

Miscellaneous

© Sue Small-Kreider 2021

One in a Melon

When you are caught eating a melon at a farm stand you know you are one in a melon!

This cute little card is made from an Art Impressions Tryfolds by Bonnie Krebs. The set has six stamps and two dies that cut the apertures or windows in the farm stand and fruit stand.

I stamped the images on white cardstock with a permanent black ink that won’t run when wet and colored with watercolor pencils. Next I fussy cut the images.

The card base is made from two pieces blue gingham cardstock (5 ½ inches x 4 ¼ inches) and a piece of green gingham cardstock cut 6 inches x 4 ¼ inches. The green piece was scored and fold at ¼ inch on each end to form two tabs to glue the two blue pieces to form the tri-fold card.

I positioned my stamped, colored and cut out images following the layout on the packaging to determine the positioning of the front image. I traced the inside of the opening onto the card front and used the accompanying die to die cut the hole. Next, I glued the image in place on the front. I did the same for the middle image on the second flap, positioning the image so it shows through the aperture cut in the first image and then die-cutting the aperture. The final image was positioned, traced and then glue in place on the central panel.

The “Happy Birthday” is die-cut from green cardstock and glued in place.

Stamped on the back flap of an A2 slim envelope from Taylored Expressions is the sentiment from the stamp set “You’re one in a Melon!” green ink.

Thank you for reading this blog post. Please like and leave comments. 😊

If you enjoyed this tri-fold card, check out some of my other trifolds:

Shabby Chic Trifold Card

Festive Foliage and Hearts – Trifold card

Santa Vintage Trifold

Sleepytime Dreams

Materials Used:

Dies

Stamps

Inks/Watercolors

Papers

Miscellaneous