Crafty Friends are fun to have and making special cards for such friends is both challenging and rewarding. This slimline mini-sliders card was made for an animal lover who appreciates interactive cards.
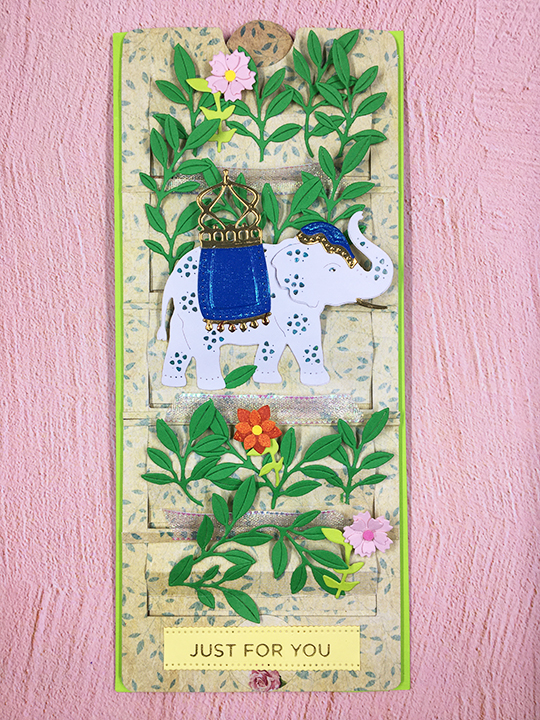
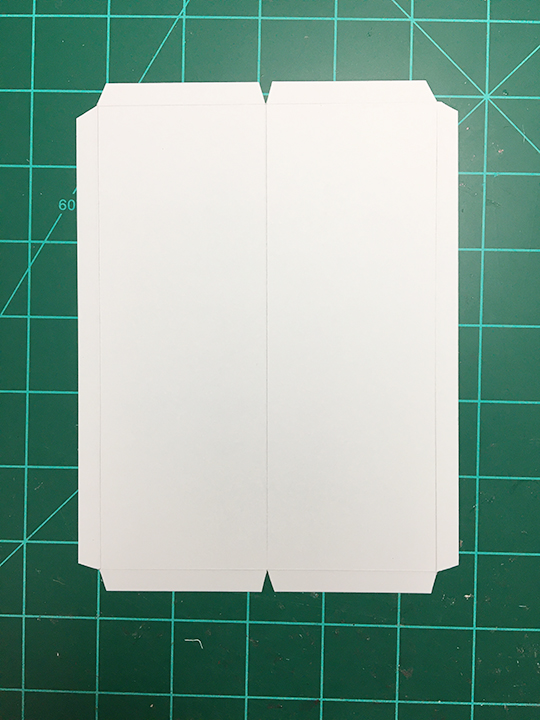
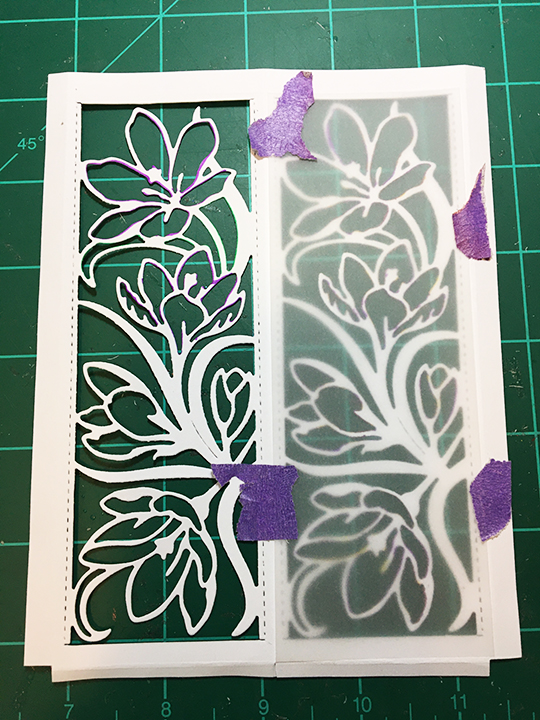
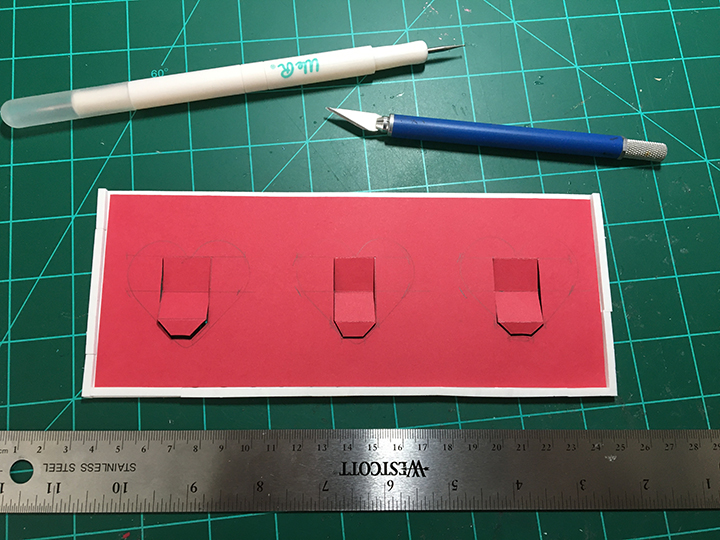
Instead of using my split slider template for this 9 inches x 4 inches card, I hand drew the five mini sliders and cut using a craft knife and metal ruler. (I miss cut and ended up having to reinforce the narrow bars between the sliders with additional patterned cardstock bars.) The coated Dress My Craft patterned cardstock was my last sheet of this vintage leafy print, so I had to make the slider panel work. Assembly is very similar to the assembly of the split slider template.


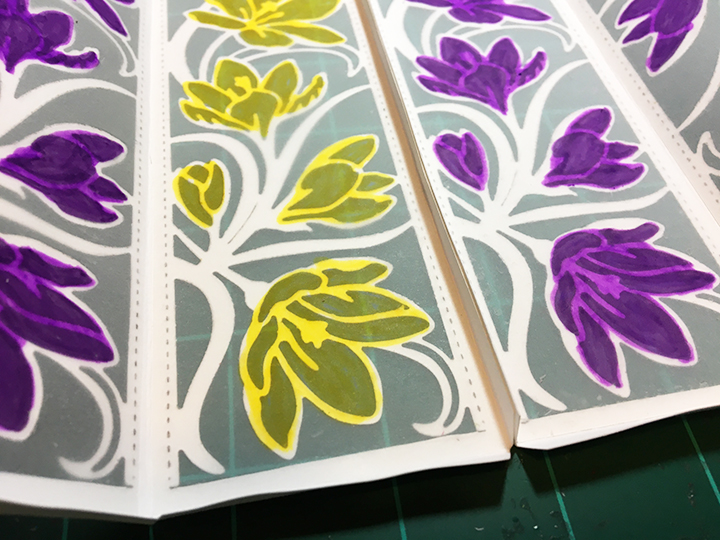
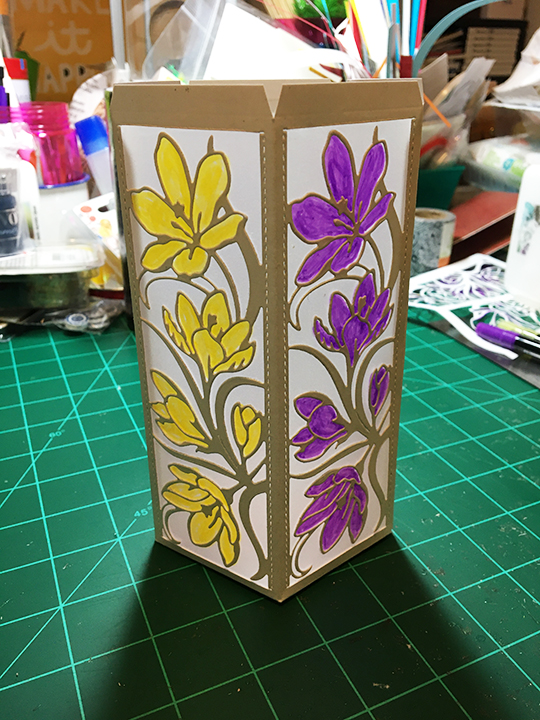
The foliage and floral dies used to decorate are a mishmash of dies from my collection. The elephant is one that I had assembled when I made another elephant card.

The foiled sentiment strip is one I had made during batch foiling session a while back. I used a die from a different Glimmer plate set to die cut the decorative scalloped edges.
Scraps of holographic ribbon were added between sliders to add some subtle sparkle to the card.

Inside the card I added a vellum strip to hid some tears around the half circle cut for a finger grip on the pull panel. A personal note will be added inside.
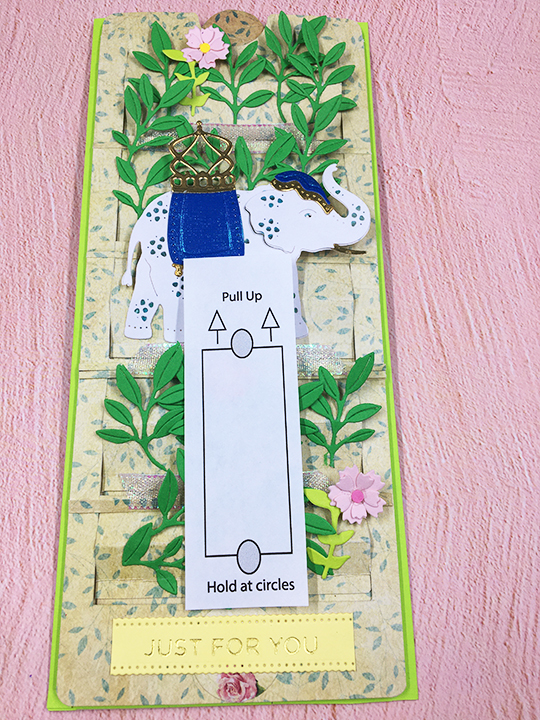
I glued 1-inch circles on the two points where the card recipient needs to place their fingers to hold and pull the slider panel up. A CRX instruction sheet is enclosed with the card to explain how to use the card.
Stamped on the back flap of a #10 business sized envelope in blue ink is a small elephant from Bus Cubbies stamp set sitting under the sentiment “Hello Friend” from Hello Friend stamp set.
Thank you for reading this blog post. Please like and leave comments. 😊
If you enjoyed this card, check-out my original Split-Slider Slimline Series:
Day 4 – A Valentine for A Baseball Fan
Materials Used:
Dies
- Memory Box – Craft Die – Leafy Heart -94377
- Spellbinders – Die D-Lites Elephant Festival Etched Dies – S3-385
- Spellbinders – 3D Fun Time Cruiser – DOML-JUL19 – Flowers
- Spellbinders – Glimmer Plate & Dies – More Sentiments – GLP-156
- Spellbinders – Fun Stampers Journey 1″ Circle Punch – TO-0013
Stamps
- Art Impressions – Unmounted Clear Stamps with dies – 4759 – Hello Friend MTF
- Art Impressions – Clear Stamps & Dies by Bonnie Krebs -Bus Cubbies-5226
Inks/Polish
- Stampin’ Up – Classic Stampin’ Pad – Blueberry Bushel
- Cosmic Shimmer Opal Blaze Polish –Teal Raspberry
Foiling
- Spellbinders – Glimmer Kit of the Month – February 2019 -GOM-FEB19
- Spellbinders – Glimmer Hot Foil Roll – Matte Gold – GLF- 002
- Spellbinders – Glimmer Hot Foil System – GLS-001
- Spellbinders – Quick Trimmer – T-017
Papers
- White, gold mirror and colored card stock scraps from my stash
- Dress My Craft – Teenie Weenies – 12″ x 12″ Paper Pad
- Vellum scrap from my stash
- Cream #10 Business Envelope
Miscellaneous
- Cosmic Shimmer Acrylic Glue
- Scrapebook.com Clear Double Sided Adhesive Roll ¼ inch
- American Craft – 1/8 inch wide Sticky Thumb double-sided super sticky tape
- Stampin’ Up – Foam Adhesive Strips – 141925
- Tonic Studios – Tim Holtz Stamp Platform
- Die cutting machine
- Metal Ruler
- T-square ruler
- Pencil
- Scissors
- Craft knife
- Low Tack Tape
- Clear Tape – Scotch Magic Tape
- Small Corner Punch
- Holographic ribbon scraps from my stash
- Blue Washi Tape from my stash
© Sue Small-Kreider 2021