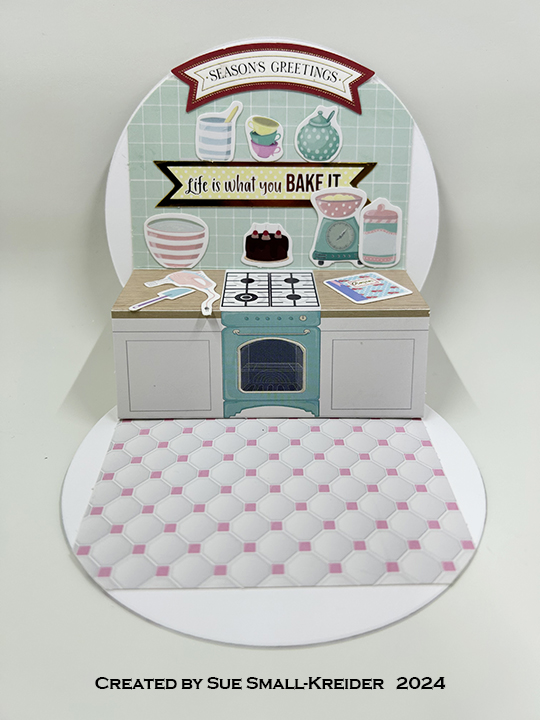
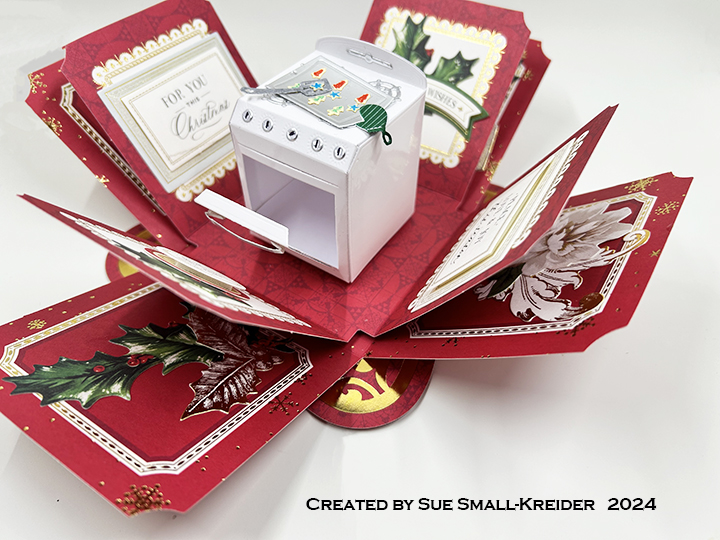
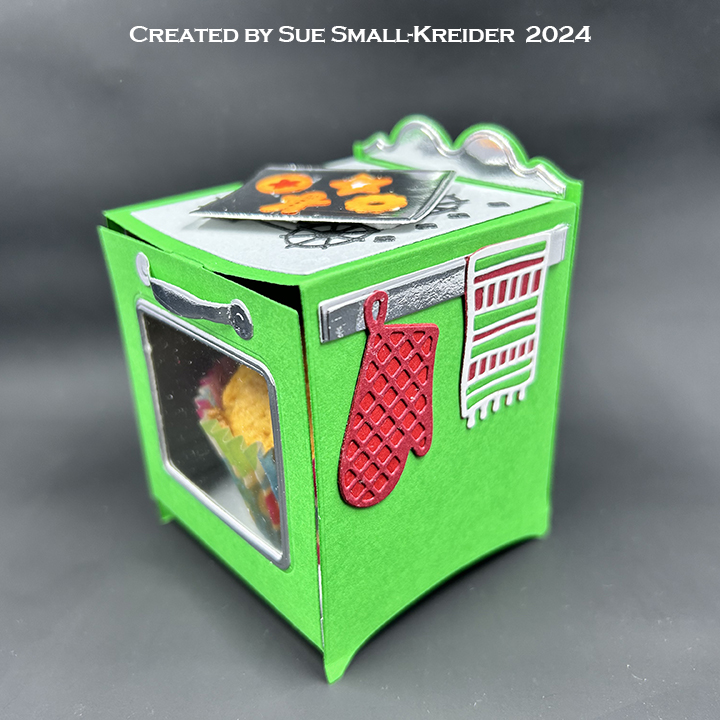
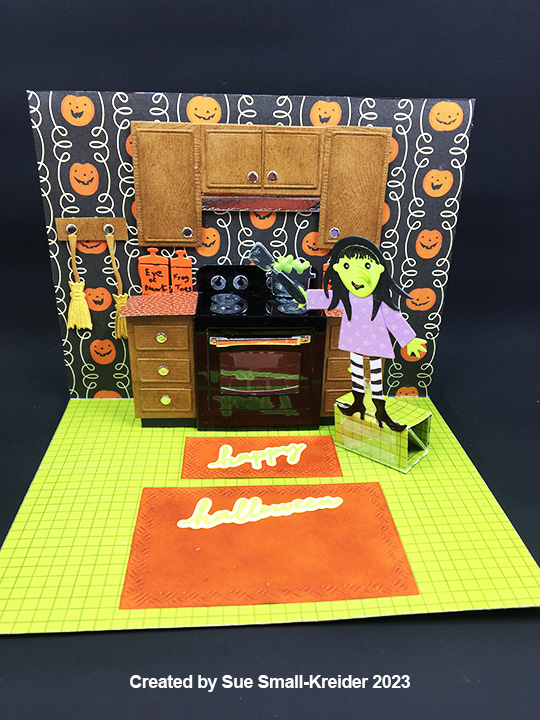
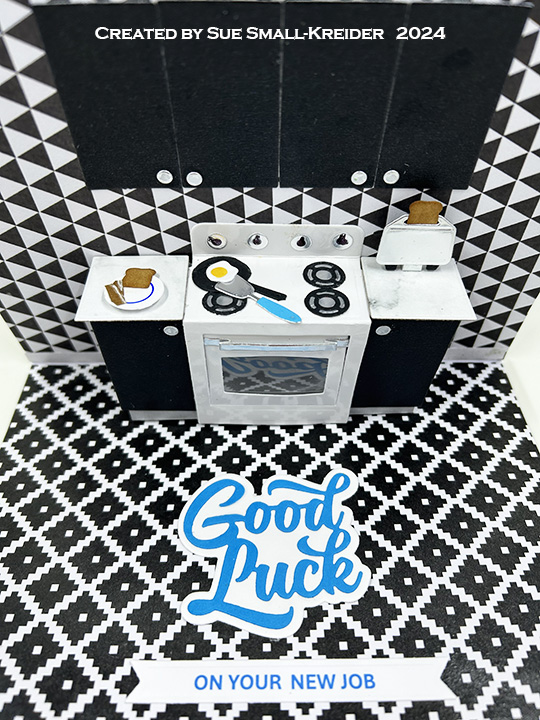
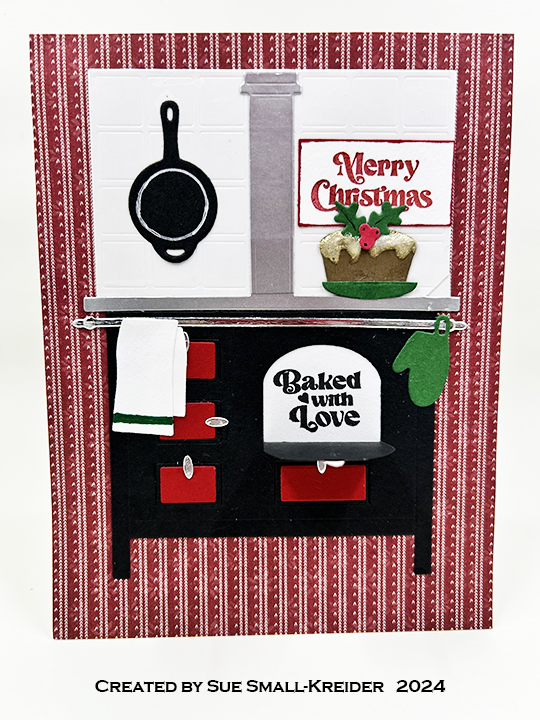
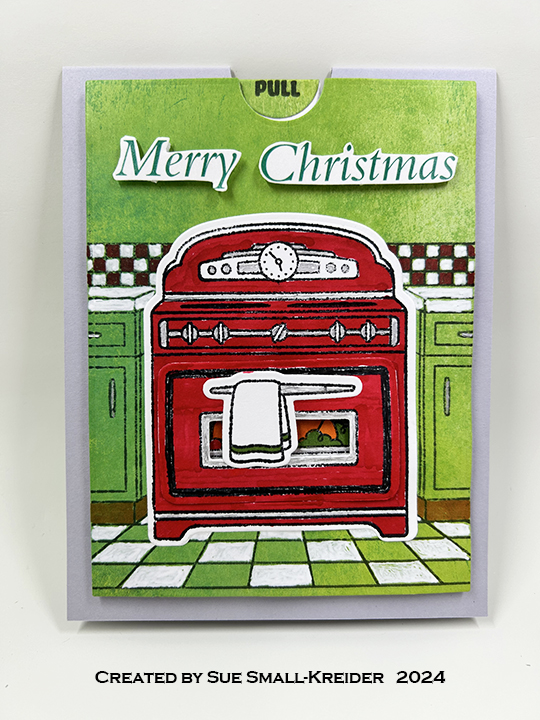
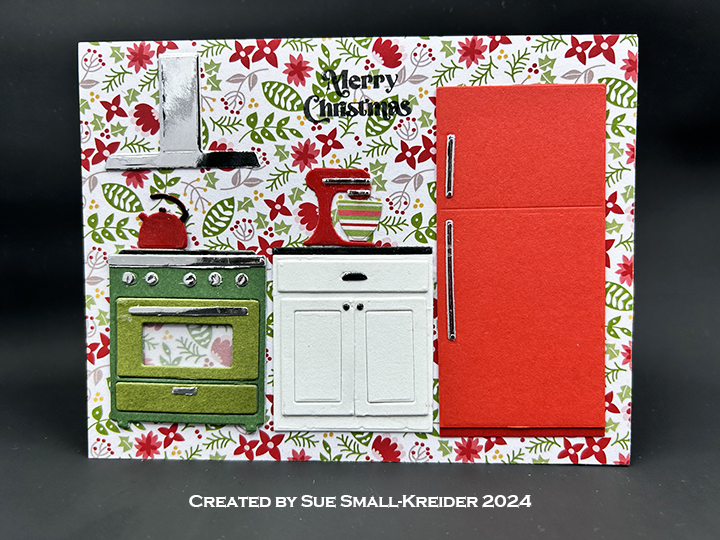
I have been collecting and making oven cards for several years now. Here is a collection of all my ovens blog posts. Click on an image to see details of the oven.
(Images are posted from the earliest release of dies/stamps/kits 2016 to newest 2023.)
____________________________
Thank you for experiencing this blog post.
I hope this inspires you and makes you smile.
Please like and leave comments 😊
___________________________________
Disclaimer: Karen Burniston products are provided free of charge by the manufacturer for review and use. All other items were personally purchased. Compensated affiliate links used where or when possible, meaning I will receive a small percentage commission from these manufacturers at no cost to you. This will allow me to add more content to my YouTube channel and help out a lot. Thank you.
I’m using Paper Discovery’s Cosy Kitchen dies and stamp sets for today’s Christmas oven card. Olga Direktorenko is the designer behind Paper Discovery, a Craftstash/Practical Publishing brand.
Watch video above for a tutorial on how to make the card.
Cardbase: I started with a 5 3/4 x 10 1/2-inch rectangle of white cardstock that was scored and folded at 2 5/8-inches, 3 5/8-inches, 6 7/8-inches and 7 7/8-inches.
Decorations: The copper kettle and utensils are stamped on orange foil cardstock with StazOn ink using the Paper Discovery Cooking Up A Storm set and fussy cut. The trolley tables are made with a die from Paper Discovery Cosy Kitchen -Baking Fun die set. The gingerbread house, Christmas pudding and bowls are from the Lawn Fawn A Creature Was Stirring stamp set. The wallpapers, borders and picture stamps are from Graphic 45’s T’was The Night Before Christmas paper collection.
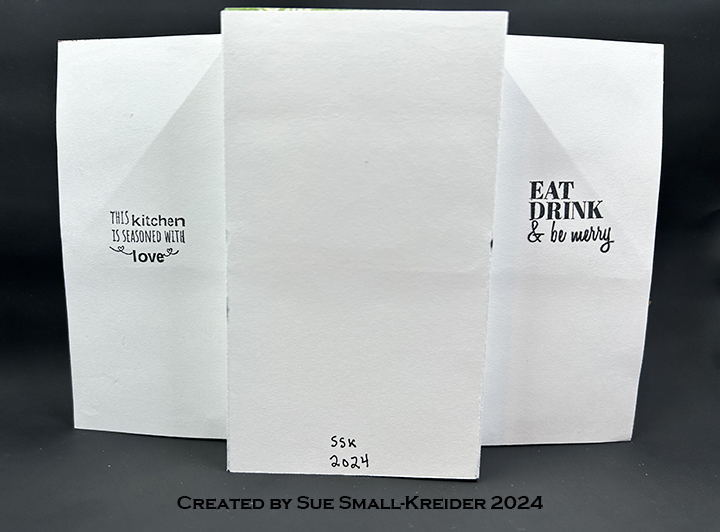
Sentiments: I used sentiment stamps from three sets. On the back of the card – “This kitchen is seasoned with love” and “Eat, Drink & be merry” are from Paper Discovery’s Simply Food set. Heat embossed in white behind the oven doors are “Merry Christmas” and “Baked with Love” from the Greetery’s Bake Someone Happy set. Also behind an oven door is “Warm Wishes” from the My Hero Monthly kitchen kit. The “NOEL” banner is a shape die set by Scrapbook.com.
Envelope: The card fits into a 6×9 catalog envelope. The back flap are stamped with an Hero Arts sentiment and images from Lawn Fawn.
___________________________________
Thank you for experiencing this blog post.
I hope this inspires you and makes you smile.
Please like and leave comments 😊
___________________________________
Disclaimer: Karen Burniston products are provided free of charge by the manufacturer for review and use. All other items were personally purchased. Compensated affiliate links used where or when possible, meaning I will receive a small percentage commission from these manufacturers at no cost to you. This will allow me to add more content to my YouTube channel and help out a lot. Thank you.
Materials Used:
Dies
Paper Discovery – Dies – Cosy Kitchen – 2D Perfect Kitchen
Paper Discovery – Dies – Cosy Kitchen – Baking Fun
Scrapbook.com – Shape Dies – Holiday Banners
Stamps
Hero Arts – My Monthly Hero Kit – May 2022 – Clear Sentiment Stamps
Lawn Fawn – Clear Stamps – A Creature Was Stirring
Paper Discovery – Clear Stamps – Cosy Kitchen – Cooking Up A Storm
Flickering candles in a dimly light room, people singing along with the guitar man, these are the cues for this birthday card for a musician.
Using Paper Discovery dies and stamps designed by another musician, Olga Direktorenko, this was a quick card to make. The large guitar face die cuts a shaped folded card base using an 8.5-inch by 11-inch piece of kraft cardstock folded in half and then cut with the long straight edge of the die jutting out slightly over the fold. Using a specialty paper-backed wood, I cut an additional card front and adhered it to the shaped cardbase with double-sided tape. The details of the pick guard, bridge and soundhole are die-cut from cardstock with the six strings cut from pearlescent vellum.
Sentiments from two different stamp sets by Olga were used inside the card. “Life is a song. Sing it” and ”Happy Birthday.” Musical notes were also used from both sets on the envelope flap.
Thank you for reading this blog post. I hope this inspires you and makes you smile. Please like and leave comments 😊
Materials Used:
Dies
Paper Discovery by Olga Direktorenko – Music -play On – Guitar & Violin Card Front
Stamps
Paper Discovery by Olga Direktorenko – Music -play On – Sentiments
Papercraft Society Box 9 – Paper Discovery by Olga Direktorenko – Music
Papers
American Crafts – 12×12 Specialty Paper Backed Wood
This is the seventh card in the Fireplace Christmas Card series.
Waiting for the grandchildren to arrive to decorate the tree. It’s that peaceful moment when the dog is asleep before the fire and the chairs are ready for tired bodies.
For this card I used two Paper Discovery die sets by Olga Direktorenko – Timeless Room and Elegant Roomas well as the Timeless Room embossing folder. These sets are available in limited quantities from Craftstash. Olga is an amazing designer of scene dies and stamps who lives in Ukraine.
Cardbase: A purchased A7 (5×7 inches) gatefold cardbase and matching envelope were used for this card. The inside was covered in a red and white striped wallpaper with embossed floor moldings made using the Timeless Room embossing folder. A red rug is in the center bottom. The outside has wreath paper from the same 6×6 paper pad as the striped paper.
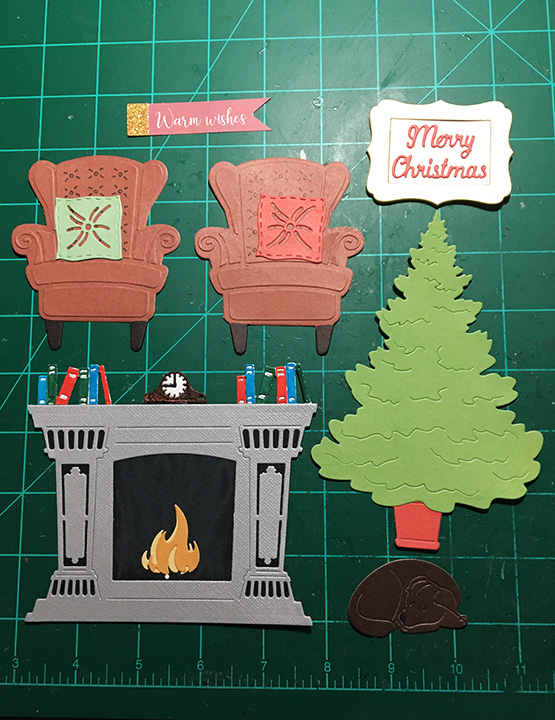
Fireplace: The fireplace die cuts a detailed image that needs to be backed with black paper to make the details stand out. The final touch is the snoozing chocolate labrador retriever in front of the fire.
Chairs: The chair die in the Timeless Room set has an outline die and then one other die that cuts all the detailed pieces that make up the dimensional chair. The seat back die has a stencil feature for tufting which I used with a fine-tipped black marker to add this detail to the chair. The cushions are from the same set. When attached to the inside flaps of the card, the chair extend slightly over the edge, but card covered by the tree on the card front when the card is closed.
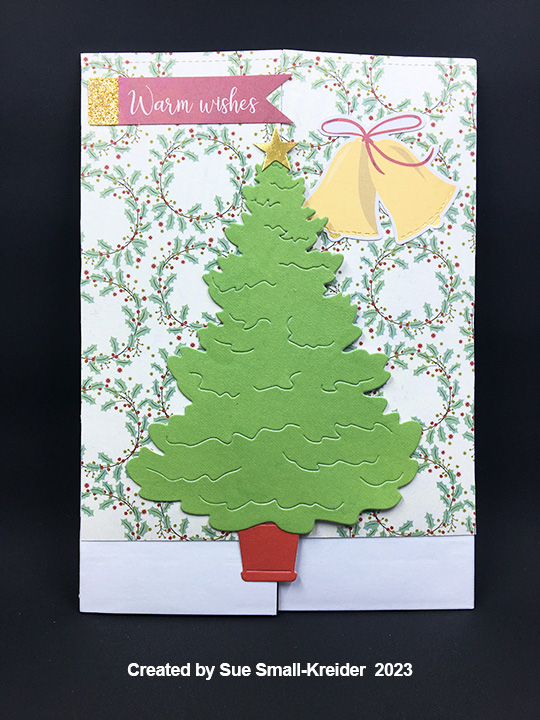
Card Front: An evergreen tree sits in a red pot waiting to be decorated. The tree is from the Elegant Room set while the pot is from the Timeless Room set. The left half of the tree is glued to the left card flap. The yellow bells were added to balance out the banner. Both are from a Spellbinder’s Christmas card kit.
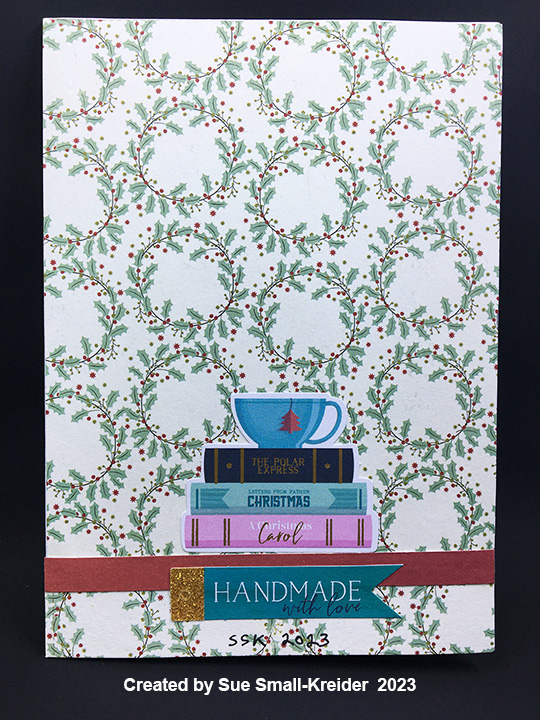
Card Back: A red strip covers the seam where the two pieces of paper meet. Ephemera from a Spellbinder’s Christmas card kit was used to decorate the back including a stack of Christmas themed books and a banner stating, “Handmade with love.”
Sentiments: The front banner “Warm Wishes” is from a Spellbinder’s Christmas card kit. “Merry Christmas” is part of the Elegant Room set and includes the frame. The two white ovals over the chairs are spaces to write personal messages.
Envelope: The back flap is decorated with yellow bells from a Spellbinder’s Christmas card kit.
Thank you for reading this blog post. I hope this inspires you and makes you smile. Please like and leave comments 😊
This is the fourth card in the Fireplace Christmas Card series.
Grand rooms to celebrate Christmas evokes feelings of another time that is both formal and cheery.
To create the 3D card front and inside pop-up fireplace, Crafter’s Companion Gemini Create-A-Card die sets were used along with a Paper Discovery embossing folder to create the textured wallpaper and moldings.
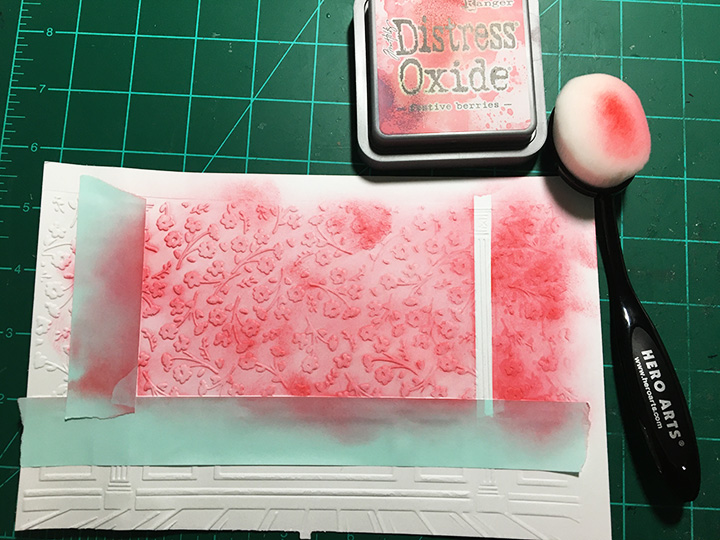
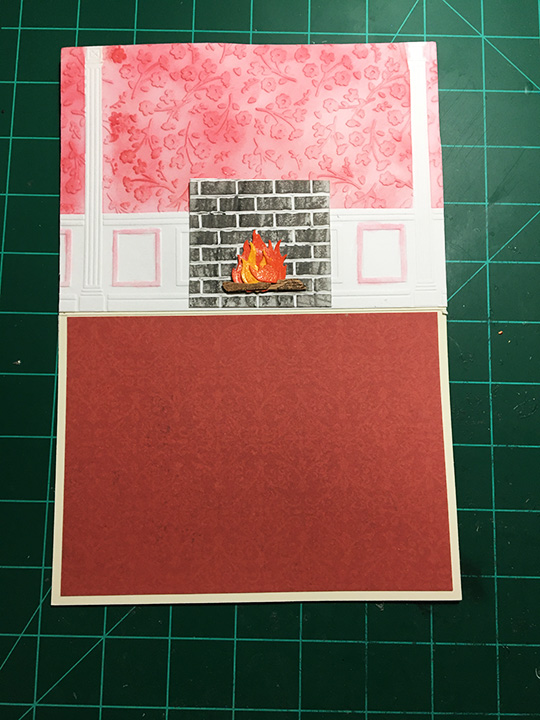
Embossed Walls: I made a room scene card a few years back using the same embossing folder to create the wall. Because I liked the look of the red ink blending and the white woodwork of that earlier card, I repeated it. I cut two pieces of heavy weight white cardstock, spritzed them with water and used the embossing folder with the suggested sandwich of embossing mat and thin plate to emboss in my die-cutting machine. (I used 3M post-It notes the last time I ink blended the wallpaper.) This time with low-tack paper tape, I masked off the columns and wainscoting molding before ink blending.
Cardbase:For the cardbase, I used a purchased ivory A6 (4.5 x 6.25 inch) card with matching envelope.The two embossed wall pieces go on the card front and the inside top panel. Because they are back-to-back, heavy layers of decorative papers need to go on the card back to balance out the weight of the two panels when the card is opened. The advent calendar numbers on the back are to suggest the counting of days until Christmas.
Card Front: I placed the embossed piece with the left column at the left edge of the card. The dies for the staircase are in the tree die set and cut just the banister and stair treads. I embossed a smaller piece of molded wainscoting to adhere the stair treads to with thin foam square. The railing backs-up to the column. Using a brown marker, I colored the hand railing before adding some greenery swags from the accessories die set and ornaments from the yuletide treasure set.
The Christmas tree is popped-up on thicker foam squares. I used some tiny holographic tinsel to create the illusion of a fir tree. More of the ornaments from the stairway are used with a glitter foam star as tree decorations. For the tree stand, I trimmed-down the coal shuttle from the accessories set after die-cutting it from black shinny packaging. The frame of the sentiment is cut from matte gold cardstock and the white sentiment pieced into the frame and glued in place with thin strips of cardstock on the backside, before being adhered to the card with thin foam squares.
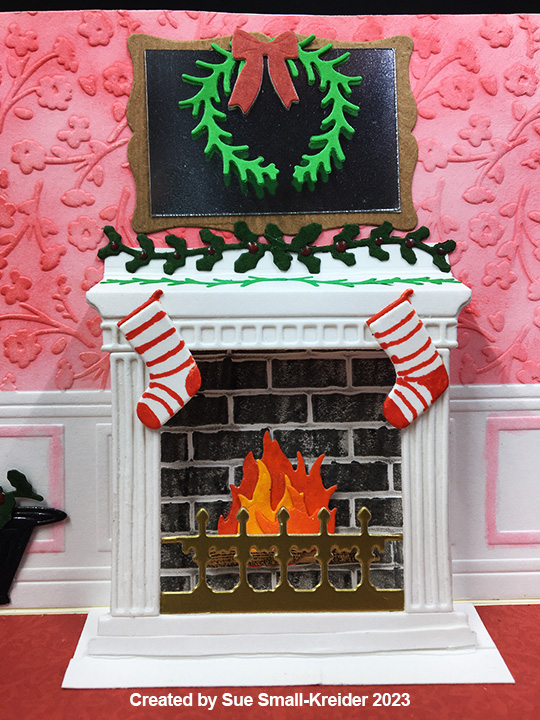
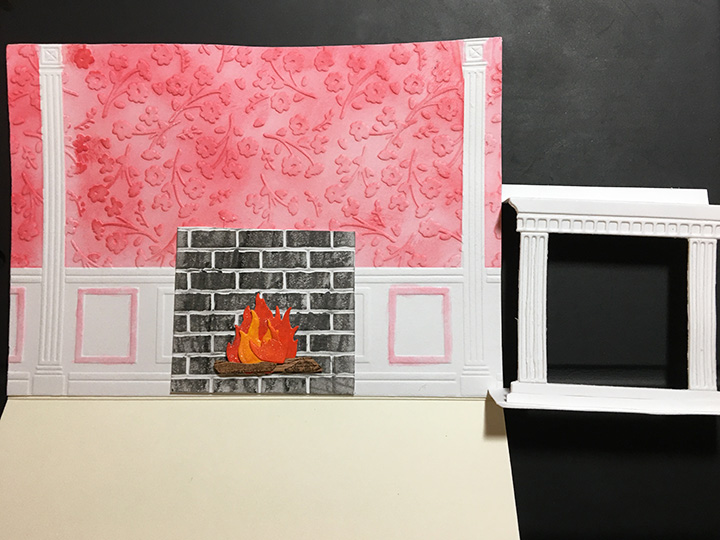
Fireplace: Because the fireplace die is designed to be cut out from the cardbase, I had to modify it by cutting it from a scrape of heavy white cardstock and cutting a .25-inch tab across the top and a similar tab at the base. The four decorative molding pieces need to glued on to the mantel piece. I cut a .5-inch strip to go across the two side flaps of the hearth stone so the firebox has a white floor.
Next, I cut a 2.5-inch square of white cardstock and embossed it in the brick folder. Using gray and back Distress crayons, I colored the bricks to look sooty before gluing them in place to the inside wall of the cardbase. Using the flame and logs from the accessories set, I cut the pieces and then used some glitter inks to color the flames. The logs were cut from brown woodgrain paper. The fender or fire guard piece was cut from gold matte cardstock and glued to the backside of the mantel piece. (Fender is also in accessories set.) The carpet needs to be glued onto the bottom inside card panel before the mantel can be glued in place. Glue goes on the bottom of the hearthstone and the back top tab. I positioned the bottom piece to be a smidge from the cardbase fold. With the fireplace folded flat on the carpet, I lowered the cardbase top panel onto the flattened mantel piece to get the correct placement.
Room Decorations: With in the accessories set, there are the coal shuttle, holly and greenery garlands, a wreath and bow, two stockings and a picture frame. The mirror is a piece of sliver plastic packaging adhered to the woodgrain embossed cardstock frame with double-sided tape. Nuvo Drops were used on the holly strands for berries. A fine-tipped marker was used to create the striped stockings.
Sentiments: There is only one sentiment of “Happy Christmas” on the card front. The cream-colored rug inside the card can be used to write a personal message.
Envelope: To hint at what is to come, “Warm Wishes” has been stamped in red ink onto the back envelope flap.
Thank you for reading this blog post. I hope this inspires you and makes you smile. Please like and leave comments 😊
Olga Direktorenko is the creative designer behind thePaper Discovery brand sold by Craftstash out of the UK and carried by Paper Wishes in the USA. I love her dimensional dies sets that often feel like creating a doll’s house or miniature scenes.
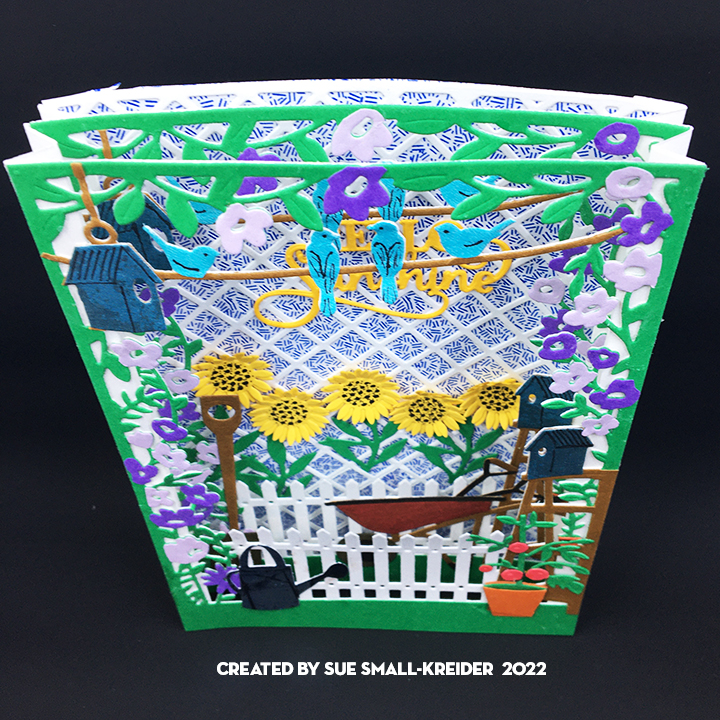
On Craftworld, she talks of her garden with vegetables and Ukrainian sunflowers in one of her video demos. This card is my first time out using her Garden Delight dies which are copyrighted in 2021. I purchased them from Paper Wishes.
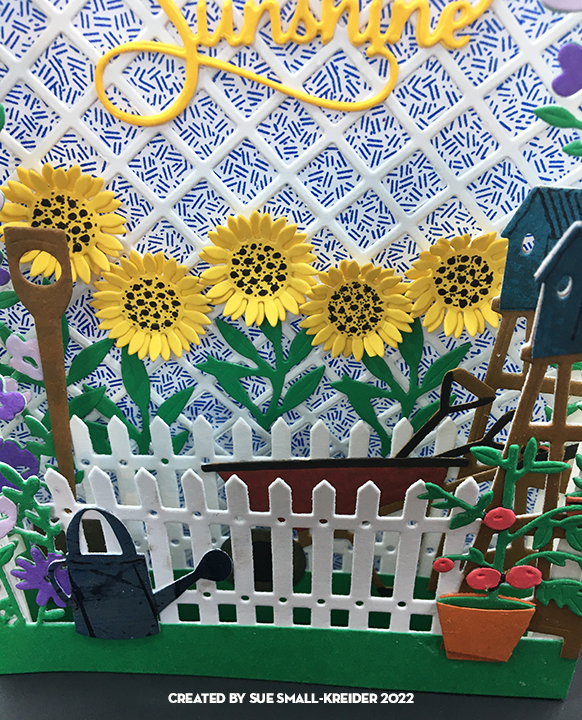
The side dies cut and score accordion folds that easily create tunnel-like cards. Her garden accessories allow for fun details, but like doll house accessories, not all are on the same scale. I placed the wheelbarrow in the middle layer because I felt it was of a larger scale than the picket fence.
I colored the garden frame using colored papers. The flowered vines reminded me of purple morning glories common in the USA. I cut the frame die, several times in several colors to fussy cut and glue the vines, flowers, birds, rope, bird houses and ladder on to the white base frame.
For the sunflowers have two flower head dies and are intended to be glued on top of each other with the petals alternating to create a full flower. Using a black gel pen, I colored the seed heads that are embossed with the die.
The white lattice background is glued to some blue patterned paper recycled from an envelope.
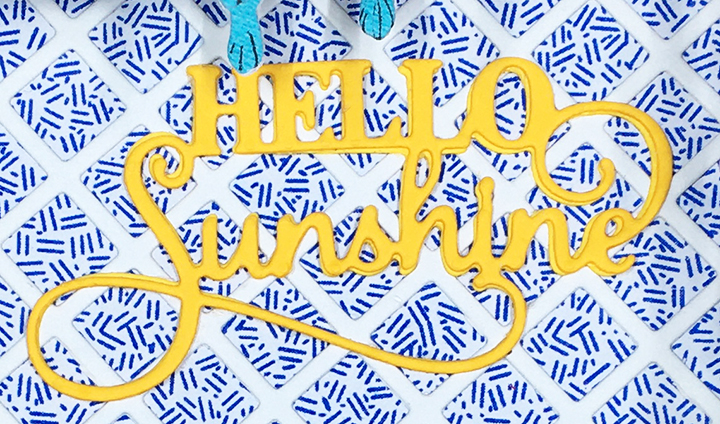
The sentiment “Hello Sunshine” is a die-cut from Sue Wilson of Creative Expressions. (While there are stamps that go with the Garden Delights collection there are no sentiments.)
This card will collapse to fit into a 5 inch by 7 inch envelope.
Thank you for reading. If you enjoyed this blog post, please like it and follow the blog. 😊
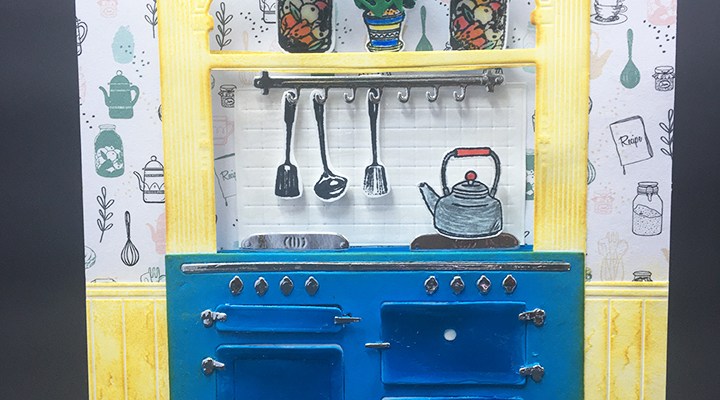
Mary Berry and Paul Hollywood, icons of British baking and favorites of the person this card is made for, have been hosts for The Great British Baking Show from 2010-2016.
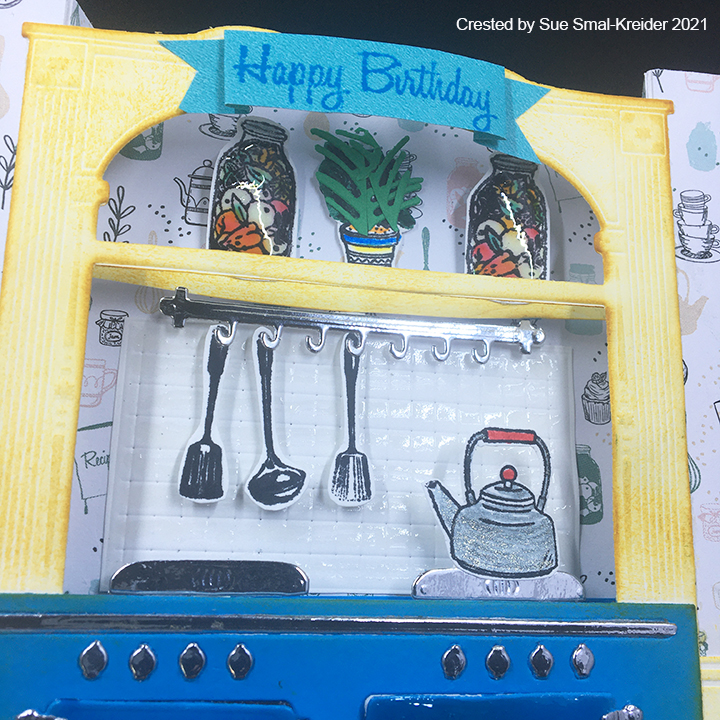
Stove Doors: I wanted the oven doors to have the look of enameled iron, so I cut set of blue doors. (Save the out-cut of door openings for stamping and stove knobs for later) I cut a tiny white circle for the oven gauge and glued it in place on the one door. Next I covered all but the hinges on the doors with Glossy Accents gel and let them dry overnight. Once they were dry, I cut and glued the silver latch and hinges on to them before gluing them on to the doors I had already glued to the stove.
Tile Backsplash: I cut the tiled back splash from white card stock and brushed a light coat of Glossy Accents over the rows of tiles, avoiding the deep embossed grooves between tiles.
Glass Jars of Fruit: To achieve the look of glass, stamp and color on white cardstock using permanent inks when dry cove with a thick layer of Glossy Accents. When dry curve around your finger or pen to create the curved glass effect.
Dresser: Cut one and use an embossing sandwich for your die-cutting machine to emboss the details into the cardstock. Cut a 1/4 inch x 4 1/2 inches strip of white cardstock for the shelve crossbar. Using an ink blending tool color the crossbar and dresser to bring out the embossed details using a yellow ink. (Don’t ink where the stove is as you will be stamping there.)
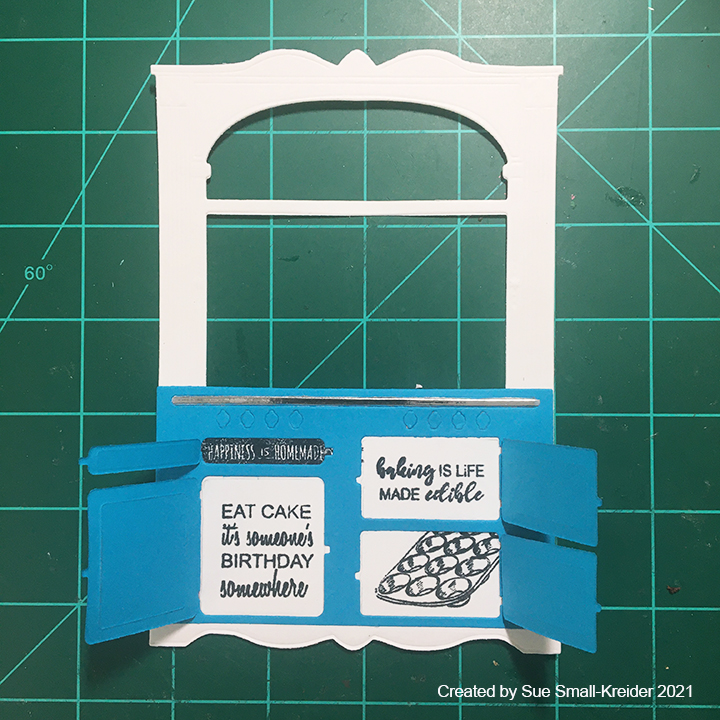
Oven Stamping: Using the stove out-cut from cutting the stove doors, trace with pencil where the door openings are onto the dresser back. Remove stove out-cut and using a stamping platform stamp sentiments or baking trays in oven openings. (I masked off the other openings that the rolling pin handles and baking pan that would cover with yellow paper tape.)
Stove Assembly: Cut another stove from blue cardstock. Glue all the doors to the backs of the “enameled’ doors from first step. Glue the stove front to dresser matching up stamped images with the door openings. Adhere two layers of the blue stove knob cut-outs to top of stove. (This will add some dimension to make the knobs be raised up from stove front.) Cut from silver mirror cardstock the knobs, thin line trim, door hardware, stove burners and utensil rack. Glue silver hardware onto doors and knobs and silver trim in place. Glue door hinges into place on to stove front being careful not to get glue onto stamped images. Once glue is dry, fold doors back to crease hinges. Cut a 1/2 inch x 4 1/2 inches strip of blue cardstock for the stove burners crossbar. Glue dresser on to card base after the shelf and burners step.
U-Fold Card Base: Cut a 6 3/8 inches x 6 15/16 inches rectangle from heavy white cardstock. Score on a scoreboard at 1 inch, 1 1/2 inches, 5 7/16 inches and 5 15/16 inches and fold the outer folds as mountain folds and the inner folds as valley folds. This should create a U-shaped card base.
Wallpaper: Cut pieces of your decorative “wallpaper” to fit the top half of each of the card base’s sections. Allow for black space over the folds. Glue decorative pieces in place. (Note: It might make the crossbars stronger if you glued the narrow inside strips of decorative paper on after the crossbars are attached, but before the dresser is glued in place.)
Wainscoting: Using the kitchen background embossing folder, emboss the wainscoting and floor from a piece of cardstock that is at least 7 inches x 3 inches. Using an ink blending tool, color the wainscoting and floor with yellow ink to match the dresser. Cut pieces to cover the lower half of the card base (two 1-inch panels of wainscoting and first row of floor tile and one 3 7/8 inches x 3 /4 inch of two rows of floor tile and bottom edge of wainscoting.) Glue the two 1-inch panels to the side sections of card base. Cut a 3 7/8 inches x 2 1/2 inches piece of blue cardstock to be glued in place as the back of the stove. With the card base open in the U-shape, position the dresser with stove over the opening and mark with a pencil where the shelf and stove burner crossbars should go on the narrow inside walls. Adhere the large blue stove back to the card base using the pencil mark for the stove burner crossbar for positioning. Glue remaining strip of flooring with wainscoting at the bottom of the stove back.
Shelf and Burners: Stamp color and cut out herb pot, utensils and kettle. With tiny dots of glue, attach the utensils to the silver rack and add tiny piece of foam squares to the back of the rack and utensils. Attach the kettle to the from of a stove burner. Fold 1/4 inch tabs blue crossbar at each end. Using scraps of blue, attach the burners to the blue crossbar centering them over the stove knobs. Glue the backsplash tile onto the card base above the burners. Adhere the utensil rack above the tile backsplash. Assemble the shelf and its contents in the same manor as the stove burners crossbar. Glue in place to card base using pencil marks.
Birthday Banner: Stamp onto a 3-inch x 5/8-inch paper strip a sentiment from the Simply Food stamp set. Cut notches on ends of strip and fold into a ribbon banner. Glue ends of ribbon to top of dresser.
Envelope: I used a 6 x 9 inches envelope for this card that folds flat into 5 3 /4 inches x 6 3/8 inches. The stamps are from the baking set of stamps.
Thank you for reading. If you enjoyed this blog post, please like it and follow the blog. 😊
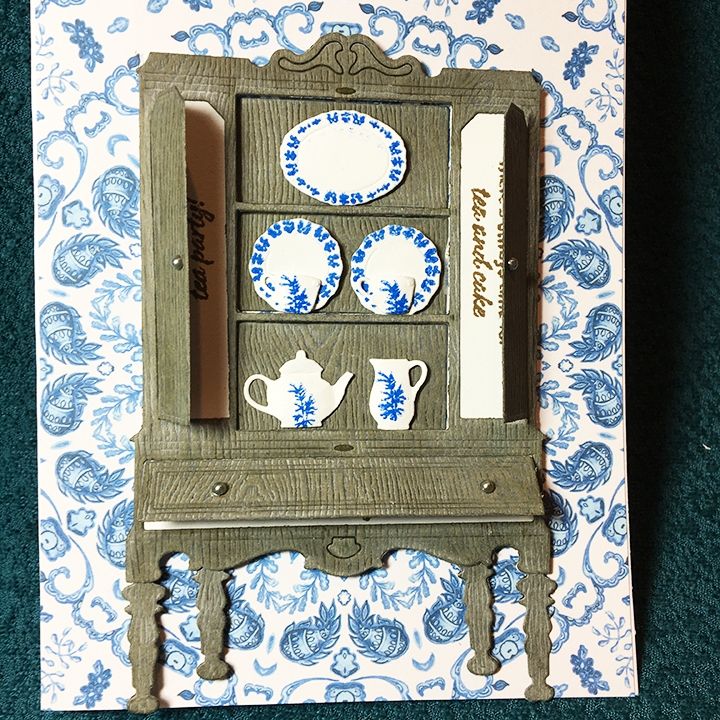
Olga Direktarenko is known for designing dies and stamps under her Paper Discovery brand that allow you to create scenes from rooms to dioramas. Her love of tea, books and old furniture were her inspiration for this kit.
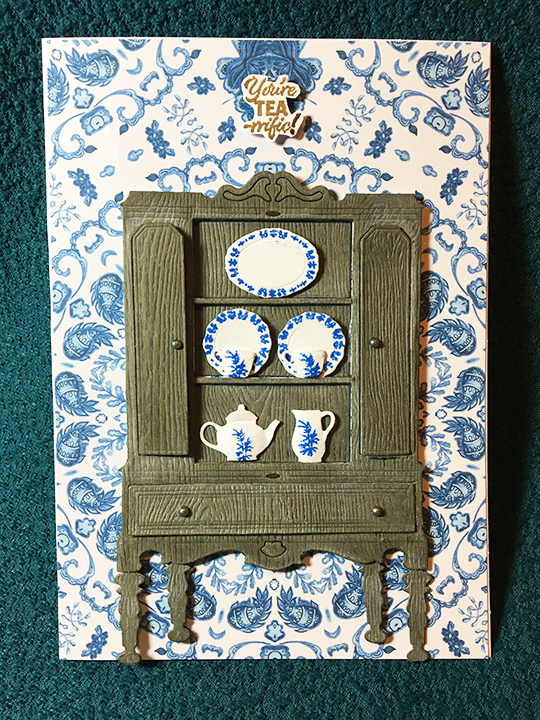
All the pieces for the cabinet were die cut from some heavy brown, wood grained cardstock which then was covered with ink to age it. The doors were then taped on using clear tape on the back side of the cabinet. A second large cabinet piece was cut without cutting any of the doors from white cardstock and glued to the back of the wood grained piece. With the doors taped open with removable tape, the sentiments from behind the doors were stamped in brown ink.
In order to achieve the 3-D look of the cabinet shelves having depth, the cabinet is raised on foam squares while the backs of the three shelves are adhered to the blue patterned paper with double sided tape. The legs were added after the cabinet was adhered to the card front. Tiny pewter colored stick-on pearls from the Papercraft Society kit were added as decorative knobs for the cabinet doors.
The dishes were die cut first and then stamped using a stamping platform and removeable taped doubled up on itself to hold the tiny dishes in place to be stamped. The dishes were then shaped using a ball tipped shaping tool (often used to shape flower petals) on the foam back of the stamping platform. Foam squares were used to adhere the dishes to the cupboard shelves.
As a finishing touch to the front of the card, a stamped and fussy cut “You’re TEA-rrific” sentiment was attached to the top with foam squares. The inside of the card is stamped in China blue “But first tea” with a tea set.
Stamped on the back flap of the envelope in China blue ink is the same tea set stamped inside the card.
Thank you for reading this blog post. Please like and leave comments. 😊